| |
| |||||||
 |
| | LinkBack | Thread Tools | Display Modes |
 07-25-2007, 01:15 AM
| #1 |
| Pebble Pounder Join Date: Jun 2007 Location: My House
Posts: 169
|
So I've never build or even played with an RC crawler, but in the past few months, I've developed an itch for one, especially with all the coverage in the mags lately. I'm always up for an engineering challenge, so I decided to get an E-Maxx to play with, contingent upon the plan to hard-core crawlerize it sometime. After the EVX dies on the fourth set of batteries, I figured I might as well fill the time that the truck is going to be down for warranty by hacking it to little pieces and making my relatively stock E-Maxx (four shocks, lockers front and rear, 12/72 gearing, removed bumpers, trimmed skidplates) which looked like this....  Into something more like this.        Now currently, I only have the front end done (as the more observant among you might have noticed |

|  |
| Sponsored Links | |
| | |
|
07-25-2007, 01:43 AM
| #2 |
| Pebble Pounder Join Date: Mar 2007 Location: IN MY GARAGE
Posts: 102
|
THAT LOOKS GREAT MAN CANT WAIT TO SEE IT DONE  |
|
| |
|
07-25-2007, 01:55 AM
| #3 |
| MWRCA'er 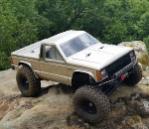 Join Date: Apr 2004 Location: Machesney Park IL
Posts: 3,995
|
With those shock angles I invision lots of torque twist and to much flex.
|
|
| |
|
07-25-2007, 10:33 AM
| #4 |
| Newbie Join Date: May 2007 Location: Russellville, AR
Posts: 41
|
as far as the shocks go i would make new upper mounts closer to vertical. I like how you used lower a arms for the upper ones, I think i'm gonna try that. So far it looks sweet. I'm gonna build a 4-link one of these days, i'm running a torsion right now. |
|
| |
|
07-25-2007, 06:38 PM
| #5 |
| Pebble Pounder Join Date: Jun 2007 Location: My House
Posts: 169
|
I probably will end up making mounts to stand the shocks up some, but I have some really high rate industrial springs and 1000wt oil that might make up for the current angle and stop some of the torque twist. That's just something I'll have to tackle when I get her rolling. I'd like to try to make it work with this geometry, but it might just need more traditional mounting. As far allowing too much twist, I'm going to have it limited with straps andway, I don't like using the shocks to limit travel on any car, too much stress on the shock that can pop off caps and make ball ends sloppy. I was rather proud of the twin lower A-arms idea. It lets me lock out the stock axles without having to have a strut coming up. Just cut a plate and bolt the shock holes together and it's rock solid. The front plate is obviously cut carbon plate (which I still need to make for the driver's side), and for the back plate, I used Losi XXX-NT motor mounts which are the same thickness as the gap for the stock lower shock ball. And they gave me a handy place to mount the lower link. Gives the whole assembly a much cleaner look than using the stock upper arms with those now unrequired gigantic holes in them. |
|
| |
|
07-26-2007, 09:13 PM
| #6 |
| Quarry Creeper Join Date: Aug 2006 Location: NORTH TEXAS
Posts: 202
|
Very clean!!!! i have one similar in the works. GREAT JOB!! |
|
| |
|
07-27-2007, 10:35 AM
| #7 |
| Rock Stacker Join Date: Feb 2007 Location: Cincinnati
Posts: 98
|
Nice use of carbon, i'm going to keep my eye on this, definitely some interesting ideas.
|
|
| |
|
07-27-2007, 10:38 AM
| #8 |
| I wanna be Dave  Join Date: Dec 2005 Location: Tax Nation
Posts: 2,289
|
I hate to do it but, i agree with MNSTR, you need to move your shock mount out closer to the axle and more verticle....Looks like you are planning that anyway. Looks like a good start.
|
|
| |
|
07-27-2007, 06:37 PM
| #9 |
| Pebble Pounder Join Date: Jun 2007 Location: My House
Posts: 169
|
I found some old Associated shock rear shock towers while rummaging around my LHS today, ones that I think will work for standing the shocks up more. They'll move the upper shock mount up and out about an inch. The downside is to use them, I'll have to move the lower mounts in even closer to the center. Whic hit being droop style, I'm using internal springs that compress the shock, well the downside is that they reduce the total stroke of the shock by about half an inch. As a result, if I move the shocks out on the lower link much more, it will start to drastically reduce available articulation. At that point, I'll have about three options, 1 use stiffer internal springs to account for the reduced leverage of a close to pivot lower mount, 2 use longer travel shocks with a more outboard lower mount, or 3 try to make external springs such as the stock ones and keep the chassis down with a short center droop strap. But again, I won't be able to really fine tune all of that until she's driving or ar least rolling on her own 4 wheels. So next up is to make a back end to match the front, then work on steering linkage, which I've also got a different idea about, mounting the servo in a new place where it's out of the way and protected.. |
|
| |
|
07-28-2007, 01:36 PM
| #10 |
| Newbie Join Date: Dec 2006 Location: UK
Posts: 24
|
Dude, thats a new approach. Nice work so far.
|
|
| |
|
07-28-2007, 08:33 PM
| #11 |
| Rock Stacker Join Date: Jul 2007 Location: Mitchell
Posts: 48
|
Sweet ride man! but i have a few questions..are you using the stock esc? and where are you planning on putting the batteries?
|
|
| |
|
07-28-2007, 10:15 PM
| #12 |
| Pebble Pounder Join Date: Jun 2007 Location: My House
Posts: 169
|
Stock ESC for now, I'm sure I'll outgrow it in time, but it will work for now just to get the chassis dialed. For the battery, I've got a 1/4 in tube hanging off the nose now, the primary purpose being to give me a place to attch the center droop strap. It just happens to be the exact width of the battery that I'm going to use right off (though that may be upgraded later as well).  (Don't mind the athletic tape, remember, I'm in mock-up mode... And there's the shock tower that I'm going to try for standing up the shocks. If it ends up working better, then I can cut a new carbon side plate with the horns integrated. I'm also going to try to use both the internal spring and the stock external. I've got them both on the shock now, and they seems to equalize at a little over half compression. With both of them on there, the shock has spring resistance to both compression and extension. This is good because you might notice that the shock isn't fully compressed while at ride height. I did this so that under articulation, one lower link will drop as the other raises, thus keeping the upper links in the same place relative to the chassis. From my tests with the mock-up, this helps prevent the dropped side of the axle from being pulled toward the center of the chassis. At least, that's the idea, we'll see how it works in practice.  |
|
| |
|
07-28-2007, 10:37 PM
| #13 |
| Newbie Join Date: Jul 2007 Location: in the middle of nothing aka out side philly
Posts: 11
|
kool looks good
|
|
| |
|
07-29-2007, 08:08 PM
| #14 |
| Rock Stacker Join Date: Jul 2007 Location: Mitchell
Posts: 48
|
Good idea with the 1/4" tube. i was wonderin where you were puttin the batteries cause you cut off the holders. i think im gonna do that |
|
| |
|
07-29-2007, 08:23 PM
| #15 |
| Rock Stacker Join Date: Jul 2007 Location: Mitchell
Posts: 48
|
Oh, and what reciever are you goin with and where are you placin it..? sorry, im gettin ideas... |
|
| |
|
07-29-2007, 11:25 PM
| #16 |
| Pebble Pounder Join Date: Jun 2007 Location: My House
Posts: 169
|
It's hard to see because it's a dark pic, but there's a Spektrum micro RX tucked in right between the aft end of the battery and the transmission in the small gap there next to the shift mechanism. I'm new to the 2.4 stuff, so I don't know if the antenna being that close to the motors will cause any interference from the comm noise or anything, but if it does, it's a small enough RX that I can put it just about anywhere on the truck. Then the EVX or replacement can go in the stock location.
|
|
| |
|
07-30-2007, 04:54 PM
| #17 |
| Quarry Creeper Join Date: Jan 2006 Location: Atlanta GA
Posts: 387
|
looks great man.
|
|
| |
|
08-01-2007, 12:10 AM
| #18 |
| Pebble Pounder Join Date: Jun 2007 Location: My House
Posts: 169
|
Some update pics.... Got the steering servo figured out. I've wondered why almost all steering servos are strapped to the top of the axle with the linkages hanging out in the wind off the front of the truck. Just seems like it's begging for damage that way. So I wanted to get it in a little safer place, plus this way gets it a little lower which should help the CG. Not a lot maybe, but every bit helps.  The outer mount is the front bit from a Great Planes 40 size airplane engine mount, ground down quite a bit to get everything on a level plane. The inner mounting was done by grinding a flat spot on the stock bulkheads. Fortunately, the size of the 8611 was just perfect to allow me to drill just forward of the pre-existing holes where my carbon plate is. I got lucky there.  The servo is connected to the 1/4 stainless tierod with 4-40 ball links. I know 4-40 is probably a bit small for the size of the truck and the power of the 8611, but given that it's only slightly longer than 1.5 inches, it should be ok.  320 oz/in of torque from this bad boy. Probably overkill, but it's better to have it and not need it than to need it and not have it. Plus I sold my Micro-T so I invested that in the good servo.  Nice and low-profile. It'll just barely rub the body at full flex, and if you remember how slammed the body was from my first post, that's fairly impressive.  It's also plenty tucked away. I had just enough room around the bulkhead to mount the servo arm facing forward, which makes sure nothing is dangling out where a high break-over would get it tangled. It looks pretty funky, seeing it from the front and not seeing any steering links anywhere, looks like something is missing, but it's all there and turns the wheels like a champ.  A little better shot of the RX placement. I'm doing my best not to waste any space on the chassis.  And a better shot of the shock mount. I only have the one so far, so I'm not sure how it will all feel when two shocks are bolted up yet, but just from feeling it this way compared to the other place I had it, it stiffens the action quite a bit. Only driving her will tell if it's enough. If not, I have more carbon plate to cut that I can make some other angles to try. Another little thing I did which you can barely see in this pic, I'm using arrow shafts with a 9/32" outer diameter, but I drilled the wheel collars to 5/16" so I could sleeve it with 5/16" soft aluminum tube. I did that because the arrow shaft material is pretty brittle, and hopefully the soft aluminum will spread out the force imparted by the set-screw holding the wheel collar in place and reduce the chance of cracking in that area, not to mention preventing those ugly gouges in the shaft should I need to move the lower shock mount to a different position.  That's about it for now, my job is making this slow going and it's about to get slower, but at least most of the design work is done now and all I have to do is replicate the front end to make a rear set-up. |
|
| |
|
08-01-2007, 08:59 PM
| #19 |
| Rock Crawler Join Date: Feb 2006 Location: Cutting Comms
Posts: 752
|
Wow. Extremely clean build. Im feeling pretty inspired. Ive got a set of narrow maxx axles and a maxx tranny that Im working on building as a newbie/demo rig for our local club. Came into the maxx section hoping to be inspired, looking for a way of fixing the hackage done to the axles by a previous owner. Glad I stopped in here, Ill be watching this for sure. BTW: What did you use to make the blue upper link mount? |
|
| |
|
08-02-2007, 06:34 AM
| #20 |
| Rock Stacker Join Date: Jul 2007 Location: Mitchell
Posts: 48
|
Nice pics man. This is really lookin good. I don t remember if you said anything previously but i was wonderin if you kept the tranny 2-speed or reduced her down to a single speed. if you reduced her down, how did you go along doin this?
|
|
| |
|
| |


 Linear Mode


