| |
| |||||||
 |
| | LinkBack | Thread Tools | Display Modes |
 12-29-2010, 10:12 AM
| #1 |
| Pebble Pounder Join Date: May 2010 Location: Indianapolis
Posts: 149
|
Hi everybody. I got the creeper kit for Christmas and this is going to be my build thread There aren't any pictures yet, my 5 year old Kodak decided to stop being able to flash ! I got the creeper kit and the stage II kit from CKRC, but the stage II kit wasn't in the box, so I'm waiting on that. It seems they've had some problems in their packing department, but my kit is being overnighted to me at no charge, so there's no hard feelings there.  So far I have the front and rear axles and all the driveshafts done. I have rmdesignworks pinlox on the cvd's. Great product, Man. Excellent tight fit and machined perfectly. I also have the Transmission, chassis side plates and lowerlinks together. Pro's and con's so far. Pro: Every "plastic" piece on this kit isn't plastic. They are actually the fiber composite that some kits will use for the more rigid and strong pieces. My axial SCX10's plastic pieces are soft plastic and only SOME pieces are fiber composite. Same goes for my HPI MT2. This venom kit uses the stronger composite for ALL parts. Pro: Made well. I can sometimes tell when something is made well just by holding the parts in my hands and looking at them. This is definitely one of those. I'ts hard to explain, but I'm sure some of you know what I mean. Con: the hardware. it's not too bad of a complaint, but some of the 1.5 mm are actually 1/16 standard. I have both sizes in my toolbox but it's a little pain sometimes when I'm on a roll and have to find the other one. Con: the bead lock wheels. I'm only familiar with my SCX10's beadlocks, so this "con" might be uninformed. On my SCX, the beads sit down into a definite channel in the wheel and you know they are in there and the ring is very easy to bolt down tight. On the creeper's there is only a slight divet where the bead sits. It makes it very difficult get the ring bolted down good. That's about it for now. I'll post pictures soon and more info about my build. Thanks to everybody here who has posted a build thread or tip's and trick's. I've read them all and am totally gratefull for the info before I started building. |

|  |
| Sponsored Links | |
| | |
|
12-29-2010, 11:56 AM
| #2 |
| Pebble Pounder Join Date: May 2010 Location: Indianapolis
Posts: 149
| 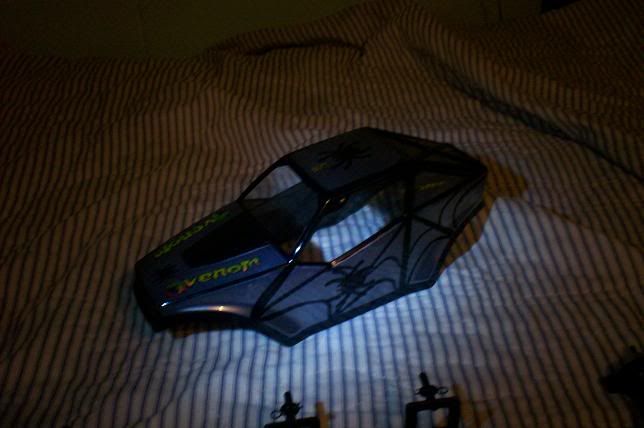 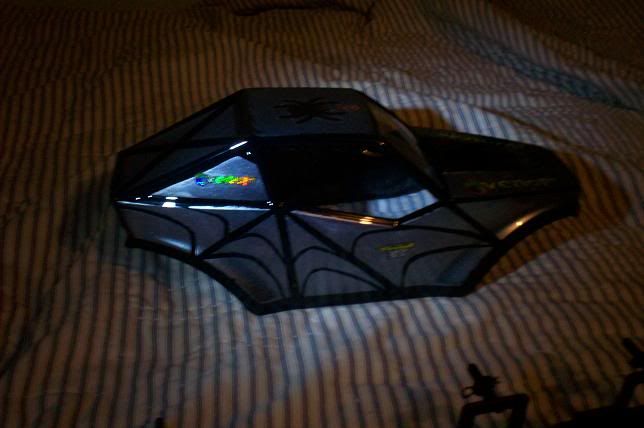 I used the factory masking for the windows. I left the front 3 clear. Liquid masking for all the rest. Outlaw black and pearl white. Pearl white should be called sparkly silver. 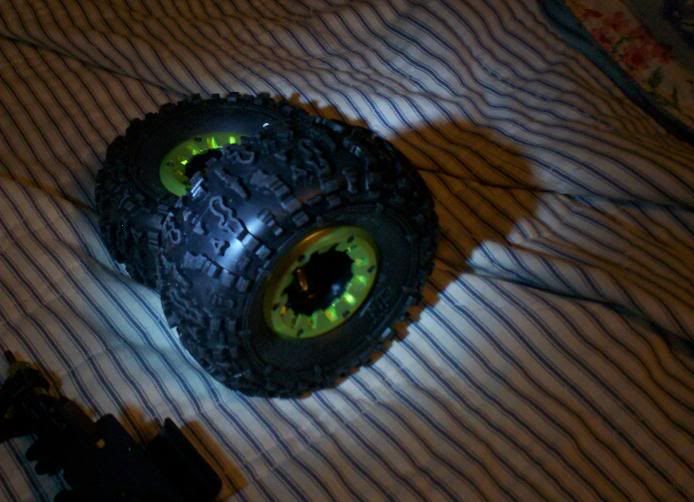 I had enough wheel weights laying around to do the rear wheels. When my stage II kit gets here the fronts will get done. 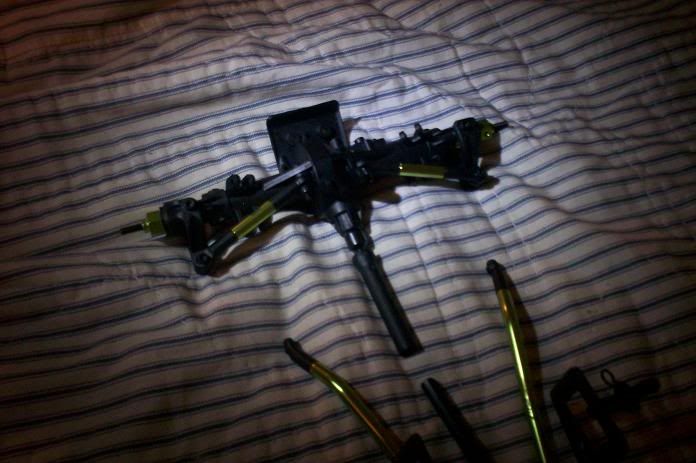 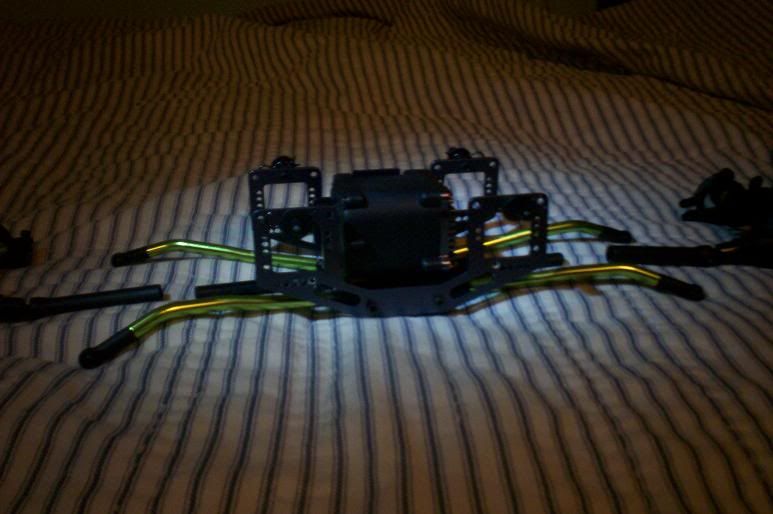 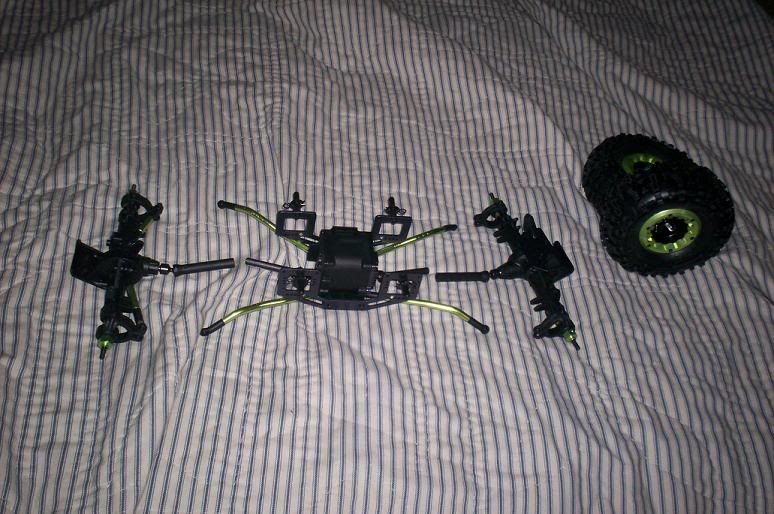 I've flipped the steering knuckles front and back. I'm gonna make a BTA for the front. Just waiting on the stageII kit now. I didn't JB weld the diffs. I used a bigger screw in the hole just to the right of the diff selector switch. I may eventually make a scaler out of this rig, and open diffs might be cool for that. : evil:"thumb sup" |
|
| |
|
12-29-2010, 12:03 PM
| #3 |
| RCC Addict Join Date: Sep 2010 Location: Malta, NY
Posts: 1,340
|
looks good man cant wait to see it on the rocks. keep us updated. |
|
| |
|
12-30-2010, 05:48 PM
| #4 |
| Pebble Pounder Join Date: May 2010 Location: Indianapolis
Posts: 149
|
Update: Got her all together and running. CKRC stage II kit Homemade BTA steering 3800 NiMh Digital high torque metal gear 1BB servo Duratrax ESC White Dot Rovers RMDW Paradox Pin Lox Venom 3 channel RxTx The darn thing needs a BEC to even drive it around the floor. The duratrax ESC has a 1 amp internal, and that servo takes all it can get. Seriously, IF i do a sharp turn on the carpet, then hit reverse, it stalls. I'm so mad at myself that I didn't see this coming. I'm impressed by the venom 3ch radio. I've never messed with settings on my cars before and it's nice to turn down the end points for the throttle on the creeper, and turn up the endpoints for the steering. Pretty cool. |
|
| |
|
12-30-2010, 06:05 PM
| #5 |
| Newbie Join Date: Nov 2010 Location: Knoxville
Posts: 11
|
how do u adjust the throttle on it?
|
|
| |
|
12-31-2010, 06:26 AM
| #6 |
| Pebble Pounder Join Date: May 2010 Location: Indianapolis
Posts: 149
|
Do you have the VR3T radio? It's pretty cool. Download the user manual (if you donn't have a copy) and check page 2. "1.2 Function/EPA (End Point Adjustment)" It gives an example of a steering servo, but if you program the throttle channel it does the same thing, even though it's controlling an ESC instead of a servo. hope that helps my radio came with the steering set at 60 and 70 percent on the dual rate. Why, I dunno? I bumped it up to the maximum, 120, and that was too much so I dialed it in at 100. I set the dual rate one value lower, just in case I hit the dual rate button accidently while driving, it won't noticeably change. These controllers are on sale on their website right now for like 30 bux! I might get one for my SCX10 to control a winch. |
|
| |
|
12-31-2010, 07:44 AM
| #7 |
| Pebble Pounder Join Date: May 2010 Location: Indianapolis
Posts: 149
|
here are 2 pics of my BTA setup. I used one stock upper link, one venom endlink and one traxxas long endlink. The servo horn is toward the "driver's side" and the link goes toward the "passenger side". I bend the link a little to clear the "passenger side" shock coil. And I bent the traxxas end (with the help of a bic lighter). The hub-to-hub link goes under the driveshaft and is connected underneith the bottom tab on the C-hubs. The upper tab on the "passenger side" c-hub has been ground of for link clearance. 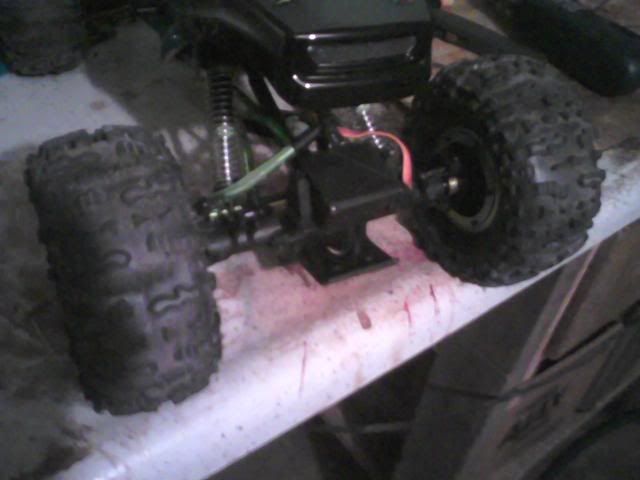 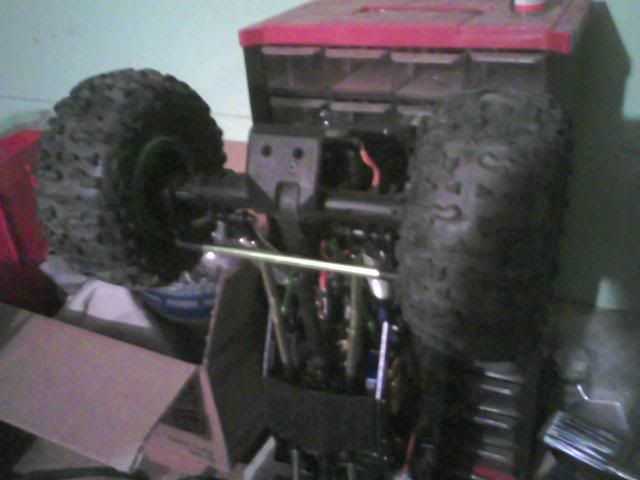 I may find that I will get the hub to hub link caught on some stuff when crawling, but it's better than in front of the axle, IMO. |
|
| |
|
01-01-2011, 04:58 AM
| #8 |
| Pebble Pounder Join Date: May 2010 Location: Indianapolis
Posts: 149
| |
|
| |
|
01-01-2011, 06:38 AM
| #9 |
| Rock Stacker Join Date: Dec 2010 Location: Roanoke
Posts: 55
|
Very nice
|
|
| |
|
01-01-2011, 01:25 PM
| #10 |
| Newbie Join Date: Nov 2010 Location: Minnesota
Posts: 4
|
Great Video! Like the steering servo set up.
|
|
| |
|
01-01-2011, 04:45 PM
| #11 |
| Pebble Pounder Join Date: May 2010 Location: Indianapolis
Posts: 149
|
thanks |
|
| |
|
01-01-2011, 05:54 PM
| #12 |
| RCC Addict Join Date: Sep 2010 Location: Malta, NY
Posts: 1,340
|
very nice vid but one thing i would think about doing is RMDW's fix to TT cus i couldnt help but notice all the TT that you had when you where tring to climb up the sillender brick the first time butother than that Nice Video. I like the way you pained the body .
|
|
| |
|
01-02-2011, 04:26 AM
| #13 |
| Pebble Pounder Join Date: May 2010 Location: Indianapolis
Posts: 149
|
thanks for the comment on the paint, I am happy with it. The TT is somewhat minimal. I'm gonna try to tweak it out though. |
|
| |
|
01-03-2011, 11:44 PM
| #14 |
| Pebble Pounder Join Date: May 2010 Location: Indianapolis
Posts: 149
|
I entered my first comp this past weekend. I didn't really want to comp, I wanted to just run free on the rocks, but they were gonna close up shop after the comp so I entered. The best i did was forward progress through 4 gates. With all of my reverses, hitting gate markers, and rollovers, it was pretty tough. Is it common for NOBODY to finish all ten gates? I thought it was layed out a bit hard, and even the Pro class drivers didn't finish all ten gates. |
|
| |
|
01-04-2011, 04:51 PM
| #15 |
| Newbie Join Date: Oct 2007 Location: Kamloops b.c Canada
Posts: 33
|
that was a hard course LOL..... anyway looks like ur on the right track with yours.... simple paint but looks good |
|
| |
|
05-16-2011, 10:59 PM
| #16 |
| Pebble Pounder Join Date: May 2010 Location: Indianapolis
Posts: 149
|
Here's a couple updated pics after more MOD's. had to chop off the front of the body to clear the JR servo arm. It's a long throw arm and was getting stuck on the lexan so out came the scissors. 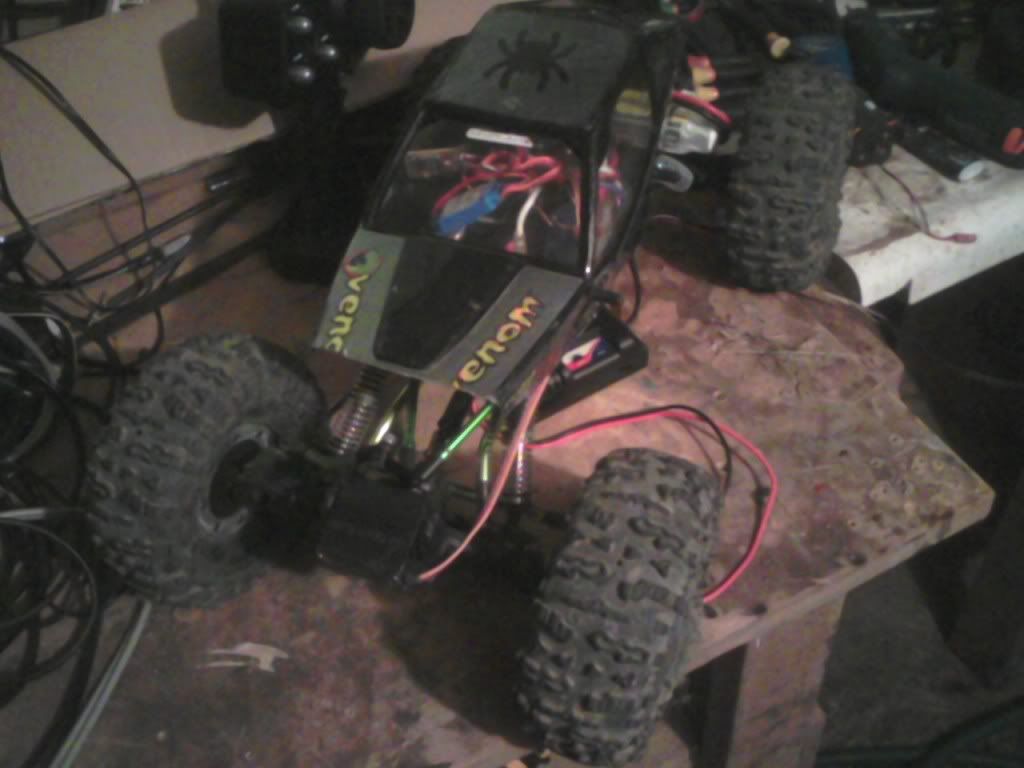 Next is the 2s lipo attached to the rear axle. wow. I was running the pack attached to the top of the tranny. I'll never do that again, this way has waaay more traction. 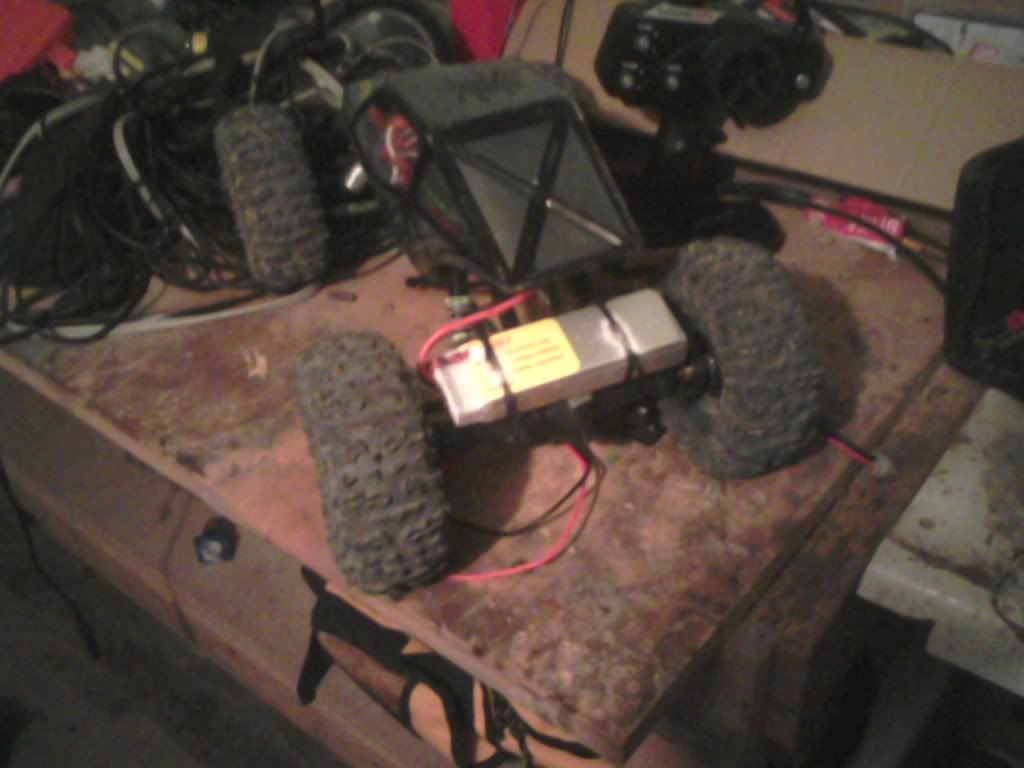 |
|
| |
|
| |


 Linear Mode


