• Welcome to RCCrawler Forums.

    It looks like you're enjoying RCCrawler's Forums but haven't created an account yet. Why not take a minute to register for your own free account now? As a member you get free access to all of our forums and posts plus the ability to post your own messages, communicate directly with other members, and much more. Register now!

    Already a member? Login at the top of this page to stop seeing this message.

Cutting a motor commutator & motor tweaks

This is the Fantom 35 turn arm I've been using with the Trinity LeMans brushes.

Looks like it hurts. Probably around 60 minutes total run time.

That got cleaned up today. Took five passes. More than I would prefer.
 

Attachments

  • IMG_3186.jpg
    IMG_3186.jpg
    95.3 KB · Views: 643
Deal.

Is it 30 degrees timing or 20?
Or worse!

Stickers on motors are funny
sticker001.jpg
 
:ror:

Could be metric, could be made up?


And I prepped my new Br00d + motor today for tomorrow's comp.

Brush break in took a while, and then I cleaned up the comm and everything else, and it's ready to rock.
 

Attachments

  • IMG_3201.jpg
    IMG_3201.jpg
    95.4 KB · Views: 643
Stickers on them were never correct....I thinking did it on one sticker but after someone pointing out the flaw I never used it again...

The timing jig is correct....

Later EddieO
 
This is the Fantom 35 turn arm I've been using with the Trinity LeMans brushes.

Looks like it hurts. Probably around 60 minutes total run time.

That got cleaned up today. Took five passes. More than I would prefer.

Ive had similar results from the Lemans brushes. The thing about is that I dont remember them being so bad in a racing application... I went back to a "traditional" silver brush. Maybe due to the lube package in the brush not working the best at the lower speeds we see???
 
Thats normal for a lemans brush......they wear the comm faster, but the brush itself lasts a long time....every time we used them, we had to cut the comms like mad, but never had to replace brushes. We only found they worked well in big outdoor paved tracks.......usually it hot climates.

Later EddieO
 
Alright guys. I've been reading, reading reading and reading and some things to me still aren't very clear. Maybe i'm lookin in the wrong places. Really wish I knew someone local who knew more about this.

I'm confused on hood alignment. Some motors you can do this, others you can't. How do you tell? Tools. What exactly does this tool look like, and what are we doing with the thing? I realize we are making it so the brush seats correctly, but what are we tweaking?

There are also a few other tools mentioned, but pics are almost nowhere and I don't even know how to use the things to even help me lol.

Brush wear. What is good and when do we know its bad? How do you tell when its properly seated and broken in?

I have these motors Eeepee posted http://www.rccrawler.com/forum/showpost.php?p=2399264&postcount=298 and they need love. I have successfully cleaned the comms, but before I put in new brushes, I would like to be more certain on what I am doing.

Any help, links and pics would be very helpful and appreciated. I'd like to learn more about this art and section of the hobby.
 
You want to be sure that the brushes are pointing to the dead center and no all wonky in relation to the comm. The motors that have stamped hoods can be adjusted. The ones with machined endbells/ hoods cannot be. The tool is basically a rod that goes from bearing to bearing. Where the brushes would intersect this rod there is a slot for a bar that can be used to work the hoods into alignment.

Your motor hood is not adjustable. New brushes and a comm cut or armature replacement is about the most you can do to it unless you want to zap the magnets and replace the bearings too.


Seated brushes- you can visually look at the brush and see that the entire face is even and broken in. I generally replace brushes when they hit 7mm long.


A tool from integy- it looks flimsy. http://www.integy.com/st_prod.html?p_prodid=4827&p_catid=168
 
Last edited:
John summed that up nicely, but if you still have questions about anything he said, feel free to ask.

I wish I had a working camera in my hands, I could take some pictures of a couple things to help clarify.

I have a hood alignment thing that is like the Integy one that was linked, but without the handle. Supposedly the handle gives you greater leverage for those 'extreme' brush hood tweaks, where you're literally bending the metal, and on some Integy motors, I've had to do that. When starting from scratch and building up every part of the motor I'll use the piece that goes from bearing to bearing along with the cross bar that goes from hood to hood, it forms a 't' in the motor. That's just to get everything close to aligned. It never really gets things where they should be, it might get the hoods perfectly straight compared to each other, but a spinning motor causes the brushes to shift in the hood, and thus they aren't aligned to the comm anymore. So we tweak the hood, we angle the hood, so when the motor is spinning the brush is hitting the comm right in the center.

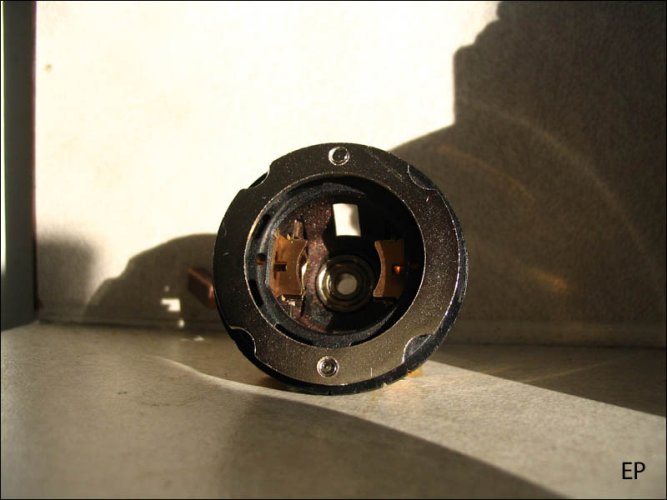
I just looked to see if I took a picture of the brushes on my newest motor, and I did! Hah! Good job, me.

I got a new Br00d not long ago, and as usual, took it apart and looked at it all, then reassembled it and began the brush seating process. I stopped just short of it being fully seated and snapped a picture. Afterwards, I kept breaking it in, then took it all apart again and skimmed the comm on the lathe, cleaned it all up, and put it all back together again.

You'll notice parts of the serration aren't as worn as other parts, so at this point I'm not done with the break in yet. Also notice the mess in the endbell. Brushes are typically made for 7.5 mil comms so when breaking them in on a ~10 mil comm, you really take away some material before they're fully seated.
 

Attachments

  • IMG_3198.jpg
    IMG_3198.jpg
    95.7 KB · Views: 551
  • IMG_3201.jpg
    IMG_3201.jpg
    92.4 KB · Views: 559
Thanks guys. I to just got some new Brood Motors. So I'm going to do some playing the the integy cans I have then attept to properly fix the epics I have.
 
Score!
I've been out of town this week on some job related stuff and on my down time I like to cruise the LHSs in town. Went in one this evening and saw some brush and springs packages on the shelf behind some other things. Asked the owner if he sells many of them. He said no and he had not sold any far a good while due to errthing being brushless now. I asked if he would sell some I wanted as a package deal. Anyway I picked these up for $10.00:shock:. 21 sets of Reedy 767 and 19 sets of Trinity and Fantom purples...:twisted:

Some of them here...
score001.jpg
 
Giggity yo!

Just yesterday I cleaned up my Br00d +, and looked for a 767 to put on the negative side. Ends up I didn't have any. Funny.

I also used my Fiddle Stick and found that springs vary a little bit, a little bit more than I thought.
 
Wait, not a 767, but the other one... too sleepy to think... 766. That's it.
 
766 is the stock laydown that comes with a sagami teardown with laydowns, 729 is standup version.......

I have tons of them with the eyelets on them from teardowns. I've never really liked the brush much, especially the laydown version.....


You can cut the eyelets off and solder them on pretty easy if ya want......PM me and I will cut you a deal on a ton of them......same with the 729 version.

Later EddieO
 
Back
Top