-
Welcome to RCCrawler Forums.
It looks like you're enjoying RCCrawler's Forums but haven't created an account yet. Why not take a minute to register for your own free account now? As a member you get free access to all of our forums and posts plus the ability to post your own messages, communicate directly with other members, and much more. Register now!
Already a member? Login at the top of this page to stop seeing this message.
You are using an out of date browser. It may not display this or other websites correctly.
You should upgrade or use an alternative browser.
You should upgrade or use an alternative browser.
Chevy Pickup on LWB TF2
- Thread starter 1tonblazer
- Start date

1tonblazer
Quarry Creeper
1tonblazer
Quarry Creeper
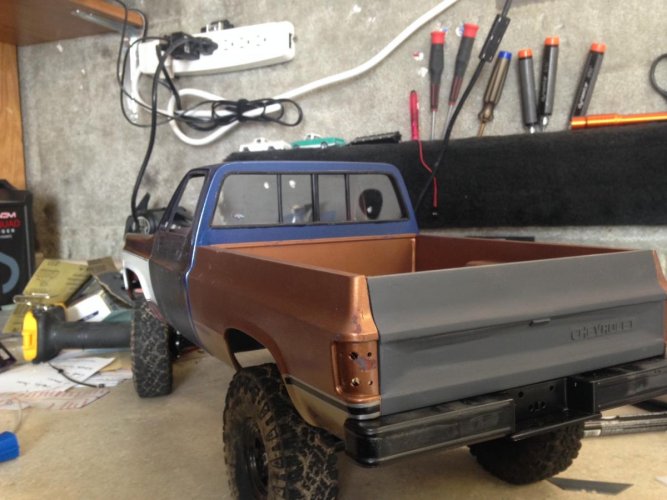
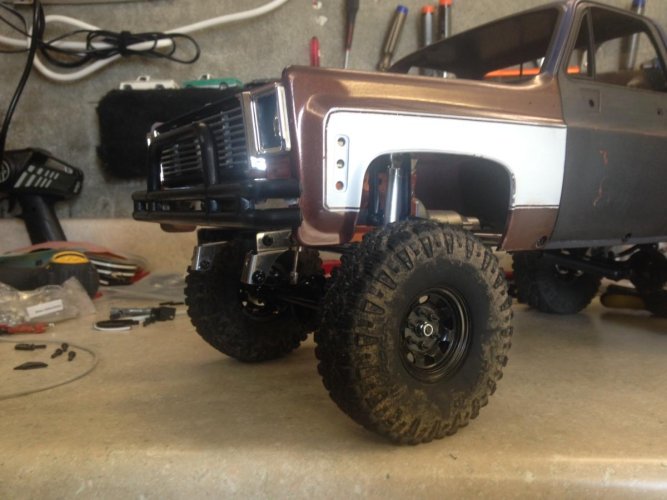
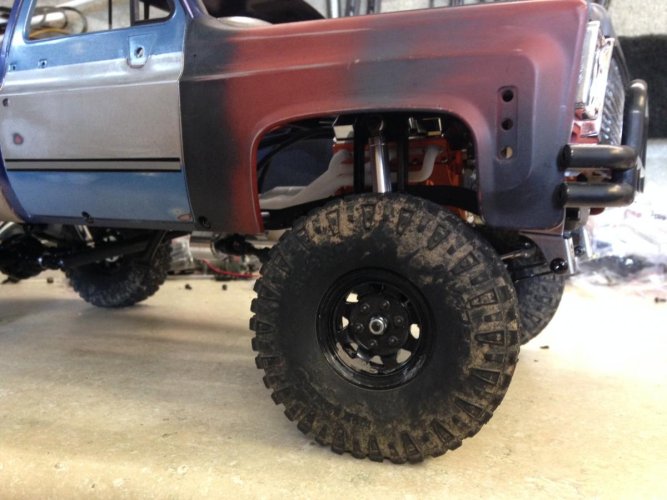
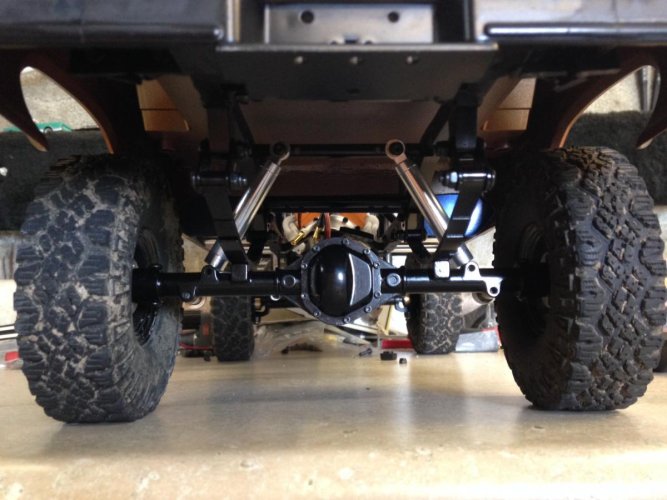
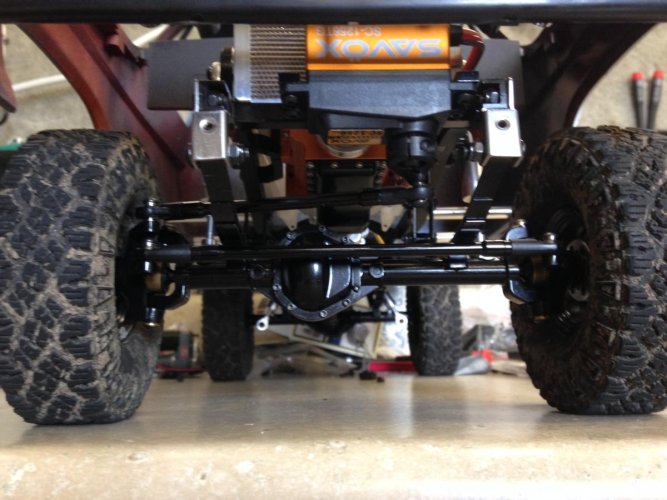
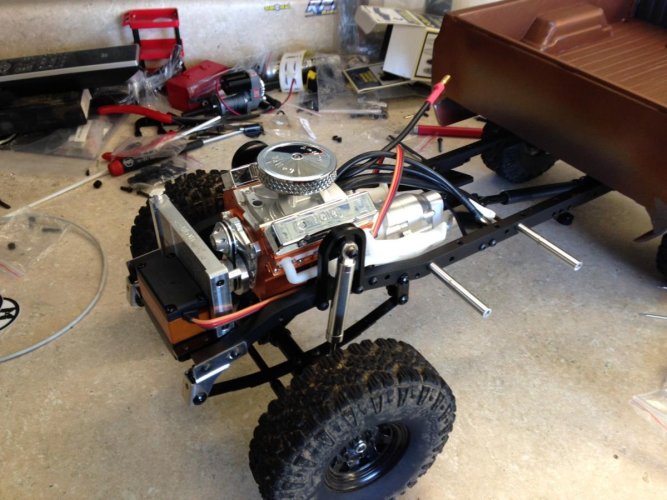
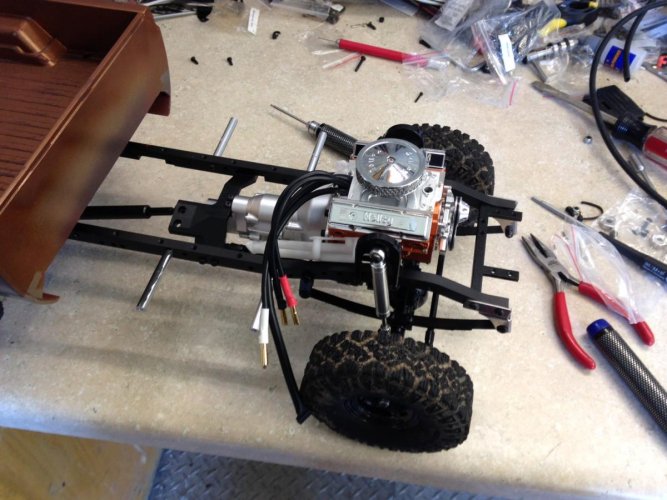
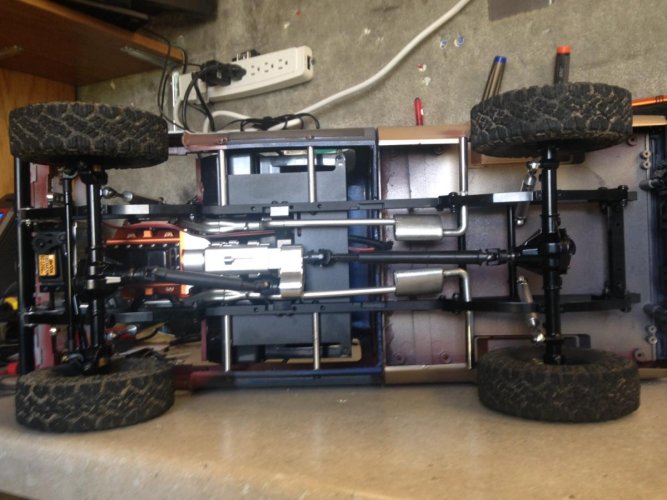
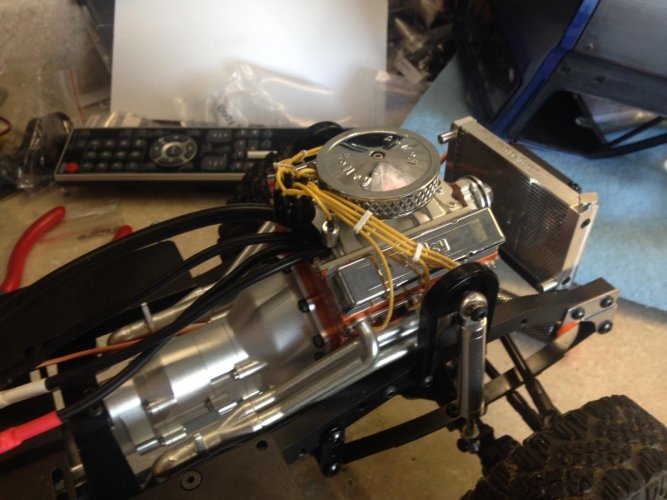
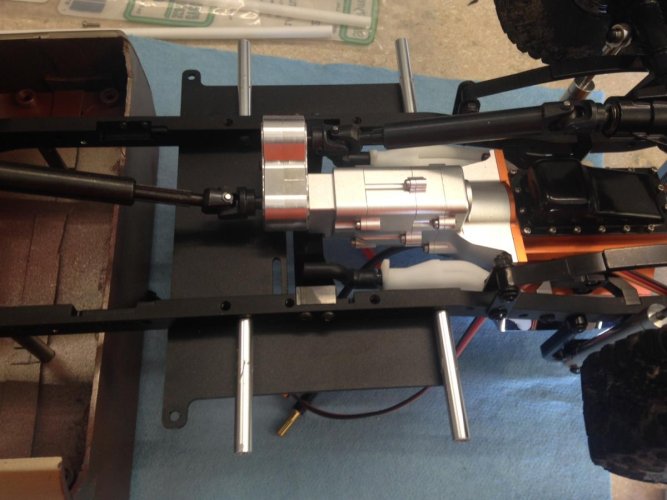
Finally got some spare time to tinker on some of my scale rc projects... Was able to install a set of the new rc4wd scale K44 axles that have the front diff on the right side... Thank you RC4WD! They are way more appropriate on my Blazer and Chevy truck projects than the yota axles I've been using. Also got a motor installed in to my v8, I used a Holmes Hobby Pro Puller Stubby 2700 brushless which fit with no issues. While I was playing around with the v8, I tossed a set of Holley valve covers and air cleaner on it, as well as a water pump and pulley/belt kit. Still need to put the distributor/wires on... Oh and a set of rc4wd headers too!
Attachments

Fatman489
Pebble Pounder
Love this truck man .. looks awesome in a scale way lol
1tonblazer
Quarry Creeper
Thanks for the kind words guys!!"thumbsup"
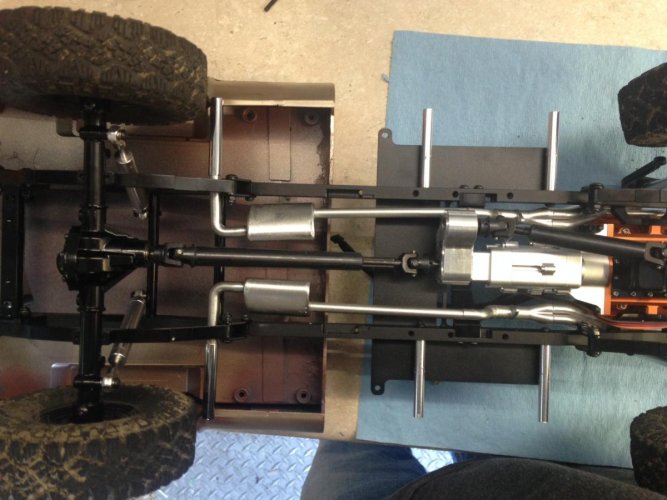
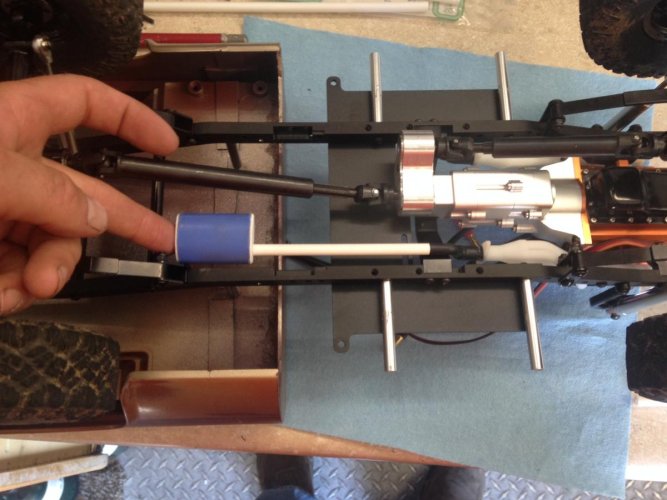
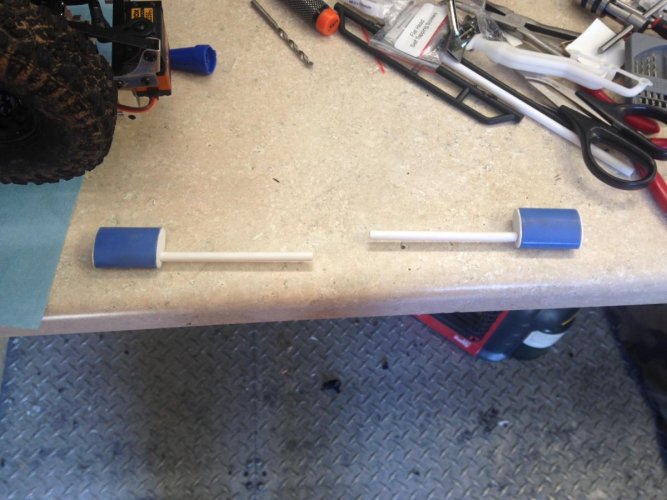
I got an exhaust system put on it and long with the distributor wires and looms... I used an old empty Bic lighter for mufflers and used styrene for the rest... Chrome tips are stole from a couple cheap extendable magnetic pick up tools... few more pics
I got an exhaust system put on it and long with the distributor wires and looms... I used an old empty Bic lighter for mufflers and used styrene for the rest... Chrome tips are stole from a couple cheap extendable magnetic pick up tools... few more pics
Attachments
-
 IMG_5296.jpg121.3 KB · Views: 1,081
 -
 IMG_5297.jpg115.4 KB · Views: 1,086
 -
 IMG_5294.jpg111.5 KB · Views: 1,091
 -
 IMG_5293.jpg105.5 KB · Views: 1,107
 -
 IMG_5290.jpg97 KB · Views: 1,117
 -
 IMG_5289.jpg128.7 KB · Views: 1,098
 -
 IMG_5288.jpg121.9 KB · Views: 1,106
 -
 IMG_5286.jpg112.5 KB · Views: 1,122
 -
 IMG_5285.jpg124.9 KB · Views: 1,103
 -
 IMG_5284.jpg99 KB · Views: 1,128
XJrob
Quarry Creeper
This turned out simply amazing!!! That's the body rc4wd should have made!!
I have a blazer body in the mail and after seeing this I am very tempted to do the same. Only thing that worries me is the back of the cab
I have a blazer body in the mail and after seeing this I am very tempted to do the same. Only thing that worries me is the back of the cab
1tonblazer
Quarry Creeper
This turned out simply amazing!!! That's the body rc4wd should have made!!
I have a blazer body in the mail and after seeing this I am very tempted to do the same. Only thing that worries me is the back of the cab
Thank you! I wouldn't worry too much about the back of the cab if you planned on running a pickup bed. I just used .080" thick styrene on the cab back and bed. I'm not really worried about making it have all the factory recessing and stamping since you only see it when the bed and cab are separated. It was really pretty simple to do. I used a lot of .040" styrene on the inside of the seams too and my favorite product to bond and fill it with is Q-Bond... Its been super strong so far.
1tonblazer
Quarry Creeper
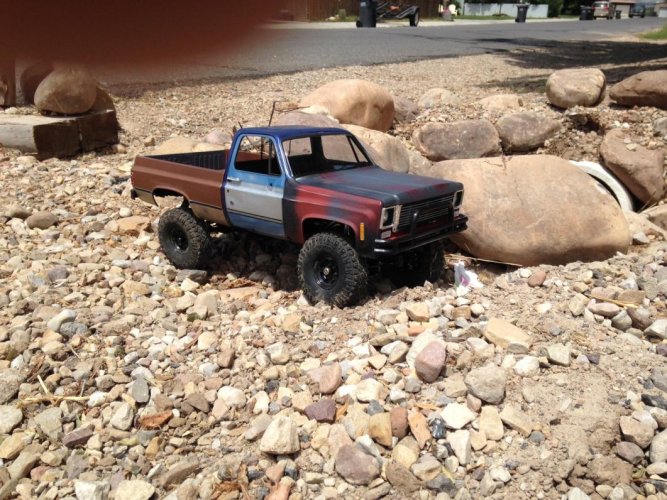
I finally made it to my local hobby shop to get more battery connectors, keep forgetting to order them when I make other purchases... anyhow took it out side for a maiden voyage, it did well for as heavy as it is. I only ran it for maybe half hour but I'm happy with it so far. I had my son come out to take some pics... but he only took one lol... I still have to finish the interior and the engine compartment but at least it's drivable now.
Attachments
1tonblazer
Quarry Creeper
Any updates on this rig?
Well, it’s been almost a year and this is the first time I saw this post. Sorry, my rc hobbies have been shelved for a while, but just starting to make time again. This truck is in the exact condition as last seen still, did pick up a few detail items for it and hopefully in a couple weeks I’ll have more updates.
Can't waitWell, it’s been almost a year and this is the first time I saw this post. Sorry, my rc hobbies have been shelved for a while, but just starting to make time again. This truck is in the exact condition as last seen still, did pick up a few detail items for it and hopefully in a couple weeks I’ll have more updates.
Awesome build, man! "thumbsup"
1tonblazer
Quarry Creeper
how did you mount the bed on this?
it looks like you used screws through the bed into the chassis but I could be wrong. im looking for ways to mount the bed on mine.
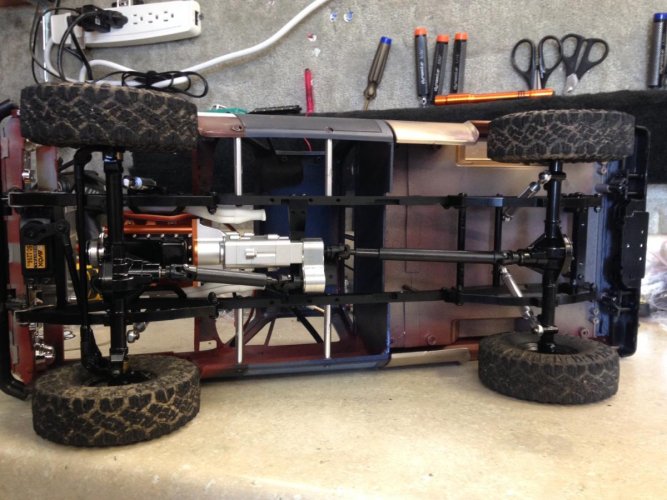
Yeah, drilled and tapped the frame and used some long screws and spacers to mount the bed.
Similar threads
- Replies
- 59
- Views
- 19K
- Replies
- 3
- Views
- 2K