• Welcome to RCCrawler Forums.

    It looks like you're enjoying RCCrawler's Forums but haven't created an account yet. Why not take a minute to register for your own free account now? As a member you get free access to all of our forums and posts plus the ability to post your own messages, communicate directly with other members, and much more. Register now!

    Already a member? Login at the top of this page to stop seeing this message.

Masking and painting flowing lines

PaulH

Newbie
Joined
Apr 29, 2020
Messages
19
Location
Kendal, Cumbria, UK
I've just got myself a Capra and I'm hoping to paint it up using images inspired by Keith Haring. (It's my first RC car in about 40 years - don't ask!)

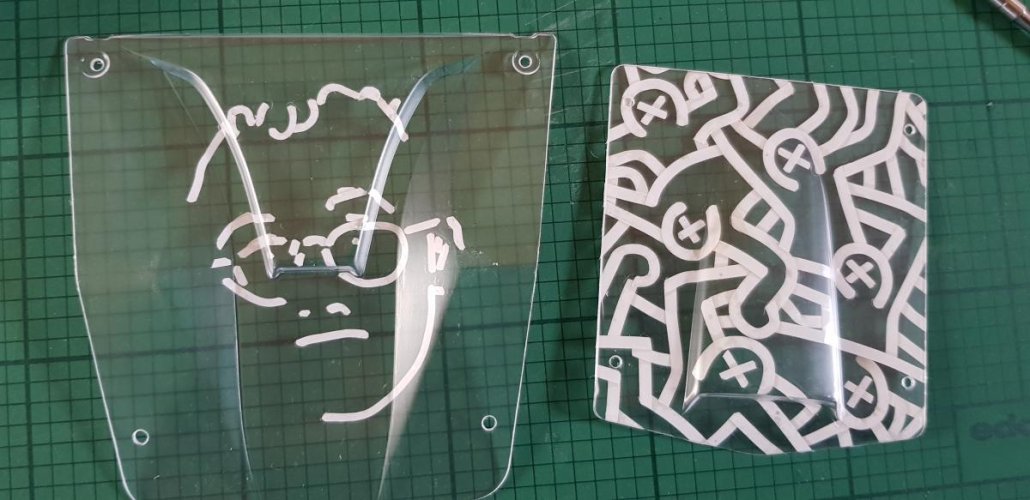
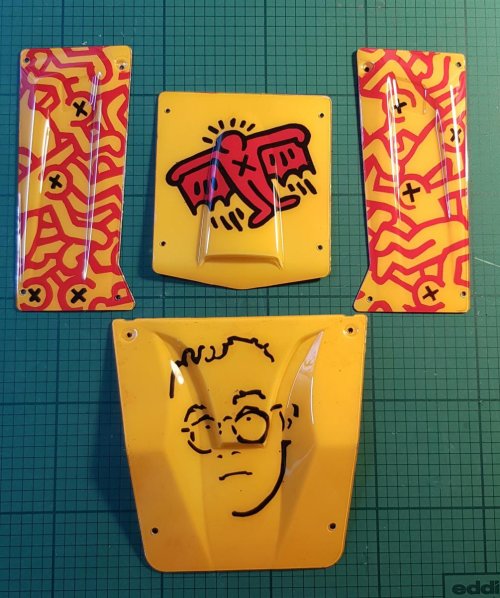
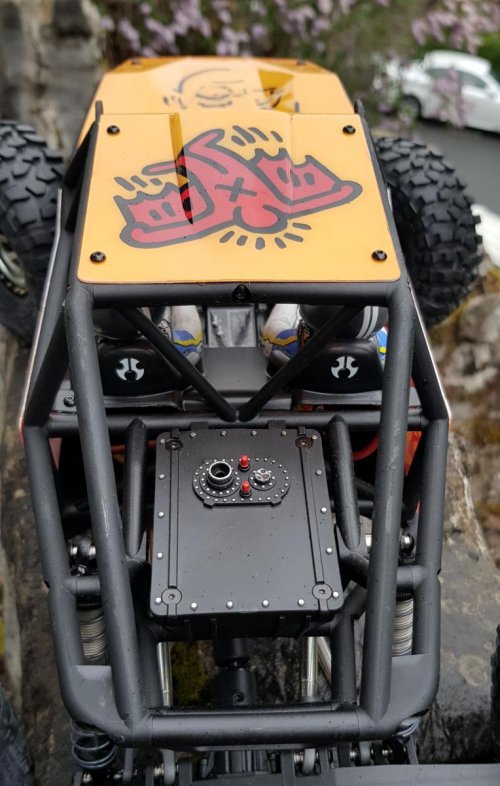
I'm hoping to use this stylised image of him on the bonnet (that's the hood to you guys over the water).

untitled.png

Any suggestions how I might proceed? I'm thinking of using liquid mask, but it'll involve some pretty fine cutting out. I'm reasonably competent with a craft knife, but I wonder if I'm biting off more than I can chew.

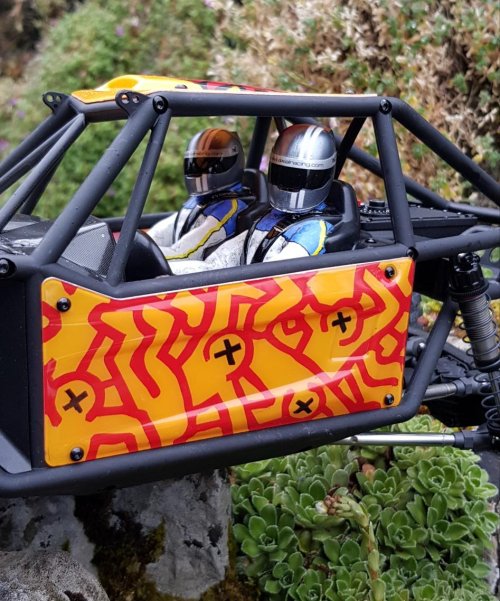
The idea is to cover the rest of the bodywork with something like this:
Cozmic flight.jpg

Any thoughts?
 
The portrait would be easy to do by printing it on paper then cutting it out . Put on the outside and trace with marker then tape inside and hold up to a light source and cut around the marker . Remove all but the marker sections spray white then remove tape and spray black .

The figures you could do the same but it’s a lot of cutting and it takes a pretty long time . I would print a copy and use the marker and light trick but probably use paint brushes and liquid mask .

Those panels are kinda small no?

You might be able to Hold the paper down and paint over it on the inside with the liquid mask .
 
I would try a few coats because mask is easier to remove when it’s thicker then thinner . Looking at it again tho the red lines all touch so i think it would be easier to put the copy on the outside and use markers to transfer the lines to the outside then paint the liquid mask on the inside following the marker lines as a guide .

I’m interested in seeing it done.

If it helps Keith’s lines were definitely crisp and linear but if it turned out like Giacometti did it I think he would’ve still said it was museum worthy !

Google hemistorm on YouTube and watch his painting videos .
 
For the portrait, I'd print a copy in reverse, turn it over on the outside tape it down, then paint with a brush and black polycarbonate on the inside.

As for the rest, I think I would try to cut it out from decal material. It would be time consuming, but the end result would be awesome and very unique. "thumbsup"
 
So I've started masking, using Tamiya 2mm and 3mm flexible tape for curves. Body has been washed but not scuffed.

Unfortunately the tape keeps lifting in places, especially where I've stretched it into tight curves. I'm going to try a side panel with a different technique, masking the whole panel and cutting out.

Any advice on whether scuffing might make the thin flexible tape stay put better?
 

Attachments

  • 20200514_154535.jpg
    20200514_154535.jpg
    68.1 KB · Views: 291
  • 20200515_095234.jpg
    20200515_095234.jpg
    96 KB · Views: 297
Liquid mask will work best.
Also a hair dryer will heat the tape and surface for better adhesion, then use a burnisher, to stick the edges. Tamiya paper tape will only bend so far, 3M fine line works well.


Hang up and Drive
 
Last edited:
In the end I scrapped the flexible tape and went with taping the whole surface and cutting out. I think it's worked pretty well. Least successful is the portrait of Haring himself. I'd quite like to strip it off and do something different - if that's possible.
 

Attachments

  • 20200515_195140.jpg
    20200515_195140.jpg
    174.3 KB · Views: 286
You're all very kind. I've got to say I found the Hemistorm videos really, really helpful. Lots of excellent advice, and shows just what can be done simply with tape and rattle cans. I'd certainly have been putting on tons more layers of paint if I hadn't watched him in action. So thanks for the steer in that direction, guys.

Now for the interior - any good info sources for that?
 
I've tried to 'animate' the driver figure a bit. Both heads are turned to the left, but they're not at the same angle. I inserted a wedge of epoxy putty between the driver's body and head, so he's now looking slightly down, as well as left. You can see this in the middle picture above.

And here's an image from the other side - you can see the wedge of clay, which I've attempted to paint to look like a fire-retardant base layer - not sure this works!

I found using a heat gun to soften stickers after application made moulding them to compound curves dead easy - the seat belts and visors have smoothed down perfectly.
 

Attachments

  • 20200518_105342.jpg
    20200518_105342.jpg
    131.2 KB · Views: 201
Back
Top