• Welcome to RCCrawler Forums.

    It looks like you're enjoying RCCrawler's Forums but haven't created an account yet. Why not take a minute to register for your own free account now? As a member you get free access to all of our forums and posts plus the ability to post your own messages, communicate directly with other members, and much more. Register now!

    Already a member? Login at the top of this page to stop seeing this message.

Brushless 2.2 capra build

islandlife

Pebble Pounder
Joined
Sep 26, 2021
Messages
114
Location
Canada
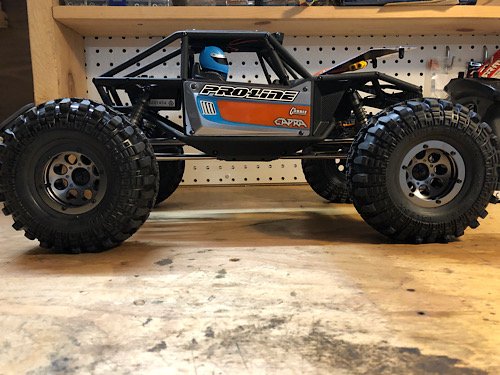
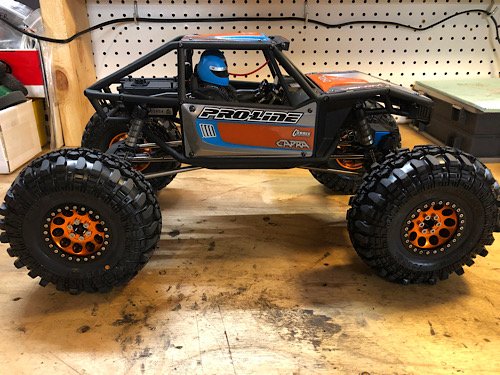
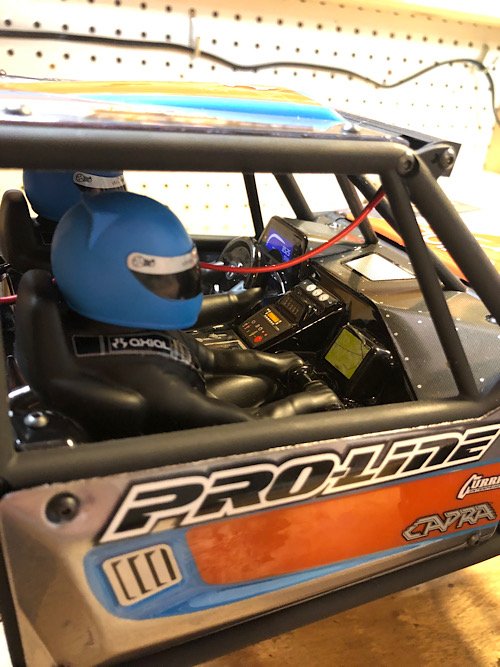
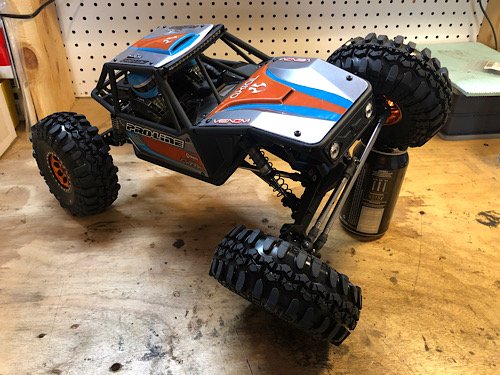
Picked up this kit for me and my 2.5yr old to build (ok, its mostly for me to build…)
Got the kit assembled over a week or so of evenings, slowed down massively by a curious toddler, he loves the “buggy truck”
Just waiting for most of the electronics to come in the mail.

Parts list is as follows:
-hobbywing axe r2 2100kv combo (some trimming willbe required)
-flysky gt5 rx/tx
-35kg amazon steering servo
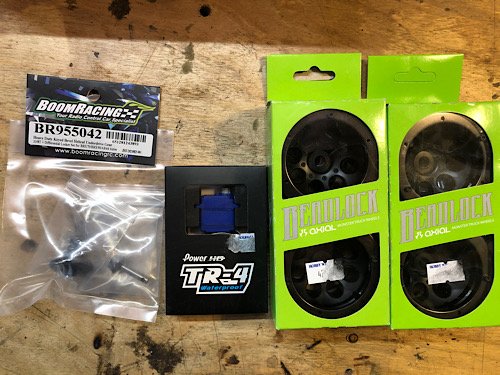
-PHD tr-4 dig servo
-boom racing underdrive rear gears
-vanquish servo mount
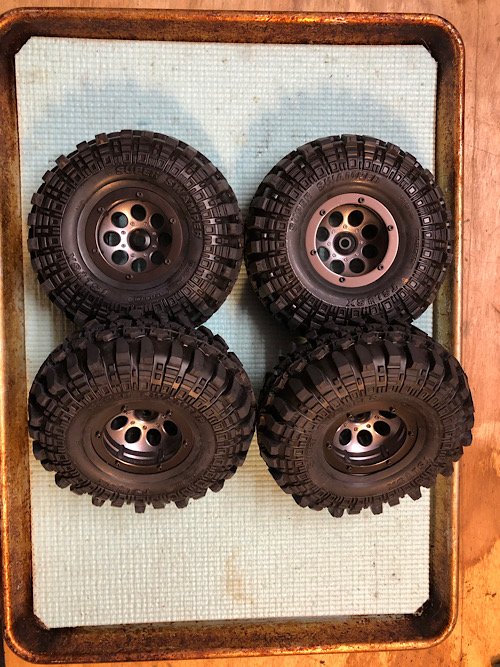
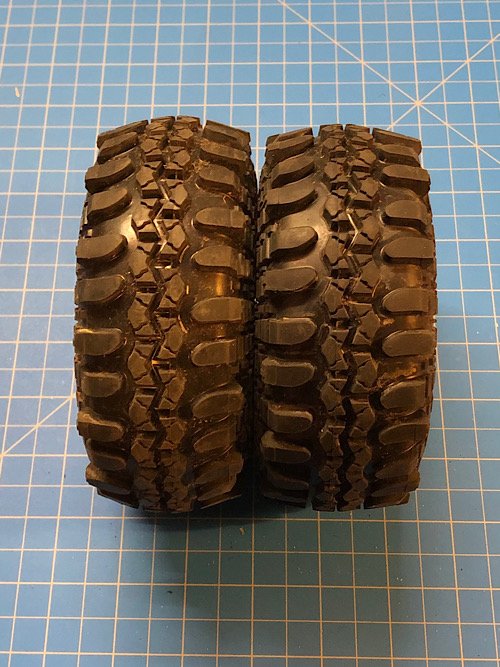
-pro-line tsl sx 2.2 g8 tires
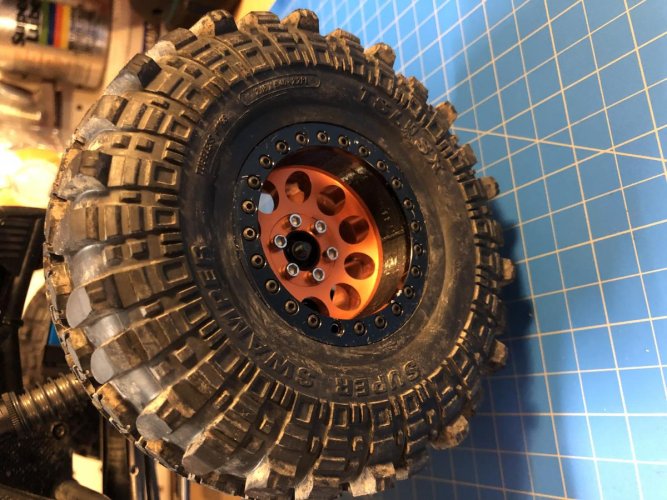
-amazon beadlocks (also ordered axial 8-hole beadlocks, but back ordered)
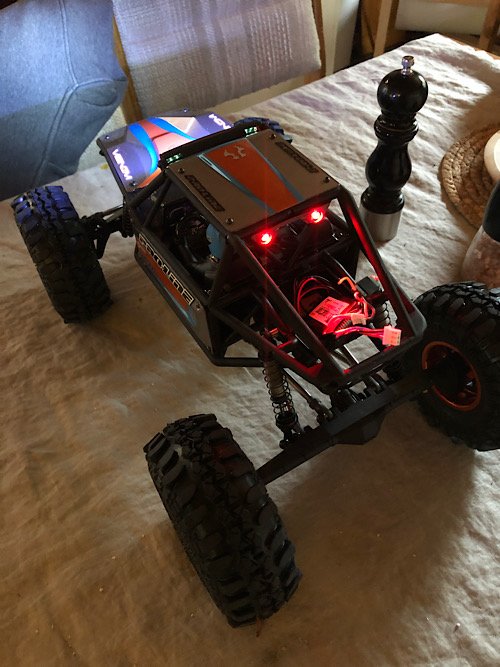
-hobbyplus led’s for headlights and tailights
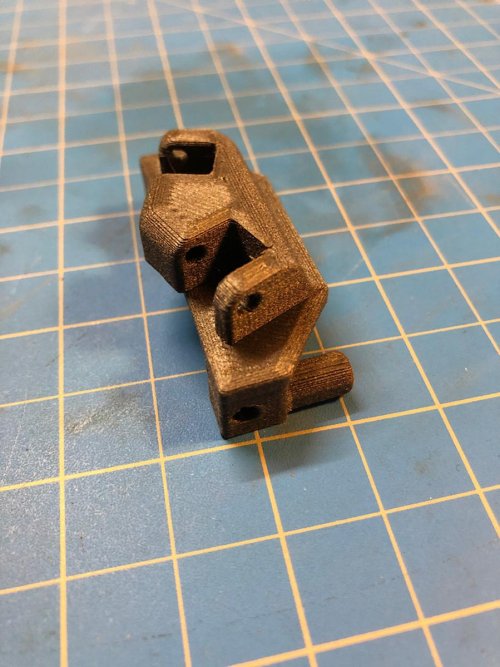
-3d printed tail light mount
-gens ace 3600mah 3s

Also 3d printed some inner wheel rings and spacers for the amazon beadlocks, as they were very narrow and extremely difficult to get the tires mounted on. The combo widens the wheel 10mm, and gives me 4mm more offset to get the 2.2’s to clear the shocks and chassis. I am waiting on some aluminum extended hubs, then i can print spacers that just widen the wheel, and dont rely on long fasteners through bolted through the spacer to mount the hub to the wheel face.

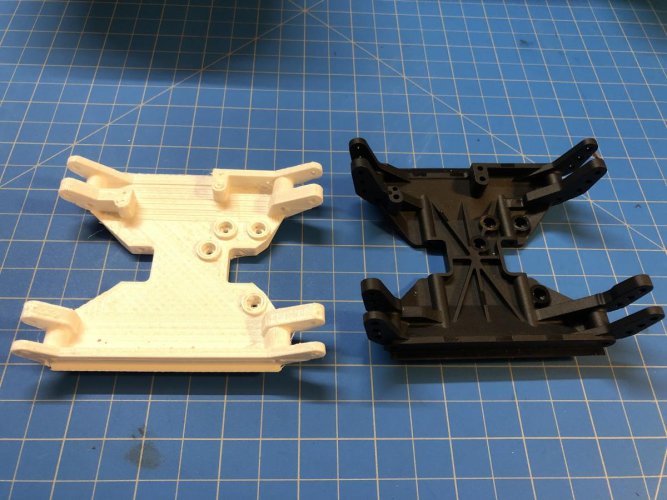
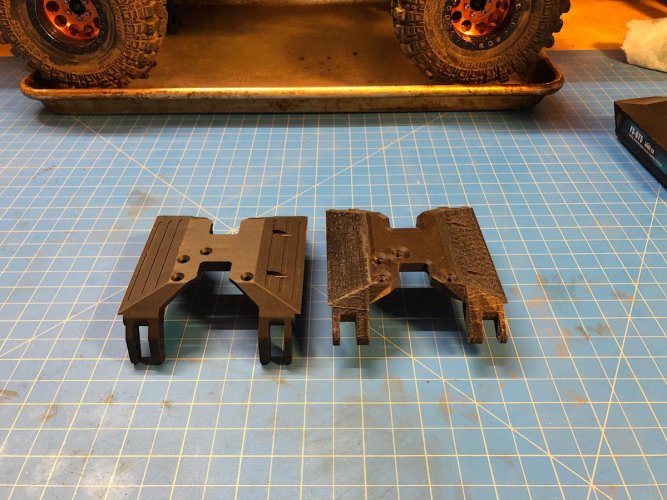
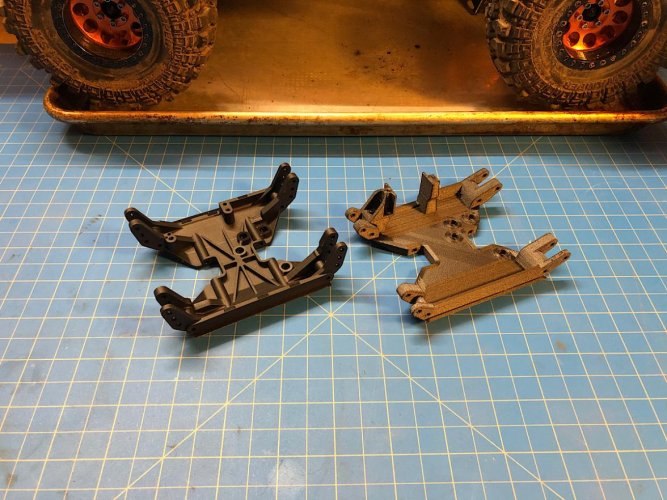
ordered a spare stock skid to try and properly modify to fit the axe 540l system, not 100% sure how im going to tackle that at this point as i dont have the motor combo yet.

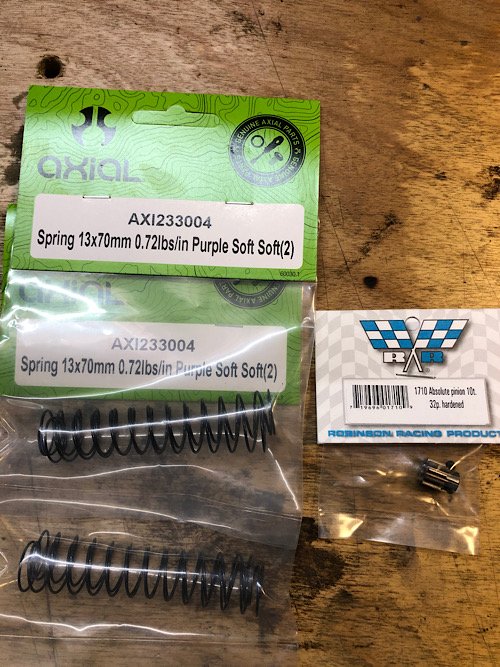
Also built the shocks with stock scx 24 coil spring on the shock shafts (like a really light pen-spring mod. And waiting on axial purple coils.
 

Attachments

  • 2F8DC03C-5BA0-428D-AFF3-FD62BFA9E503.jpeg
    2F8DC03C-5BA0-428D-AFF3-FD62BFA9E503.jpeg
    107.7 KB · Views: 2,736
  • 28F65B5C-39C8-486A-9D7E-4DC8FE73A695.jpeg
    28F65B5C-39C8-486A-9D7E-4DC8FE73A695.jpeg
    132 KB · Views: 2,683
  • EFDB8B73-3040-4CDB-992C-2AAC6156C6D7.jpeg
    EFDB8B73-3040-4CDB-992C-2AAC6156C6D7.jpeg
    104 KB · Views: 2,680
  • 095714C3-3C41-4FE3-A3FC-EBE9F4C68331.jpeg
    095714C3-3C41-4FE3-A3FC-EBE9F4C68331.jpeg
    123.3 KB · Views: 2,884
  • 31065BBC-C823-4D2A-876E-FA447E132368.jpeg
    31065BBC-C823-4D2A-876E-FA447E132368.jpeg
    119.4 KB · Views: 3,014
  • 4FB6661B-28A3-4D0F-877B-A28AFEF54F3C.jpeg
    4FB6661B-28A3-4D0F-877B-A28AFEF54F3C.jpeg
    172 KB · Views: 2,661
  • 4BE30D98-4C2C-4738-A1AF-286575D07C05.jpeg
    4BE30D98-4C2C-4738-A1AF-286575D07C05.jpeg
    144.6 KB · Views: 2,642
I’m fairly certain that Vader makes a skid for the Capra that allows longer motors to be used. I run a Revolver in my Capra but might try a Hobbywing Fusion, at which point I’ll get the skid.
 
Since you have all that extra clearance with the 2.2's, I'd work on lowering it. Is there any way to relocate the upper shock mounts?
 
Since you have all that extra clearance with the 2.2's, I'd work on lowering it. Is there any way to relocate the upper shock mounts?

Ive been thinking the same thing, but ill give it some drive time first before i start hacking up the cage to raise the front shocks. The rears could be raised without much effort it looks like.
 
I’m running 2.2s on my Capra. They’re a little shorter than your’s. Using the pen spring mod and 85g of weight on each front axle it’s crazy stable and side hills like a champ. I’d try the pen spring mod first before hacking anything up. If you like the result either keep the pen spring mod, chop up the cage if you want, or even go with shorter shocks.
 
I do have some really light springs inside the shocks, and i just recieved the lighter spring rate main coils in the mail. Im going to get it driving in that configuration before i make any more modifications. Electronics should all be in my hands in the next couple days, so hopefully have it driving by the weekend!
 
A few parts showed up today! Still waiting on motor, esc, 11t pinionand battery.
Got a 10t pinion in just to see if it could be fandangled in there somehow, ive read somewhere that a 10t can fit with some trans case shaving and different motor hardware.
 

Attachments

  • 48DC123A-B43B-447C-9CE5-8048A75CD0F6.jpeg
    48DC123A-B43B-447C-9CE5-8048A75CD0F6.jpeg
    165 KB · Views: 2,501
  • 999A053A-FEA4-4397-98D3-890EF6E6A14C.jpeg
    999A053A-FEA4-4397-98D3-890EF6E6A14C.jpeg
    97.5 KB · Views: 2,506
  • CE74C567-551D-4064-85F1-F2420DFA6A22.jpeg
    CE74C567-551D-4064-85F1-F2420DFA6A22.jpeg
    55.2 KB · Views: 2,509
I installed the lighter purple springs on the shocks, the lighter rate made for about a 5mm length difference at rest with the scx24 springs inside the shock.

Also happy to report the tsl’s went on the axial beadlocks no problem. Painted the axial wheels with the light gun metal i did the body with to brighten them up a bit.

And some pics of the trimming on the skid required to fit the axe 540L motor. Cant run the upper rear upper links in the lowest position without some extreme trimming of the rod end, but some minor trimming allowed for the middle hole.

Definitely going to make up my own skid eventually that moves the rear links back about 4-5mm (obviously stretching the wheel base the same amount). Undecided at this point whether to go flat belly like the vader skid, or similar to stock and keep the motor/trans as low as possible. But probably wont start on that project for a bit.
 

Attachments

  • F47FF34F-169F-4817-9DED-9939C55FF078.jpeg
    F47FF34F-169F-4817-9DED-9939C55FF078.jpeg
    155.3 KB · Views: 2,466
  • 4E36FFE3-5476-4ACA-B0BC-14D759F8C79F.jpeg
    4E36FFE3-5476-4ACA-B0BC-14D759F8C79F.jpeg
    175.4 KB · Views: 2,435
  • 8F96B3A0-5C57-49CB-BF2B-9C680CEE3884.jpeg
    8F96B3A0-5C57-49CB-BF2B-9C680CEE3884.jpeg
    78.9 KB · Views: 2,432
  • 2D359317-1CFF-432E-BFDE-C92F64786B33.jpeg
    2D359317-1CFF-432E-BFDE-C92F64786B33.jpeg
    71.9 KB · Views: 2,405
Last edited:
All together! Unfortunately it was pissing rain last night, so just cruzed it in the living room.
With the purple springs and a little preload the links are pretty level at rest. Pumped to take it outside!
 

Attachments

  • 966B9F47-F9E1-4A27-8396-ECDF51FF064F.jpeg
    966B9F47-F9E1-4A27-8396-ECDF51FF064F.jpeg
    88.1 KB · Views: 2,410
Ran a few packs through the “buggy truck” (my 2yr old’s name for it), so far im liking it a lot, tried a few things with the different coils and shock oils. Right now ive settled on the really light purple coils, 35w front, 50w rear oil. And swapped in some slightly heavier “pen springs” compared to the scx springs i had in before. I run a bit of preload on both ends and it seems to perform quite well compared to stock. Much lower and more stable sidehilling, also less drama under heavy throttle. Might try some lighter oils in the front next.

Also picked up a smaller battery from the SLHS today, a tattu 3s 75c 1550mah. Fits really nice, and a bit lighter than the GA 3600 i am running now.

My nice paintjob is flaking off unfortunately, turns out i used the wrong tamiya paint, not the stuff for polycarbonate. Noob mistake, picked up the proper stuff today to try to give it another go.
 
I installed the boomracing underdrive gears in the rear diff the other day, is it normal to get a bit of click/clack noise out of the driveline when the f/r gearing is different? I assume thats not out of the question with the metal trans gears.
Also got the paintjob re-done with the correct paint, will throw up a pic soon
 
Got some stuff printed over the last couple days. Printed and installed the rear bulkhead that got recommended earlier in this thread. Mounted the esc to it, nice fit.
Also printed a draft of a skid i modelled to fit the 540L motor without hitting the rear link mount. This skid design moves the lower link mounts and belly of the skid up 3mm, and moves the motor/trans, and front links forward 6mm. The draft bolts up to everything just fine, but the slipper nut touches the tab on the battery tray that has a wire guide screwed to it. I just trimmed that off as im not using it. I also forgot to move the mounting holes for the dig servo forwards, and it look that i can drop the motor/trans about 2mm without hitting anything.
Im printing V2 draft with the updates, also modeled an integrated mount for the dig servo instead of using the little stadoffs that come stock. Should be a nice stiffer mount.
Finally got the hex hubs and hardware i needed to improve the way i widened the amazon wheels i got. Now there is no printed parts involved in bolting the wheels to the truck, the printed part goes between the outer beadlock ring and wheel. Also printed new inner rings with a tapered profile and new width to match the new setup. Gives the tires a slightly shorter/flatter profile, which i like. And the tires are a breeze to mount as well.

Still curious about the increased drivetrain noise with the underdrive rear gears installed, hopefully that is just a part of having mismatched axle gears
 

Attachments

  • EF432FEB-1E2E-444A-953B-6FCE3CFFD269.jpeg
    EF432FEB-1E2E-444A-953B-6FCE3CFFD269.jpeg
    153.3 KB · Views: 2,208
  • FED8930F-D333-4DD4-B088-2133F5840A4C.jpg
    FED8930F-D333-4DD4-B088-2133F5840A4C.jpg
    156.5 KB · Views: 2,188
  • B599E12F-9364-47EC-8C13-00255E966874.jpg
    B599E12F-9364-47EC-8C13-00255E966874.jpg
    164.7 KB · Views: 2,210
  • E605EAAF-A244-401B-BE1A-A23579314D47.jpg
    E605EAAF-A244-401B-BE1A-A23579314D47.jpg
    94.1 KB · Views: 2,178
  • D7702884-846B-4F35-9F17-CEA5EEBC3F76.jpg
    D7702884-846B-4F35-9F17-CEA5EEBC3F76.jpg
    131.5 KB · Views: 2,171
  • A693814D-38CE-4814-9E9B-B1A3E5AEAD84.jpg
    A693814D-38CE-4814-9E9B-B1A3E5AEAD84.jpg
    178.1 KB · Views: 2,171
Last edited:
Printed the “finished” version of the skid ive been working on. I ran the previous test version that i printed out of petg. it worked great, but one mounting tab broke as well as a slightly bent portal stub shaft on a big fall that may or may not have been “inspired” by my 2 yr old.
This version is slightly tweaked in the dig servo mount area and printed more solid out of carbon fiber reinforced petg. Cant believe how nice this filament is to print! And seems to be very strong.
Also printed a rear upper link riser that is on thingiverse out of the same carbon petg. The link riser is already installed and seems to work as advertised.
Currently running 50w shock oil on all 4 corners, i think I personally like the heavier oil. Will try even heavier at least in the rear soon.
 

Attachments

  • A58B1E7B-B467-4BB2-86A2-FA65971F689F.jpg
    A58B1E7B-B467-4BB2-86A2-FA65971F689F.jpg
    130.9 KB · Views: 2,091
  • A7141028-45F4-4913-B300-93A579D4B995.jpg
    A7141028-45F4-4913-B300-93A579D4B995.jpg
    174.1 KB · Views: 2,088
  • 117282D1-EA22-4334-BEC4-73F943E5C125.jpg
    117282D1-EA22-4334-BEC4-73F943E5C125.jpg
    178.6 KB · Views: 2,095
Man idk if this is just a coincidence.. but I ripped a Capra axle housing in half with a hobbywing axe 2300kv setup and a friend of mine has ripped 2 10.3 housings in half with a hobbywing setup also.


Sent from my iPhone using Tapatalk
 
Never really like the look of the front end on the capra, so i whipped this up last night. Uses the lenses and led retainers from the stock grill. Printed with carbon fiber nylon, ill see how long it holds up!
 

Attachments

  • FB29EF14-11BE-4697-96DC-46F460D0B0F7.jpg
    FB29EF14-11BE-4697-96DC-46F460D0B0F7.jpg
    175.7 KB · Views: 1,850
  • 576E4B3A-8436-49AF-A61C-4A5C17CA9B83.jpg
    576E4B3A-8436-49AF-A61C-4A5C17CA9B83.jpg
    188.8 KB · Views: 1,837
  • 80E6725D-A54C-4C66-BF54-0C249506C3C3.jpg
    80E6725D-A54C-4C66-BF54-0C249506C3C3.jpg
    171.4 KB · Views: 1,838
Hmm, no love for the capra nose. Lol

When i replaced the cracked front axle housing i noticed i had a slightly busted portal cover on the same side. So i got a set of vitavon 84g brass portal covers. The fit and finish on them was impressive, actually had to freeze the bearings to let them slide into the covers easier.
Also replaced the portal stub shafts, as they were very slightly tweaked.

I then proceeded to go on another shock oil test session. Had 35w front, 50w rear originally. Switched all 4 to 25w and ran them through my rock garden. Then switched all 4 to 70w and ran the same lines.
The 25w was pretty great unless there was side hilling involved, would definitely flop over way easier. But pretty much eliminated the front tire hang when cornering fully articulated.
The 70w really improved the side hill performance, and other than having to use the servo to settle the truck down if a tire would pull up, i’d say it was an overall improvement.
If i get the time this weekend i may run 60w and 50w in all 4 and see if i can get the best of both.
 
Back
Top