losikid
Got Worms?
sweet thanks! ordered another header pin for my 2nd radio and a pair of VR's and a pair of bearings "thumbsup"
Thanks"thumbsup"
sweet thanks! ordered another header pin for my 2nd radio and a pair of VR's and a pair of bearings "thumbsup"
this idea may have been posted before, if so sorry.
I thought my new Losi hacked GT3B went through the first set of batteries
kinda quick even with the regulator mod till I figured I actually left it on.
Follow Losi's instructions on dissassembly, I'll pull mine apart again for
a picture of my connections.
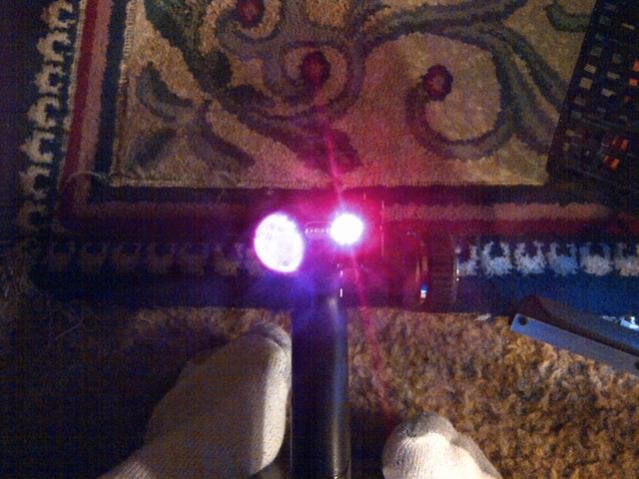
when the backlight goes out it's kinda hard to tell it is still powered up
so here is what I did, added an LED to indicate that it is still power up,
parts required is a 1.7 volt 20MA LED (any color you wish), a 560 ohm resistor and some soldering skills, the LED can be powered from the voltage regulator,
solder 1 end of the resistor to the plus side of the led the other end to pin 1 of the voltage regulator, ground side of the led to the middle leg of the regulator, you can poke a hole along side of the switch like I did.
now I know when my radio is powered up , picture has some glare but you'll get the idea
Did you know you can program the radio so the screen never turns off OR there is a inactivity alarm, so you can set it after a certain amount of time it'll start beeping?
Although the led mod is a great way to say that its on, it pulls the same amount as the lcd, and thats another 20ma drawn constantly. The whole radio only pulls like 75ma (with vr mod) when the lcd is off.
sweet my order shipped early "thumbsup"
Hey Mr Losikid, you don' t install lipo anymore but can you install wiring and give ref of the lipo....Like that I just have to add the batt...
---
I am here: Google Maps
Axial Wraith and Losi SCTE
I'm having trouble with my dual ESC offset. I have both trims maxed out in opposite directions but the rear still starts 1st FWD and the front 1st in REV. I'm at 99 and -99 on the trims. What am I doing wrong?
Oh and the 3rd channel trim forward button stopped working, luckly I programmed the 3rd channel button as a front dig as well.