• Welcome to RCCrawler Forums.

    It looks like you're enjoying RCCrawler's Forums but haven't created an account yet. Why not take a minute to register for your own free account now? As a member you get free access to all of our forums and posts plus the ability to post your own messages, communicate directly with other members, and much more. Register now!

    Already a member? Login at the top of this page to stop seeing this message.
  • RCSC

jebster's tonka truck rc conversion

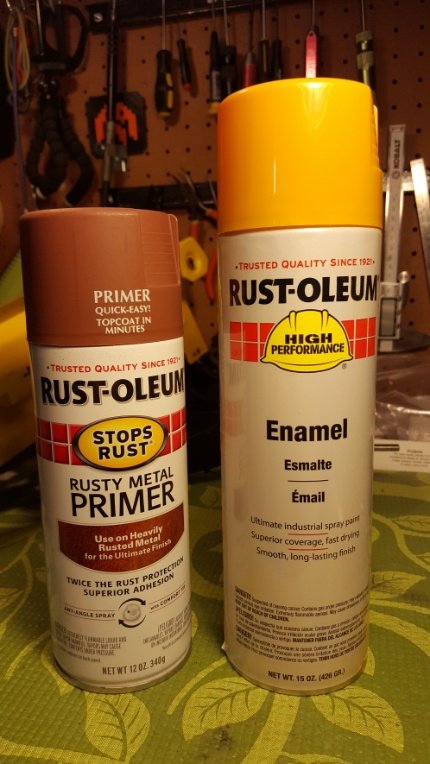
Auto parts stores have a brush-on paint that you apply directly to a rusted surface, that turns the rust to primer, I don't remember what it's called. Everything else that's bare metal, you can apply a self-etching primer, then I would recommend a damp proof primer over those before you do your finish coats.

I used the rust treatment on the frame of my '40 Chevy. When dry, it turns the metal black. After it dried, I used a damp-proof red primer before finishing it in gloss black.

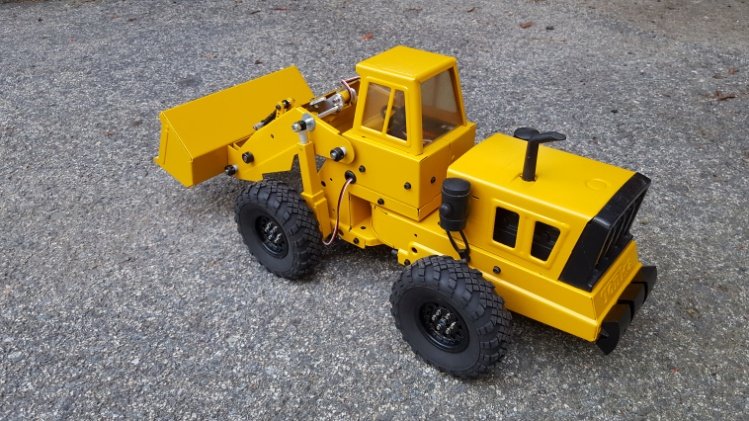
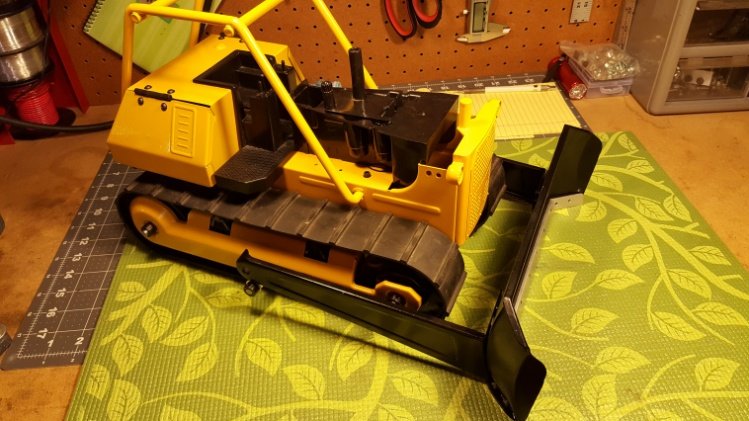
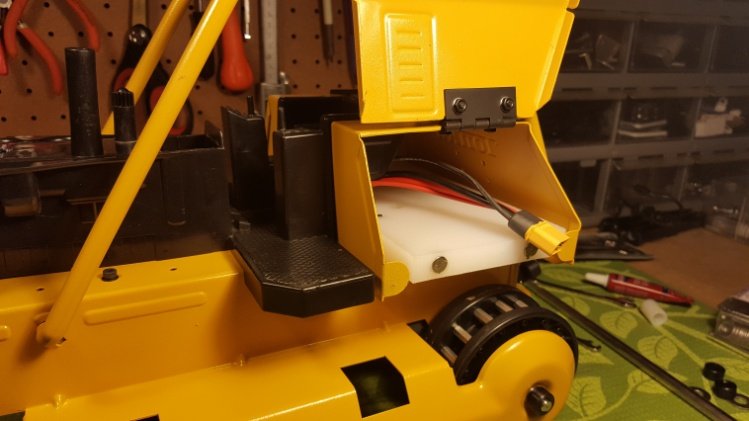
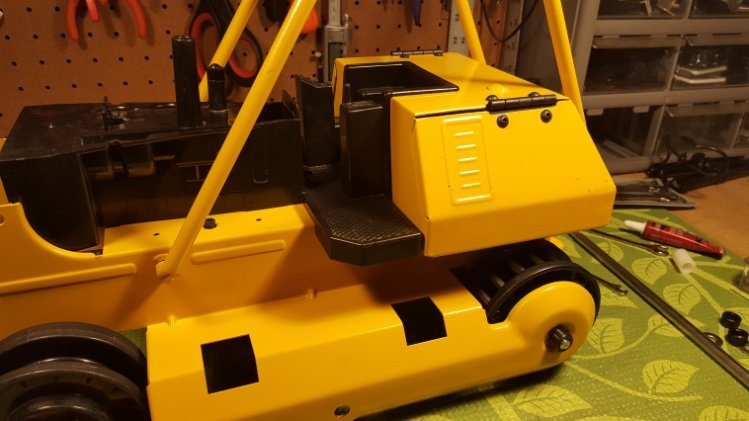
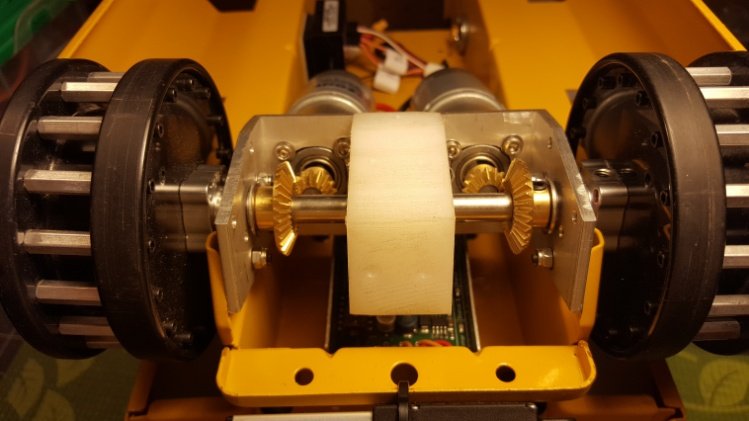
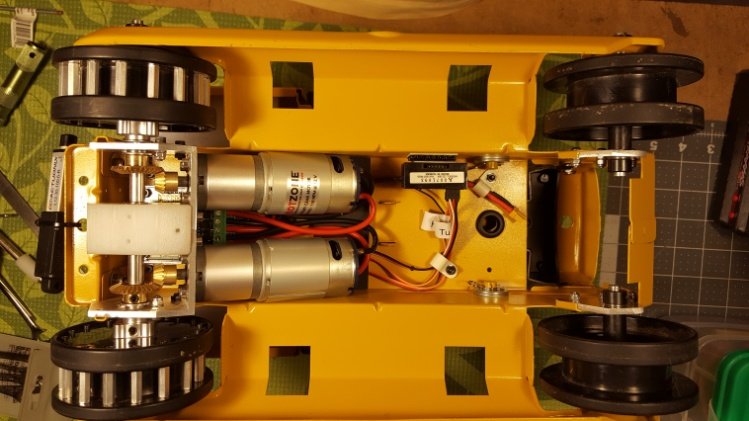
Nice job on the actuators"thumbsup", my only question is did you check how low the bucket will go, once you have the tires on? When the bucket was lowered, it raised the front up a bit, but it didn't look like it would be low enough with the running gear.

i'll have to check out those paint options. I like that idea better than wire wheeling everything because I want to get the insides of everything painted too to prevent further rusting.

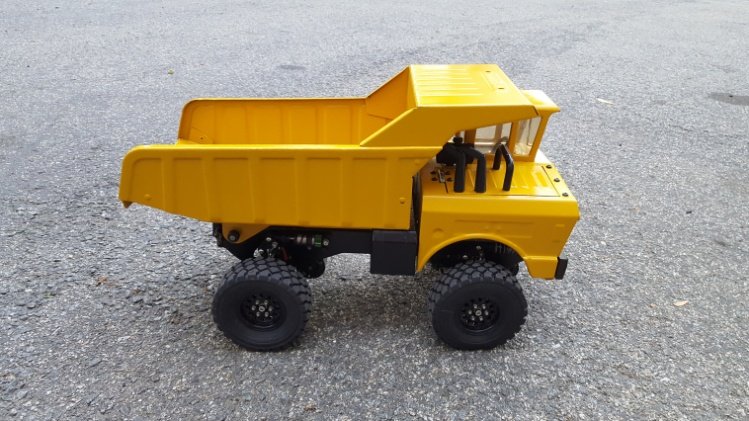
as for the actuator height I did the measurements with the tires on originally (have them mocked up on the dump truck now). in the video I have the front of the loader propped up a little, which make is look like the bucket doesn't come down as far. with the tires on the bucket lays flat on the ground. (if I need to dig a little I can just tilt the bucket.)
 
Finally had a little time to work on the loader. Got all the actuators installed and working. While hydraulics would obviously be stronger I'm pretty happy with this setup.

https://youtu.be/bThRuOFNBxY

Now it is time to tear both rigs down so I can get them painted. After that it will be playtime!
 

Attachments

  • IMG_20180521_193420.jpg
    IMG_20180521_193420.jpg
    174 KB · Views: 1,095
  • IMG_20180521_193303.jpg
    IMG_20180521_193303.jpg
    150.4 KB · Views: 1,082
  • IMG_20180521_193319.jpg
    IMG_20180521_193319.jpg
    153.3 KB · Views: 1,079
  • IMG_20180521_193334.jpg
    IMG_20180521_193334.jpg
    149.8 KB · Views: 1,094
  • IMG_20180521_193351.jpg
    IMG_20180521_193351.jpg
    172.3 KB · Views: 1,083
  • IMG_20180521_193405.jpg
    IMG_20180521_193405.jpg
    173.6 KB · Views: 1,147
The linear actuators give your equipment a more realistic action than the servos would have, well done "thumbsup""thumbsup"
 
I think a lot of your steering issues stem from the axles being locked and the vehicle weighing quite a lot. Almost like holding a steering axle and expecting the rear end to sweep left and right.

As far as your track drive: check out the Blizzard drivetrain, that had a single motor and applied the brakes to diff driven axles.
 
Last edited:
I think a lot of your steering issues stem from the axles being locked and the vehicle weighing quite a lot. Almost like holding a steering axle and expecting the rear end to sweep left and right.

As far as your track drive: check out the Blizzard drivetrain, that had a single motor and applied the brakes to diff driven axles.

Funny thing about the steering. I agree the locked axles causes an issue but it is turning better now that I have the bucket on. When I was doing my original testing I didn't have that on and the front was light so the back just pushed it along. Now with weight up front it is turning better.

I had been considering the blizzard. I had the original nitro with a diff/brakes setup and currently I have the dual motor version. I am leaning towards dual motor with a sabertooth esc. The drivetrain is in my head so I just need to start mocking it up.
 
Great job on the paint, thats quite the transformation!

Thanks. It was pretty straightforward. All spray can work. A primer made for rusty surfaces then CAT yellow. Had to order the CAT yellow because I couldn't find it in any local stores. Good thing about that is I only used 2 of the 6 pack I had to buy so I have plenty for future tonka projects!
 
Last edited:
Started mocking up the drivetrain for the bulldozer. I have some bevel gears 16t / 32t I'm going to use for a simple gearbox. I'm thinking about a direct drive with a pair of brushed motors controlled by the saber tooth esc. I like the saber tooth because I can mix the steering and throttle and use my pistol radio.
The real question on the direct drive is what turn motor to get. I was thinking something in the 80t range but haven't done the math yet.
For the drive wheels I have a simple solution on how to engage the tracks. I'm going to install hex standoffs (16 total) around the outer edge of the wheel.
 

Attachments

  • IMG_20180526_185532.jpg
    IMG_20180526_185532.jpg
    88.7 KB · Views: 967
  • IMG_20180526_185548.jpg
    IMG_20180526_185548.jpg
    118.3 KB · Views: 961
  • IMG_20180526_185603.jpg
    IMG_20180526_185603.jpg
    110.3 KB · Views: 983
Got some work done on the drive wheels. They should work out fine. Also got my motors in the mail today. Looking forward to fabricating the mount.
 

Attachments

  • IMG_20180601_205716.jpg
    IMG_20180601_205716.jpg
    89.7 KB · Views: 916
  • IMG_20180601_205651.jpg
    IMG_20180601_205651.jpg
    94.1 KB · Views: 935
  • IMG_20180601_205632.jpg
    IMG_20180601_205632.jpg
    132.7 KB · Views: 932
really nice what you've done. what did you use for a primer? POR15 is really tough, if you plan on using these in the dirt and rocks. they look so nice, not sure I'd want to get them dirty if they were mine. been thinking of doing a dump truck for my son, and you've inspired me enough to start one soon. (won't be as nice as what you've done though)

Sent from my SAMSUNG-SM-G920A using Tapatalk

Haven't got them dirty yet. I have a fear of that first scratch!

I didn't do anything special for the paint. Just a primer and then the color. Here is what I used.
 

Attachments

  • IMG_20180603_144205.jpg
    IMG_20180603_144205.jpg
    125.5 KB · Views: 907
Last edited:
Making good progress on the bulldozer. All painted and drivetrain installed. Still need actuators for the blade so that is work to go. And the short actuator on the back will be for a ripper blade I plan on adding. I know that isn't original but I thought it will look nice.

Took it for its first drive in the basement and it works as expected. It is a little slow but that is running on a 2s battery. Hopefully 3s gives it a little more.

I have ran into one problem. The tabs on the tracks that engage with the drive wheels are just a fraction closer than I measured. That means every couple rotations one of the tabs lands on top of a standoff and causes the belt to stick out. I tried removing every other standoff and that helped a little but it isn't perfect. I think I'm going to just switch over to some long bolts with no standoffs. That would limit the area a belt tab can land on top of so I hope it just slides to one side or the other of the bolt. You can see what I'm talking about in the second video.

I'm also excited because I picked up some trucks for future projects. Have a bunch of ideas on how I will make them work!

https://youtu.be/D9-CTJHbKgU

https://youtu.be/efxIIVCk56M
 

Attachments

  • IMG_20180623_120623.jpg
    IMG_20180623_120623.jpg
    106.7 KB · Views: 878
  • IMG_20180623_120606.jpg
    IMG_20180623_120606.jpg
    143.9 KB · Views: 923
  • IMG_20180623_120550.jpg
    IMG_20180623_120550.jpg
    131.1 KB · Views: 860
  • IMG_20180623_120533.jpg
    IMG_20180623_120533.jpg
    93.7 KB · Views: 900
  • IMG_20180623_120508.jpg
    IMG_20180623_120508.jpg
    104.8 KB · Views: 945
  • IMG_20180623_120444.jpg
    IMG_20180623_120444.jpg
    87.5 KB · Views: 873
  • IMG_20180623_120429.jpg
    IMG_20180623_120429.jpg
    95.1 KB · Views: 864
  • IMG_20180623_120409.jpg
    IMG_20180623_120409.jpg
    96 KB · Views: 879
  • IMG_20180623_120342.jpg
    IMG_20180623_120342.jpg
    118.4 KB · Views: 939
  • IMG_20180623_120641.jpg
    IMG_20180623_120641.jpg
    132.5 KB · Views: 876
You're going to have the Tonka Construction Co. complete soon. Still need the Road Grader and the Crane yet "thumbsup".

Great job on the Crawler "thumbsup""thumbsup", works well even with the wobble.
 
Back
Top