• Welcome to RCCrawler Forums.

    It looks like you're enjoying RCCrawler's Forums but haven't created an account yet. Why not take a minute to register for your own free account now? As a member you get free access to all of our forums and posts plus the ability to post your own messages, communicate directly with other members, and much more. Register now!

    Already a member? Login at the top of this page to stop seeing this message.

Skaldiddog's "Progress"

SkaldidDog

2013 2.2P Nat. Champion
Joined
Sep 1, 2009
Messages
2,584
Location
BorderLine Crawlers Season 3 is on!
***The chassis in this build is a one-off and bears no resemblance to the "Progress" chassis sold by RCP Crawlers. They must have just really liked the name.***

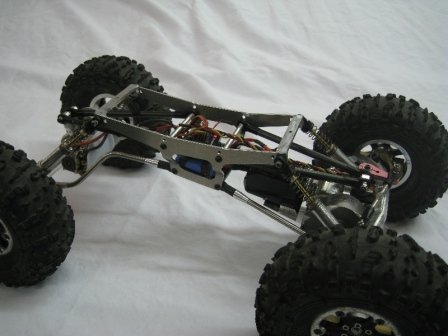
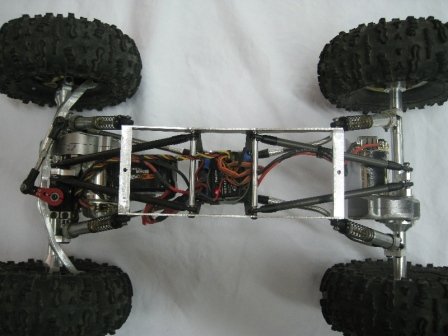
Finally made "Progress". My first machining project. I have great respect for all of you "Etch a Sketch" millers out there (Nabil's funny quote from yesterdays comp). Took 2nd or 3rd yesterday, I forgot the final standings8)...nice driving Jake"thumbsup". Currently ~6+lb rolling. Removing all weighs would shave another 14 oz from the rig. Don't know how that feather would drive but I'll try it for S&G's. The COG is insane low. Custom axles allowed me to take the 0.006" slop out of the steering knuckle bushings. Steering is tight now. This took hundreds of hours of design and execution (taking into account my screw ups). A massive amount of work but worth it. Nothing like driving your own rig. Time to learn how to drive this morphed beast.

McMasterCarr rocks!

Specs:
T1Ev2
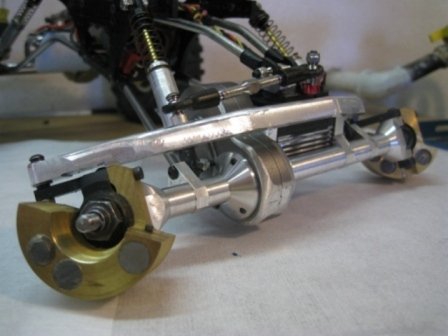
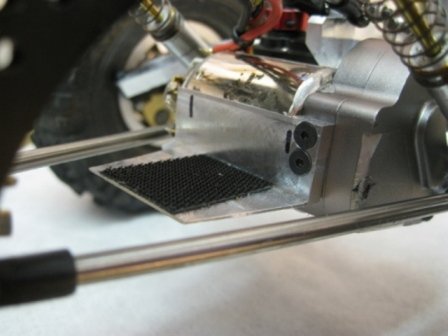
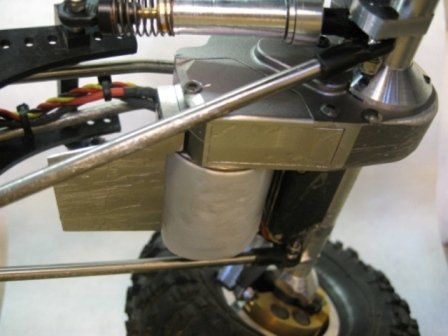
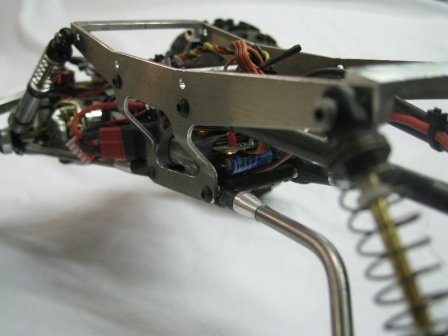
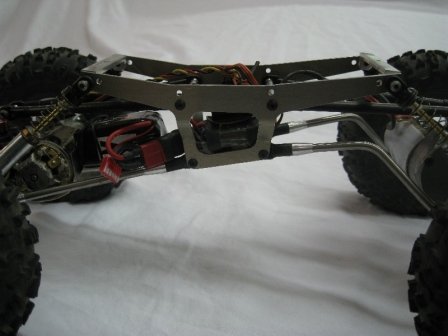
Everything is made of 7075-T6 milled/lathed from scratch (except for gear cases)
Swiss cheese gears
Signature bearing pressed steering tie rod
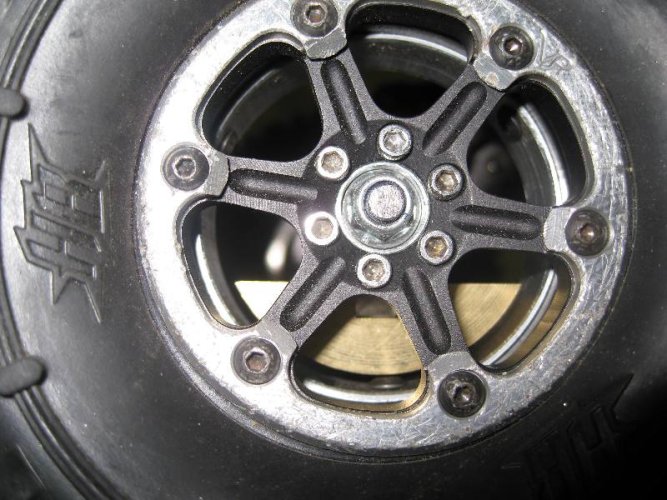
Custom inner beadlocks (ID ~1.9")
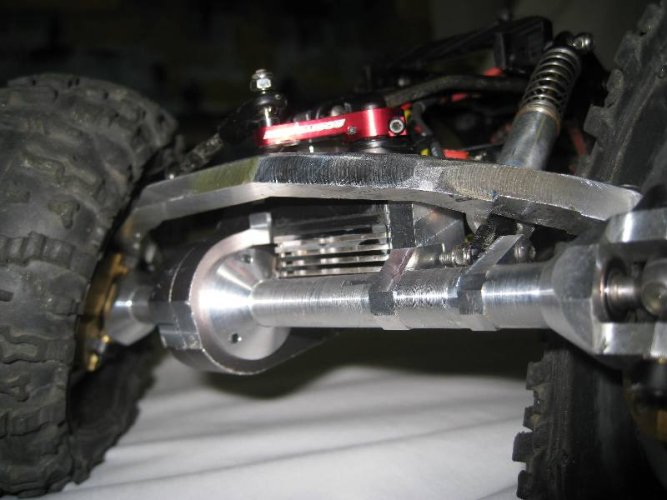
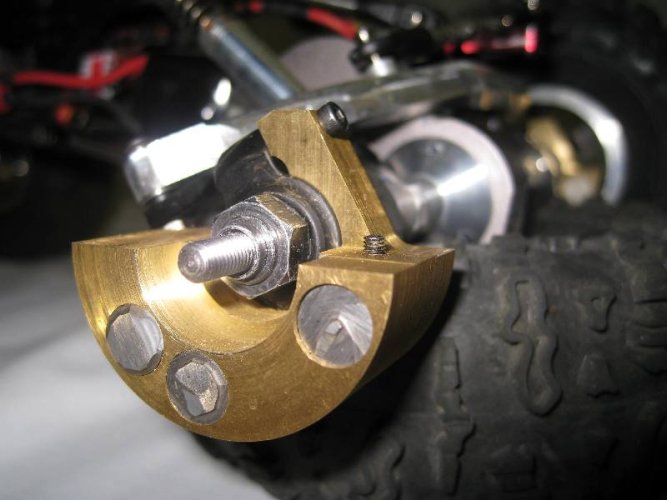
Brass knuckle/axle wts, fronts with tungsten inserts (1.1 oz ea), rears adjustable by choosing a different sized wt. Wts are all 1.8 OD
30 deg caster
Steering maxes out Super300s (awesome product SDS"thumbsup") and thirds are super300 as well
Vanquish ZA's (12mm outer bearing)
Axle cases are 0.450 OD
12mm axle bearings
Ti front links, carbon and delrin rears


Enjoy
 

Attachments

  • IMG_2441.JPG
    IMG_2441.JPG
    70.9 KB · Views: 5,659
  • IMG_2442.JPG
    IMG_2442.JPG
    60.6 KB · Views: 5,605
  • IMG_2443.JPG
    IMG_2443.JPG
    41.3 KB · Views: 5,596
  • IMG_2447.JPG
    IMG_2447.JPG
    56.8 KB · Views: 5,631
  • IMG_2446.JPG
    IMG_2446.JPG
    56 KB · Views: 5,491
  • IMG_2445.JPG
    IMG_2445.JPG
    96.6 KB · Views: 5,455
  • IMG_2452.JPG
    IMG_2452.JPG
    49.4 KB · Views: 5,457
  • IMG_2449.JPG
    IMG_2449.JPG
    60.3 KB · Views: 5,441
  • IMG_2448.JPG
    IMG_2448.JPG
    66.1 KB · Views: 5,460
  • IMG_2444.JPG
    IMG_2444.JPG
    32.2 KB · Views: 5,447
Last edited:
easily one of the more insane builds I've seen.. nice work! I need a set of wheels like that :shock:

Good driving at Wohlford on Saturday too "thumbsup"
 
86jeep steering rocks"thumbsup" but with the axle clocked the tranny hung 0.25" below the motor and was a snag. Milled it off and replaced the bottom with 7075. Closeup of the battery tray milled from a 1" thick block of 7075 as well. In focus shot of the front axle. More later.
 

Attachments

  • IMG_2456.JPG
    IMG_2456.JPG
    67.6 KB · Views: 5,043
  • IMG_2455.JPG
    IMG_2455.JPG
    70.5 KB · Views: 5,009
  • IMG_2454.JPG
    IMG_2454.JPG
    64.9 KB · Views: 5,048
  • IMG_2453.JPG
    IMG_2453.JPG
    70.9 KB · Views: 5,087
Link "Sliders"

***Updated 021111. Tank brought to my attention that some time ago JeepinDoug originated the adapters I call sliders. These then are not my original idea as I thought they were. Go idea JeepinDoug.***

Got tired of snagging rod ends since I switched to 3/16 Ti links so I made some 7075 "Sliders" that work awesome. I beat on them for a pack trying to get them to move and they didn't. They are a couple thou' larger ID than the links and slide on snug. A small layer of Goop between the link and Slider hold them fast. I'll install them all the way around and see how they work when facing rear. They should slow rod end wear as well and add negligible weight. Also fab'd some o-ring insurance for my battery tray. It takes some oomph to get a pack out now. Included a shot of my rear bearing retainer/axle weight mounts. Enjoy.
 

Attachments

  • IMG_2460.JPG
    IMG_2460.JPG
    78.2 KB · Views: 5,517
  • IMG_2459.JPG
    IMG_2459.JPG
    71.2 KB · Views: 4,878
  • IMG_2458.JPG
    IMG_2458.JPG
    64.7 KB · Views: 4,942
  • IMG_2457.JPG
    IMG_2457.JPG
    71.1 KB · Views: 4,961
Last edited:
awesome work my friend. that thing gets shinyer every time i see it. how do you drive it without blinding yourself ? :lmao:good work man "thumbsup"
 
Talk about pimp your ride. Nice work skaldiddog. Looking forward to seeing this at the next comp. "thumbsup"
 
Last edited:
Hey man your doing a great job on that thing. I was wondering what the idea behind the inner beadlock ring is and why its 1.9?
 
love the idea of the slides to stop rod ends being snagged "thumbsup" you could definitely sell those as a vendor if you wanted to go that route.
cheers
Darren
 
Hey man your doing a great job on that thing. I was wondering what the idea behind the inner beadlock ring is and why its 1.9?

Stock VP inner bead retention system takes up too much space on the inside of the rim (~1.7" ID?). Replacing the stock system with my rings signifiicantly increases the rim ID to about 1.9". The larger ID allows for a larger knuckle weight that is large now enough to pack all of the necessary weight below the axle. The whole point/end game of my rings is weight below the axle.

New chassis in progress. Will post when I'm done. Thanks for checking out my build.

Cheers,

Joel
 
couple of ??

skaldiddog - I saw that you did well at the SoCalRCRC Comp with your new setup. My questions for you are:

Why are you putting your Berg on a Diet? Is it to fit your driving style? or Are you trying to be as light as the New XR10's.

Do you feel this is the new way for the Berg's? I mean by making them lighter.

With your new weights on the knuckles. Do you still run weights inside the wheels?

Hey Switch,

My berg is going on a diet consisting solely of sprung weight and weight above the axle. This will make the rig more stable and allow softer springs. I like my rig in the 6lb range (currently 5.85) and will only remove chassis associated weight going forward. I'll probably make it down to 5.75lbs while maintaining my current weights setup. I'm keeping my front knuckles full (6oz total each side knuckle plus WC plugs) and will leave the 1oz rears in place for now. I do not intend to run XR10 light. If I strip my rig of weights it would be 4.89lbs before the ongoing diet. Way too light. The rover white compound needs some weight to work IMO. I have zero weight inside my tires. Not sure if I have a driving style yet. I've only run 6 comps total. Much work and learning to do.

Hope this helps.

J
 
Finished my first all 7075 custom chassis. Plates are 0.063". The TVPs weigh ~3g less each than my butchered T1Ev2 plates. As thin as the plates are, with the crossmembers the chassis has almost undetectible flex. I am still surprised how stiff the whole thing is. Overall articulation is slightly less than the delrin chassis and I now think it's because of the absence of chassis flex. The delrin flexed visibly at full twist. More triangulation on the uppers is nice and you can beat carbon straight links. With the wider chassis top I lowered my inboard link ends since battery clearance is no longer an issue. Uppers are ~2g each lighter than the Ti links and just as rigid. I included a shot of my variable pre-load shock spring retainers for losi mini T springs. The body screws down to the shock crossmembers and the shell becomes incredibly stiff when snug to the chassis. It's like a helmet. Final weight shell and all is 2604g/5.74lb including almost 14oz of sub-axle weights. I'll drive her like this for a while and see how it goes.

Thanks for checking out my build.
 

Attachments

  • IMG_2468.JPG
    IMG_2468.JPG
    64.8 KB · Views: 4,242
  • IMG_2467.JPG
    IMG_2467.JPG
    70.3 KB · Views: 4,253
  • IMG_2466.JPG
    IMG_2466.JPG
    76.9 KB · Views: 4,306
  • IMG_2465.JPG
    IMG_2465.JPG
    70.8 KB · Views: 4,281
  • IMG_2464.JPG
    IMG_2464.JPG
    65.2 KB · Views: 4,304
  • IMG_2463.JPG
    IMG_2463.JPG
    64.5 KB · Views: 4,349
  • IMG_2462.JPG
    IMG_2462.JPG
    78.1 KB · Views: 4,345
  • IMG_2461.JPG
    IMG_2461.JPG
    71 KB · Views: 4,342
  • IMG_2469.JPG
    IMG_2469.JPG
    66.5 KB · Views: 4,241
Back
Top