| | #21 |
| Pebble Pounder Join Date: Mar 2013 Location: ringgold
Posts: 132
|
Probably one of the coolest things I've seen on here Sent from my iPhone using Tapatalk |
| |  |
| Sponsored Links | |
| | #22 | |||
| RCC Addict  Join Date: Aug 2005 Location: New Oxford PA
Posts: 1,290
| Quote:
SHHHHH! Quote:
 Quote:
Let the teardown begin! I decided to keep the body shell's understructure to give something to attach the new panels to. 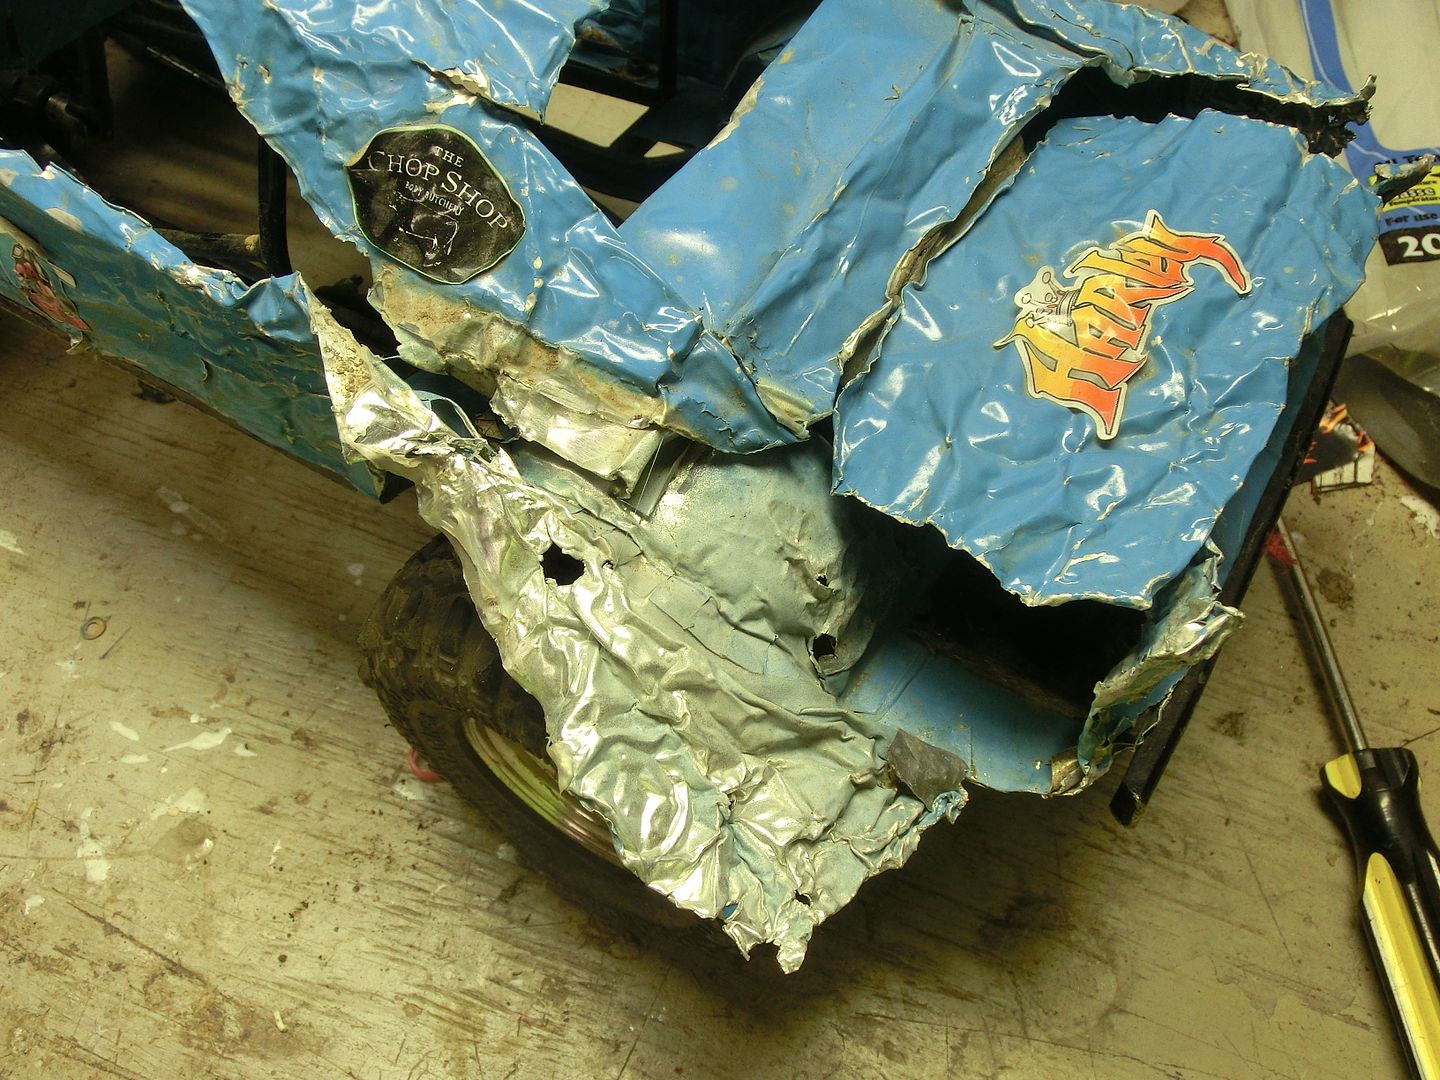 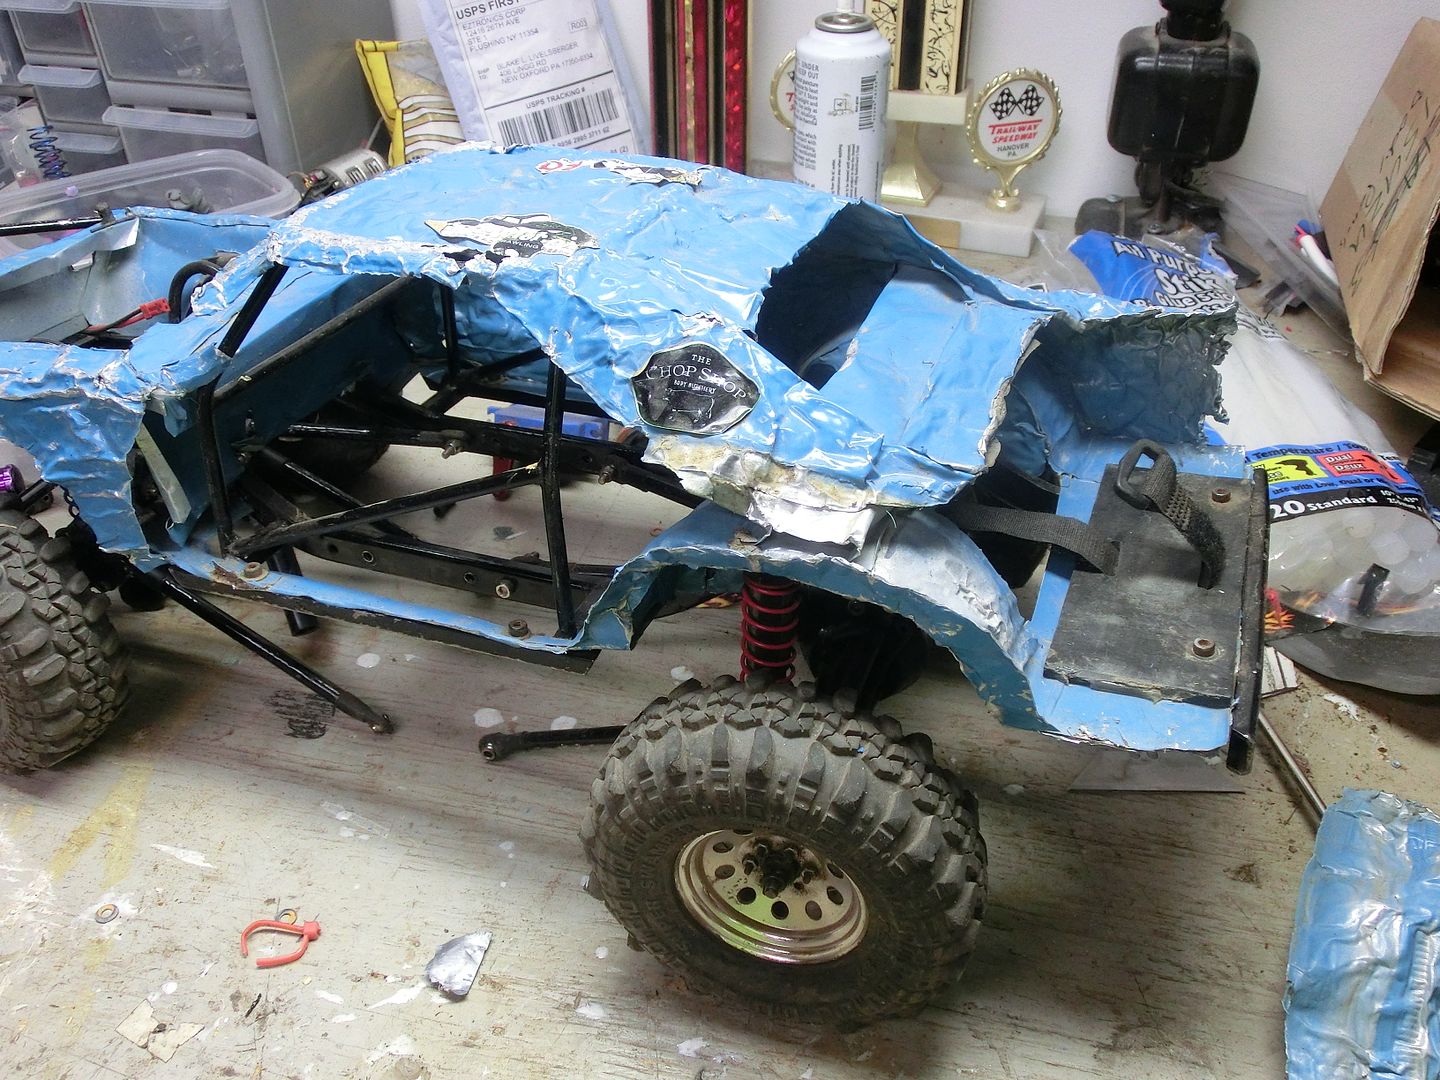 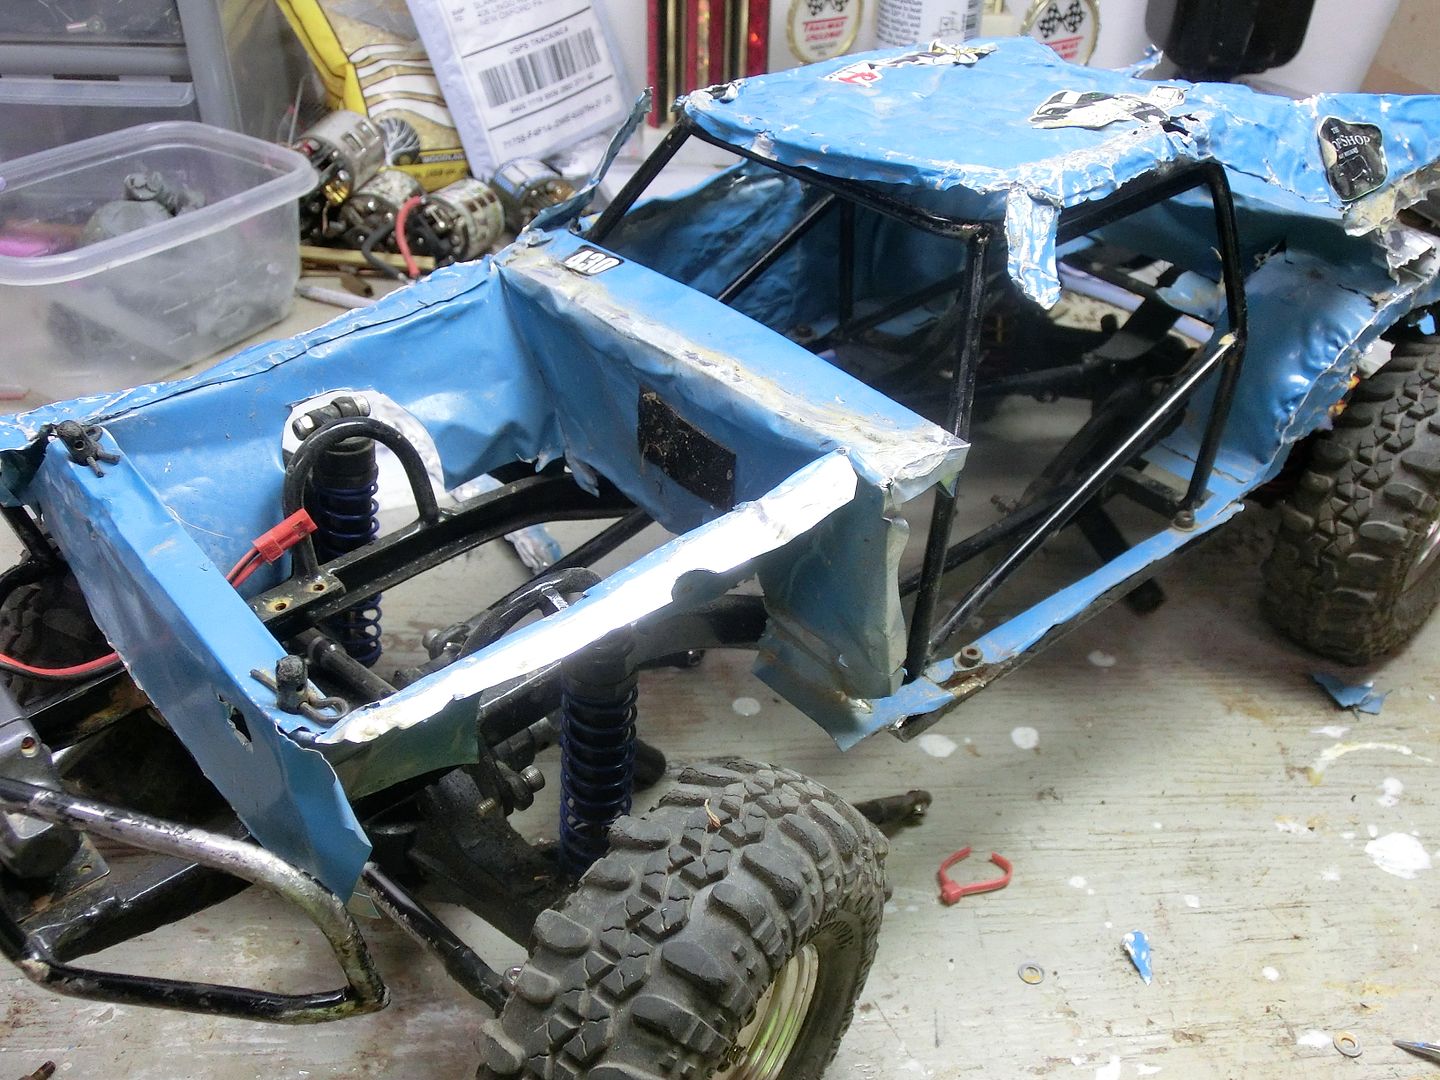 and there you go all stripped down! 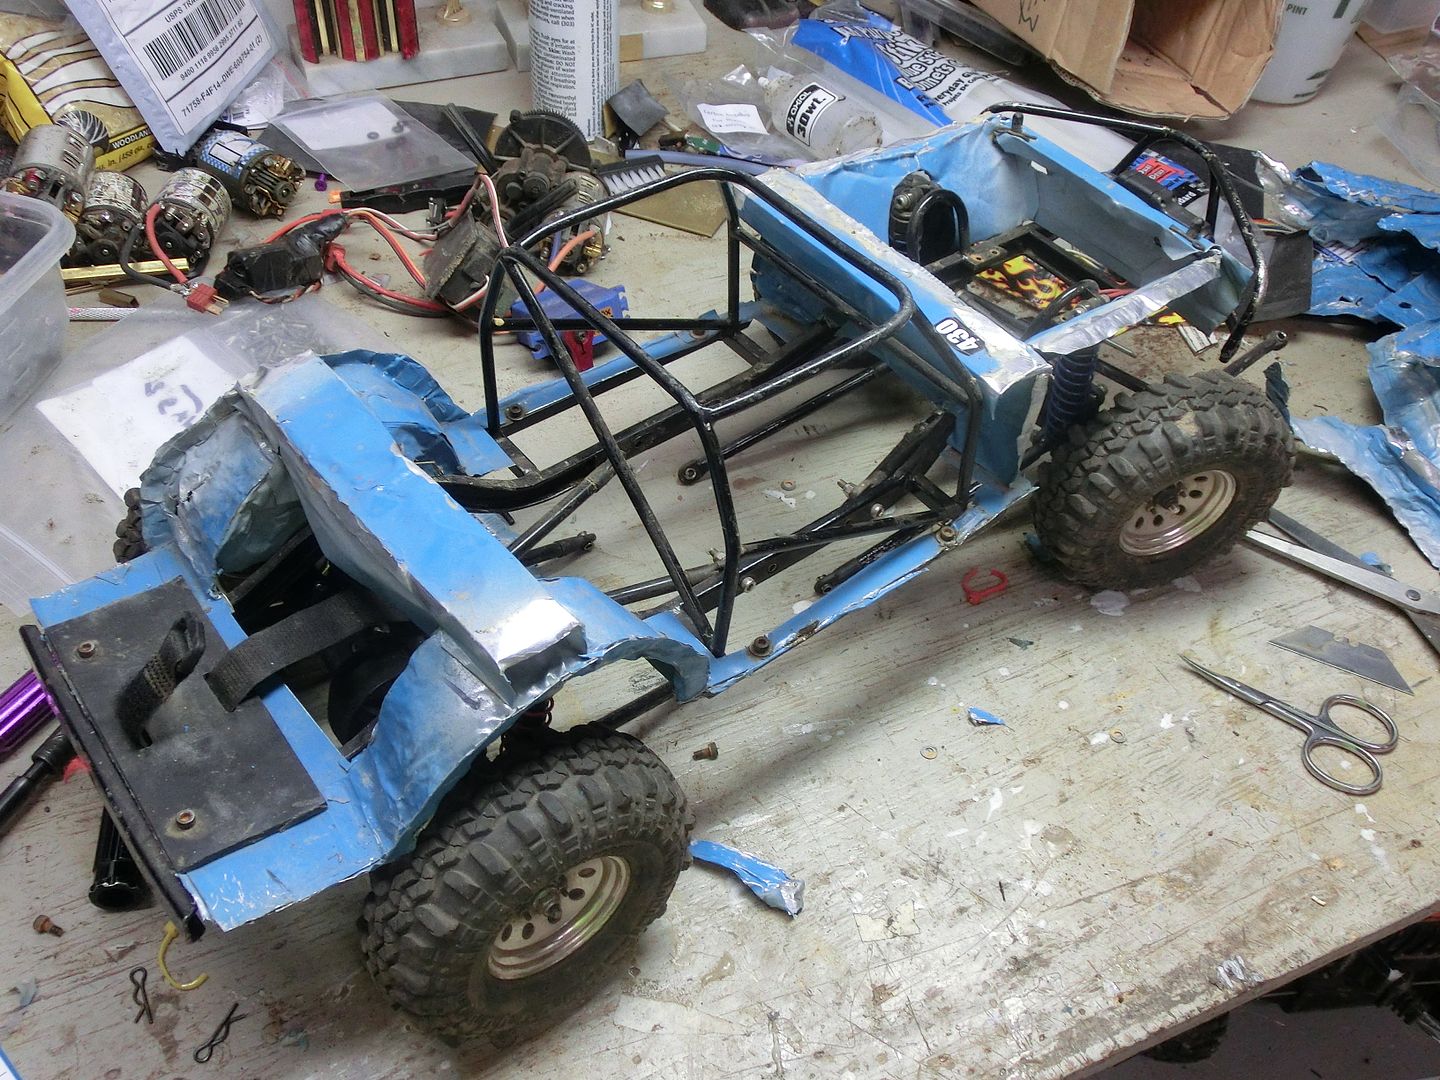 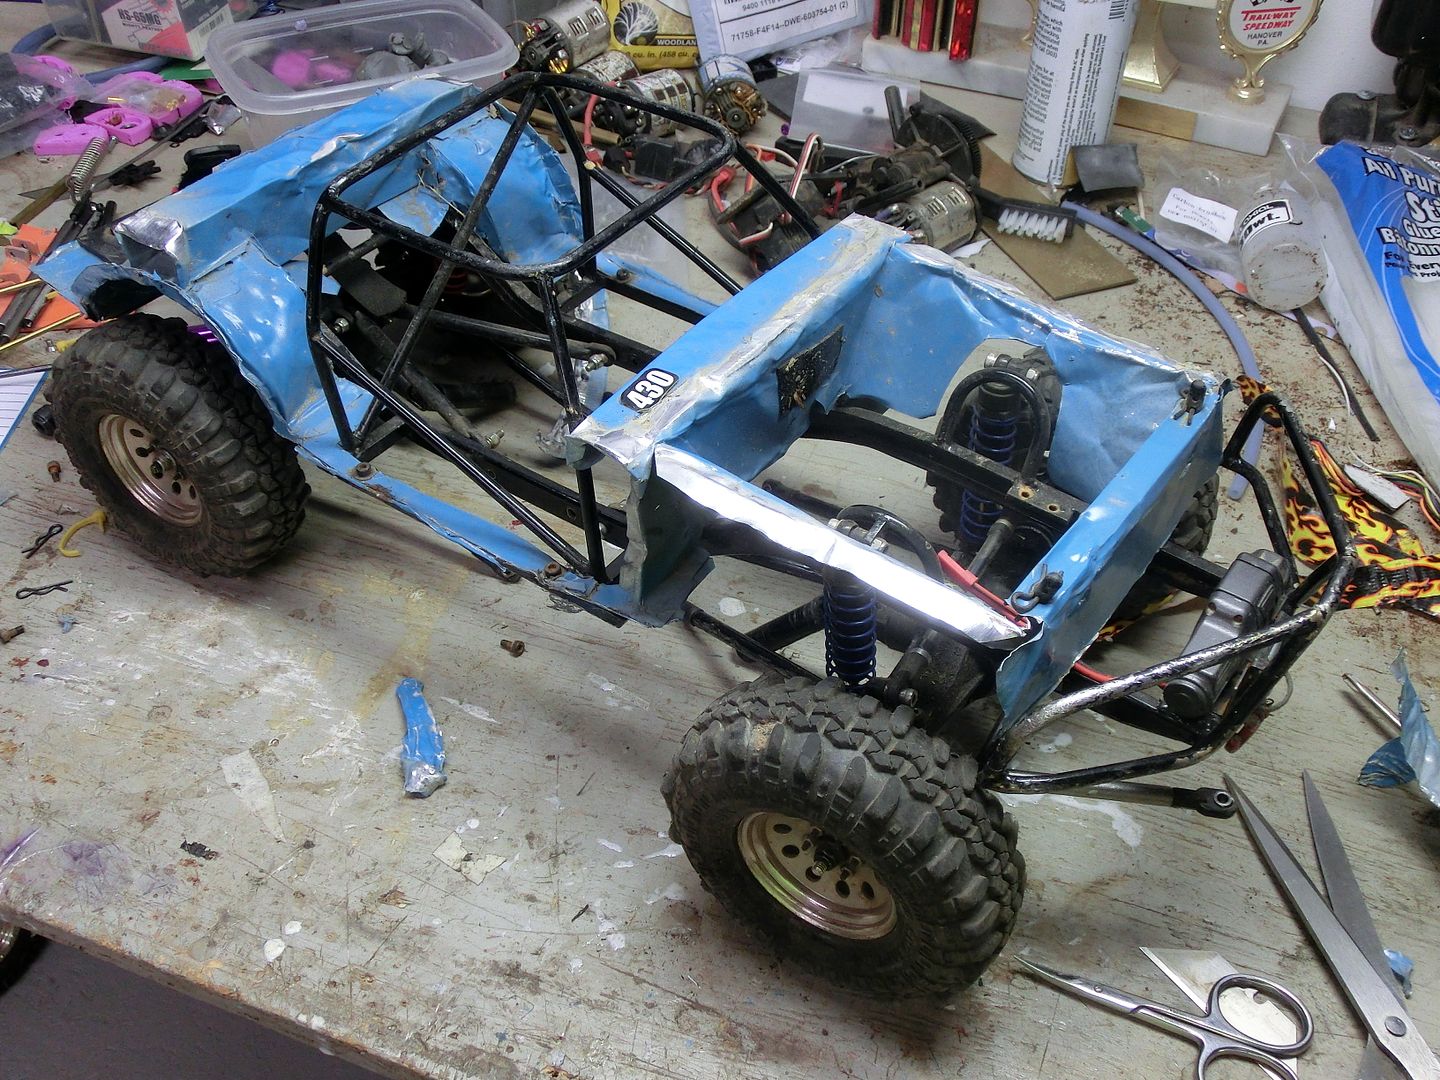 here is what was left 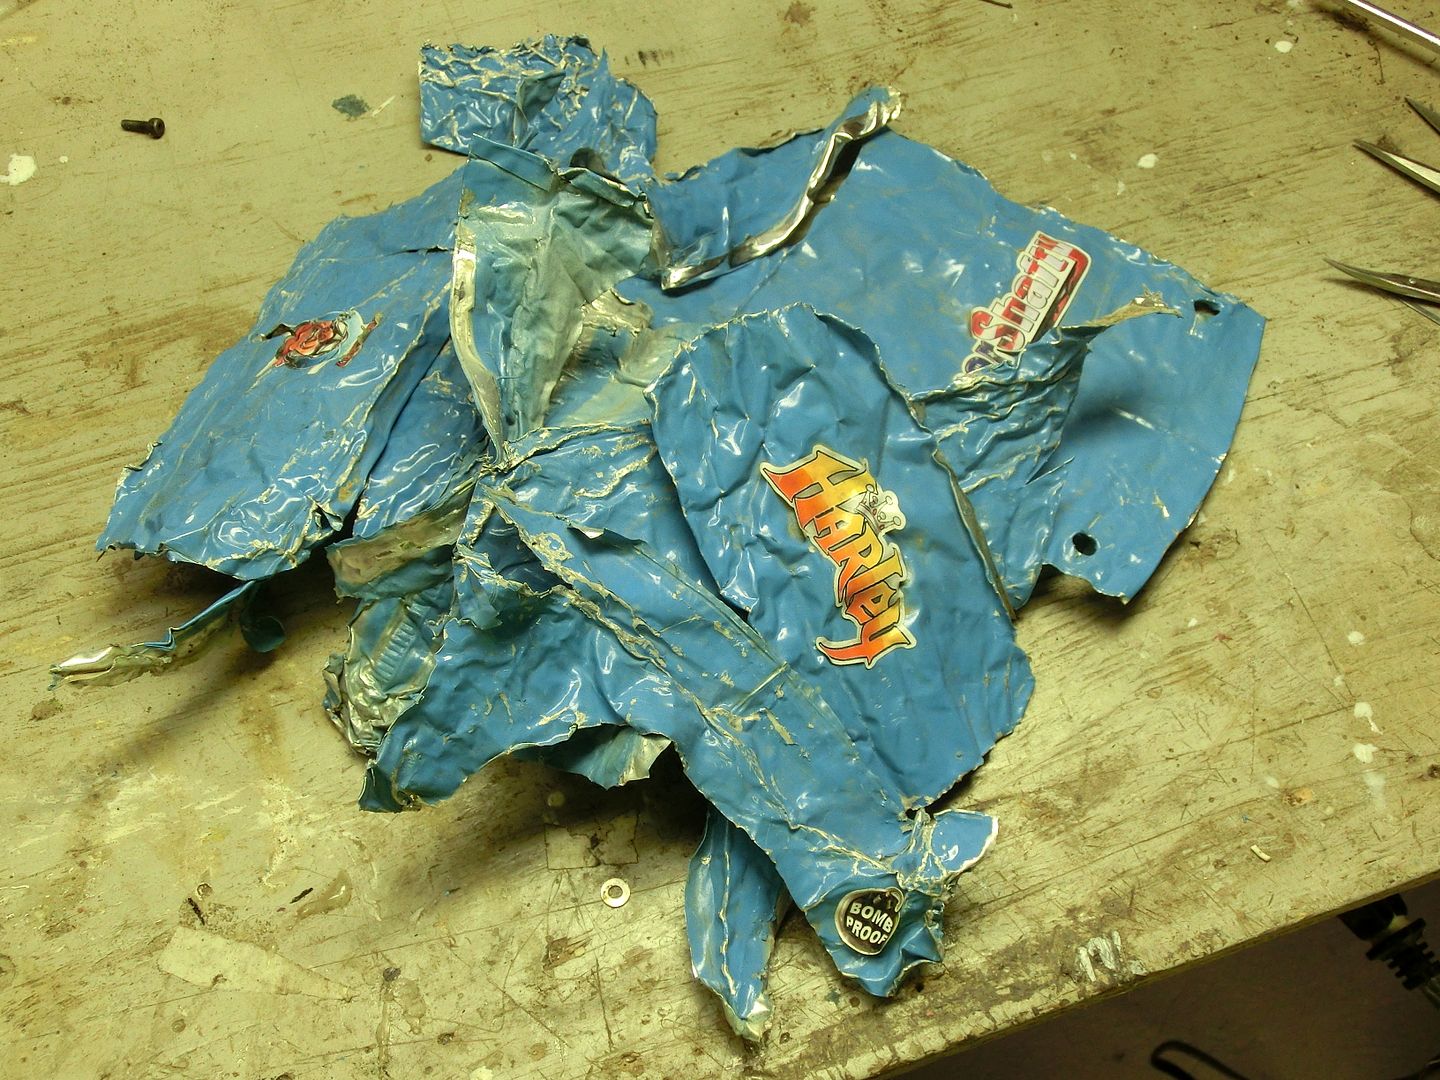 oh and you might have noticed that I removed the skid and tranny. I have a special plan for that! | |||
| |  |
| | #23 |
| RCC Addict  Join Date: Aug 2005 Location: New Oxford PA
Posts: 1,290
|
ok, time to fill the void between the frame rails. i promised my buddy last year that i would add an interior to gain him some scale points but i needed a way to gain more room for the seats. now i could have purchased many different set-ups to accomplish this but i have very little excess money and being a designer by trade i have the access to not only the tools to design what i want but i have access to a 3D printer as well. Now i knew how the Dinky set-up was like and loosely based my design around that but purposefully did not look at any pictures while doing the design to try and make it my own. Here is what i came up with 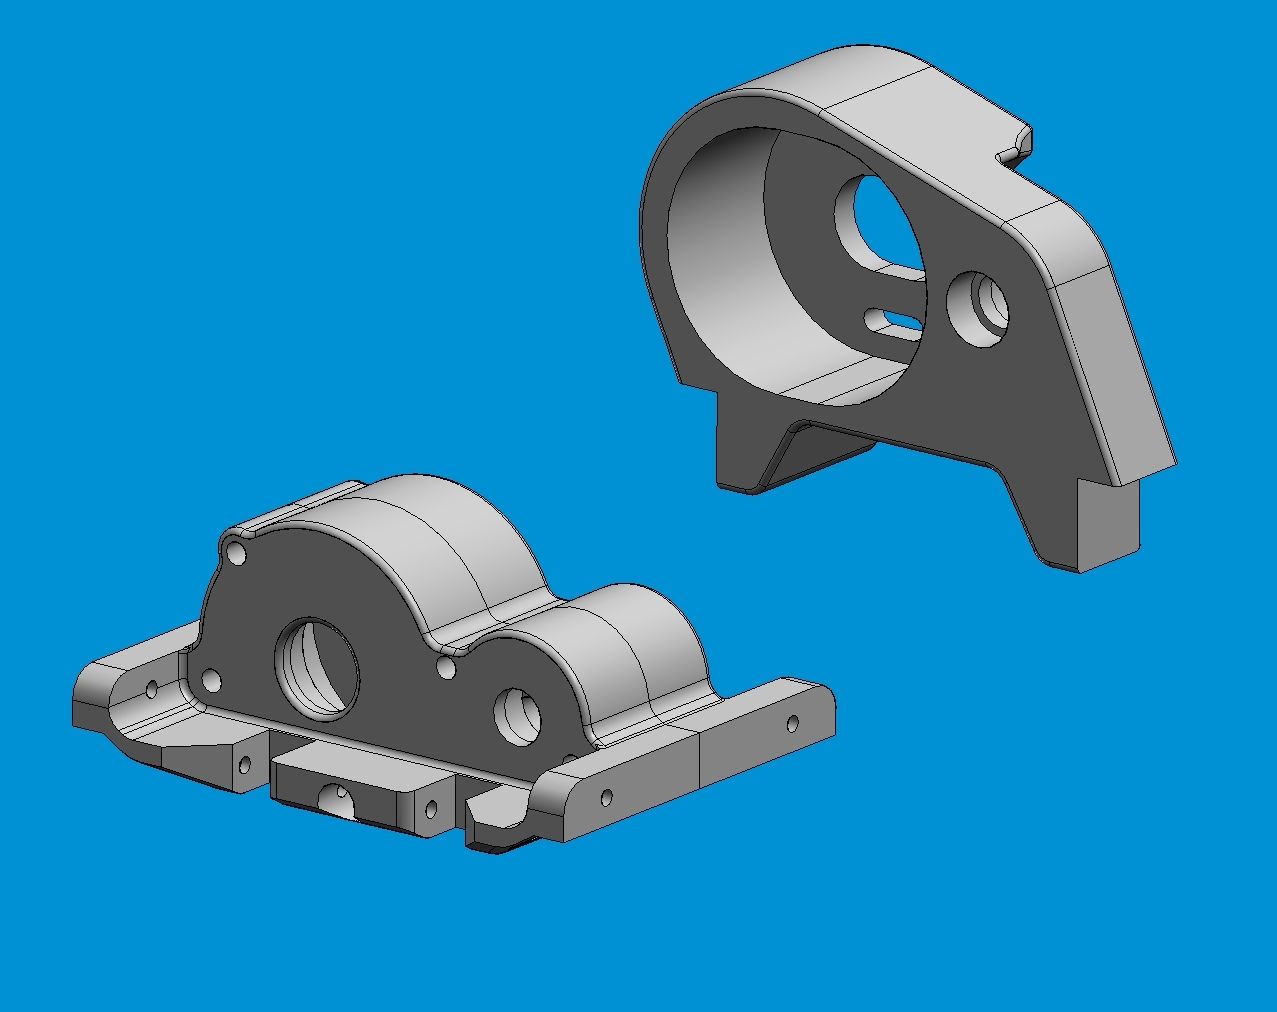 the 3D printed parts came out real nice and i designed it to use the existing tranny gears. 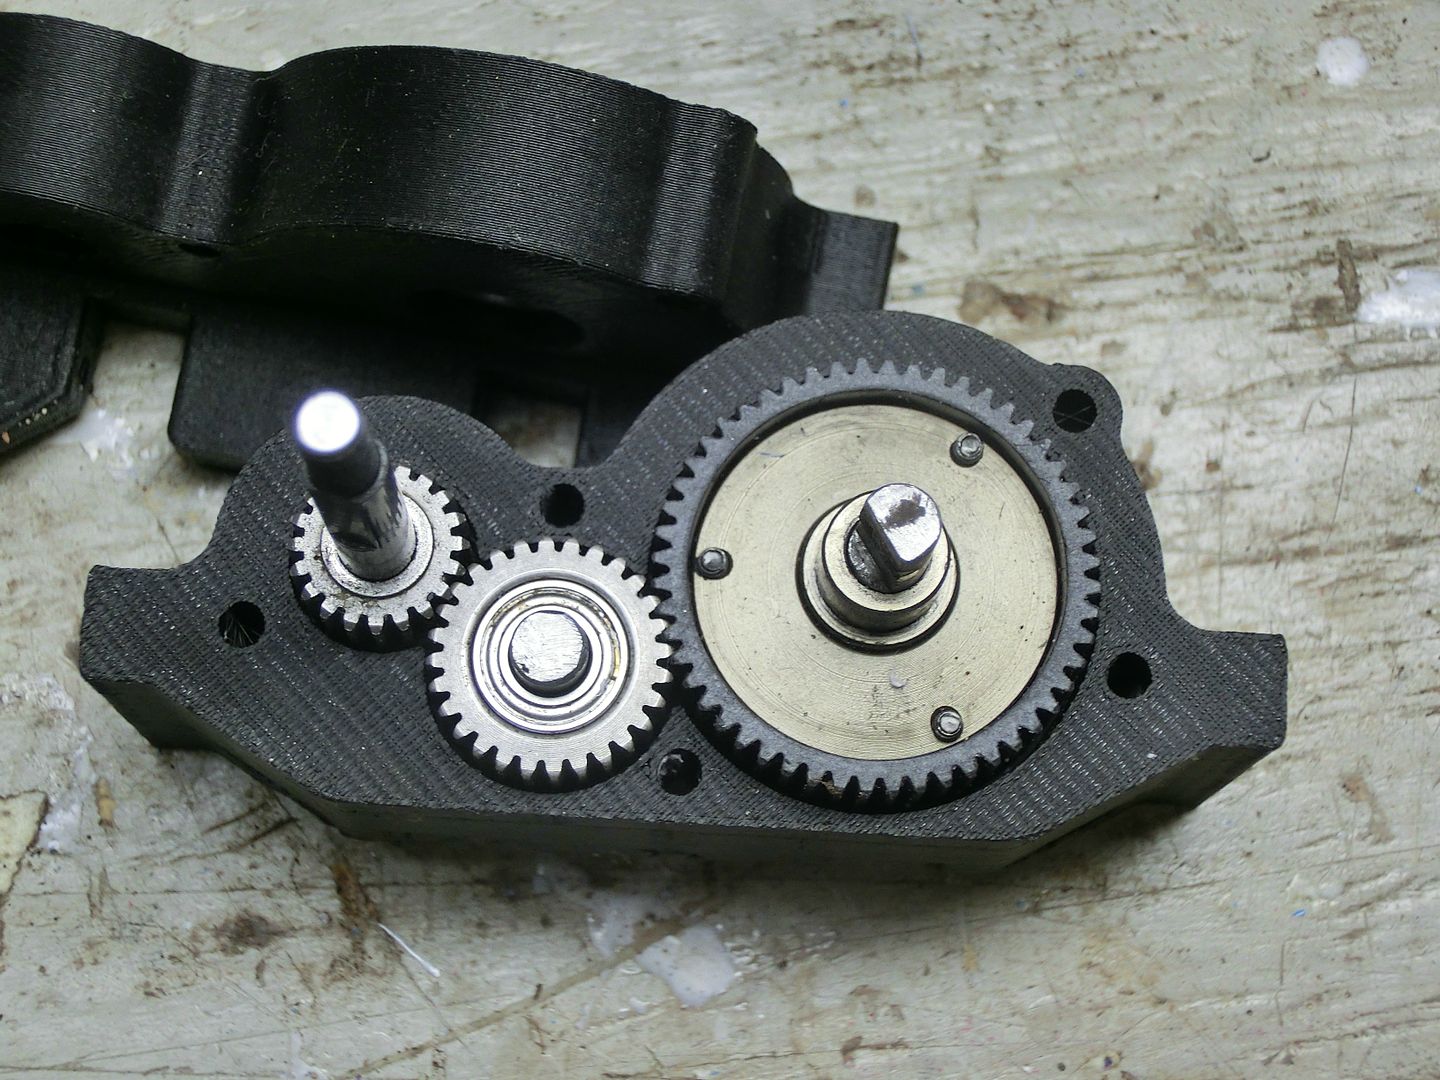 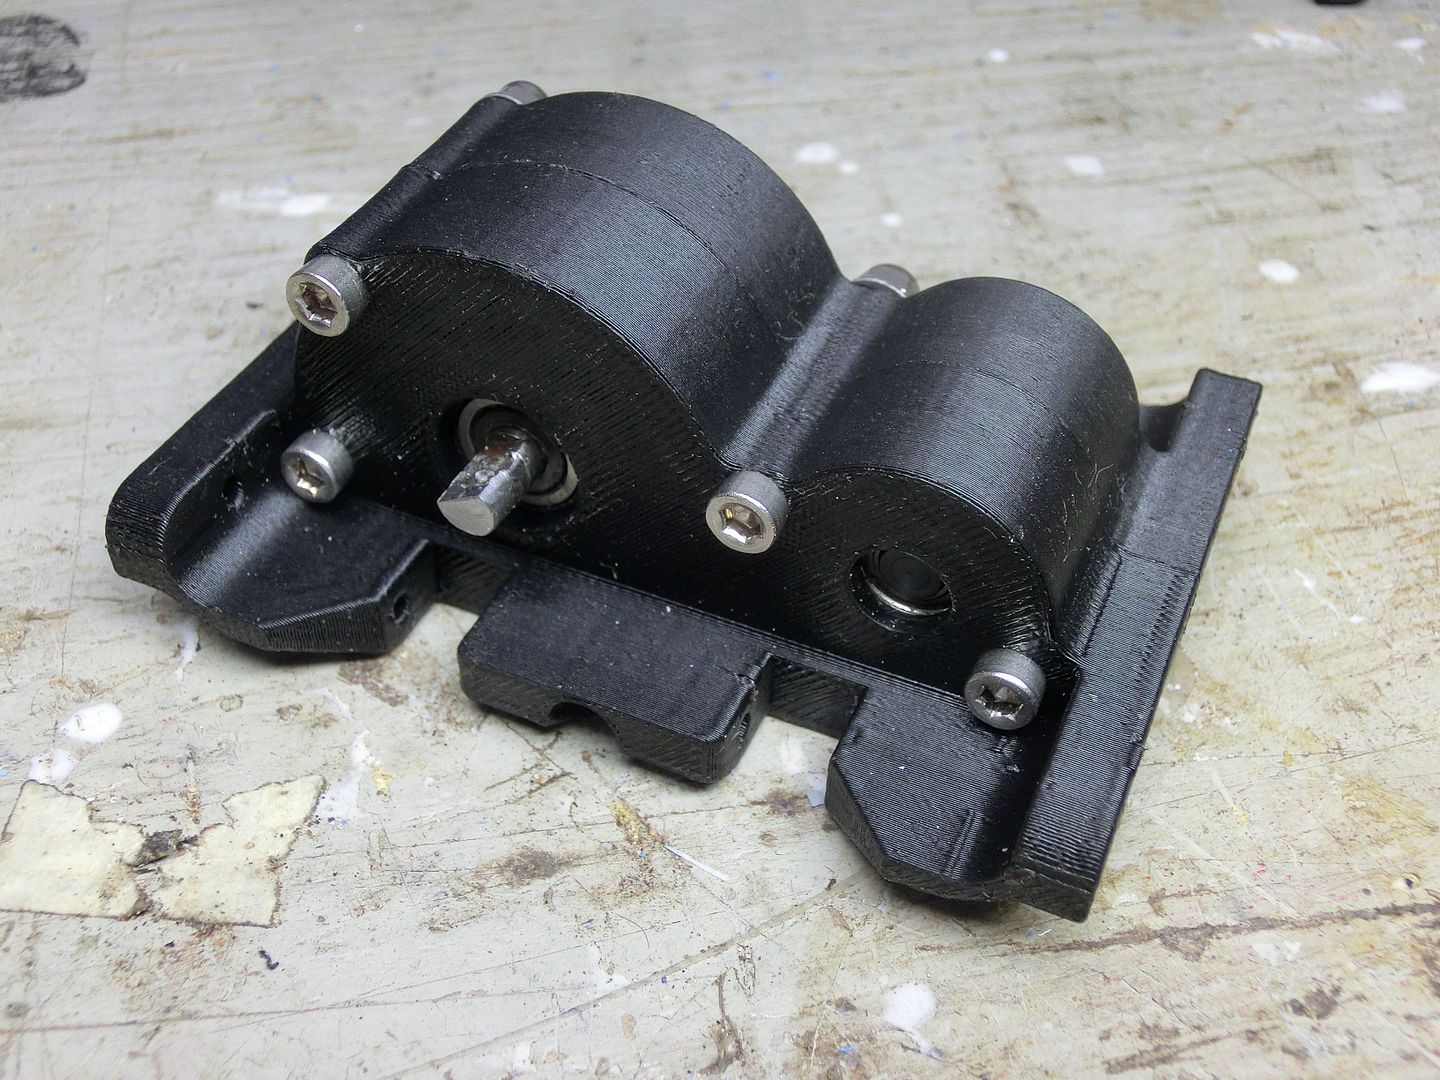 the bottom is pretty smooth just like the SCX10 skid 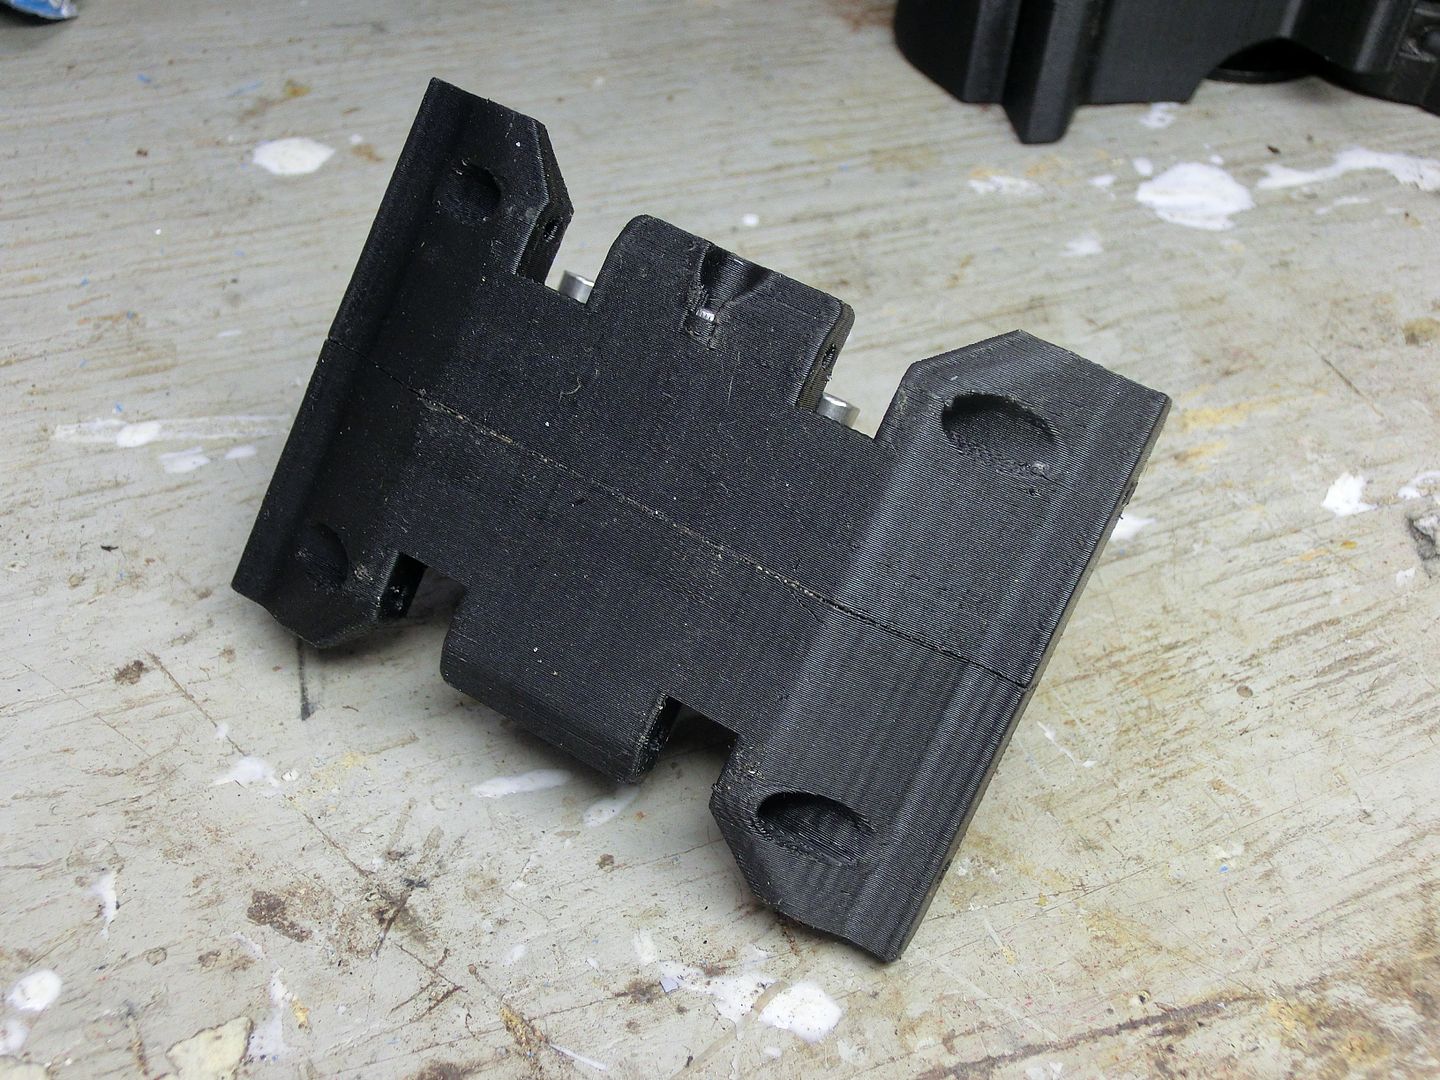 the motor/spur mount simply uses the top shaft without the internal gear. 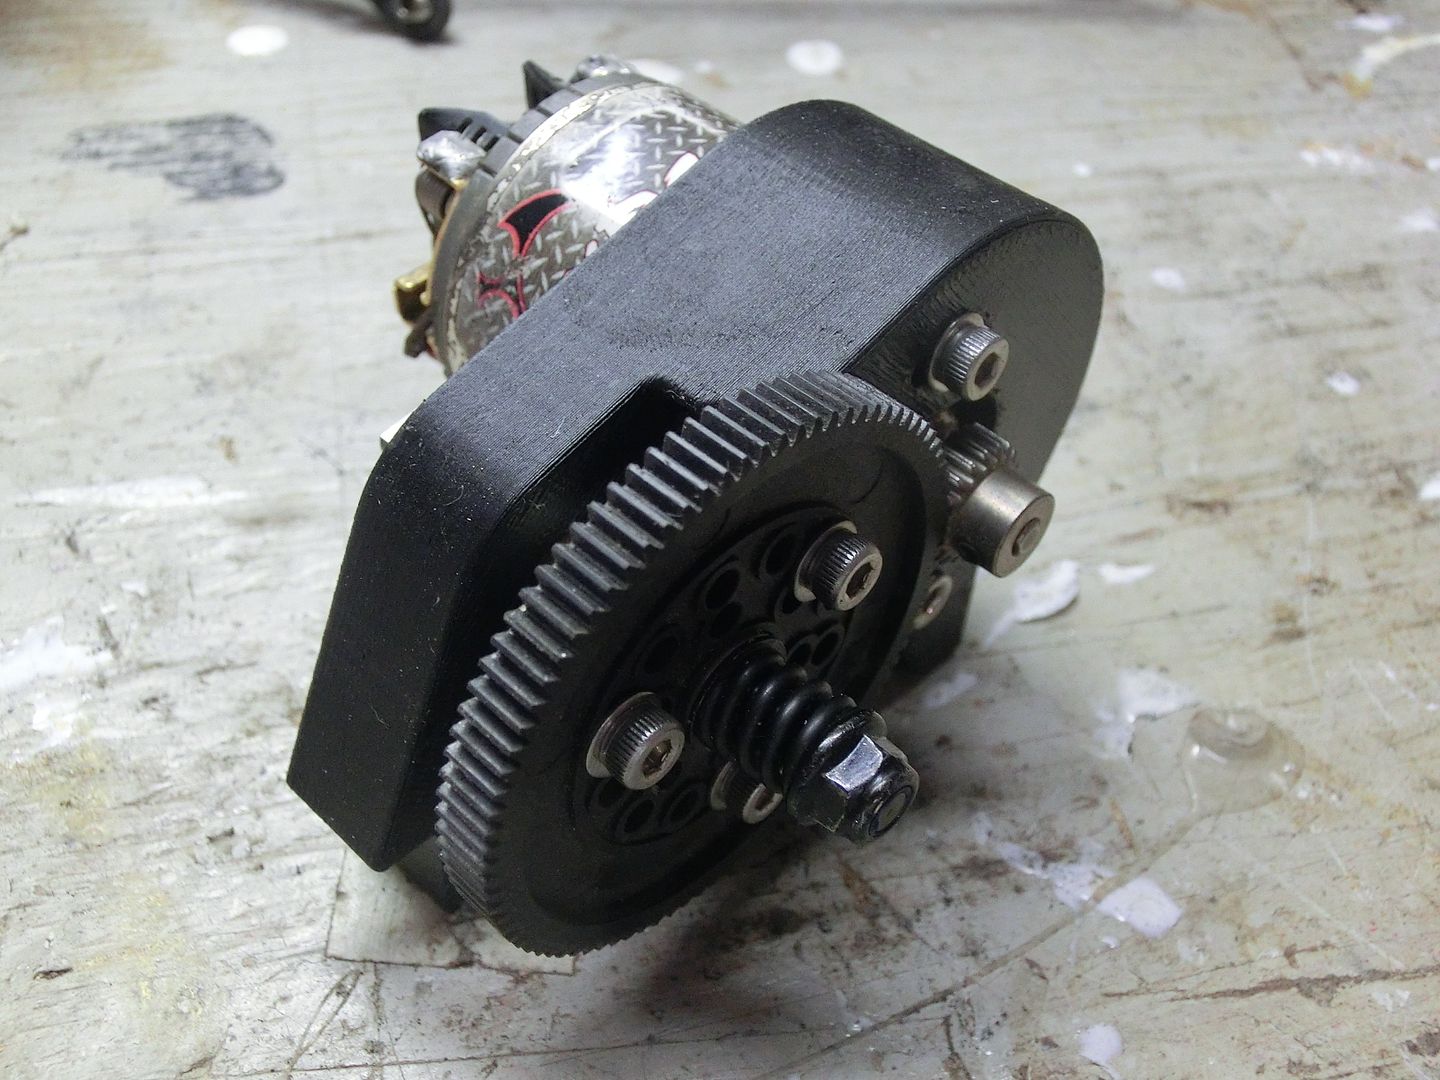 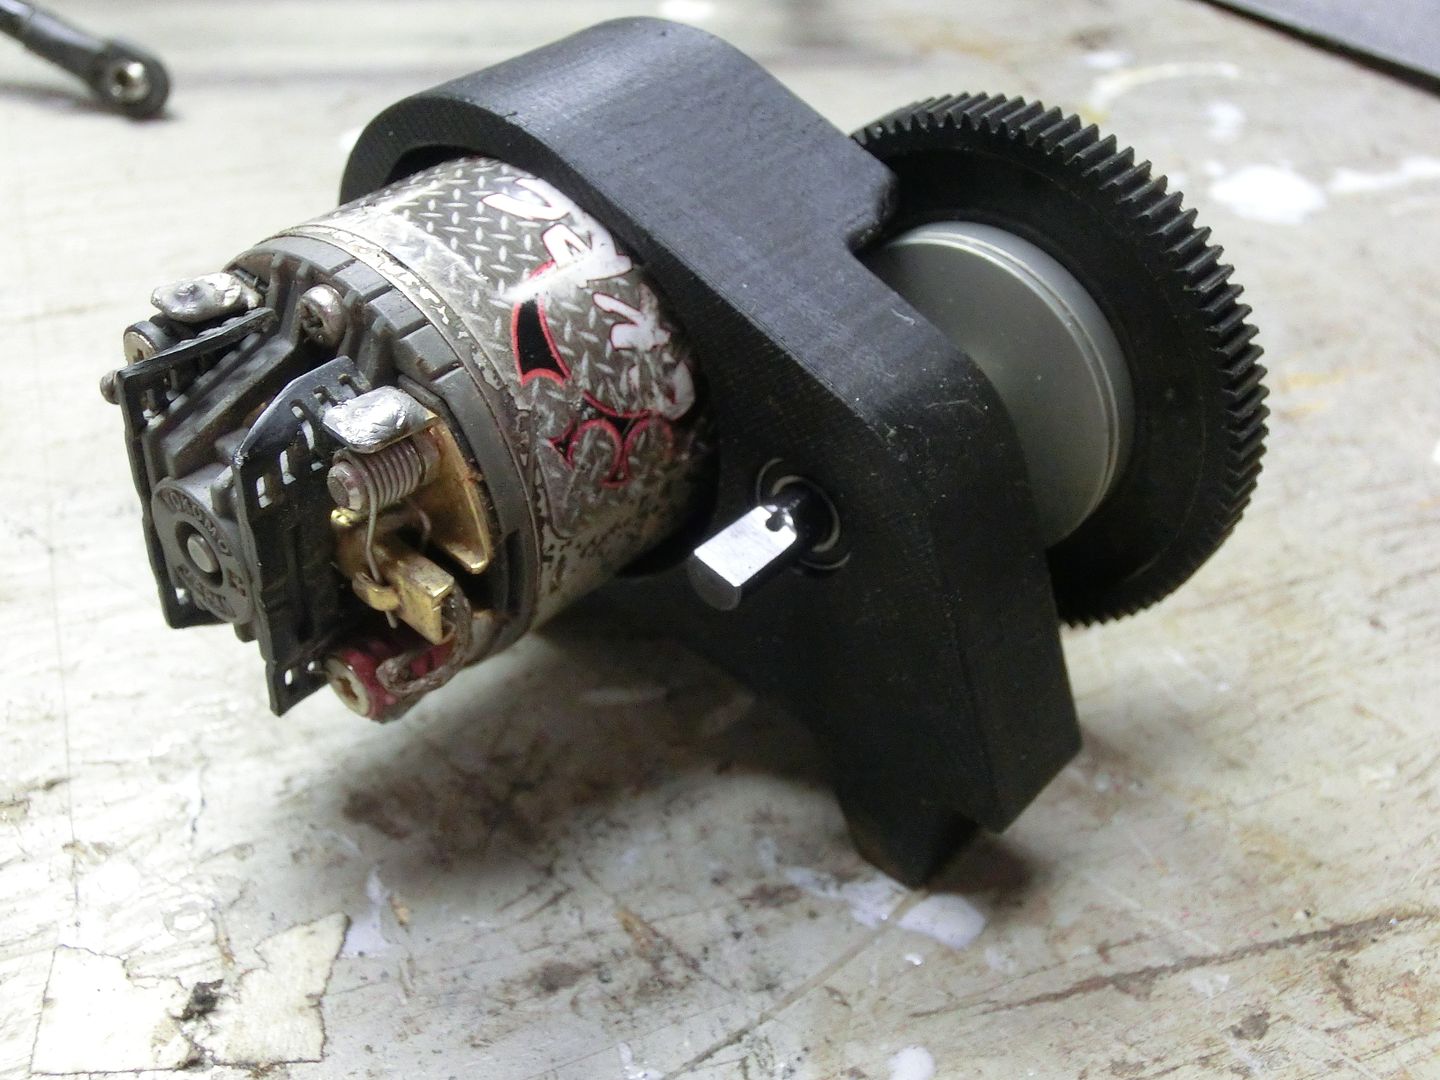 the motor mount sits nicely between the frame rails 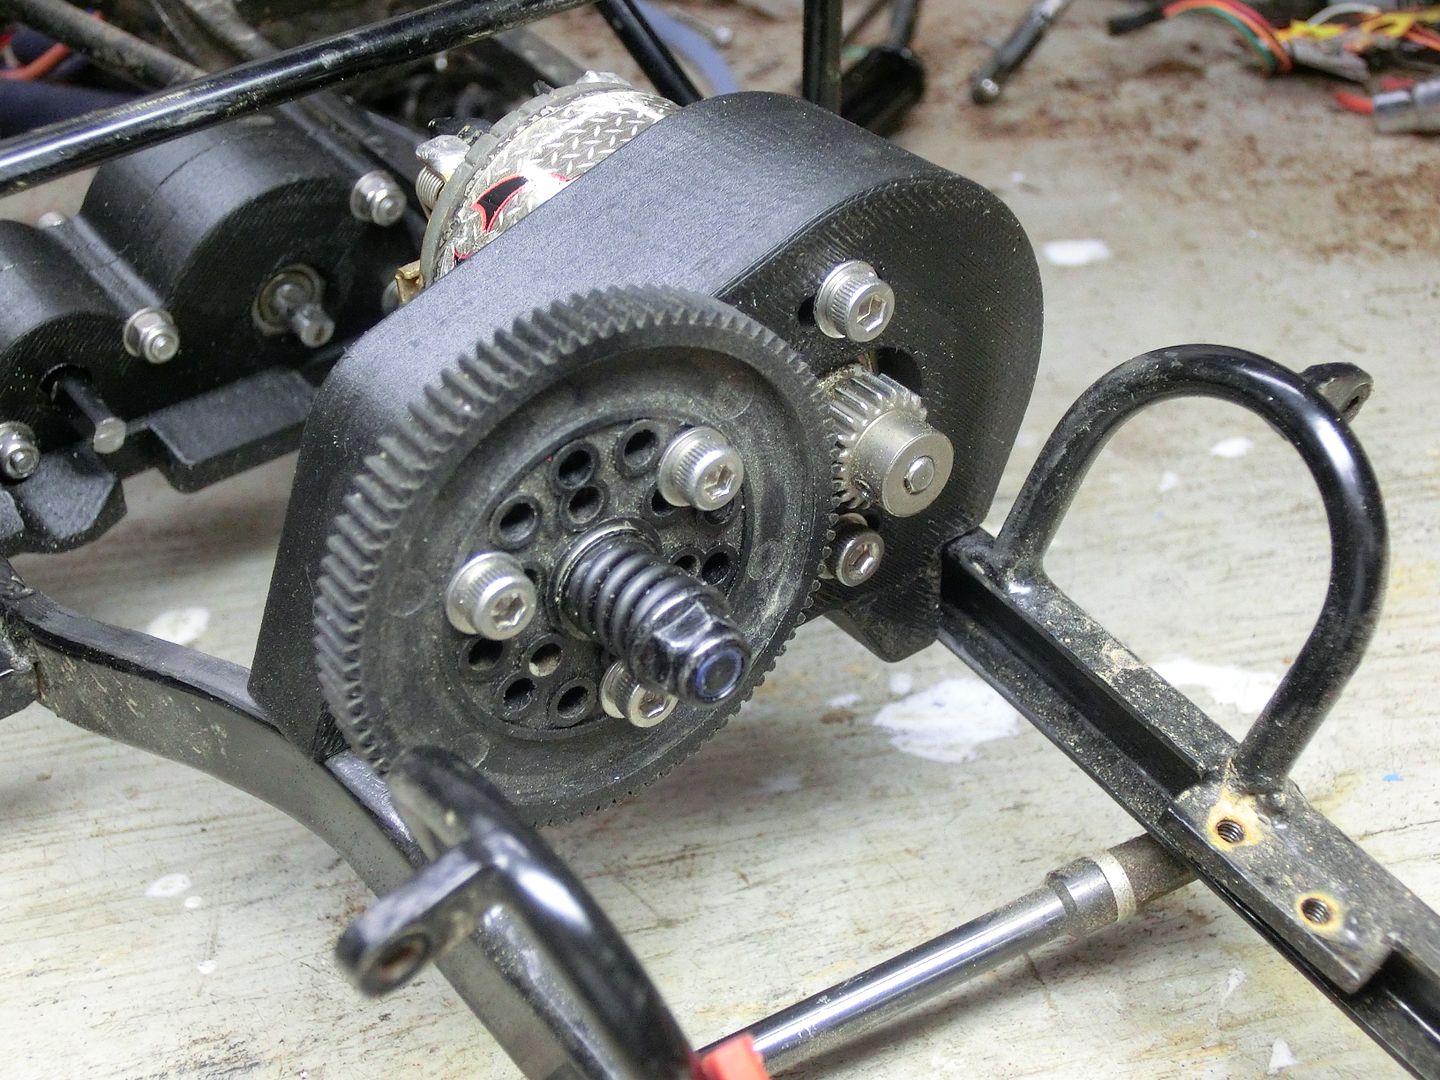 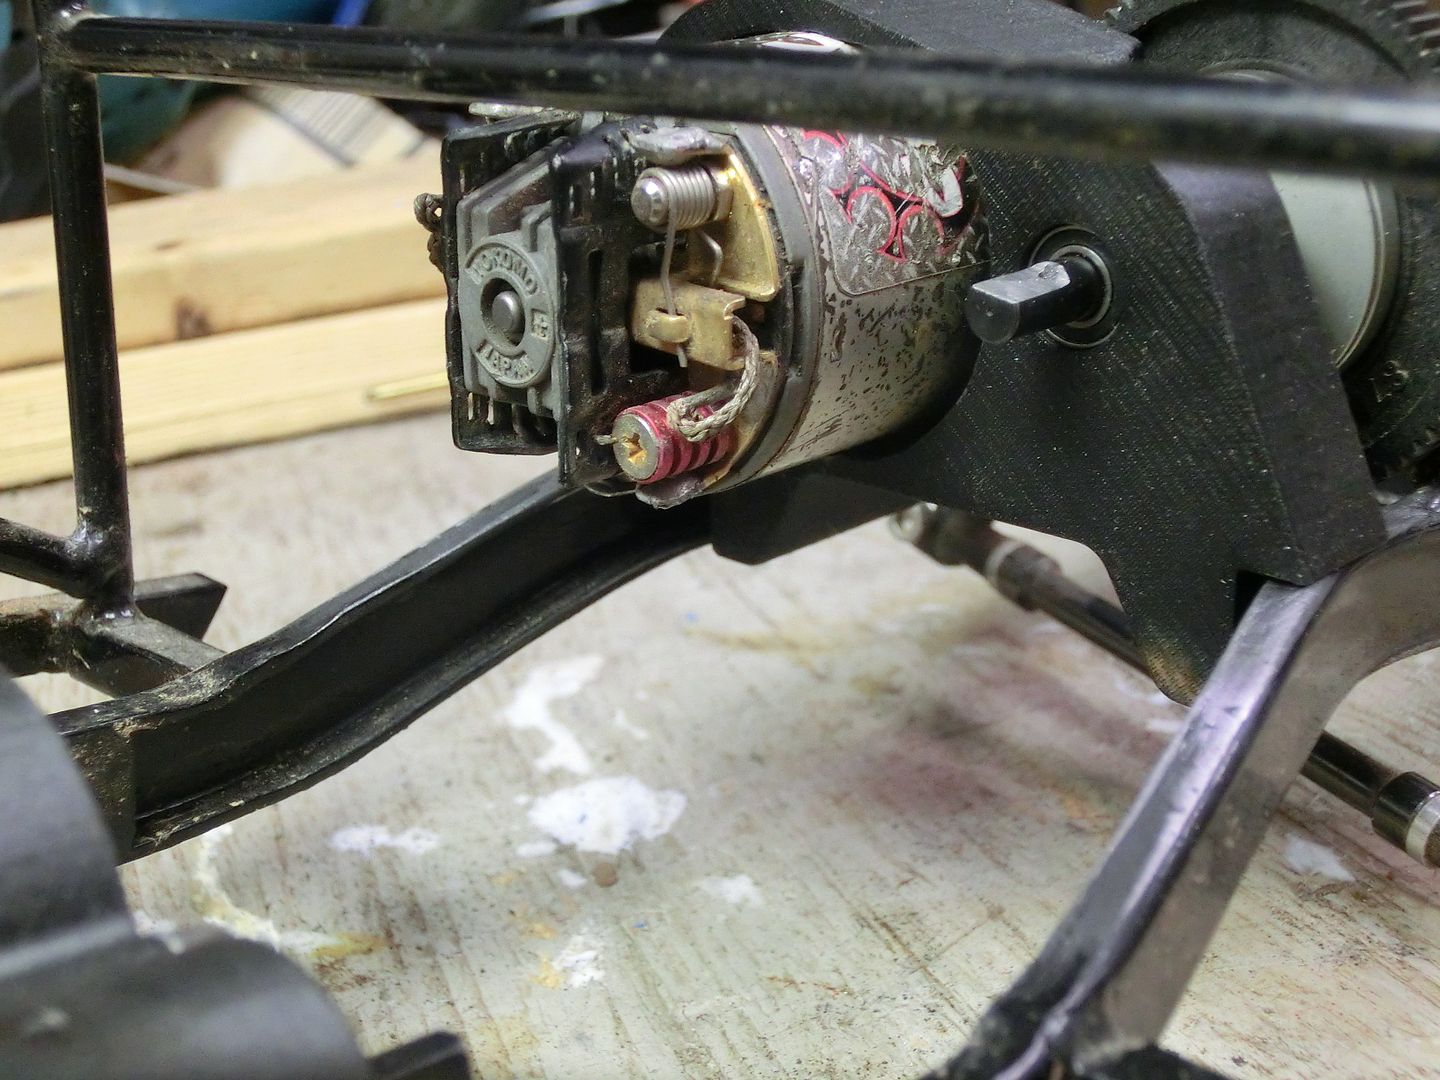 to mount it i used the same method i did for the skid by cutting plates 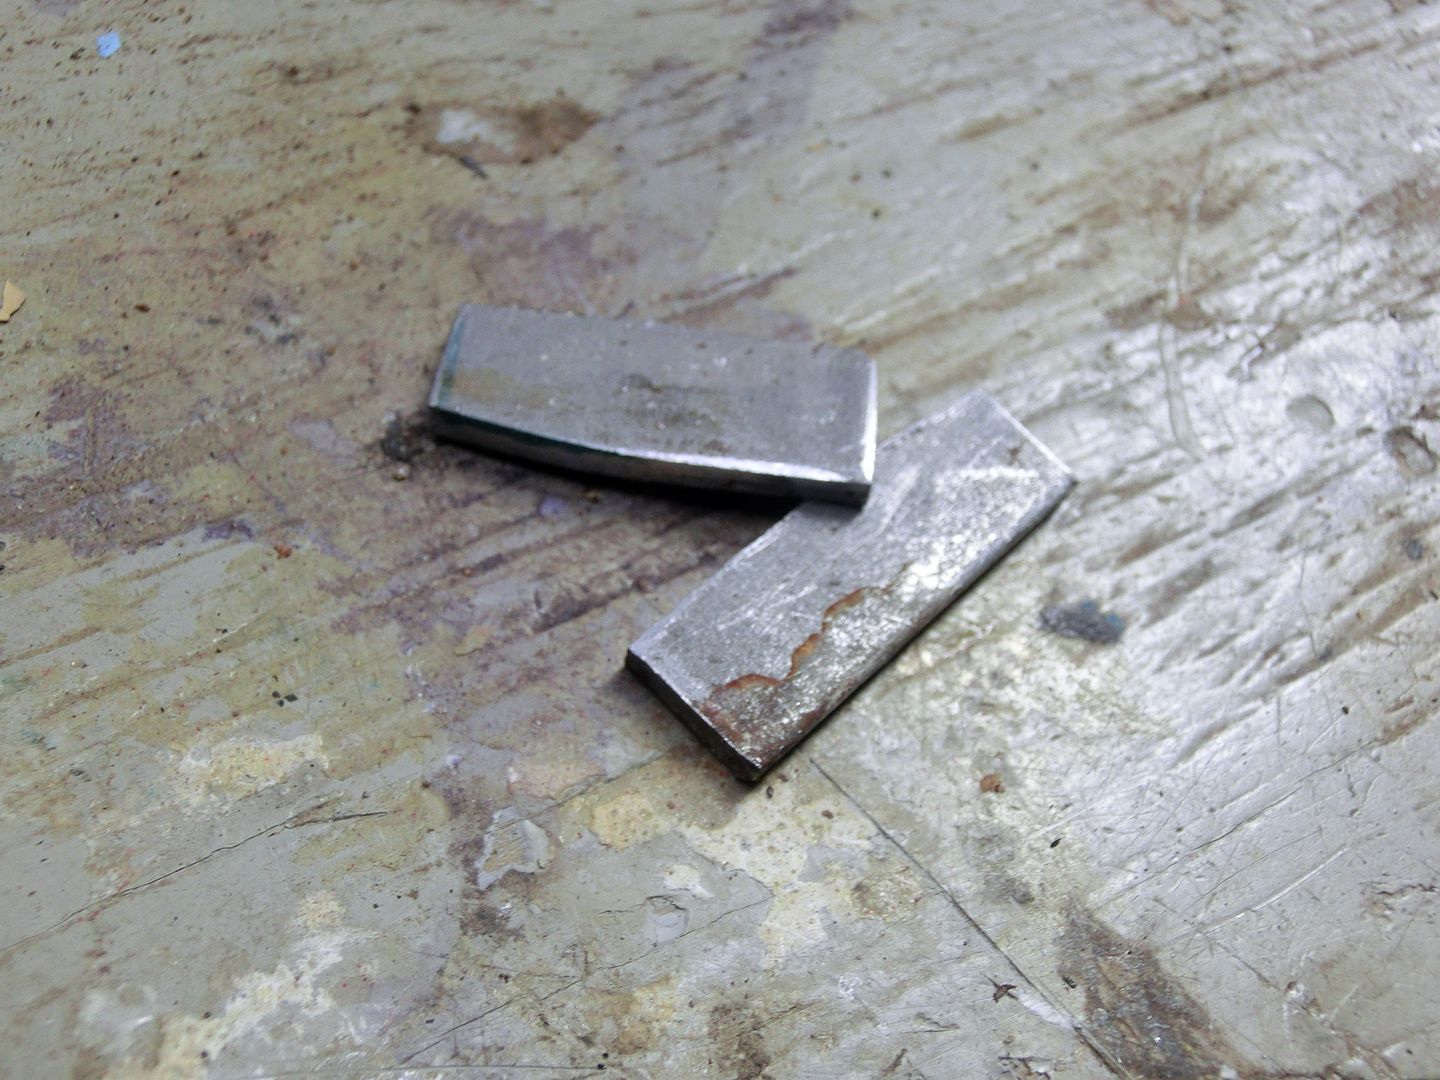 and welding them to the inside of the frame 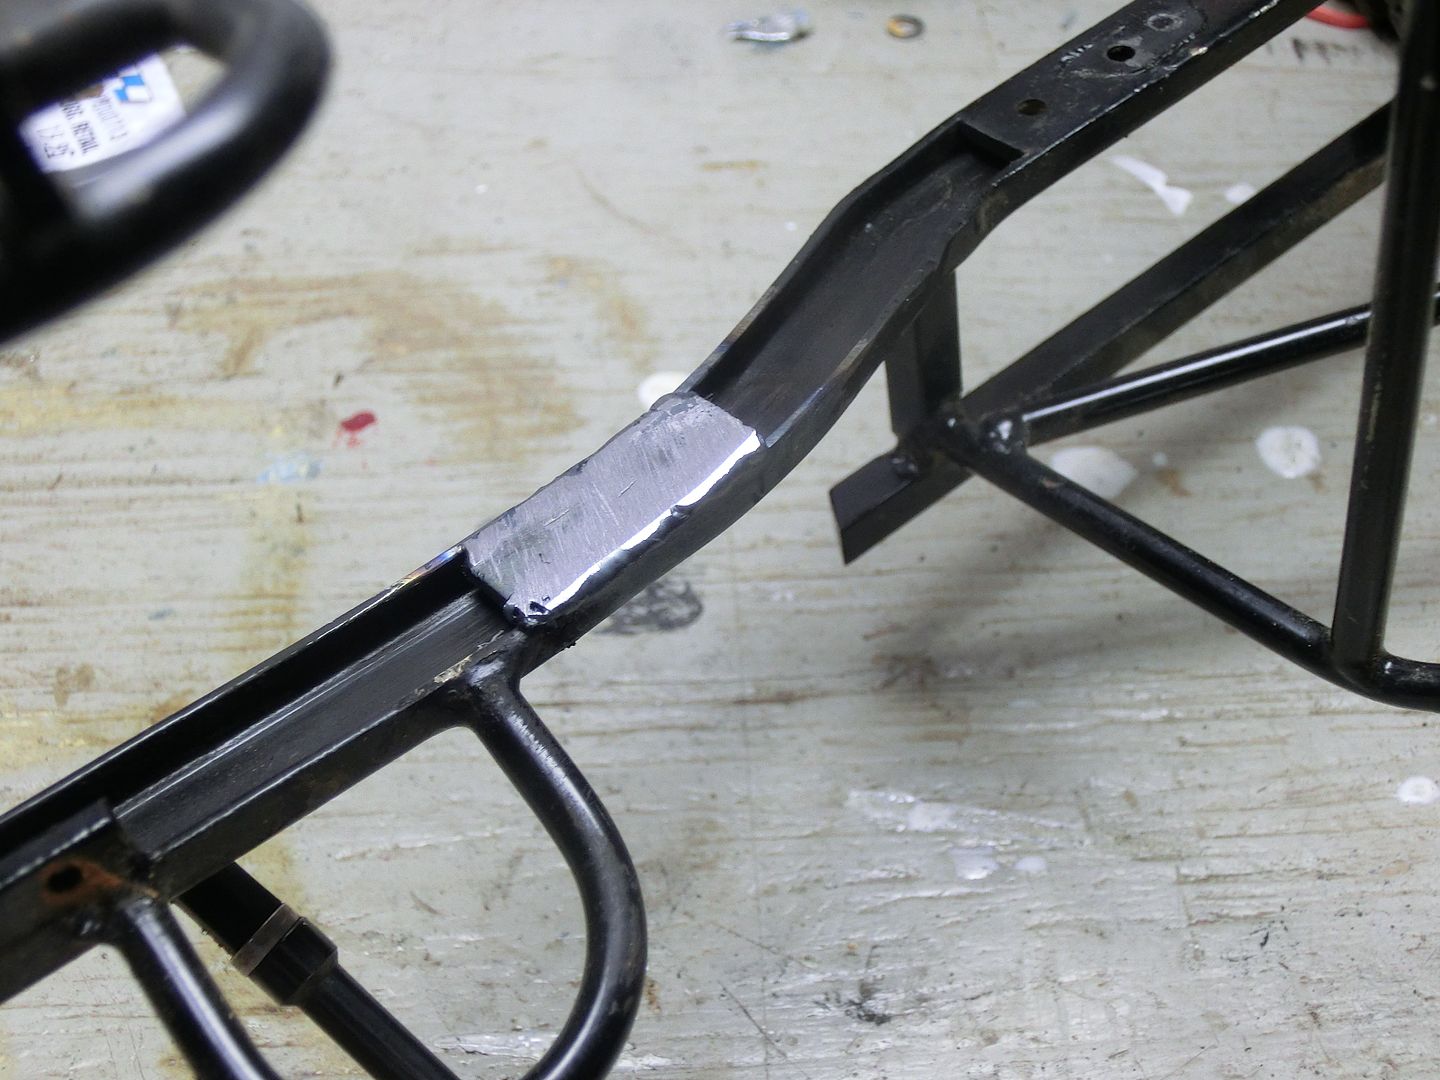 then drilled holes to secure it 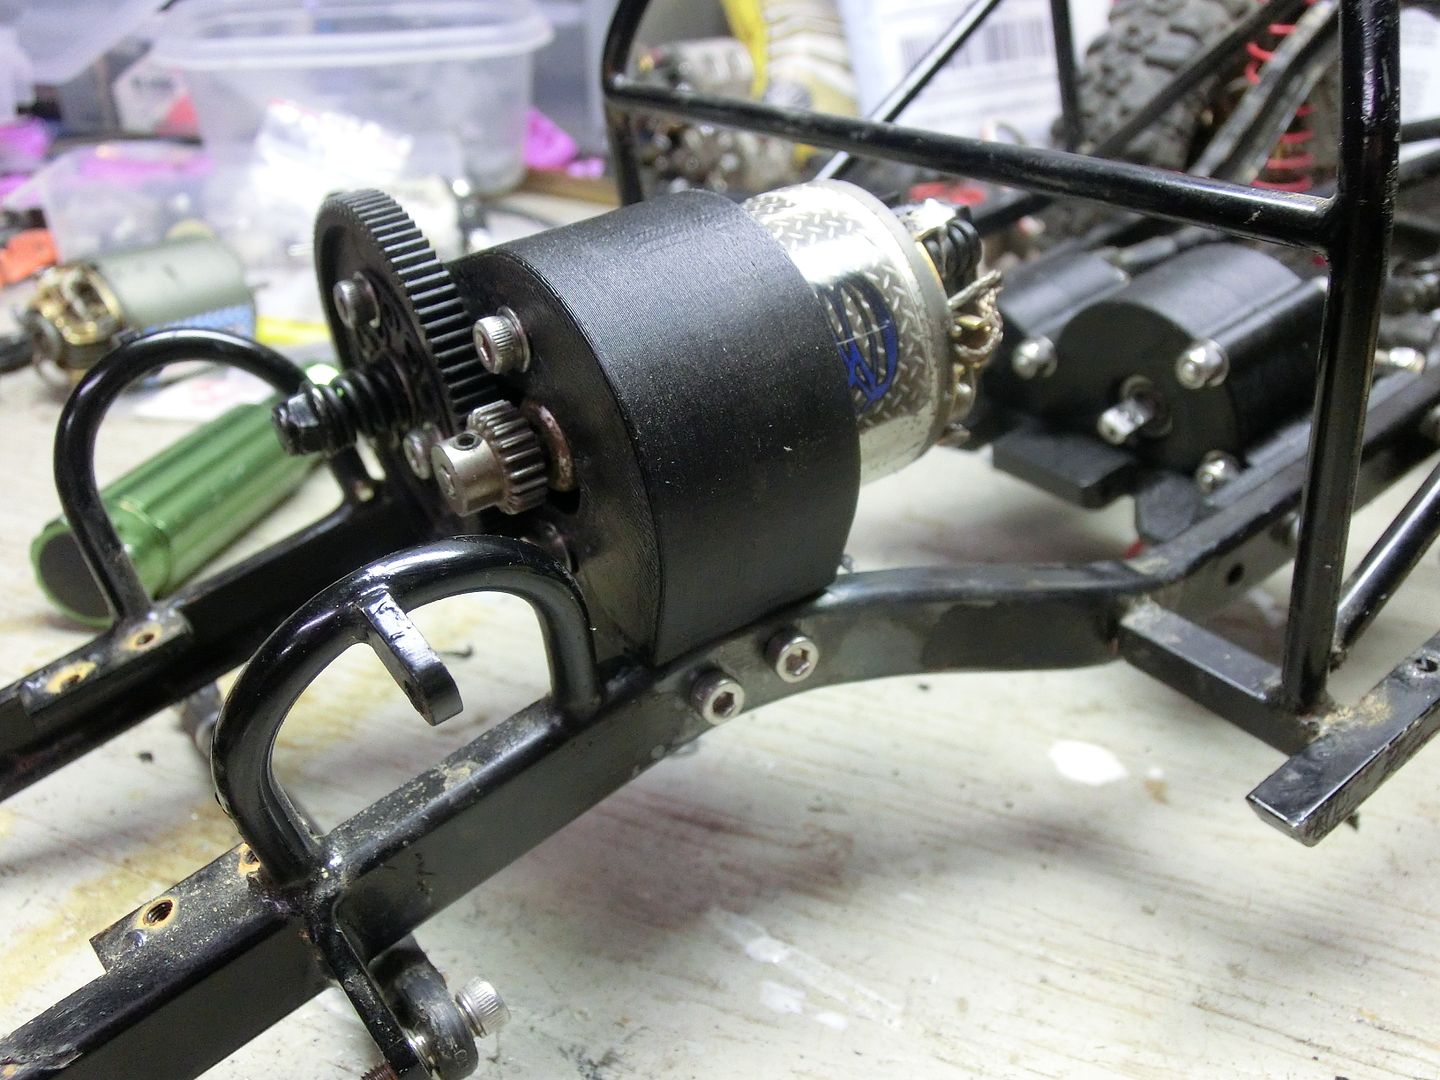 the skid gets attached just as before. then i realized my error, the drive shaft angle it too steep. 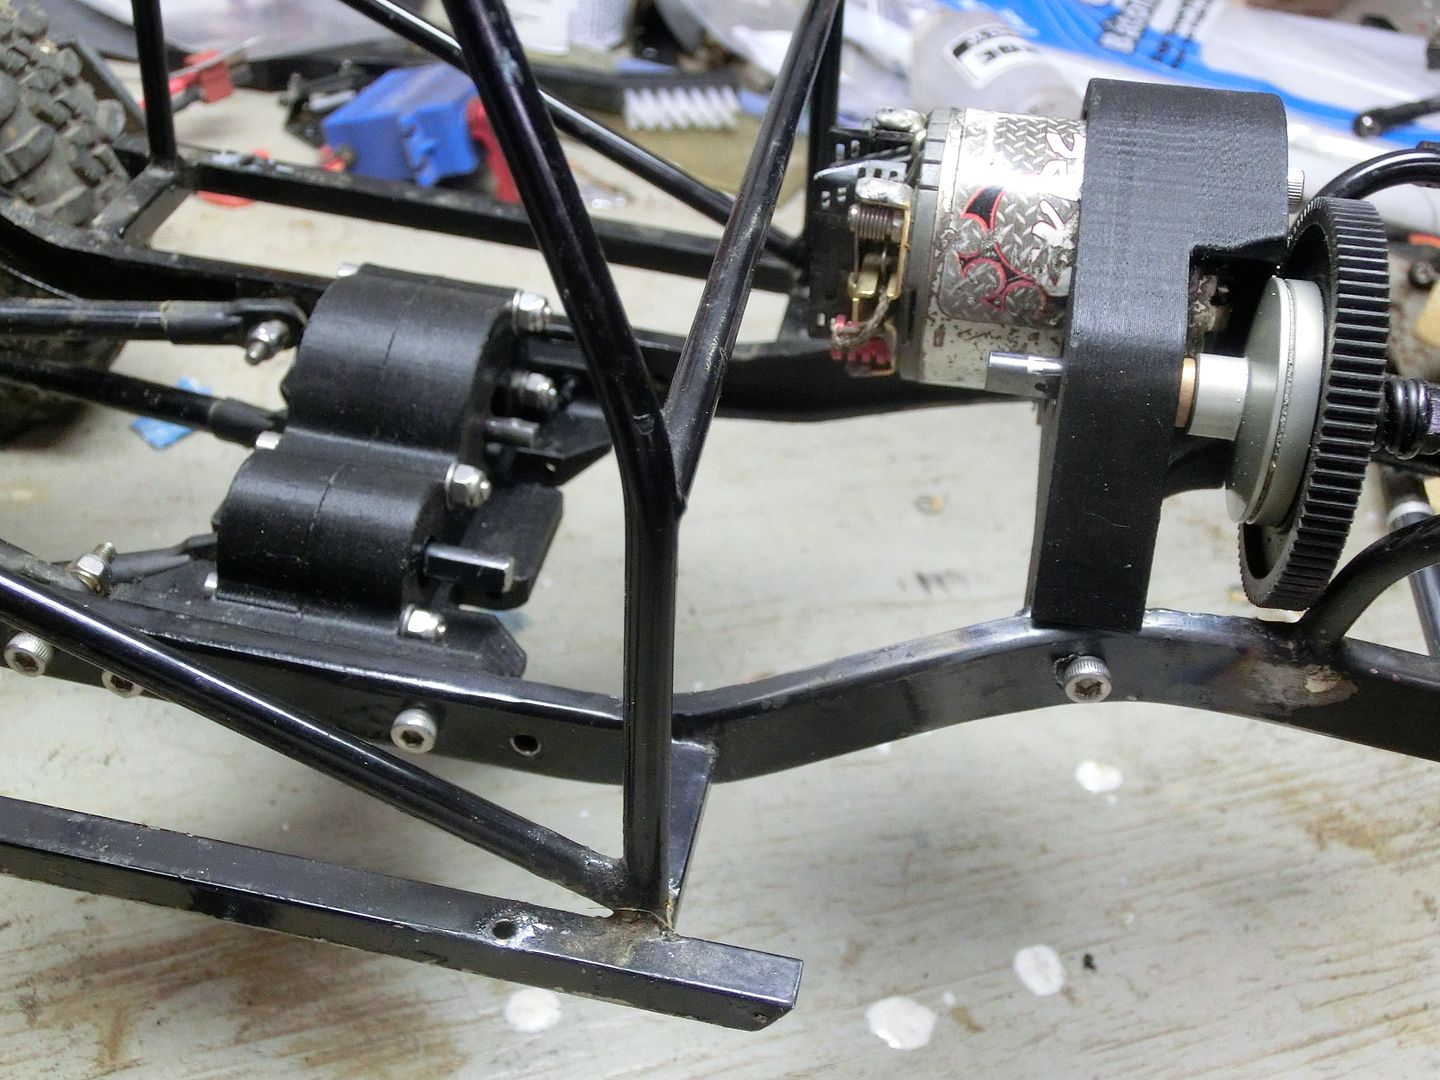 no problem, i just removed one of the screws, rotated it down and drilled another hole in the mount 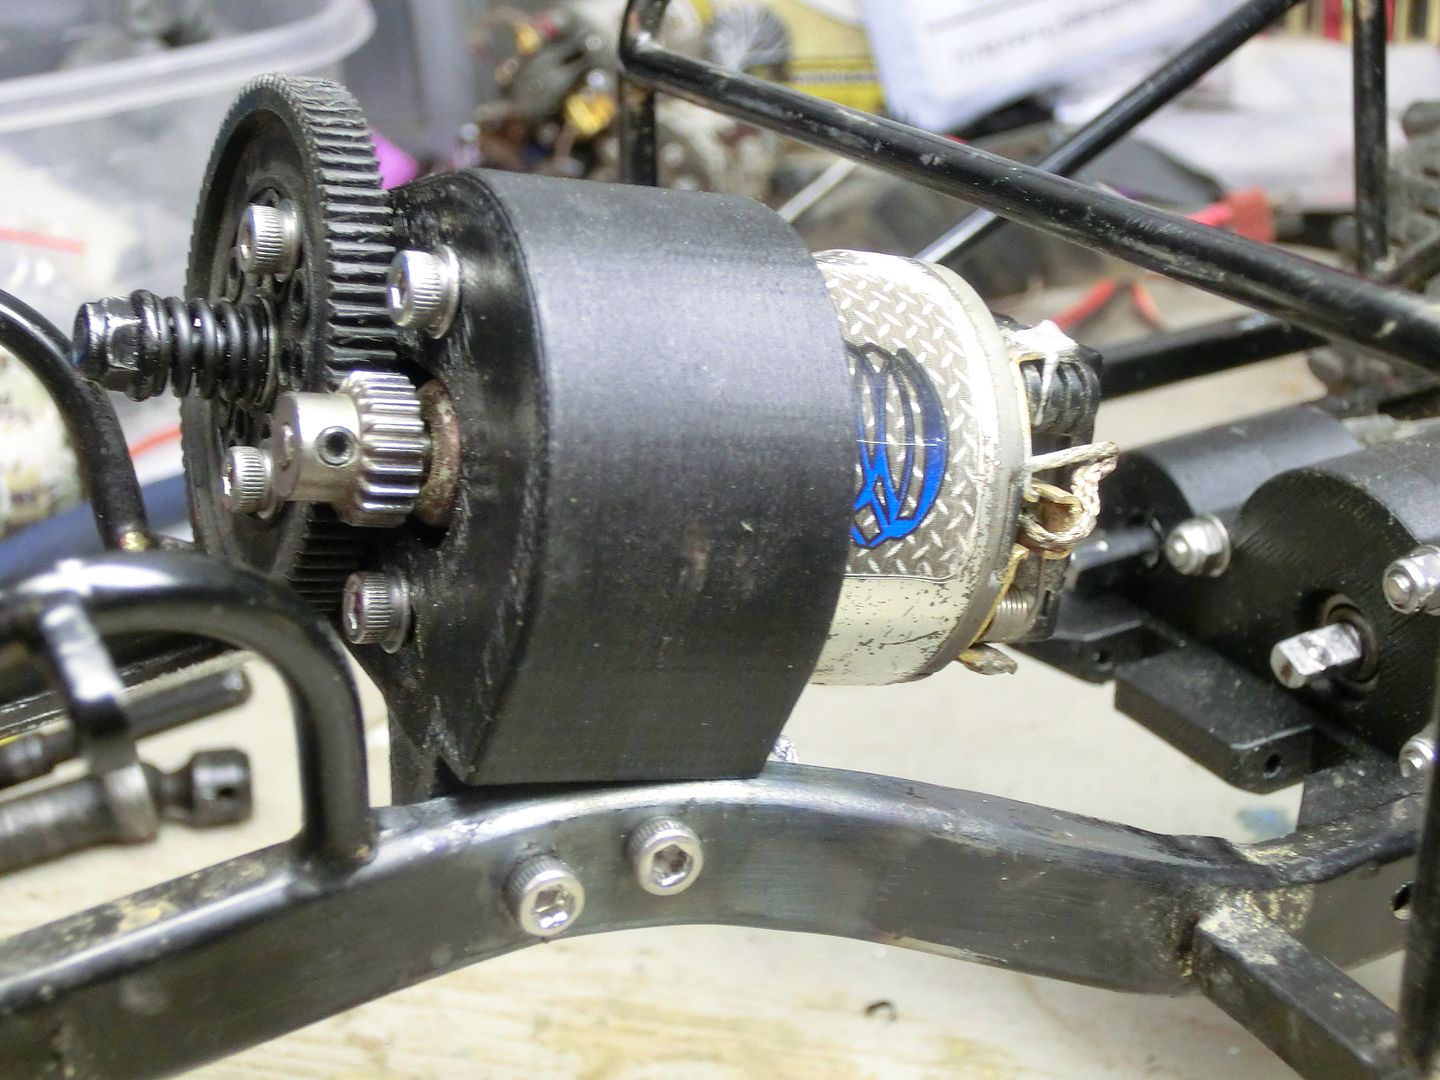 much better 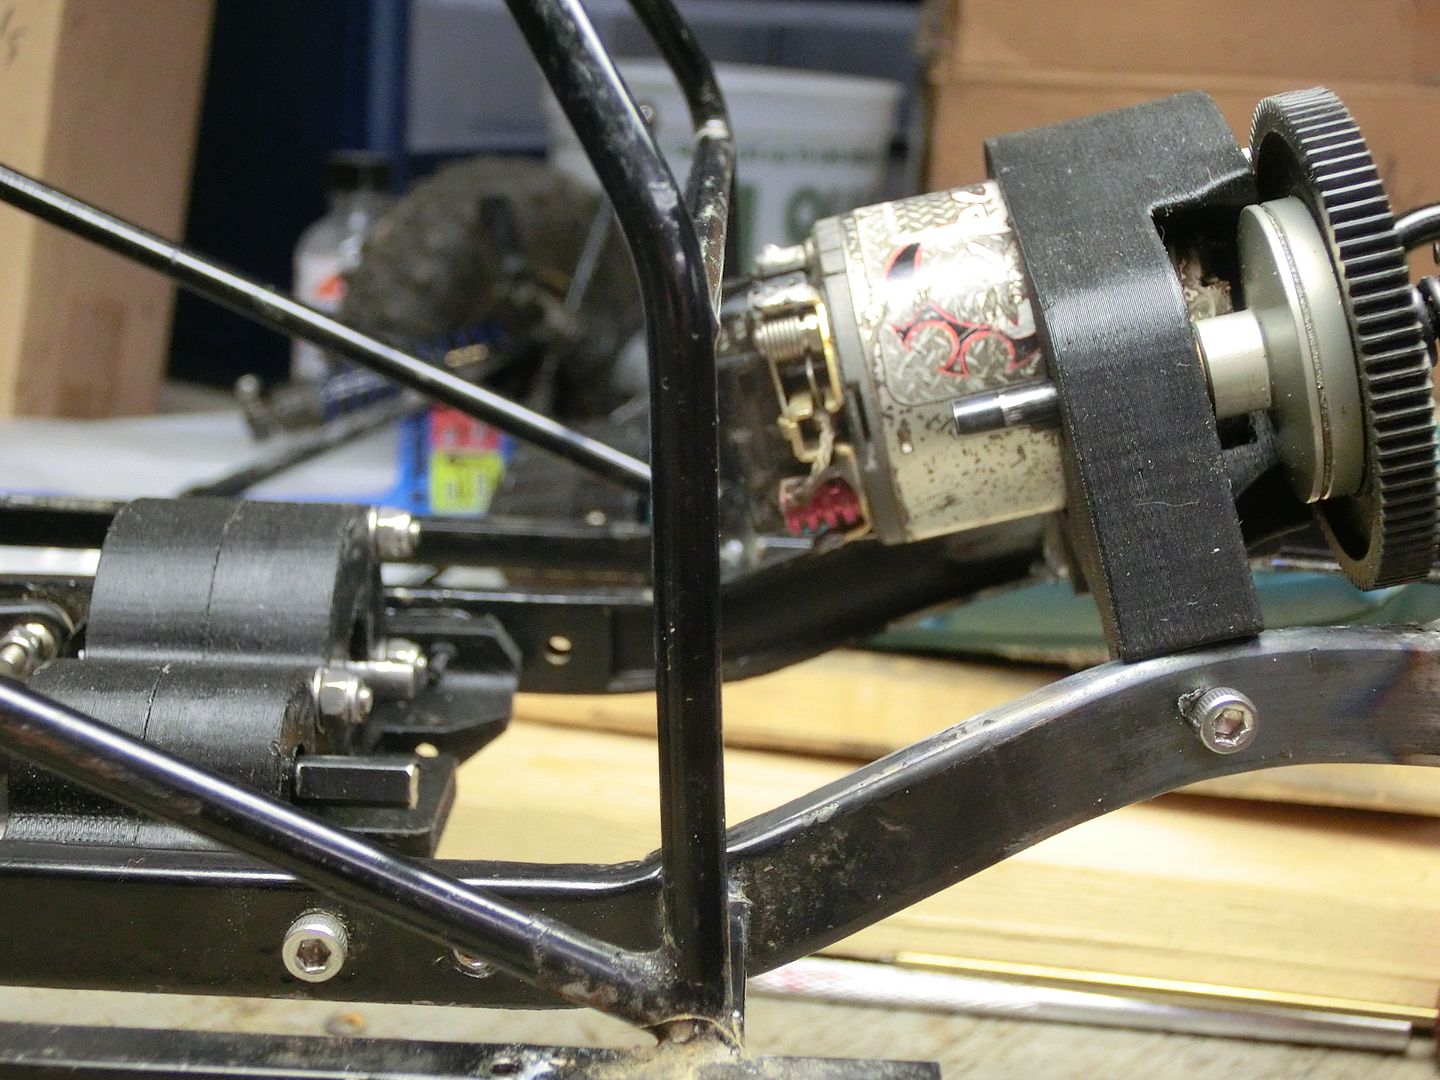 next is the new body! |
| |  |
| | #24 |
| RCC Addict Join Date: Jul 2006 Location: Johnston SC
Posts: 1,562
|
Now your a master metal worker and plastic genuis. Looks awesome  |
| |  |
| | #25 | |
| RCC Addict  Join Date: Aug 2005 Location: New Oxford PA
Posts: 1,290
| Quote:
So now it was time to start the skins. i always begin with the rear quarters as it aligns the whole body. test fitting, they seem to align up well. 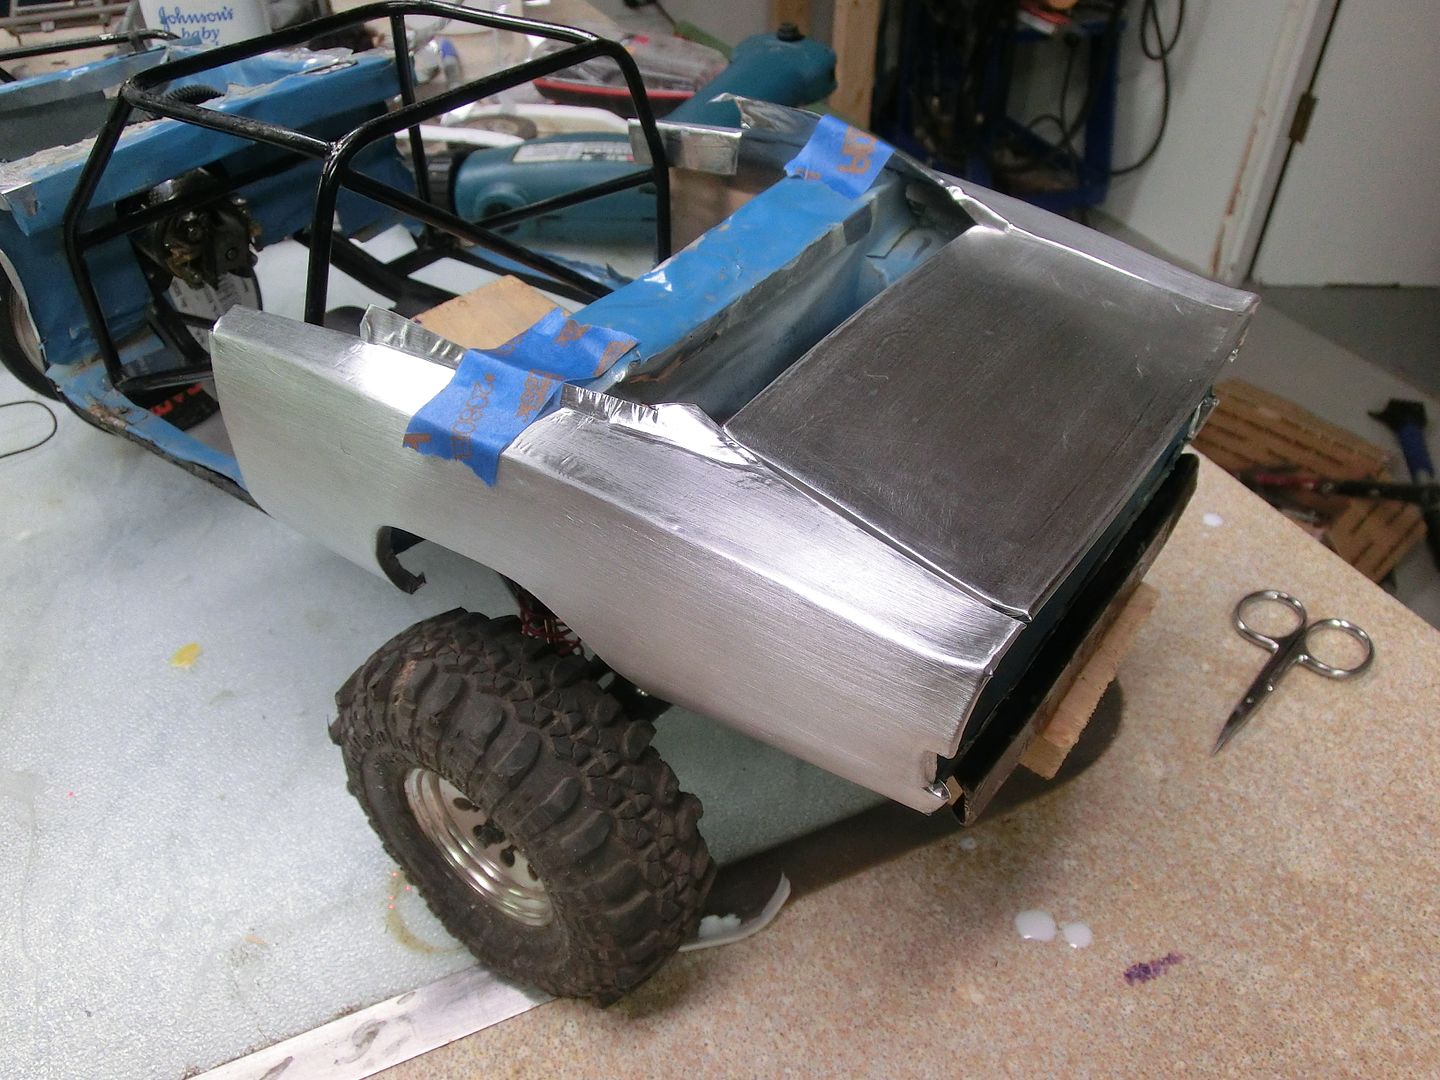 it's kind of hard to see in these pics but the inner fenders didn't reach the new skins. i think it was the way i build the first body. i didn't take a lot of time aligning things the first time around. 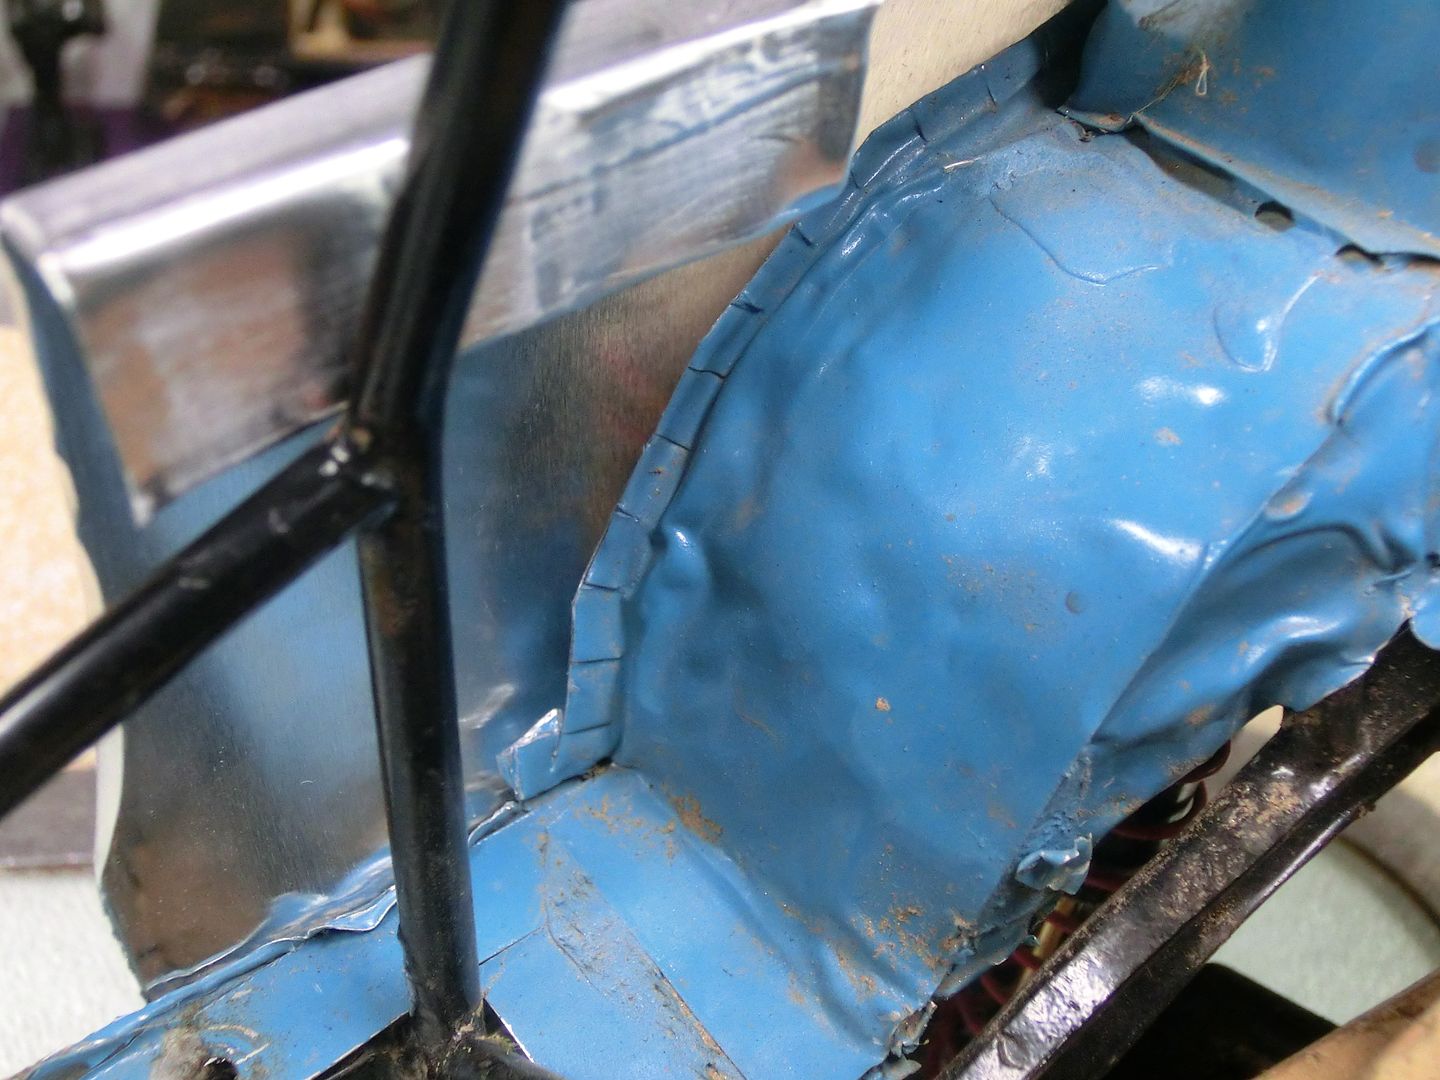 I'll need to make filler panels i guess. i decided to trim more of the inner fender away to get to some cleaner metal then i glued the new skins on with the doors to keep it all aligned. 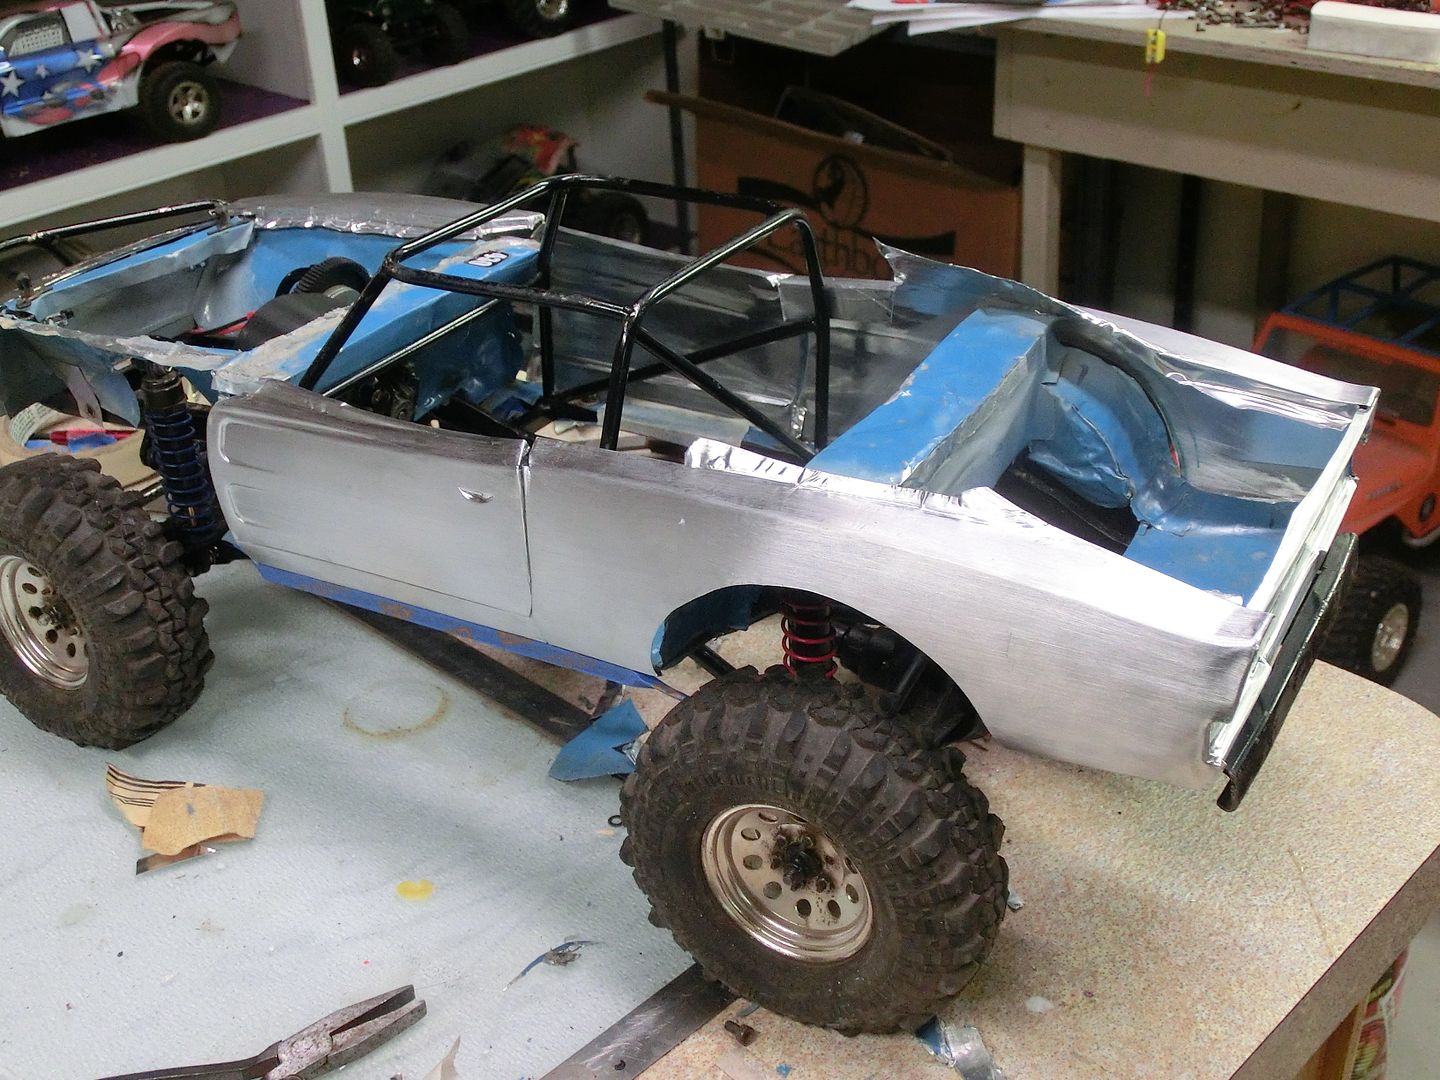 now this time i wanted to have a decent hinge for the hood and trunk so i bent up some TIG wire 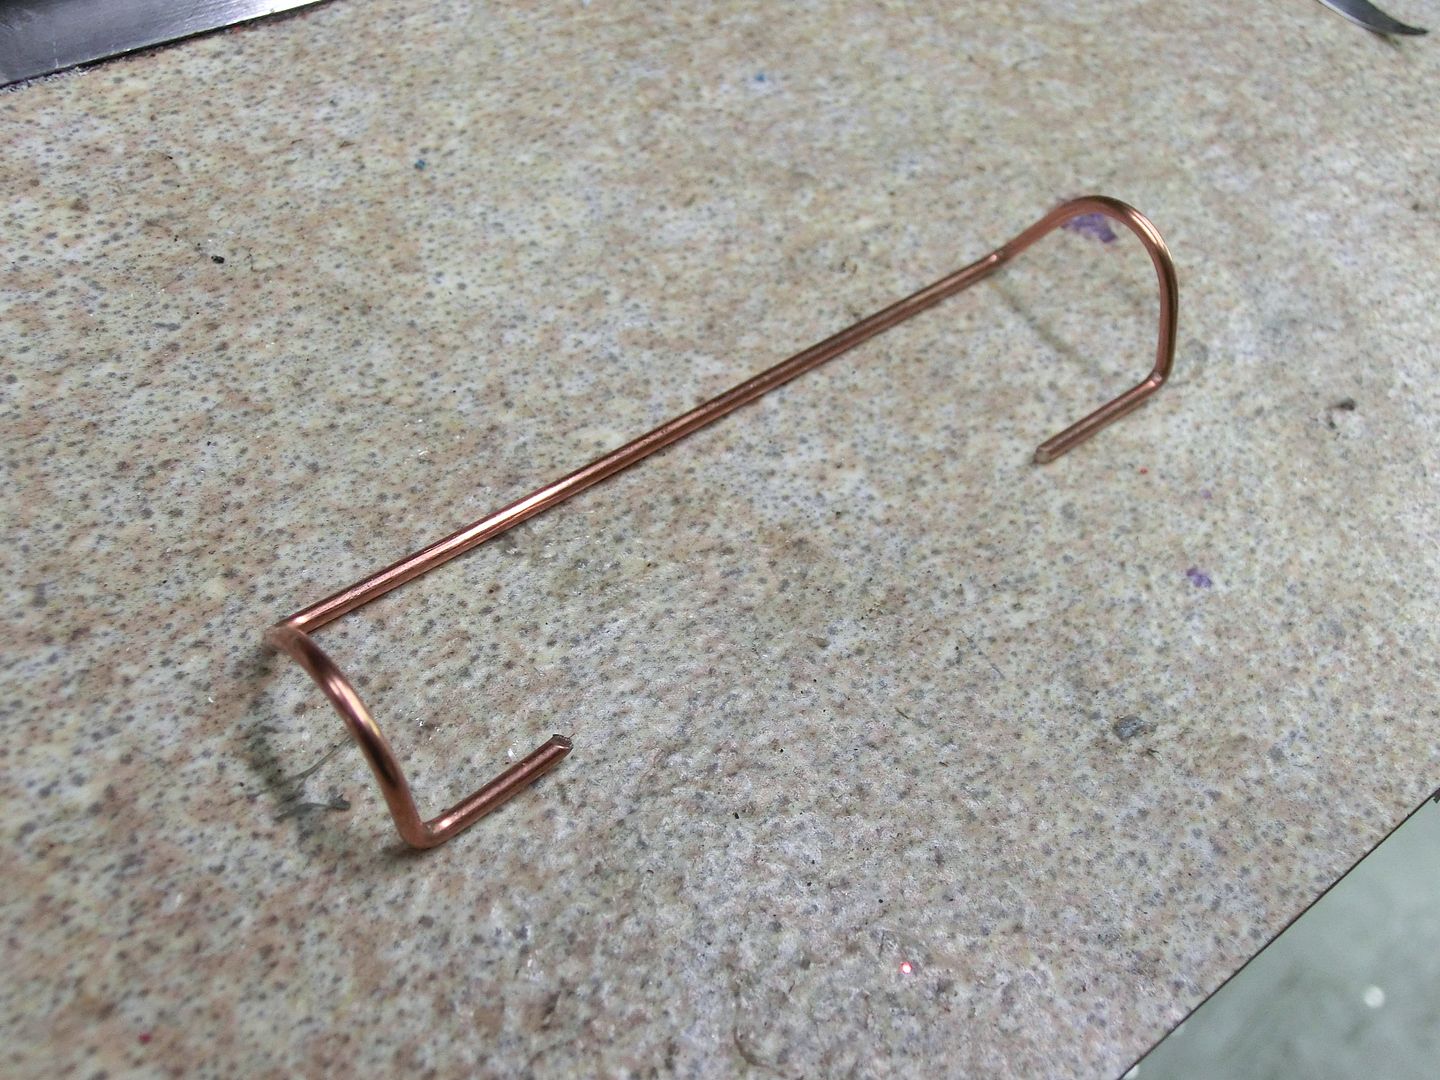 then i used some aluminum to make a hinge 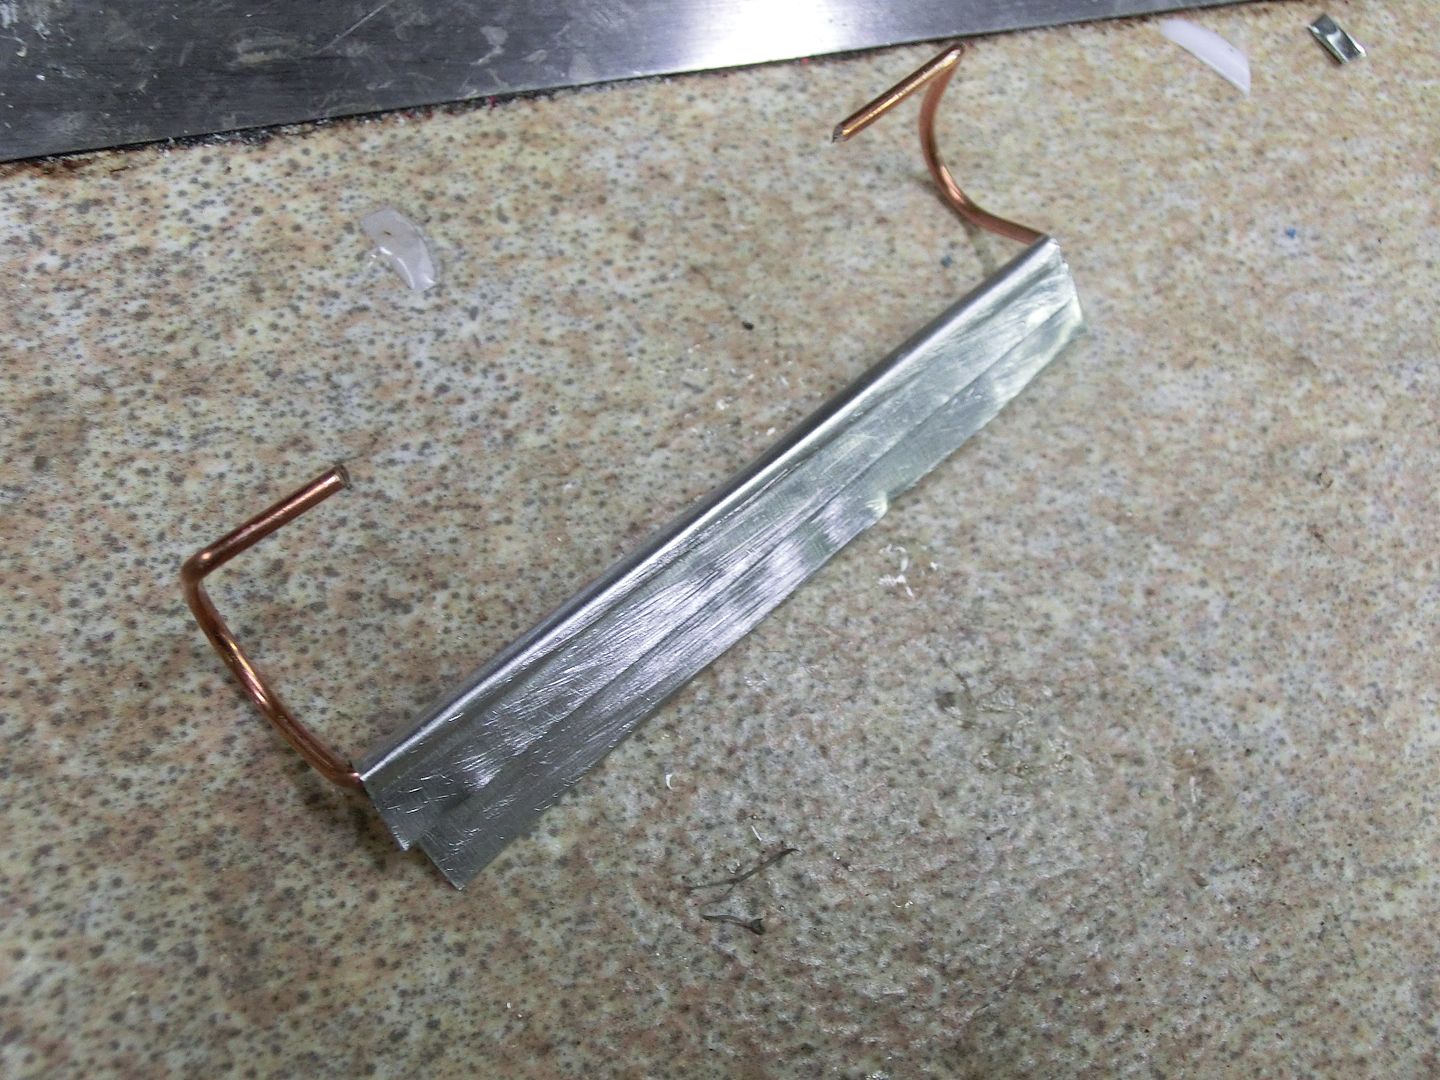 glued the whole shebang together 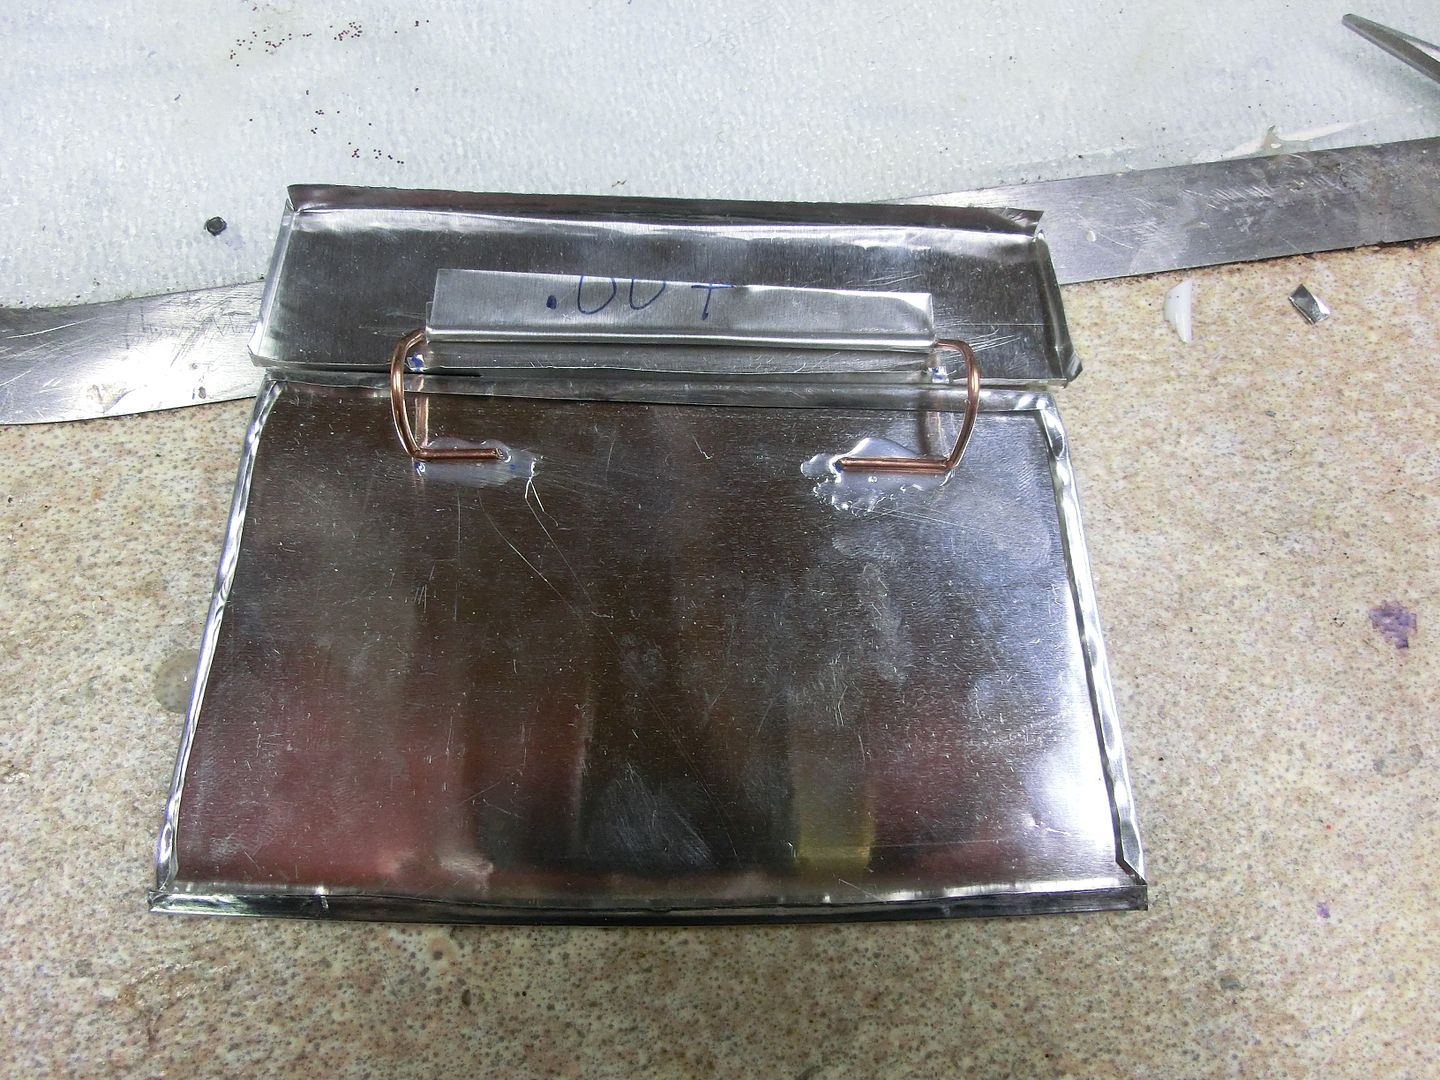 and attached it to the body 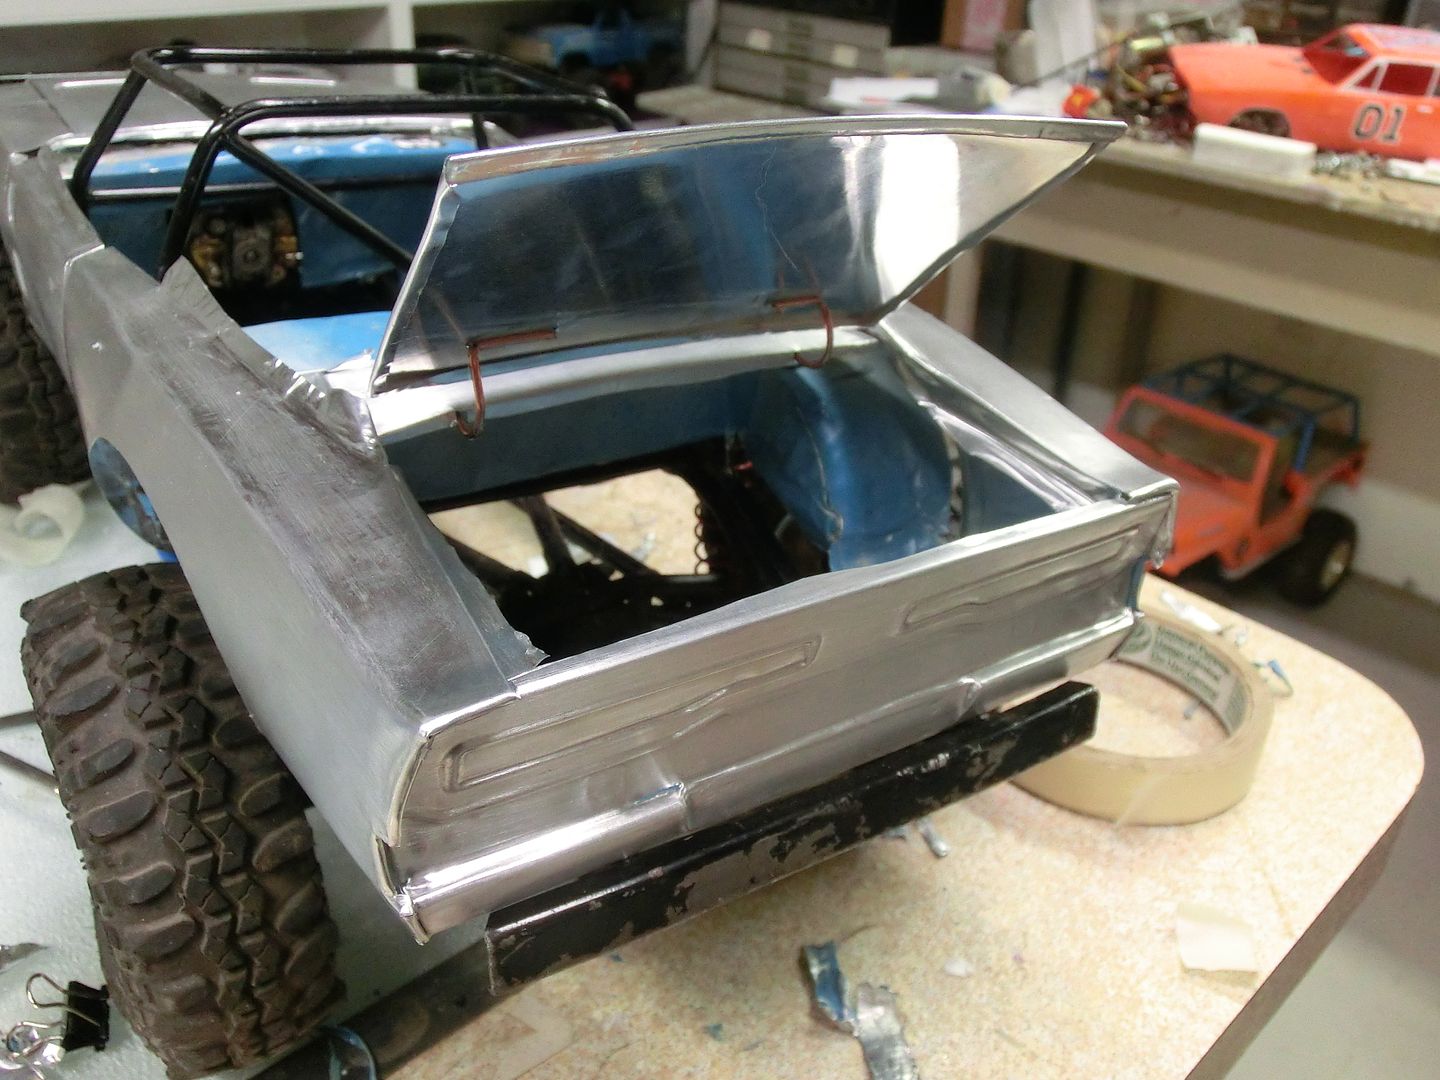 now i made the front fenders permanent. 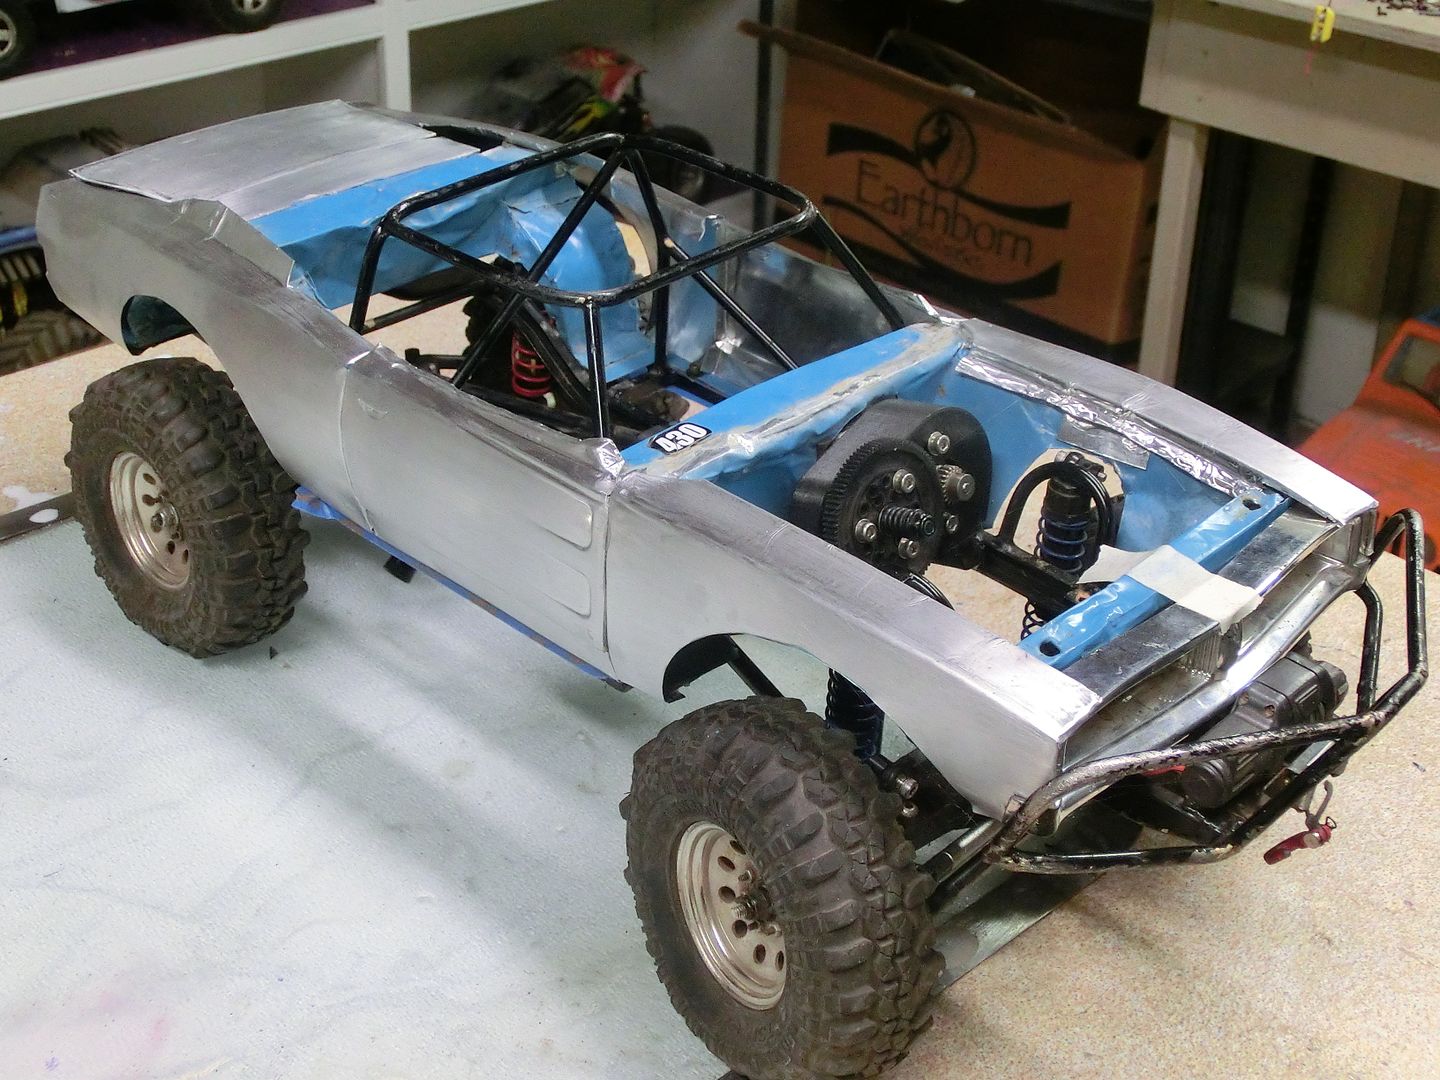 next i repeated the hinge for the hood. 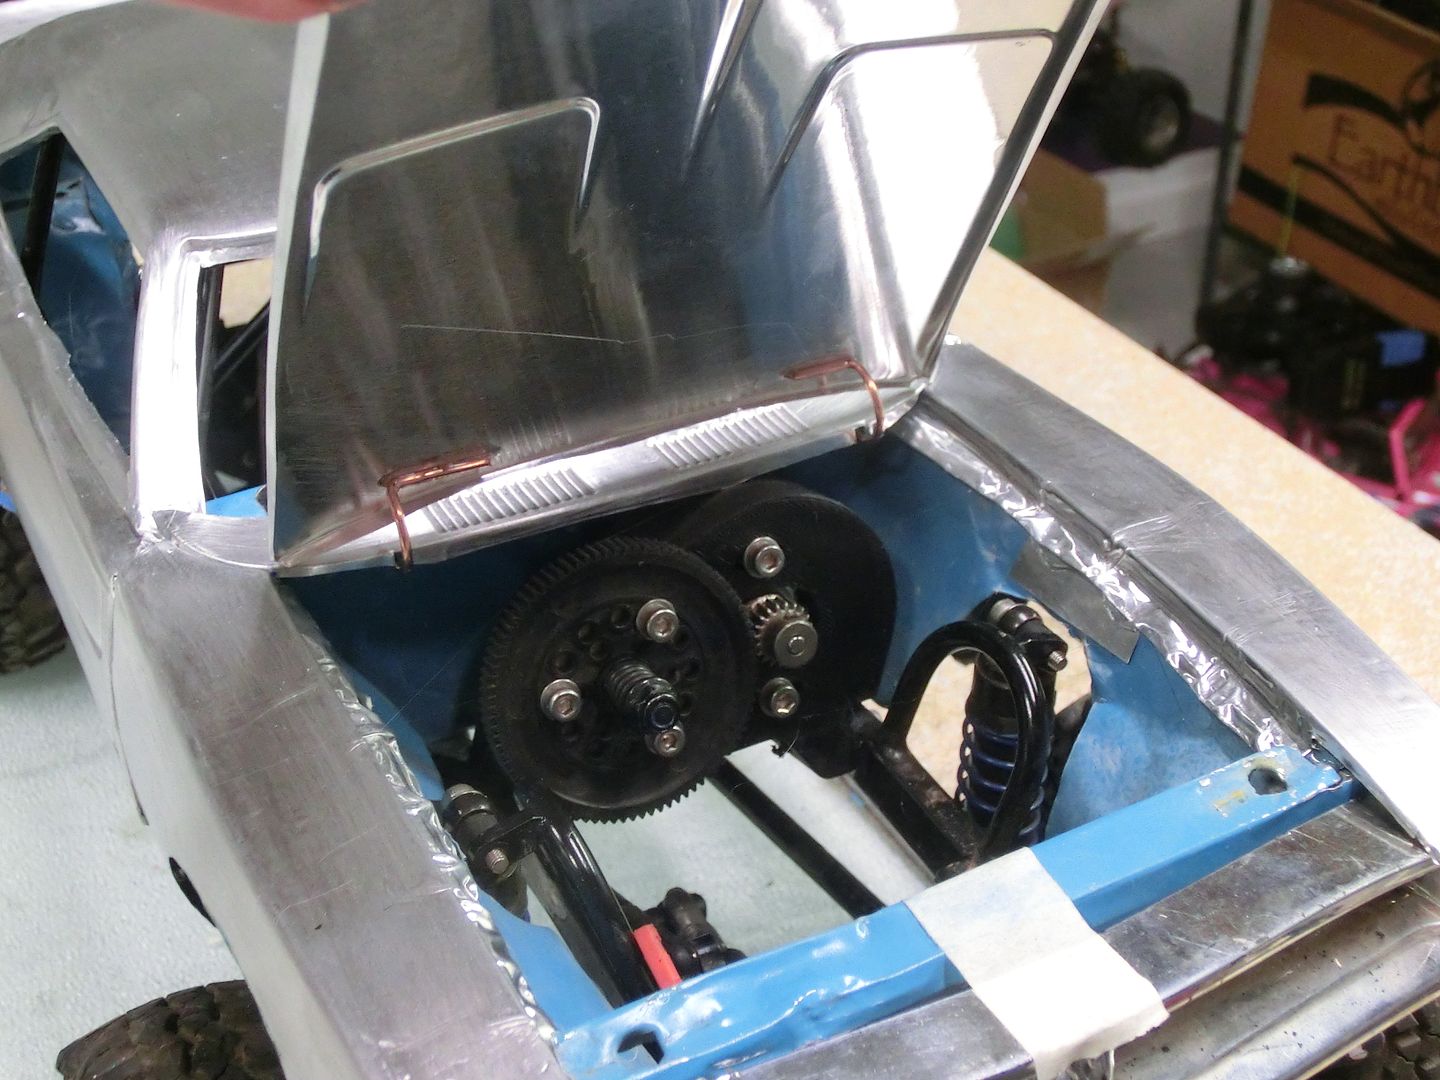 And finally the roof went on. 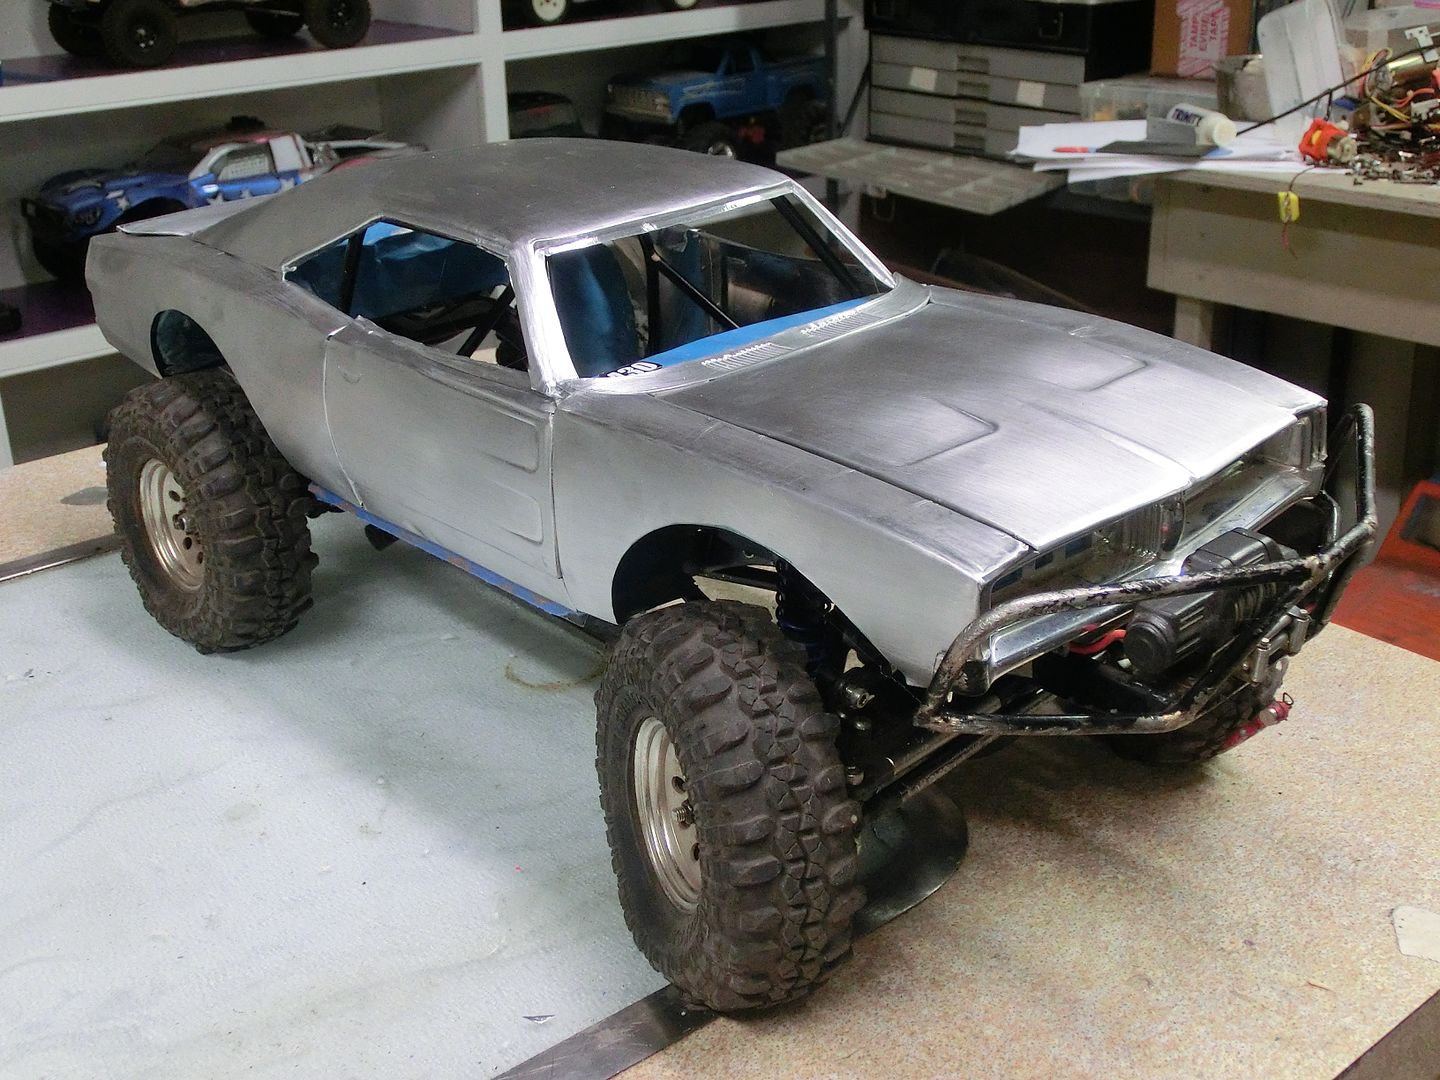 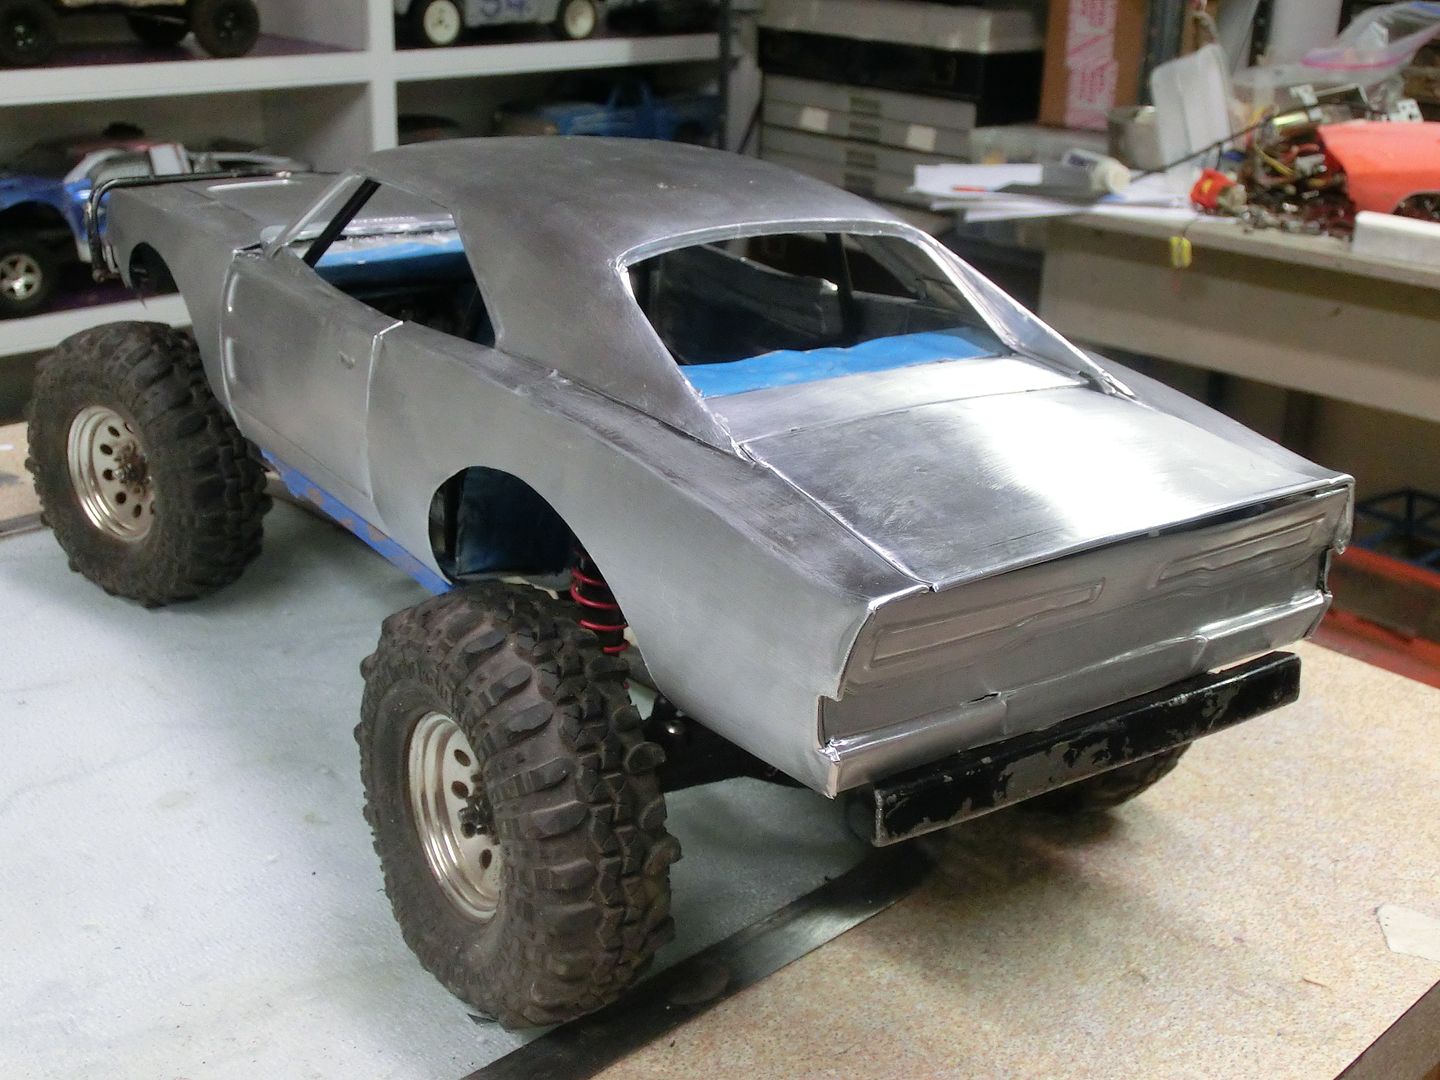 getting closer! | |
| |  |
| | #26 |
| Rock Crawler  Join Date: May 2012 Location: Washougal
Posts: 625
|
Holy schnikes! Awesome work as usual Blake  |
| |  |
| | #27 |
| RCC Addict  Join Date: Aug 2005 Location: New Oxford PA
Posts: 1,290
| Thanks Sam. I never thought I would like a Trar but I'm really enjoying this one. I had one last thing to do to the body for strength which was rear inner fender extensions. to accomplish that I chucked up my inner fender mold I made a while back and bent up some new parts 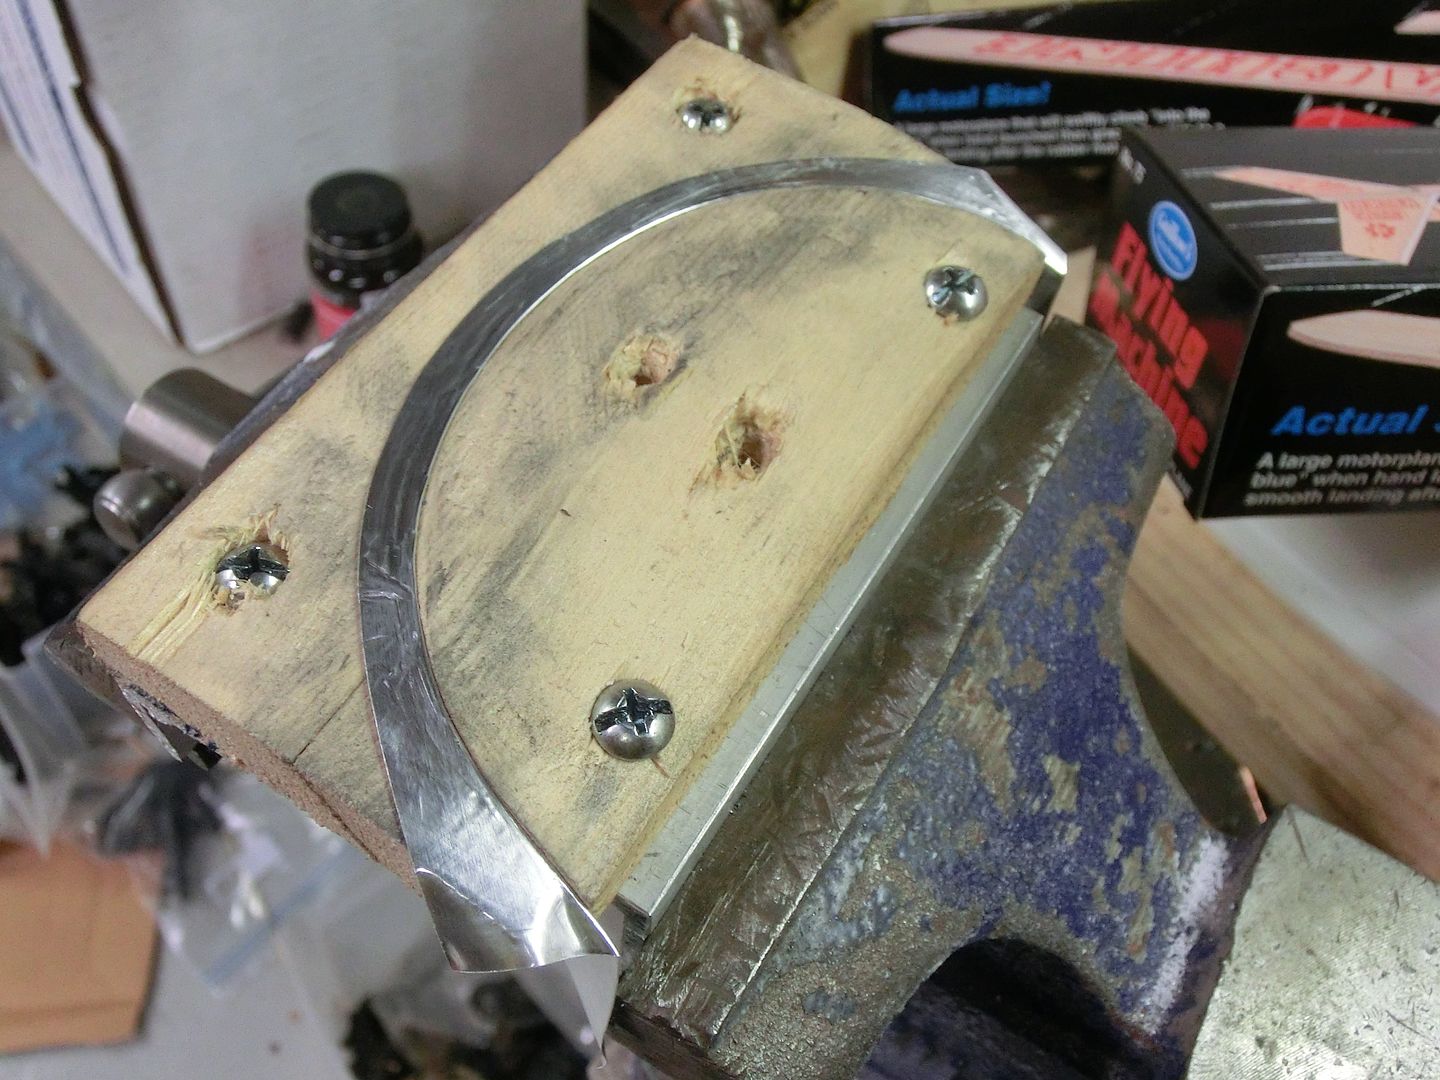 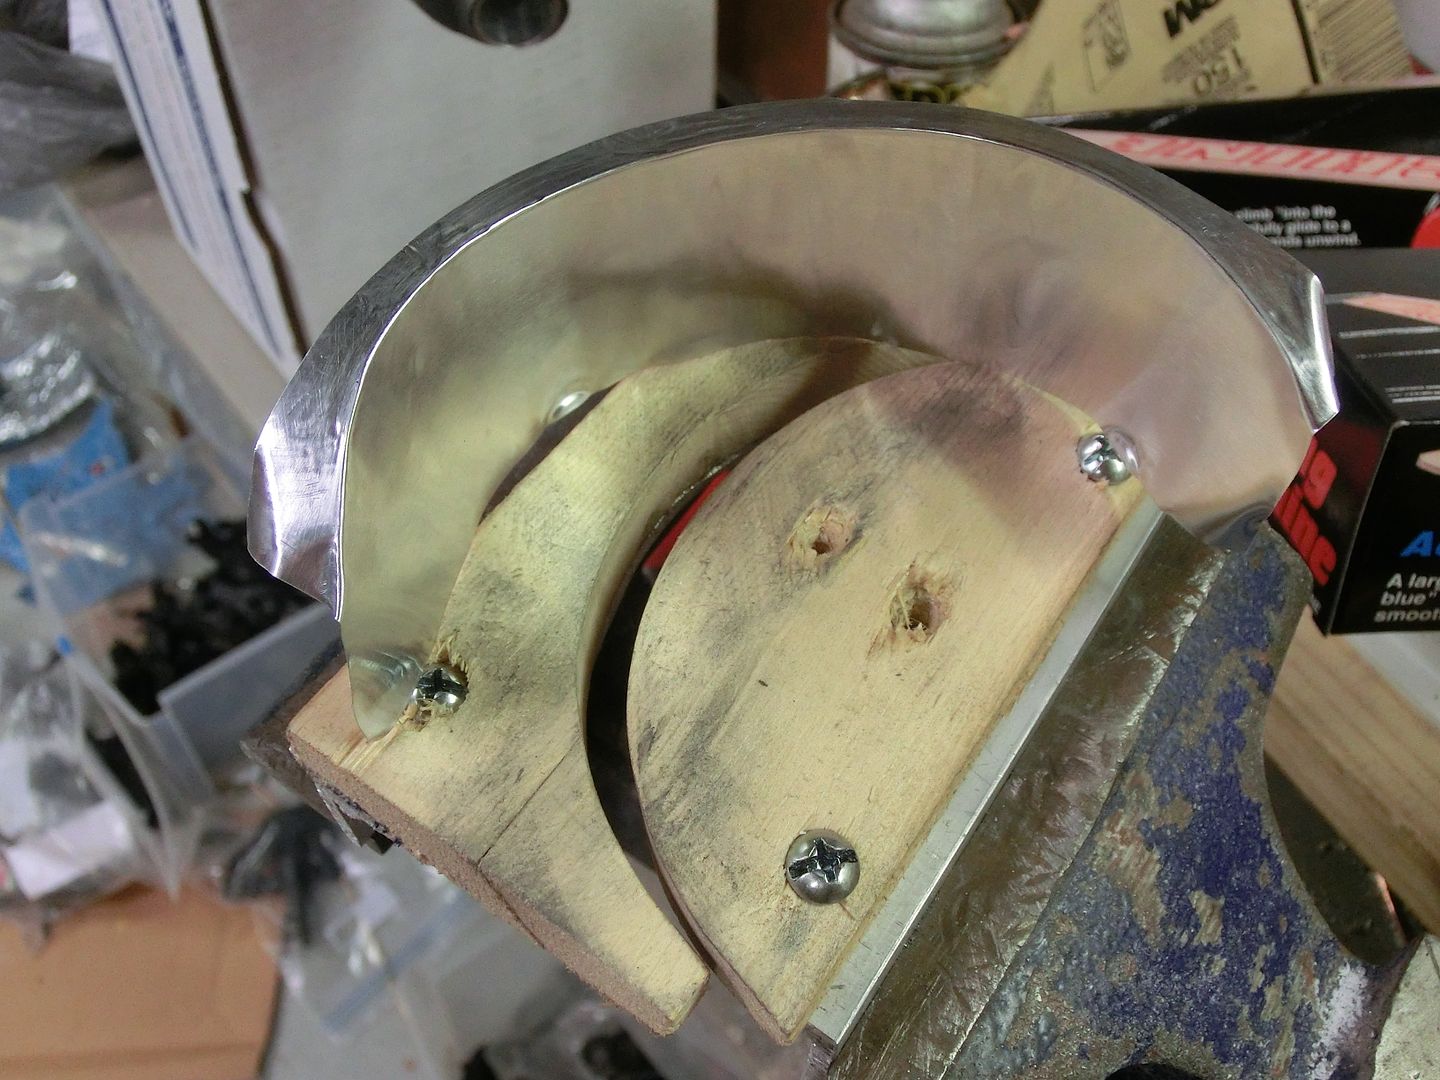 then they were trimmed to size and glued in place 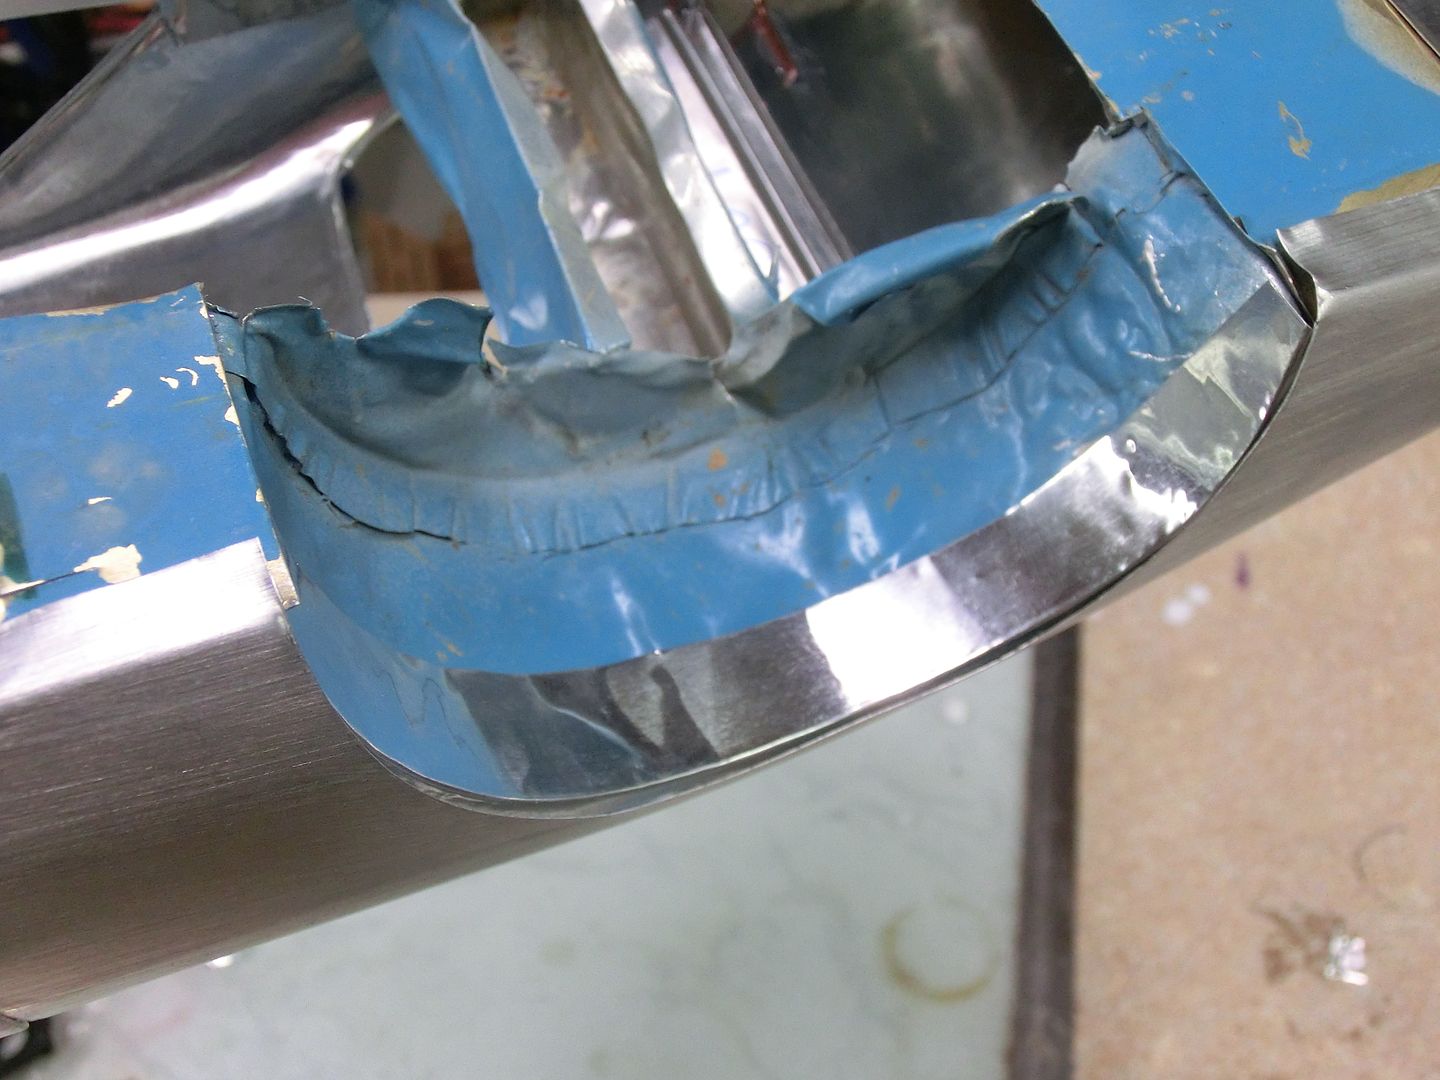 Now I could tackle some chassis mods. The rear bumper was always just temporary and since it got hung up on everything and now that it's starting to bend I really needed to dump it. 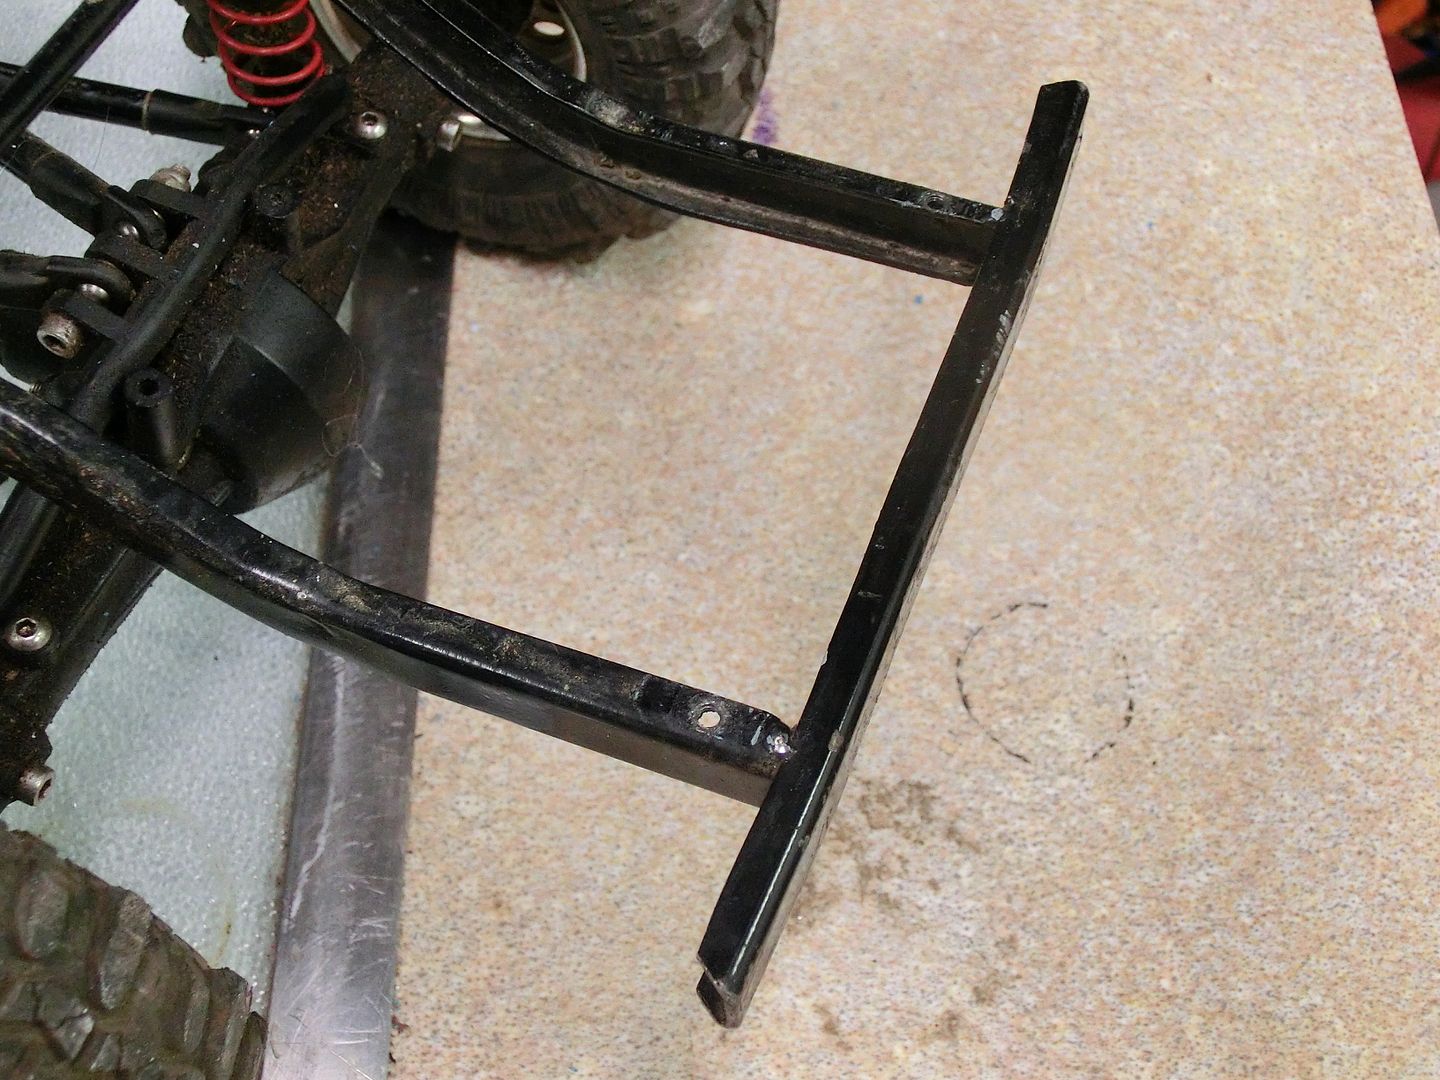 a few minutes with a hack saw and the offending piece was removed 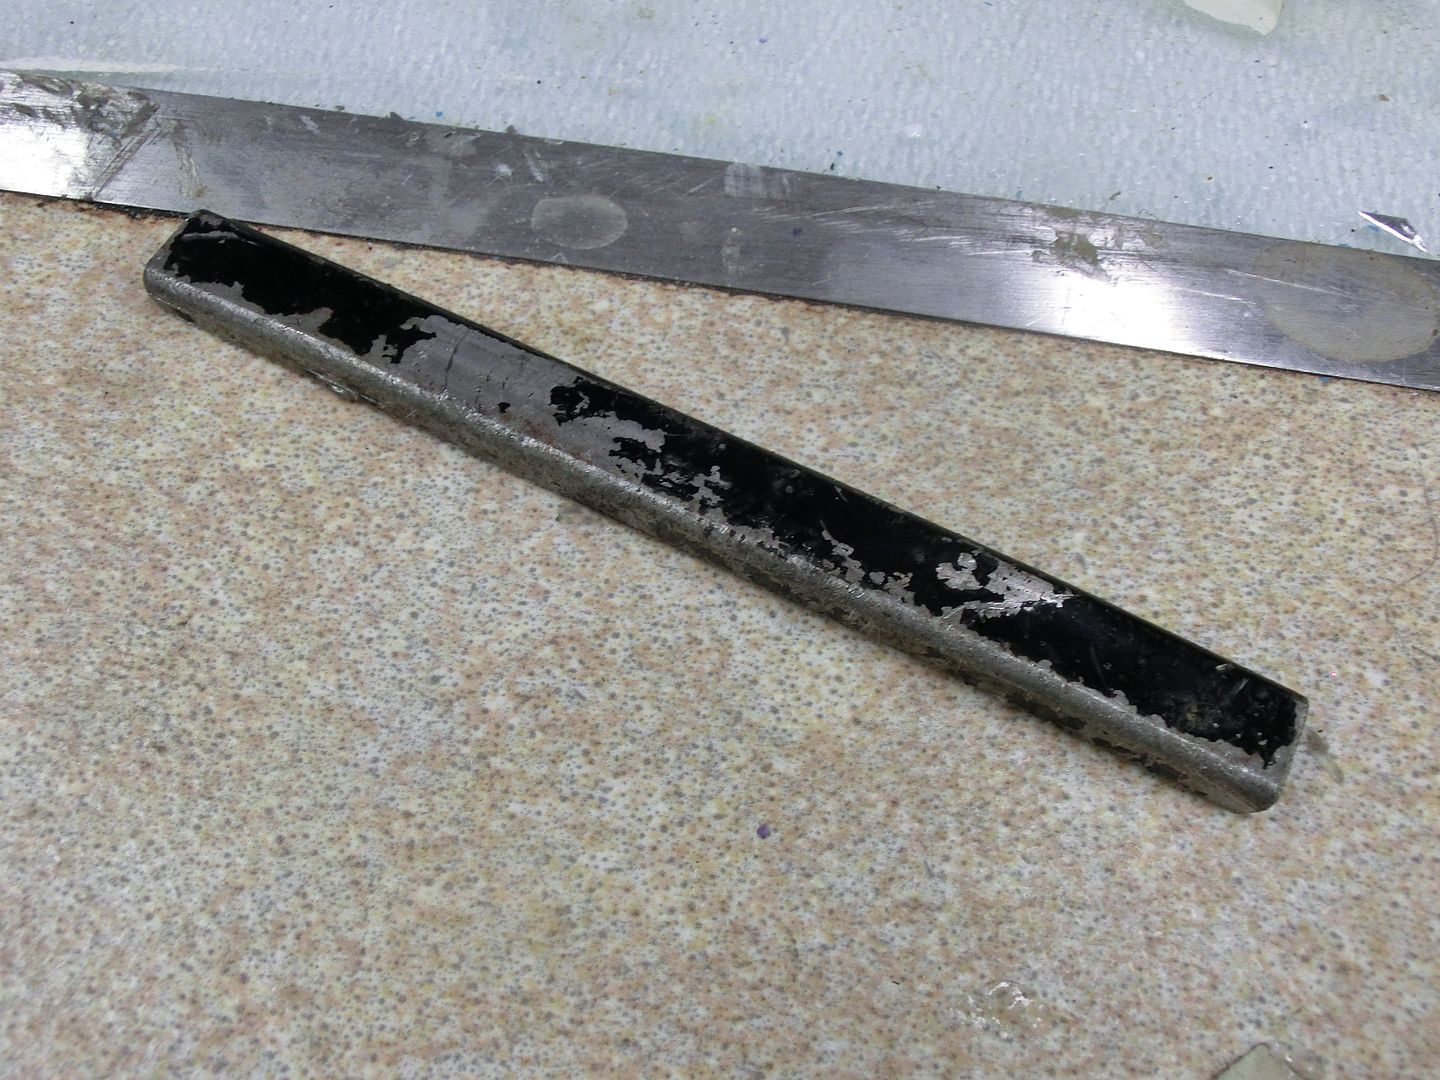 my plan now is to go with a tube bumper so the frame was pie cut and narrowed up to fit the size of the tube an gain more clearance 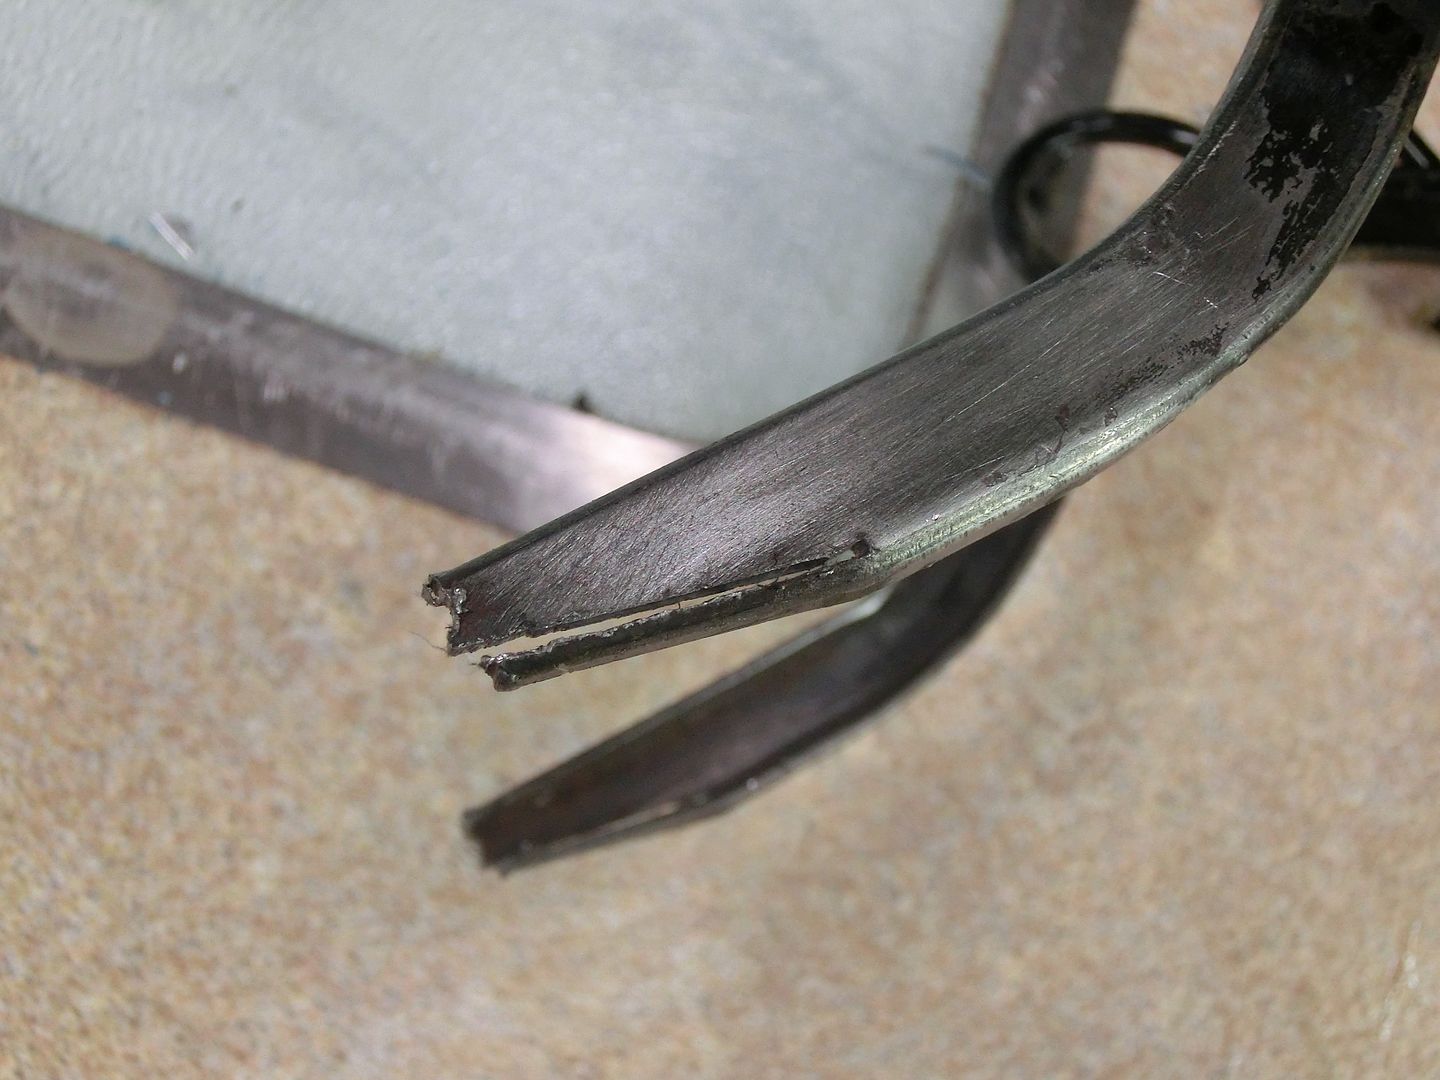 then a simple profile was made 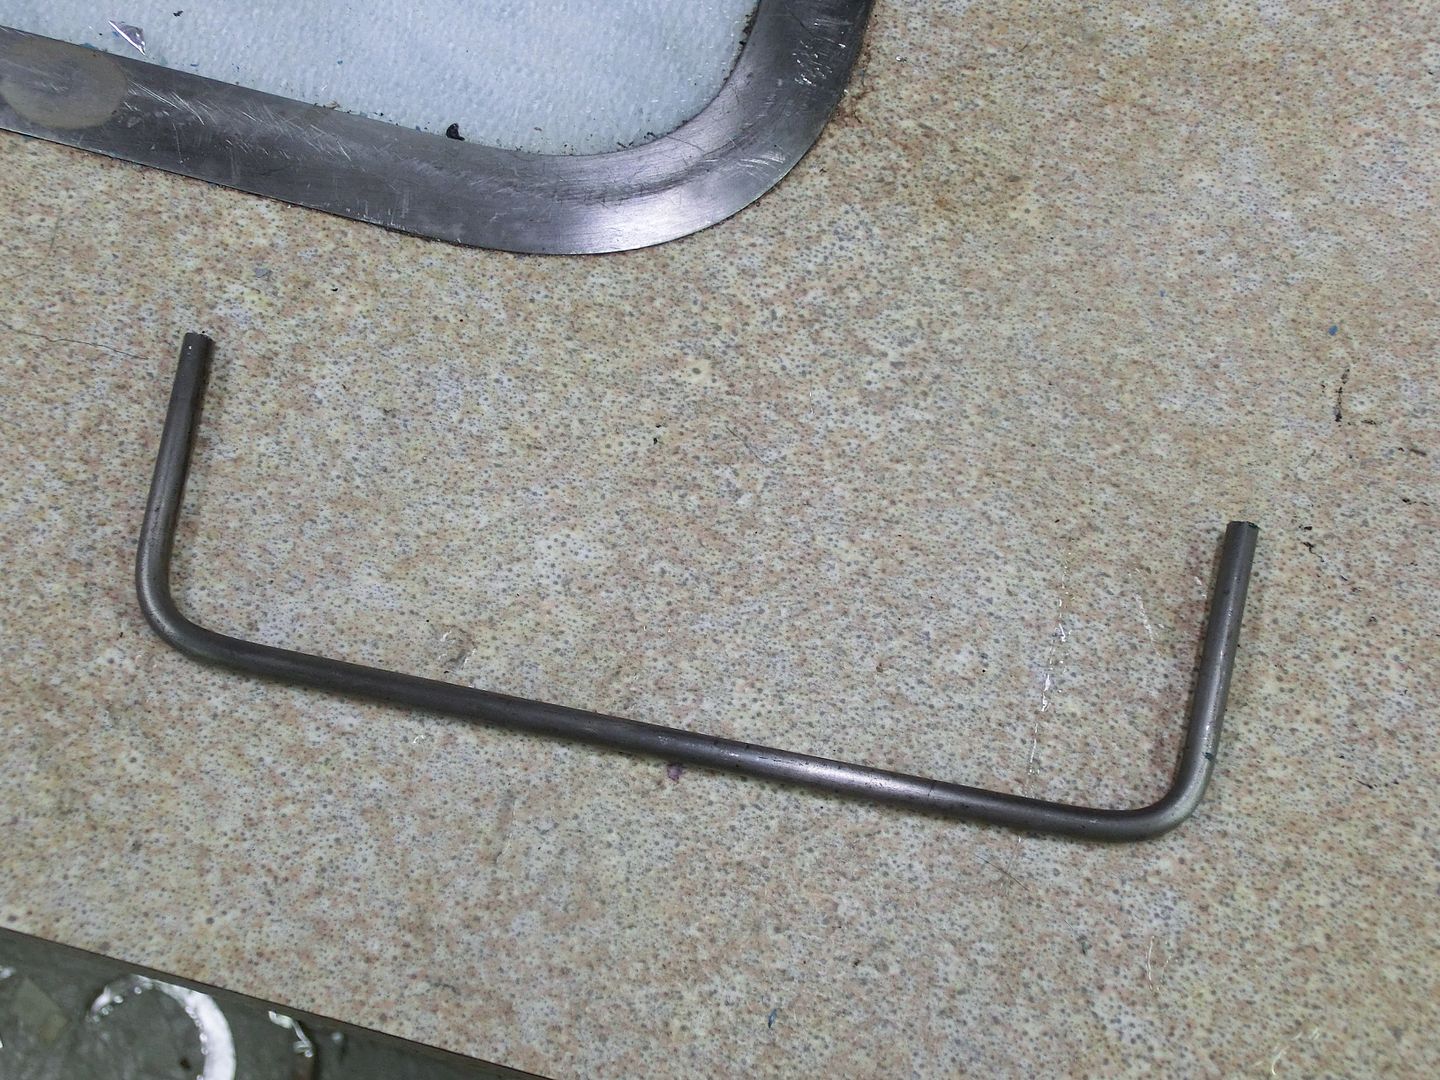 and tacked in place to check the fit 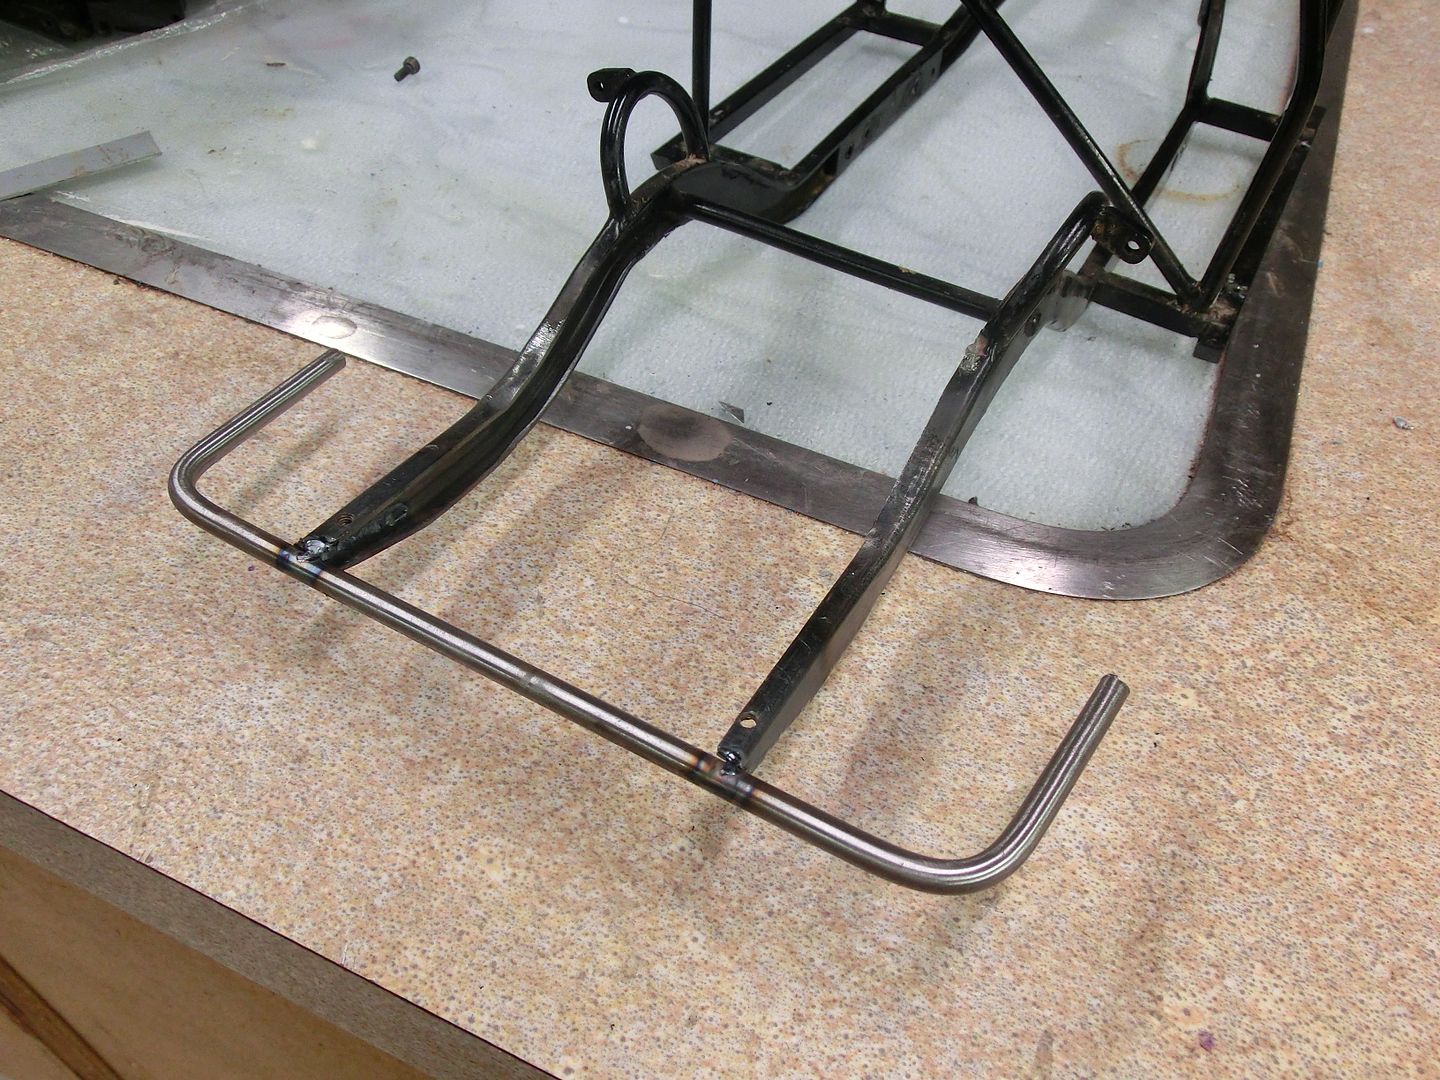 tucks up there pretty good 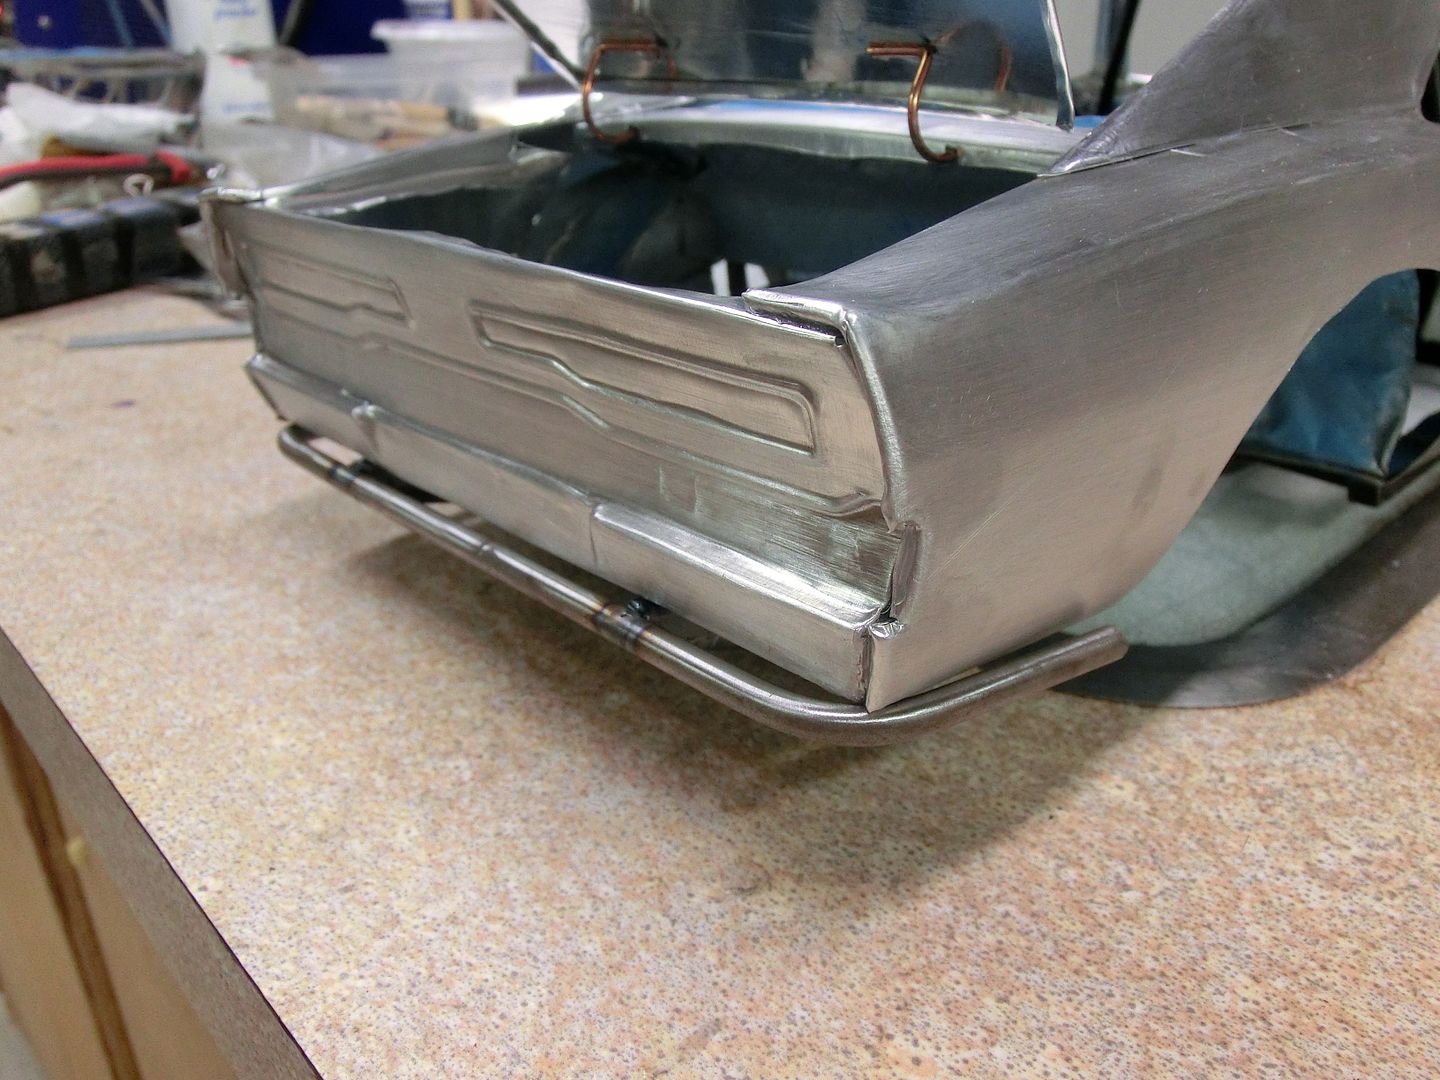 happy with the fit I added some braces 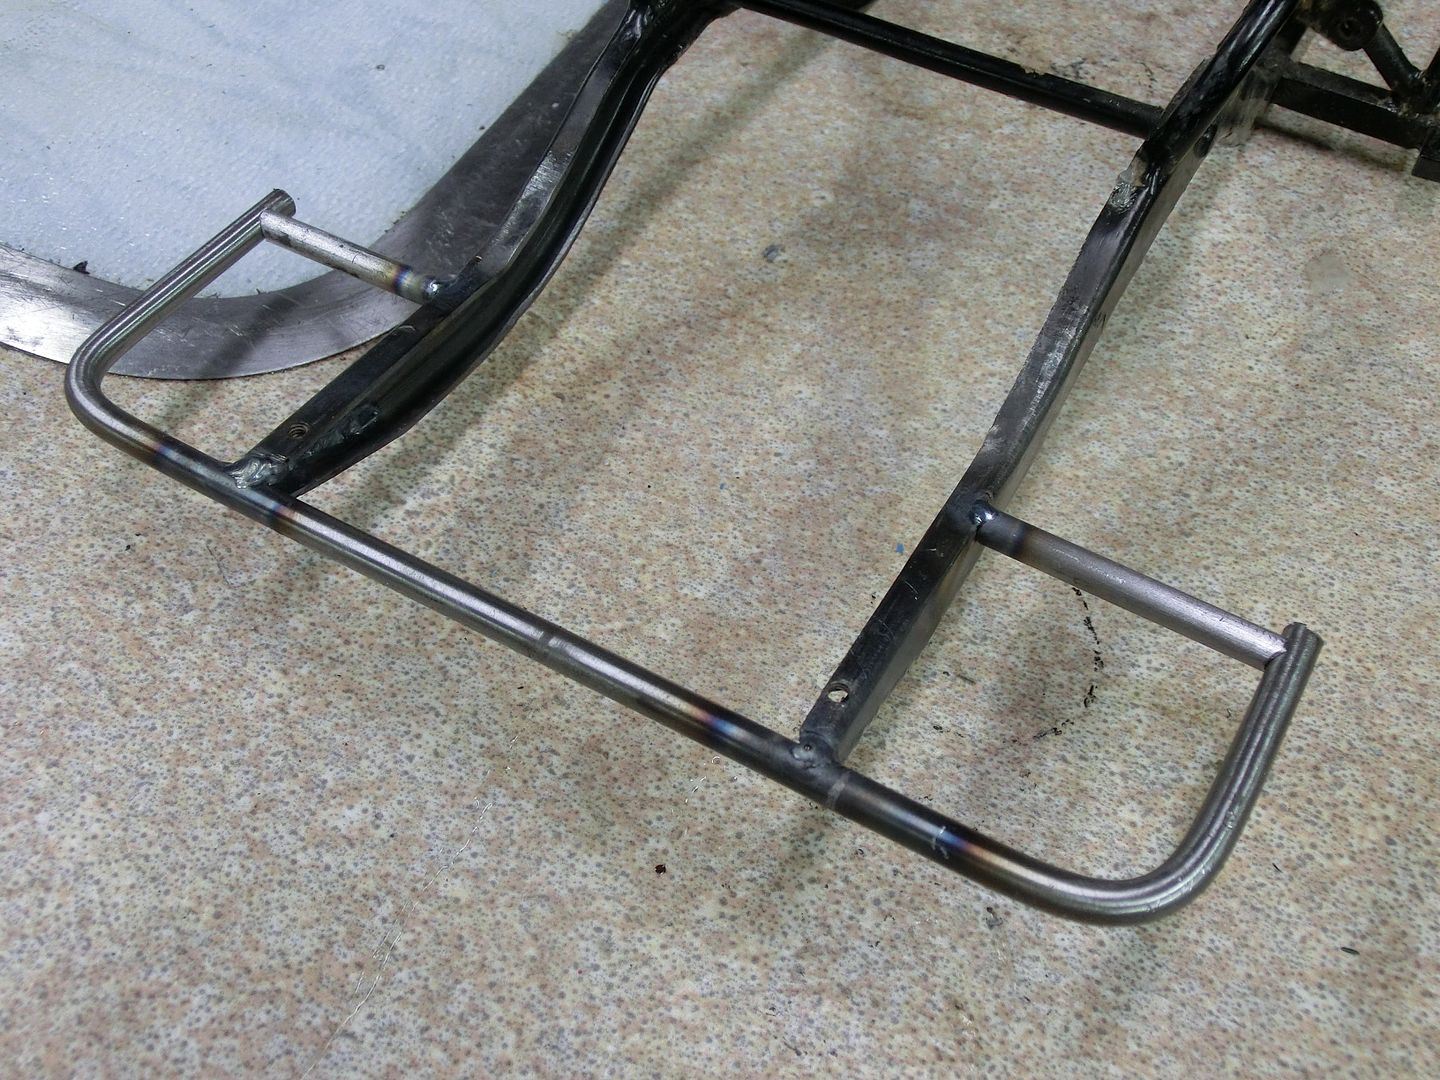 one more check and all looks good. 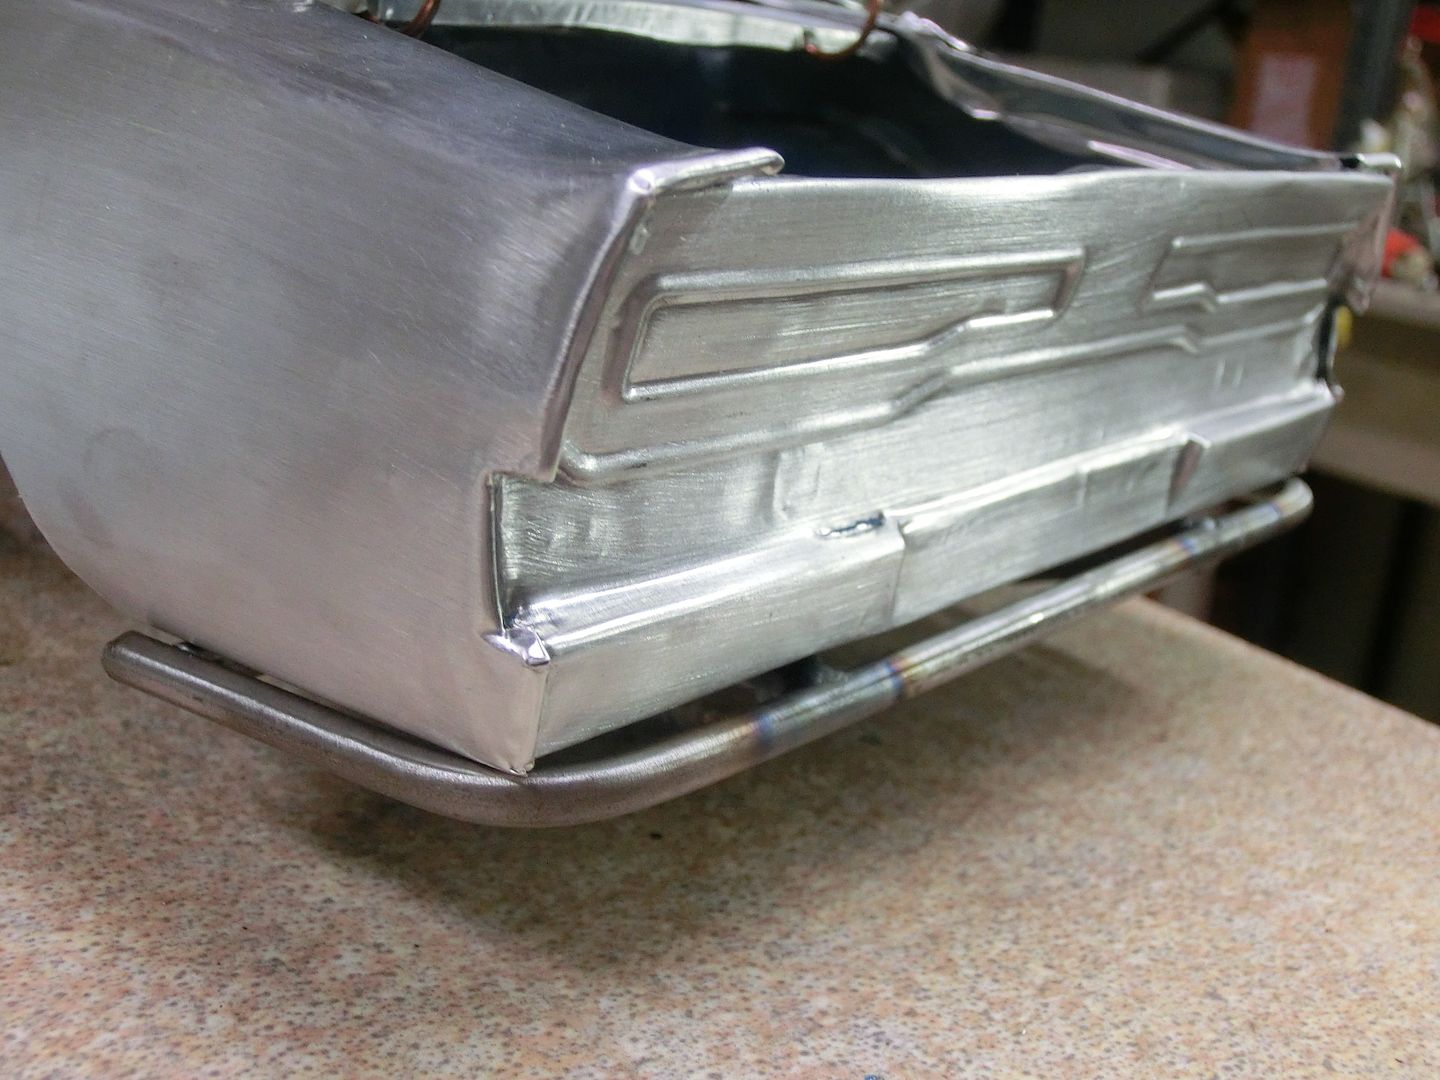 the last mod I did to the chassis was the addition of the braces to the front bumper. I got tired of bending it back every other time it got used. 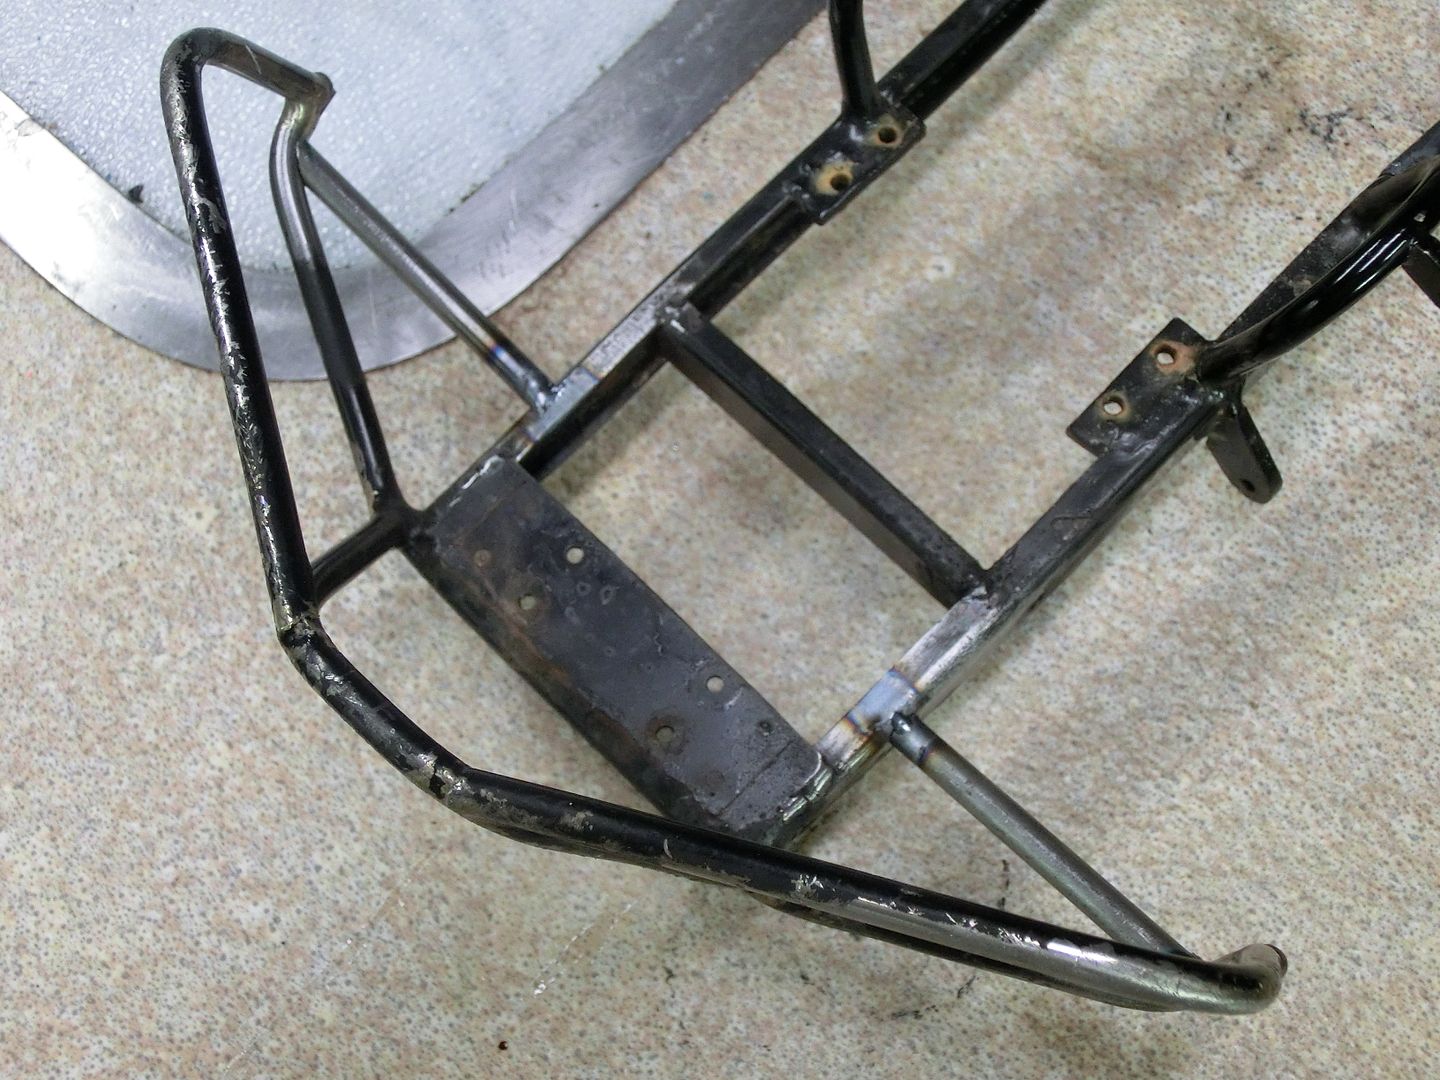 more later! |
| |  |
| | #28 |
| Pebble Pounder Join Date: Apr 2013 Location: traverse
Posts: 183
|
Speechless, just when I think I've seen the most impressive and innovative builds possible I simply wander thu a few more threads and find something of this caliber. While I've had and continue to have fun with my go fast and other rc's, the builds I see on this forum are simply beyond words and bring the hobby to an entirely new level. John Delorean would be impressed. Such attention to detail and ability to manipulate your building materials are beyond impressive.  !!! !!!
|
| |  |
| | #29 |
| RCC Addict Join Date: Mar 2013 Location: Commerce Township
Posts: 1,594
|
Simply amazing, the pile of body parts resembles the aftermath of an old NASCAR Petty Charger, rolled - smashed and tossed in a pile. Just needs a photo of the parts sitting in a field and it would be perfect! And some 43 decals! Great metal fab work, just an awesome build.
|
| |  |
| | #30 |
| RCC Addict  Join Date: Aug 2005 Location: New Oxford PA
Posts: 1,290
|
thanks guys! Time for more progress. I needed to do a few more things before I could paint which was a way to hold the hood and trunk down. I wanted to keep hood pins on the front but didn't like the size of the pins I had before so I used a method I developed on my other trucks which was taking a small nail and drilling a hole just big enough for a micro LST body clip and glued it to the radiator support. 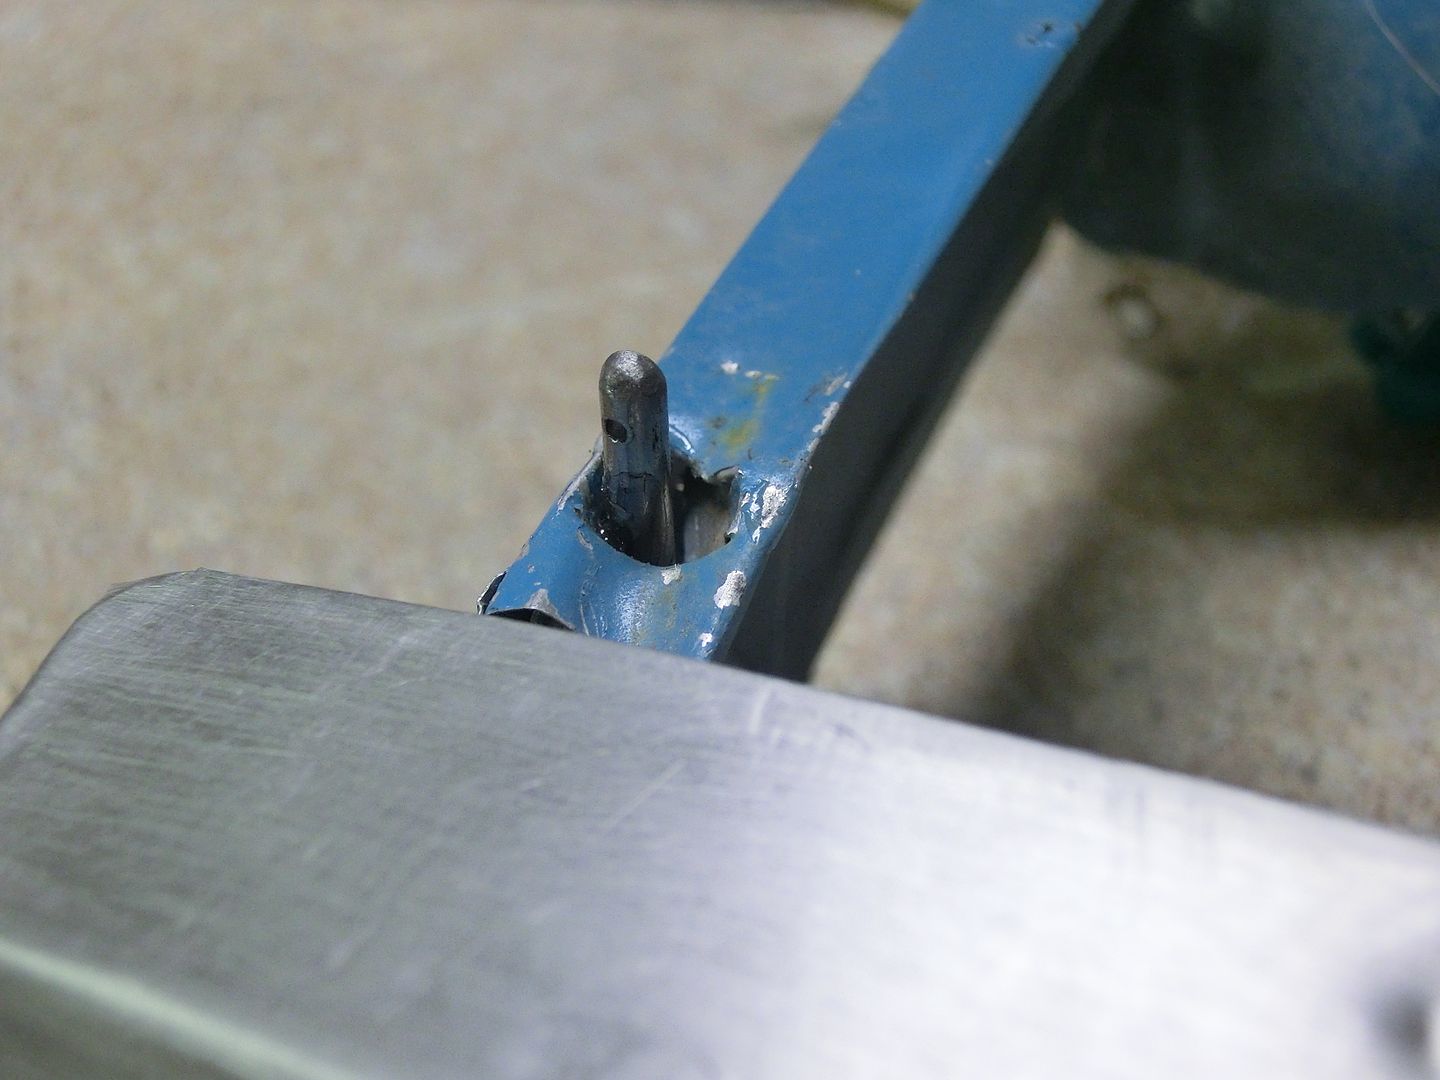 once I popped the hole in the hood that was ready to go. 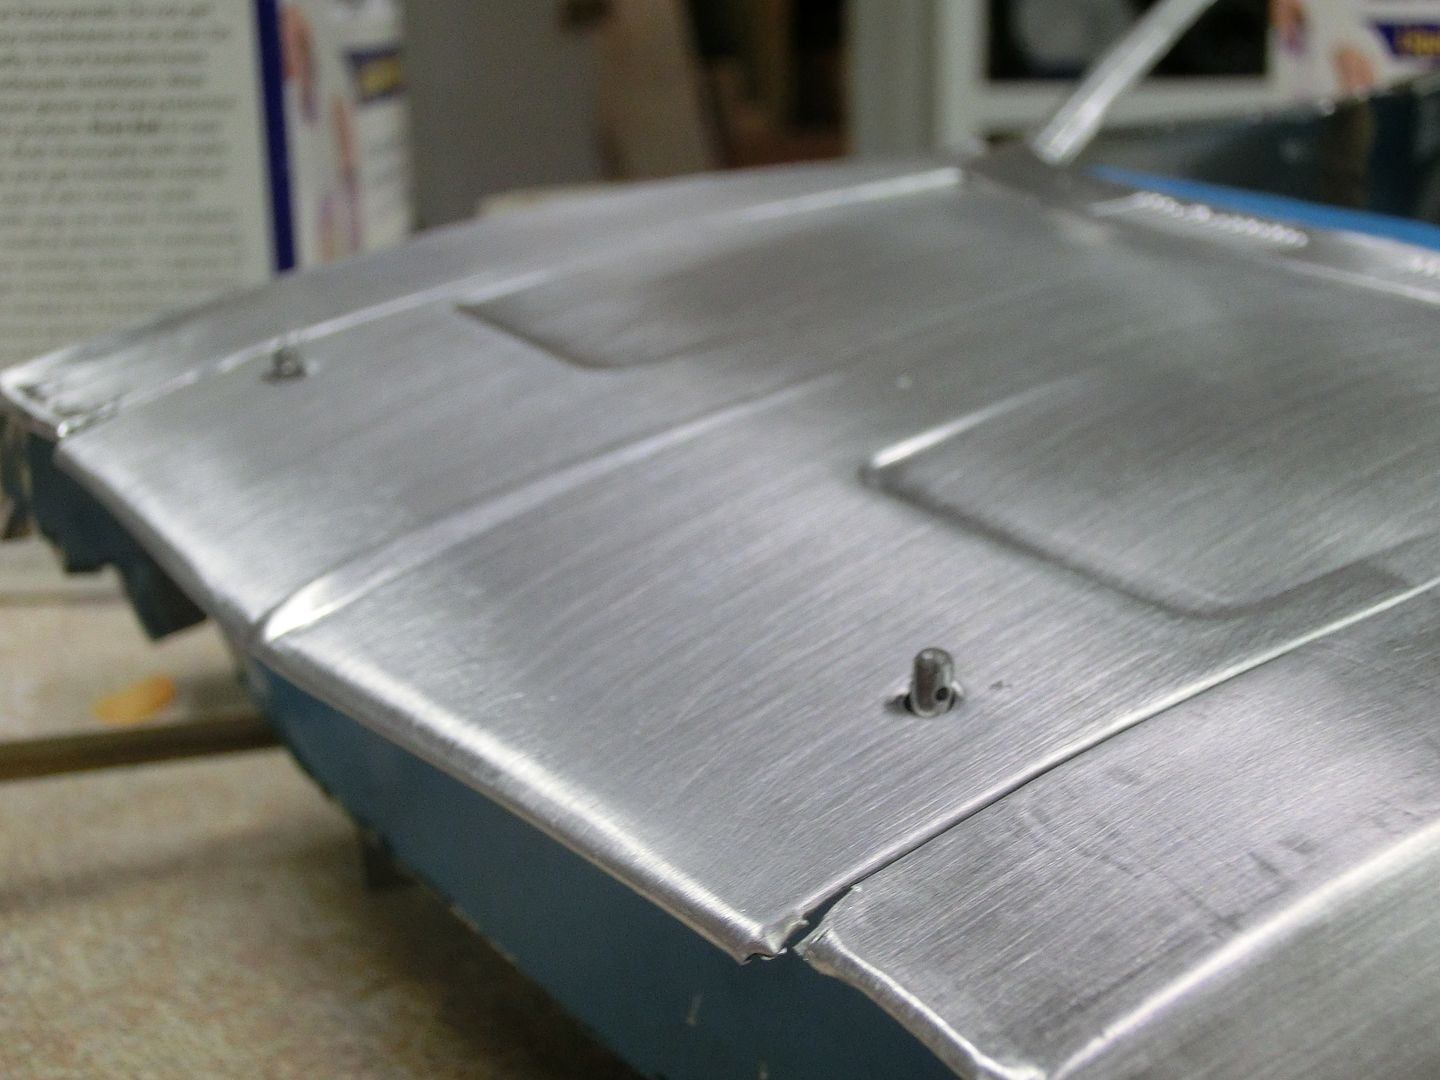 for the trunk I needed something easy to open for battery access but didn't want hood pins showing. I don't have time for some complicated latch mechanism like on my class 1 toy and Scout so I decided to go with rare earth magnets. the problem is that they are actually too strong and I was afraid I would bend the trunk lid trying to open it. so the first order of business was to reinforce the area. for the tail pan I formed a channel that fit the profile and went all the way to the trunk floor. 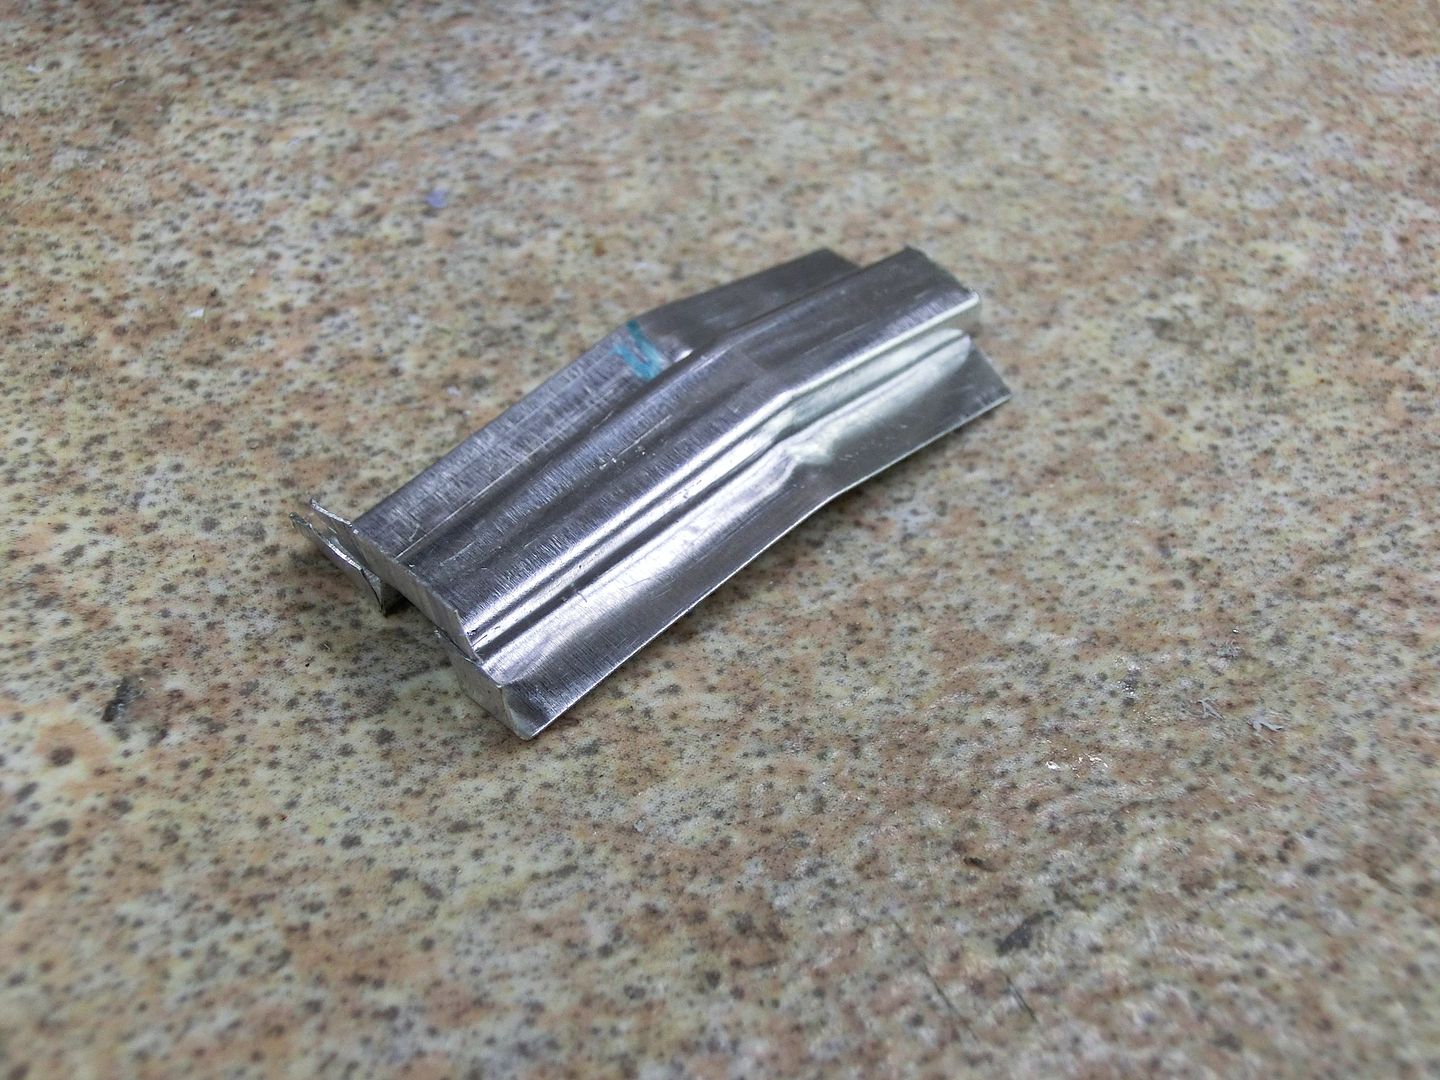 then glued it in place 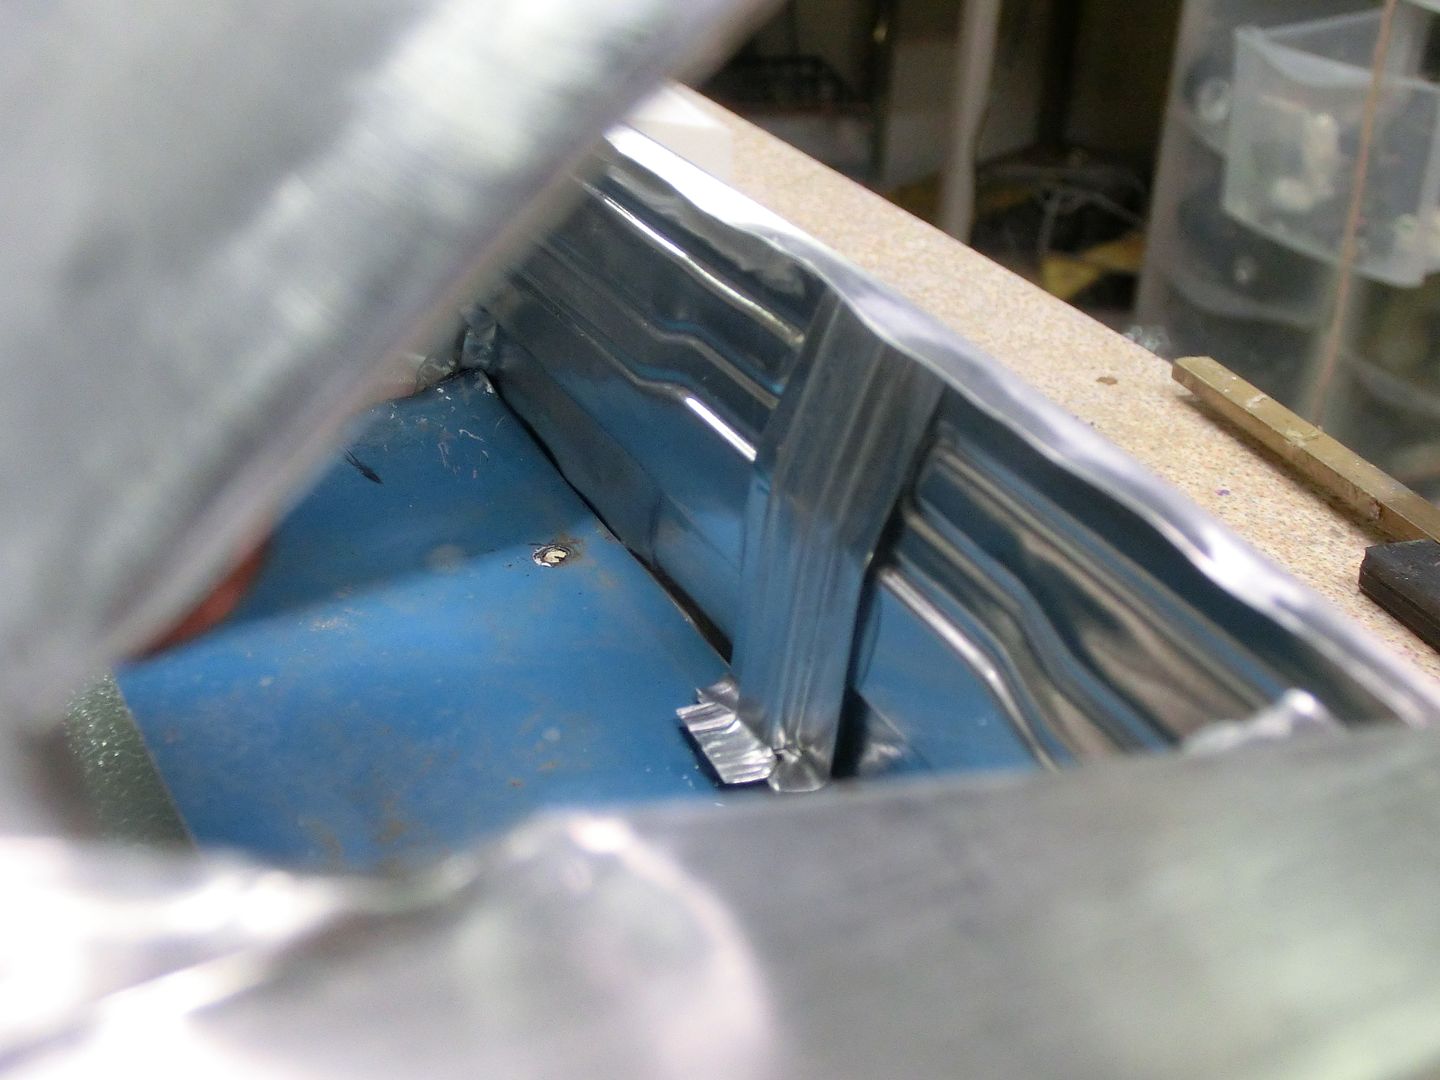 next I added a channel to the trunk lid 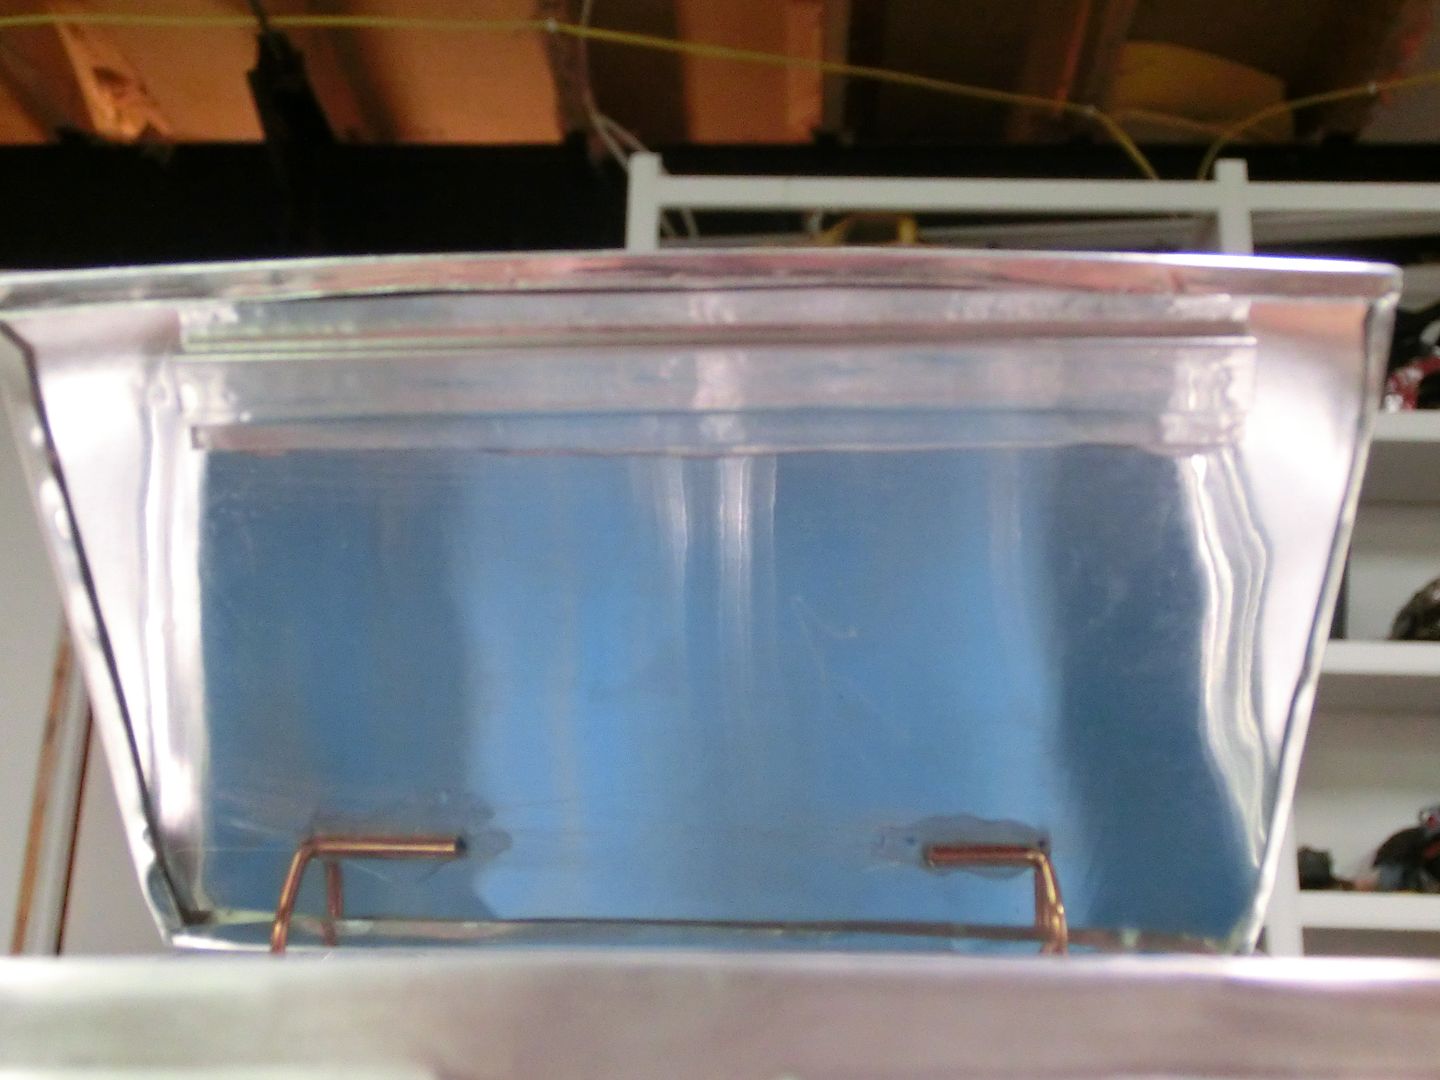 now I needed something for the magnet to stick to so I used some real thin tin I had lying around. 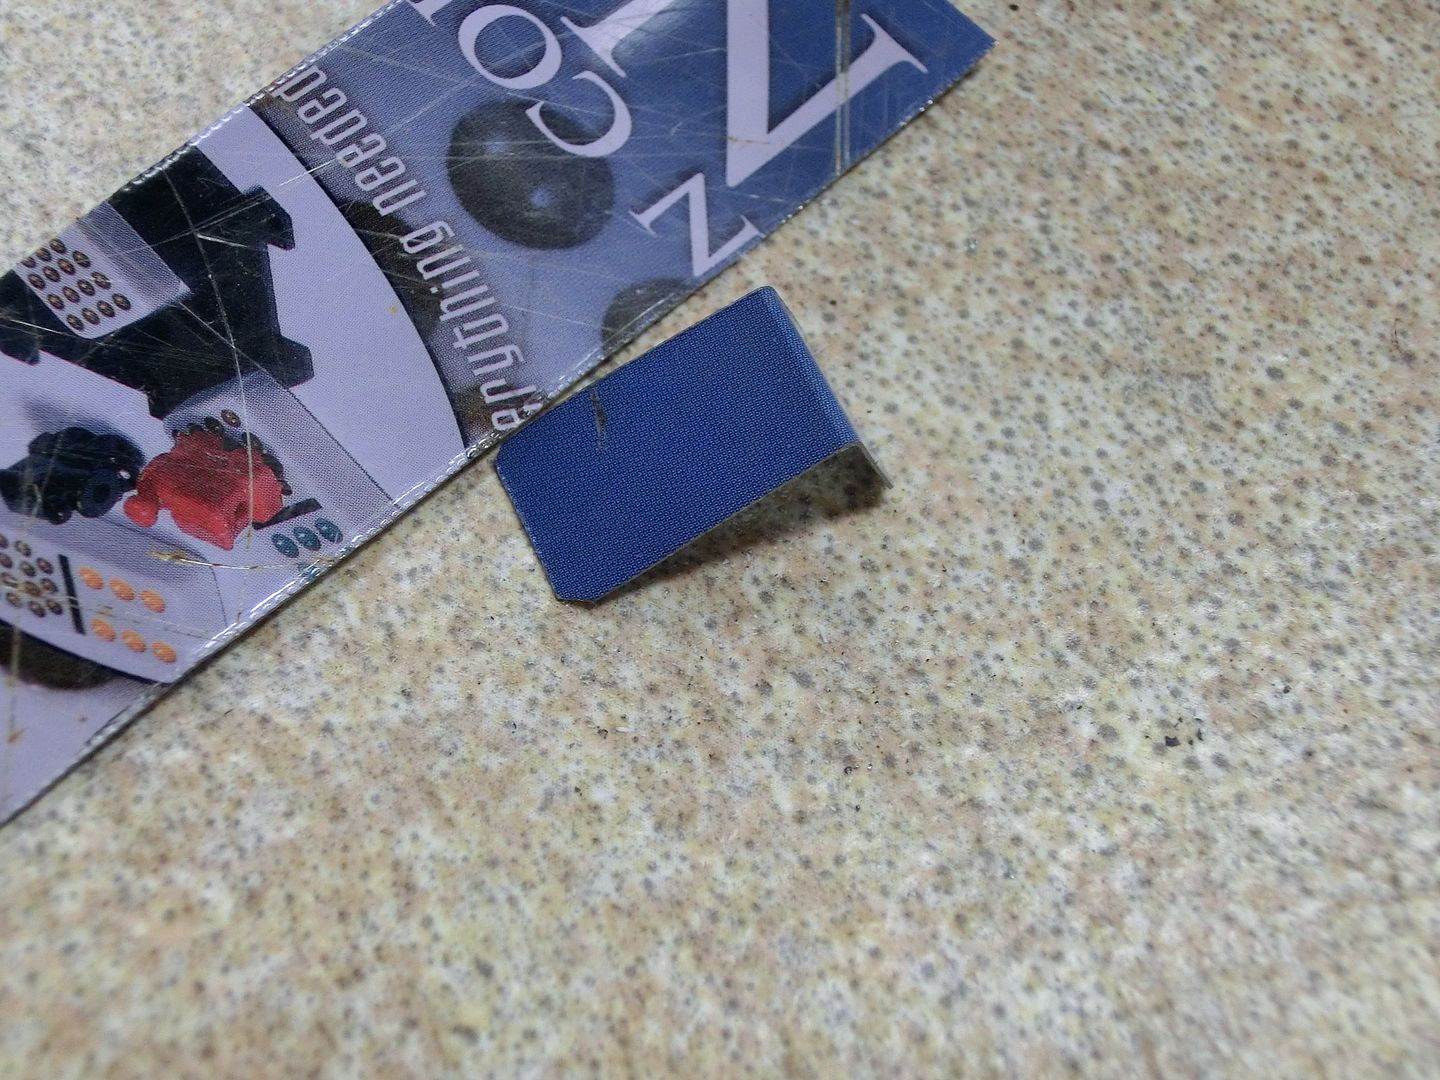 fits good 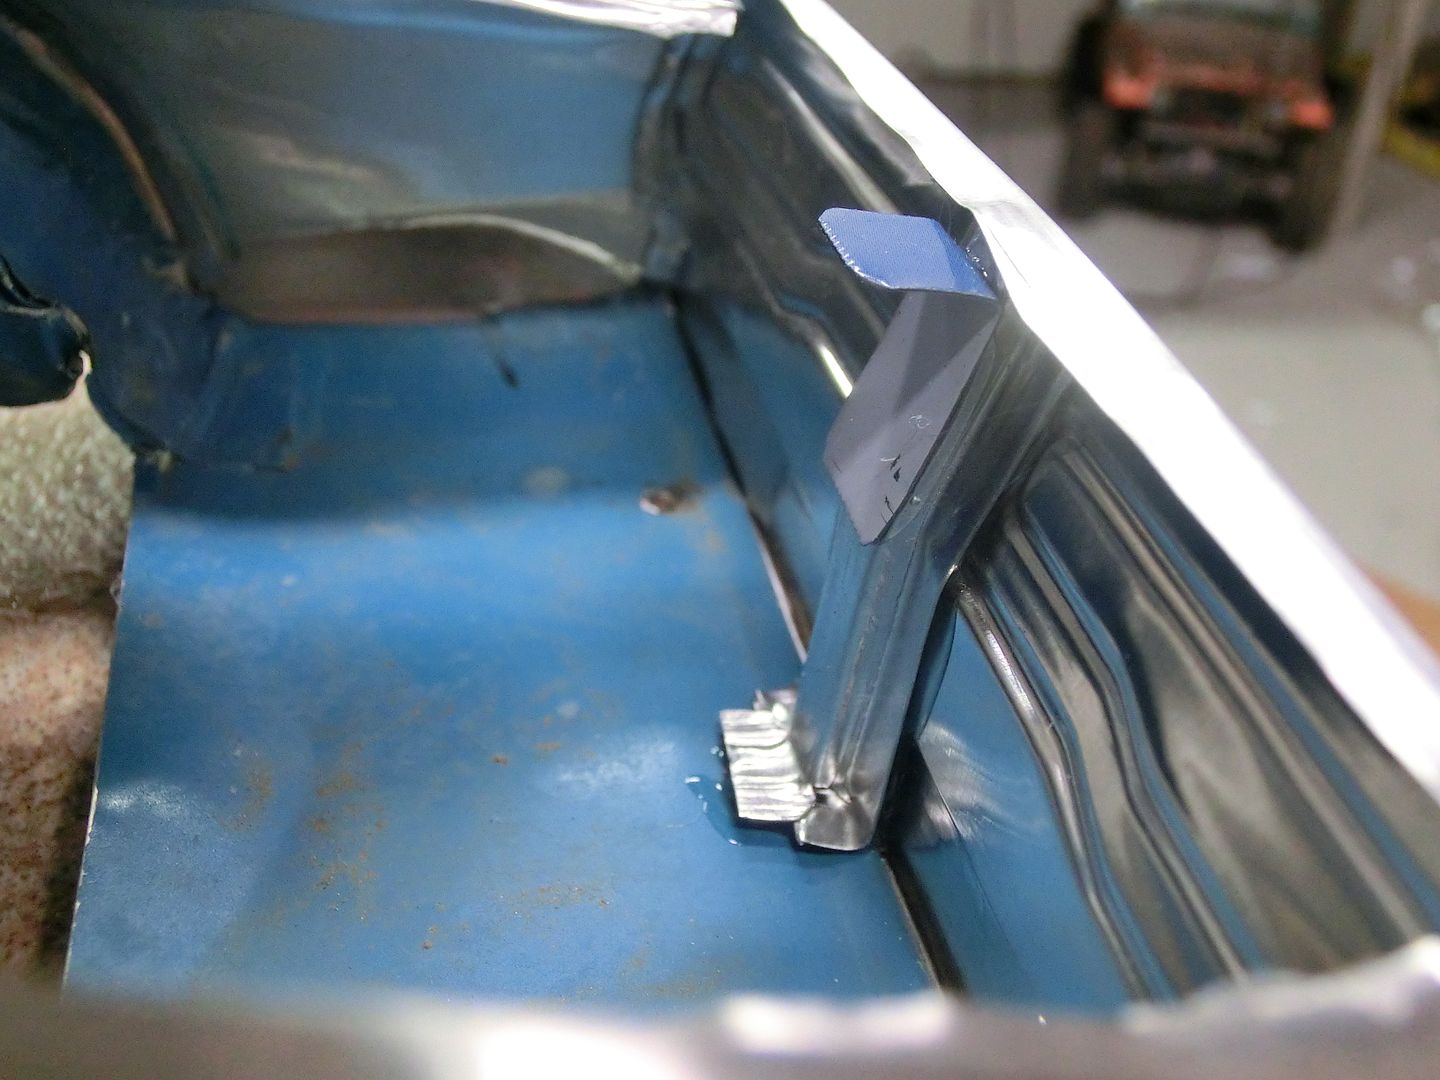 lastly the magnet 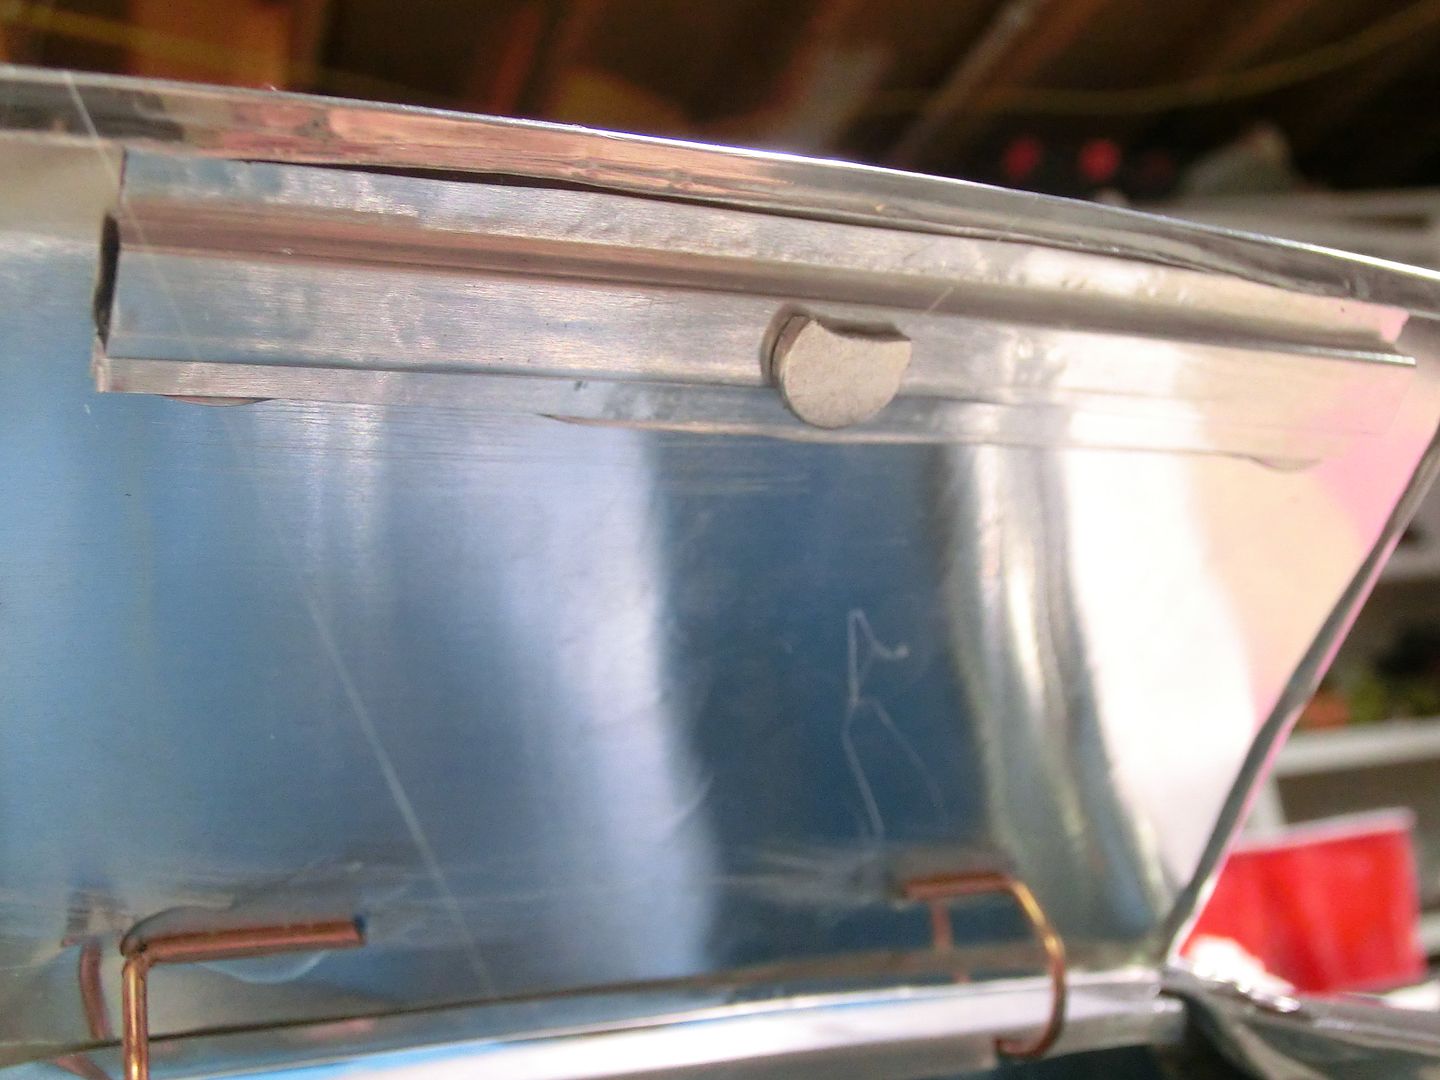 it worked beautifully and holds the trunk lid firm but allows me to open it without damaging the trunk lid. finally it was time for paint and since it is a Mopar, and I love purple, I put on my version of metallic plum crazy because honestly, this thing truly is! 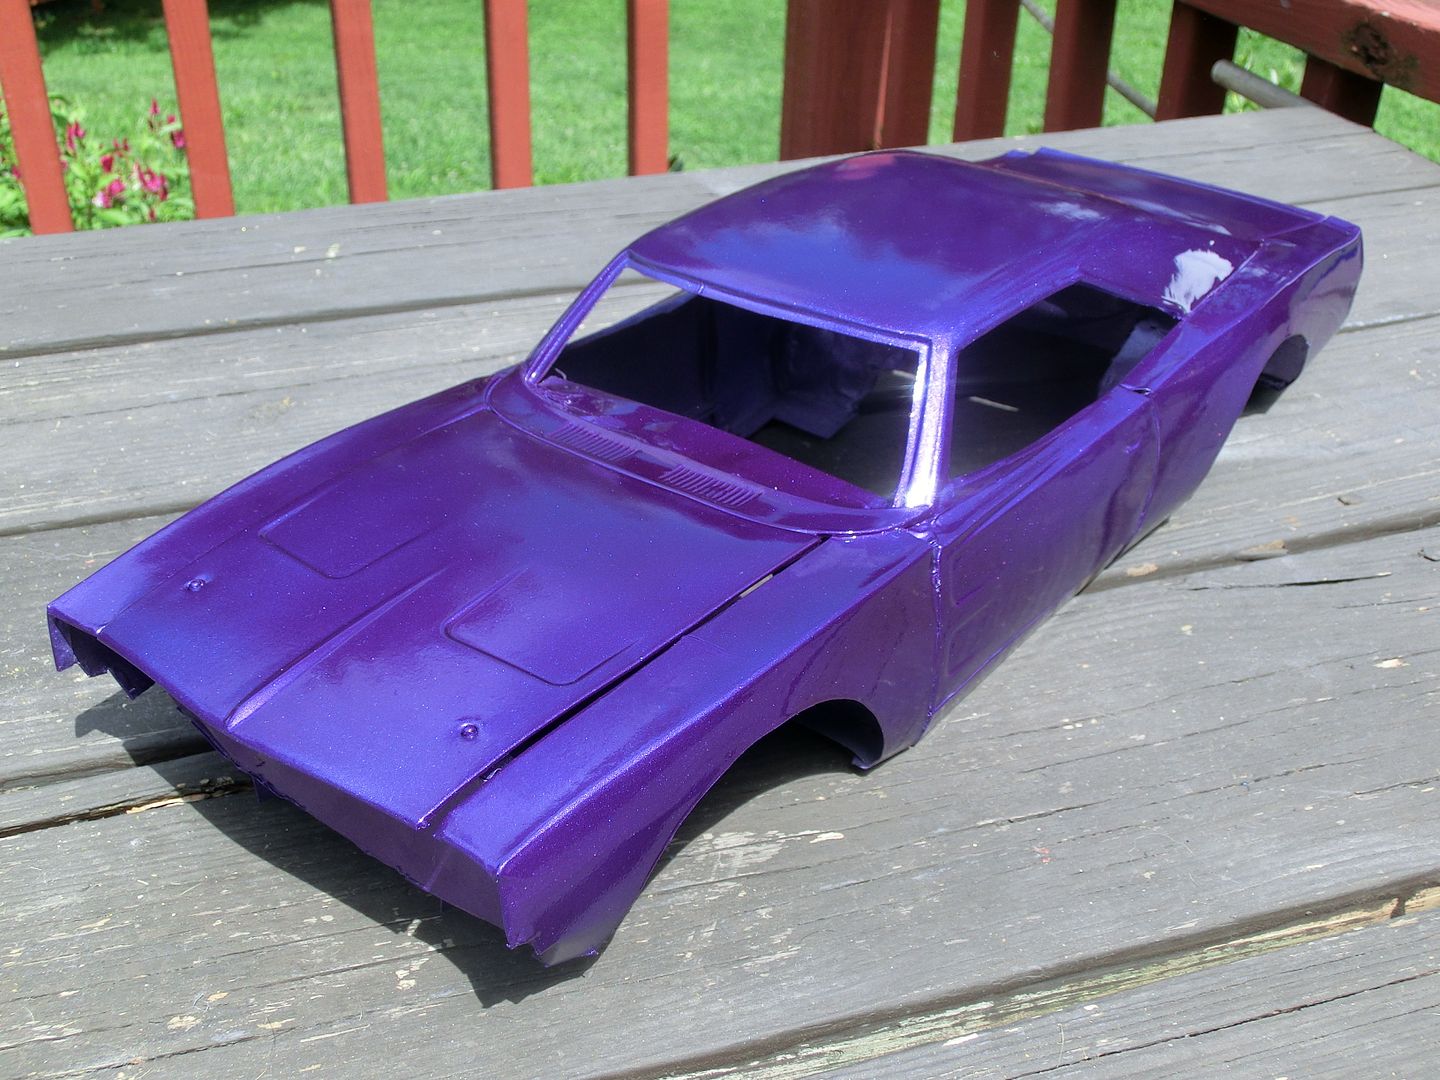 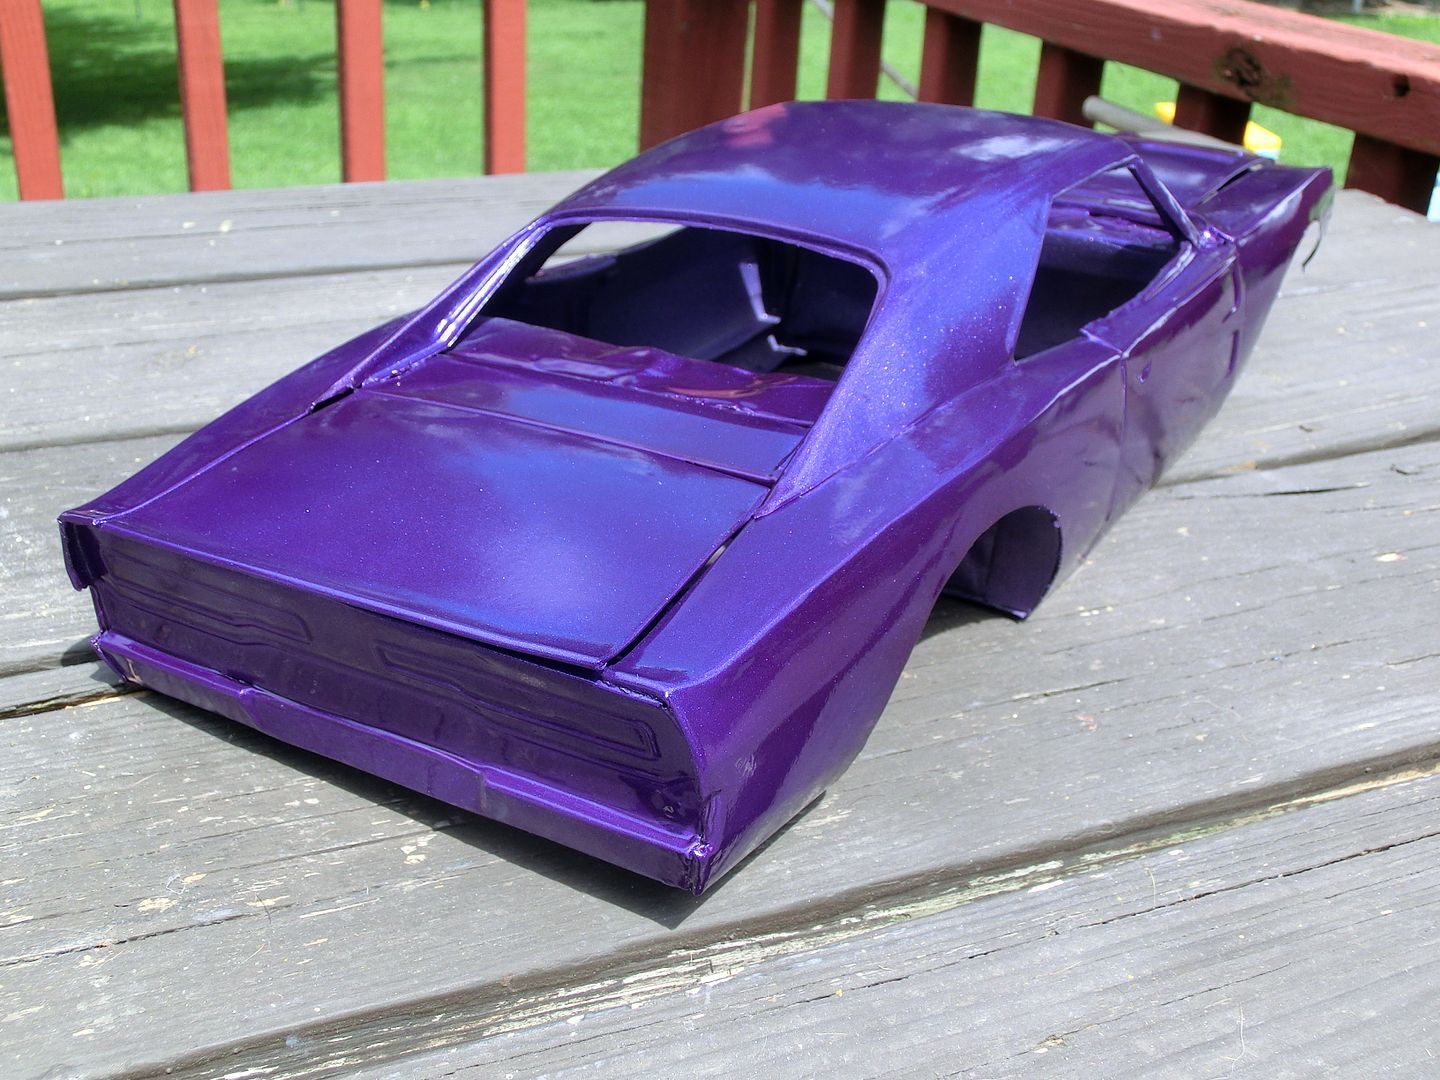 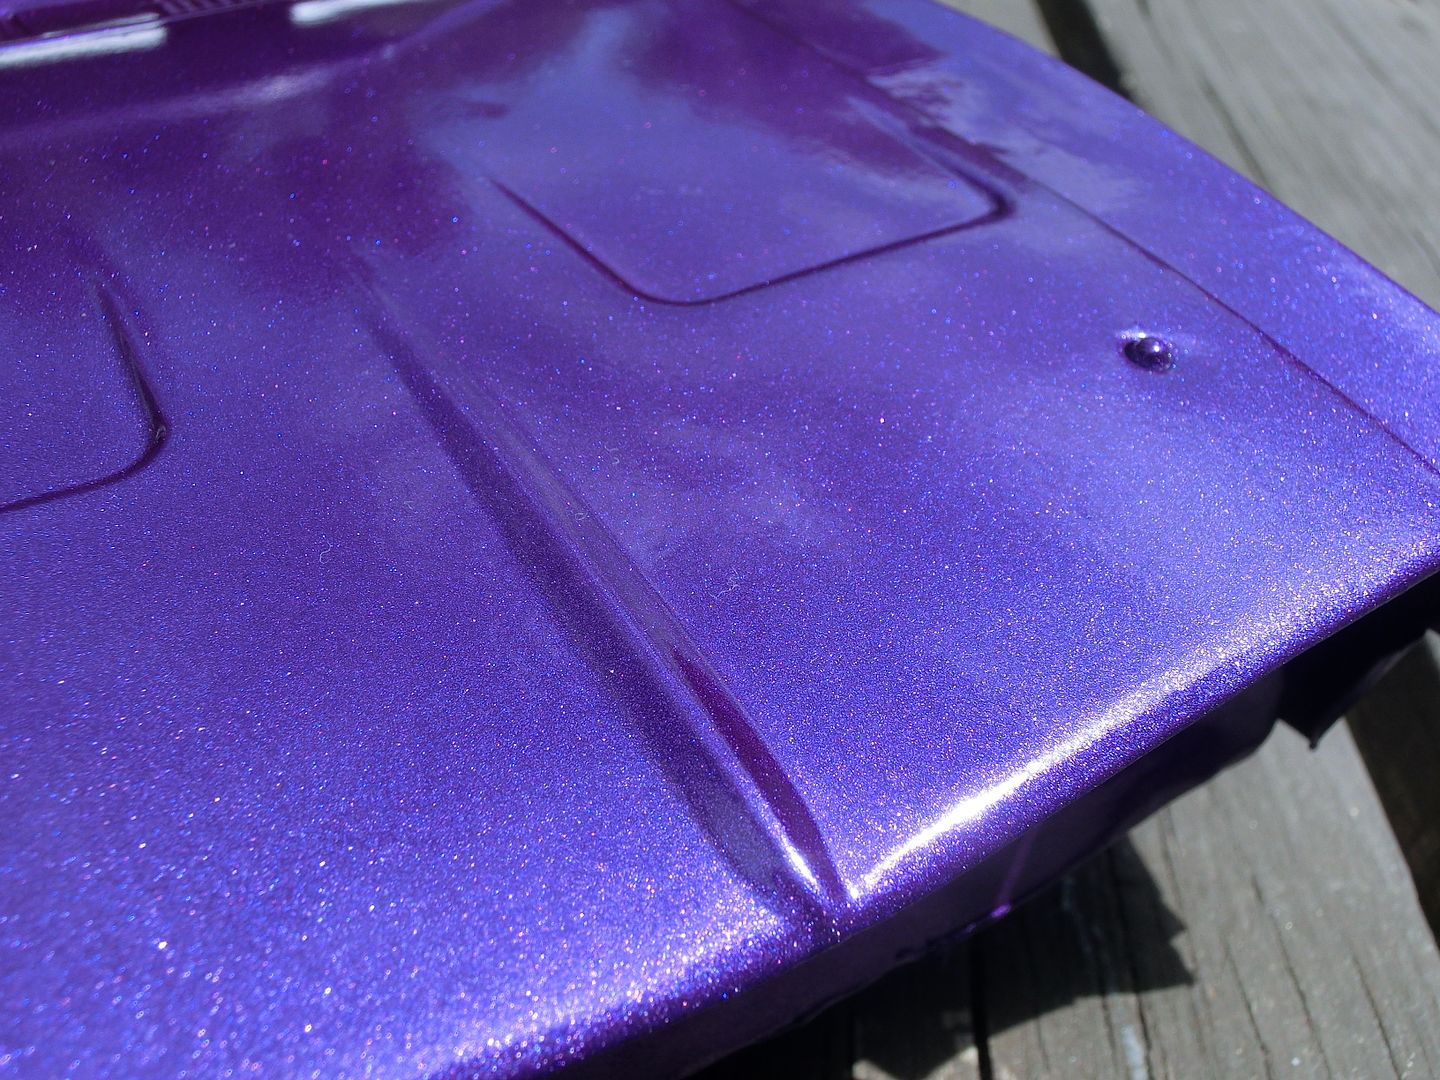 I still have more to do but it's getting close! |
| |  |
| | #31 |
| Sinking with the ship    Join Date: Mar 2005 Location: El Capitan...sole survivor and sinking fast
Posts: 8,864
|
So bad ass ! Love the color !
|
| |  |
| | #32 |
| Newbie Join Date: Feb 2014 Location: Livermore
Posts: 38
|
That color is so sweet!
|
| |  |
| | #33 |
| Pebble Pounder Join Date: Jun 2015 Location: Smethport
Posts: 148
|
wow...that's all, just wow.
|
| |  |
| | #34 |
| RCC Addict  Join Date: Aug 2005 Location: New Oxford PA
Posts: 1,290
|
Thanks guys! the glue is Shoogoo goop or E6000. same stuff ECSC is coming up real fast! I gotta get moving! Now that I had the body painted I turned my attention to the grill and tail lights. I wanted to make a copy of it so that I don't need to worry about braking the original and I can smash them up all I want and just replace them. I started by bedding the parts in clay and making boxes to surround them. 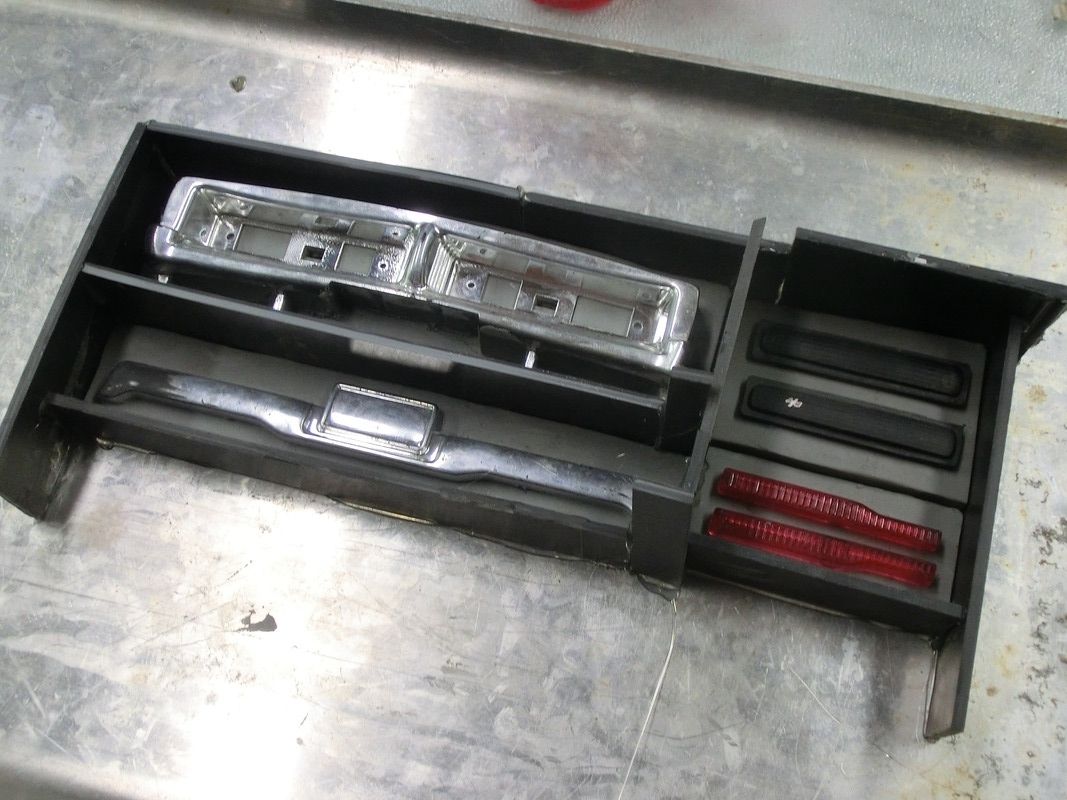 then poured the latex to make the molds. some of them are done at this point. 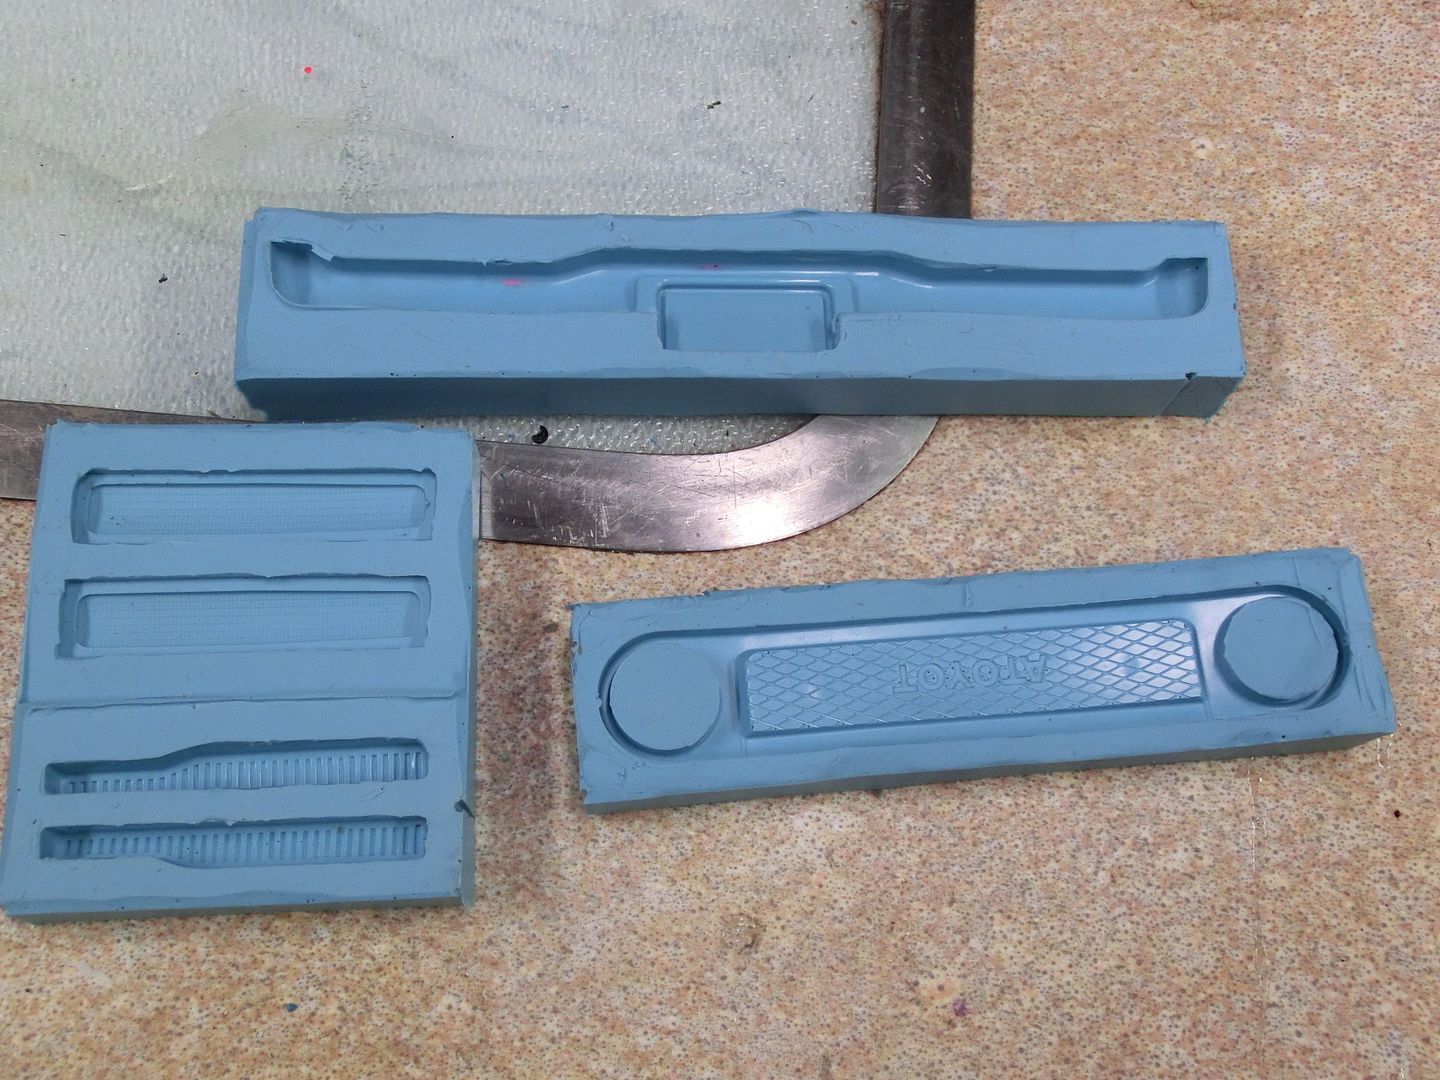 but the grill will be a 2 piece mold because if I left the back fill up when I poured the resin it would be way to thick and heavy. It got left in the lower half. 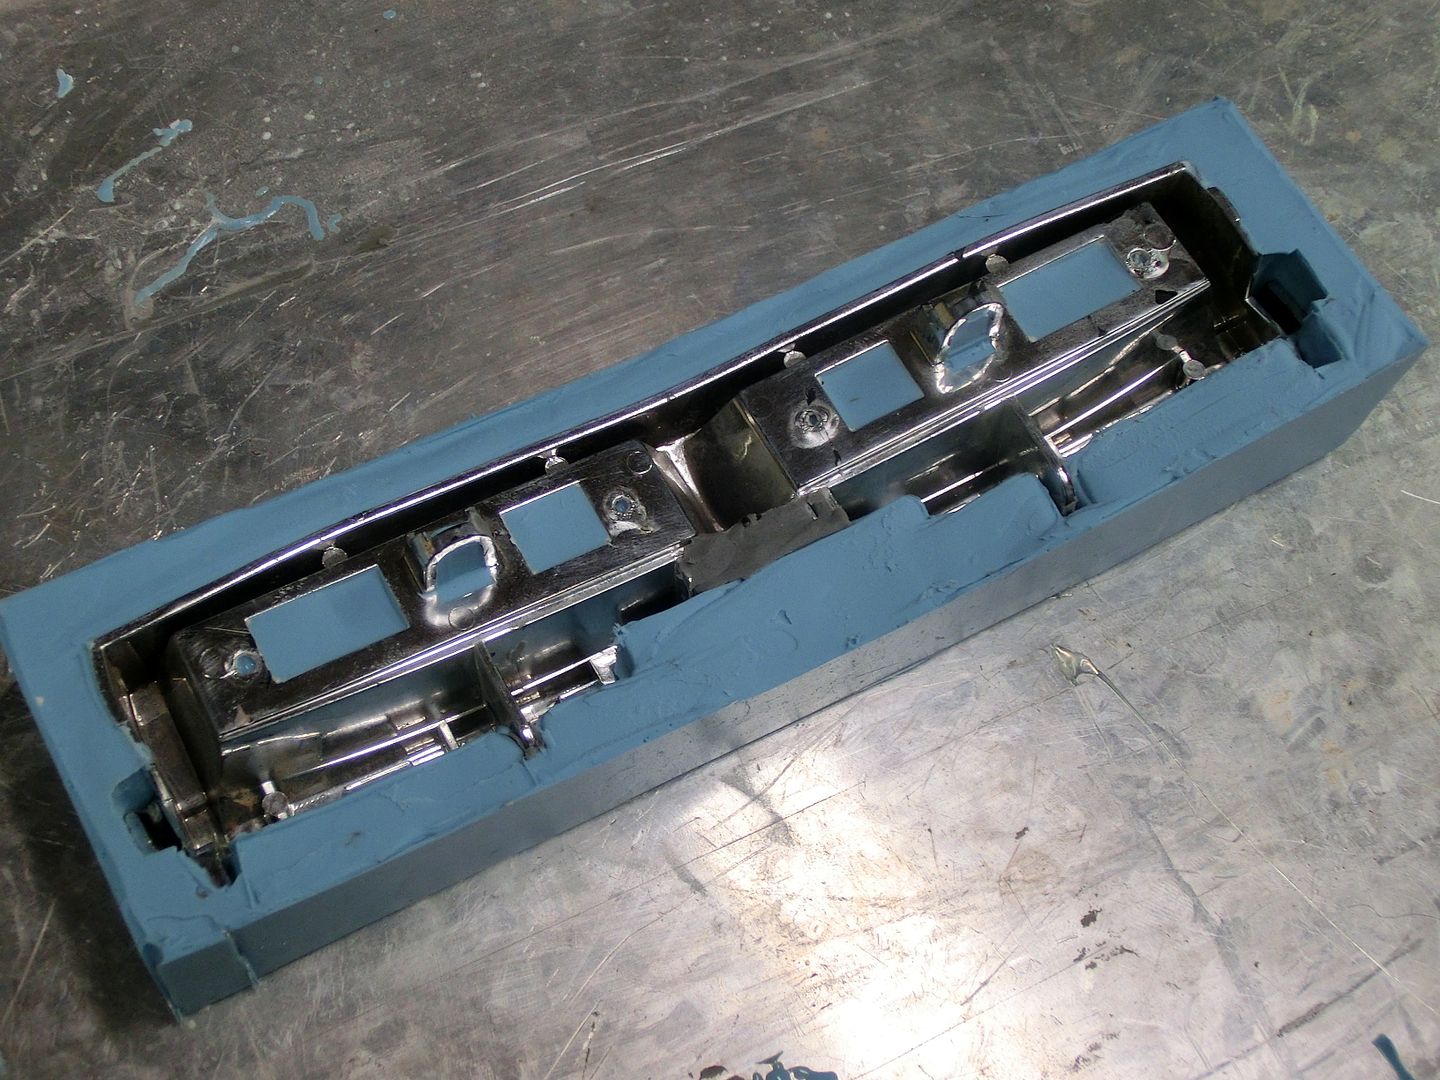 then once I poured the top half I had my mold. 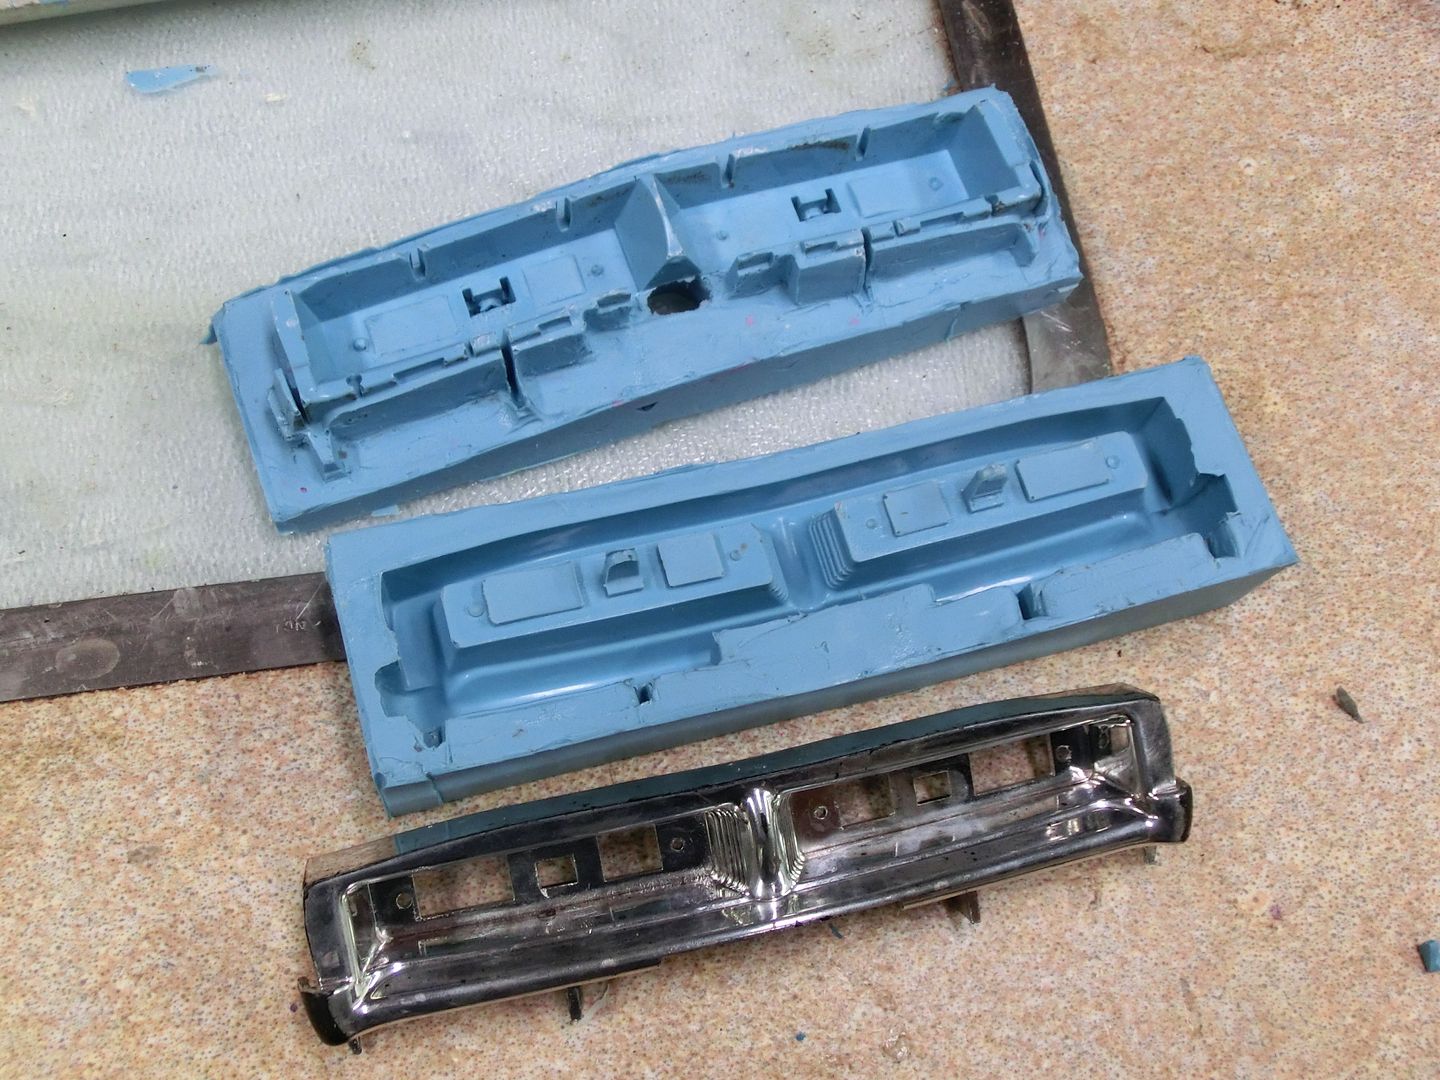 before I could do a test pour I had to vent the top half using a piece of brass tubing. 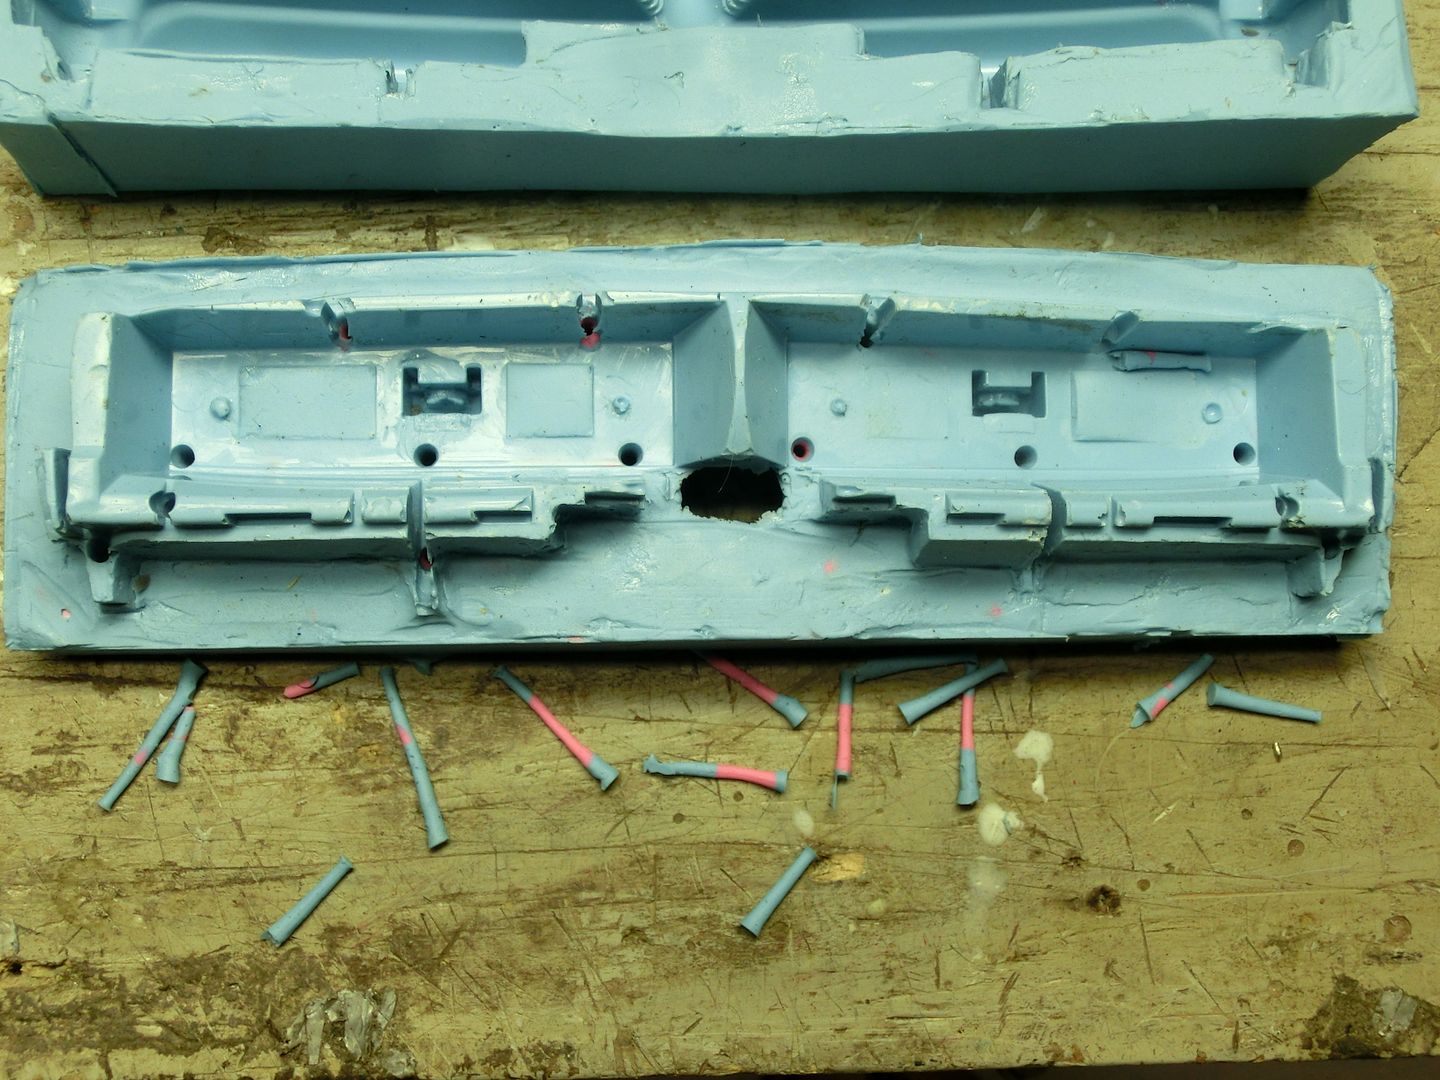 and here was the first test strait out of the mold 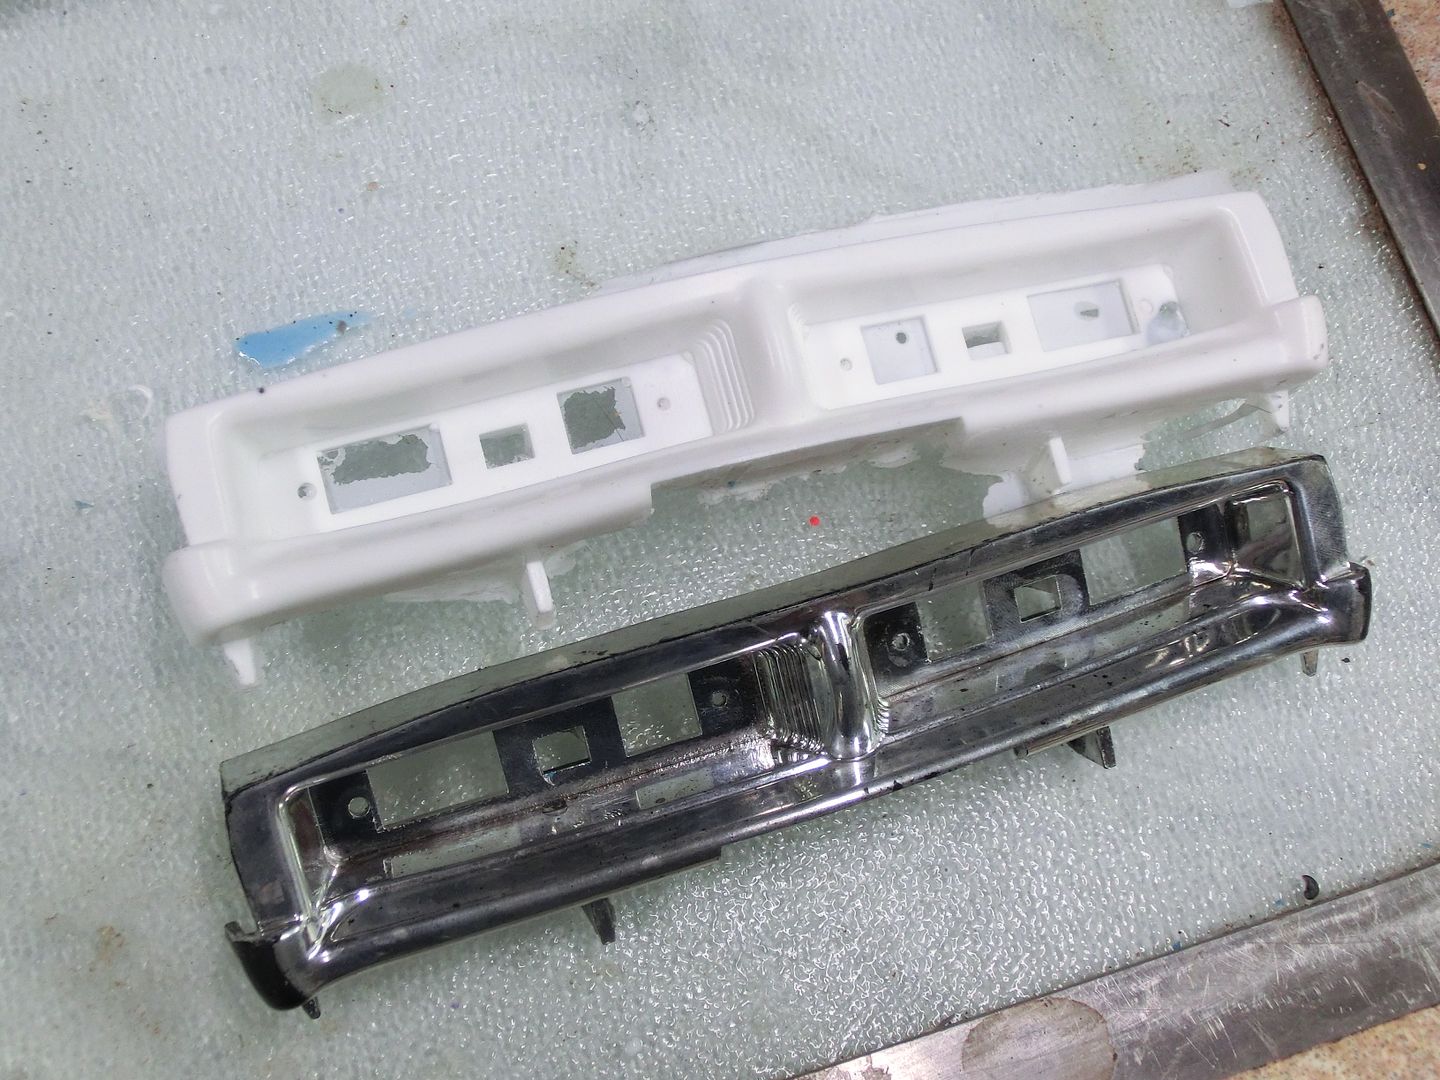 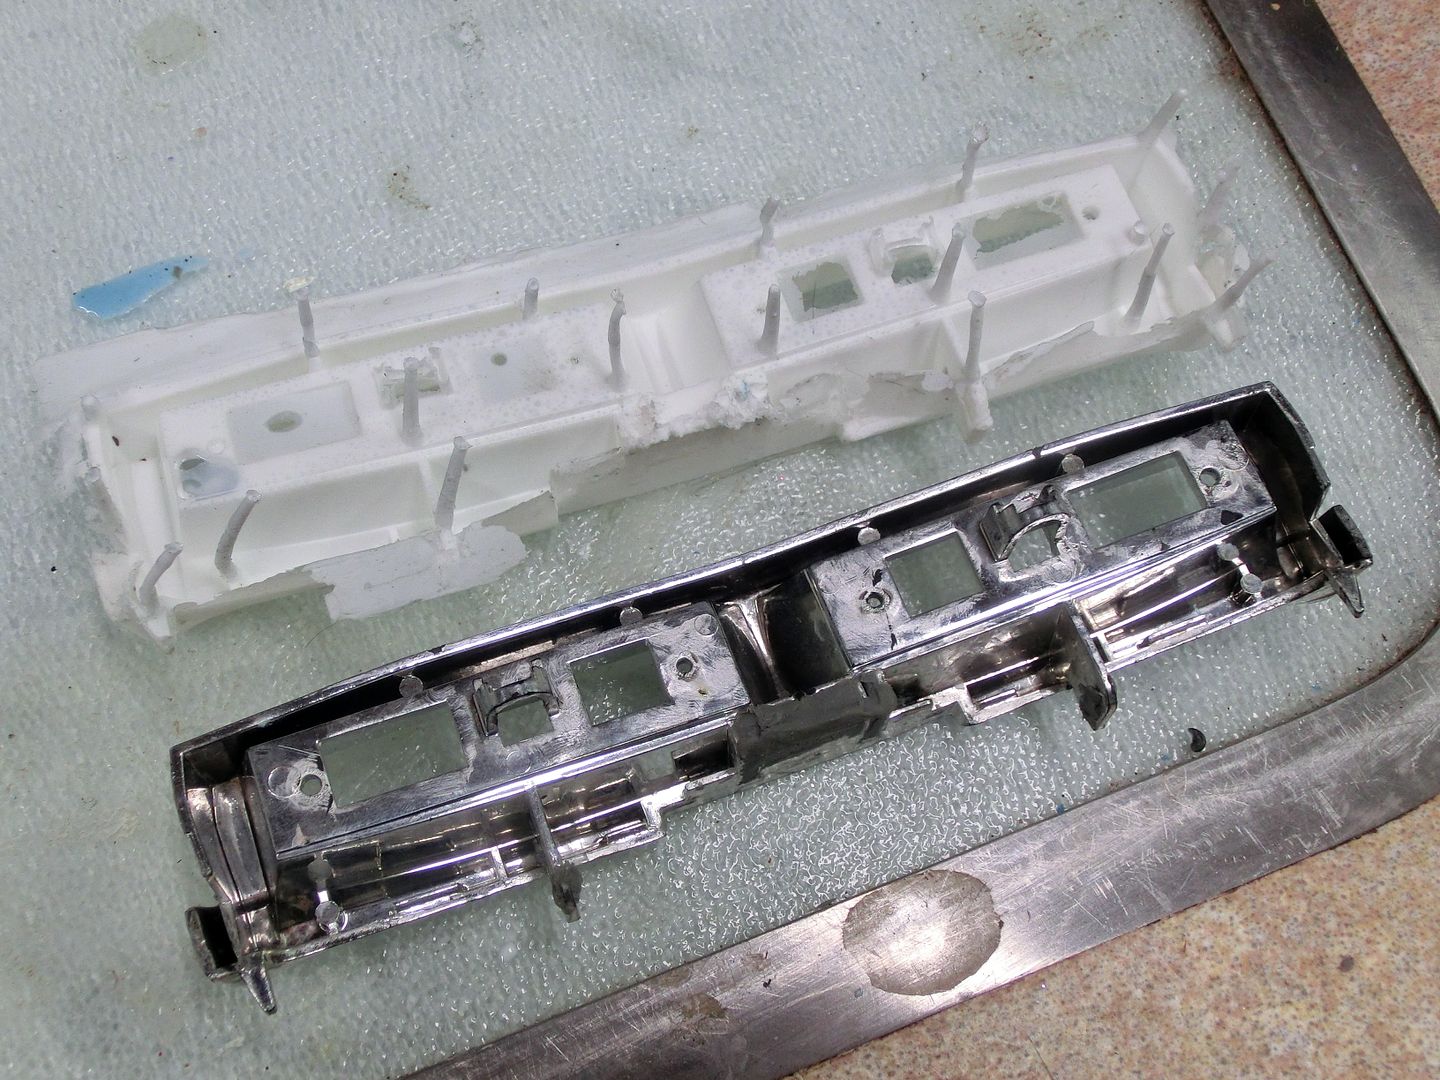 then I trimmed it up 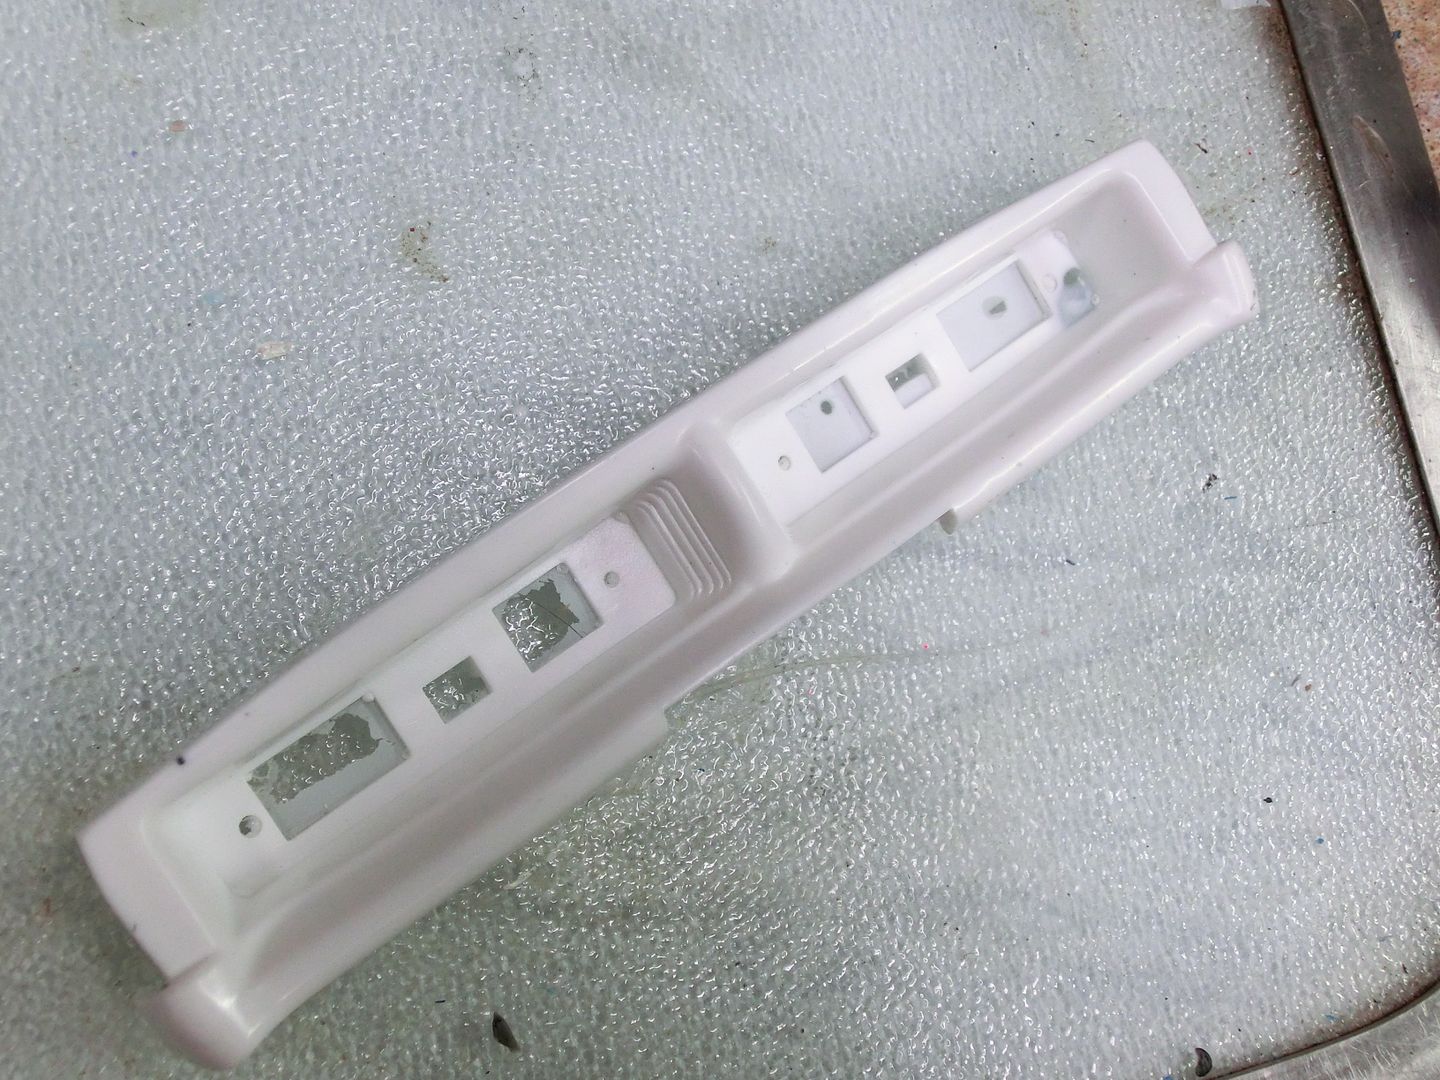 next I poured the inserts for the grill 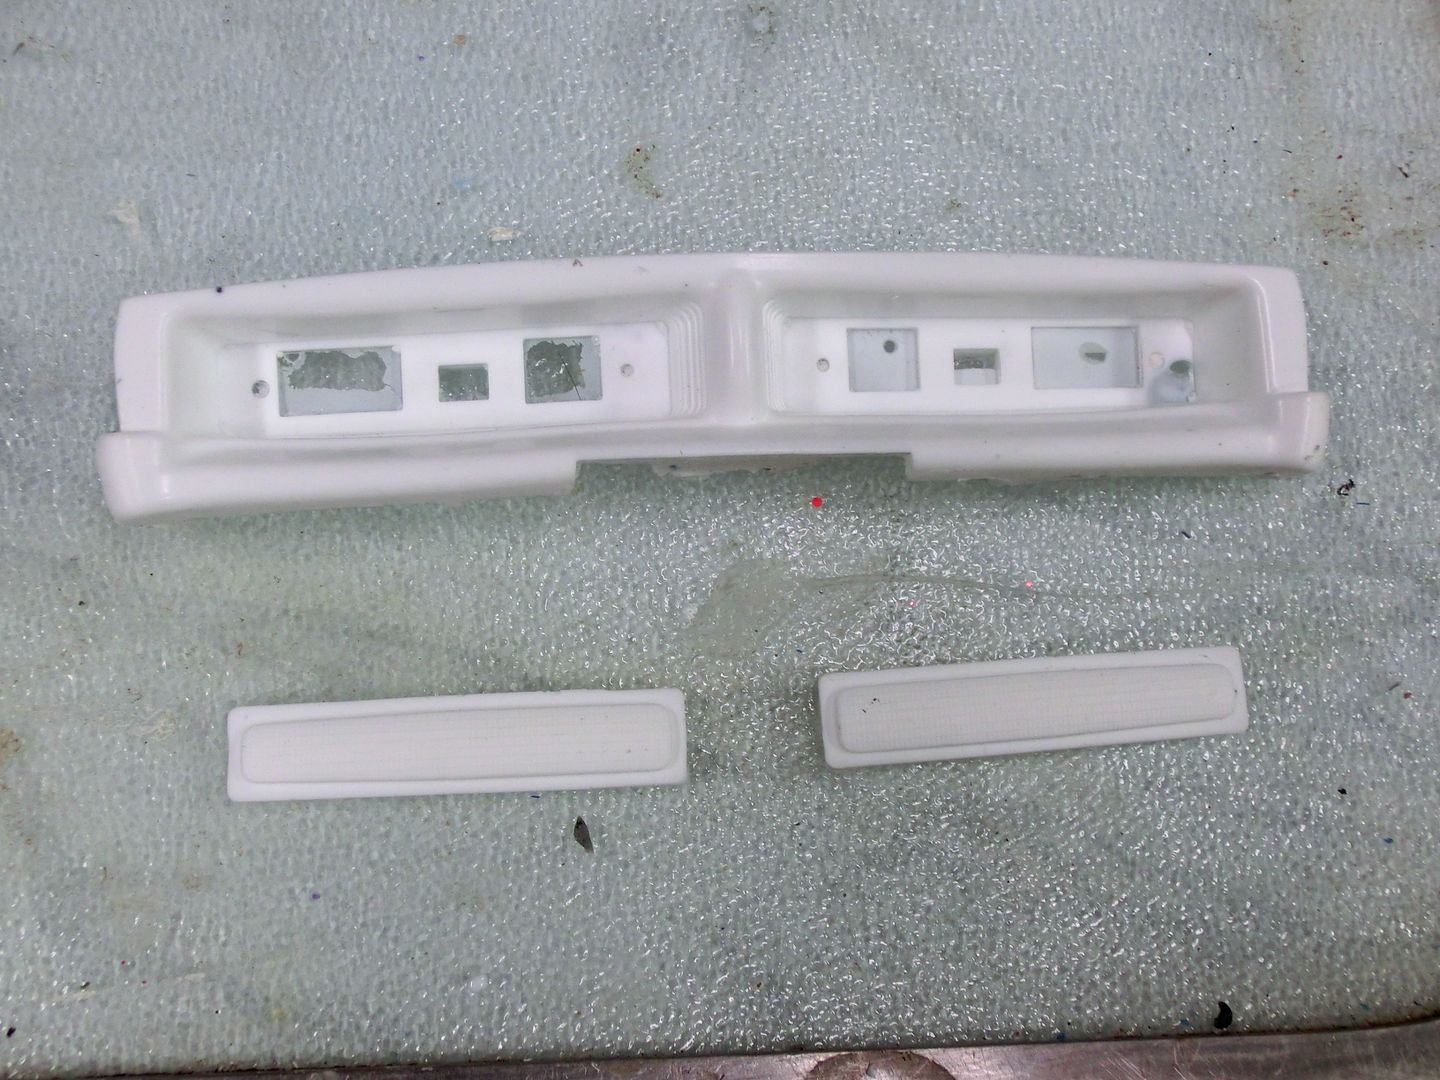 the detail is amazing 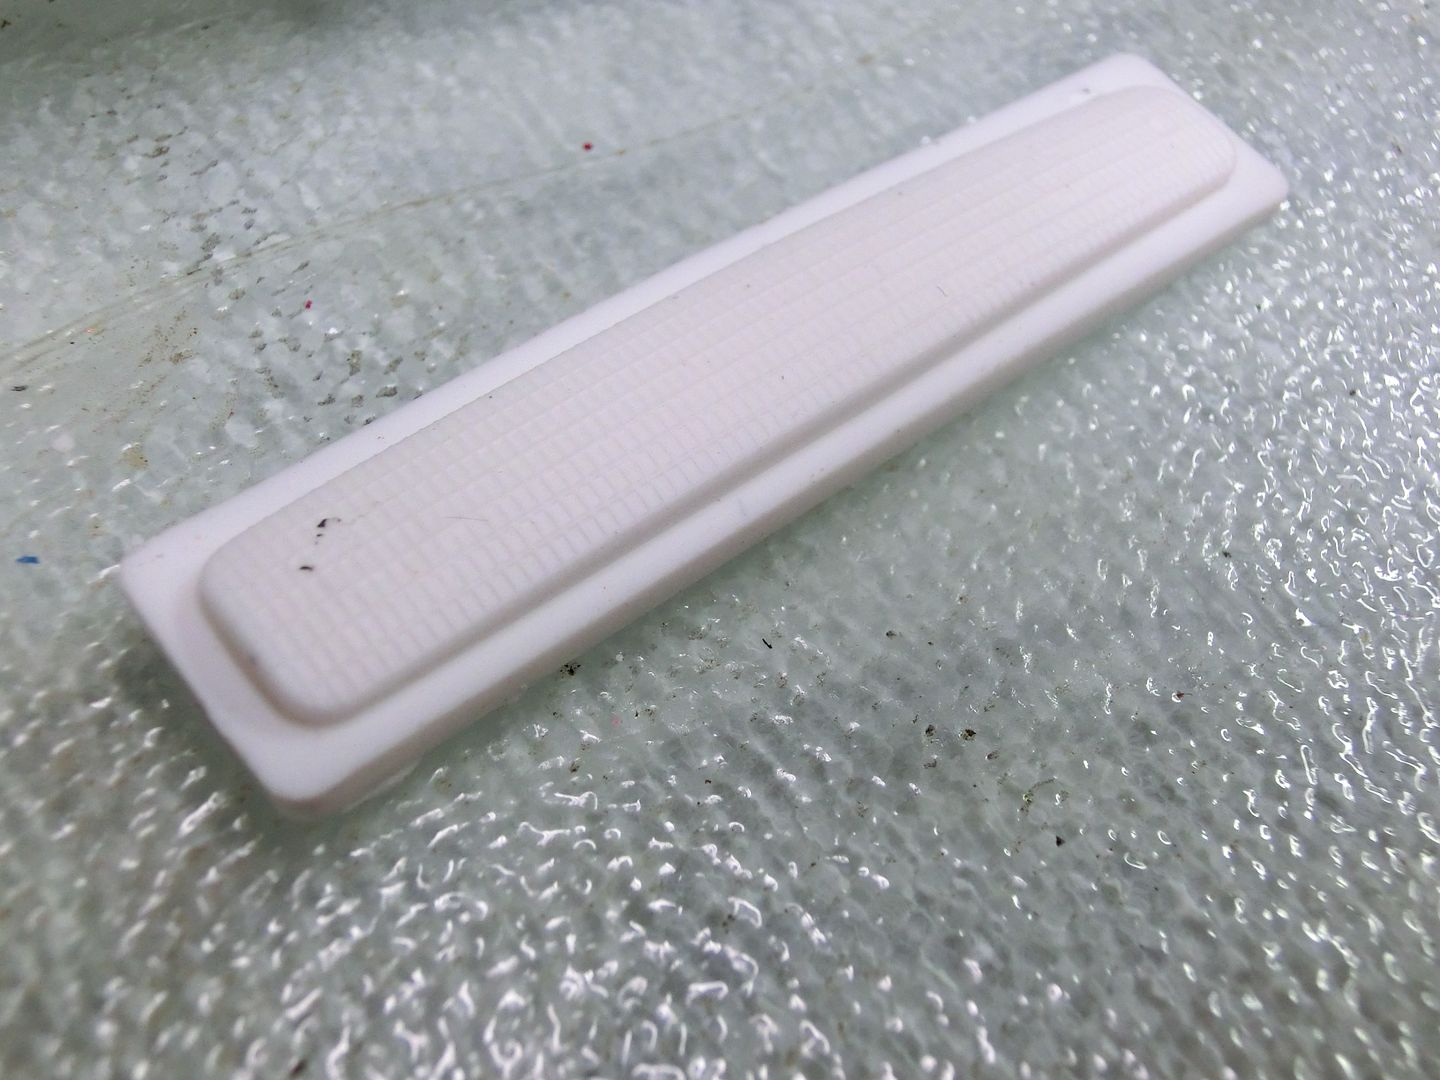 quick test fit and I'm happy 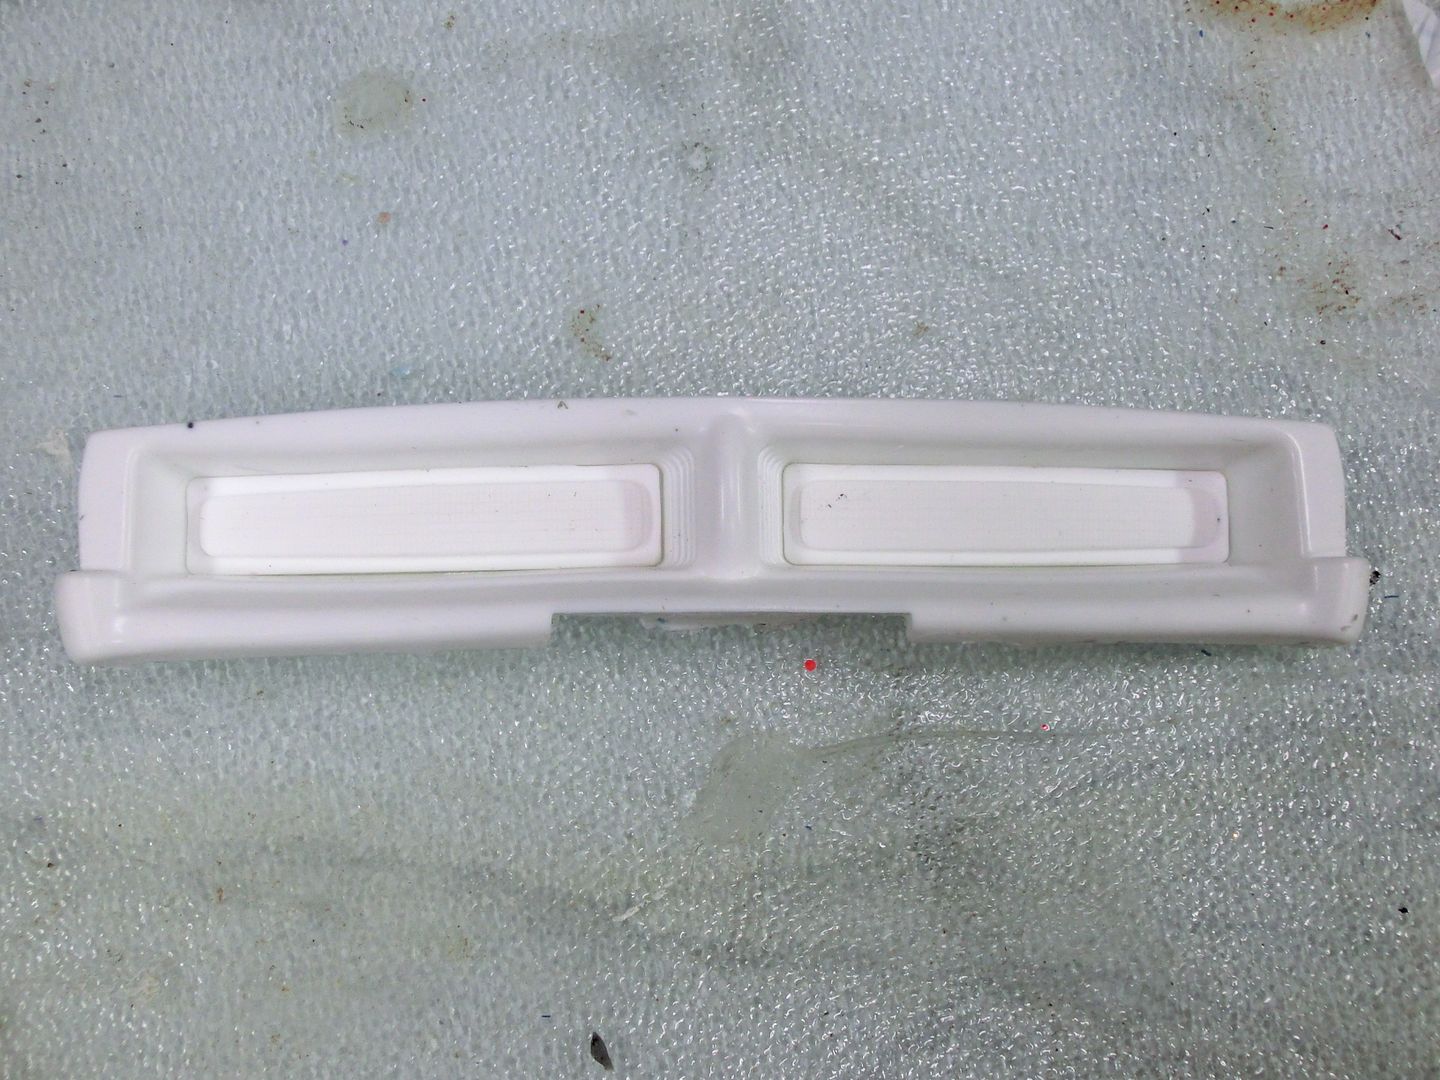 next I made the mold for the rear bumper. 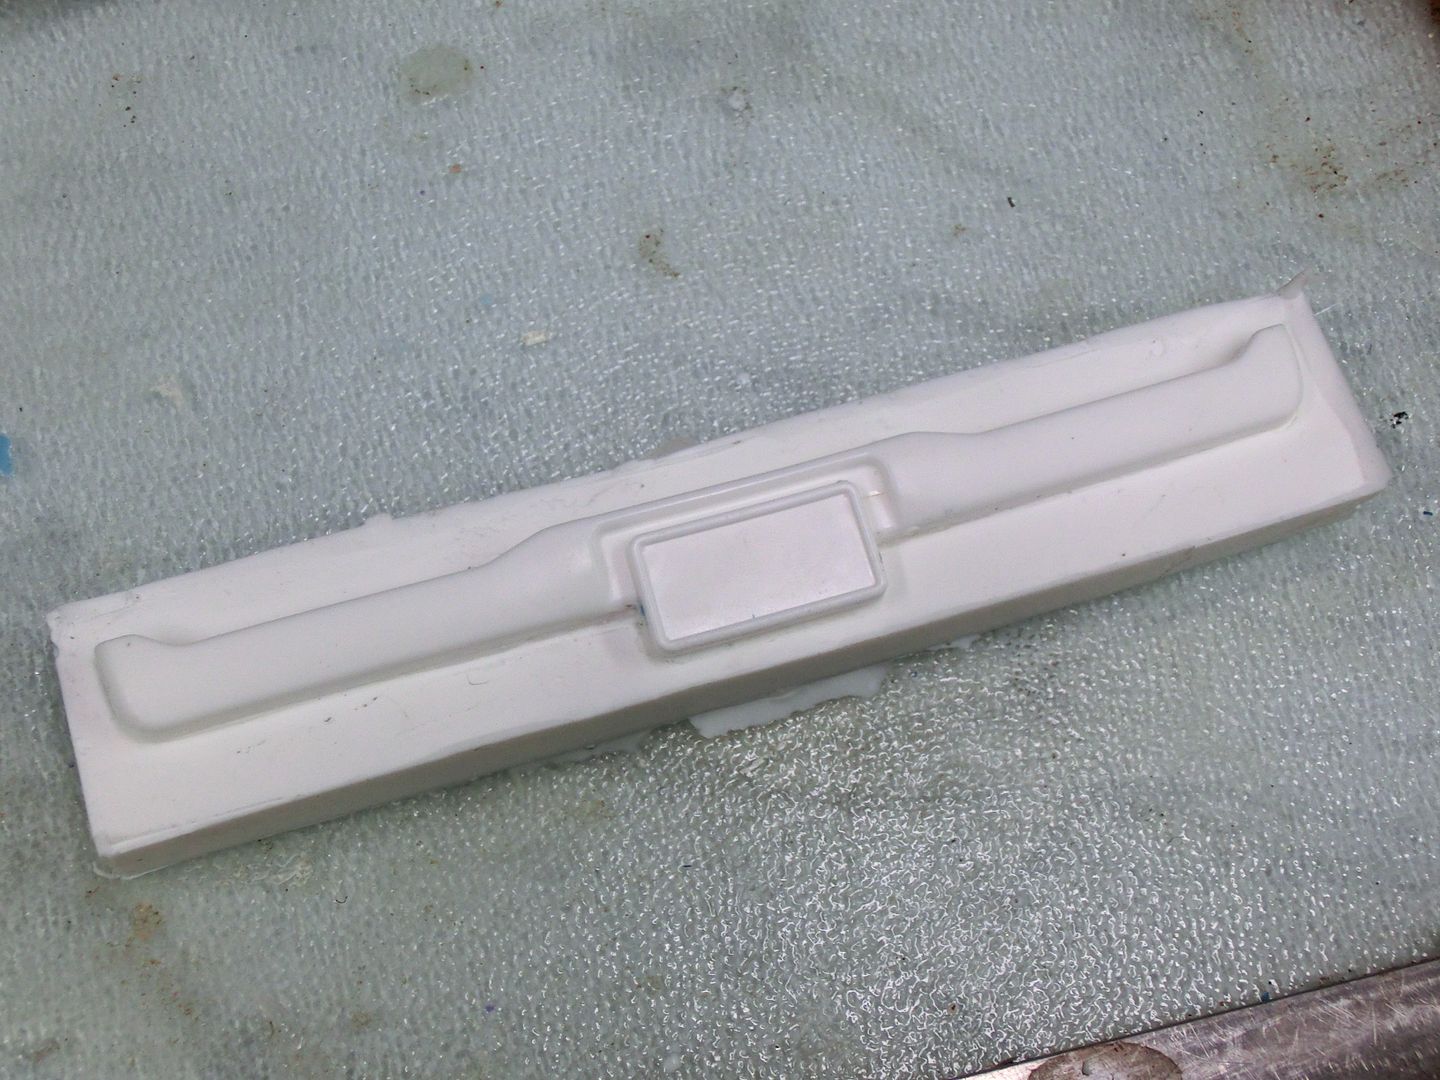 then using some .010 material, which is twice as thick as the body, I formed a rear bumper. 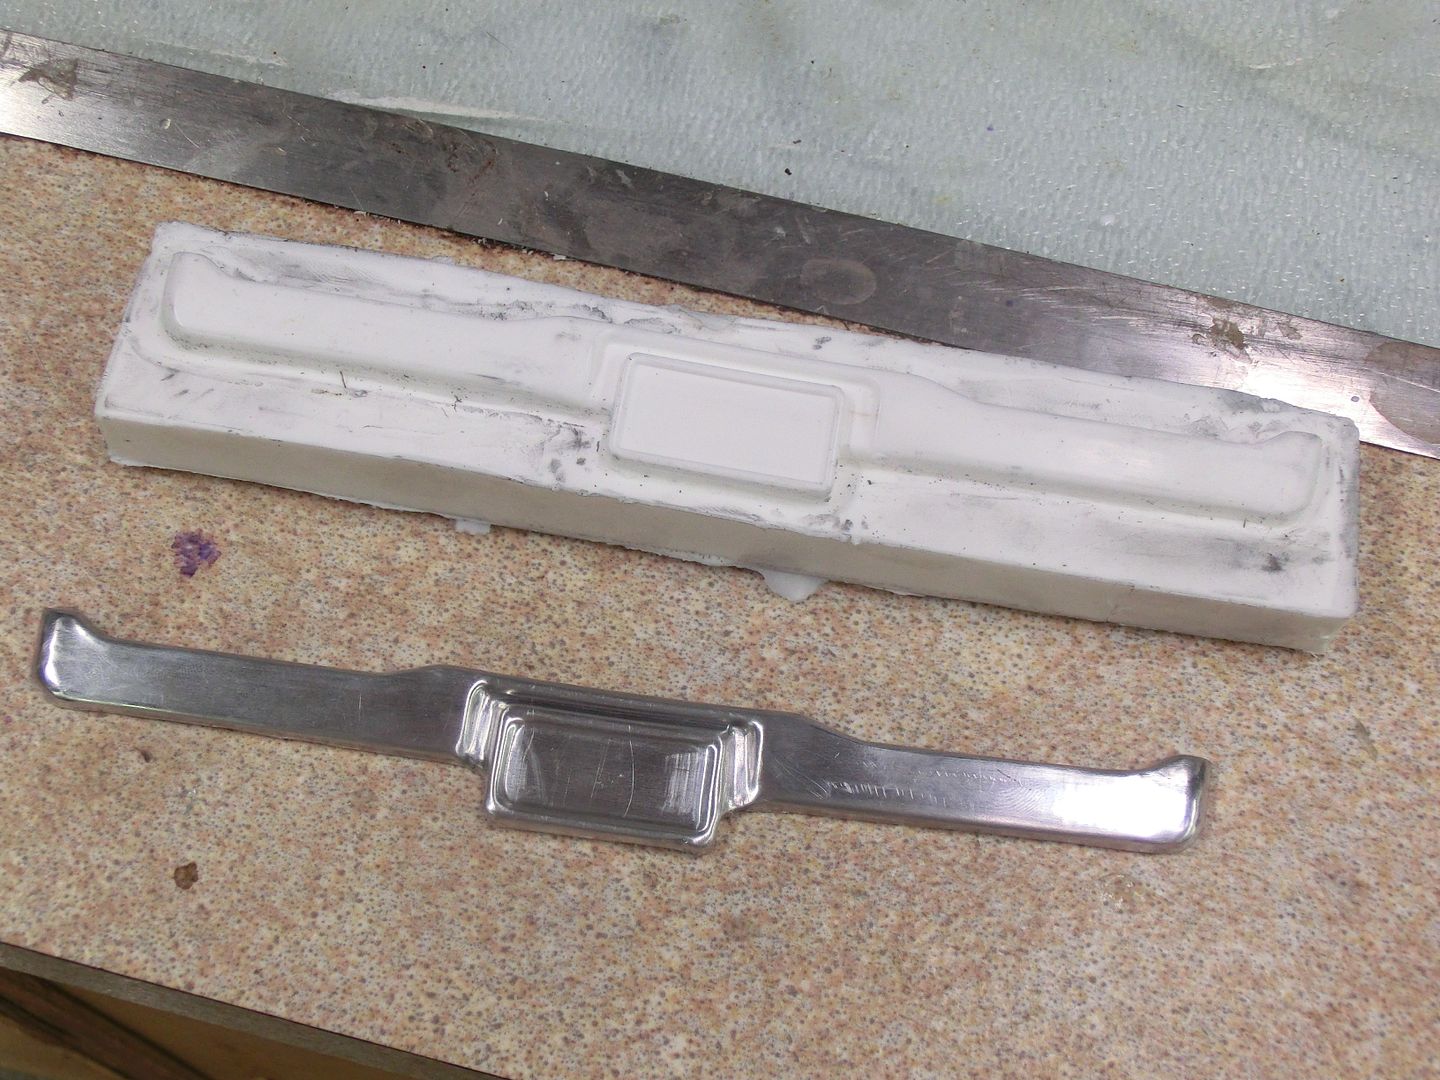 then just for kicks I tried polishing it and I think it came out pretty good. 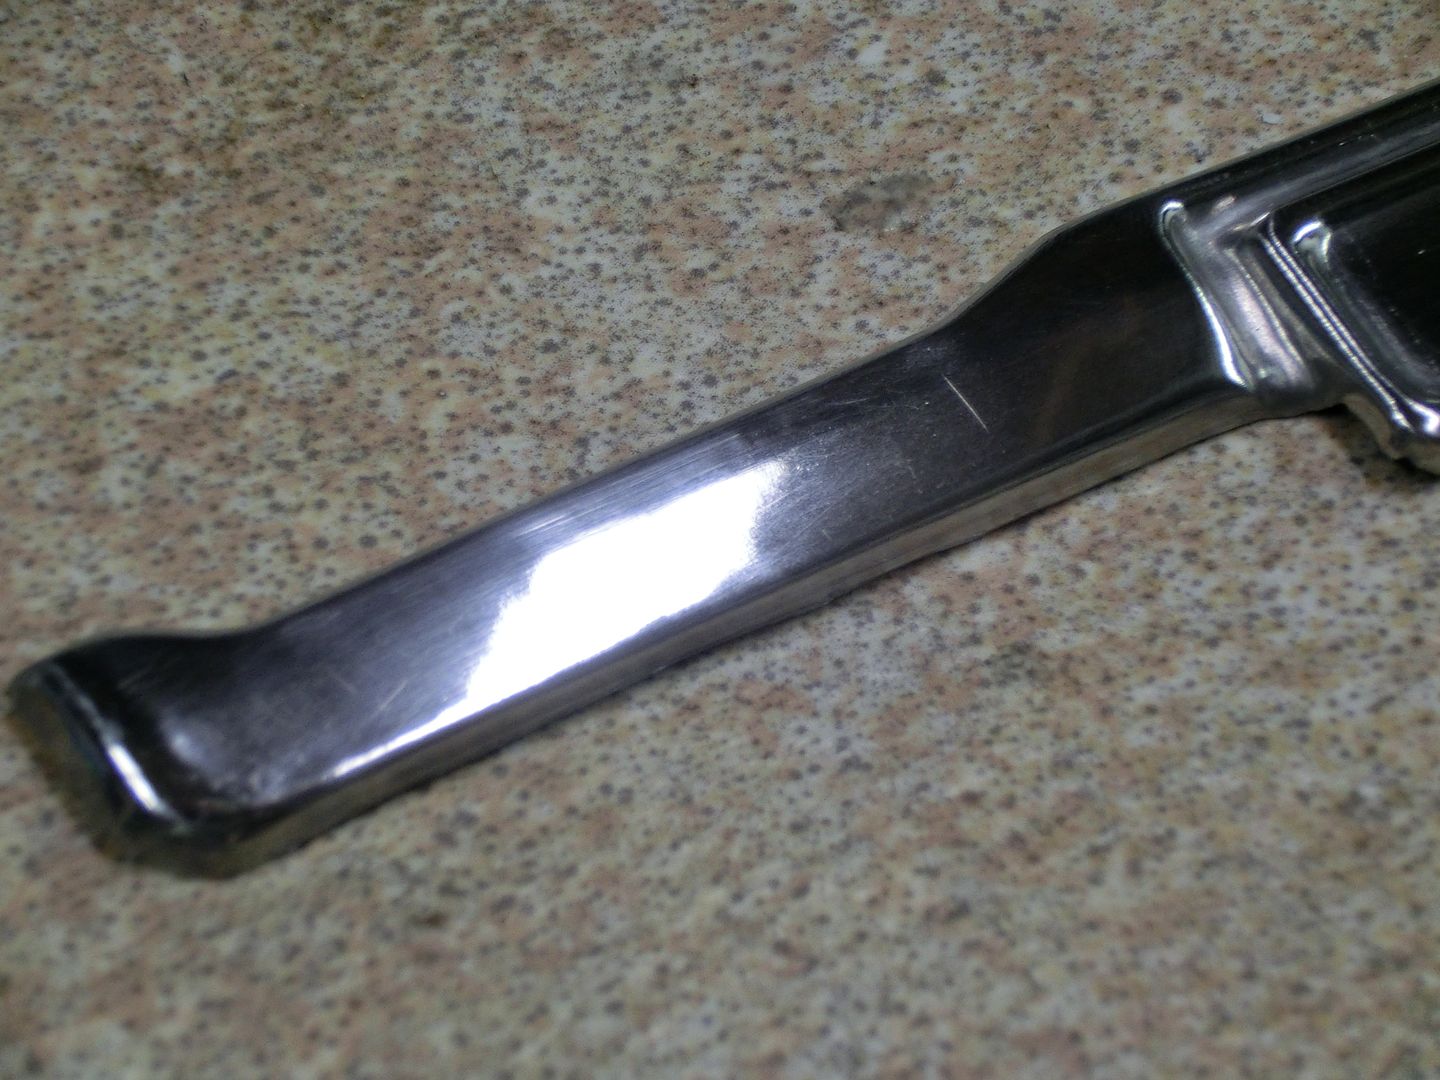 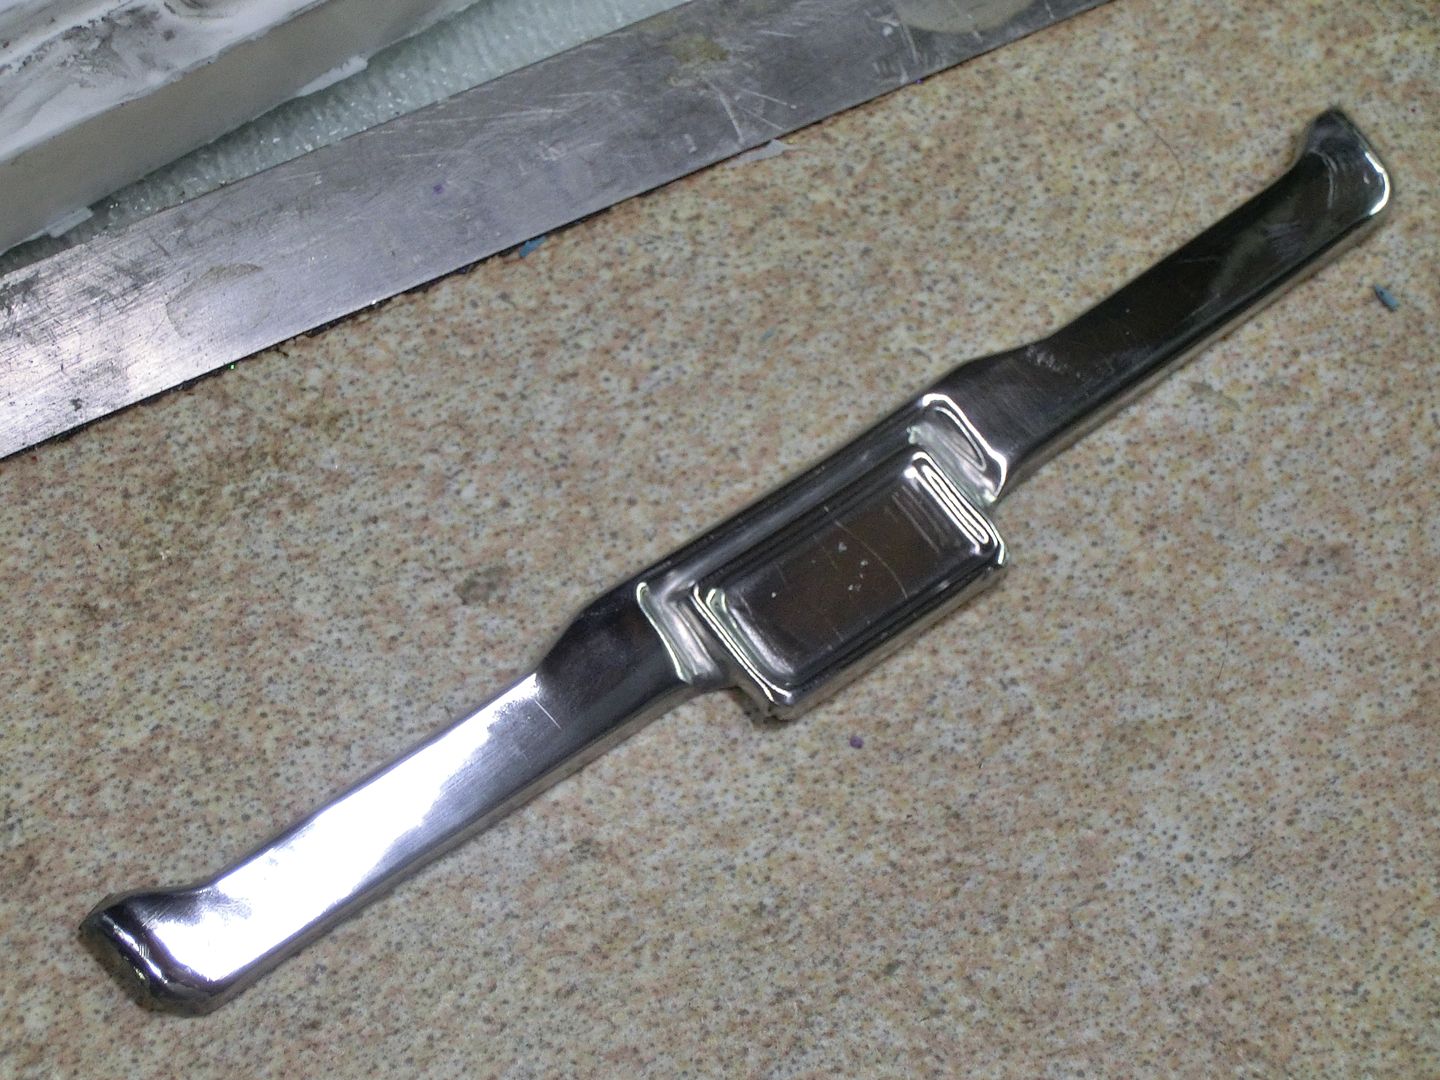 finally I painted the parts up in silver and flat black 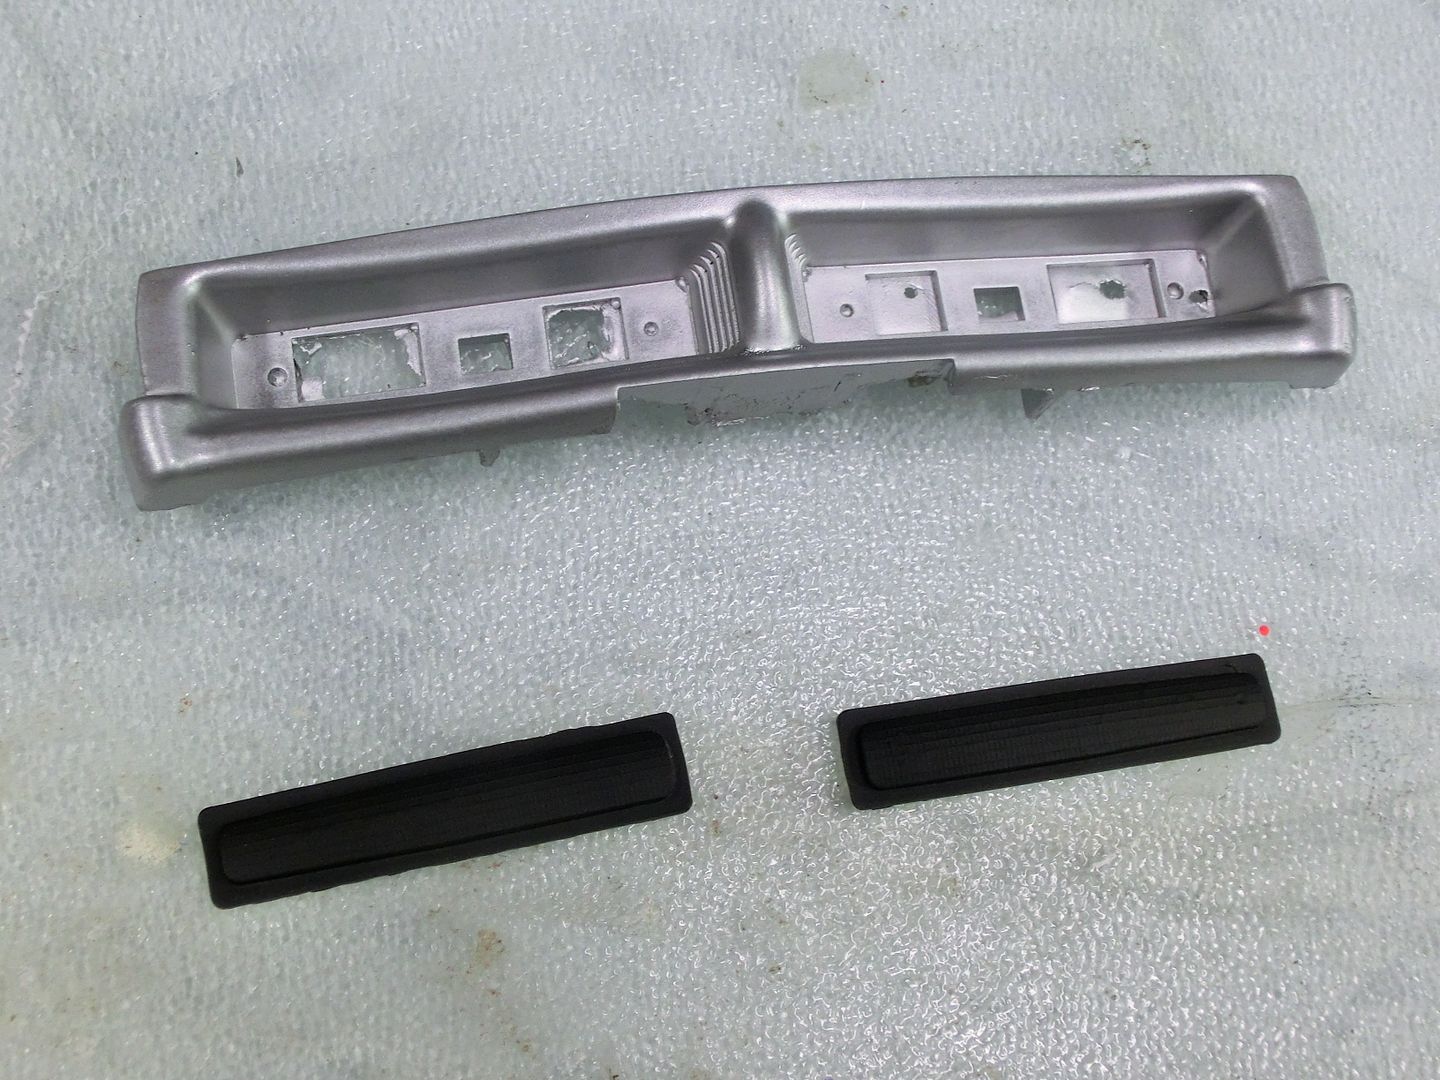 and did a quick test fit. Now it looks like a Charger! 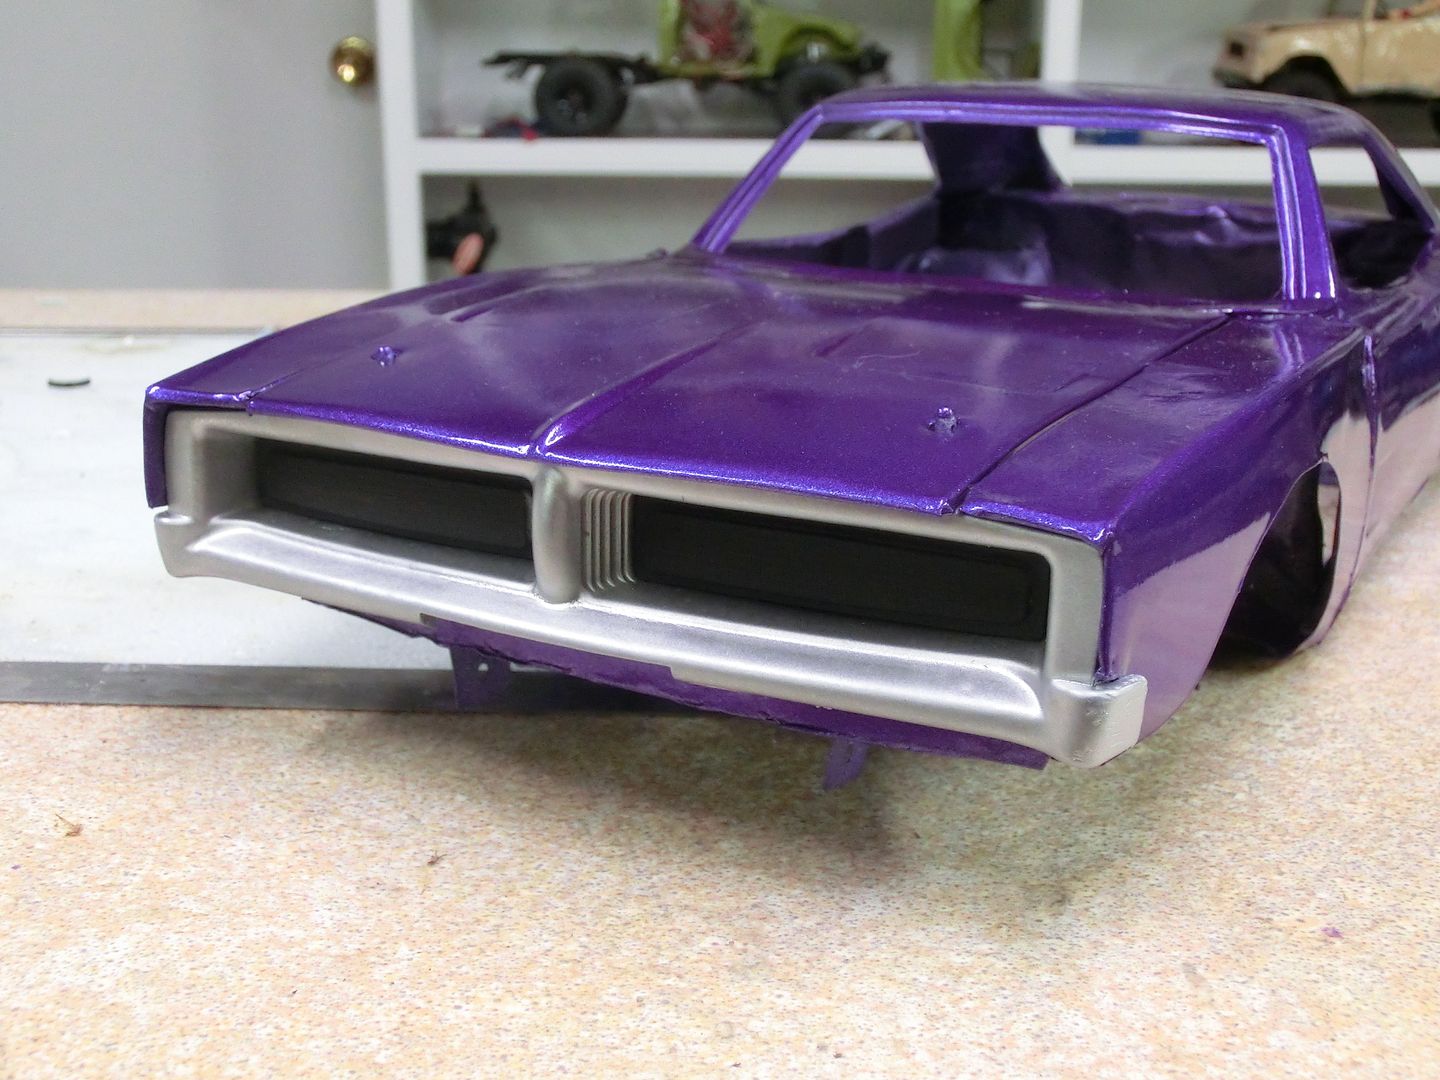 More later |
| |  |
| | #35 |
| Rock Crawler  Join Date: Jun 2015 Location: In the Sticks in the Ozarks
Posts: 940
|
Totally AMAZING work !! You've got me wanting to try making some fenders and bumpers for my '53 Ford. I'll have to check your 'Yota again, and other builds to get some pointers. Thanks for sharing these builds. |
| |  |
| | #36 |
| Newbie Join Date: Aug 2015 Location: US
Posts: 5
|
Amazing simply amazing. Sent from my HTC6525LVW using Tapatalk |
| |  |
| | #37 | |
| RCC Addict  Join Date: Aug 2005 Location: New Oxford PA
Posts: 1,290
| Quote:
more progress. I finished brazing the chassis and taking my wife's suggestion, painted it silver this time. 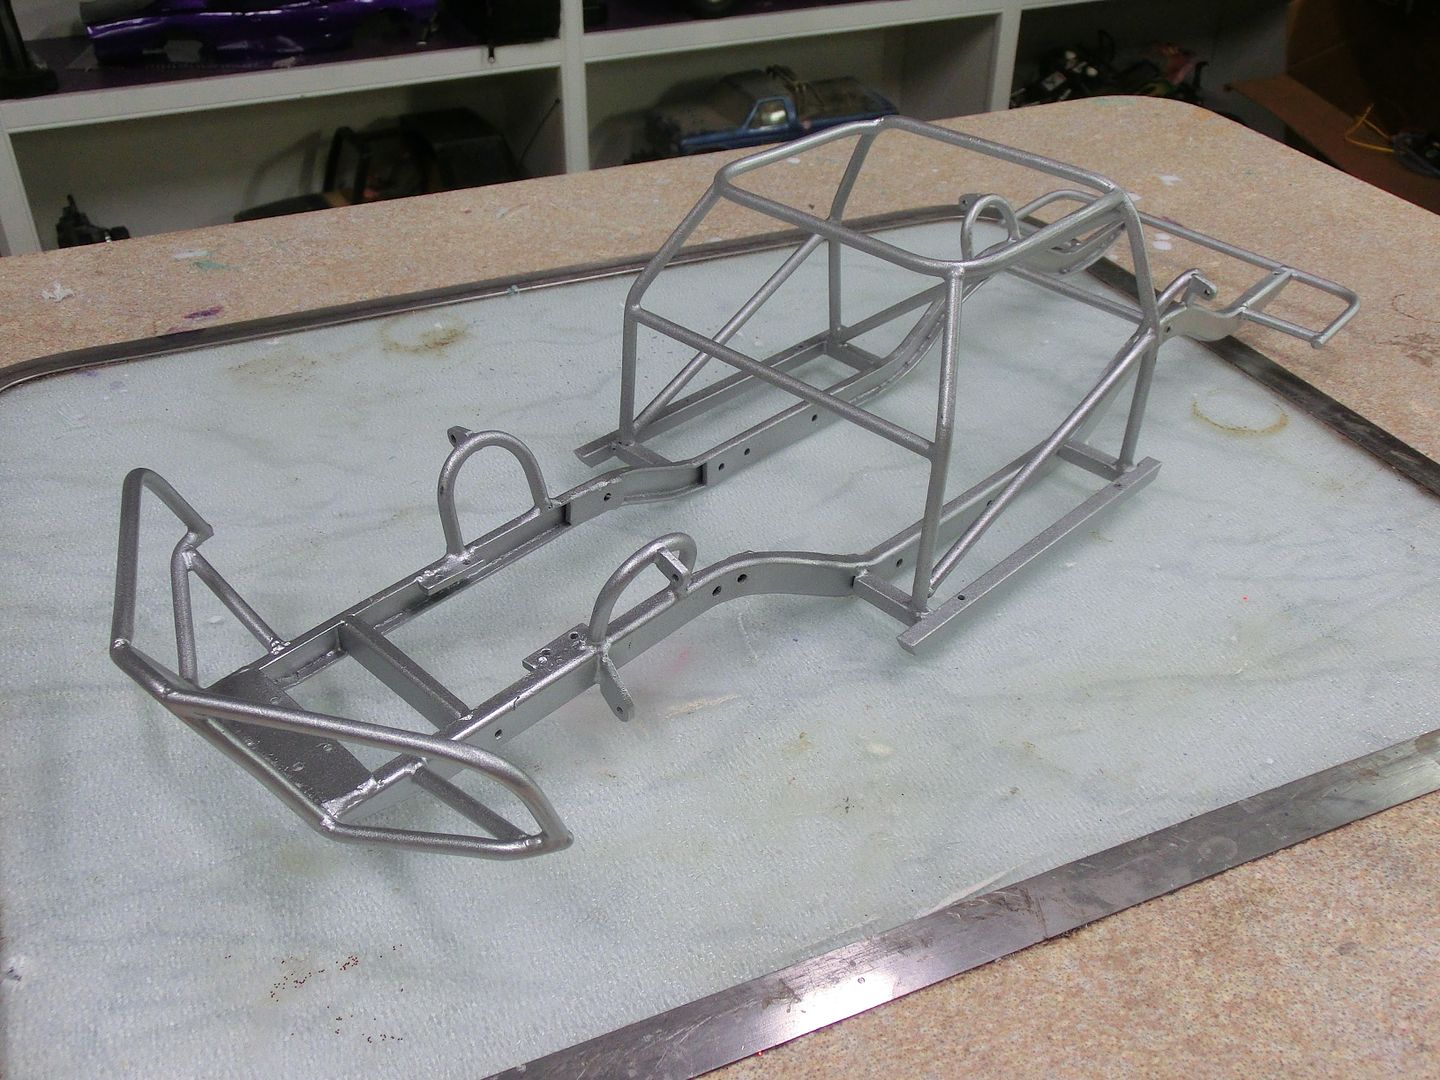 then I bent up a floor using the back of an old bus side mirror. 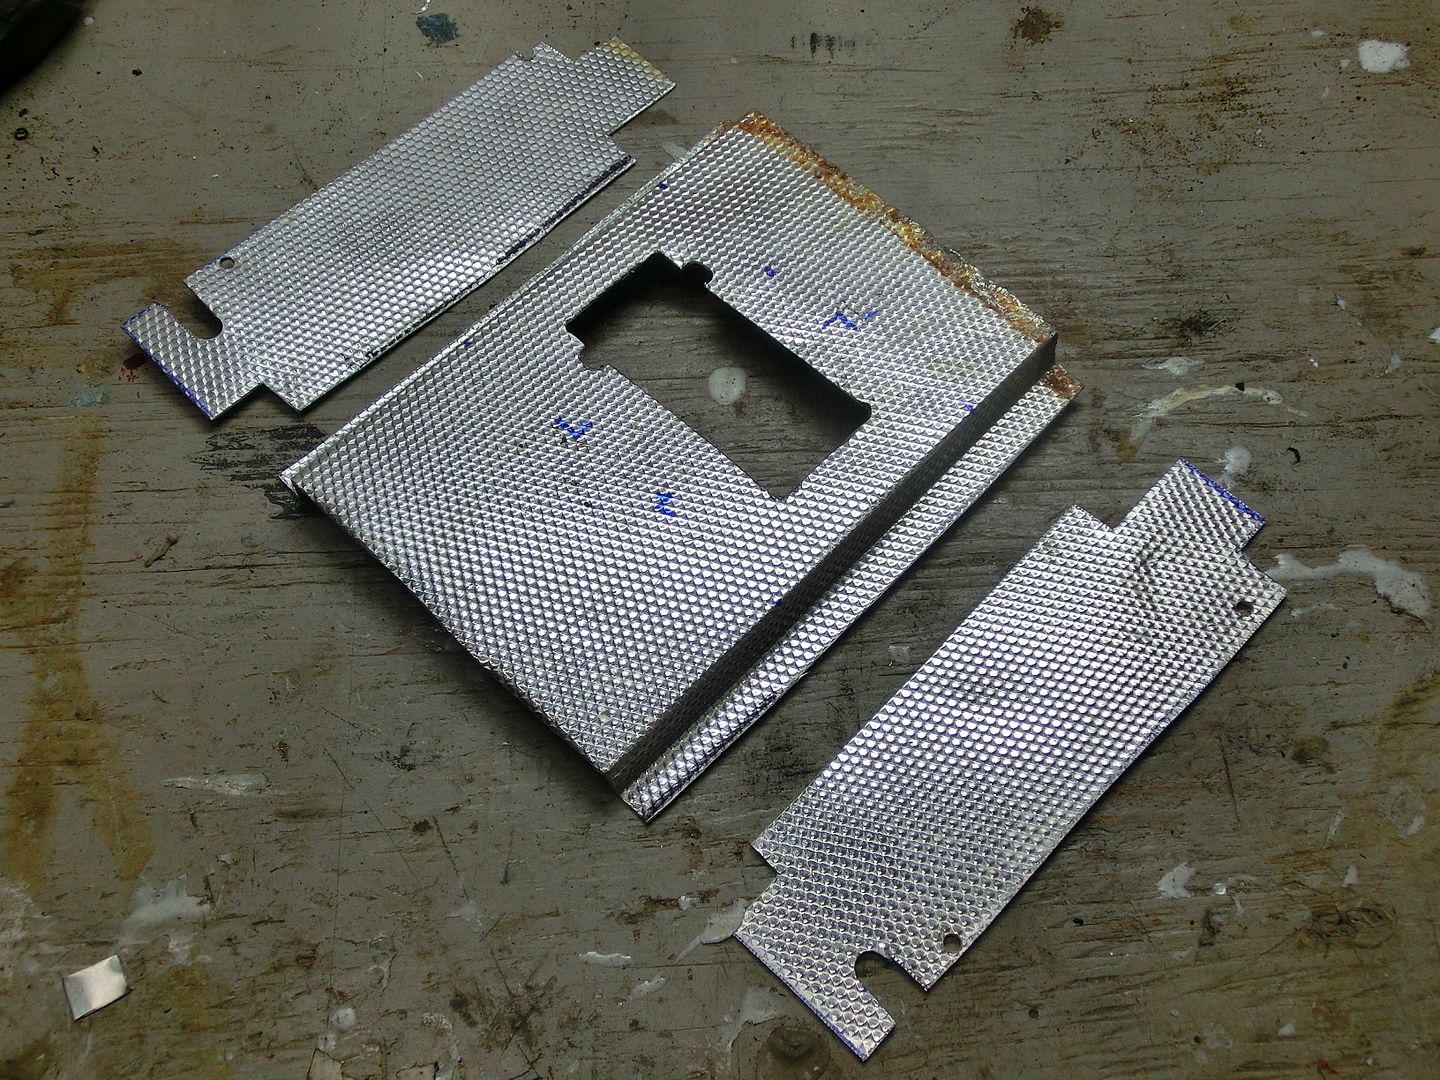 then mounted it to the chassis 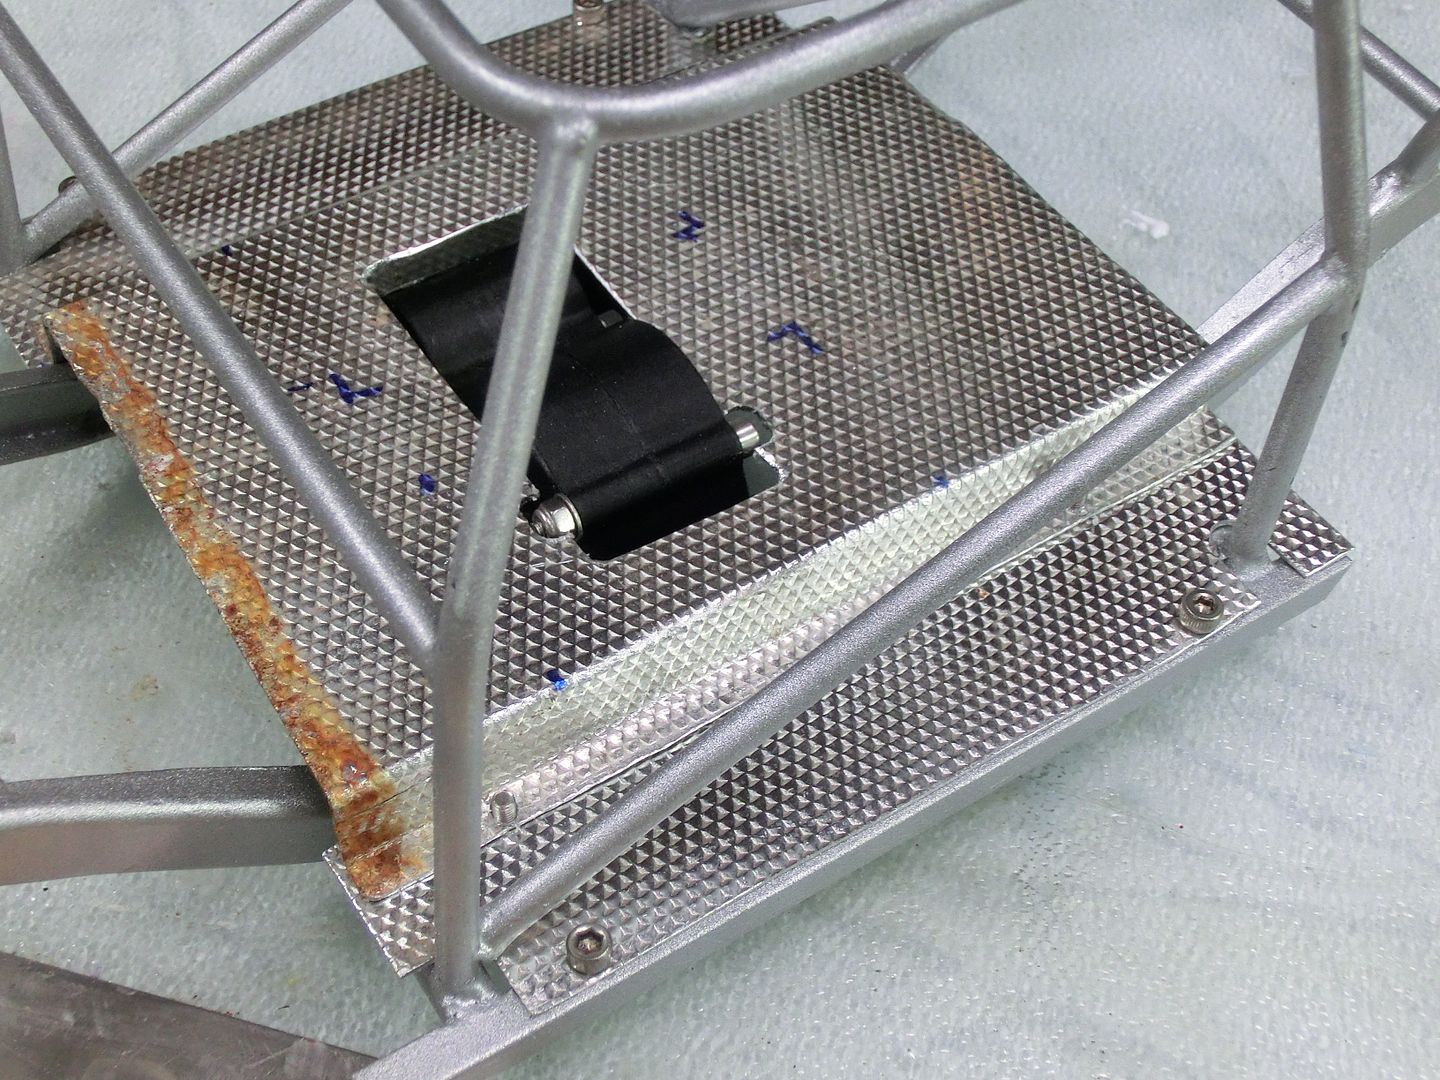 then glued the seats down 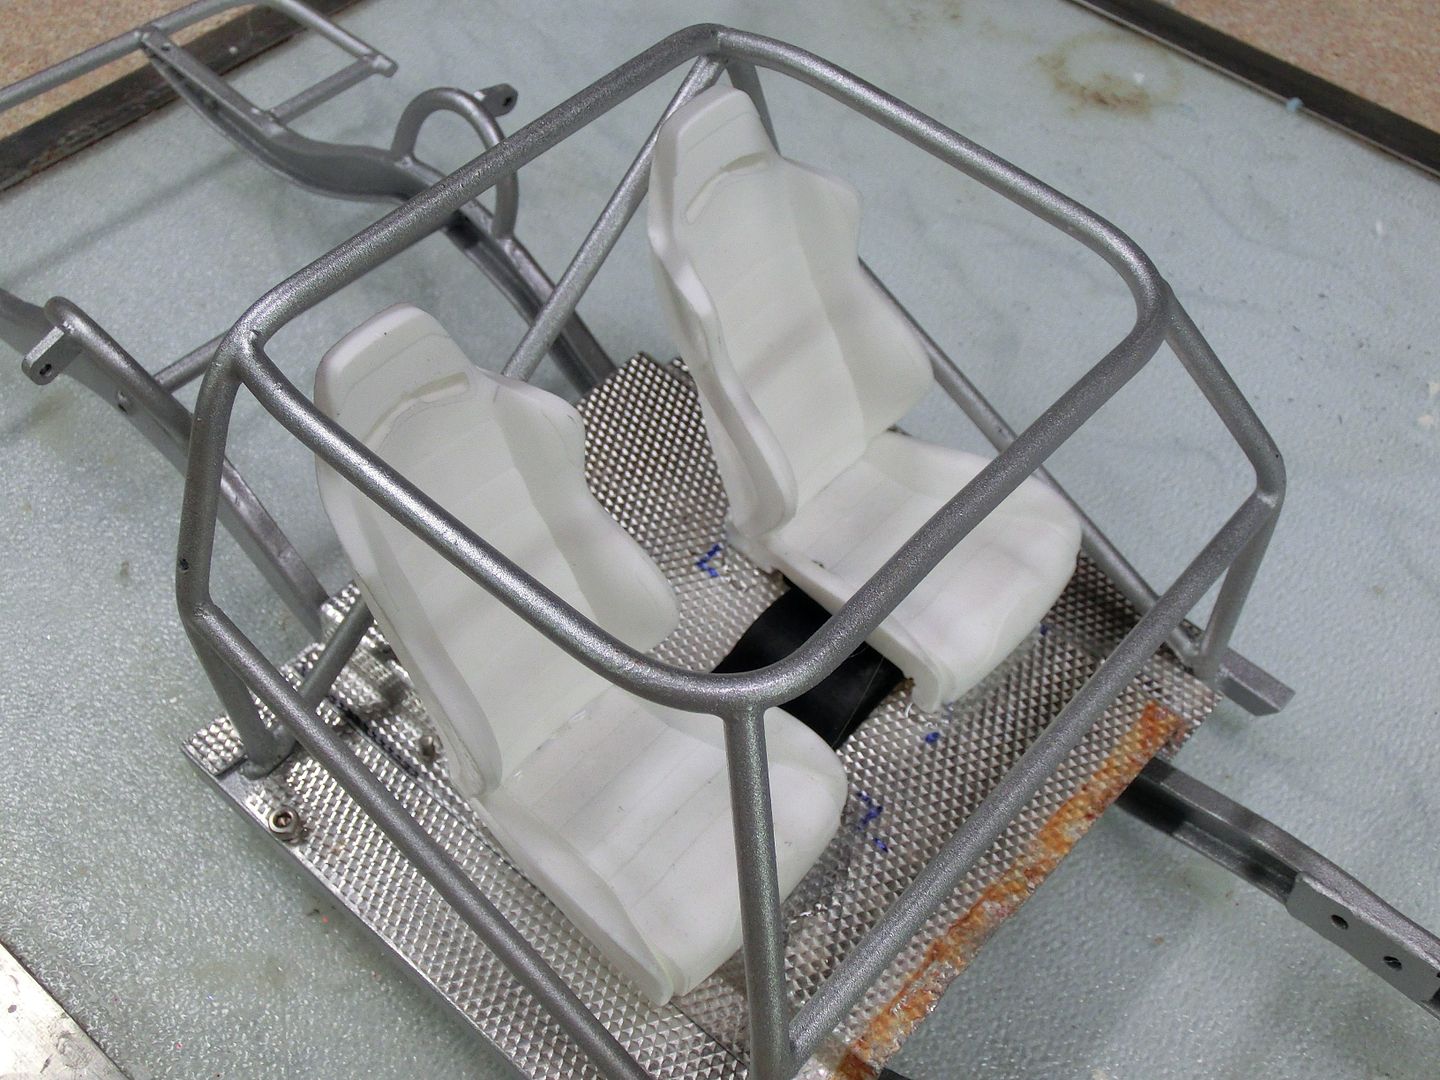 I realized after I did that that I could not remove the interior now so I said the heck with it and left it the color it was. before long the chassis was rolling again 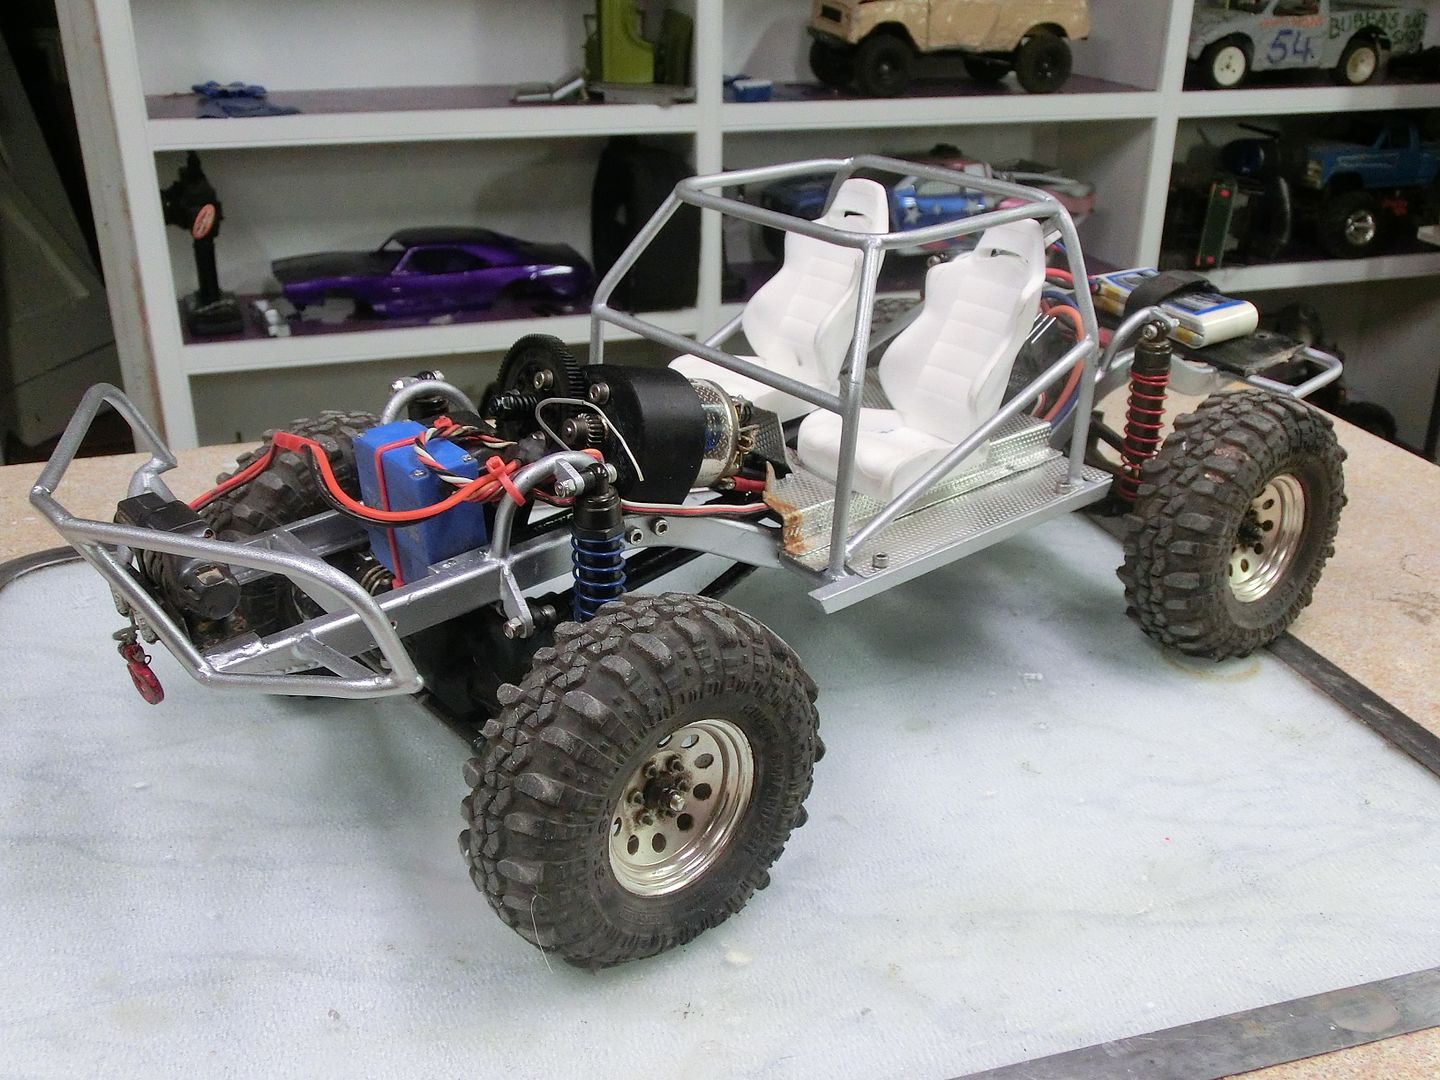 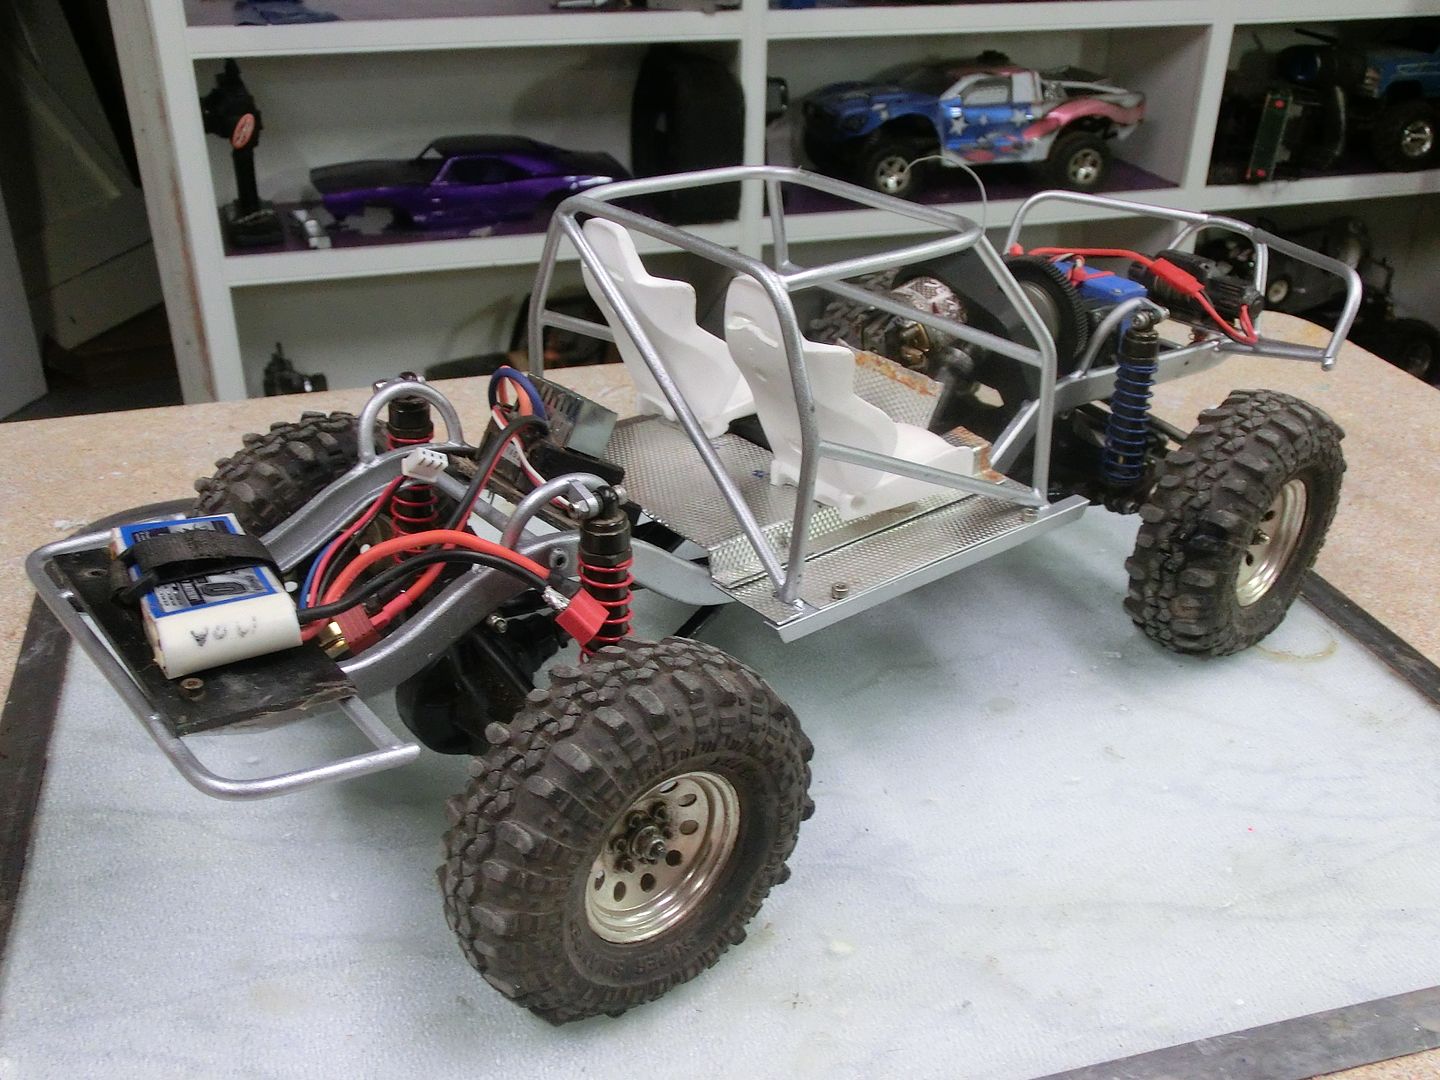 I had to make some clearance to the floor for the drivetrain but otherwise everything fit good. 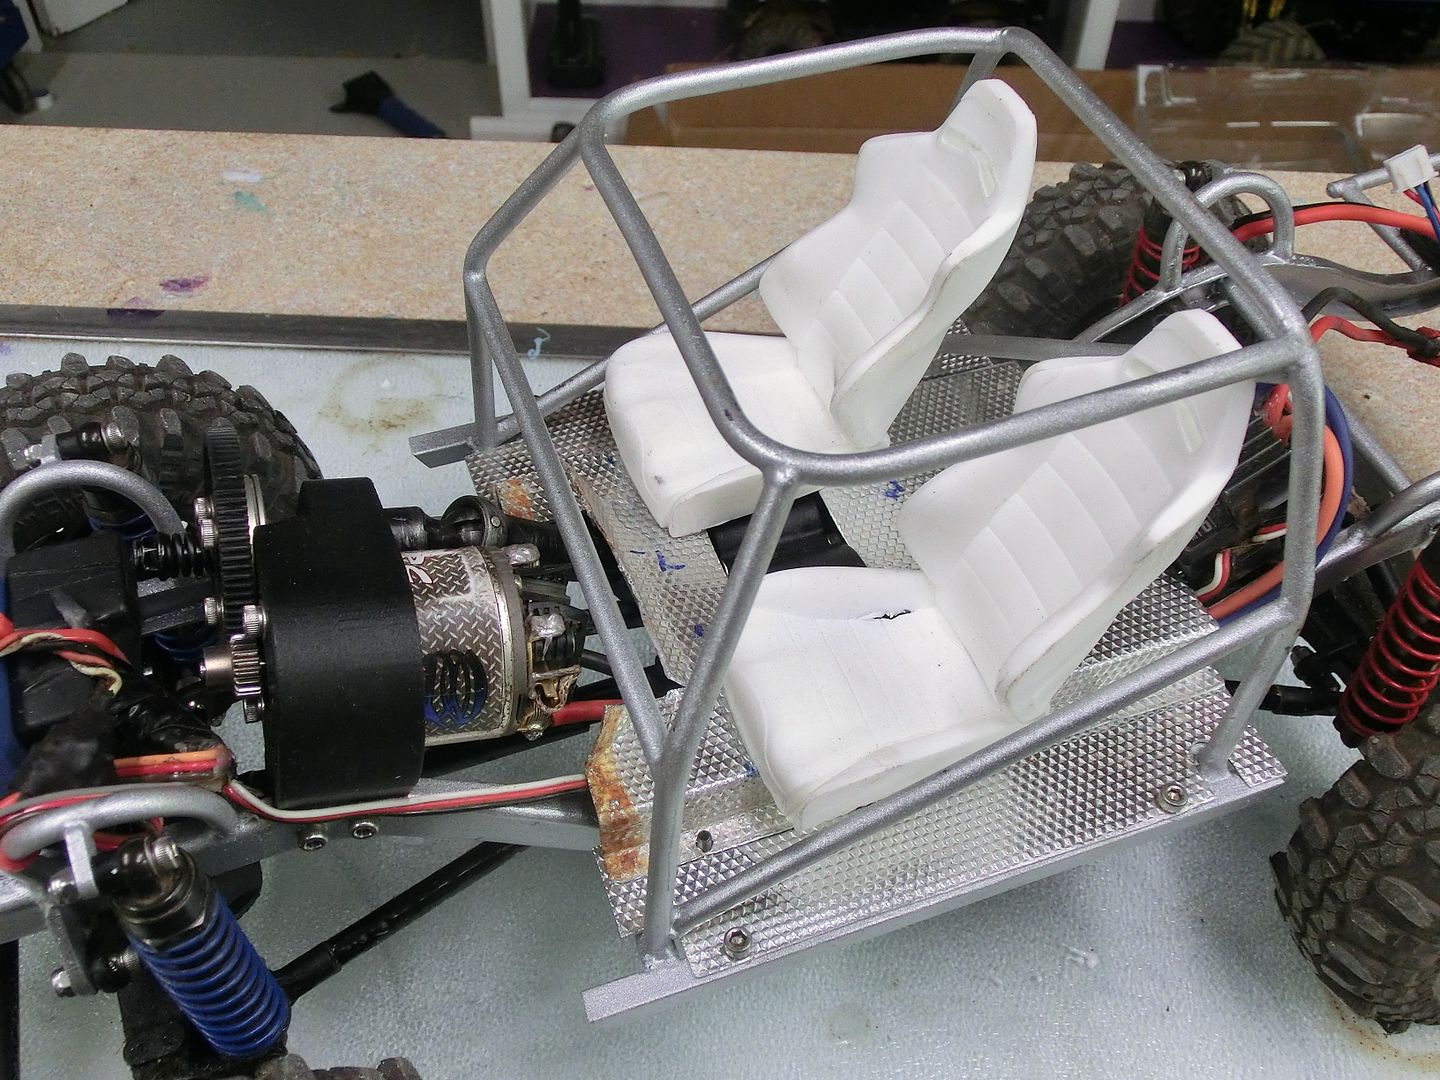 now the steering wheel could go in 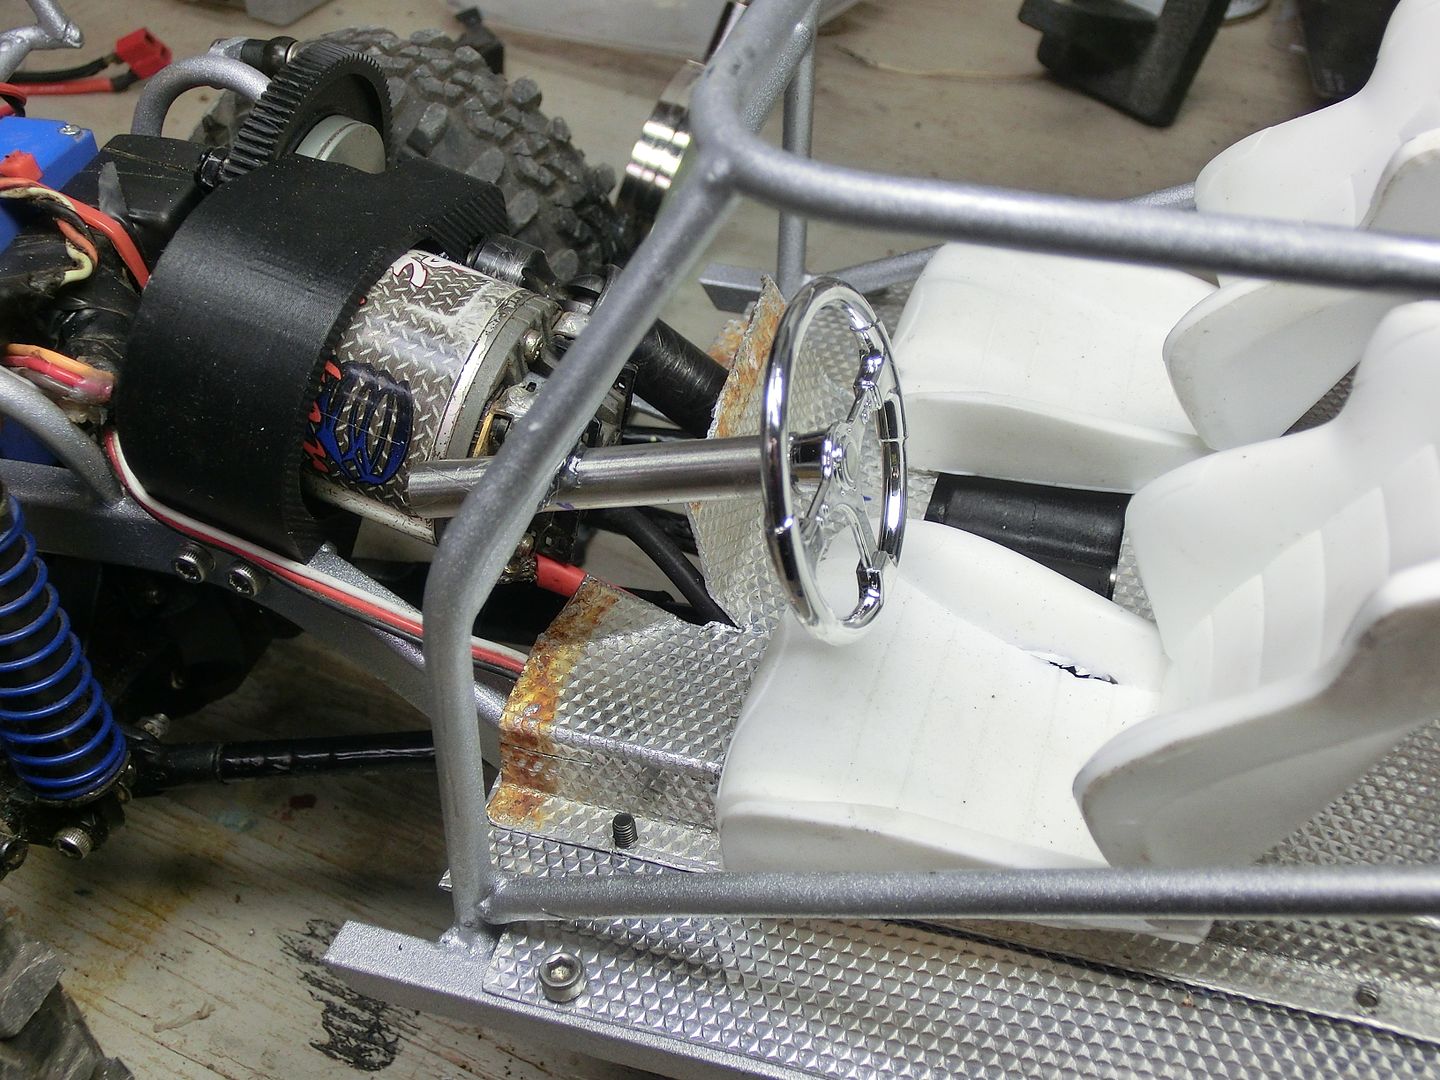 finally the body was installed. this time, when installing the battery tray, I countersunk the screws 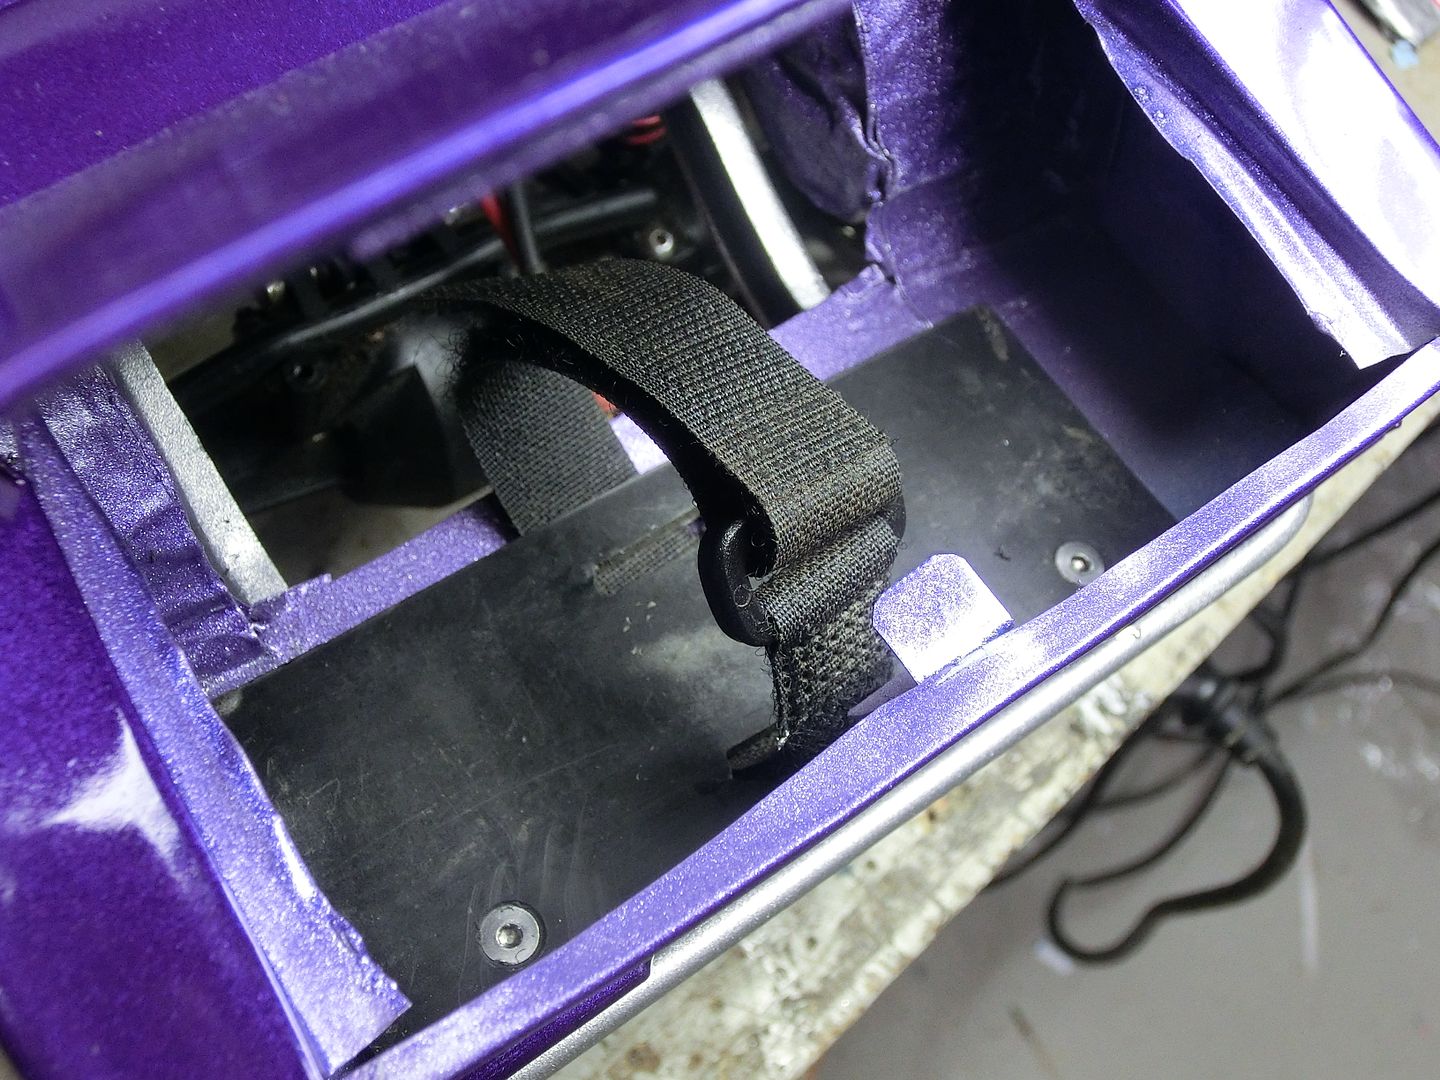 And I added a longer strap to securely hold standard size batteries. 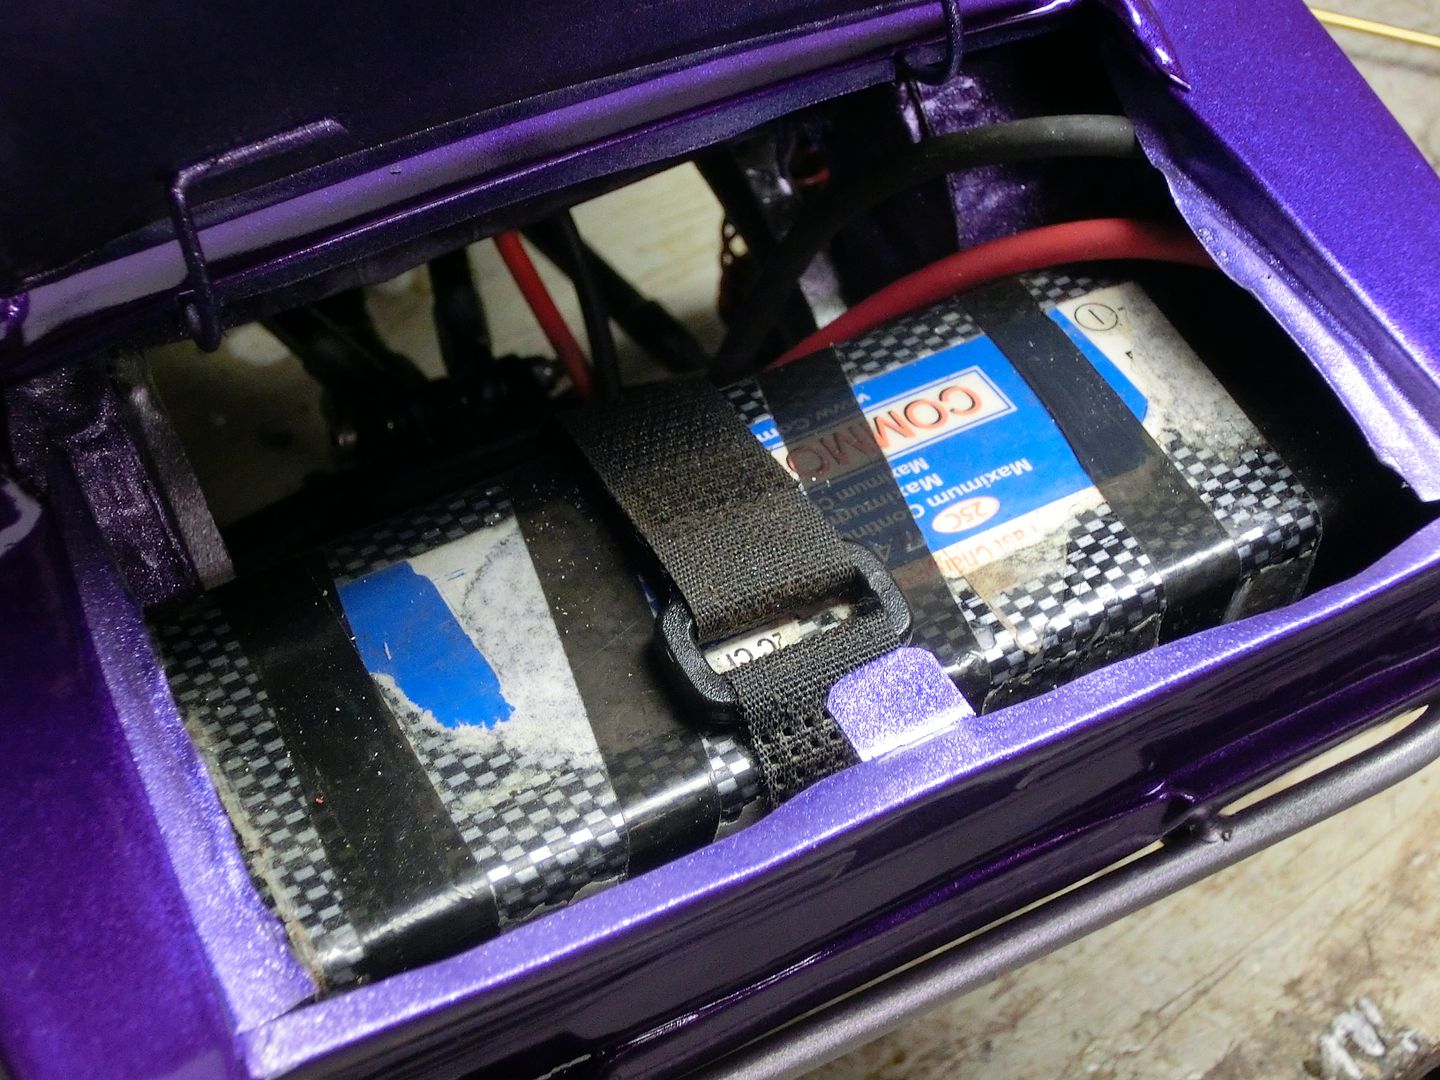 I also got the driver in place before I set the body on. I think he fits real good. 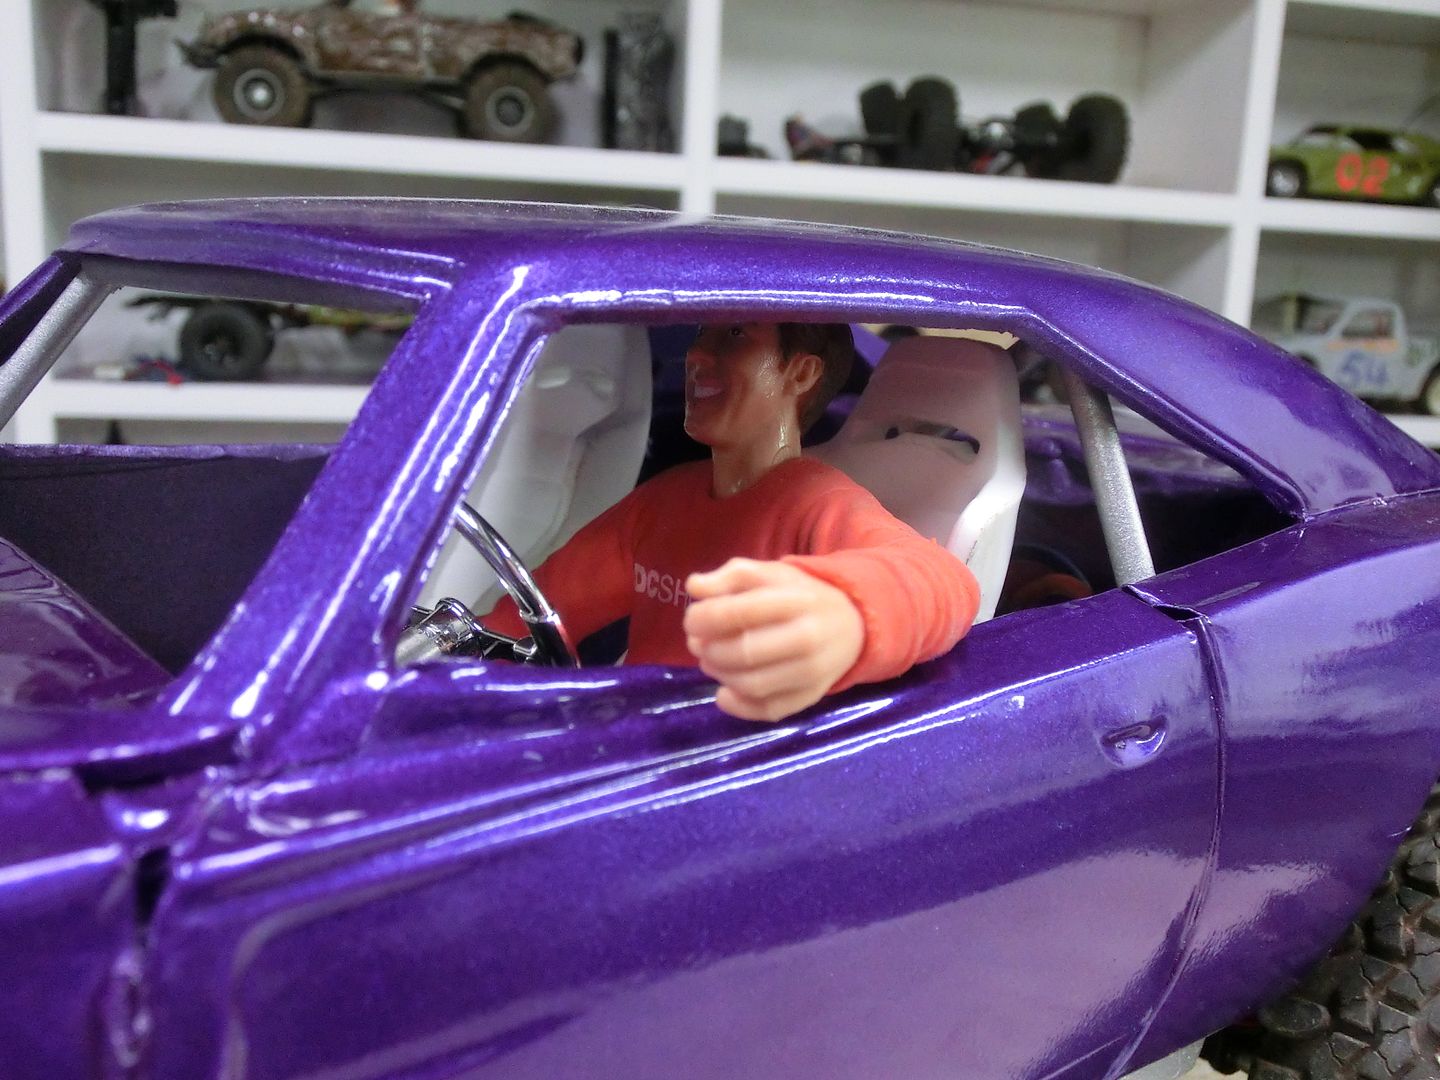 and here it is overall 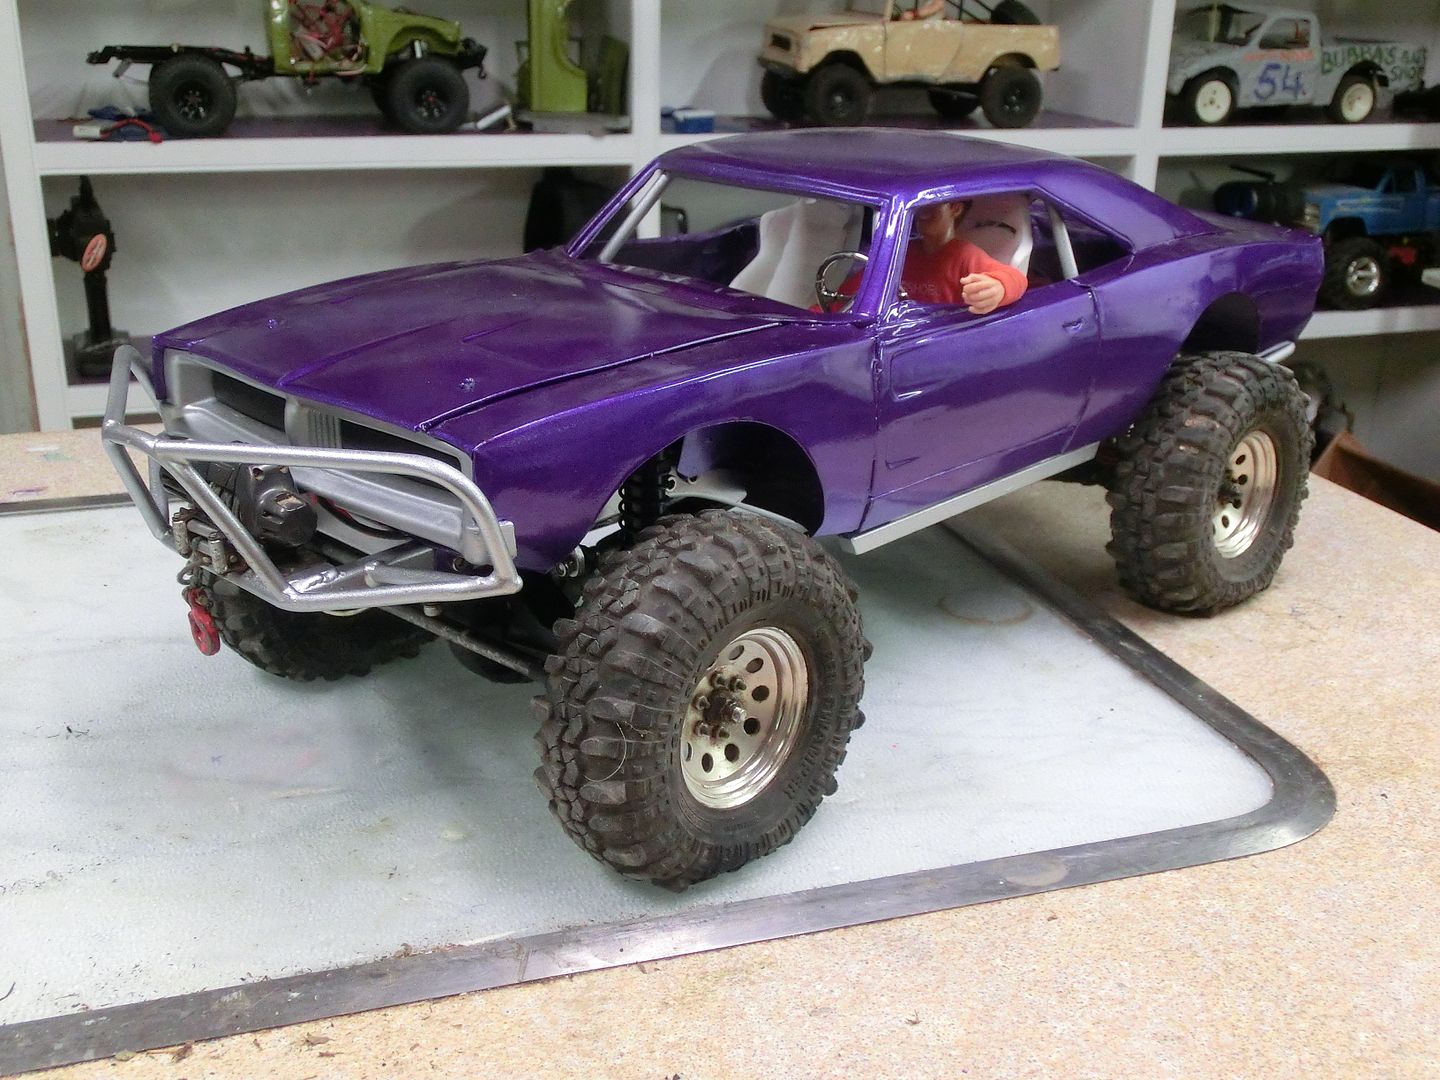 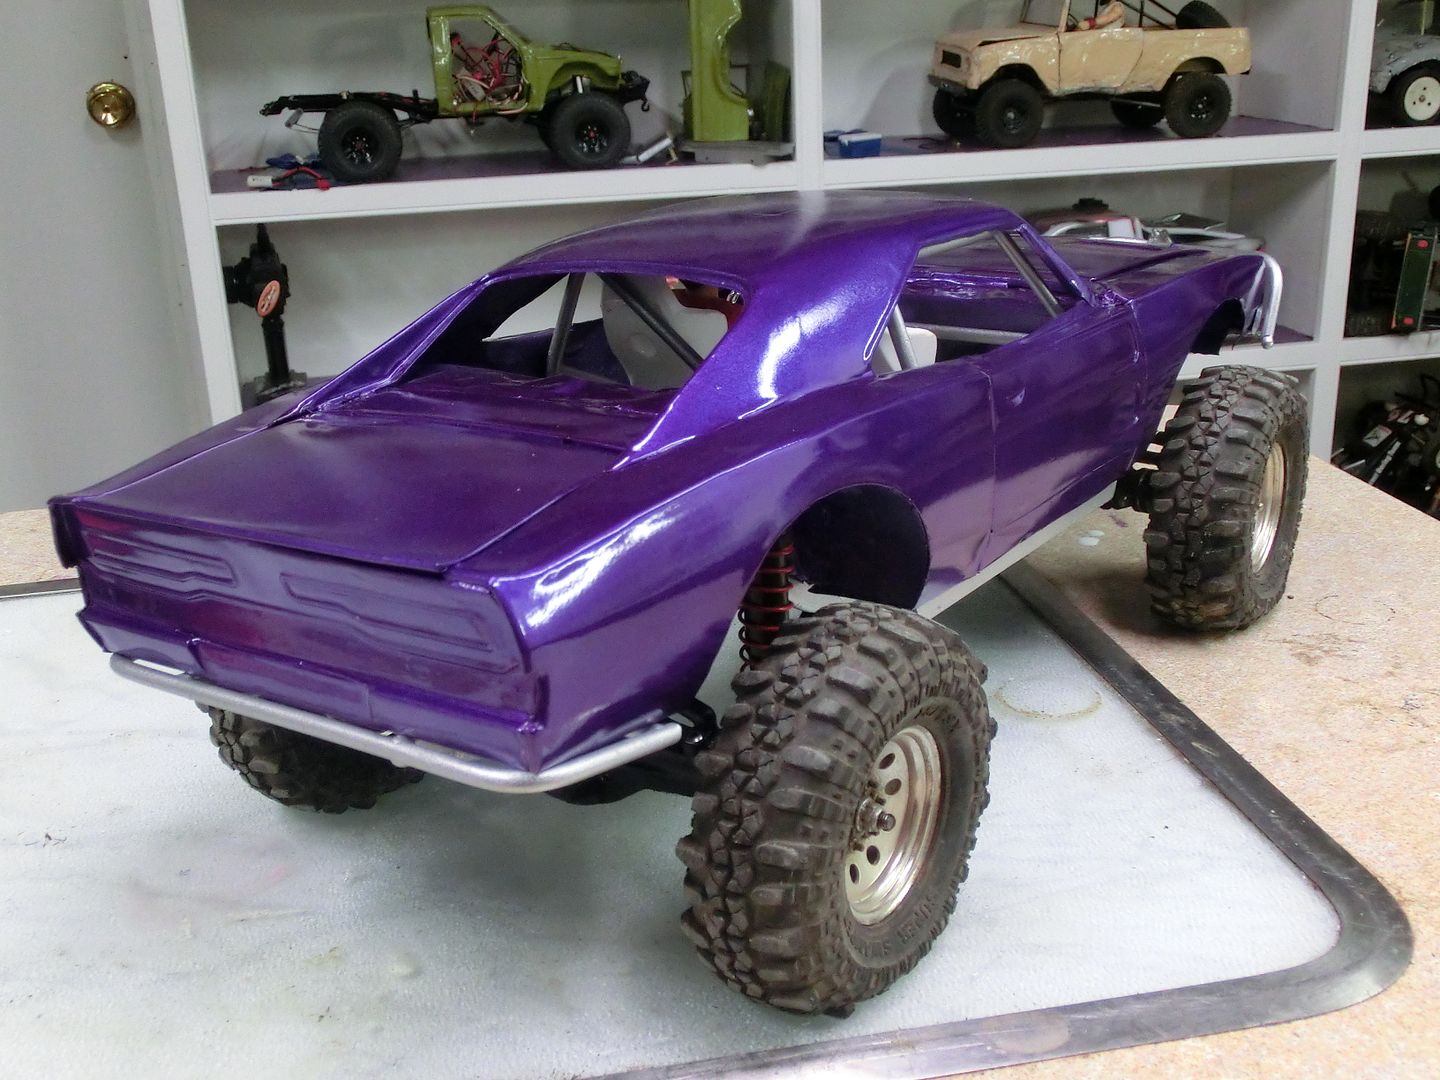 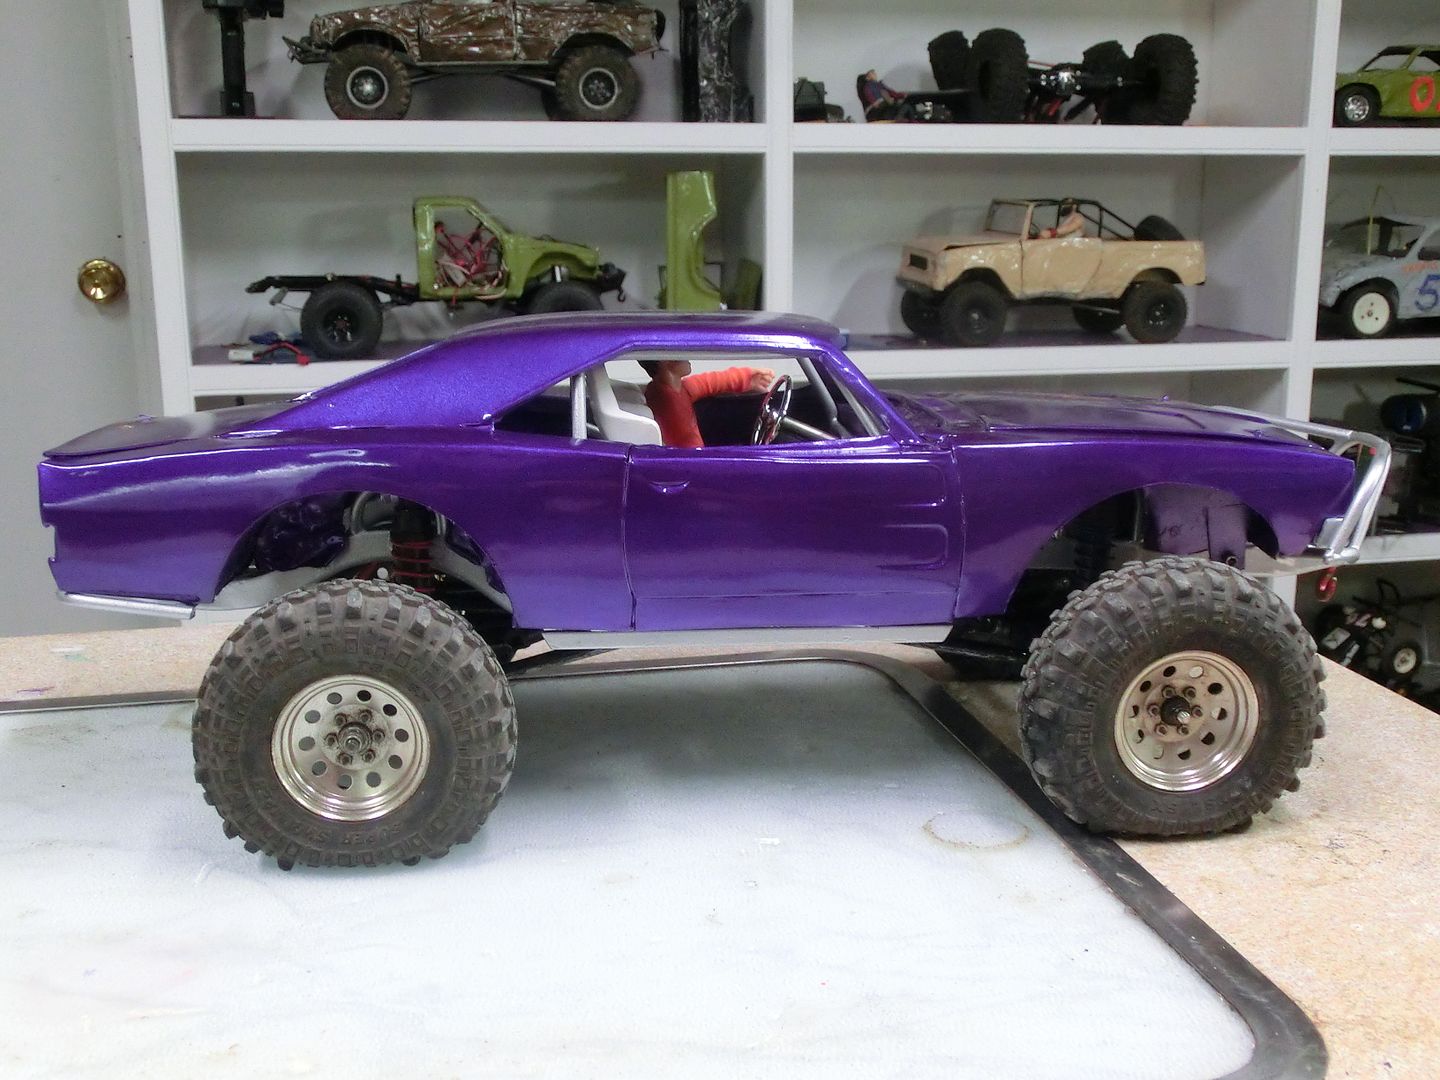 it still needs a couple details but I'm really happy with how it turned out and more importantly my buddy is happy with it. | |
| |  |
| | #38 |
| RCC Addict  Join Date: Aug 2005 Location: New Oxford PA
Posts: 1,290
| |
| |  |
| | #39 |
| RCC Addict  Join Date: Aug 2005 Location: New Oxford PA
Posts: 1,290
|
Well, my prediction was right. The charger came through the weekend with not a single panel dent free but it was not the complete destruction I had hoped for. Gary is getting pretty good at driving this thing, given the little seat time he has had with it. He actually did really good for a novice and completed 1 course, almost completed another and got over half way in the 3rd one. Here is how it looked during the comp. pics curtisty of Rob Morgan  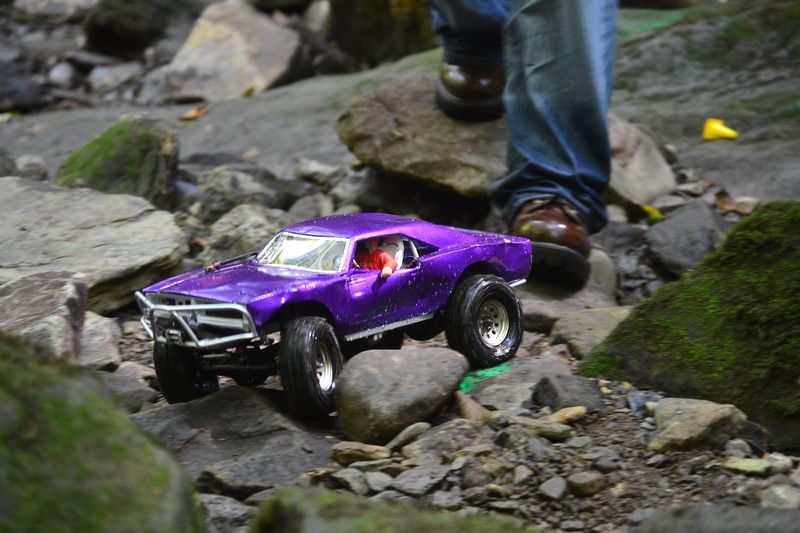  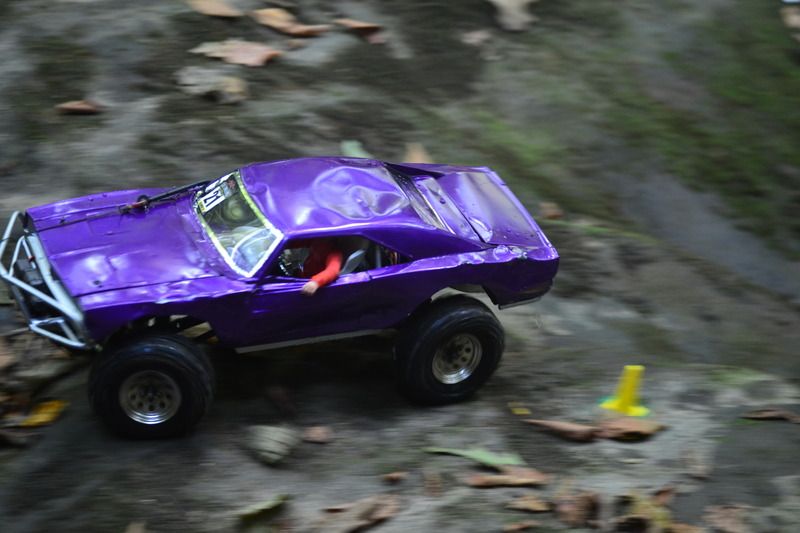 Here is the aftermath. 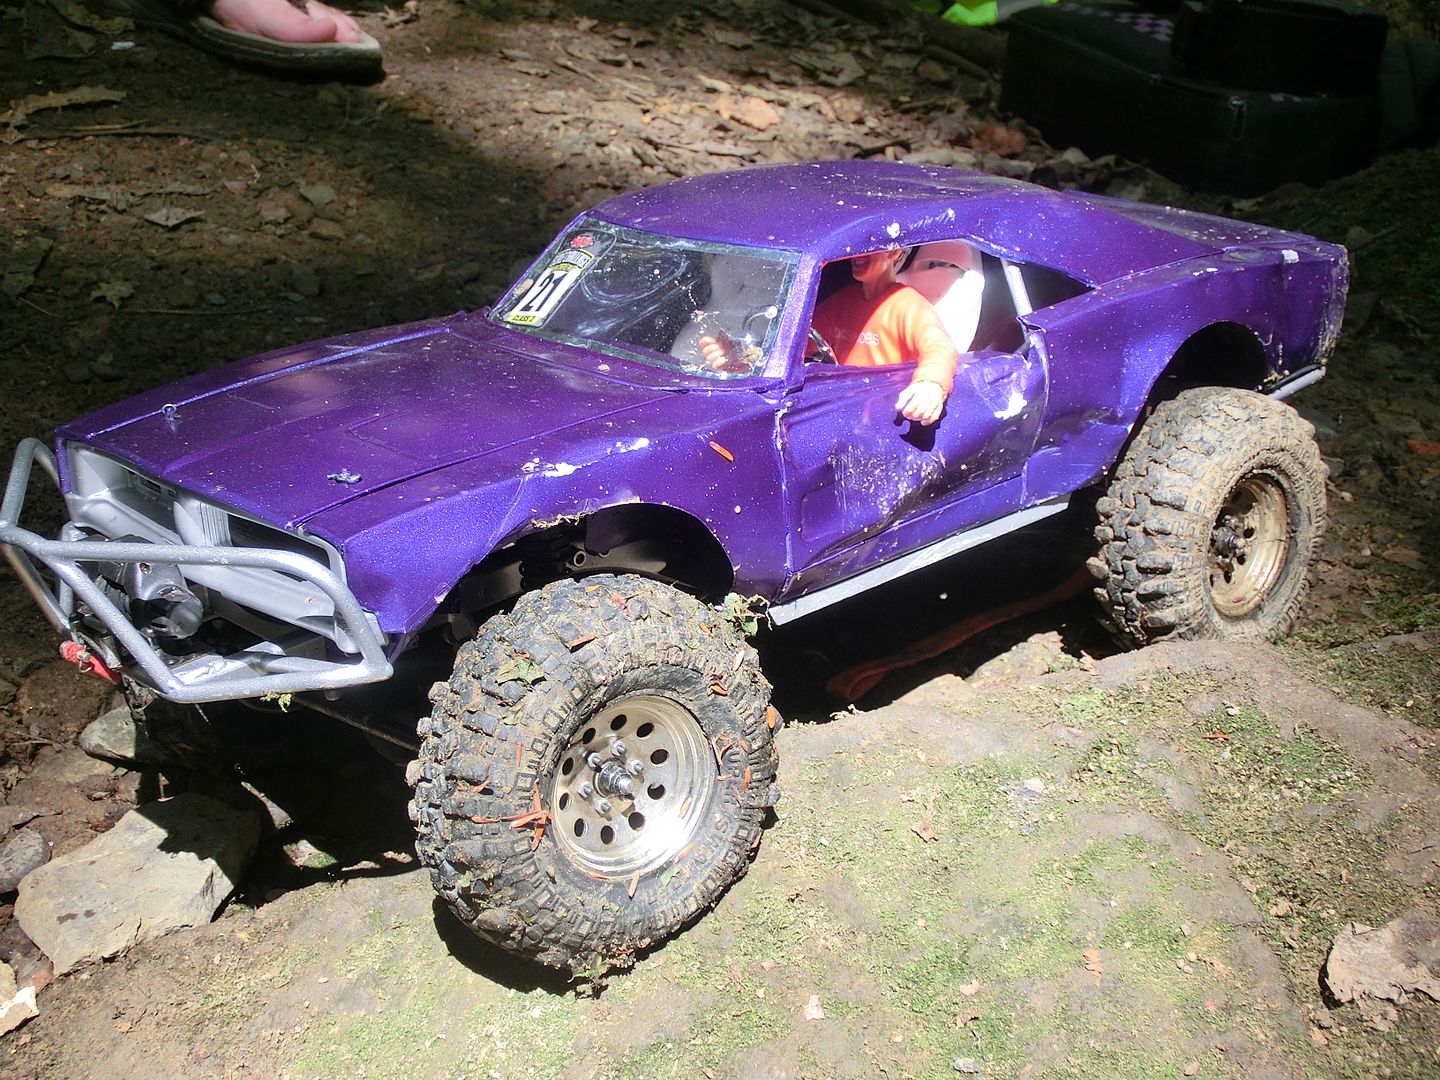 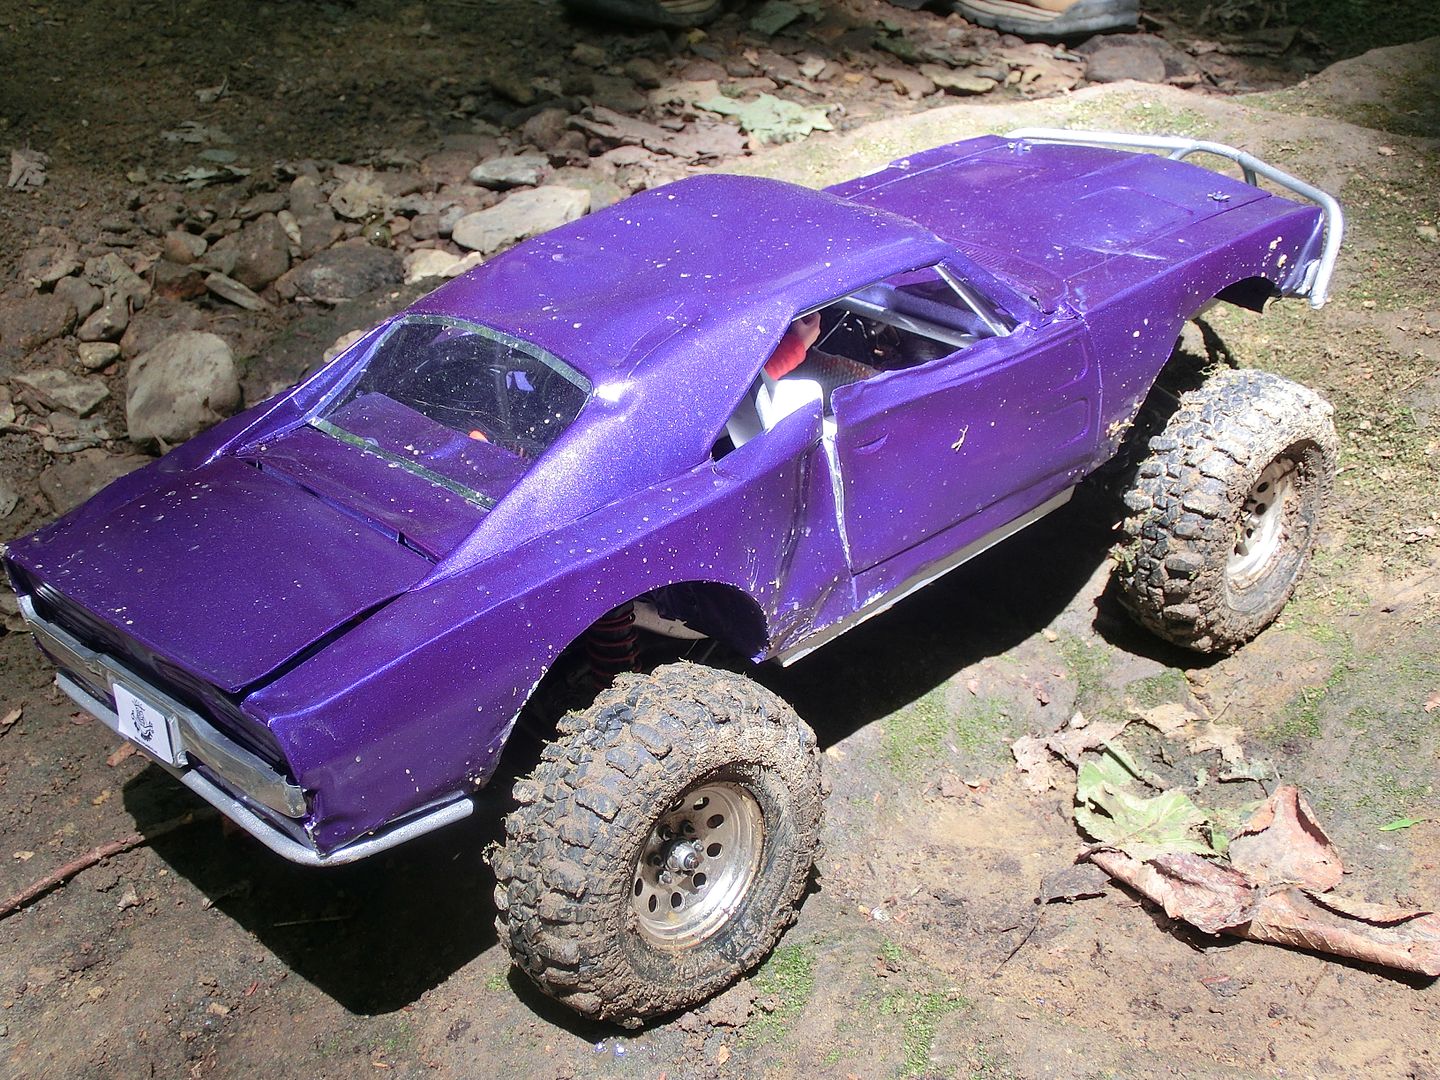 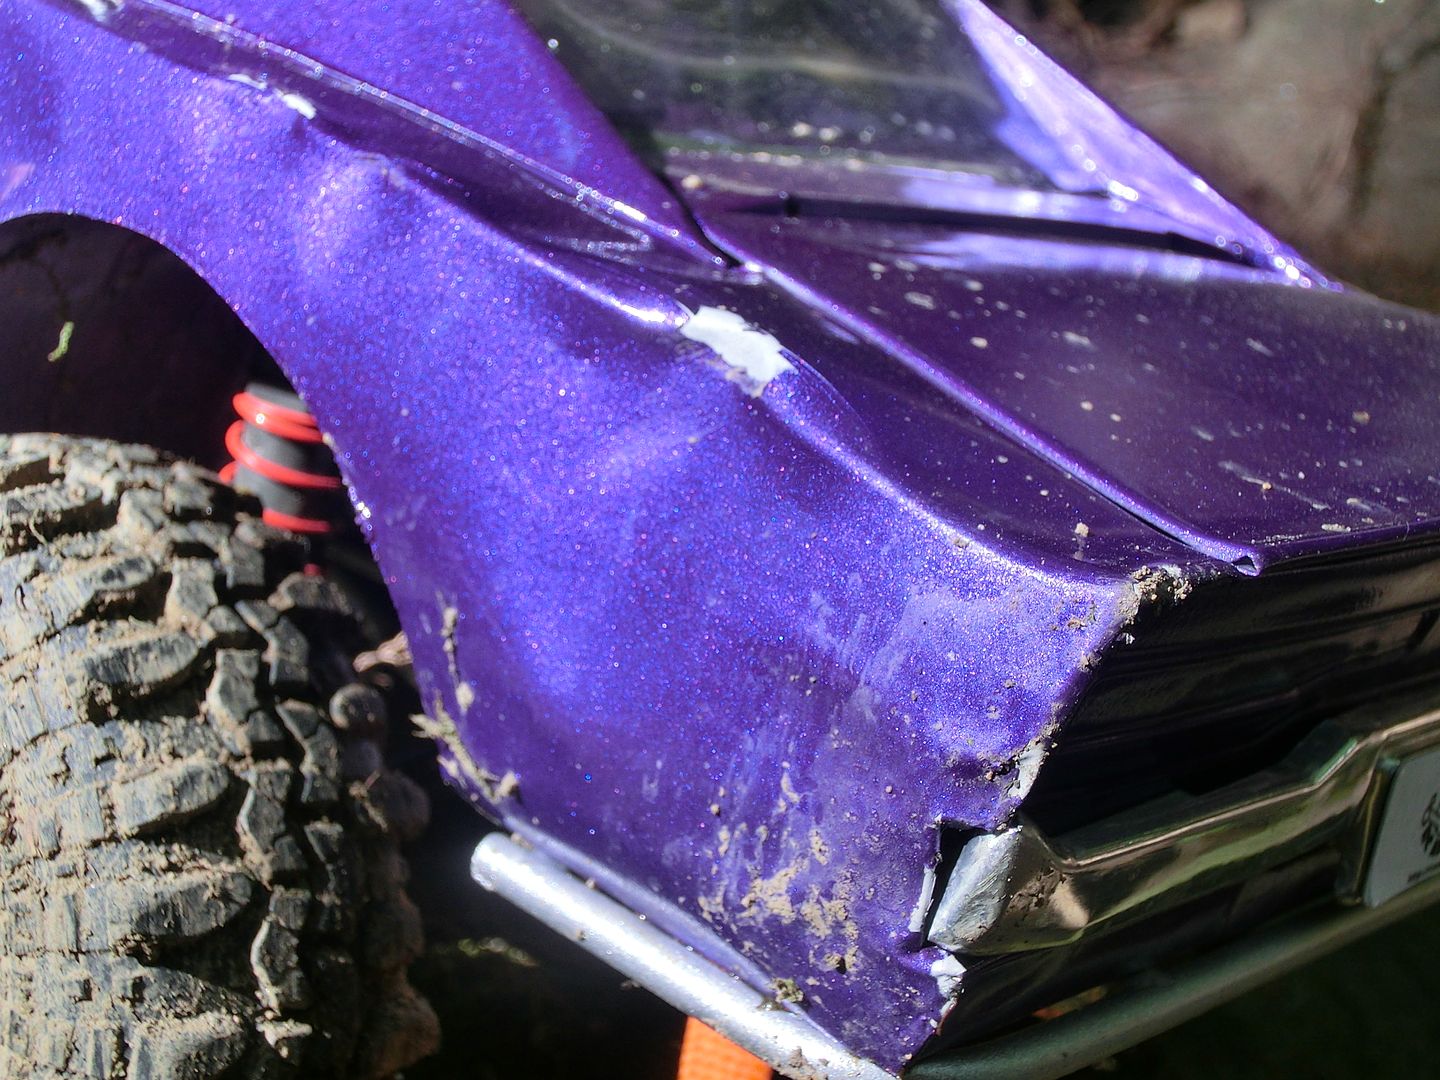 The driver's got some strong arms! he took a direct shot on his bicep that even ripped the door and he is still smiling! 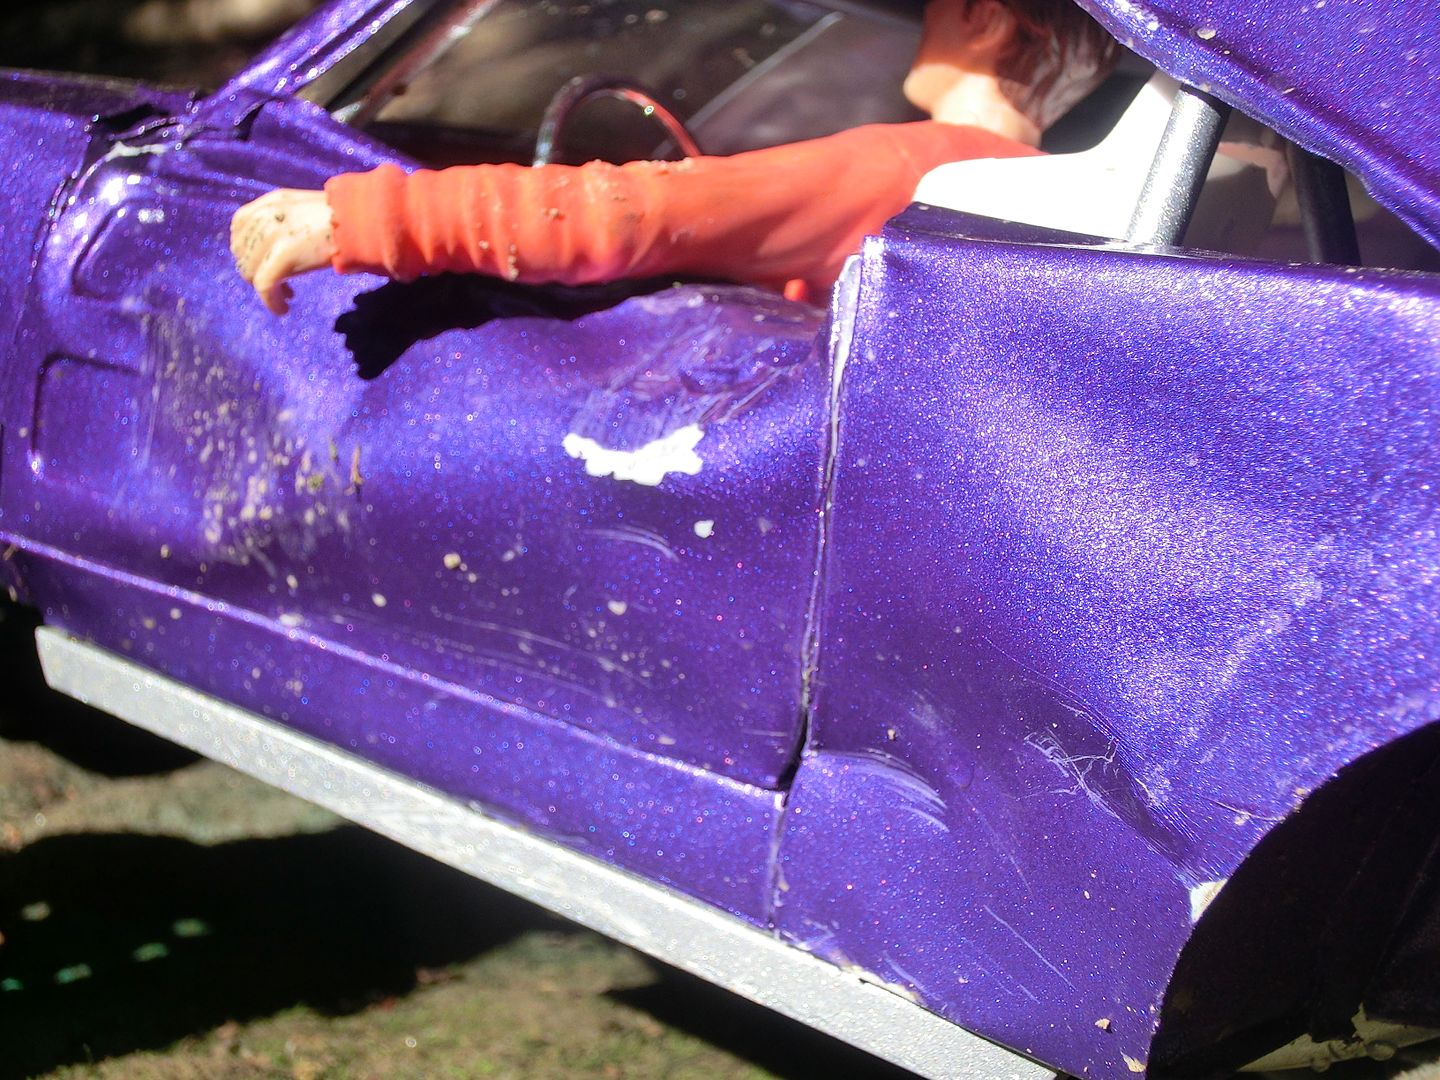 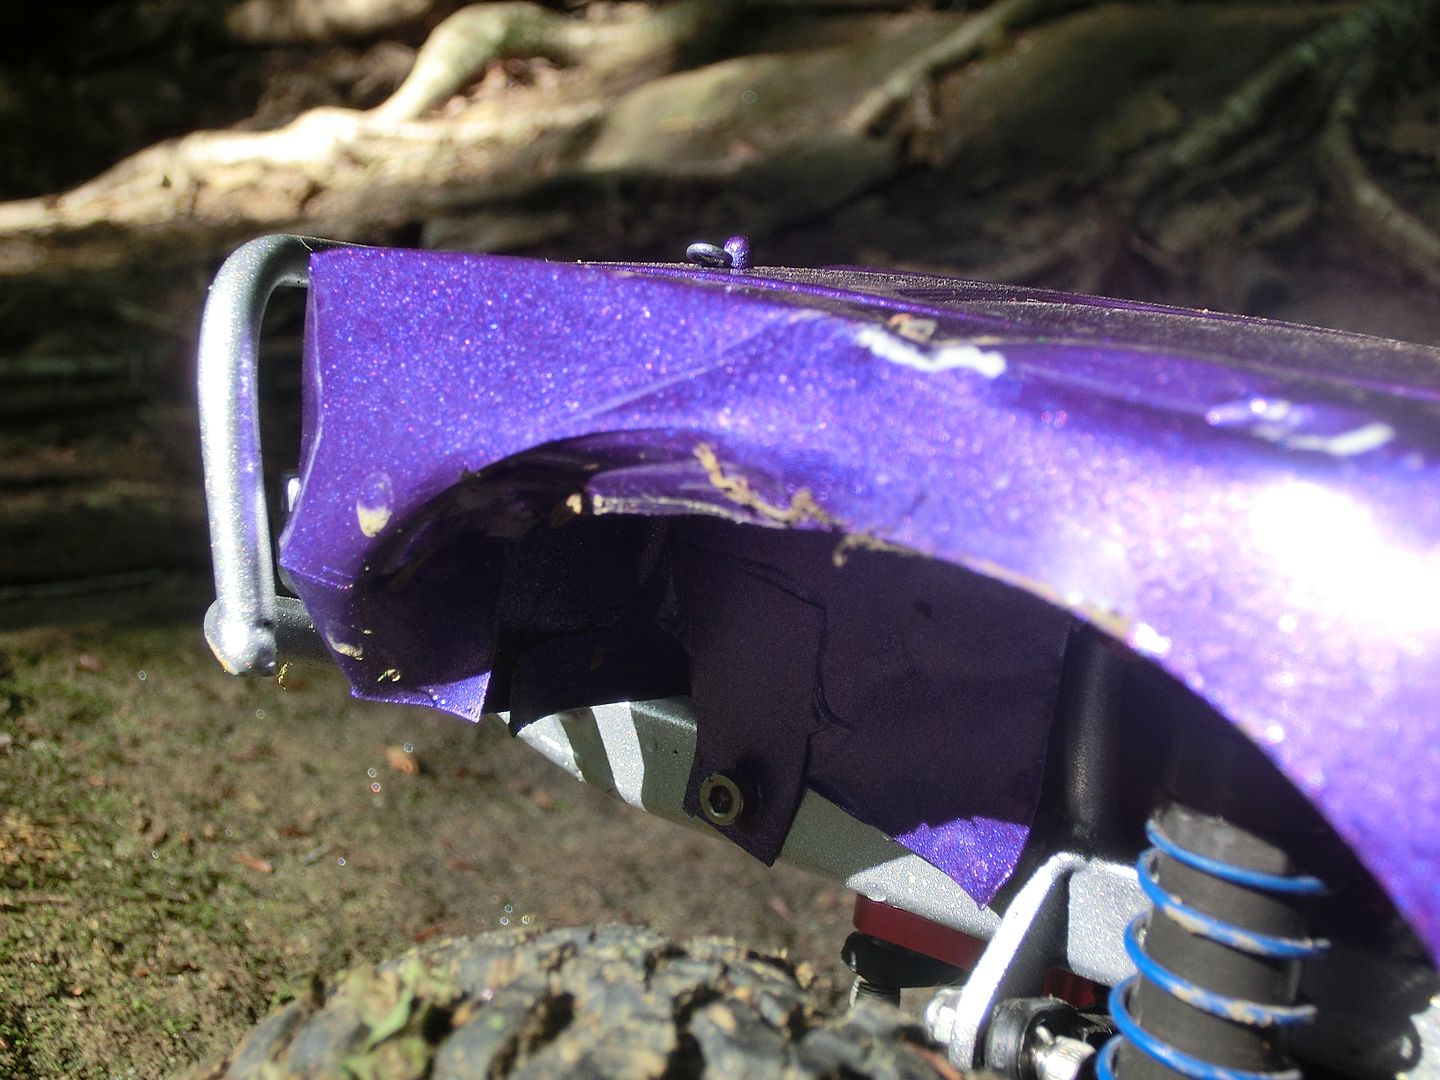 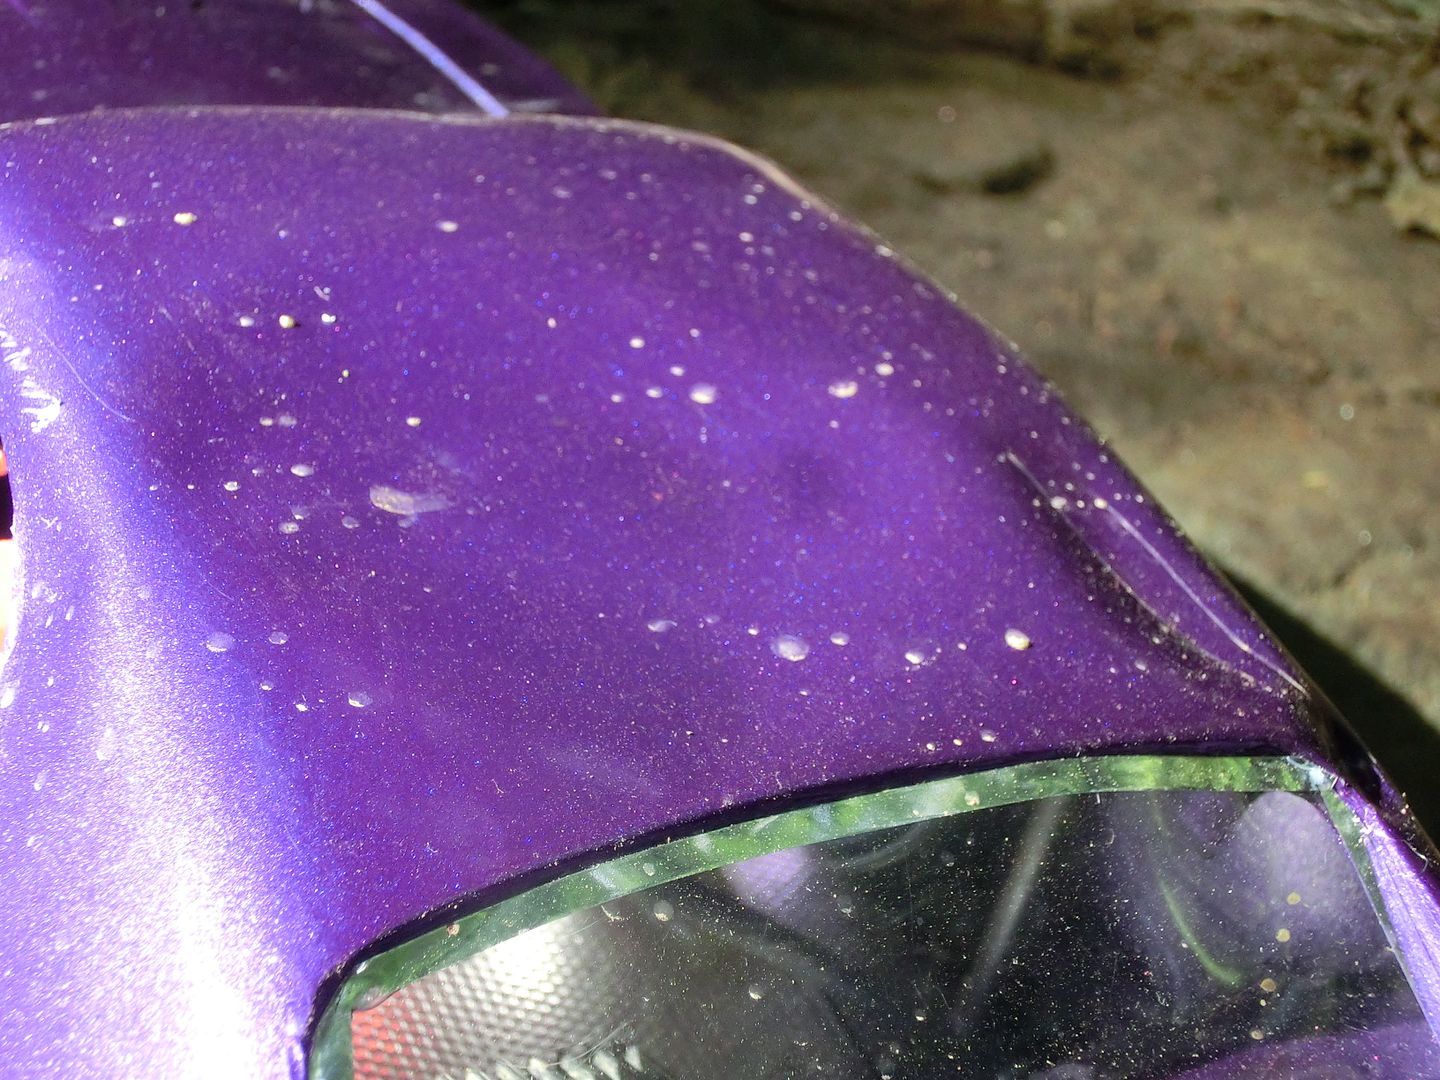 This on is my favorite. the crease right on the body line looks killer! 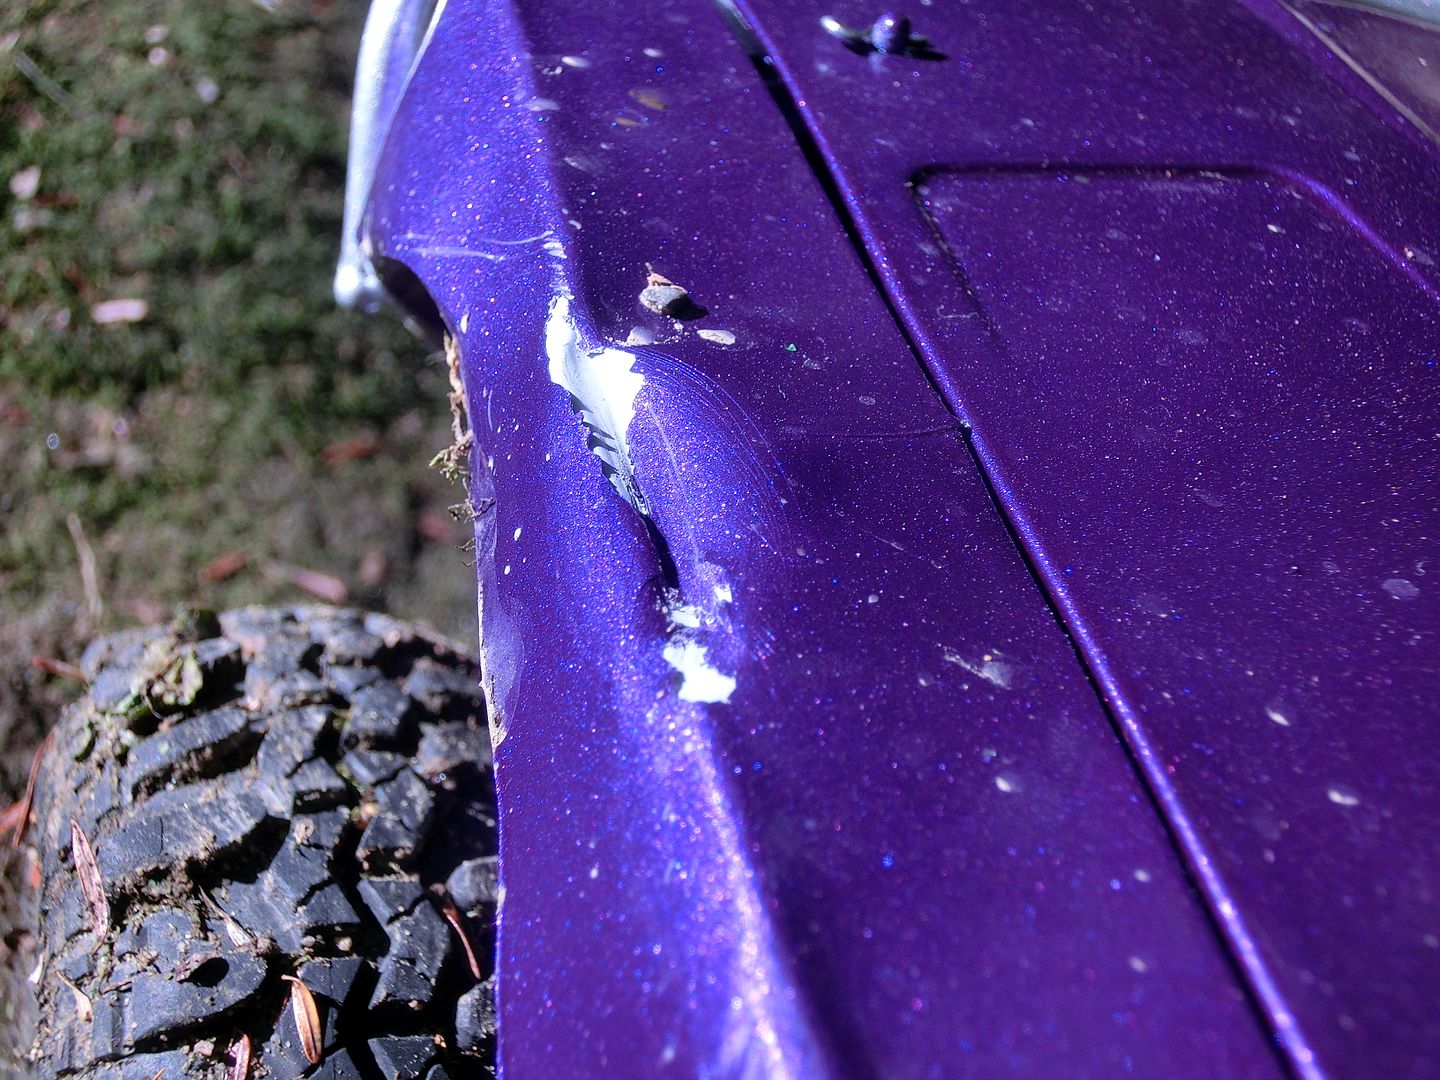 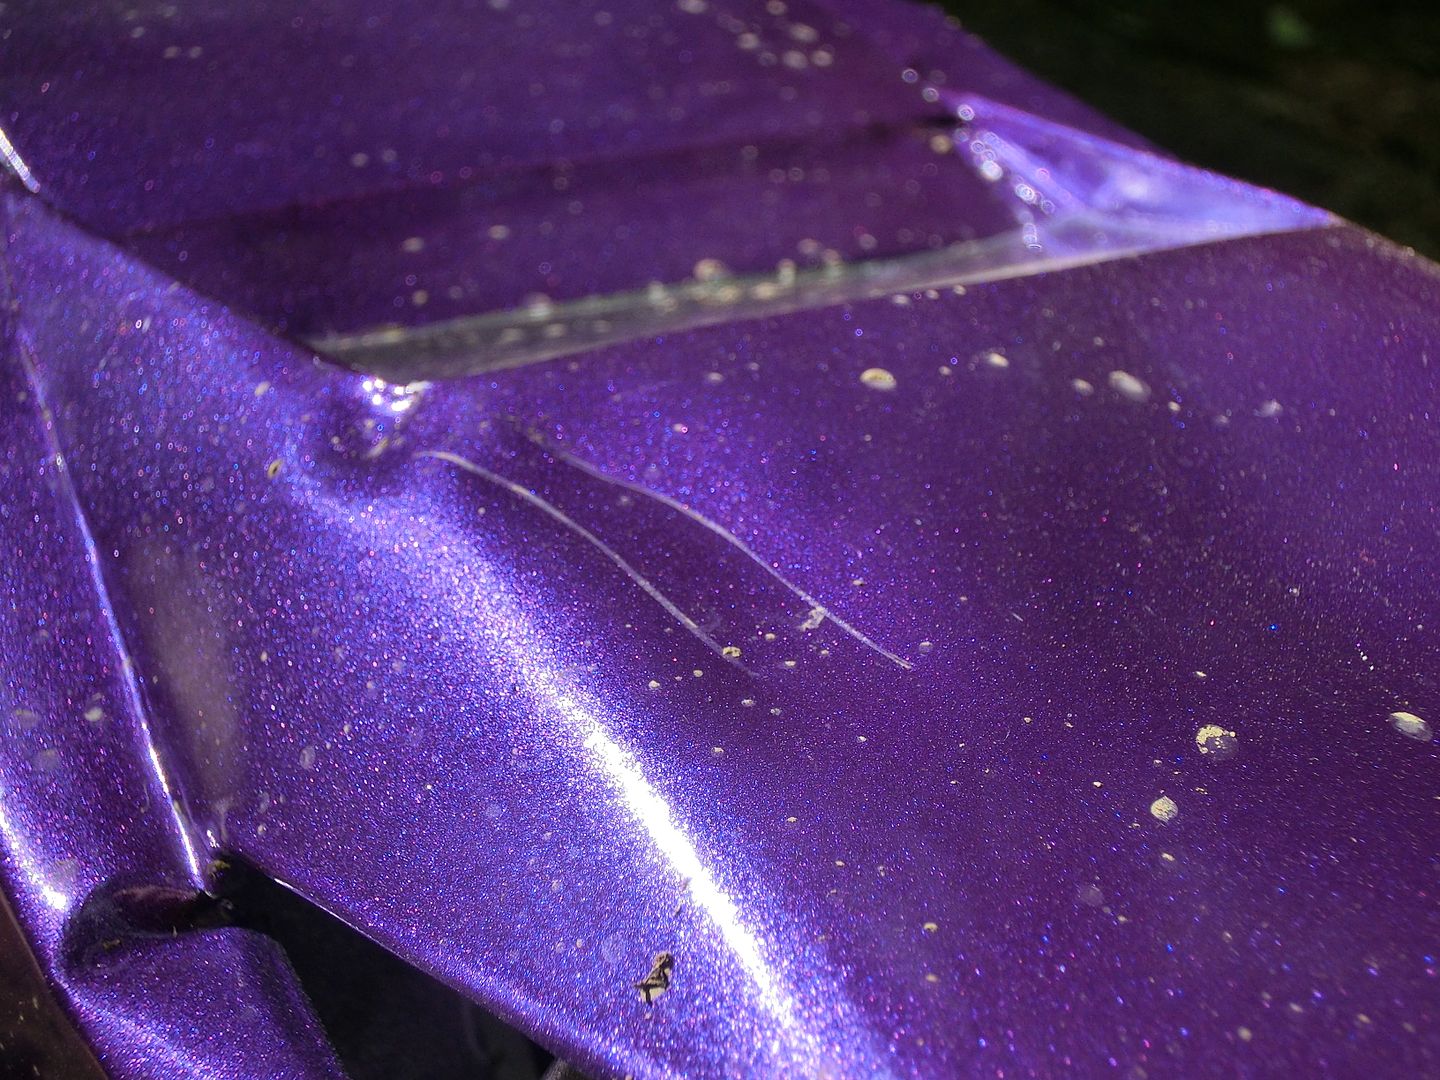 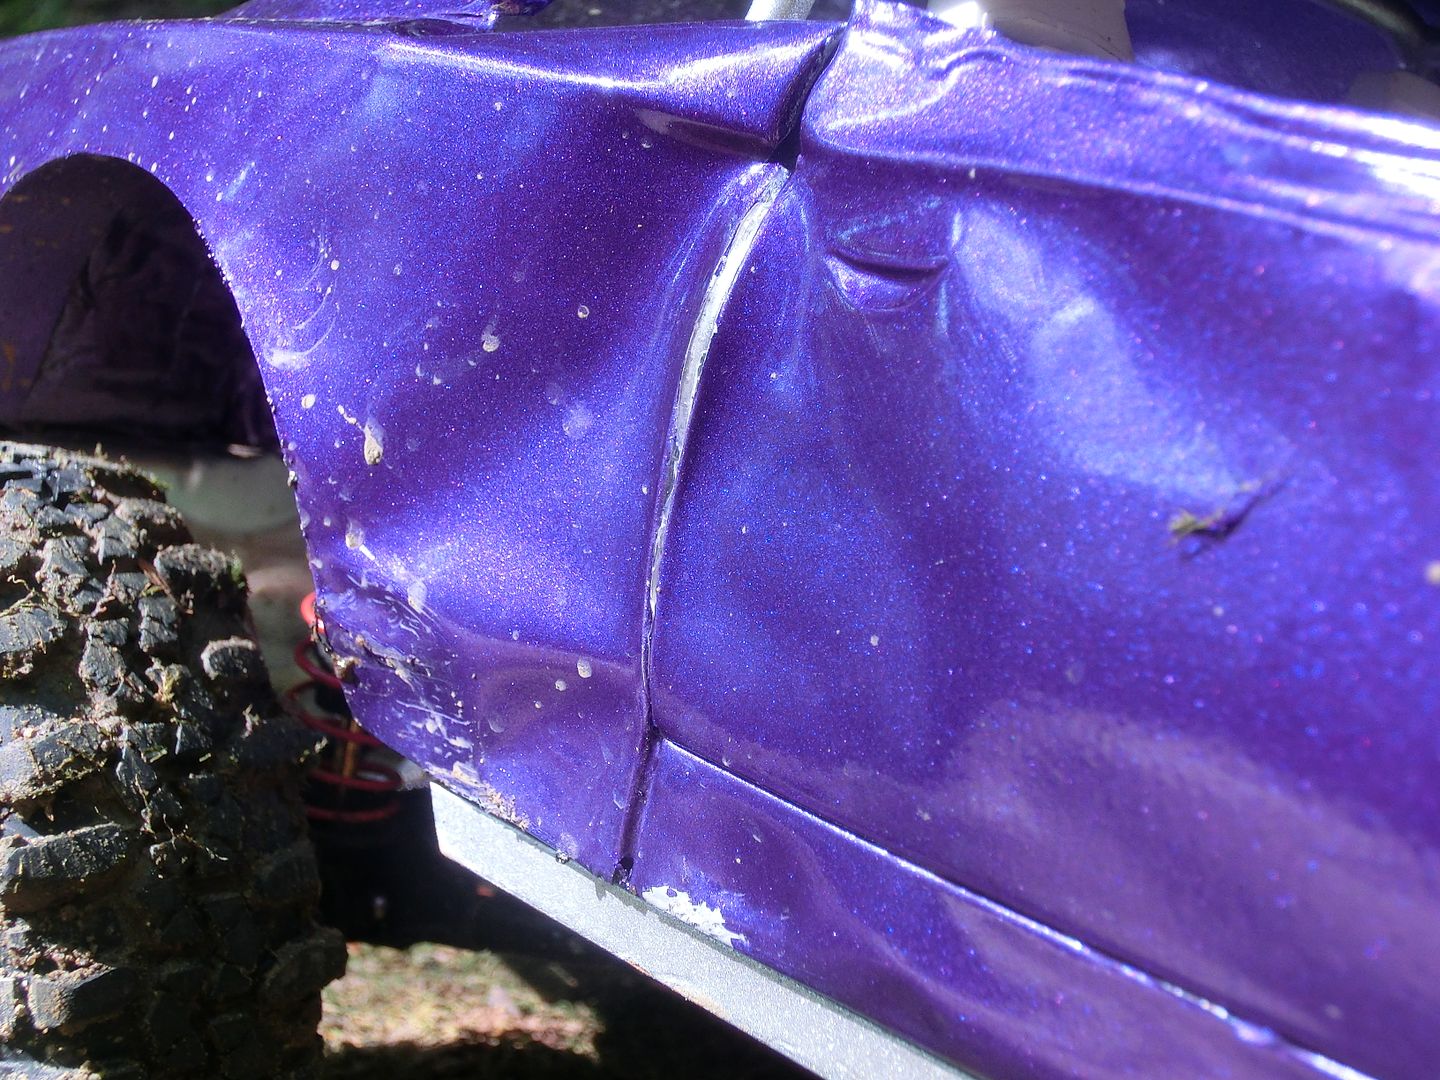 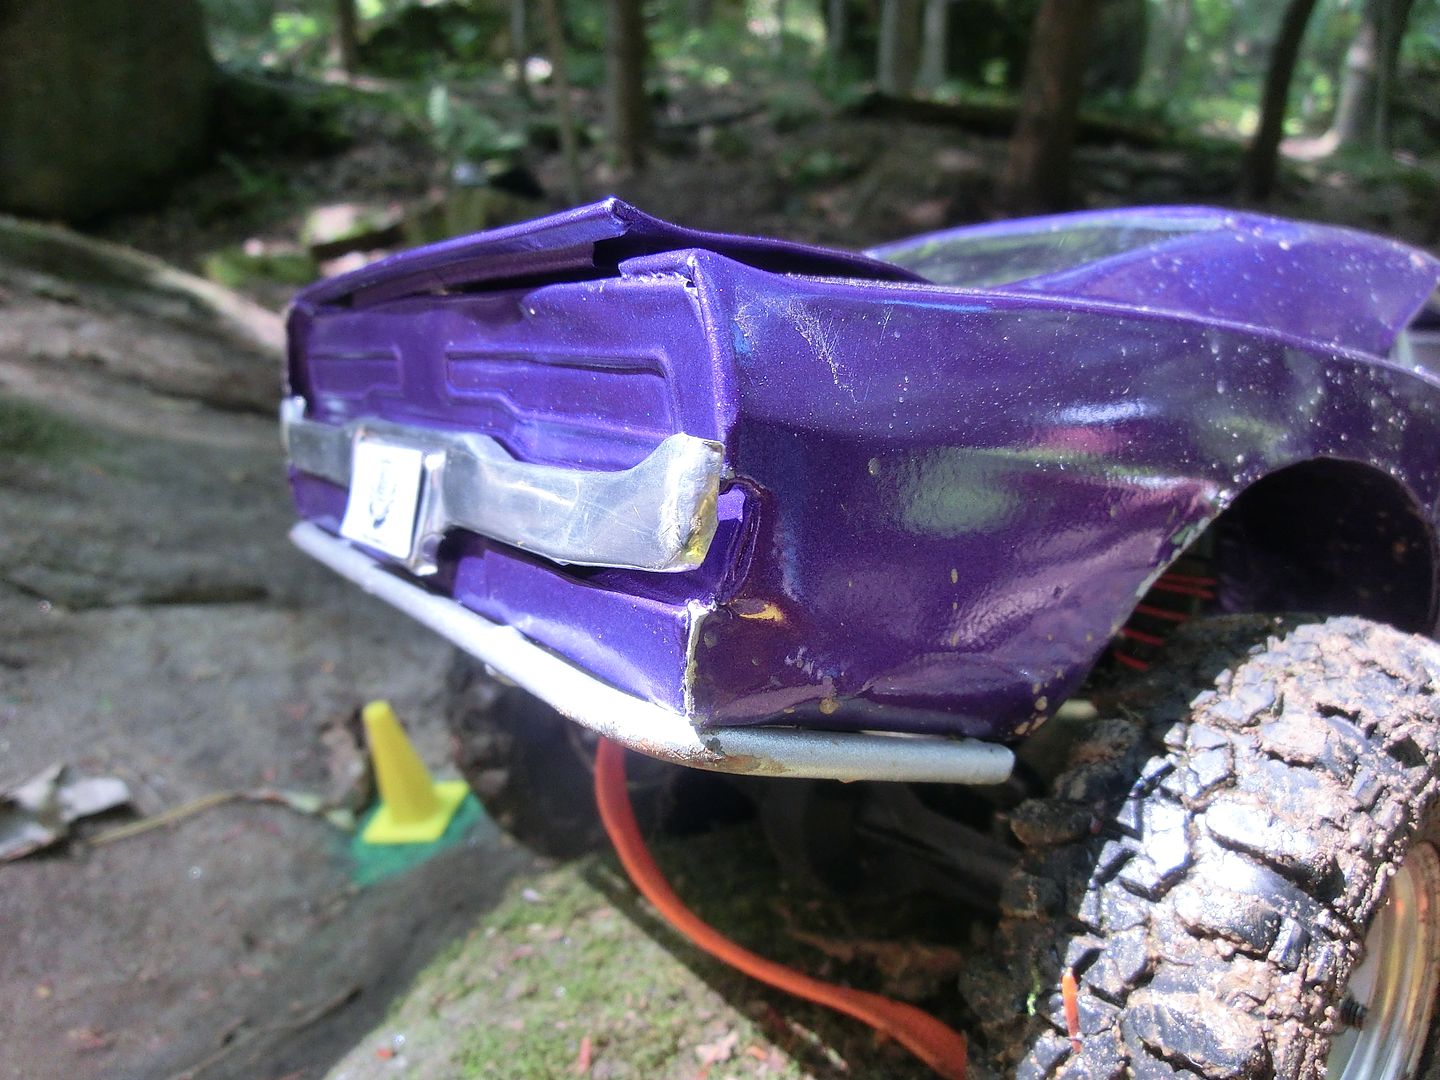 All in all it fared pretty well. the only mechanical issue was the motor coming loose during the king of the rose event and the setscrew to the front drive shaft started hitting one of the nuts on the T case. both are easy fixes. Now it's time to clean her up and get ready for the next event! |
| |  |
| | #40 |
| RCC Addict Join Date: Mar 2013 Location: Commerce Township
Posts: 1,594
|
Has to be one of the coolest builds ever, the effects of the foil denting just like a 1:1, very creative - love it.
|
| |  |
 |
 Rock Charger - Similar Threads
 | ||||
| Thread | Thread Starter | Forum | Replies | Last Post |
| Lipo Charger/Batter for 1/18 Losi Mini Rock Crawler | jwalker497 | Losi Mini-Rock Crawler | 14 | 11-20-2013 09:00 PM |
| |