| |
| |||||||
 |
| | LinkBack | Thread Tools | Display Modes |
 02-20-2018, 08:57 PM
| #1 |
| I wanna be Dave Join Date: Jul 2010 Location: Toronto
Posts: 2,389
|
And no, it's not some Aussie slang. I'm building a Vanquish Ripper - #16 to be exact. I was fortunate enough to be in the building when they started construction of these "Halo" builds. I call it that because it really is an exercise in engineering brilliance. Much like a supercar, it's the best of everything they have to offer, and it's pretty cool. I consider myself very lucky to have one. I've decided to throw everything at this build and try using it for this seasons' competition in C2. There'll be a couple things on it that won't be specifically allowed for C2, but I'm pushing my own limits in building a truck to perform, while still keeping in the spirit of the SBG. This will be my build thread, and much easier than my initial thought of a video build. Impossible! Step one, inspect box. Hey, funny story, I took that picture on the box at AxialFest last year! Box is nice and has a sticker on it. Additionally, it was shipped right side up. A first for an RC manufacturer! 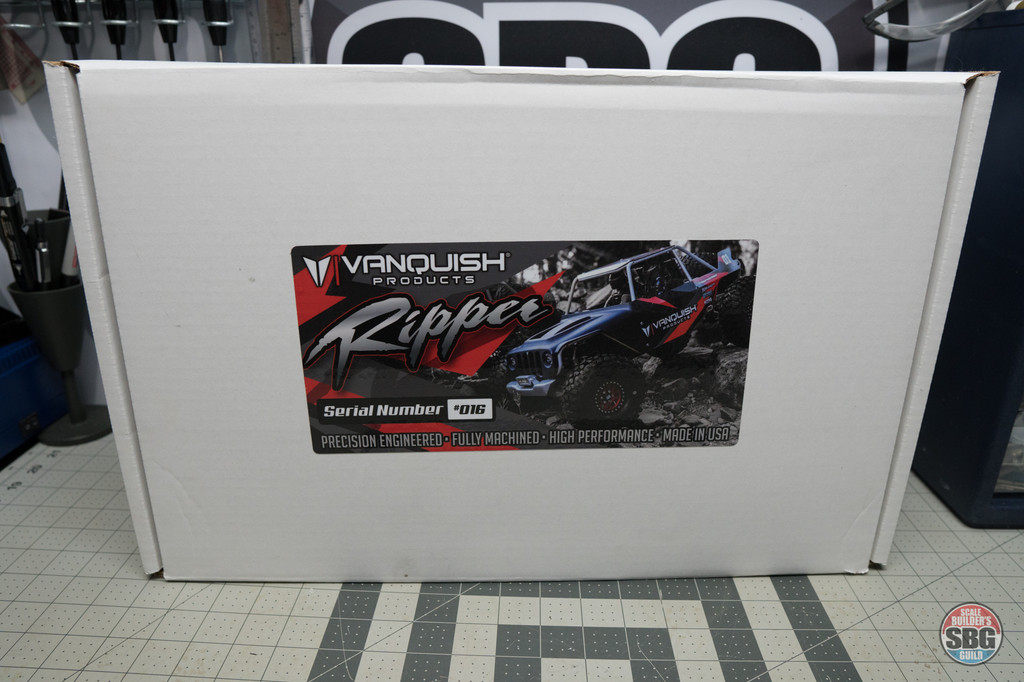 A book! I'm not here to read. Lame. 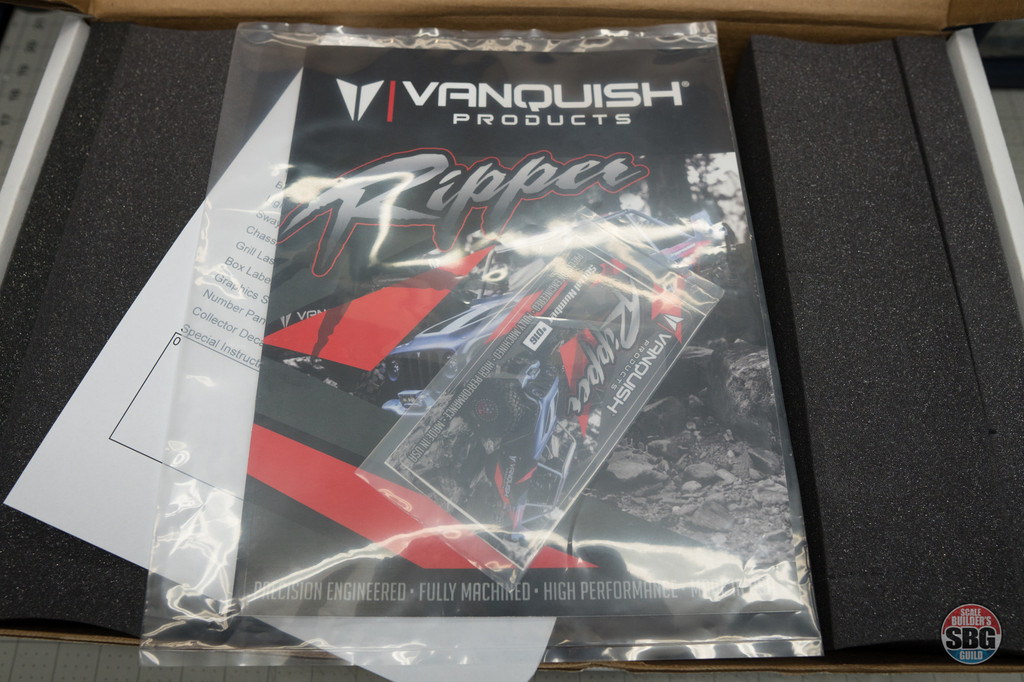 Packing list - I know who packed this, and thanks, for including all the bits. 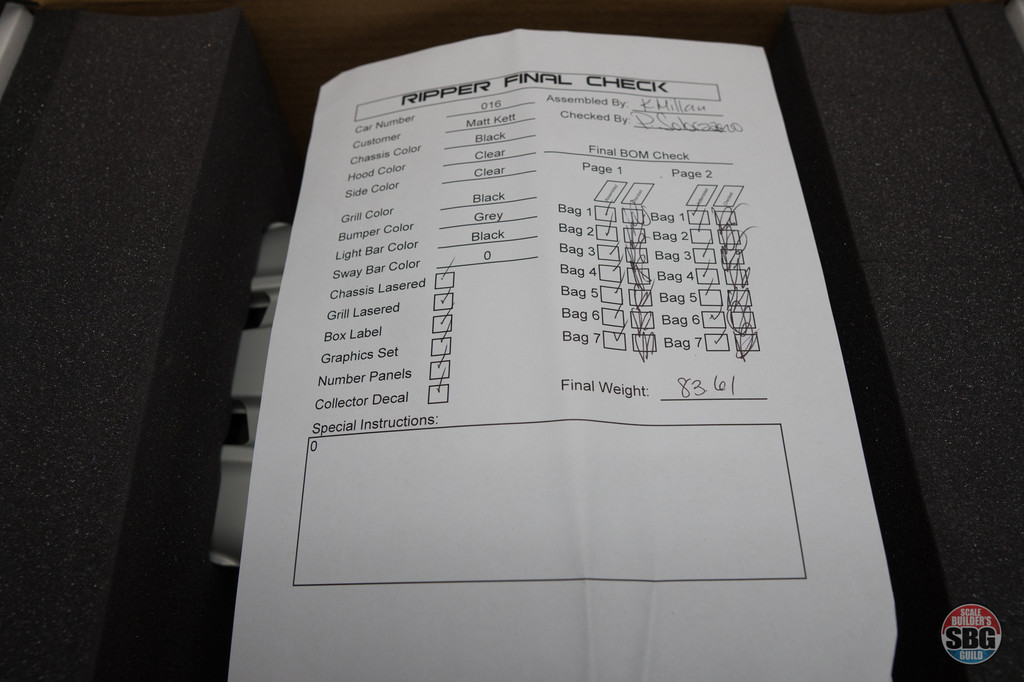 Stickers made by Freqeskinz. Apparently, he will print anything you want instead of the stock stickers. I'm going to get a set with a bunch of Kittens on it. 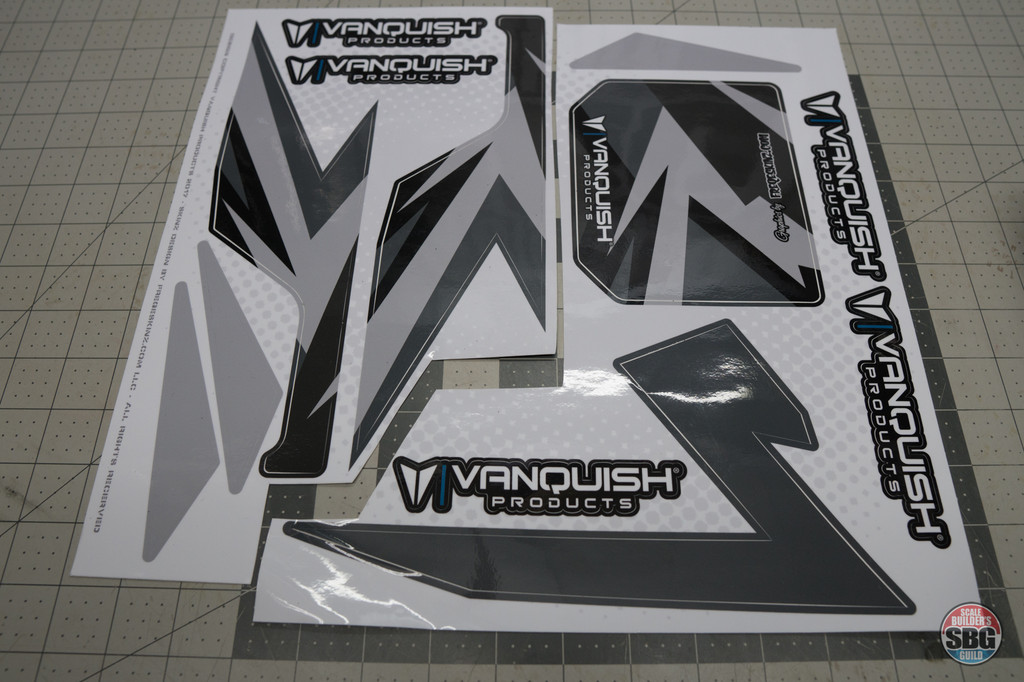 Hey neat! A truck, or at least, the beginnings to a truck. 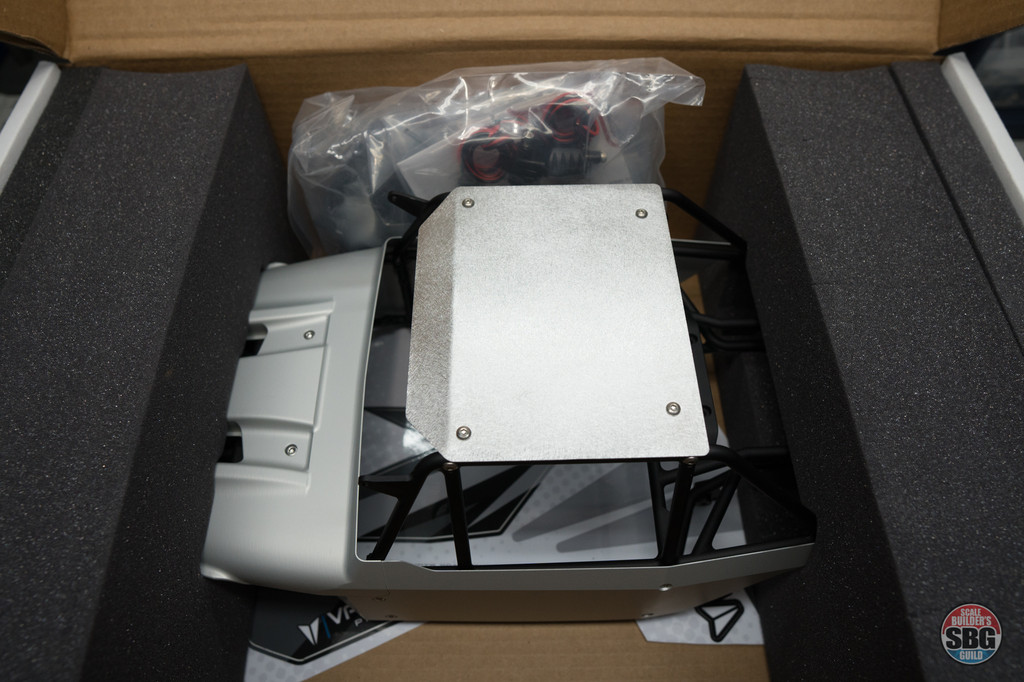 It's well packaged and protected from bumps or jolts and arrived without any flaws. 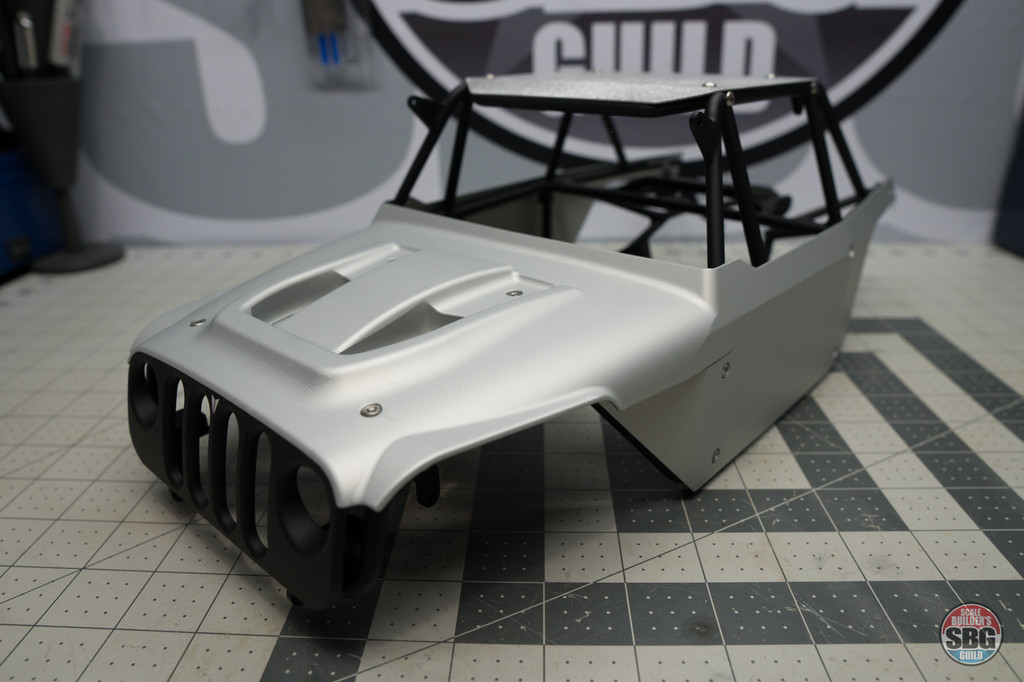 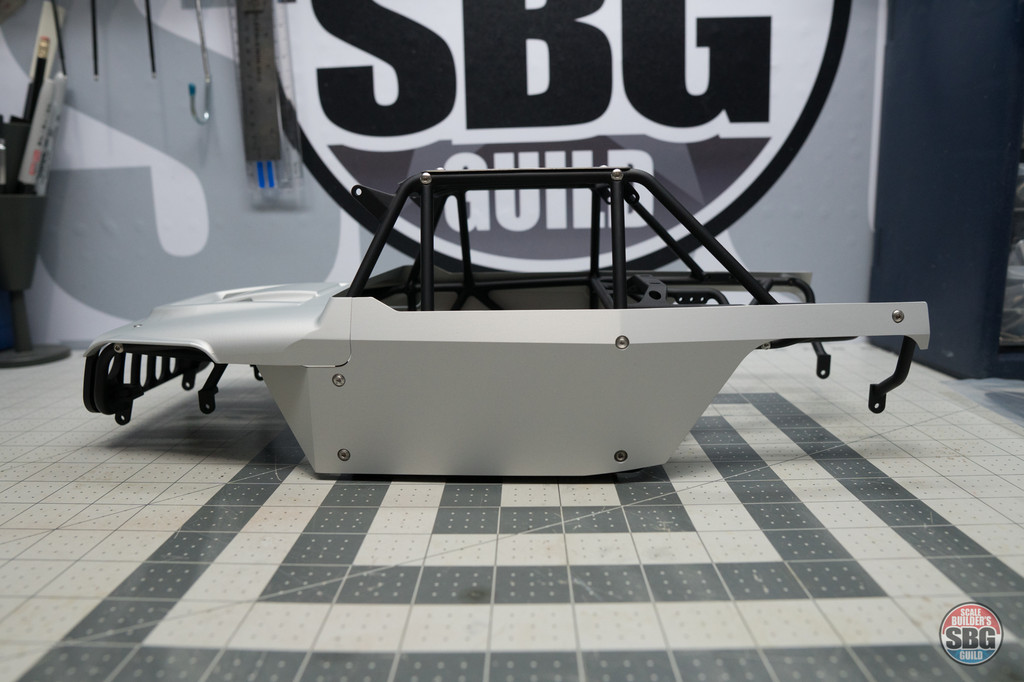 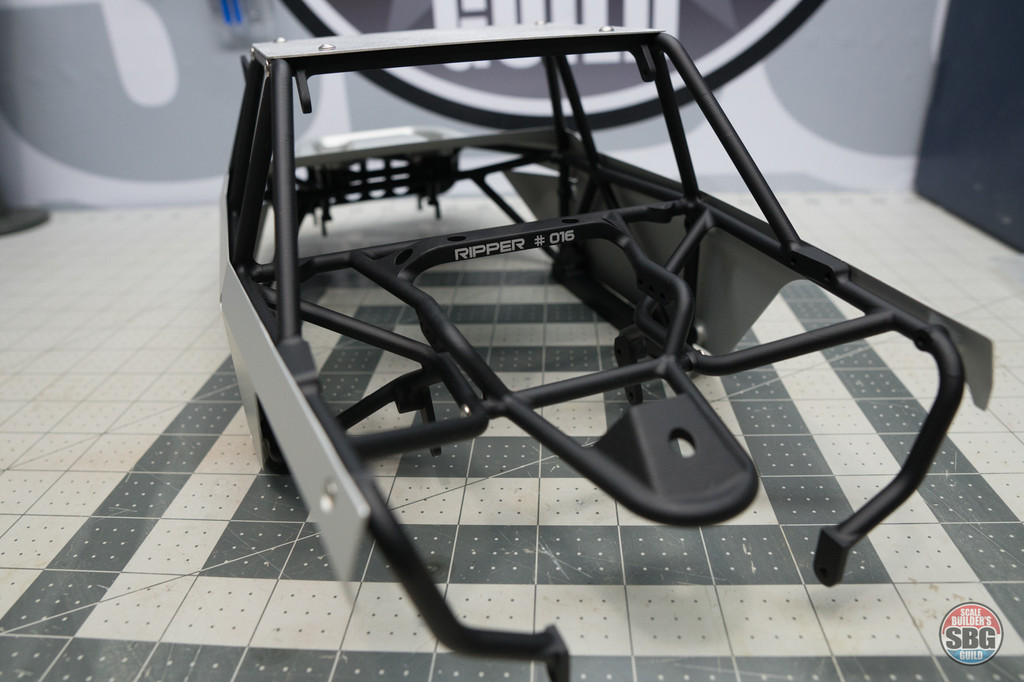 Upskirt. 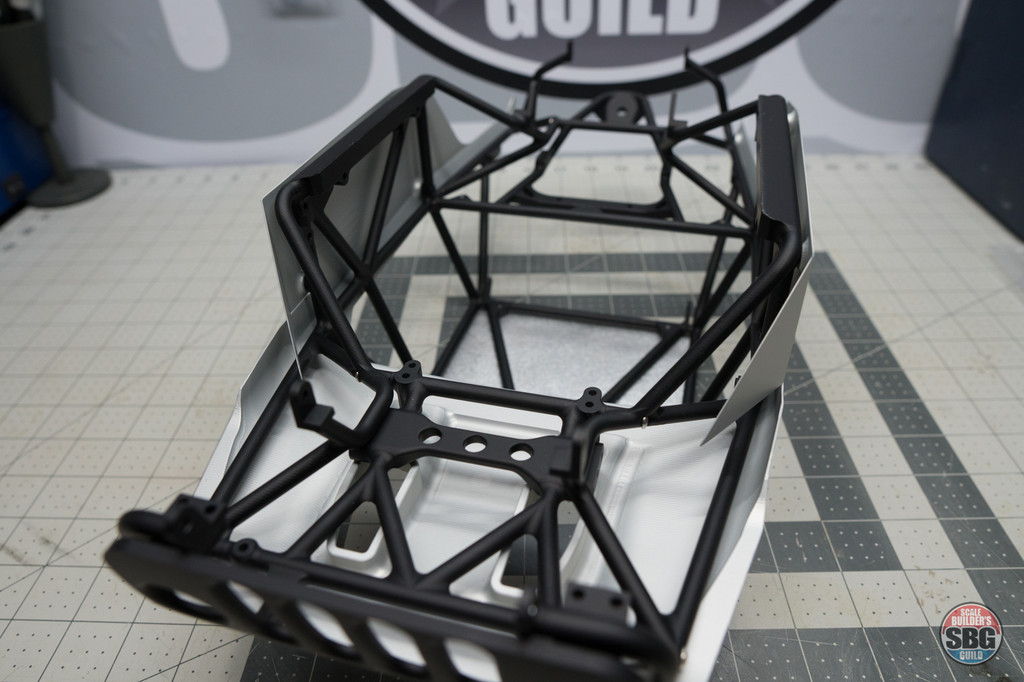 This thing really is bonkers. Everything is machined. The frame, the side panels, the grille, the hood. All machined from solid aluminum. Crazy really. The fit and finish is incredible, and it's the little details that set it apart from, well, shucks, there aren't really any competitors. When you initiate the pre-order, as these are built to order, you get to choose all kinds of color combinations. I went for the boringest. Bag of stuff that comes with the truck. No, not everything you need, but a substantial number of parts that will get you close. 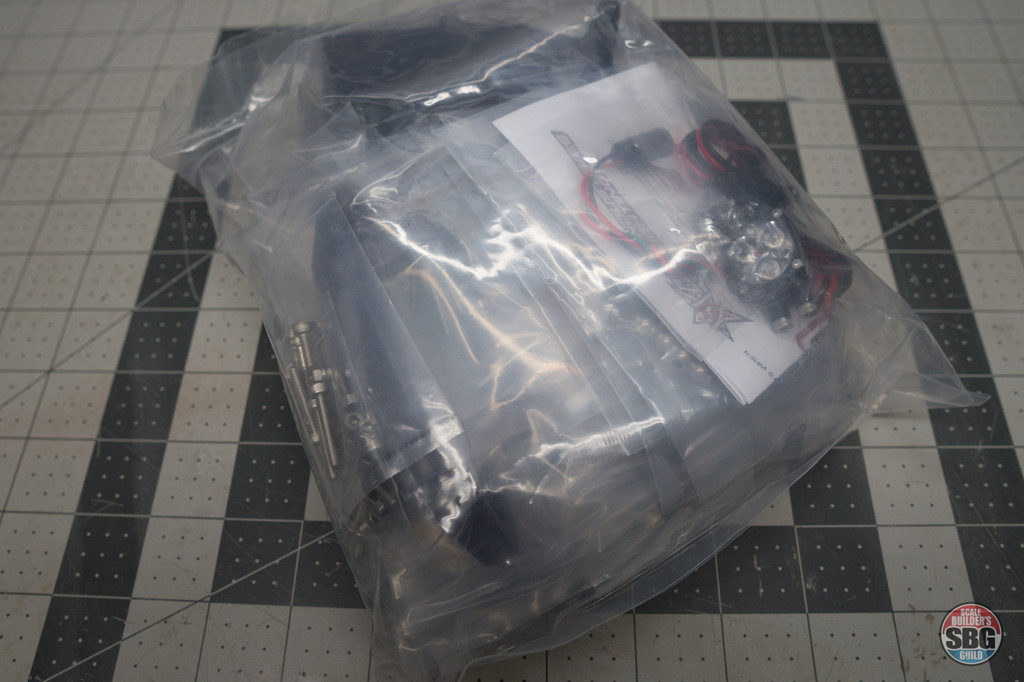 Things from inside that bag. 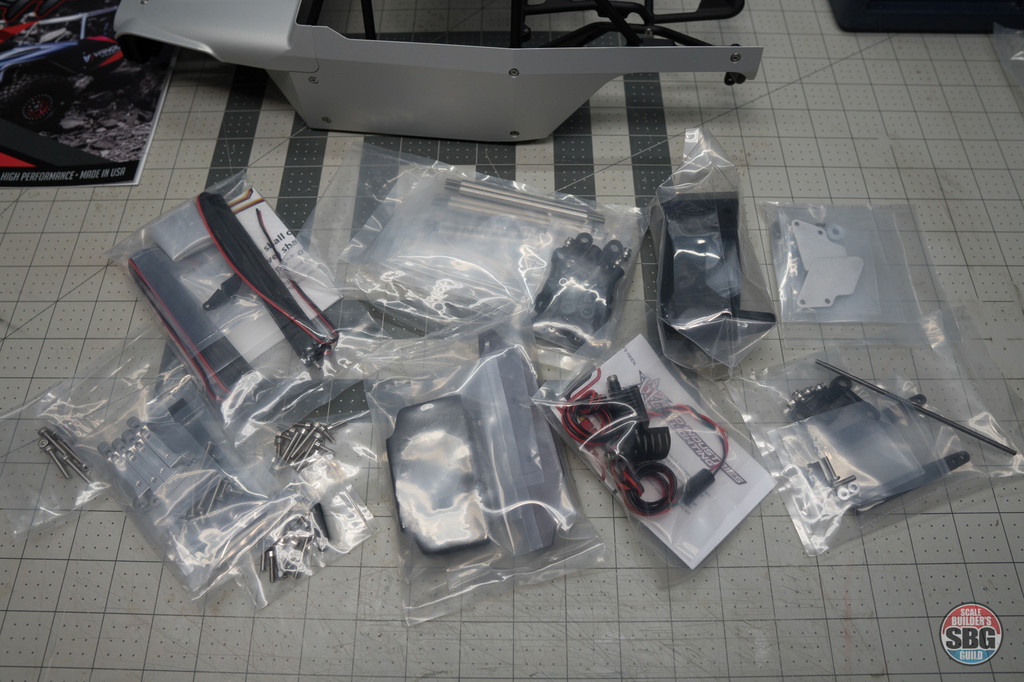 It's true that the list of things required to finish one of these to drivable status is long, but this isn't the typical truck, and I'll forgive the omissions, as it means you get to personalize it further to your tastes. If you're interested in finding out, check out this link. Onto the building. Instructions are well laid out and easy to follow. Nice exploded views. No explosions. 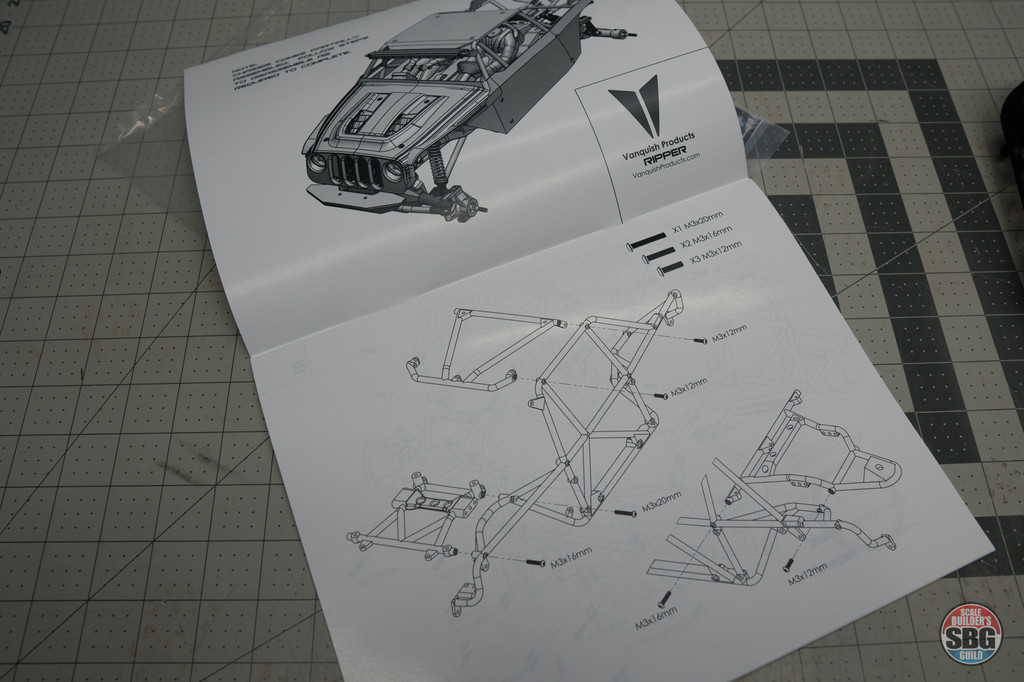 Step one is to install the 3D printed battery box and o-rings that are used to strap down the battery. 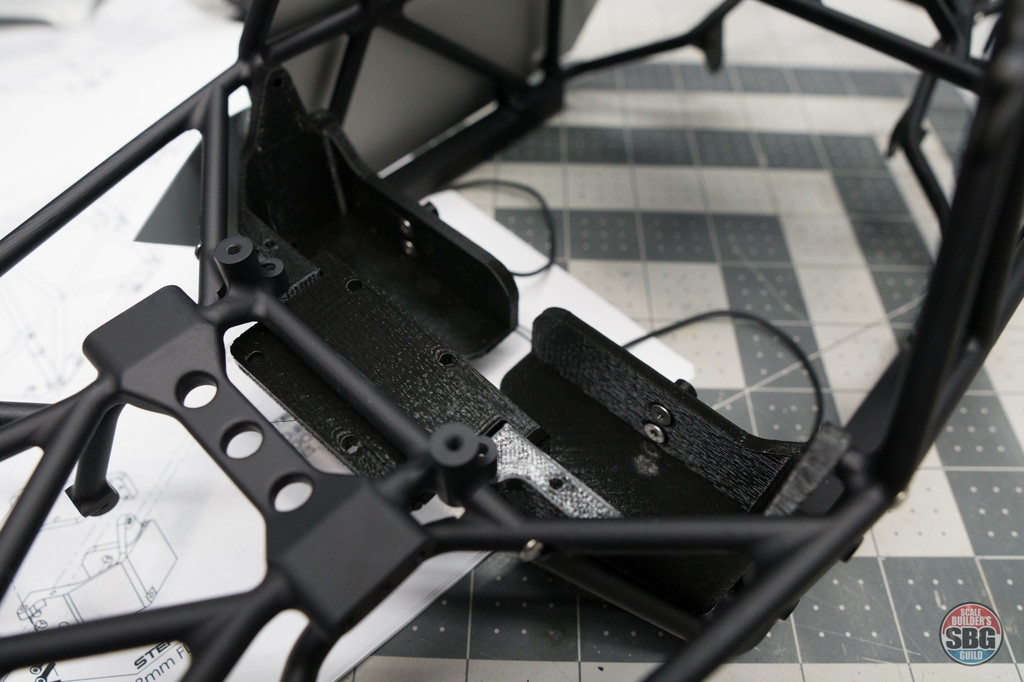 Step two, install the skid plate/chassis mounts. 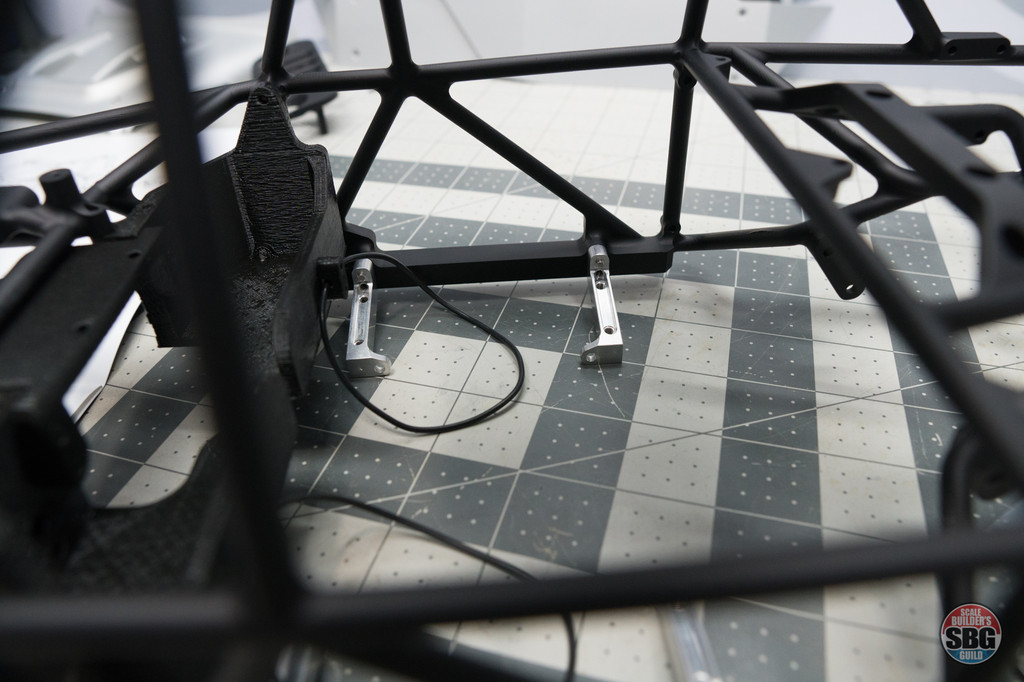 Step three, assemble the Axial chassis rails and skid. These are not included and must be sourced. Please note that I have flipped the skid, as I'll be using Dig. Yes, I know it's not legal in C2. 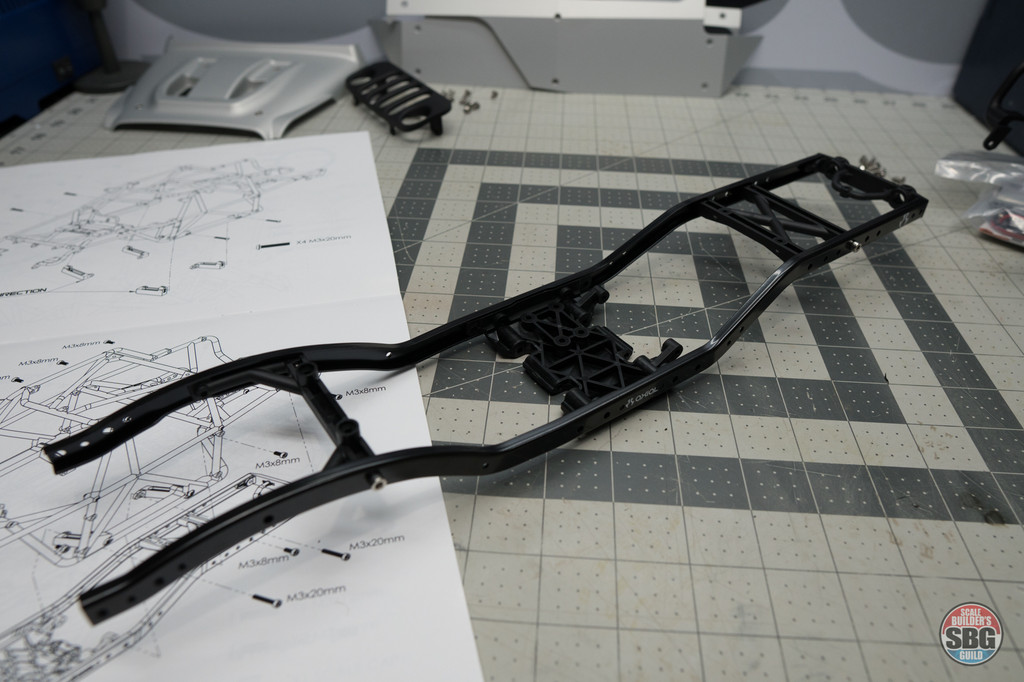 Step four, attach rails to Ripper. 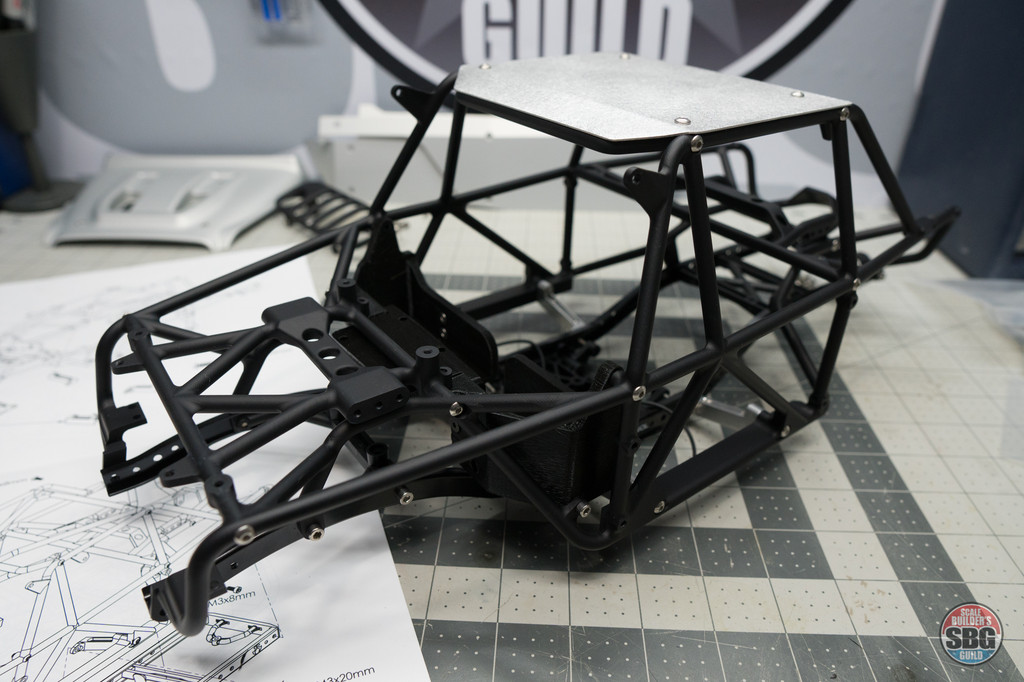 Step five, go to bed. More soon. |

|  |
| Sponsored Links | |
| | |
|
02-21-2018, 01:21 AM
| #2 |
| RCC Addict Join Date: Jan 2012 Location: Vancouver
Posts: 1,921
|
Such a great piece of art to scratch and dent and hopefully not roll. Look forward to more of this build as I have with other builds of yours.
|
|
| |
|
02-21-2018, 06:45 AM
| #3 |
| RCC Addict Join Date: Dec 2007 Location: Rochester Hills
Posts: 1,773
|
Ive been waiting to see one of these show up and to see you doing one..........subscribed! As sick as this thing already is I cant wait to see what your insane skills can add to it. Im sure this will turn out to be a real winner for ya. Are you by any chance heading to scale nationals in Tennessee? Later, Farmer |
|
| |
|
02-21-2018, 07:28 AM
| #4 |
| Rock Crawler Join Date: Mar 2017 Location: Rubicon Trail
Posts: 518
|
I am in awe... excited to see what you do with this rig! Sent from my iPhone using Tapatalk |
|
| |
|
02-22-2018, 09:23 AM
| #5 | |||
| I wanna be Dave Join Date: Jul 2010 Location: Toronto
Posts: 2,389
| Quote:
Quote:
Quote:
Onto the next step, adding the skid plates. Note that these will have to be removed when I start adding the links and axles. That'll come later. 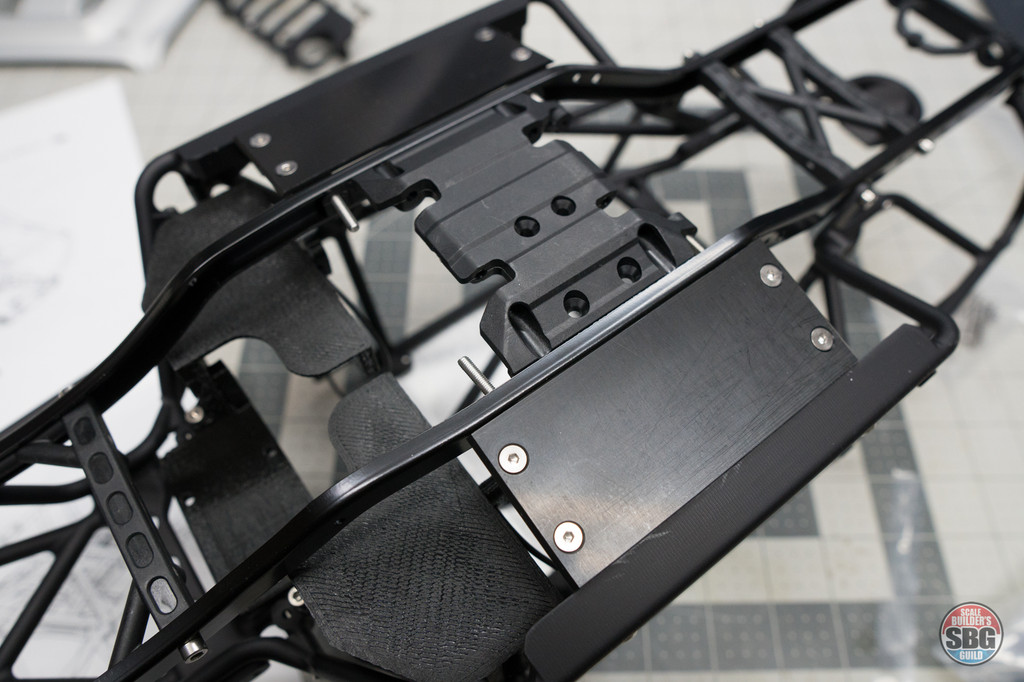 The great thing about this is how well it integrates the Axial skid and rails, but doesn't require any shock hoops, or other parts typically required in a chassis. Next, add the 3D printed radiator. Nice piece, love how it integrates a real working fan. I presume you're supposed to put the ESC somewhere behind it for MAX MR. COOL ICE. 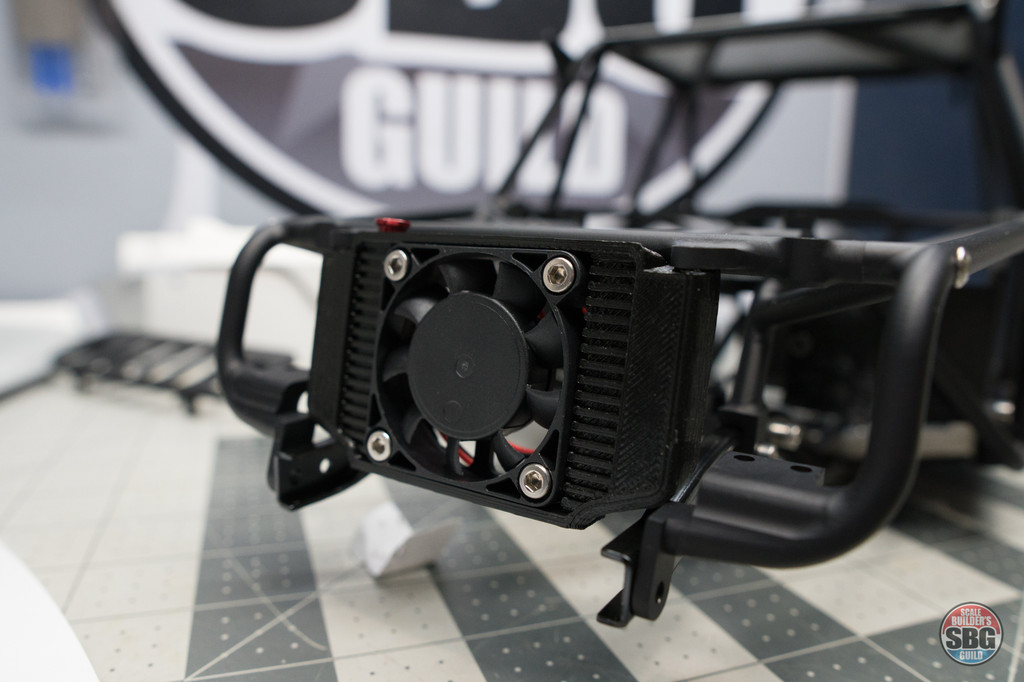 Bumper for bumping is next. This is the grey anodized Ripper bumper. Installs easy. 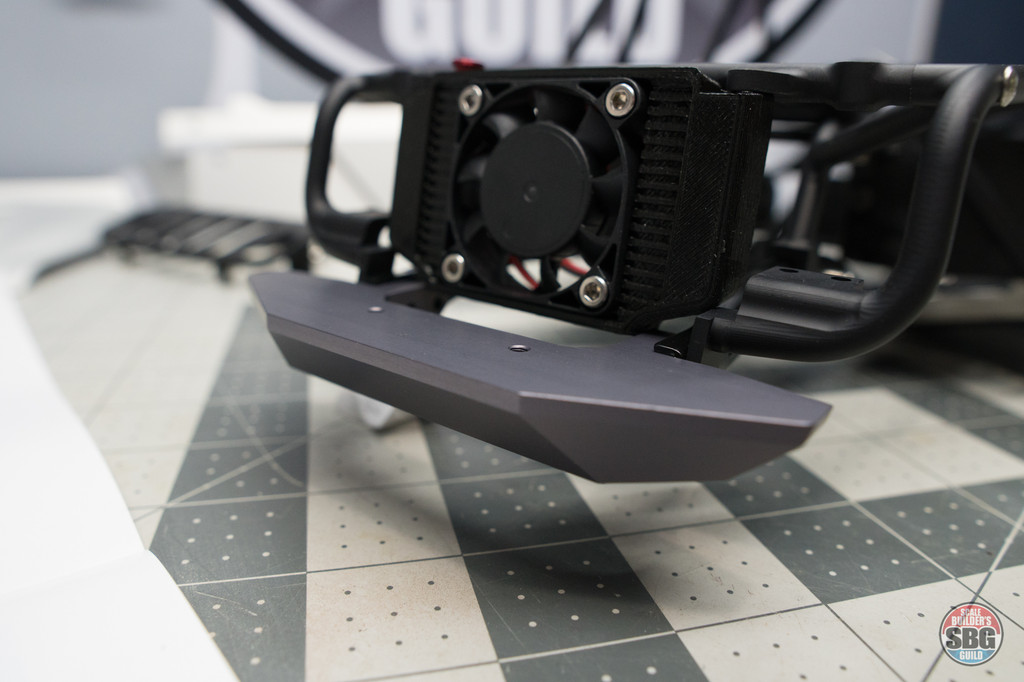 Next, add these cool-ass Rigid Q-series LED headlights into their mounting positions on the grille. These are bright. I'm still blind from looking at them last summer. I've been randomly typing keys on the keyboard so I hope it makes sense. 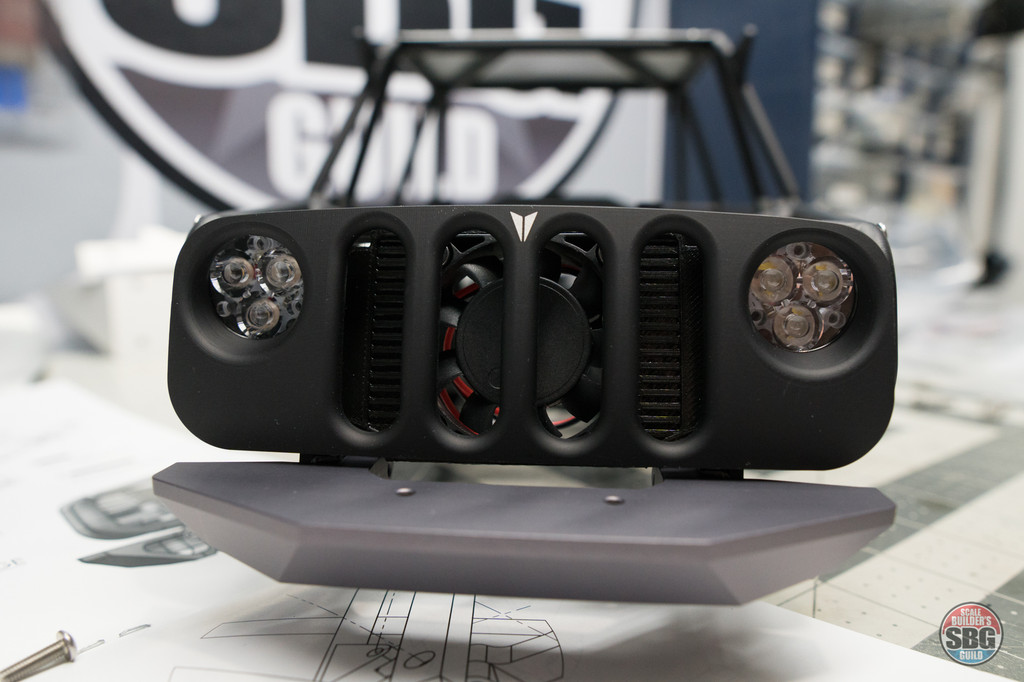 Another, you need to find these yourself part, the Axial Radiator and fuel cell - both from the Yeti I think? I can't remember. Luckily I had a bunch of these in my Axial plastic bin. In the instructions, it calls for the Rad to be installed backwards, with the fans on the front - WHAT? No. Fans need to face the back so they can suck more, or is it blow less? I don't know. But I know which way it should go. The right way. 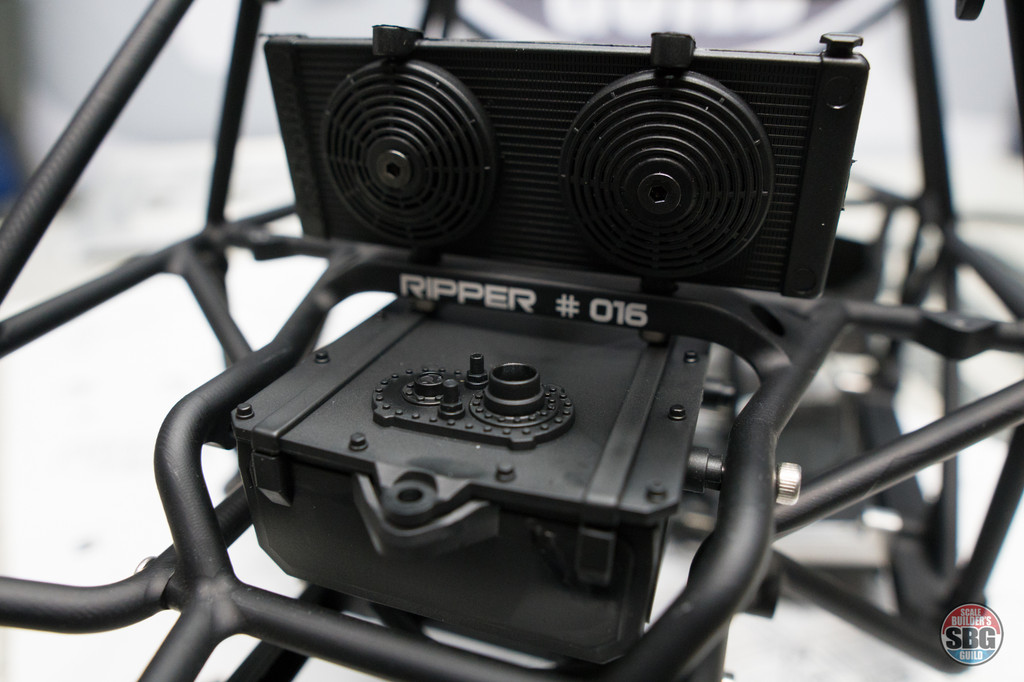 After that, do your rear sway bar, included in the kit. 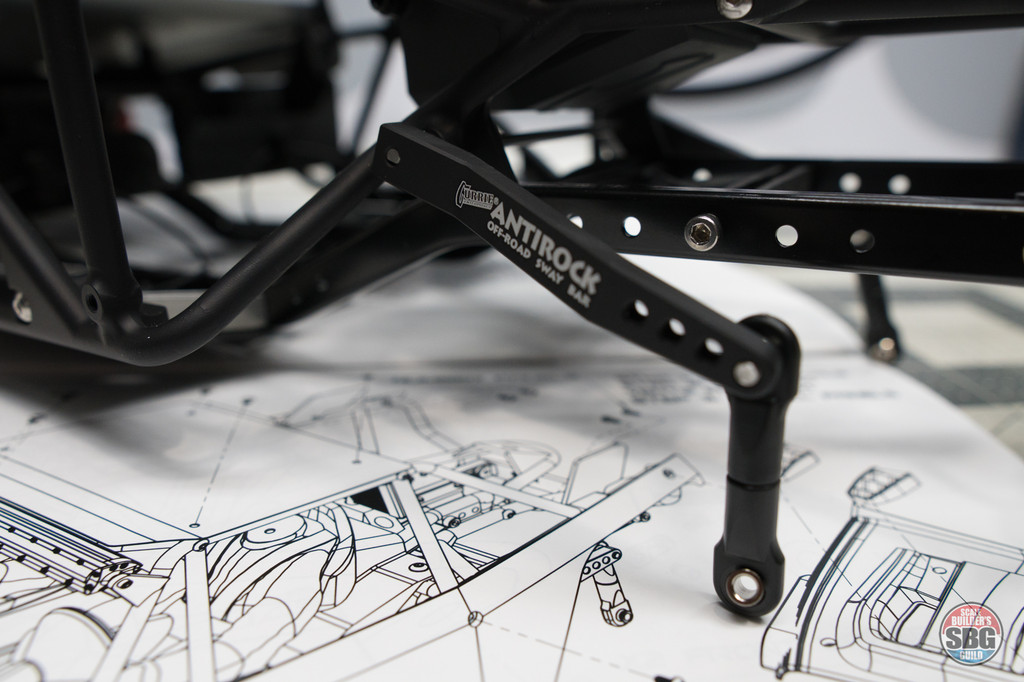 And after you've done all that, add the included light bars. 5" super white on the front, and 4" red on the rear. I've always wondered if that counts as a tail light for SORRCA points, or if it's just another light bar... 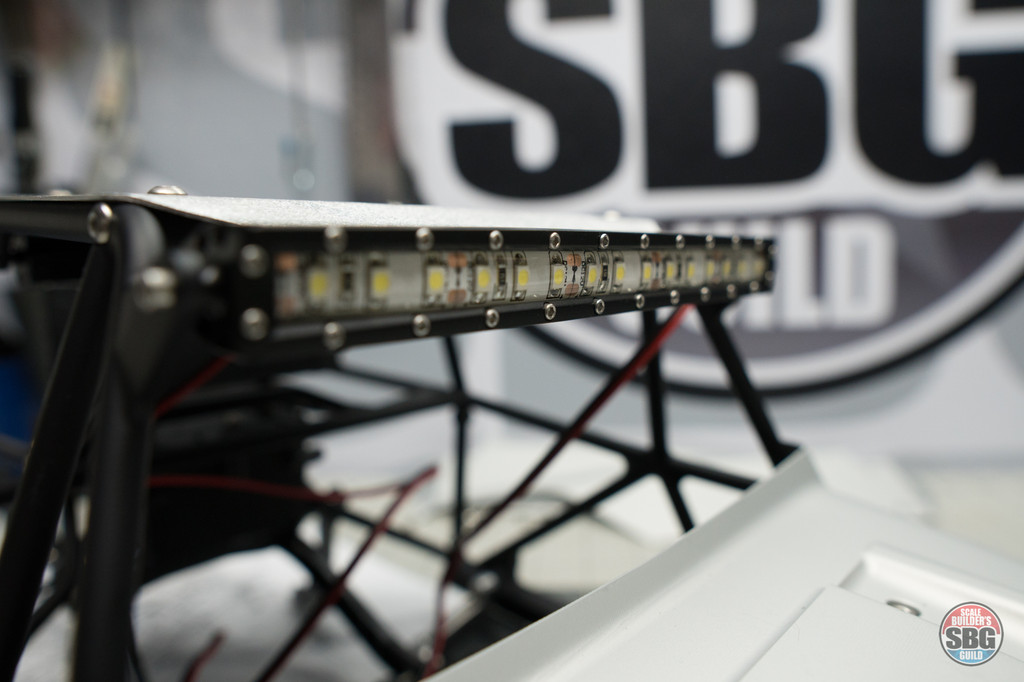 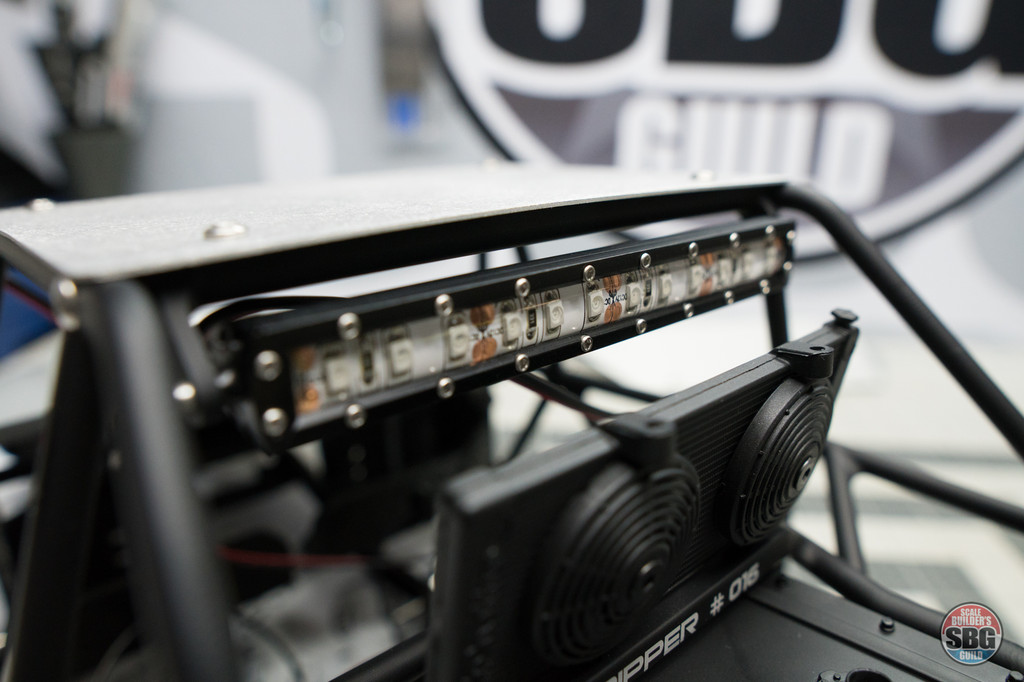 And here it is, essentially kit completed, except for links, which I hate building. My thin girlish fingers don't agree with all those rod ends. 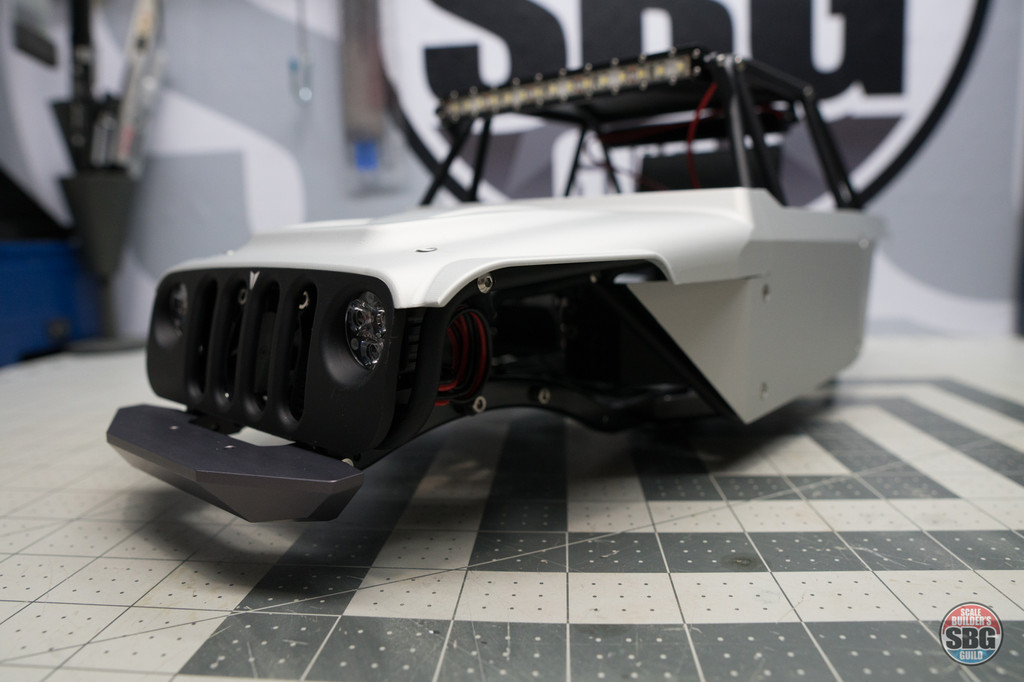 Next steps are building axles, drivetrain, and about a million other things. | |||
|
| |
|
02-22-2018, 09:36 AM
| #6 |
| I wanna be Dave Join Date: Sep 2012 Location: Victoria, BC
Posts: 2,257
|
So much awesomeness in one place! One thing I noted that needs attention is an upper radiator support and/or tilting it forwards so the top rests below the rear light bar. I'm jealous! |
|
| |
|
02-22-2018, 09:41 AM
| #7 | |
| I wanna be Dave Join Date: Jul 2010 Location: Toronto
Posts: 2,389
| Quote:
| |
|
| |
|
02-22-2018, 10:36 AM
| #8 |
| Rock Crawler Join Date: Feb 2013 Location: Casper
Posts: 505
|
Where can I buy one?
|
|
| |
|
02-22-2018, 10:45 AM
| #9 |
| I wanna be Dave Join Date: Jul 2010 Location: Toronto
Posts: 2,389
|
There's a link in the OP. But here it is again: http://www.vanquishproducts.com/pre-...ipper-project/ |
|
| |
|
02-22-2018, 02:26 PM
| #10 |
| I wanna be Dave Join Date: May 2008 Location: Baltimore
Posts: 4,442
|
So all of that "tube" work is actually CNC'd from a piece of billet?
|
|
| |
|
02-22-2018, 02:31 PM
| #11 | |
| I wanna be Dave Join Date: Jul 2010 Location: Toronto
Posts: 2,389
| Quote:
| |
|
| |
|
02-22-2018, 02:50 PM
| #12 | |
| I wanna be Dave Join Date: Oct 2007 Location: Castle Rock, WA
Posts: 8,785
| Quote:
You need a #szczerbatool  | |
|
| |
|
02-22-2018, 03:12 PM
| #13 |
| I wanna be Dave Join Date: Sep 2012 Location: Victoria, BC
Posts: 2,257
|
I use the Traxxas Slash rod end tool. Save your fingers!
|
|
| |
|
02-22-2018, 03:40 PM
| #14 | |
| Quarry Creeper Join Date: May 2016 Location: Nässjö
Posts: 241
| Quote:
I need that lol shapeways? Skickat från min iPhone med Tapatalk | |
|
| |
|
02-22-2018, 07:36 PM
| #15 |
| RCC Addict Join Date: Aug 2008 Location: Paulina
Posts: 1,213
|
I’m a little jelly. These things look soooo good.
|
|
| |
|
02-22-2018, 08:09 PM
| #16 |
| I wanna be Dave Join Date: Nov 2009 Location: Chico now
Posts: 2,384
|
DAYUMMM! |
|
| |
|
02-22-2018, 08:24 PM
| #17 |
| Quarry Creeper Join Date: Jan 2005 Location: Seymour, Tn
Posts: 394
|
Ok, now how do I explain to the wife that we need to get a second mortgage on the house just so I can buy one of these and build it with parts of equal quality? Seriously though, can't wait to see what you do with this build. Wayne |
|
| |
|
02-23-2018, 01:02 AM
| #18 |
| Shelf queen   Join Date: Aug 2008 Location: Internet
Posts: 5,857
|
No billet battery tray with billet o-rings? Pssssh!
|
|
| |
|
02-23-2018, 02:05 AM
| #19 | |
| RCC Addict Join Date: Dec 2012 Location: Crookston
Posts: 1,872
| Quote:
Sczerba tool · Rc Scaleworx · Online Store Powered by Storenvy | |

| |
|
02-23-2018, 07:07 AM
| #20 |
| Quarry Creeper Join Date: Aug 2016 Location: Or-eee-gun
Posts: 274
|
I'm subbed. Looking forward to seeing what sort of SBG flavor you give this one.
|
|
| |
|
 Imthatguy builds a Ripper. - Similar Threads
 | ||||
| Thread | Thread Starter | Forum | Replies | Last Post |
| Imthatguy builds an SCX10 II | imthatguy | Axial SCX10 II | 216 | 09-18-2018 02:15 PM |
| Imthatguy builds a Toyota - SHOCKER! | imthatguy | 1.9 Scale Rigs | 57 | 10-19-2017 08:06 AM |
| Imthatguy builds a Cherokee because he hates Jeeps. | imthatguy | 1.9 Scale Rigs | 57 | 10-31-2016 02:46 PM |
| |


 Linear Mode


