| |
| |||||||
 |
| | LinkBack | Thread Tools | Display Modes |
 10-14-2009, 05:59 PM
| #1 |
| Newbie Join Date: Oct 2009 Location: canada
Posts: 38
|
Hey all, new here. and i am brand new to the world of crawling, and i have a few pics on my homemade links and steering arms. just thought i would share. i have also just finished weighing down the tires 7.5 oz in the front and 5oz in the rear. cut the foams down a lil and siped the hammers. ill add more pics later. thanx 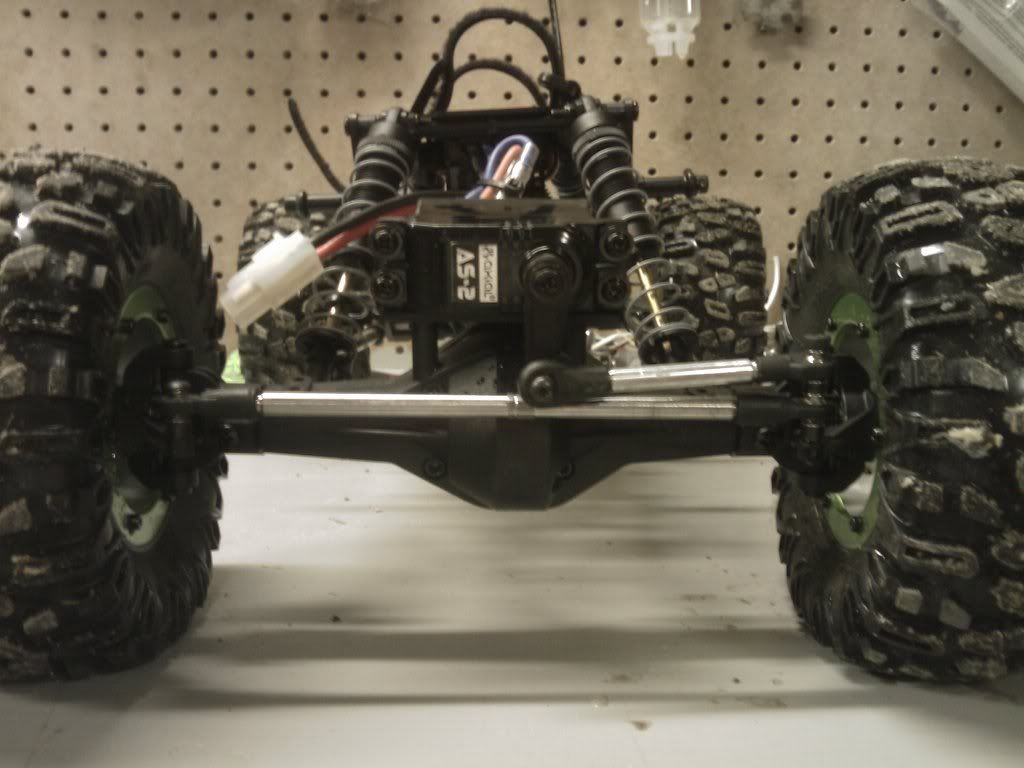 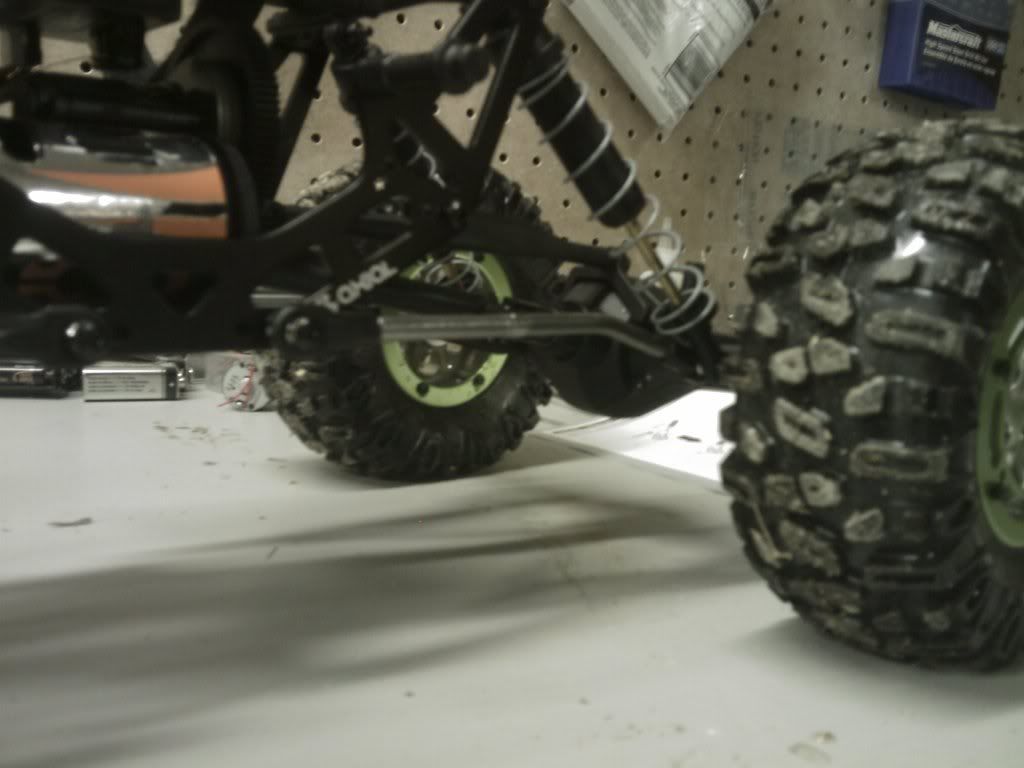 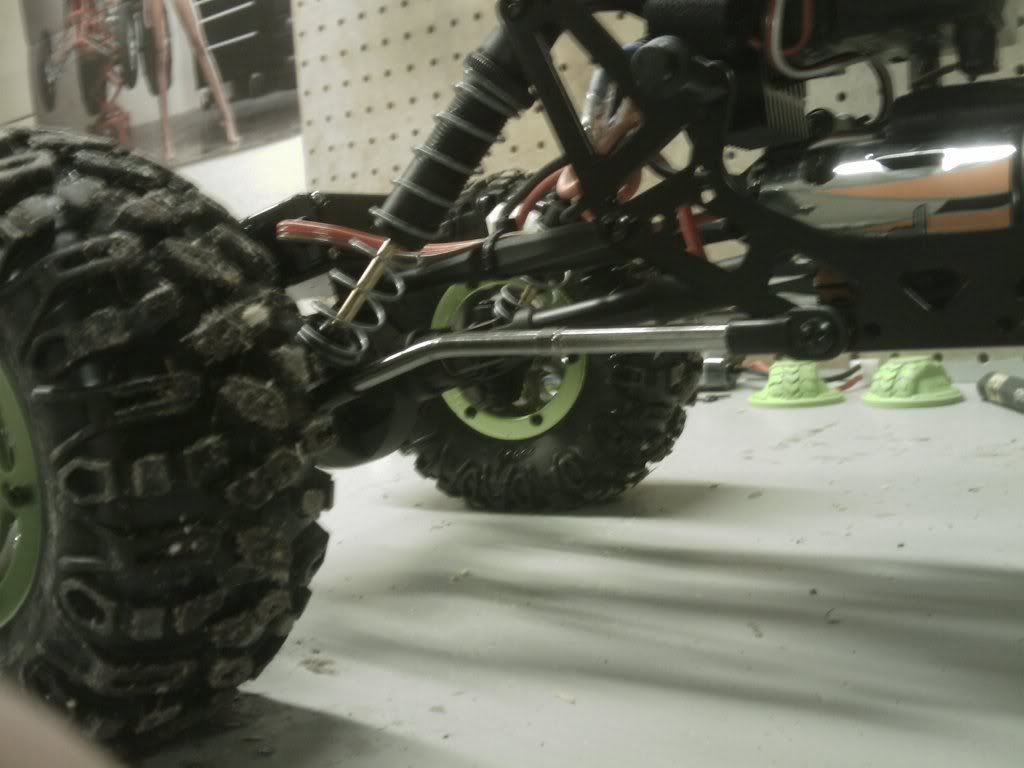 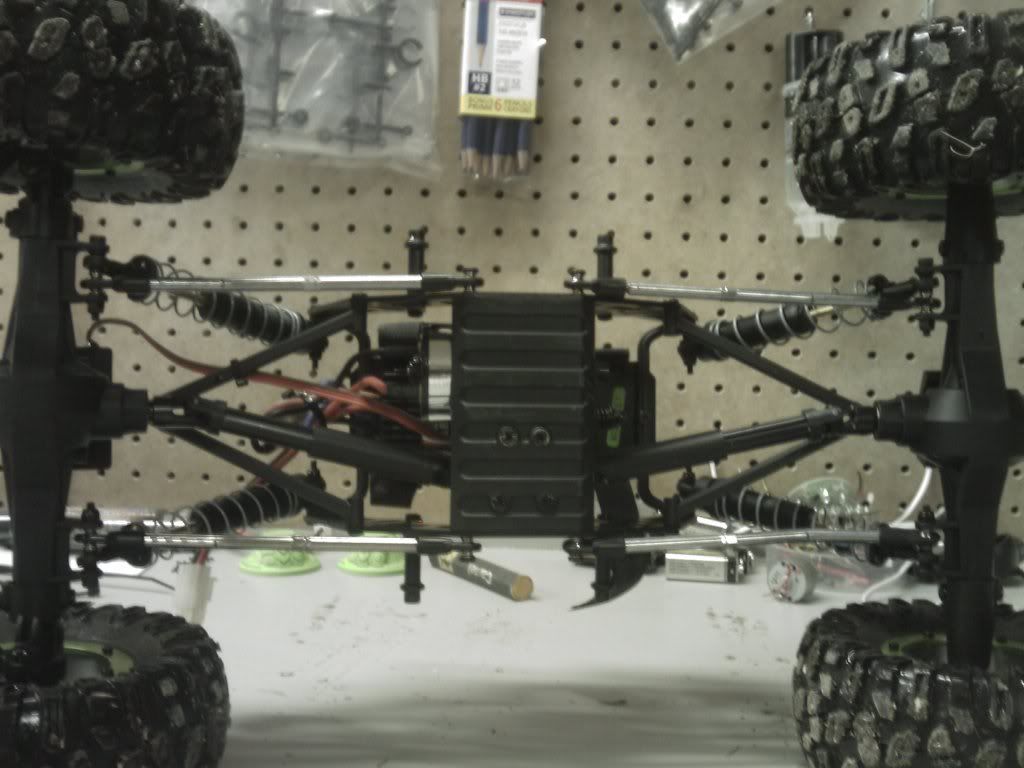 Last edited by revo_chance; 10-30-2009 at 05:11 PM. |

|  |
| Sponsored Links | |
| | |
|
10-14-2009, 06:01 PM
| #2 |
| Newbie Join Date: Oct 2009 Location: canada
Posts: 38
|
oh and if anyone notices, these are just parts off my revo that i've changed out.
|
|
| |
|
10-14-2009, 07:07 PM
| #3 |
| Rock Crawler Join Date: Dec 2008 Location: Appleton, Wi
Posts: 660
|
did the same thing with the bent traxxas rods when I first started. Worked great till the truck falls and lands on the rear wheels and bends the links.  Just a heads up. I wish I would have started w/ an artr or rtc instead of a rtr. Just a heads up. I wish I would have started w/ an artr or rtc instead of a rtr.
|
|
| |
|
10-14-2009, 08:59 PM
| #4 |
| Newbie Join Date: Oct 2009 Location: canada
Posts: 38
|
yeah thanks for the heads up. i will have the stock links to put back into place if they bend. but for now they will work ok i think. i would like some aluminum links but a tight budget as of now will keep me working on cheap parts.
|
|
| |
|
10-14-2009, 09:20 PM
| #5 |
| Pebble Pounder Join Date: Nov 2008 Location: Marysville, WA
Posts: 197
|
Since you are on a budget..look up the Venom skid plate, or some other brand of skid plate that allows you to move those lower links inboard and cut your stock skid plate to do the same thing. I did this with my stock skid and it worked pretty good for a while, but I eventually had to replace it because the mount holes eventually start rounding out...its an easy upgrade for the budget crawler...just remember that you have to buy some spacers for the axle portion of your suspension reconfiguration..inside the mount ears going from the tire side is your shock,(also moved inboard, if not already, on the chassis) then a spacer, then outside the ear, on the diff side, goes your lower link, followed by a nylock nut....gonna need some longer screws for this too...anyway, that's my .02...
|
|
| |
|
10-15-2009, 01:47 AM
| #6 |
| Quarry Creeper Join Date: Aug 2009 Location: Golden, CRAWLERADO
Posts: 491
|
i cut cut my stock skid plate to move my lower links inboard. its a free skid plate versus paying for one. also i would swap your driveshafts so the female end is on the axle. it saves the shaft from getting damaged by rocks. i started uilding my rig on a budget but that was about a grand ago. good thing is now i have enuff spare parts that i pulled off my rtc to build a second rig |
|
| |
|
10-15-2009, 07:05 AM
| #7 |
| Newbie Join Date: Oct 2009 Location: canada
Posts: 38
|
does anybody have pics on the skid mod, i will probably end up doing it my self (cutting). i will do a search but pictures are easier. thanx for the tips guys, anymore would be greatly appreciated.
|
|
| |
|
10-15-2009, 07:22 AM
| #8 |
| Suck it up!   Join Date: Mar 2008 Location: Arkansas
Posts: 11,652
|
Looking good so far! The skid mod is very easy, all you have to do is notch the skid on the inside of the frame to move the links in. A simple hand saw or dremel will work. You might also take a look at my budget build here... http://206.180.232.134/forum/showthread.php?t=203342 Most of the electronics are aftermarket, and so are the shocks and tires, but everything else you could easily build for yours with very little $. My link plates, over-the-axle battery tray, and most of the links were made with easily found inexpensive aluminum. The best part is that it crawls nearly as well as my regular comp rig at less than half the cost. |
|
| |
|
10-15-2009, 08:32 AM
| #9 |
| Quarry Creeper Join Date: Nov 2008 Location: Orange
Posts: 221
|
if you go to www.rccrawler.com/axialcompbuild.html (i hope it works) i do not think you will have to do the susp. part but every thing else will help you out. i did this without a dime spent. (before the swx) |
|
| |
|
10-15-2009, 03:14 PM
| #10 |
| Newbie Join Date: Oct 2009 Location: canada
Posts: 38
|
well that went well, here is the updated pics.  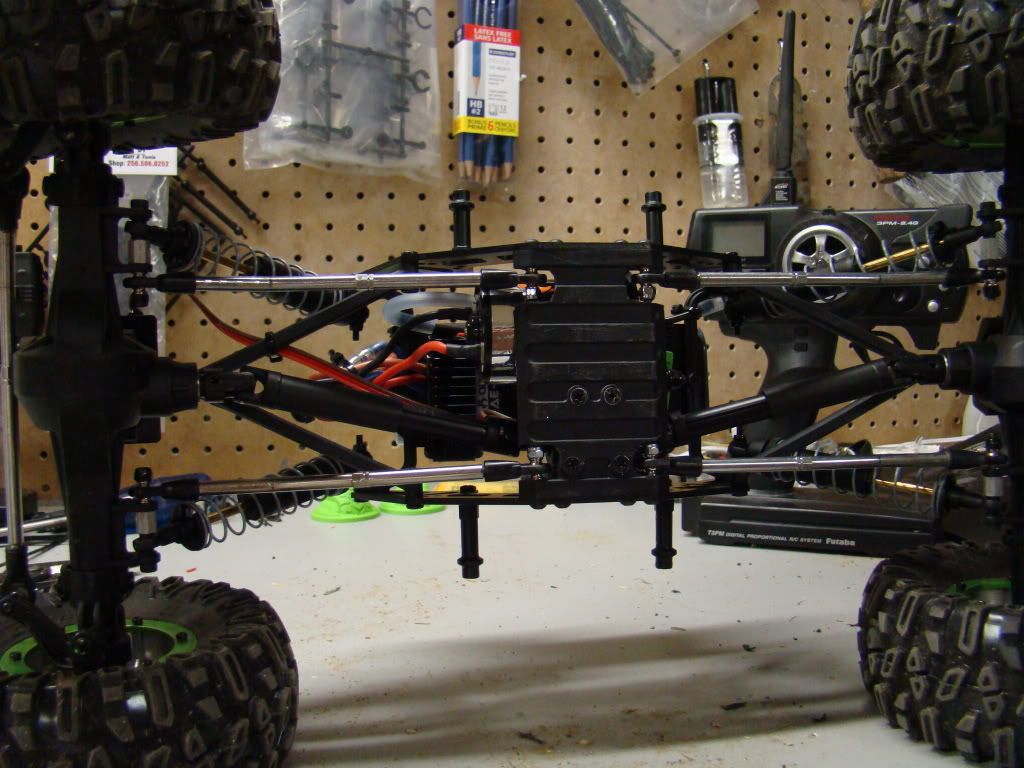 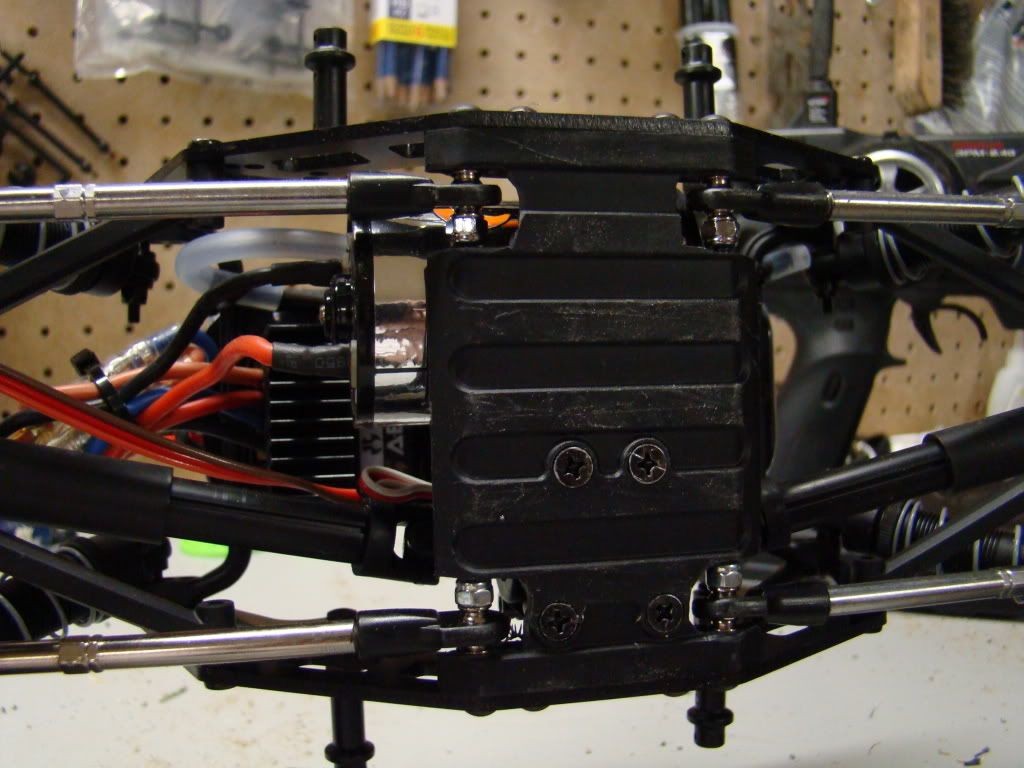 and here is a couple of me crawling over a candle holder from our wedding, i really had nothing else and it snowed.  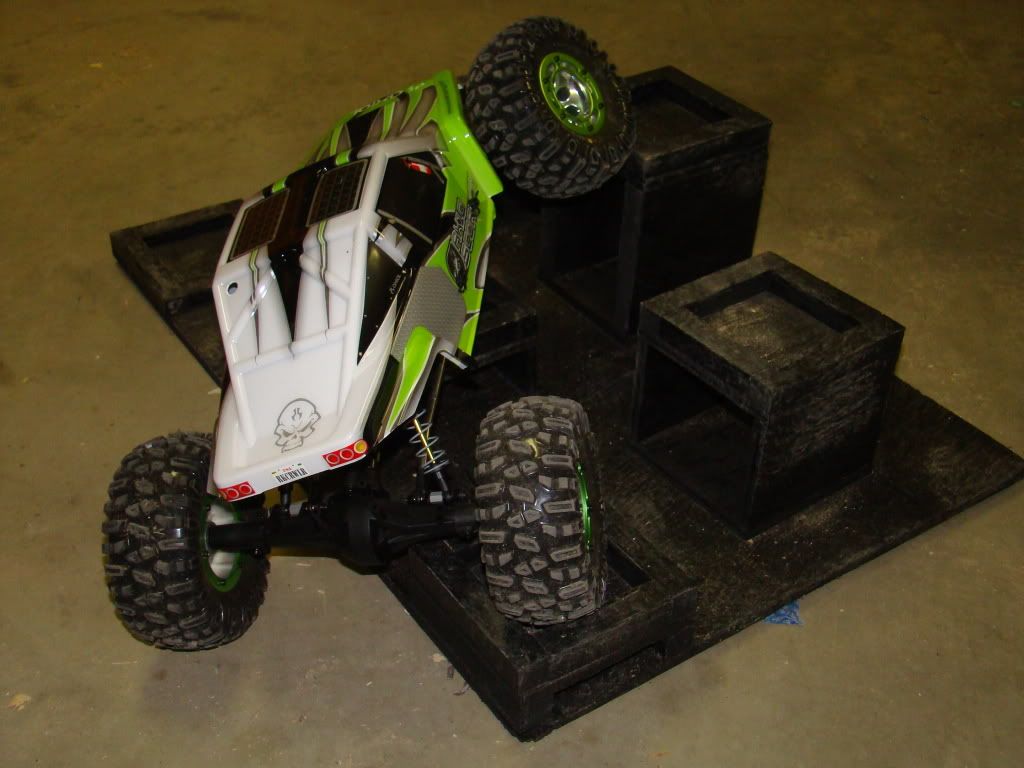 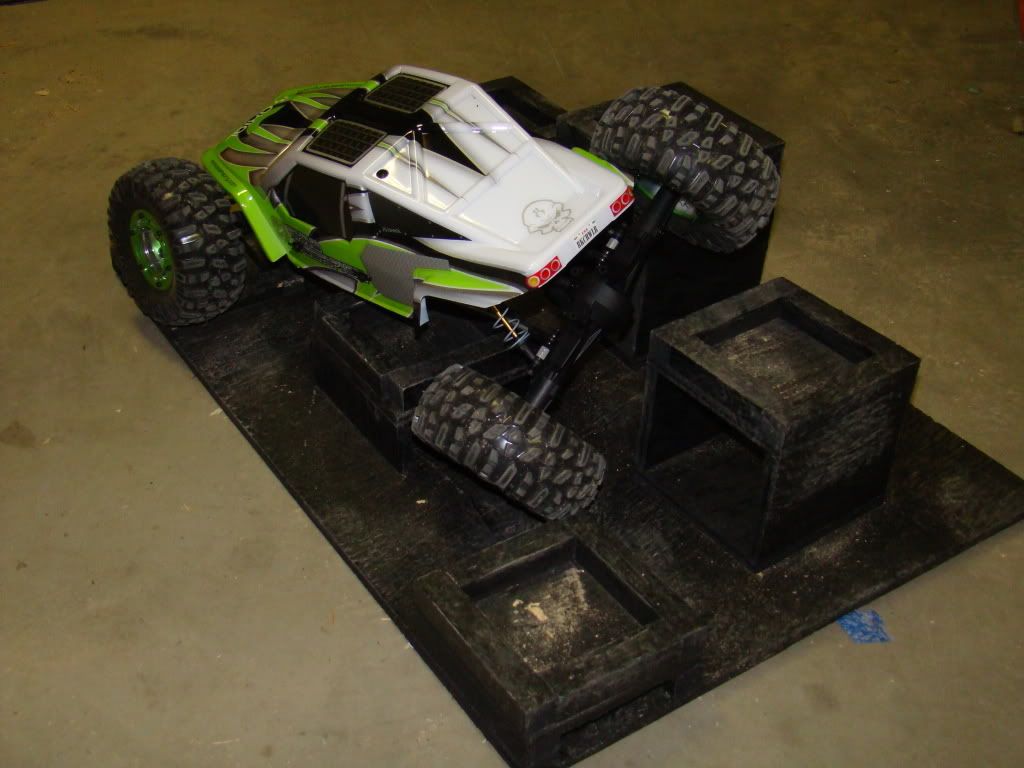 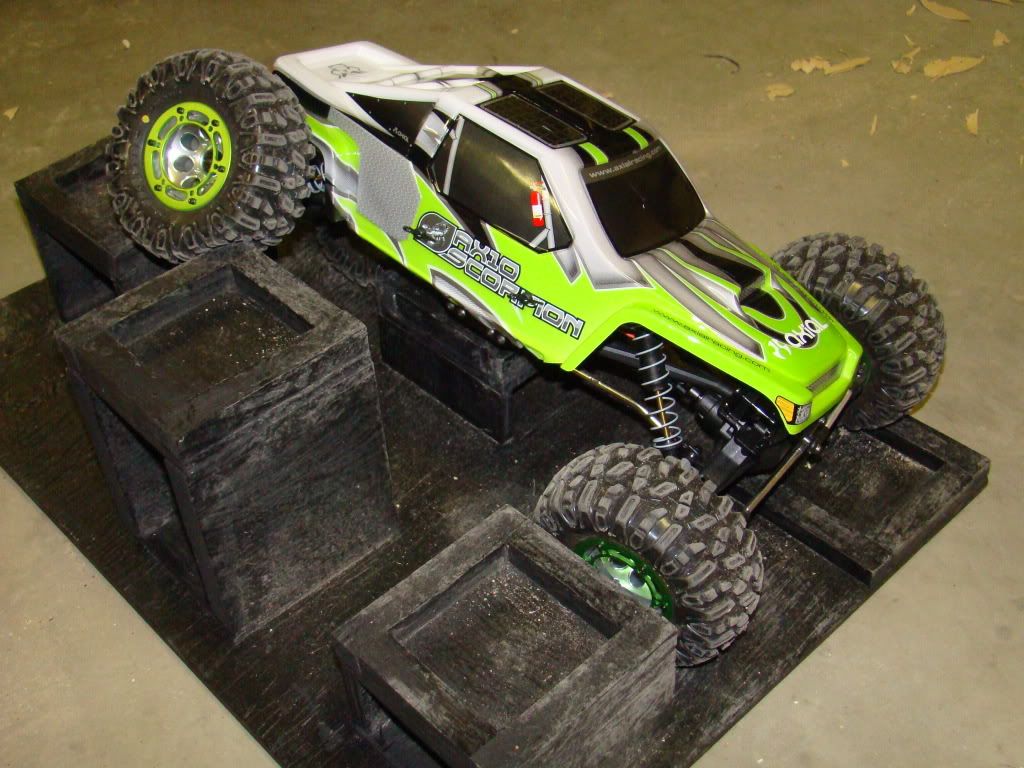 |
|
| |
|
10-15-2009, 08:04 PM
| #11 |
| Pebble Pounder Join Date: Nov 2008 Location: Marysville, WA
Posts: 197
|
Good job on the skid bud ...Hopefully it lasts a while for ya..it was easier than you thought wasn't it?
|
|
| |
|
10-15-2009, 10:42 PM
| #12 |
| Newbie Join Date: Oct 2009 Location: canada
Posts: 38
|
yeah everything has been so far, i think im gonna have to trim some more off my foams tho, and there is a weird glitching feeling at full steering and very low speed. almost feels like the from dogbones are hard to turn and the motor almost fights it. i dont know if thats what it is or not. but it does crawl way better. thanx guys.
|
|
| |
|
10-15-2009, 11:15 PM
| #13 |
| Pebble Pounder Join Date: Nov 2008 Location: Marysville, WA
Posts: 197
|
too bad you are on a budget, cause I tell you what...memory foam is the way to go, as opposed to cutting the foams...cutting the foam, IMO, is too much of a cheap copout... you gotta splurge for the good "sticky" tires with memory foams...unbelievable difference...I'm running Losi Comp Claws with memory foams (went to those from the stock tires w/ cut foams) and the difference was HUGE!!! Rocks, I couldn't crawl for the life of me with the stock tires and cut foams, I am able to walk right up with the Comp Claws...Everything else can be budgeted out pretty well and still be able to keep up with "some" of the big boys. Also, you did drill a couple holes in your rims to allow for air to escape, right?
|
|
| |
|
10-15-2009, 11:30 PM
| #14 |
| Pebble Pounder Join Date: Nov 2008 Location: Marysville, WA
Posts: 197
|
yer also going to want to store it on some sort of stand..I use a 4 x6 chunk of wood that just keeps the tires off the bench and keeps the suspension in it's idle position...the 4 x 6 is cut to fit at the ends of the front and rear lower links..just at the inside edges of the front and rear diffs. If you have memory foams and you keep it sitting on your bench for a couple days, you will have flat spots when you show up at the rock pile that will take a while to work out...not a good thing!
|
|
| |
|
10-16-2009, 07:47 AM
| #15 |
| Newbie Join Date: Oct 2009 Location: canada
Posts: 38
|
the truck came with proline hammers and memory foams, i shoulda just trimmed a little off when i weighed them down, and i did sipe the tires and they work well, really. and i do store it not sitting, i hang all my rc's that way they are all off the tires and suspension. i would still like to know if that glitching problem is normal, it really does feel like the front end is binding and causing it to feel like that.
|
|
| |
|
10-16-2009, 11:13 AM
| #16 |
| Quarry Creeper Join Date: Sep 2009 Location: Ukiah
Posts: 280
|
The glitching is crappy electronics. Mine glitched alot but i seperated the esc and rx and now its a little better, so try that out.
|
|
| |
|
10-16-2009, 11:20 AM
| #17 |
| RCC Addict Join Date: Jul 2009 Location: reelsville
Posts: 1,871
|
i think the stock ESC only has a 1 amp bec, that probably whats up
|
|
| |
|
10-16-2009, 01:50 PM
| #18 |
| Newbie Join Date: Oct 2009 Location: canada
Posts: 38
|
bec? can you explain please. i will try the seperation thing and see how it works out. thanx guys
|
|
| |
|
10-16-2009, 05:39 PM
| #19 |
| RCC Addict Join Date: Jul 2009 Location: reelsville
Posts: 1,871
|
it's the part of the ESC that drops the voltage to the rx. a better esc will have a 3 to 5 amp one but the 10 amps from a cc bec is the cheapest and best fix, esp if your gonna get a strong servo.
|
|
| |
|
10-17-2009, 08:50 AM
| #20 |
| Newbie Join Date: Oct 2009 Location: canada
Posts: 38
|
ok i am assuming that cc is castle creations, i was looking and they dont have a crawler specific esc, so i was wondering what esc ppl reccomend?
|
|
| |
|
| |


 Linear Mode


