| |
| |||||||
 |
| | LinkBack | Thread Tools | Display Modes |
 07-01-2018, 03:45 PM
| #21 |
| Rock Stacker Join Date: Jun 2018 Location: belgium
Posts: 80
|
thnx for the tip. There is already some paint on it. I used some acryllic paint but it you are right that it probably wont last long. The body is done. All went good exept for the window stickers. There are some air bubbles in the windows... not really showing on the pics. 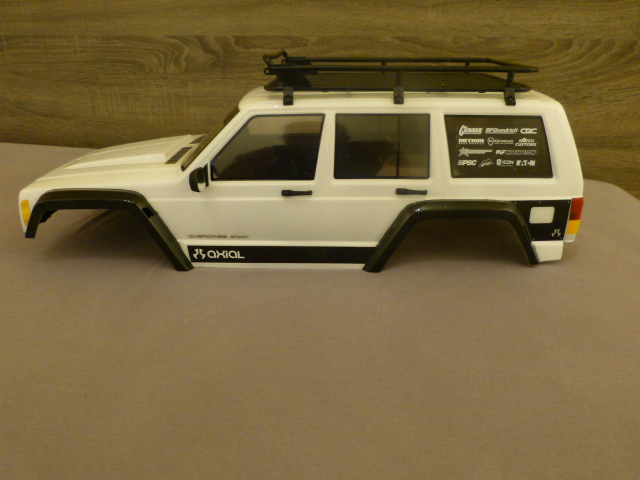 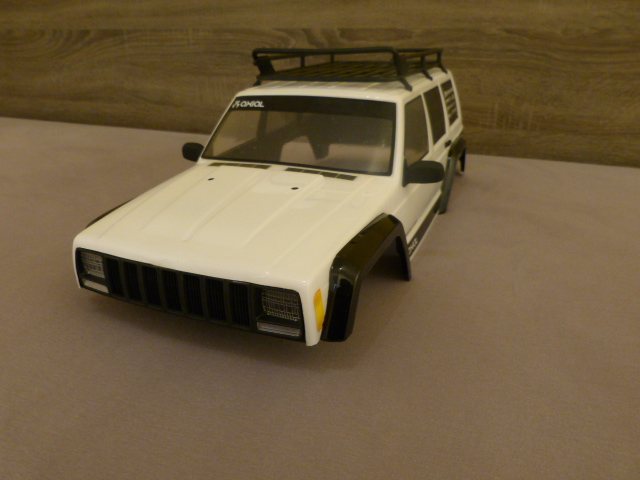 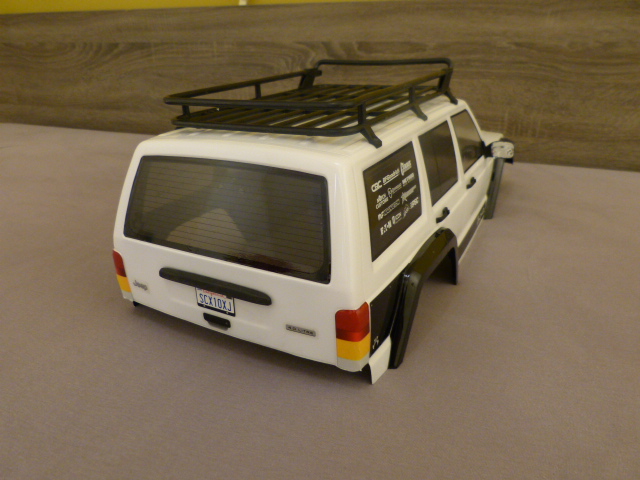  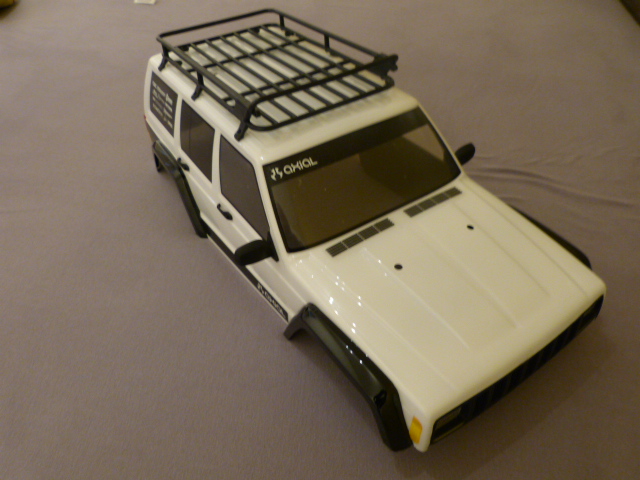 Last edited by THX_138; 07-10-2018 at 12:15 AM. |

|  |
| Sponsored Links | |
| | |
|
07-02-2018, 06:44 PM
| #22 |
| Pebble Pounder Join Date: Jun 2006 Location: San Diego, CA
Posts: 124
|
That looks great! I did mine in the same color. This was the first RC body i did where i wasnt an impatient teenager... it came out surprisingly good but i made a few rookie mistakes. The worst part though was cutting that grill out. Its a small detail but the door handles are on in the wrong direction |
|
| |
|
07-02-2018, 07:02 PM
| #23 | |
| Rock Stacker Join Date: Oct 2016 Location: Us of a
Posts: 62
| Quote:
 Sent from my SM-G955U using Tapatalk | |
|
| |
|
07-03-2018, 05:48 AM
| #24 |
| Rock Stacker  Join Date: Jan 2018 Location: Ivins, the Red Rock Southwest
Posts: 67
|
Man, that looks really great ! I hope mine turns out somewhere close to that. I have never painted a body (first time build), and have been searching around for hints and tips. Good one for reversing the white and black sequence to preserve the white. Conventional ? wisdom would have you mask the flares first. Good Tip ! R |
|
| |
|
07-04-2018, 02:57 PM
| #25 |
| Pebble Pounder Join Date: Oct 2012 Location: Georgia
Posts: 100
|
My $.02. Stay with stock as long as possible, to see what breaks and what you don't like. Watch out for the Chinese knock offs. Measurements are off lots of the time. Always refer to this site and ask if you don't know. Wish someone would have warned me when I started and told me of this site. LOL - I'd be richer today. What started out as a small hobby has landed me with 8 pricey RC Cars and lots of parts. AND I still love it! Nice build. Good Luck.  |
|
| |
|
07-06-2018, 03:51 PM
| #26 | |
| Rock Stacker Join Date: Jun 2018 Location: belgium
Posts: 80
| Quote:
Thx, iI had no clue Thnx for the compliments and response. I recommend tamiya PS paints. With 1 can u should cover the entire body. They spray really good and also smell really good Last edited by THX_138; 07-10-2018 at 12:16 AM. | |
|
| |
|
07-11-2018, 04:20 PM
| #27 |
| Rock Stacker Join Date: Jun 2018 Location: belgium
Posts: 80
|
I have build the transmission with vanquish top shaft. Note that the plastic spacers are numbered wrong in the instructions. 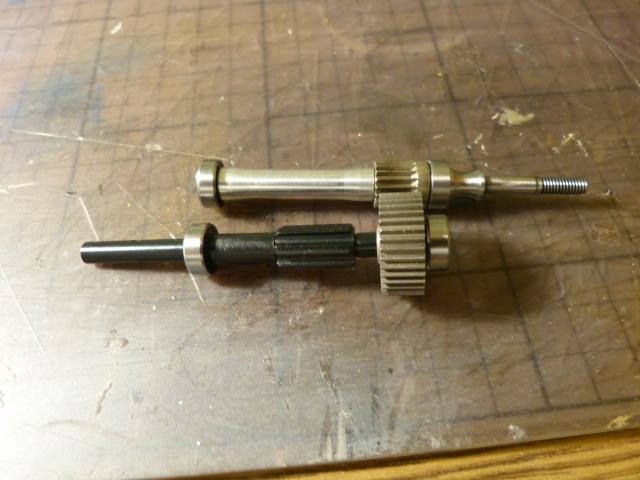 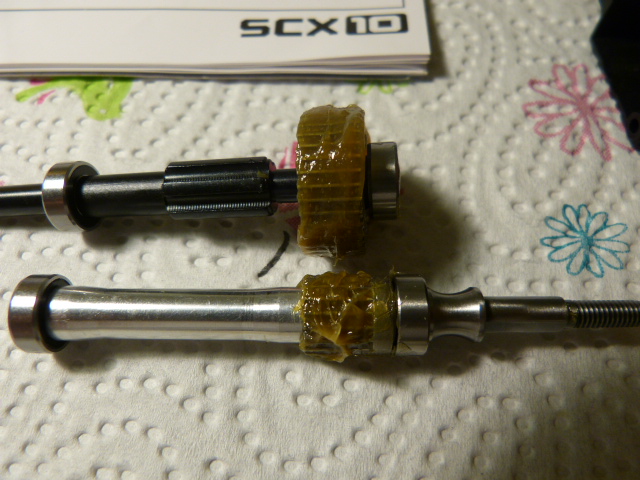 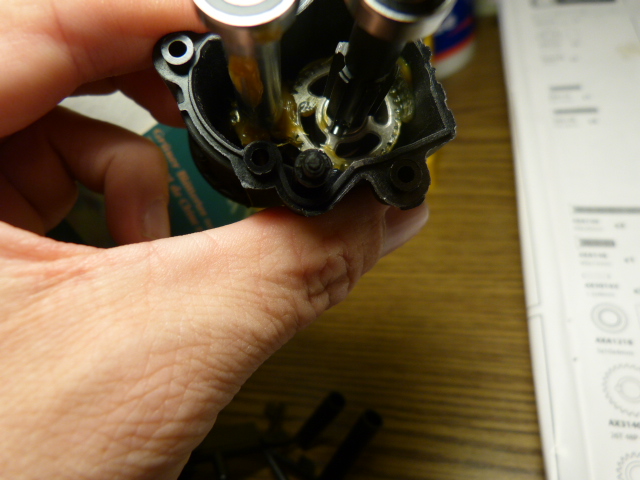  |
|
| |
|
07-11-2018, 04:58 PM
| #28 |
| Quarry Creeper Join Date: Nov 2015 Location: US
Posts: 456
|
i think you could get away with less grease. looks great for a first kit build.
|
|
| |
|
07-12-2018, 05:43 AM
| #29 |
| Rock Stacker Join Date: Jun 2018 Location: belgium
Posts: 80
|
I always have the feeling there is not enough grease so I end up with quite a bit of grease As the gears spin the exess grease will fly off |
|
| |
|
07-12-2018, 05:49 AM
| #30 |
| RCC Addict Join Date: Jun 2017 Location: Canada
Posts: 1,742
|
Just make sure grease flying up dosen't pour outside the diffs or transmission by little cracks. You Will end up with a greasy mess that attracts dirt like crazy... Sent from my Nexus 6 using Tapatalk |
|
| |
|
07-12-2018, 08:12 AM
| #31 |
| Rock Stacker Join Date: Jun 2018 Location: belgium
Posts: 80
|
Yeah that would be bad. I learned from it and pulled the axles and transmission back apart. Turned all the gears round and got rid of all the exess grease that came out of the gears. The gears mesh into each other en push the grease out. I hope it is clear, english is not my language I have build the transfer case today and did the same procedure with the grease. Filled the mesh of the gears with grease, assemble and turn the gears and wipe of the grease that is pushed out of the gears. This is the amount of grease that stays after wiping exess off:  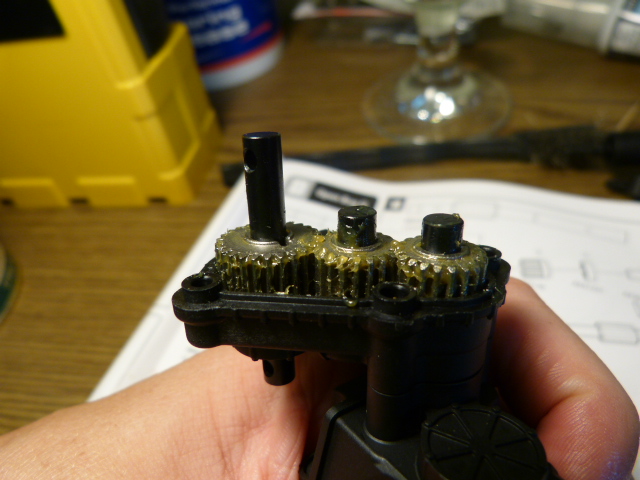 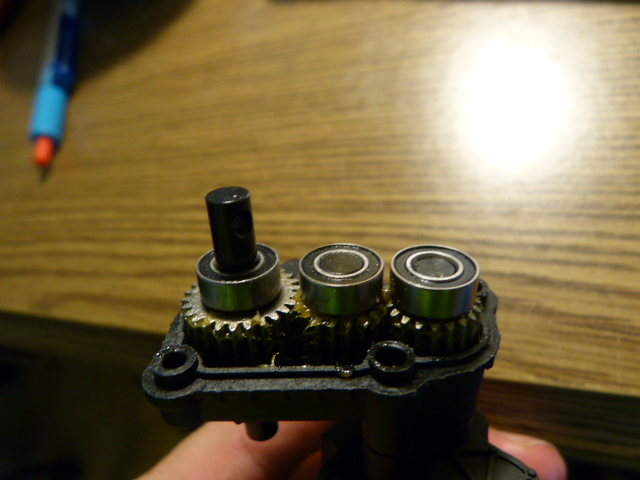 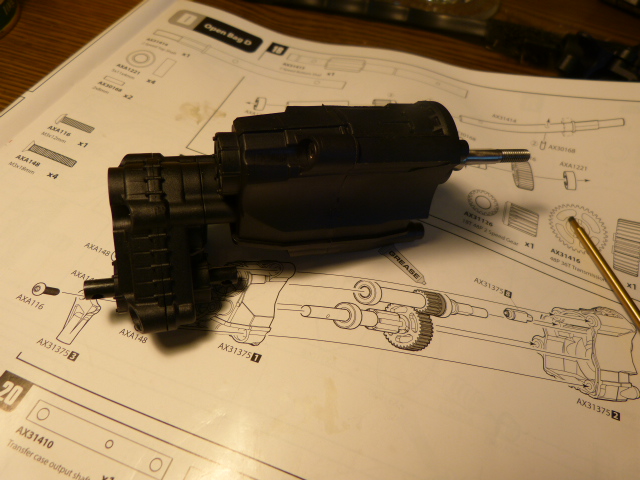 |
|
| |
|
07-12-2018, 08:20 AM
| #32 |
| Quarry Creeper Join Date: Nov 2015 Location: US
Posts: 456
|
that doesnt look too excessive
|
|
| |
|
07-12-2018, 03:23 PM
| #33 |
| Rock Stacker Join Date: Jun 2018 Location: belgium
Posts: 80
|
Finished installing the motor. Installed motor plate and slipper clutch, then the motor with pinion and meshed it with a piece of paper. Set the slipper clutch like in the instructions. This is all the way tight and then loosen 2 turns giving the 8 mm gap. The motor is a puller pro stubby 2700 kv. I did broke a screw point for the cover ( see white circle ) . It happened before the screw bottomed out I guess this screw is not the most important one.  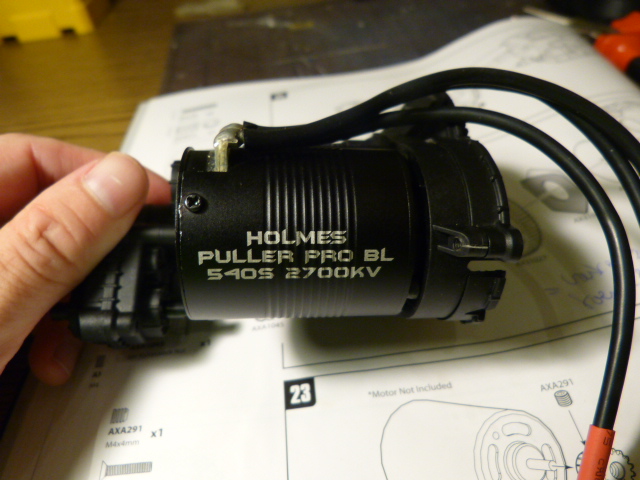  |
|
| |
|
07-14-2018, 03:18 PM
| #34 |
| Rock Stacker Join Date: Jun 2018 Location: belgium
Posts: 80
|
Did the driveshafts and skidplate. All screws that go in metal are treadlocked. Now it is waiting for some aluminium parts to arrive from China 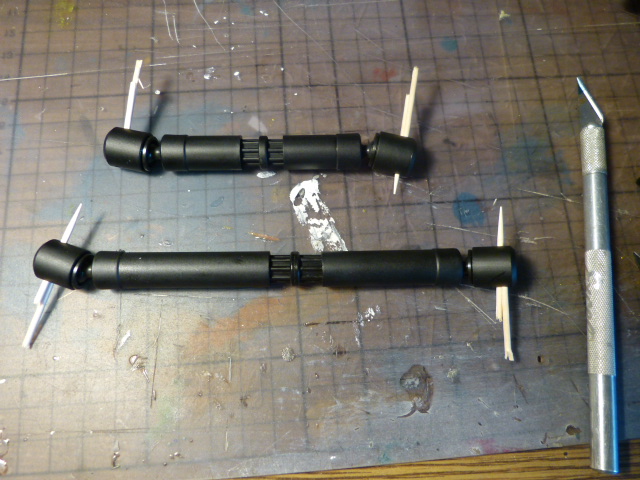   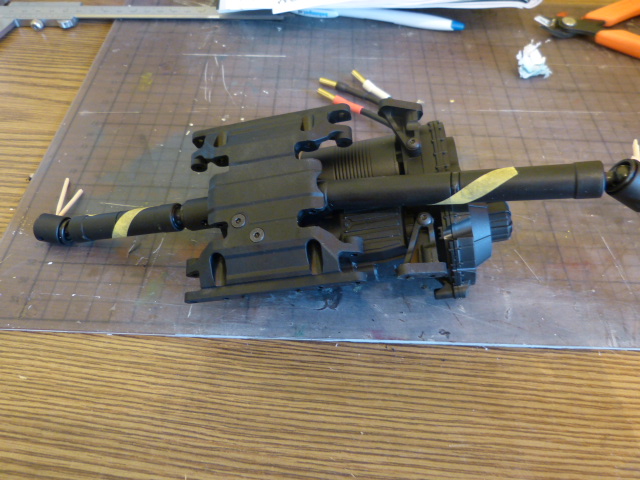 |
|
| |
|
07-16-2018, 10:55 AM
| #35 |
| Rock Stacker Join Date: Jun 2018 Location: belgium
Posts: 80
|
My proline wheels were laying on the shelf so I decided to try putting a tyre on it. It took about 1 hour to put in on. Needed two tries and 32 screw to put it together. ( I have no power tools) I used the kit tyres and kit foams. Now should I put holes in the tyres or not? They are airtight now. I will be trailrunning and nearly no rocks. Some pics:   Last edited by mcbartho; 07-16-2018 at 10:58 AM. |
|
| |
|
07-16-2018, 02:16 PM
| #36 |
| Rock Stacker Join Date: Jun 2018 Location: belgium
Posts: 80
|
Second wheel went much faster. I put the body over the wheels to see how it would look. I am happy with it. Too bad that the bag from the wheels is missing 1 screw. I put that towards the back. The other 15 screws of that bead will hold the bead just fine  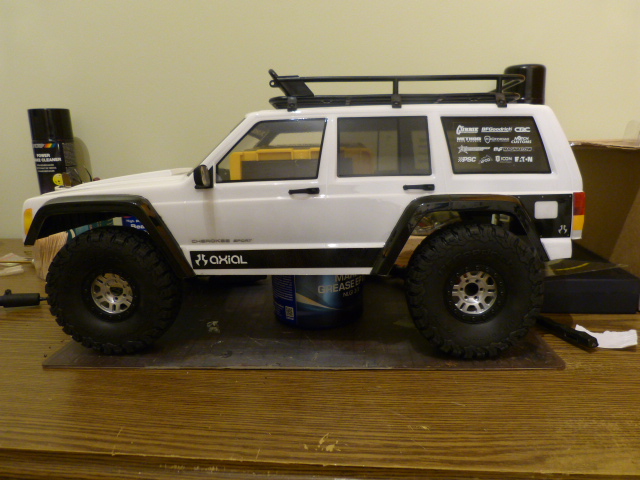 |
|
| |
|
07-23-2018, 02:39 PM
| #37 |
| Rock Stacker Join Date: Jun 2018 Location: belgium
Posts: 80
|
My motor, esc and servo came water resistant from the factory and the only thing that is not waterresistant is the receiver. After some reading on docter google I bought this:  It is a silicone laquer for electronics to seal it against water, dirt, .... I pulled the receiver out of the case and gave it 3 coats. That should be plenty. It is transparent and looks like this:  But in UV light u can see the coating: 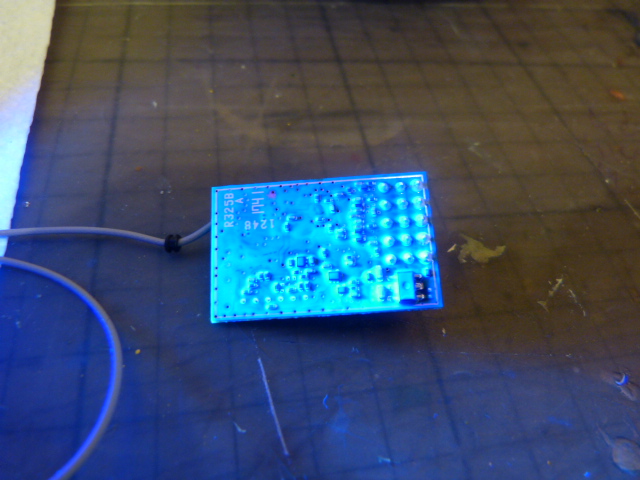 I did not put it on the button or the connector pins. I dont want to seal the button and if water enters there it should not be a big problem I hope:  It is nice to know that there is some kind of protection on the receiver. Not planning to submerge the rig but if it start to rain or I drive trough some puddels it has extra protection. While I wait for parts I going to read the 4PLS instructions because that is all new for me and looks complicated... |
|
| |
|
07-23-2018, 10:49 PM
| #38 |
| Pebble Pounder Join Date: Jun 2006 Location: San Diego, CA
Posts: 124
|
Very cool pictures of the conformal, i never knew it showed up like that under UV. I am using a 4PLS radio also. It definitely has a little bit of a learning curve. Setting up the basics like sub-trim and endpoints was straight forward, but i had to watch some videos on youtube on how to get the other channels working the way i wanted. If your using a Castle based ESC, you can program the AUX wire to switch the drag brake on and off. This is really useful for just walking on a trail. This is one video i watched for setting up a winch, but it will give you an idea on how to configure the different channels and switches to do what you want. https://youtu.be/m8Q-xwKLmZ8 BTW, the crack in the motor plate seems to be a very common occurance. To prevent this, drill out the hole of the piece that is sandwiched in between the motor plate and the spur gear cover. I cracked mine also, i ended up replacing the motor plate with one from Vanquish. |
|
| |
|
07-24-2018, 11:48 AM
| #39 | |
| Rock Stacker Join Date: Jun 2018 Location: belgium
Posts: 80
| Quote:
Thnx for the link. This radio can do much more then I thought! I also want the drag brake on the aux channel of the esc. If i cant figure it out i know who to contact now Last edited by mcbartho; 07-24-2018 at 11:55 AM. | |
|
| |
|
07-27-2018, 09:07 AM
| #40 |
| Rock Stacker Join Date: Jun 2018 Location: belgium
Posts: 80
|
My incision vanquish 10 pc stainless steel link set came in today. I like the original links too but followed the advice to upgrade the stock rod ends and pivot balls. Because this kit includes this I went for it. 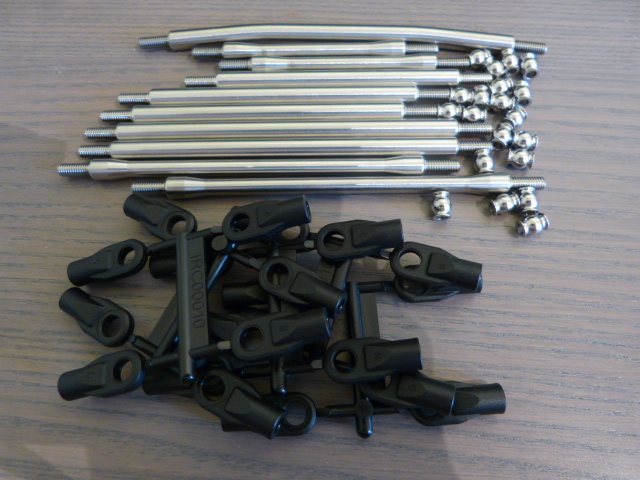 The front axle is done: 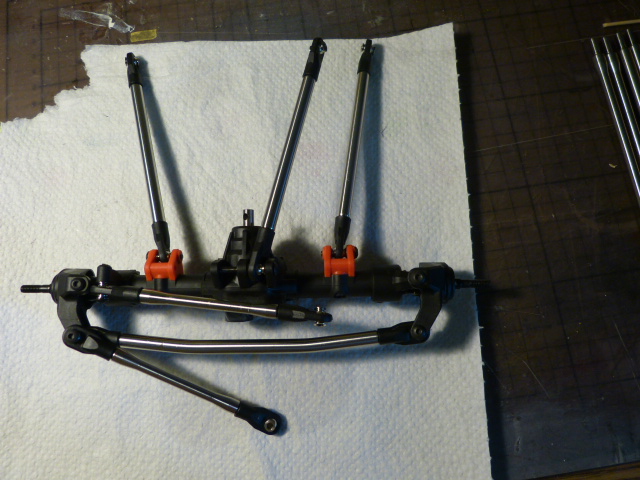 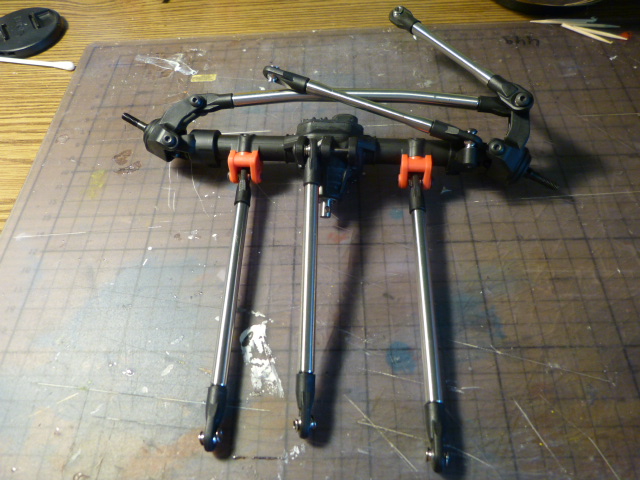 |
|
| |
|
 SCX10ii build - my first rc car kit - Similar Threads
 | ||||
| Thread | Thread Starter | Forum | Replies | Last Post |
| best link ends for scx10ii kit? | tdc | Axial SCX10 II | 13 | 06-13-2020 06:51 PM |
| 2008 Newbright JK on scx10ii kit | thehallsrc | 1.9 Scale Rigs | 2 | 06-07-2018 10:49 PM |
| SCX10II Kit Trans Issues... | JSterrett | Axial SCX10 II | 9 | 03-12-2017 10:24 PM |
| |


 Linear Mode


