| |
| |||||||
 |
| | LinkBack | Thread Tools | Display Modes |
 03-17-2012, 04:46 PM
| #1 |
| I wanna be Dave Join Date: Jan 2012 Location: CANADA
Posts: 2,648
|
I just wanted to post some pics of my Wraith in progress! Any tips or criticism are welcome. Thanks. I moved the battery to the front, added a Hitec 7954SH steering servo, Vanquish 3/16 tie-rod and drag link, Futaba 3PM-X radio, XR-10 Bead locks, much more to come. I will have the CFM aluminum "Set up". I have a long ways to go but I am enjoying the build. I am not a good wire runner so I am trying to figure out the best way to tidy it up. Oh well good times!  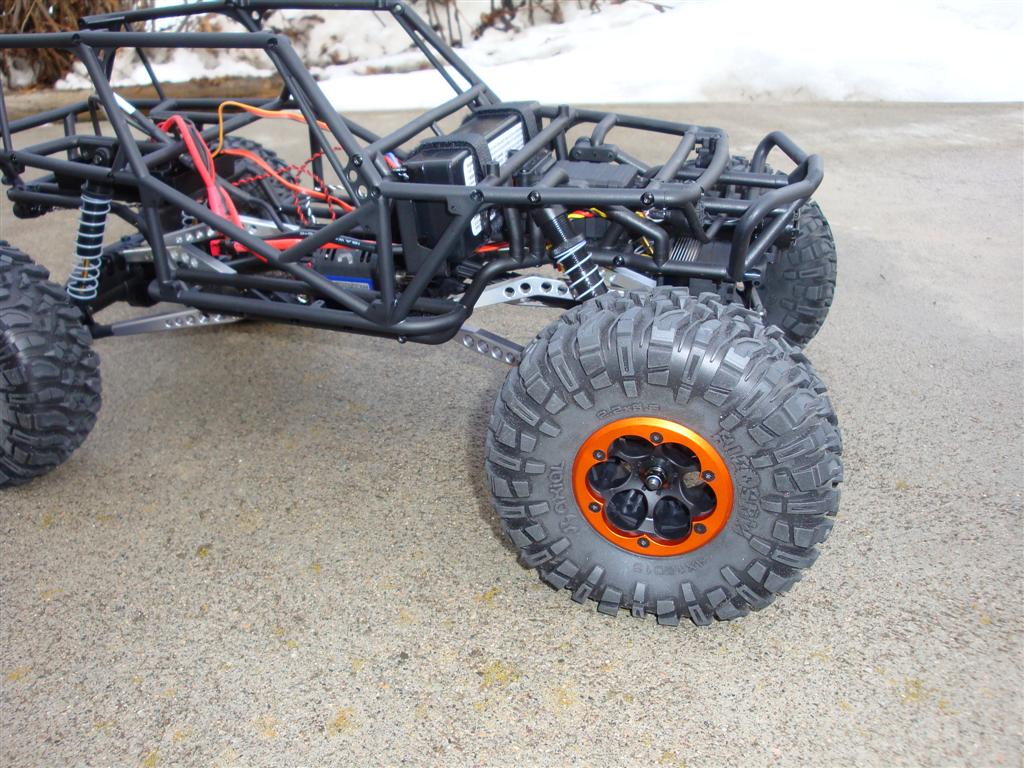 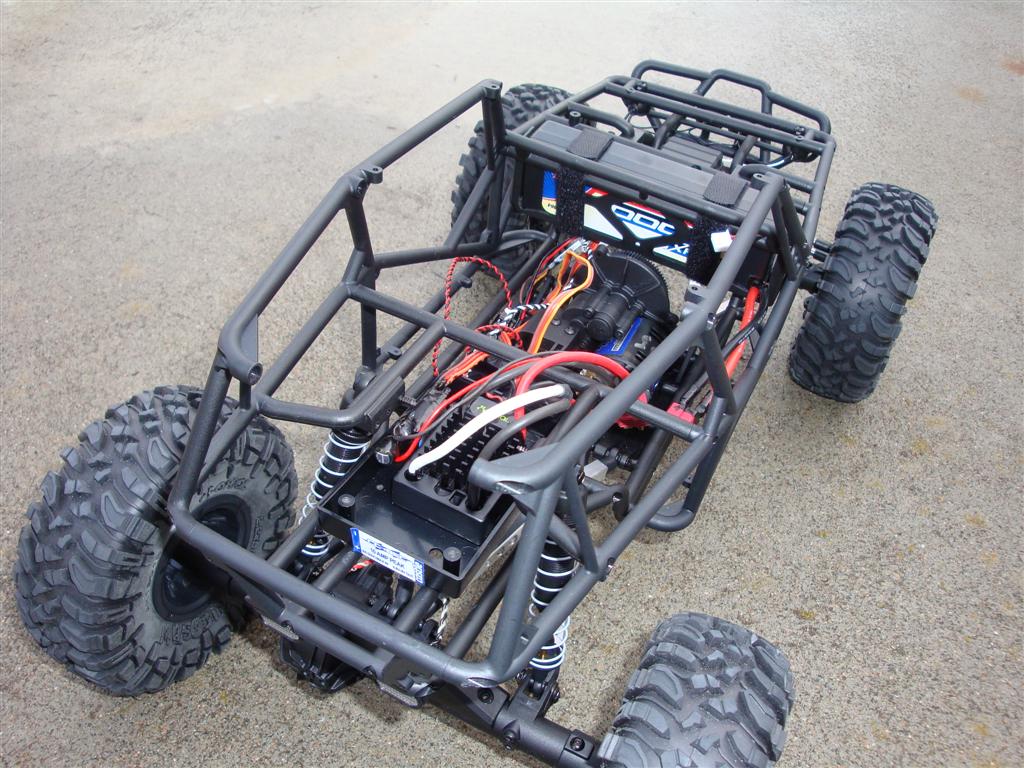  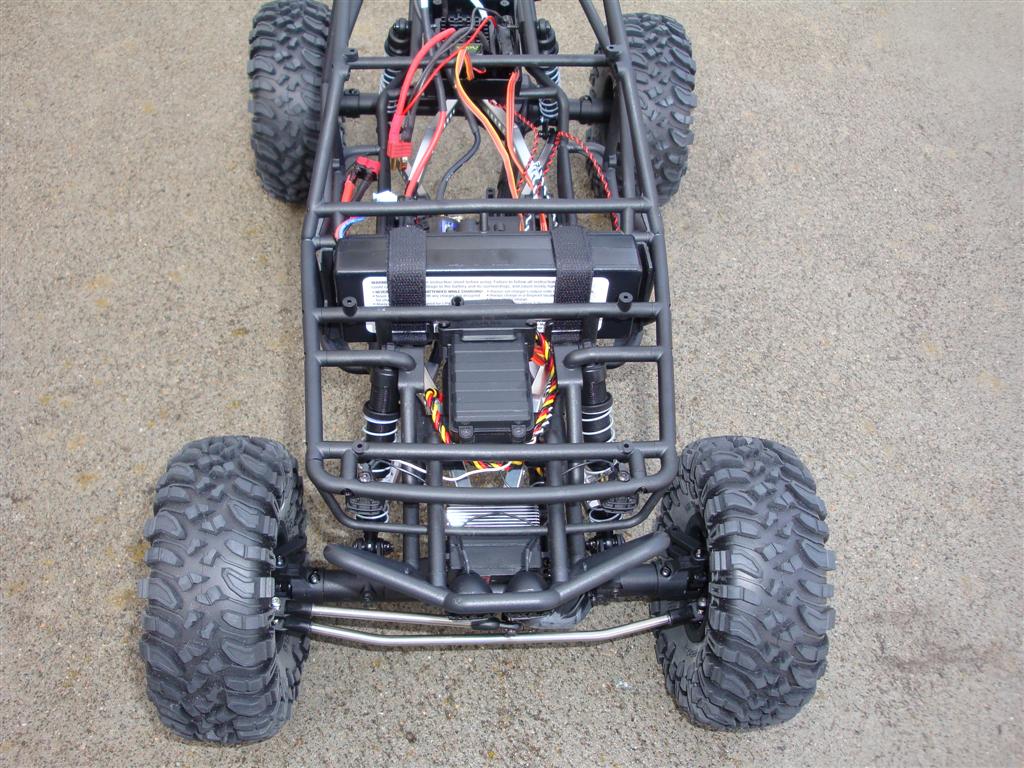 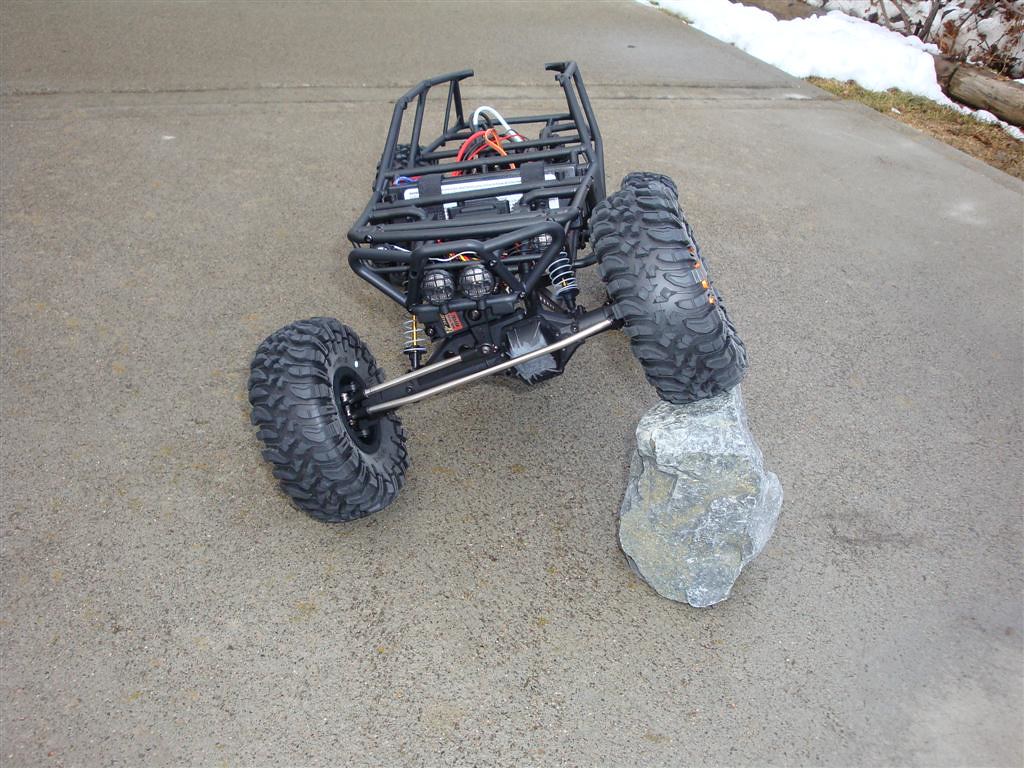 Last edited by ZippoMan; 03-17-2012 at 05:27 PM. |

|  |
| Sponsored Links | |
| | |
|
03-17-2012, 06:15 PM
| #2 |
| RCC Addict  Join Date: Oct 2011 Location: British Columbia
Posts: 1,487
|
Appropriate title, Clay. Neat wiring is always an issue. Mine's fairly neat, but I don't like it and will likely tear it all apart and redo it at some point. The only way to get it from back to front (and hidden) is under the hump in the interior making sure it's tied up and away from moving parts. A PITA, for sure. Looks good otherwise.  |
|
| |
|
03-17-2012, 06:25 PM
| #3 |
| I wanna be Dave Join Date: Jan 2012 Location: CANADA
Posts: 2,648
|
Yeah Solitaire it is a rats-nest right now....so I figure just go with that...hahaha. Thanks for the comments. I am going to have most of my wires run under the hump but my power from the battery can't because I am not able to bend the wires enough to get into the hump. I will have to run it like the RTR version through the interior for now. I bought a spare interior so when I change my mind and maybe get a smaller battery I will switch it all up. I am so new to this RC hobby but am up for challenges. Last edited by ZippoMan; 03-17-2012 at 06:27 PM. |
|
| |
|
03-17-2012, 06:44 PM
| #4 |
| RCC Addict Join Date: Oct 2011 Location: British Columbia
Posts: 1,487
|
Mine's setup basically the same way as yours. Battery in front and ESC in the rear. I just made an extension for the power wires on the ESC just long enough to bring it forward to the battery compartment. Not the best way to do it as the fewer connections the better, but that's the only way to keep it all hidden.
|
|
| |
|
03-17-2012, 06:55 PM
| #5 |
| I wanna be Dave Join Date: Jan 2012 Location: CANADA
Posts: 2,648
|
Cool I guess I could do that too. Thanks I just might try that before I get further along. |
|
| |
|
03-18-2012, 08:29 AM
| #6 |
| Pebble Pounder Join Date: Feb 2012 Location: Carlsbad
Posts: 118
|
After I moved my battery up front, I ended up using the radioshack 4x2x1 project box as several others have done and moved my reciever to the back and added the Axial NVS light controller to the box as well. Keeping the receiver and ESC and light controller in the back helped to clean up my wiring mess, and the only wires I have coming from the front are the servo and front lights. (I have a Novak timbuk2 controller, which while some people don't like it, it's really nice and small and it's mounted to my electronics box just with servo tape). 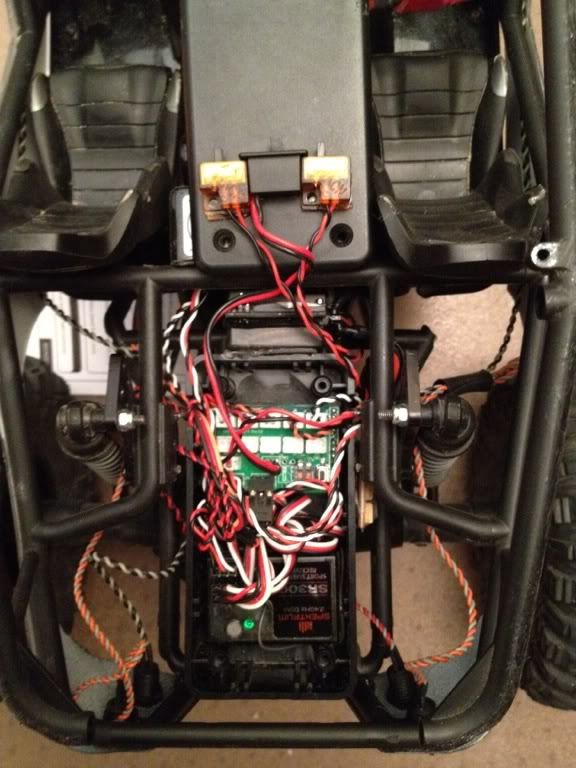 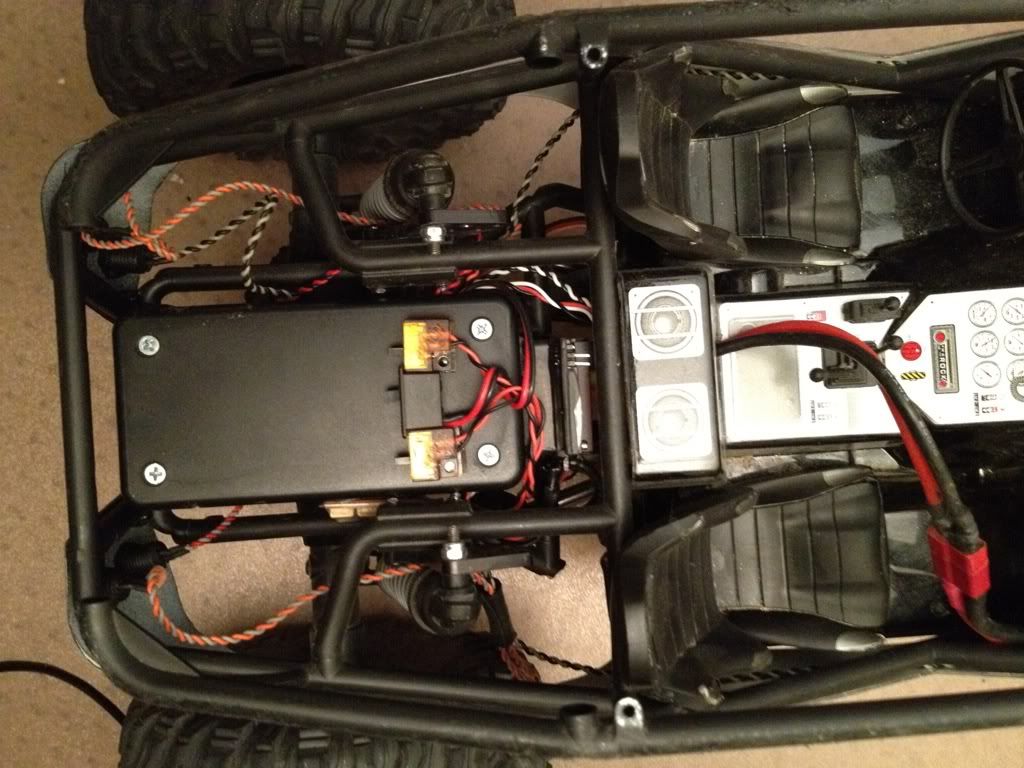 I still have some clean up on the lights. By moving the lights controller to the back it's a pretty tight stretch to get the front lights to the controller. So I think I may end up soldering extensions to these, and for cables which are too long, trim those down and add JR servo connectors for termination. I also think I'm going to end up using plastidip spray on my lights cables to make them all nice and black so they don't stick out as much. |
|
| |
|
03-18-2012, 10:30 AM
| #7 |
| I wanna be Dave Join Date: Jan 2012 Location: CANADA
Posts: 2,648
|
Looking good there agent00111. I see you are running your battery wires through the interior which is what I originally planned but might change still. This has been the trickiest part of the whole kit build.....wiring not so fun. LOL. I don't have all the tools or connectors to cut my wires and make them shorter. With my servo up front I just looped the extra length around the Receiver box, it works and isn't so bad. I am just glad I have a spare interior coming soon. I bought it because I hacked 2 holes in my current one trying to figure out a way to run my battery wires. If I do the extension wires from the ESC I hope to tuck them up in the hump and out of site but we will see. I figure buy spare stuff now because I know how expensive vintage parts will be later. |
|
| |
|
03-18-2012, 09:24 PM
| #8 |
| Pebble Pounder Join Date: Oct 2011 Location: loveland
Posts: 177
|
its gonna look good with a hood on it! |
|
| |
|
03-18-2012, 09:52 PM
| #9 | |
| Quarry Creeper Join Date: Feb 2012 Location: AZ
Posts: 309
| Quote:
| |
|
| |
|
03-19-2012, 10:09 AM
| #10 | |
| I wanna be Dave Join Date: Jan 2012 Location: CANADA
Posts: 2,648
| Quote:
Last edited by ZippoMan; 03-19-2012 at 05:39 PM. | |
|
| |
|
03-19-2012, 10:13 AM
| #11 | |
| I wanna be Dave Join Date: Jan 2012 Location: CANADA
Posts: 2,648
| Quote:
Oh well trial and error....I am learning and that is cool!! | |
|
| |
|
03-20-2012, 09:59 PM
| #12 | |
| I wanna be Dave  Join Date: Jan 2006 Location: Corruptifornia
Posts: 12,107
| Quote:
| |
|
| |
|
04-06-2012, 08:46 AM
| #13 |
| Pebble Pounder Join Date: Feb 2012 Location: Carlsbad
Posts: 118
|
@zip: going through some more wiring cleanup myself. Here are a few things I'm learning: 1. use all black wires, or use liquid tape to make red wires black. That makes everything look a lot cleaner 2. I'm using deans 6-pin connectors to aggregate light wires together (3 light harnesses per deans 6-pin). It's a lot of soldering, but solid connections and looks great 3. Invest in a decent soldering station. I just think cutting wires to length and learning to solder and/or use pin crimpers is key. 4. If you're soldering and sizing wires to length, spend oodles of time laying out wire paths, etc before doing any of the work. 90% prep, 10% actual wire work saves a lot of frustration. Here is a pic of a deans 6-pin connector below. I'm using these so that my electronics box only needs 3 connectors for all lights (5 harnesses), servos, power, etc (I use axial NVS light controller and 3ch rx in the e-box). 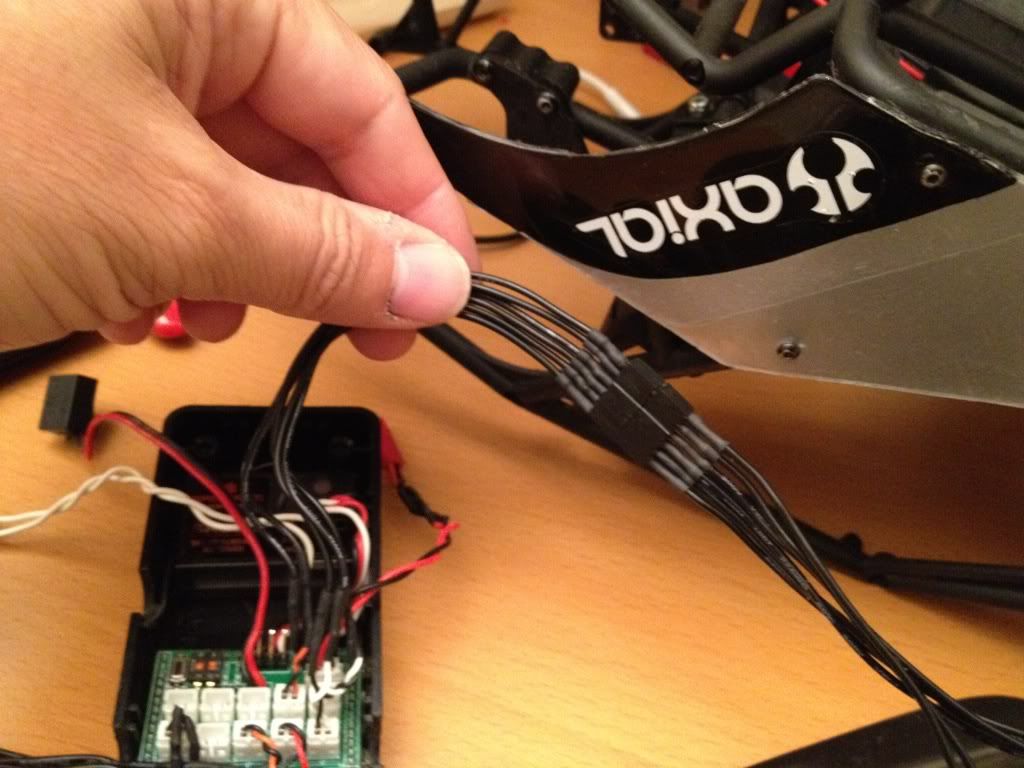 |
|
| |
|
04-06-2012, 10:49 AM
| #14 |
| I wanna be Dave Join Date: Jan 2012 Location: CANADA
Posts: 2,648
|
Very nice job there agent!! Yeah I need a good soldering station that is for sure. I think I would be confused if I went with all black wires....I know it looks good and would blend in better. I am scared to cut any wires right now so I will just see how it goes. I am trying to get a 4x2x1 box but in Canada they are not so easy to find. Our stores used to be Radio Shack but they now call them The Source (by Circuit City). They carry most of the same stuff but the project boxes are smaller. I have a 3x2x1 and I know it will be too small for all my junk..lol. I want to put my RX, ESC and BEC inside the box in the back. Who knows maybe I will just leave it sort of the way I had it. Rx box up front and ESC/CC BEC in rear and Simple LED controller somewhere, not sure yet. This has been more brain draining than I ever imagined...lol |
|
| |
|
04-06-2012, 12:41 PM
| #15 |
| I wanna be Dave Join Date: Jan 2012 Location: CANADA
Posts: 2,648
|
Here are some updated pics!! In progress big time still! Changed the rims!!    I love the small CFM stickers! Thanks to another Clay for the "Setup". I have to mount the aluminum hood soon. |
|
| |
|
04-06-2012, 08:32 PM
| #16 |
| Pebble Pounder Join Date: Feb 2012 Location: Carlsbad
Posts: 118
|
Lookin good man! I think the interior looks kinda cool unpainted and no stickers. While it would break the 'scale' look, it would be interesting to do a partial paint of the interior, so that it has some see through areas where you can see the motor, dig, etc.
|
|
| |
|
04-06-2012, 09:03 PM
| #17 |
| Pebble Pounder Join Date: Mar 2012 Location: tri city
Posts: 133
|
looks nice zip, like the new wheels, what kind?
|
|
| |
|
04-06-2012, 09:35 PM
| #18 | |
| I wanna be Dave Join Date: Jan 2012 Location: CANADA
Posts: 2,648
| Quote:
| |
|
| |
|
04-06-2012, 09:37 PM
| #19 | |
| I wanna be Dave Join Date: Jan 2012 Location: CANADA
Posts: 2,648
| Quote:
| |
|
| |
|
04-06-2012, 09:44 PM
| #20 |
| Pebble Pounder Join Date: Mar 2012 Location: tri city
Posts: 133
|
you need to get the rj2 steering linkage to clear that pumpkin, Im thinking of getting some smooth vp covers for mine.
|
|
| |
|
 Clay's Rats-Nest Wraith in progress - Similar Threads
 | ||||
| Thread | Thread Starter | Forum | Replies | Last Post |
| My Wraith - A Constant Work in Progress | BCkoots | Axial Wraith | 20 | 10-23-2011 08:09 PM |
| Some Eagle's Nest fun | rhett314 | Scale Videos! | 8 | 06-30-2009 02:55 PM |
| nESt mettING Sunday Mar 1st 10am @ Mermaid | Nicklepimp | Minnesota | 44 | 03-11-2009 05:16 PM |
| when is the nest metting | mummbles | Minnesota | 15 | 02-04-2009 10:10 AM |
| |


 Linear Mode


