| |
| |||||||
 |
| | LinkBack | Thread Tools | Display Modes |
 12-15-2007, 12:08 PM
| #1 |
| Rock Stacker Join Date: Dec 2007 Location: 45th Parallel
Posts: 79
|
I have Cross posted my version of Adding a Throttle Return Spring to my DX6 here. http://www.rccrawler.com/forum/showt...725#post964725 Hope this helps, Flynfrog Gooch, I did take a few Pics...would some one enlighten me on how to post attachments? I actually did the Throttle Spring Return twice. Once to add the throttle spring and another time to fabricate & add the spring setup I borrowed from the elevator. Option 1: Borrowing the Elevator Return Dogleg & Spring & placing it on the Throttle. A. Remove the 6 screws from the DX6 back case B. Remove the RX Battery C. With the Antenna Facing away from you & the Back open, The Throttle & Rudder Gimble will be on the RIGHT hand side. D. Throttle Trim Pot will be the Right INSIDE small circuit board, it may also have the flat metal ratchet spring on the top. E. Remove the 4 screws (phillips) on holding down the gimble assembly from the front face. There are indents in the corners to guide the screwdriver. F. Gently Pull out the Throttle/Rudder Gimble Assembly. G. Remove the 2 Silver/brass colored screws attaching the Throttle Trim Pot, remove the flat ratchet spring and put it aside (1 screw) H. This completes the removal for the Throttle Trim PotI. Repeat the process for the Elevator Stick - Left Inside Trim Pot assembly. We will be using the Elevator Spring Return to place on the Throttle Trim Pot. J. Looking at the Spindle of the Elevator Trim pot, you will see the Dogleg & Spring setup that will be transferred to the Throttle stick. K. Carefully pull off the Small return spring & remove the Dogleg. L. Install the Dogleg & Spring onto the Throttle Trim Pot. the slot on the Dogleg opposite of the Spring hook rests on the bar of the in the small box creating a pivot point. M. Carefully reassemble the Trim Pot INTO the GImble. Notice that there is a FLAT spot on the Trim Pot Spindle that is Keyed to the hole receiving hole in the Gimble. Do not use excessive force to reassemble the gimble. N. ReAttach the Trim Pot to the Gimble with the 2 small screws. Watch for the 2 small lifting prongs on the gimble stick. these lift the Dogleg up & down creating the return tension on the stick. O. Test you New Throttle Return Stick setup - it should feel friction free & self center. P. ReAttach the Throttle/Rudder Gimble to the Front face with the 4 screws. I found that if you place the screws in the corners of the gimble BEFORE sliding the Gimble back, the assembly is easier. Q. Repeat the ReAssebmly procedure for the Elevator/Aileron Trim Pot & Gimble Assembly. R. If you want Tension/Ratchet on the Elevator (right stick-vertical movement), Attach the Flat Throttle ratchet spring to the Elevator side of the Trim Pot. There will be a Pilot hole for the screw- it will be a little tight, go slow. If yo so not like the ratchet feel, place a piece of heat shrink tubing or fuel tubing over the "indent" in the ratchet spring. This will allow for tension but no ratchet. This Complete the Elevator & Throttle Return Spring Swap. It does entail removing both Gimbles and Subtracts the return spring from the Elevator (2nd Throttle for a 2 motor setup). If you need 2 Throttle Spring Returns or a dual motor setup. You will need to Add a Dogleg & spring assemble to the Elevator Trim Pot. Unfortunately the DX6 Manufacturer will require you send in the TX. I would suggest spending a few $$ & time to fabricate an exact copy of the Dogleg. There are 2 options- both require 30 minutes of fabrication. Option 1: purchase the Spring return kit from: http://www.ckrccrawlers.com/shop/ind...products_id=46 this includes a Template & the 3mm Piece of plastic to cut / sand the dogleg from - It also includes the Return spring. I discovered this After I fabricated my own setup. Option 2: Fabricate your own Dogleg with a tracing of the Dogleg you swapped from th Elevator to the Throttle Trim Pot. You will need to find a small extension spring from an old TX or cut one down from a spring purchased from the hardware store. you can DeTemper (make Softer) the hardware spring by heating it with a Flame- you will see the spring Relax and soften the Pull. Place a loop in the both ends of the spring to attach to the spring slots. My Dogleg Fabrication process: A. Find a 3mm piece of scrap plastic (this can be built up from 2 thinner pieces & glued with CA). B. Place a piece of Masking tape on the piece of plastic- this will be used to trace the Dogleg onto - it makes it easier to cut & sand to the outline. C. Find a drill that matches the 1/2 hole in the DogLeg. Drill a hole into the plastic near an edge. This hole will determine where we trace the Original DogLeg onto the plastic. D. Trace the DogLeg onto the plastic using the drilled hole as the pivot point for the spindle. you will be sanding 1/2 of the hole away during the cut & sand process. E. Cut & Sand the New DogLeg from the plastic. I used a bandsaw (scrollsaw will work) and a bench sanding wheel/ belt. The most important surface of the DogLeg is the Flat surface adjacent to the Pivot !/2 hole. It must Be Flat in order to Evenly lift the 2 knobs on the Gimble spindle.  F. Attach the DogLeg as described above. G. ReAssemble the TrimPot to The gimble & then ReAttach the gimble to the front face. I hope this is of some benefit to other DX6 /DX7 users. Purchasing a Dogleg from the manufacturer would be a lot easier. Flynfrog / Ron Last edited by Flynfrog; 12-18-2007 at 01:36 AM. |

|  |
| Sponsored Links | |
| | |
|
12-16-2007, 01:20 PM
| #2 |
| Pebble Pounder Join Date: Oct 2007 Location: San Diego
Posts: 140
|
Flynfrog, thanks for the new post this will help allot  . In order to post pics you need to be a member. $20.00 per year. If you need help with that I can get you a link. . In order to post pics you need to be a member. $20.00 per year. If you need help with that I can get you a link.The Gooch |
|
| |
|
12-17-2007, 09:07 AM
| #3 | |
| I wanna be Dave Join Date: Jun 2007 Location: Canada, eh.
Posts: 2,919
| Quote:
| |
|
| |
|
02-14-2008, 11:35 AM
| #4 |
| Pebble Pounder Join Date: Oct 2007 Location: San Diego
Posts: 140
|
Just wanted to add that the DX7 dog leg is much smaller than the DX6 one. But the spring will work in both. Also Spektrum will not sell you any parts. I made my own as well and it works very great. Thanks again for the thread. The Gooch |
|
| |
|
02-16-2008, 04:29 PM
| #5 |
| Rock Stacker Join Date: Dec 2007 Location: 45th Parallel
Posts: 79
|
If you have a set of needle nose pliers or a pair of surgical hemostats, you can carefully remove just the spring from both the dogleg & the spring hook on the inside of the gimble. Reach down along the return spring and grab the lower base loop leg of the spring. Push straight down to dislodge the spring loop- remove the spring. Reverse the porcess to place the spring on the throttle gimble. Flynfrog |
|
| |
|
02-16-2008, 11:32 PM
| #6 |
| I wanna be Dave Join Date: Sep 2005 Location: USA
Posts: 11,196
|
Spektrum let me order the parts, but they kept sending the wrong ones, so I did the next easiest thing. Bought a Used Dx6 off someone cheap. Had enough springs and Levers to do a few Dx6's. Plus I had a Spare battery/Charger/Antenna/ and more. Well worth the money.
|
|
| |
|
02-17-2008, 08:29 AM
| #7 |
| Newbie Join Date: Feb 2008 Location: Finland
Posts: 6
|
I have about 20 of those levers, CNC cut out of delrin. PM if interested. The spring in the pic is only prototype(not included). 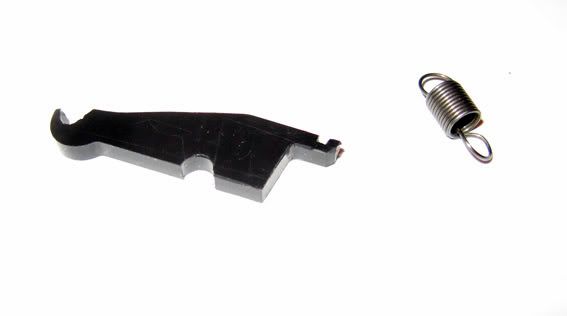 Last edited by GarageJ; 02-18-2008 at 09:08 AM. Reason: more info |
|
| |
|
02-09-2009, 08:10 PM
| #8 |
| Newbie Join Date: Jan 2009 Location: Canada
Posts: 21
|
(Just to update this thread as well for the DX6i, copied my post from the other thread on this.) Well I finally pulled my new DX6i apart. Turns out its easier than first thought. The little tab that holds the spring at the bottom was already installed on my radio, so all I had to do was fabricate the swing bracket (by copying the other one inside), I made it out of aluminum (doesn't need to be 3mm exact) and then cut three pins from old servo arms (they turned out to be exactly 1.5 mm which is the width of the stock pins). I cut one pin to 9mm for the swing bracket and 7mm for the other two. Tossed them all in and "voila", throttle return without sending my damn radio to Horizon. I'll post pics soon. Just have to hit the LHS for a Futaba or whatever joystick spring to replace the one I stole from the right hand stick Cheers Tim |
|
| |
|
05-28-2009, 02:55 PM
| #9 |
| I wanna be Dave  Join Date: Oct 2006 Location: Martinsburg WV
Posts: 2,781
|
I asked Futaba about this for my 7CAP, but all they will do is let you send in your TX for them to modify for you. They won't just sell you the parts. It's damn near impossible to drive with the ratcheting left stick. Anyone here running a Futaba stick TX that has some internal pics?? |
|
| |
|
05-31-2009, 04:50 PM
| #10 |
| Rock Stacker Join Date: May 2009 Location: skagit valley
Posts: 89
|
I did this swap on my dx5e but now the throtle is always on even when I adjust the trim all the way down. Did I mess something up or is this just the way it is? |
|
| |
|
10-14-2010, 11:21 PM
| #11 | |
| Newbie Join Date: Oct 2010 Location: Tampa
Posts: 1
| Quote:
| |
|
| |
|
 LinkBacks (?)
LinkBack to this Thread: http://www.rccrawler.com/forum/electronics/96174-dx6-throttle-return-spring-mod-instructions.html | ||||
| Posted By | For | Type | Date | |
| My Hilux/TLT based scaler - Page 2 | This thread | Refback | 03-05-2013 07:35 AM | |
| Ny Stikkeradio | This thread | Refback | 02-15-2013 11:35 AM | |
| |


 Linear Mode


