| |
 08-16-2007, 06:04 PM
| #41 | |
| RCC Addict Join Date: Jun 2006 Location: Sin City
Posts: 1,852
| Quote:
| |

|  |
| Sponsored Links | |
| | |
|
08-17-2007, 07:10 AM
| #42 | |
| Pebble Pounder Join Date: Jul 2007 Location: Phoenix
Posts: 110
| Quote:
 | |
|
| |
|
08-27-2007, 09:54 PM
| #43 |
| Rock Stacker Join Date: Aug 2007 Location: Sellersville
Posts: 69
|
Not to add to the noob questions, but what benefits do you get with flipping the axles? I want to rotate the chassis, and extend the wheelbase to approx 12". I want a fairly capable crawler, but I still want to be able to bash the truck on jumps and stuff without bending/breaking things. Thanks, Justin W |
|
| |
|
08-28-2007, 03:47 PM
| #44 |
| Pebble Pounder Join Date: Jul 2007 Location: Phoenix
Posts: 110
|
Flipping the axles just makes it run in reverse as opposed to switching the motor wires to get the same outcome. I've never had a problem running motors in reverse, but many will tell you its not a good idea. I believe because of the angle of the brushes it may cause excessive brush wear. At any rate I felt more secure just flipping the axles.
|
|
| |
|
08-28-2007, 05:11 PM
| #45 |
| 20K Club   Join Date: Jul 2004 Location: Sending illegals home one Hayabusa at a time.
Posts: 22,981
|
Looks like you have a real nice rig going. Nice and clean. What is the gauge of the wire on your RC18 pack? Getting the servo down on the axle will give you even better performance. Best looking stock chassis'd Wheely Kings I have seen IMO. Looks like you did your research |
|
| |
|
08-29-2007, 03:48 PM
| #46 | |
| Pebble Pounder Join Date: Jul 2007 Location: Phoenix
Posts: 110
| Quote:
The gauge of the wire on the RC18 pack? Way too small. Seriously, I believe it is 22 gauge, which is too small for 1/10th scale, but they do punch better than the stock pack, so I left them in, for now. I'd like to eventually give the RC18 its battery back. I'm planning to get some KAN cells, and build a couple of my own packs. I have some 14 gauge Novak stuff I'll use for that. Lots of things I want for it, tight on money at the moment though. I did do my research, but I also had a couple friends that gave me some one on one time. That helped quite a bit, but of coarse I like to think I brought some of my own experience to this project. | |
|
| |
|
09-02-2007, 05:09 PM
| #47 |
| Pebble Pounder Join Date: Jul 2007 Location: Phoenix
Posts: 110
|
Just didn't like the paint job. Had to redo it. I'm not sure it was worth my effort, but at least I think it looks cleaner. 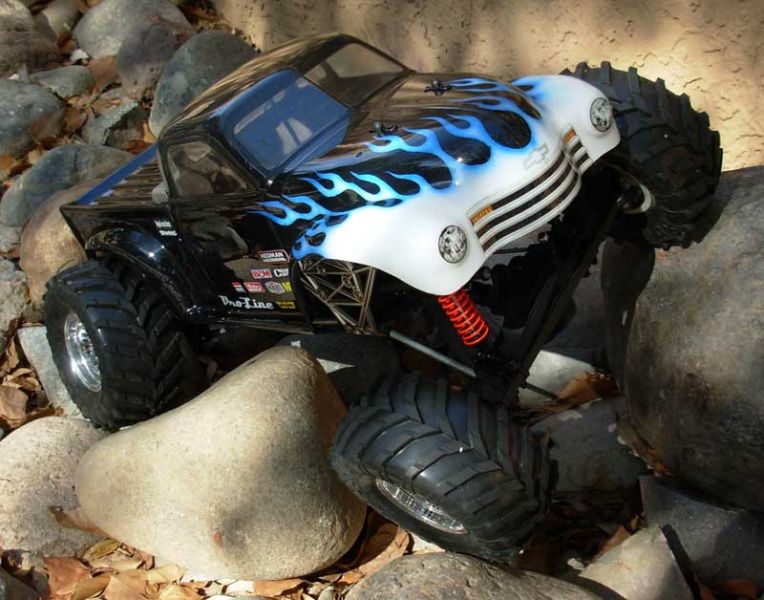 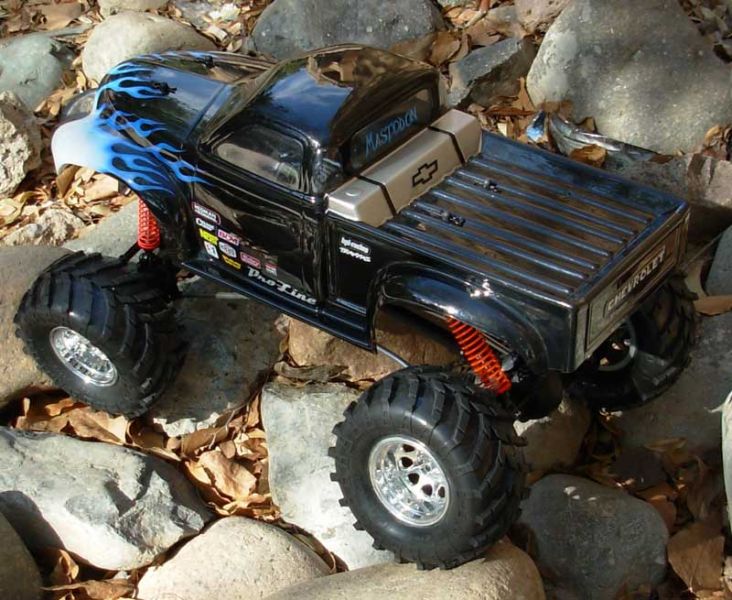 |
|
| |
|
09-03-2007, 10:03 AM
| #48 |
| Rock Crawler Join Date: Feb 2007 Location: Bridgeport
Posts: 589
|
The flame job looks beautiful! |
|
| |
|
09-10-2007, 07:36 PM
| #49 | |
| Pebble Pounder Join Date: Jul 2007 Location: Phoenix
Posts: 110
| Quote:
Since I'm lacking in funds for the goodies I want, I decided to improve on the cosmetic aspect of the chassis this weekend. Painted the frame rails with some Metal Flake Blue lacquer. Then I made some side plates from plastic backed with Spaz Stix chrome, and attached them with some screws from the Micro-T screw set. 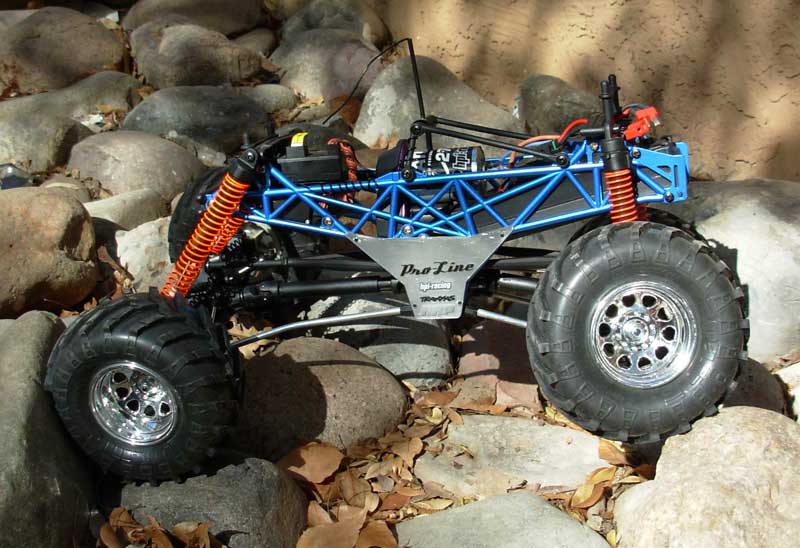 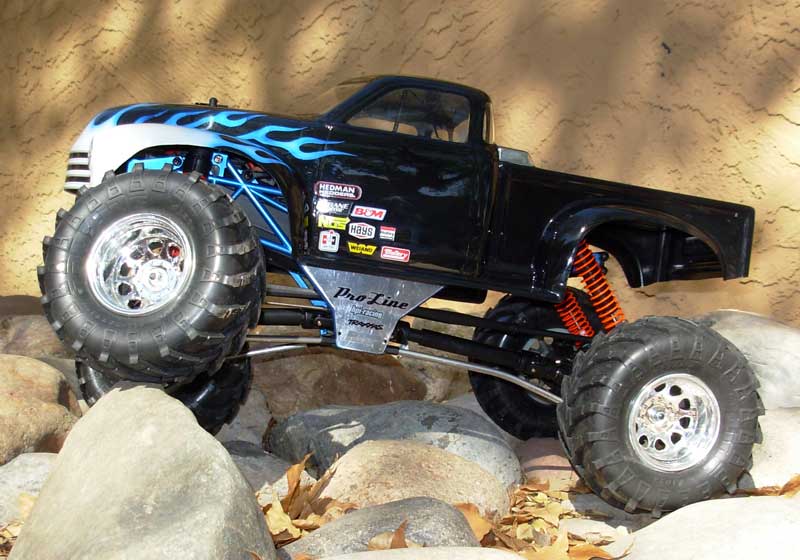 I'm really happy with the way it came out, because I think the side plates really add to the scale looks, and I dig how its all chrome sticking out from the bottom of the body, and then you can see some blue up in the wheel wells. | |
|
| |
|
11-24-2007, 09:14 AM
| #50 |
| Pebble Pounder Join Date: Jul 2007 Location: Phoenix
Posts: 110
|
Hey guys. Haven't kept this thread up because I didn't want to be replying to myself. I realize though my last couple post were cosmetic things, and I guess this isn't the forum for that. So I'll give it one more try now that I have some meat to add. I had got a 45-turn Integy motor, and some Maximizer diff locks. That really made a huge difference in how my truck performs, and how I drive it. Its a lot slower, and makes a lot wider turns. My servo still has extra throw on it, but it seems the only thing stopping it are the axles. I'm wondering if CVDs would help. I also stuck more weight in the wheels. I just put a 3oz strip in each front wheel, and another 28gm in the rears, getting them up to 56gm each. Recently I had a chance to take it along on a family outing to Papago park, and get it on "Hole In The Rock"  It took a beating out there. Several 10ft tumbles. My mom was off with my camera most of the time, but I managed to salvage a couple little clips, to give just a taste of of the fun I had. http://crazydavegraphics.com/images/wk1.wmv I broke a couple ball links, but those were quick fixes, my day ended a little early, when I broke a 4-40 rod in the rear. I finally got it back together earlier this week. I threaded a piece of 4-40 rod into a ball link and tweaked at it with a pair of pliers. I found they really shouldn't have snapped. They'll bend and twist long before they break. Judging by where mine broke I determined I wasn't getting enough threads into it. So I had to make all new linkages. I purposely made them longer, because I'll probably decide to put a bend in them. 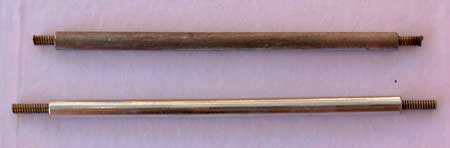 That should be more solid now. The steering has held up fine, but the threaded rod got a little tweaked. So I put some 5/32nd aluminum tubing over it. Looks nice too. 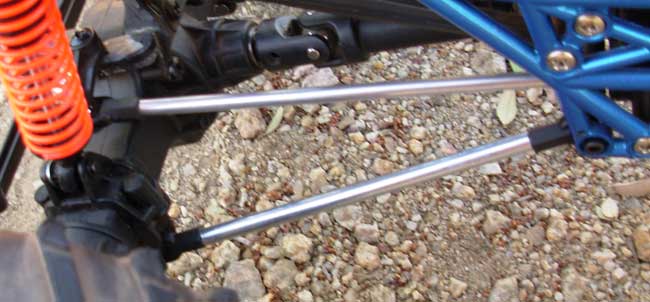 When I got home and started going over it, I realized I broke the 4-40 rod in the rear, because the upper link had snapped. I was afraid just extending that 3rd link would be a weak point. So I went ahead and did the four link thing. I was wary of doing it before, because the upper link fits inside the hole, making the hole slightly over sized. These neat little brass spacers that come with the Dubro links solved that. 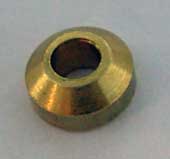 They fit perfectly in the hole 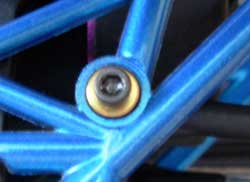 I'm glad I did it, it looks a lot better, and feels a lot more solid. That little metal bracket should be pretty tough, took me about 4-5 hours, two tries, and a hole in my finger to cut and drill it. I also used some more of that aluminum tubing on the rear steering lockouts, just because it looks nice. 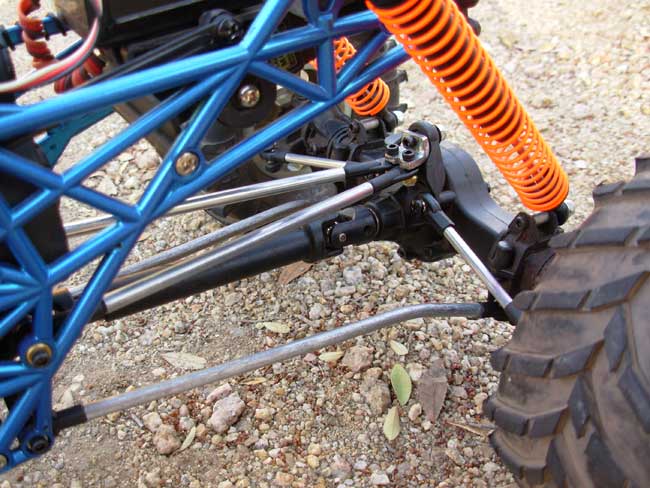 And then just because the details have changed, one more vanity shot. 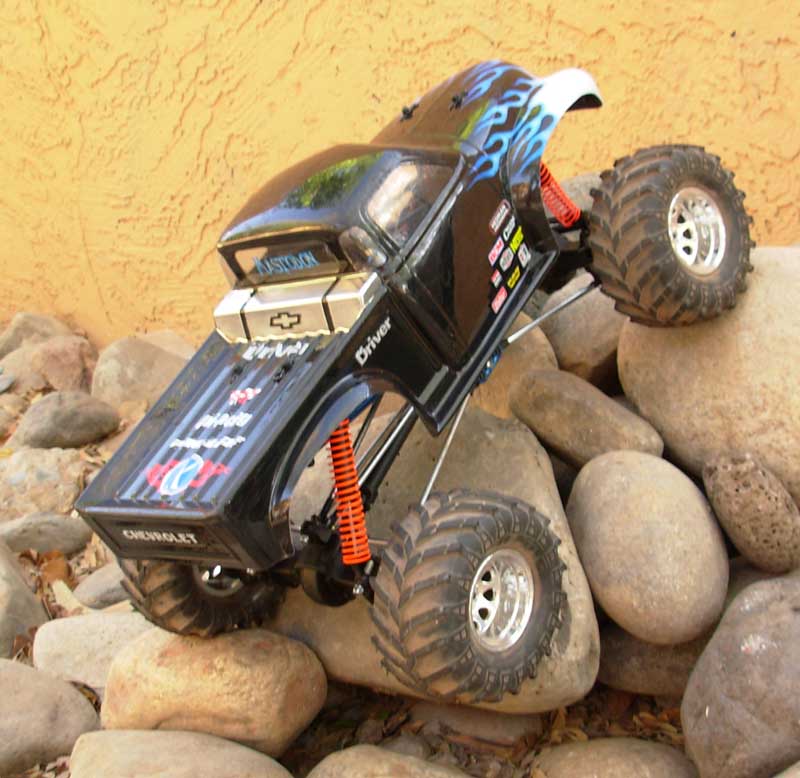 |
|
| |
|
11-24-2007, 09:28 AM
| #51 |
| Rock Crawler Join Date: Feb 2007 Location: Bridgeport
Posts: 589
|
That's a nice looking truck you got there. I like the paint and especially the way you locked out the rear axle. I'll be stealing that idea from you for sure. The "Hole In The Rock" looks like a very cool place to crawl. Unfortunately nothing like that around here.
|
|
| |
|
11-24-2007, 10:51 AM
| #52 |
| Pebble Pounder Join Date: May 2006 Location: willows
Posts: 180
|
Nice build. I just got mine and when I extended the wb I also flipped the axle mountso my shocks are moved and i was able to fit my servo mount without hitting anything. I like your antenna idea and may use it for mine. |
|
| |
|
11-25-2007, 06:03 AM
| #53 |
| Pebble Pounder Join Date: Jul 2007 Location: Phoenix
Posts: 110
|
Thanks guys, I appreciate the compliments. Feel free to use any ideas I had, but I'll tell you I borrowed that rear steering lockout from crawler_king, even though I did it slightly different. That's what great about forums, people can build off of other people's ideas. |
|
| |
|
11-25-2007, 06:28 AM
| #54 |
| Quarry Creeper Join Date: Oct 2007 Location: Ohio
Posts: 414
|
Looks good. Great job on both bodies.
|
|
| |
|
11-29-2007, 10:57 PM
| #55 |
| Rock Stacker Join Date: Nov 2007 Location: Waxhaw
Posts: 72
|
Hey CD, did you have to prep the WK frame in order to paint it? Or did you just paint right over the chrome finish? Awesome ride btw. |
|
| |
|
11-30-2007, 03:10 PM
| #56 |
| Rock Crawler Join Date: Sep 2007 Location: Denmark
Posts: 904
|
Wow loads of ideas spinning around in my head after seeing how you painted the frame Nice work |
|
| |
|
12-01-2007, 11:37 AM
| #57 |
| Rock Crawler   Join Date: Apr 2005 Location: Humble
Posts: 800
|
Hey crazydave, I haven't been in the WK forum in a while, great looking rig, yea RCC is 90% performance, 9% bling and just to keep it interesting they throw in 1% BS. You know sooner or later I'm going to get a HellCAT chassis under there, but go ahead a kick the snot out of that one for a while. |
|
| |
|
12-02-2007, 03:18 PM
| #58 | |
| Pebble Pounder Join Date: Jul 2007 Location: Phoenix
Posts: 110
| Quote:
@ripper, I haven't ruled your chassis out. My one gripe about how mine works right now is that the tranny hangs up on obstacles. I'm looking at your chassis, but you know I'm a DIY sorta guy too, so I'm still debating. | |
|
| |
 |
| |


 Linear Mode


