| |
| |||||||
 |
| | LinkBack | Thread Tools | Display Modes |
 01-20-2008, 04:28 PM
| #61 |
| Quarry Creeper Join Date: Jul 2007 Location: 517
Posts: 341
|
I figured so on the 8- 32 thing  Last edited by coolkidjf7; 01-20-2008 at 04:42 PM. |

|  |
| Sponsored Links | |
| | |
|
01-21-2008, 09:25 AM
| #62 |
| RCC Addict Join Date: Aug 2007 Location: Toronto, Canada
Posts: 1,122
|
When I get home tonight I will check those out for you. I do know there is a larger ball and smaller ball included with that kit. The width of one ball I think was like 8.3mm and the smaller was around 6.5mm... (approx guesses). But ill let ya know |
|
| |
|
01-21-2008, 10:25 AM
| #63 | |
| Rock Stacker Join Date: Oct 2007 Location: Devon, UK
Posts: 79
| Quote:
| |
|
| |
|
01-21-2008, 11:29 AM
| #64 | |
| RCC Addict Join Date: Aug 2007 Location: Toronto, Canada
Posts: 1,122
| Quote:
 The only reason why I remember that is when I was building it up yesterday I was having some fit issues with my 3mm x 25 screws that I was using. On some links I had extra screw passing the lock nut and other times, it didn't. So, I went to measure them to see what the size of those balls really were and only then I noticed there was a difference. The one's with the larger mating surface were the large width ones. The ball part sits a bit taller. | |
|
| |
|
01-28-2008, 09:15 PM
| #65 |
| RCC Addict Join Date: Aug 2007 Location: Toronto, Canada
Posts: 1,122
|
Well I finally managed to get some electronics half-arsed installed into it. Friend of mine never had a chance to work on the aluminum plates yet, but this week he said he would. .. PICs ..      Ok so as stated, yes the electronics are half arsed in there. They are held down with some tie straps. The battery is not held down at all. The POS/NEG motor wires are way too long, but they will be shortened once the plate that my friend is working on is complete. Then I need to work on a cross tube that hooks up the body posts so I can mount that plate. Shorten the body posts and mount the body. Paint it. I setup a small obstacle course in my basement consisting of 3 foldable plastic boxes and I arranged them like dominos laid down. Sucker crawled over it no problems. Even being a completely first run, untested, untweaked setup ... LOL |
|
| |
|
01-28-2008, 09:25 PM
| #66 |
| RCC Addict Join Date: Aug 2007 Location: Toronto, Canada
Posts: 1,122
|
Now that you have seen the new pics .... onto my problems... LOL. First .. Just wondering if the low speed (as in very minor pressing of the trigger button) glitching on the Rooster is normal / common / expected? From what I have read / heard .. it is. Because only when I would press the trigger very slightly, it would jump around on me. Once I pushed it pass that small point it would move fine. UNLESS .. it is something caused by how my wires are all messed up and once I clean it all up it should go away ... LOL. Second ... should the slipper clutch on the pede trans be locked up 100% tight ..? Third,... if I can hammer the trigger and get the crawler to do a small "pop-a-wheely" ... should I downgear from the 15T pinion to a 14T or 13T ...? Last edited by Nerve; 01-28-2008 at 09:33 PM. |
|
| |
|
01-29-2008, 04:41 AM
| #67 |
| Quarry Creeper Join Date: Jul 2007 Location: 517
Posts: 341
|
I like wheelspeed so I wouldn't gear down if I were you. THat glitching is probebly nothing; I wouldn't worry and as you said it might go away once you clean up the wires. I would aslo disasemble that battery pack and mount it on the front or rear axle, or even indvidual cells all over the place (conected by wires of course |
|
| |
|
01-29-2008, 11:27 AM
| #68 | |
| RCC Addict Join Date: Aug 2007 Location: Toronto, Canada
Posts: 1,122
| Quote:
If I had a video cam I would have recorded it so you guys could see what I was referring to. Well, for battery packs I was originally considering going with a 6 cell Nimh 2/3A sized pack tucked on the axle. The battery pack shown in the photos was purely so I could play with it last night and actually see it move and see if it worked. Everytime I would change an angle or stop hard the battery could go flying out the front... hah. | |
|
| |
|
06-15-2008, 03:03 PM
| #69 |
| RCC Addict Join Date: Aug 2007 Location: Toronto, Canada
Posts: 1,122
|
Hmmmm how about a 5 month update? LOL ..Hey its my build thread, i'm allowed to bring back way old threads! HAH! Changes since everything seen before: - Mamba Max - Maxamps 1600 nimh 6 cell packs - "The Source" velcro straps to secure packs - Losi Claws (not mounted yet) - Grappler body painted and trimmed and stickered - Custom made bent lower links (brake line & all thread) - Mayhem Engineering Spiders (double phattys on the way) - Proline Memory Foams - Aluminum HPI hexes to allow use with Mayhem wheels - Rear lockout redone - vertical body posts - ESC mounting plate shrunk to fit between upper links (not shown) - Front steering links redone I think that is about it. Here are some pics from mid april:   The day I received some Mayhem WK wheels:    Crawling around my gf's front yard. Yes the film and window masks were still in there when testing it out... LOL.     As it sat on my desk as of last month:  So here are some more pics from June: This shows my steering redesign attempt. I know it isn't the most popular way of doing it, but I wasnt overly happy w/ the original setup of the links. Unles of course, it was something I did.    As you can see the ball end is still resting on the lower mount link. If I wanted that extra mm or two, then I could just shave them down a bit to allow full movement. Still have to give the all thread some brake line as well ... lol. Some photos from the crawling comp yesterday.   So that is about it for my updates. Thanks for taking a look at least. ALSO .. if a mod happens to take lookie at this update, could you please change the thread title to " Nerve's WK Crawler Build " thanks !! |
|
| |
|
06-15-2008, 05:35 PM
| #70 |
| Quarry Creeper Join Date: Jul 2007 Location: 517
Posts: 341
|
Looking good buddy! The only suggestion I would make is to fold the bottom under a bit on the sides of the body, it looks better that way IMO.
|
|
| |
|
06-15-2008, 08:27 PM
| #71 | |
| RCC Addict Join Date: Aug 2007 Location: Toronto, Canada
Posts: 1,122
| Quote:
btw thanks to whoever changed my thread title. I got tired of looking at my newbie first post thread title ..;) | |
|
| |
|
04-08-2009, 03:47 PM
| #72 |
| RCC Addict Join Date: Aug 2007 Location: Toronto, Canada
Posts: 1,122
|
Alright, here goes another one of my overdue build thread updates again. It has almost been a year since I last updated something in here and I guess its time. I know how everyone loves bringing back old threads... NOTE: I started to host the photos on Flickr due to Webshots not providing a forum posting file size of photo that I was happy with (too small). So you will notice the photos are larger in size then my previous posts. I do have a 22" monitor, so the photos below look just about right on my screen. If you are viewing this thread with a small CRT monitor, upgrade your computer and then your crawler.. hehe. Updates since my last update: AX10 Trans / stock spur DNA Motor Plate DNA DIG with HS225mg servo HS7955 TG Servo Xtreme Hobbies SS / CF custom link set CC BEC SWX Skid Plate HB Rover Whites Axial AX10 Cross Lockers (to replace RCguy lockers) Ace's Donuts 3" x 5.25 foams (currently in transit) Onto the mass of photos: (January 2009 is when these were snapped btw) Just a comparison to Rovers/Claws/Moabs 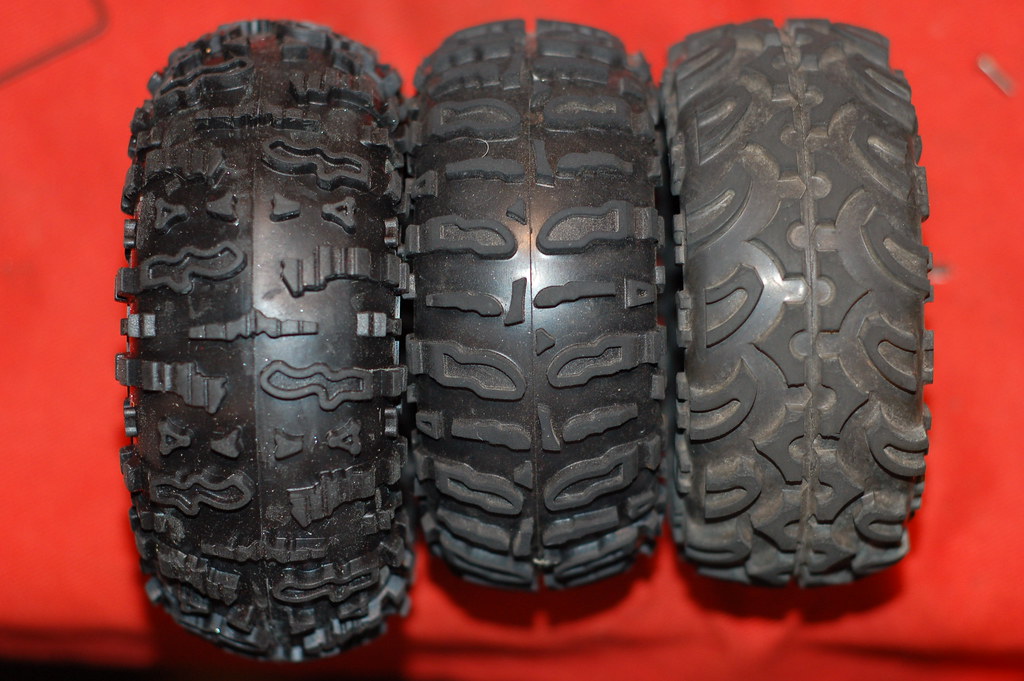 Comparison of installed Claws vs installed Rovers...lol. 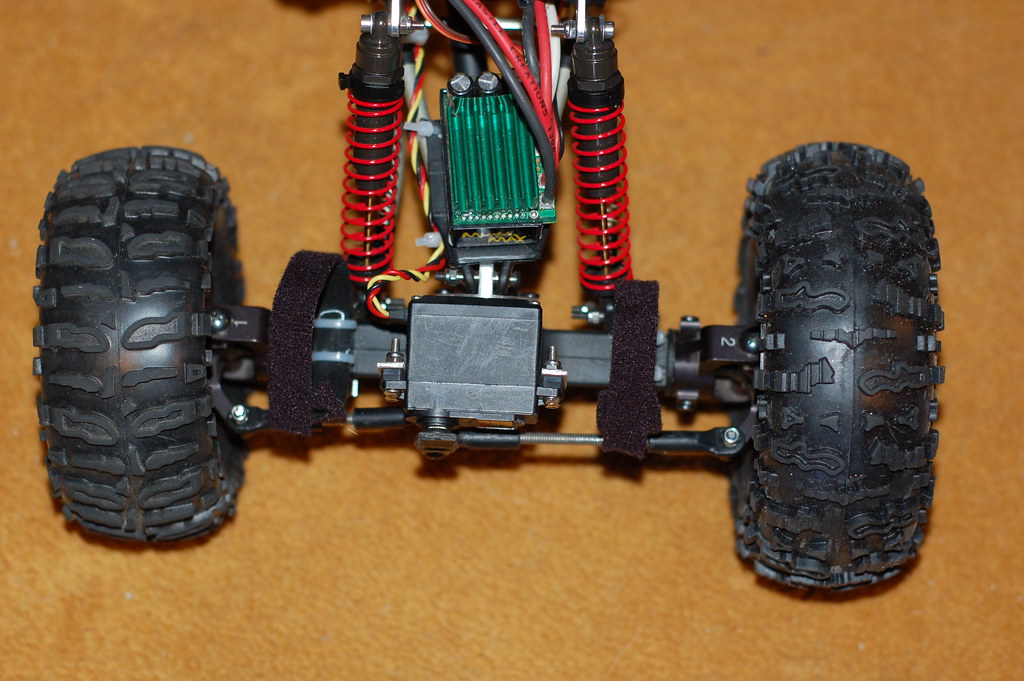 My foam choices (proline mem, Kreepy Red, stock claw, stock Rover) 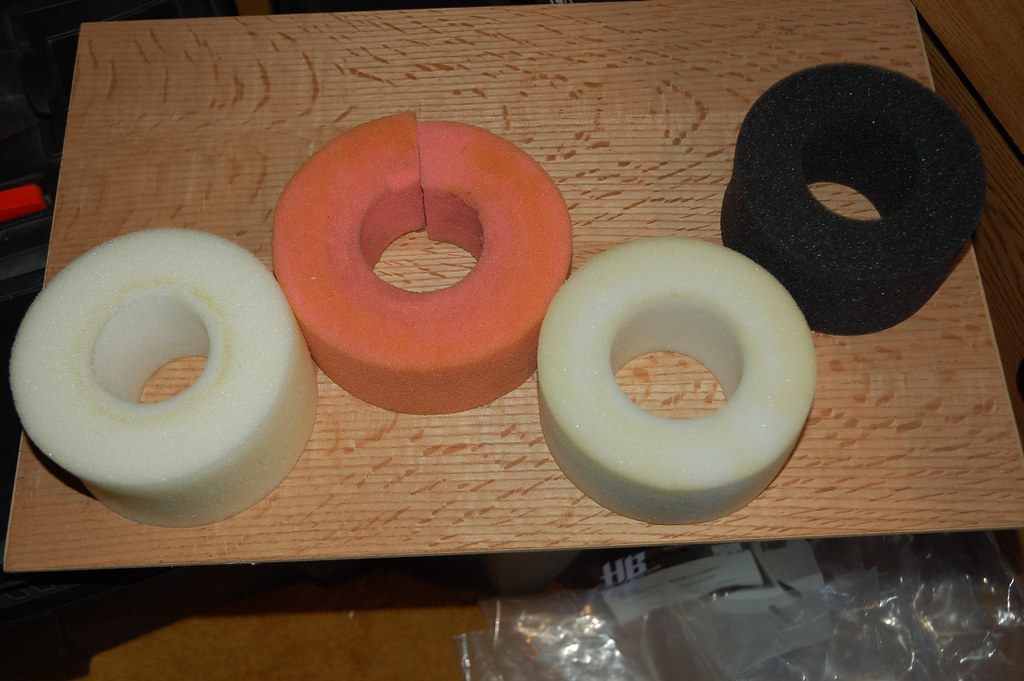 Earlier photo as it sat before all the updates listed above 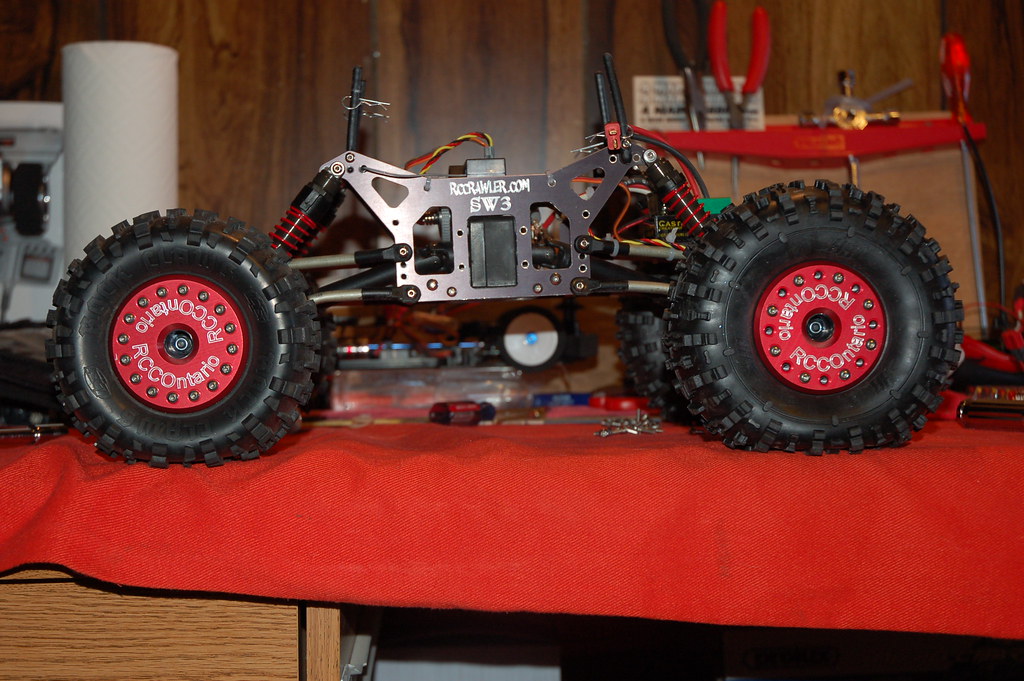 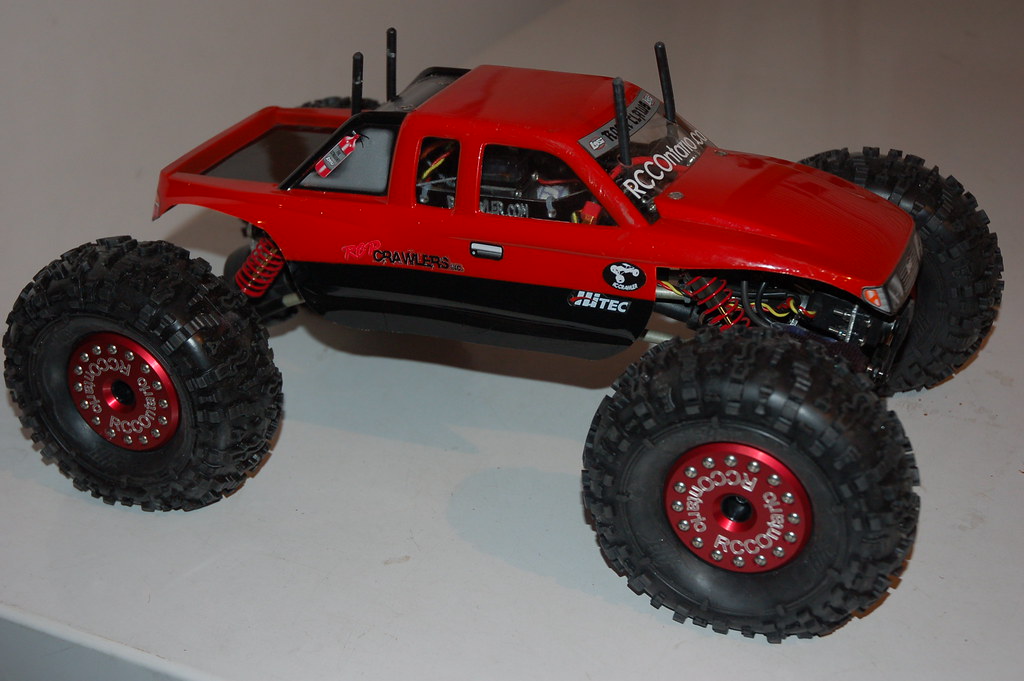 Photo from the front end showing my old steering link setup 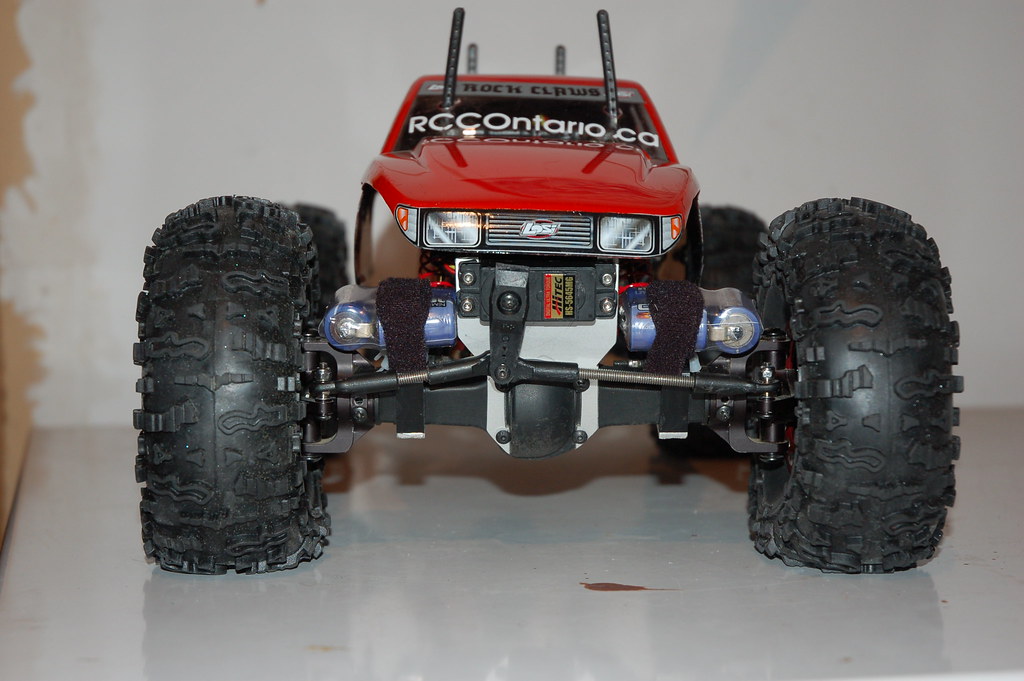 The old setup w/ the Pede trans and mamba out front. 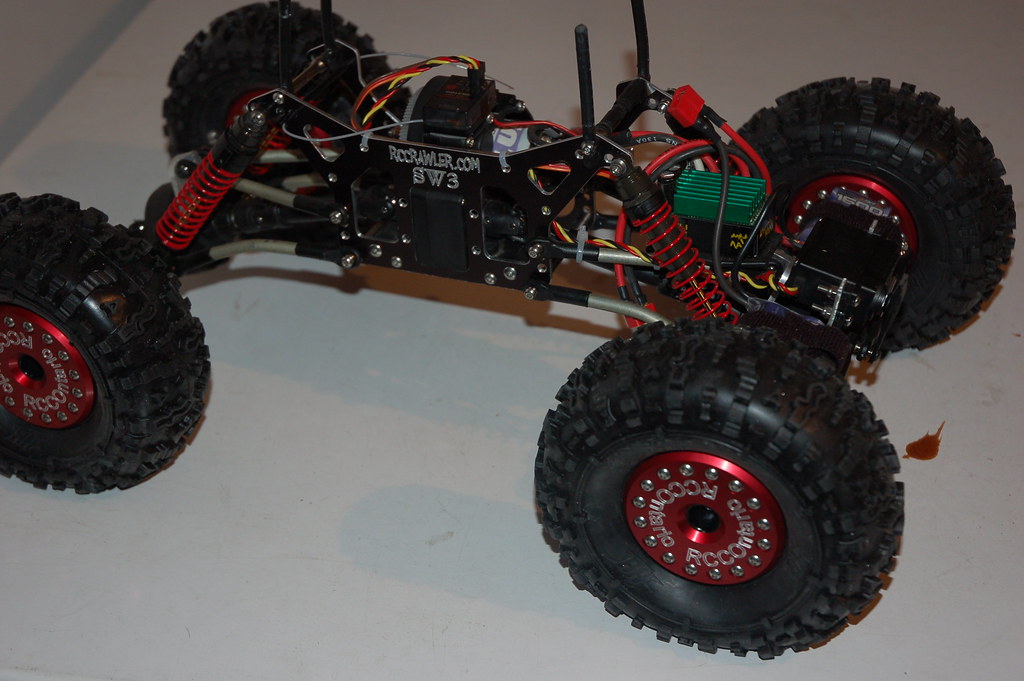 Just about 3" clearance 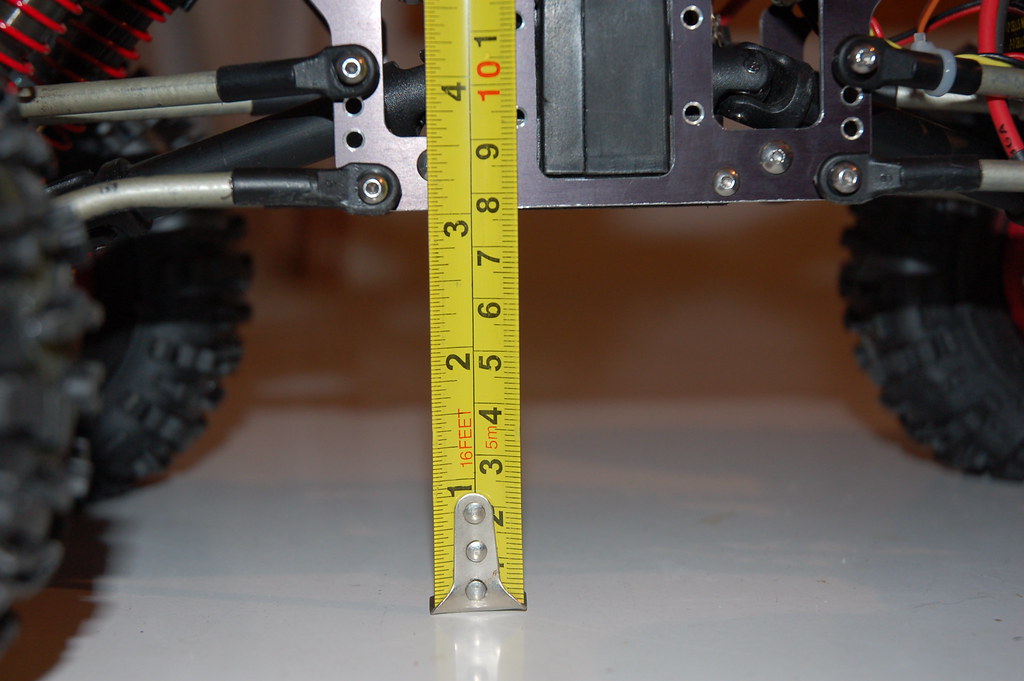 Body on, posts clipped 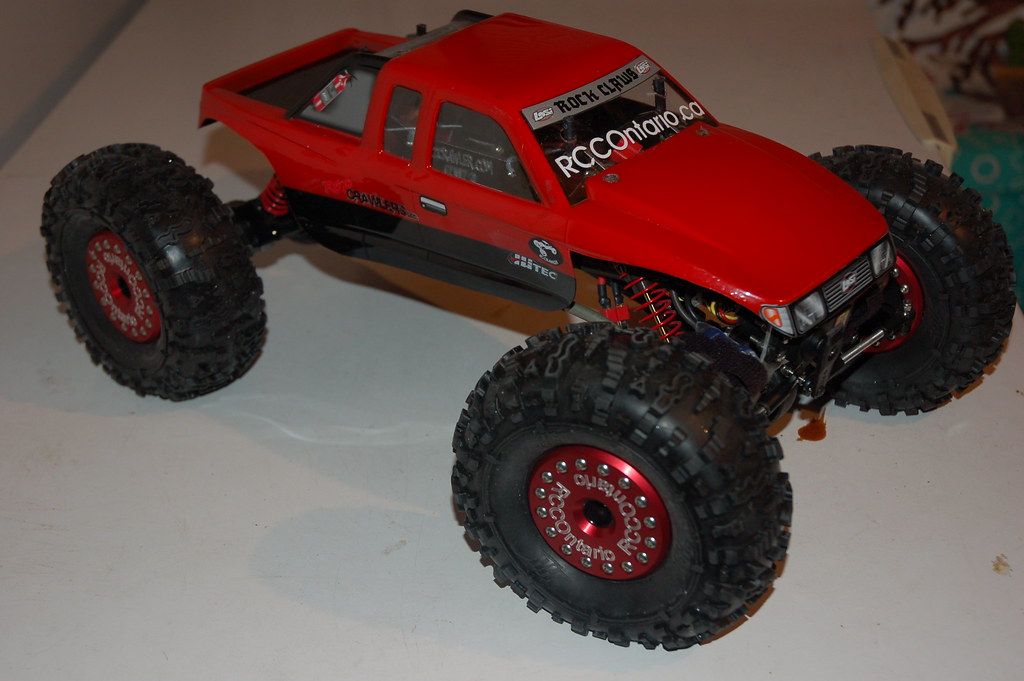 After these photos were snapped I had the rig in its first comp and was somewhat impressed by the performance. But not overly impressed with how I did. So I set out to update and lighten the rig. Onto the tear down photos and complete redo: Pede is now gone, welcome the ax10 trans and SWX skid plate (February 2009) 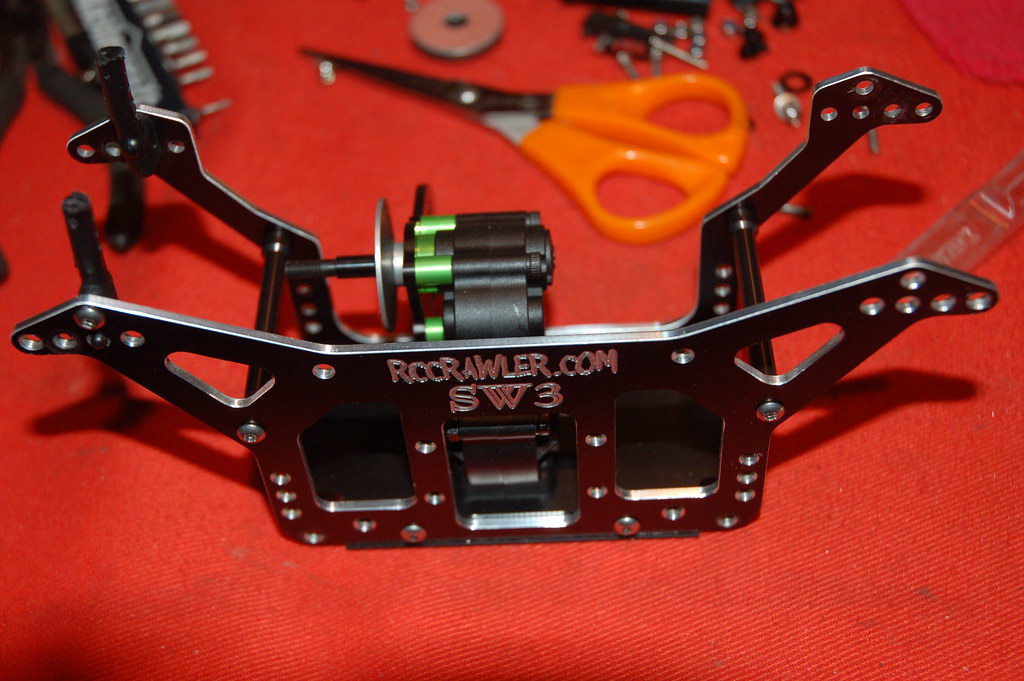 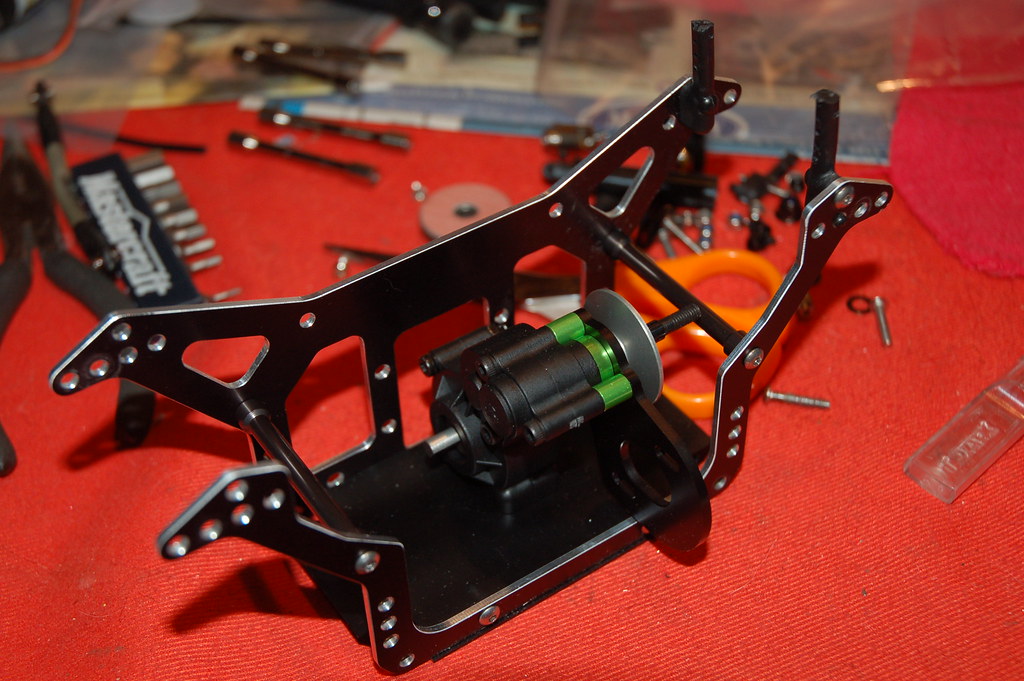 Some new stuff 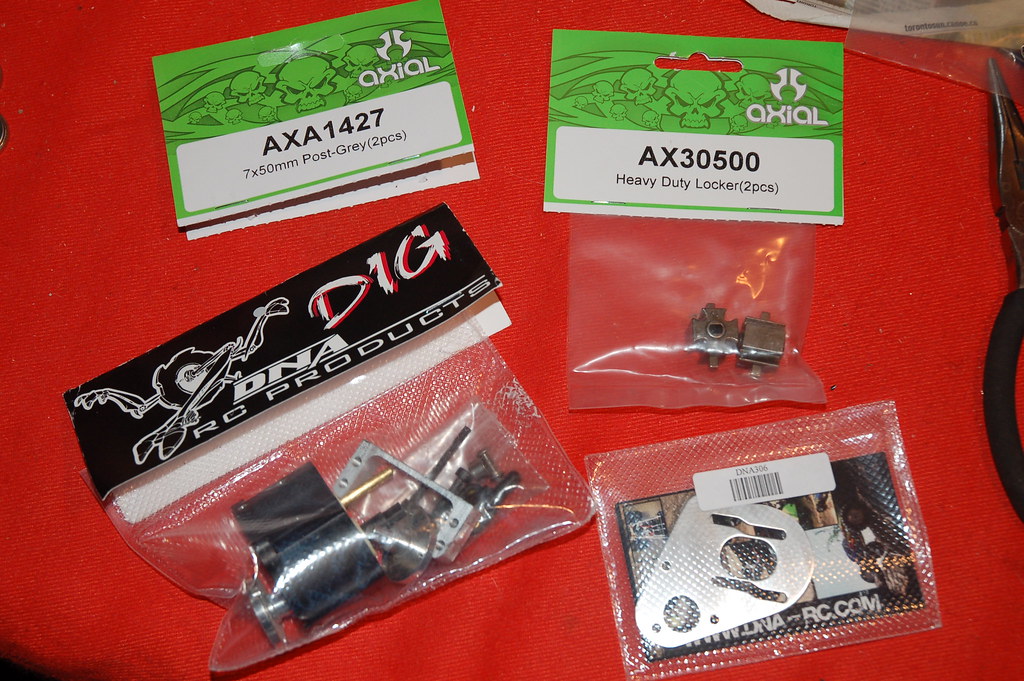 Dig Installed for the first time 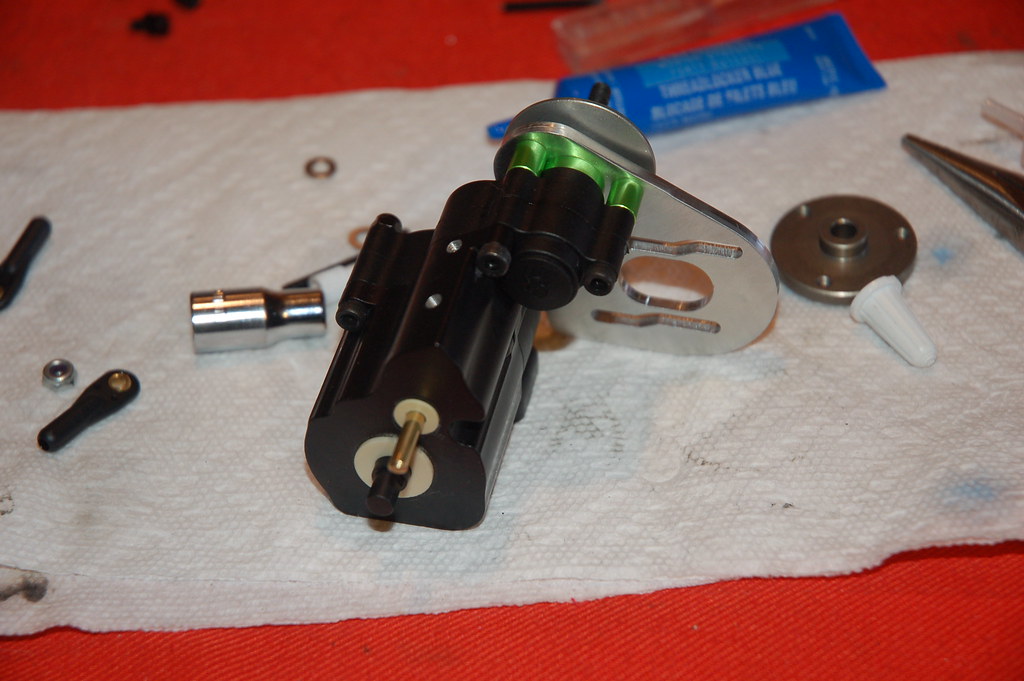 Xtreme RC Hobbies Link Set: Stainless Steel Lowers and Carbon Fibre uppers 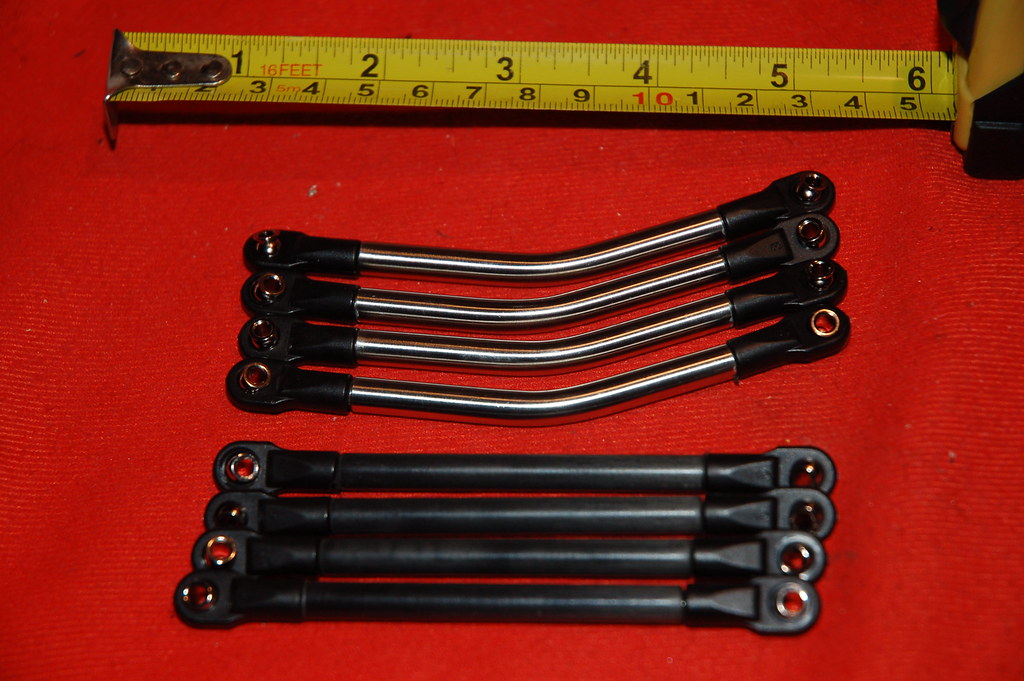 Lowers installed 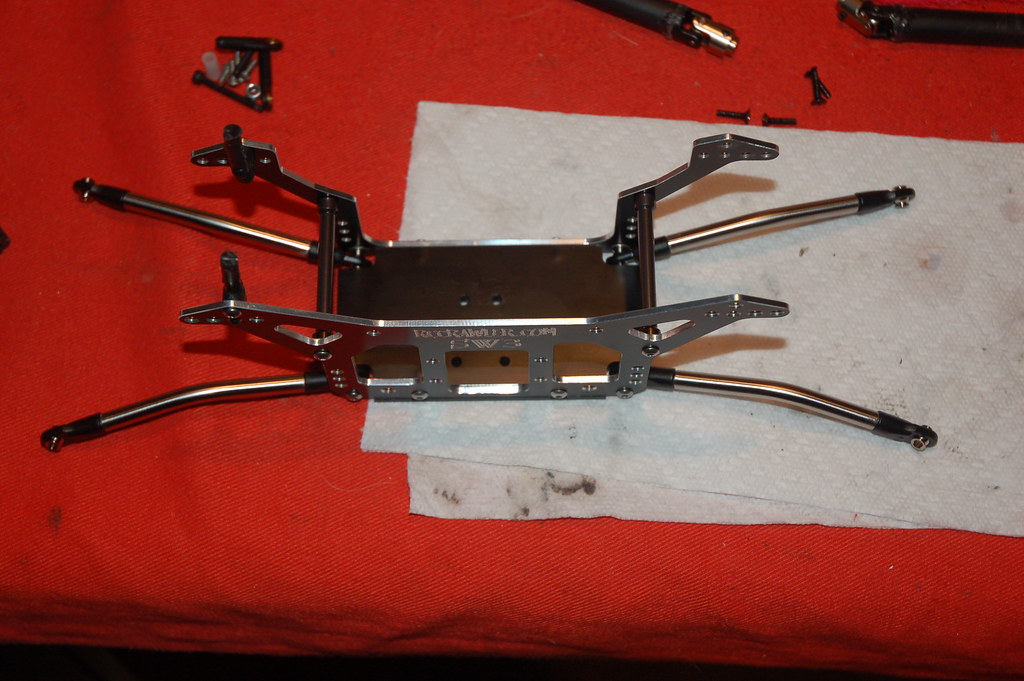 Trial fit of the links 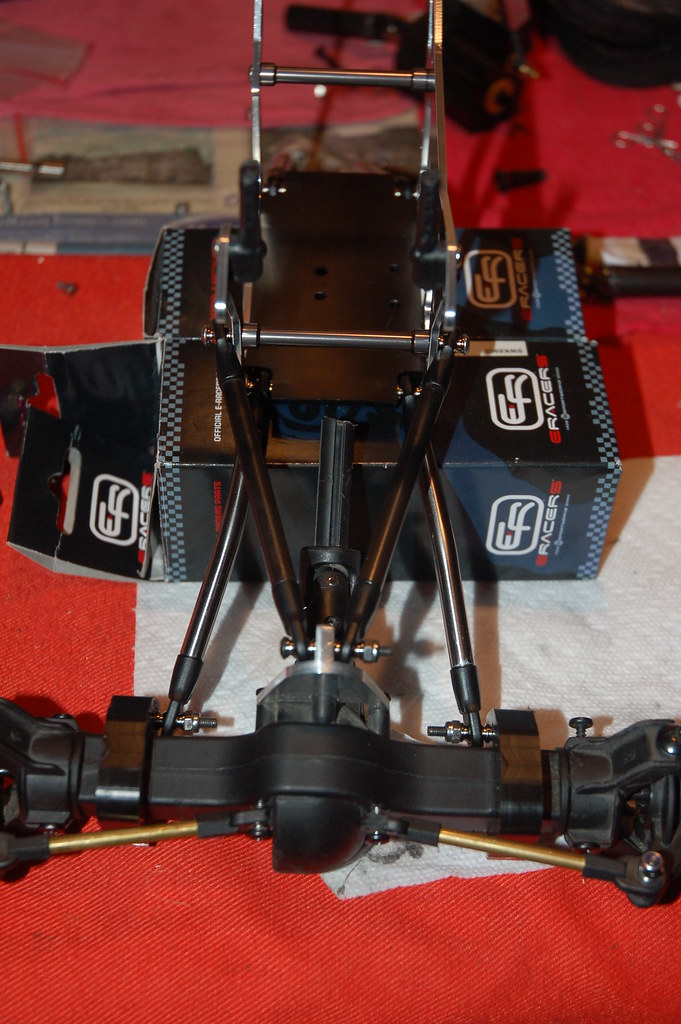 Initial setup of the links installed and shocks etc. Bang on 12.5". I must say that the Xtreme Hobbies links REALLY did improve my rig. Everything is now square! 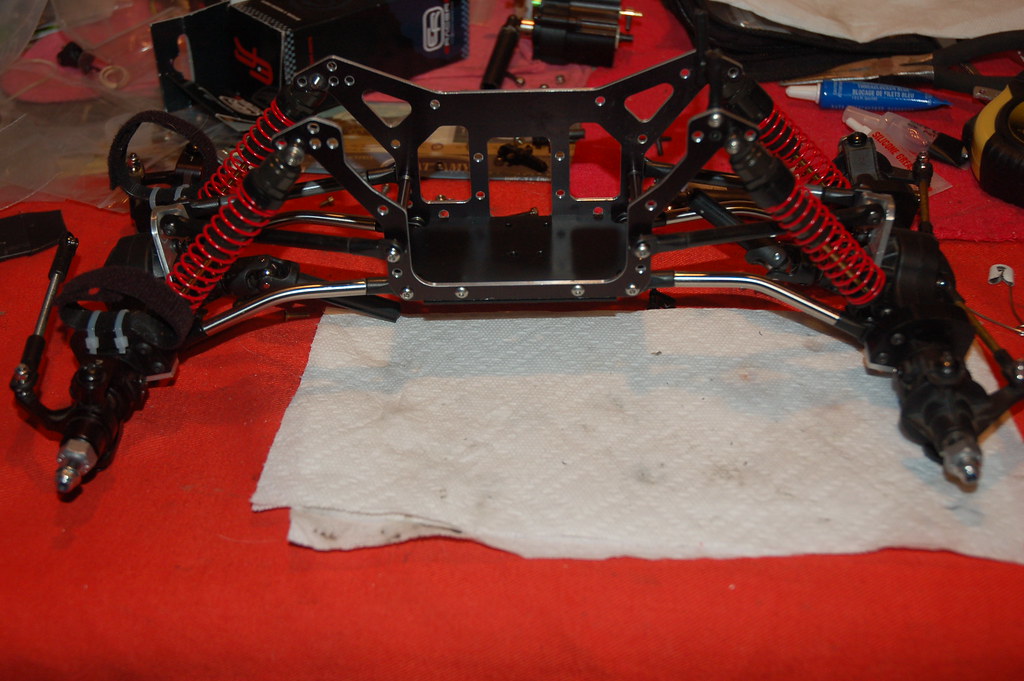 Onto the DNA Dig install photos: In order to use the supplied servo mount from DNA I had to file down the DNA mount to 6.5mm so the HS-225mg servo would fit perfectly into my chassis. From a fresh install, the servo would not even fit into the mount when installed in the chassis. I wasn't going to start drilling new holes in the skid plate and due to me using WK axles, I didn't have the room to mount a vertical mounted servo at the rear for the dig. I had to figure out another way to get it installed and I did. The original SW3 with the Pede skid plate was about 53mm wide and with the SWX skid it was now 50mm wide.    Yes. It really is THAT close to the chassis plate. I can slide a piece of paper between the horn and the chassis and that is about all. The nut that holds the dig engagement arm looks like it touches the chassis, but I can guarantee it does not. 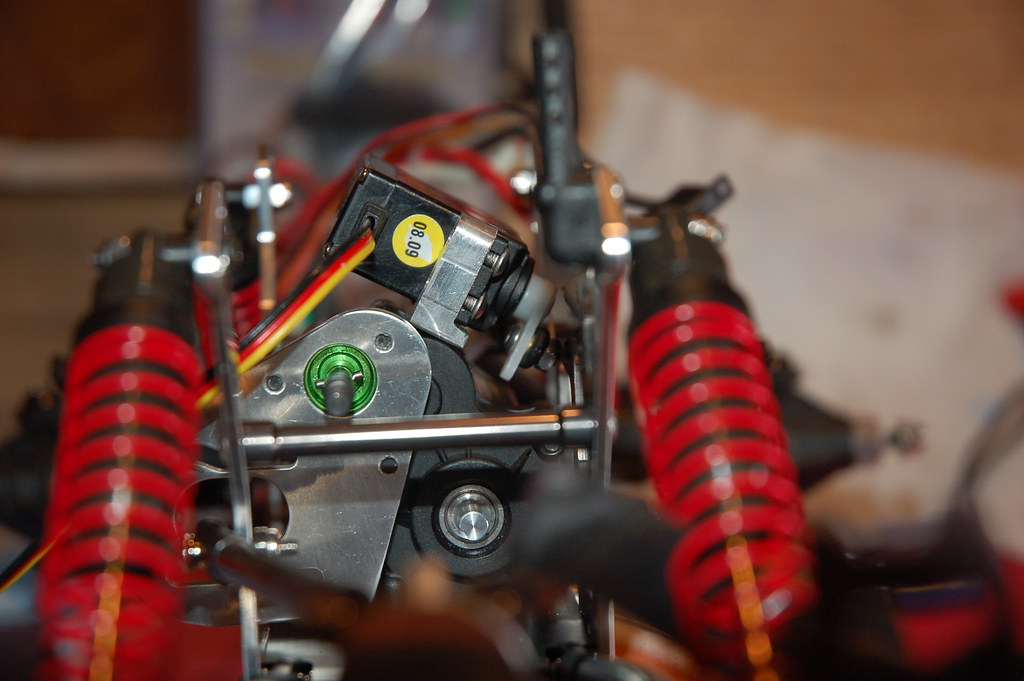 I was able to finally get my dig unit working, but it did take a bit of effort to get it going. There was a lot of trial and error and test after test. But in the end I have a reliable unit that works well for me. I believe some tweaking is still needed, but for now it functions when I want it to. Onto photos I snapped today (April 09) This is how the rig sits right now as of March 2009. I currently am running it as "dropped" (not drooped) setup. Basically my shocks are indentical to how they have been since the start, but the only thing I changed was using the inboard most shock mount holes on the SW3 chassis. Hence why I think its more of a "dropped" style vs "droop". I think my clearance was around 2.35" somewhere. Currently I have the Kreepy Red Squishy foams in the front and Kreepy Pink Squishys in the rear. Once the Ace's donut foams show up, then I will be changing them over to the Ace's. 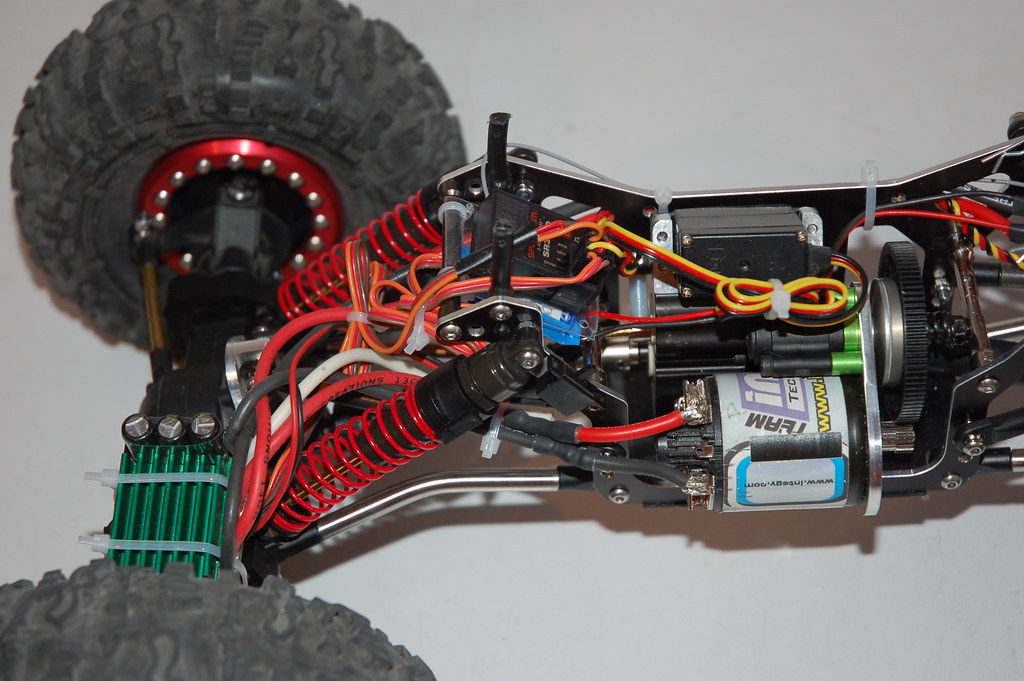 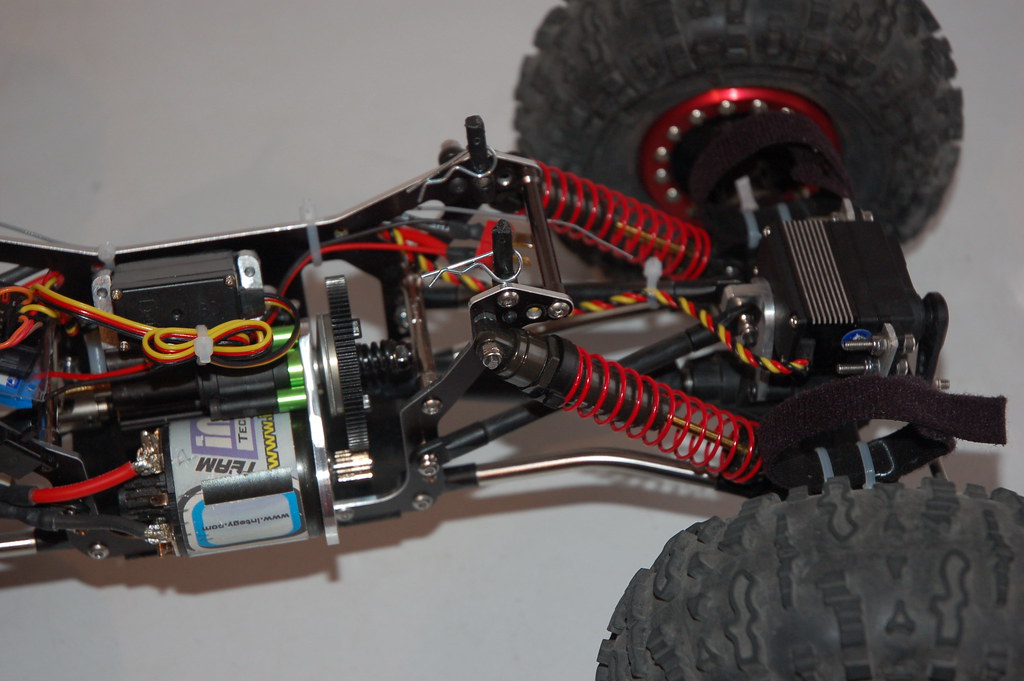 As you can see, back to the original setup for steering. The lower tie rod is purposely without any brakeline tubing to allow steering angles to be increased a bit more. The upper rod to servo arm I had to shield however. 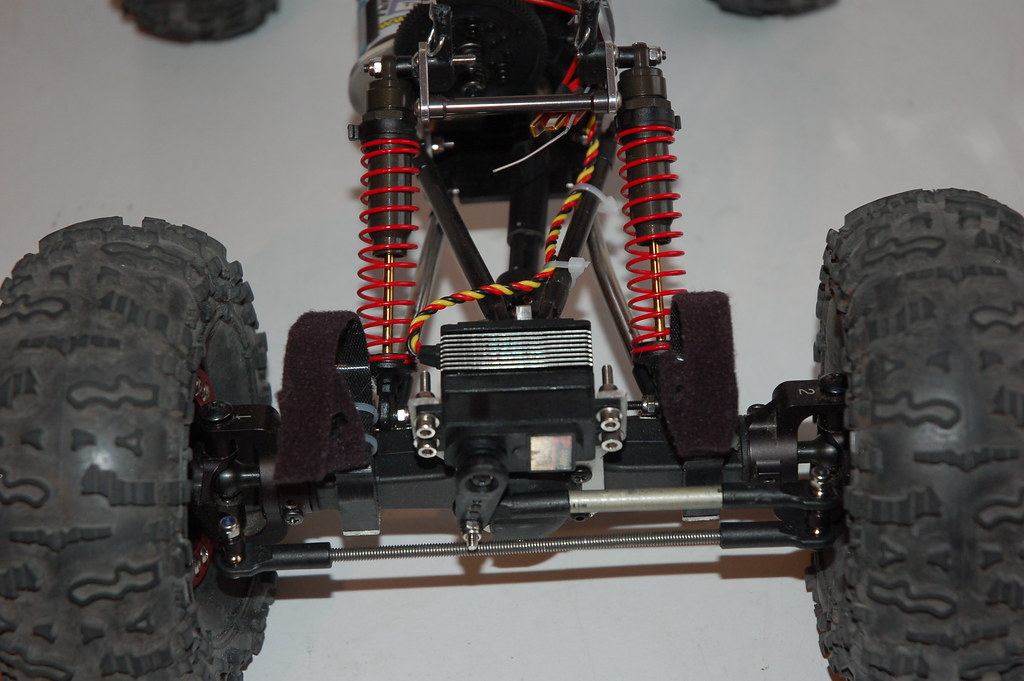 Ooooo, nice and neat and tidy. You can see my battery extension adapter I had to make so I could run the battery power from the front to the Mamba in the rear. 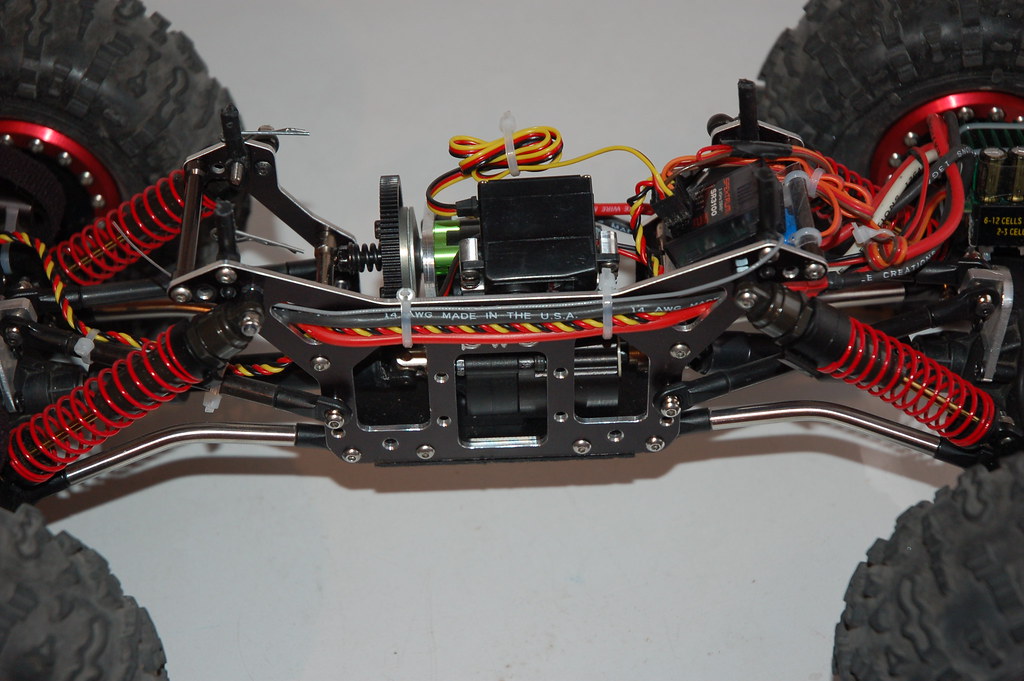 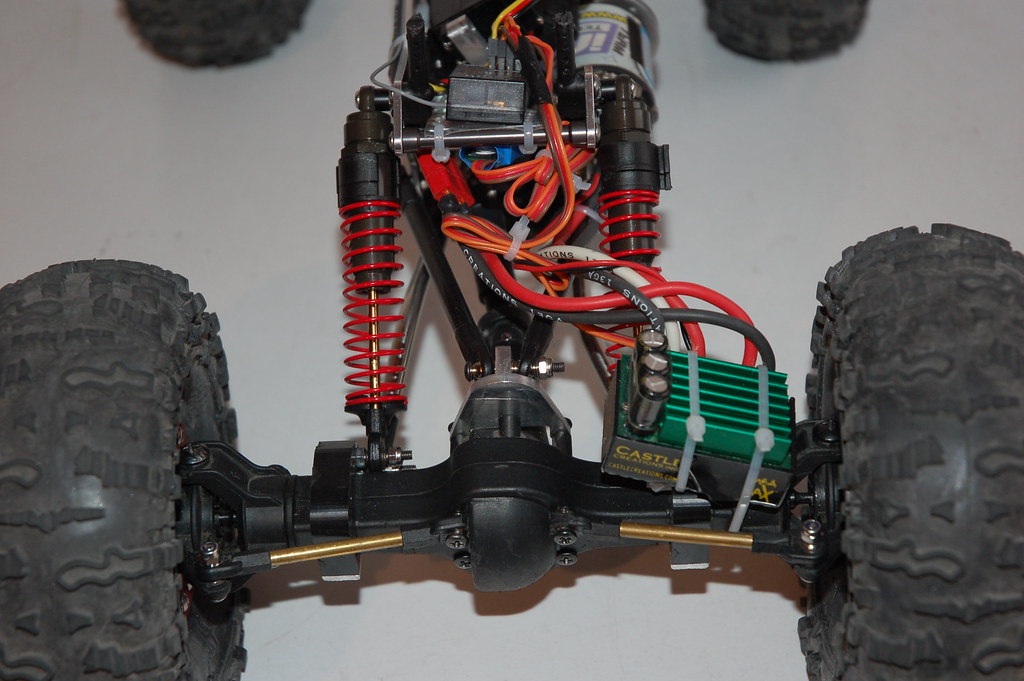 Tried to focus on the CC bec tucked underneath the receiver for this photo, didn't quite work.. lol 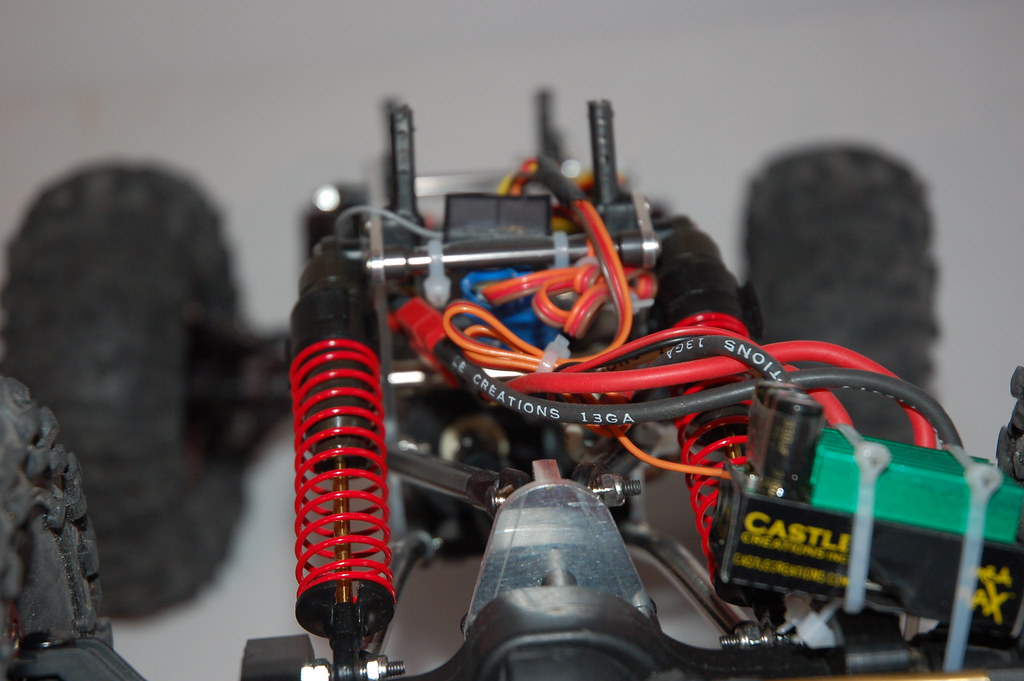 So that is basically the almost one year update of my rig that I have just been too lazy to update with new changes to my rig. I like to keep my progess somewhat current.. lol. I hope you enjoyed taking a look at what I have done and how much this thing has changed since I first started out back in 2007. Feel free to comment or ask questions etc. Look back sometime in a few months for anther update.... |
|
| |
|
03-06-2017, 08:27 PM
| #73 |
| RCC Addict Join Date: Aug 2007 Location: Toronto, Canada
Posts: 1,122
|
I sure have a thing about not updating my build threads for quite some time. Here is my almost 8 year update on where my Wheely King is right now..  A majority of the parts on my last update (April 2009 and the previous reply ), had been installed, then removed again to "almost" benefit my Underground Crawlers Fastback rig (see link below). But, sometime in I think 2013 I had pulled everything apart once again and slowly worked on rebuilding it (2014 to 2017). Which then meant I would need to put some parts aside (aka buy) for the Fastback rig to function. I enjoyed this rig too much and being that it was my first, I just had to get it back together so I could actually use it again. Even if I'm not competing, I just wanted to have it in working order so I could put batteries in and go. Here is the Axial build thread So to get my build thread back up to speed ..... Here is what happens when you don't setup your end points correctly on a DNA dig and you run with it for a few comps and then notice that your dig isn't working right.  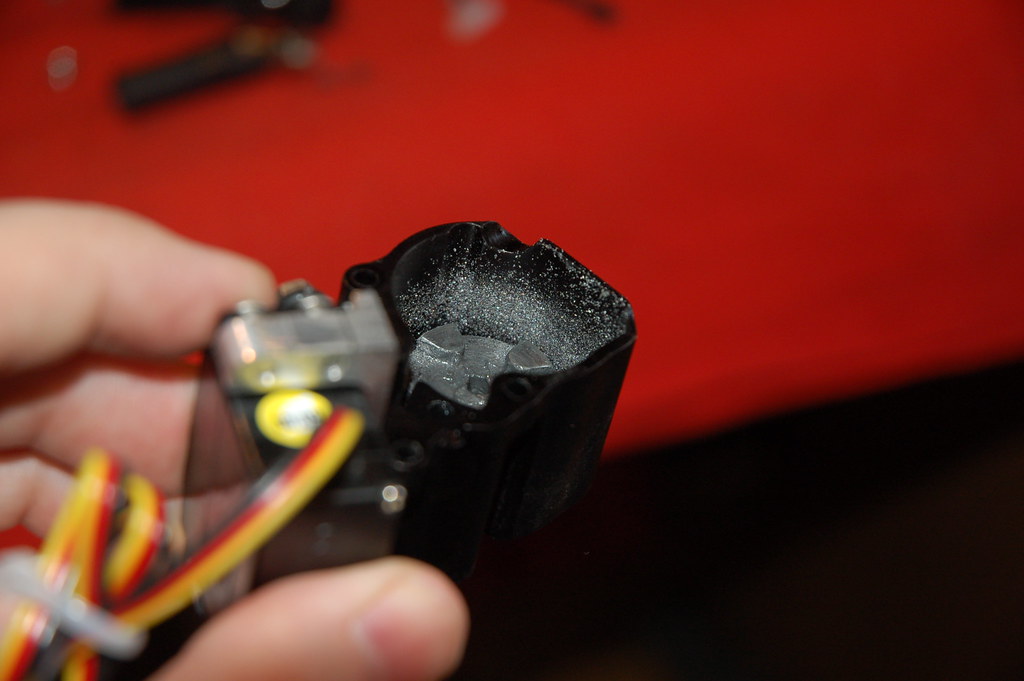 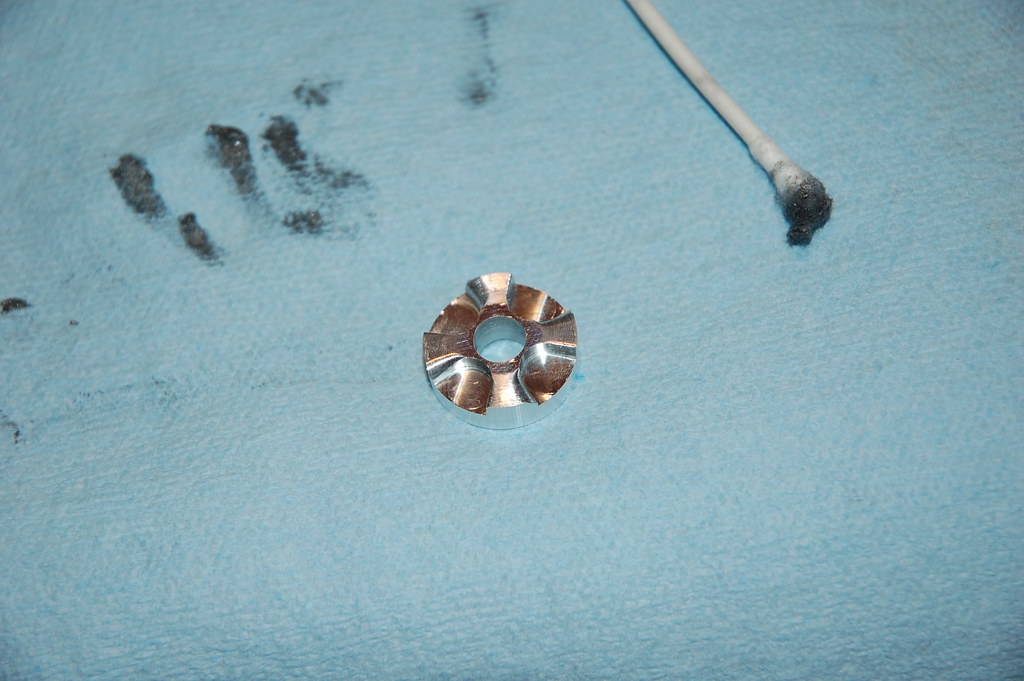 I ended up ordering replacement parts in June of 2009 and only this past week I was able to test them out. I have no idea if I got my end points right or not.. LOL. New body to replace that hacked up Grappler. Looks like this was summer 2009. 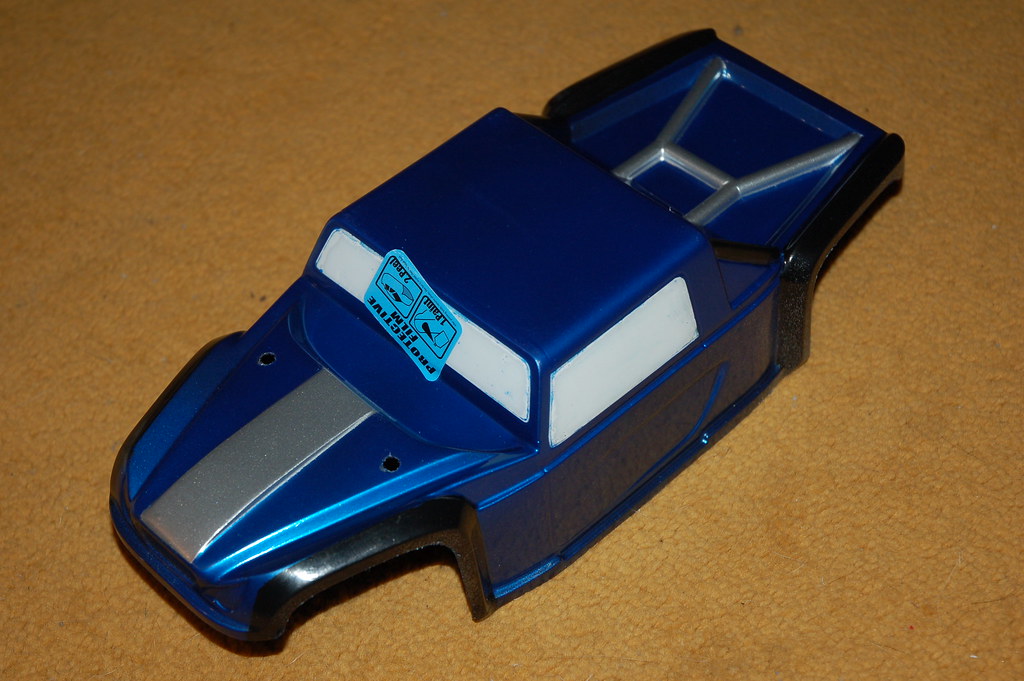 ..and now the rebuild begins (April 2013). I believe I had just torn down the Fastback and started to redo it at this point. 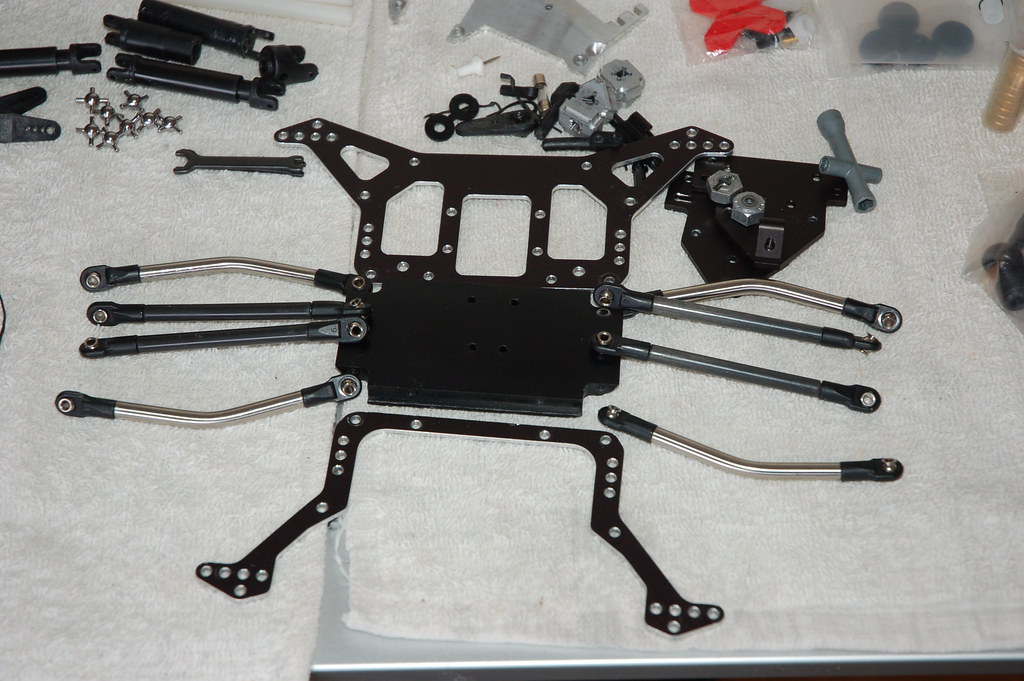 I won a Cow RC mat in 2013..  Almost finished rebuilding it in 2013 (Fastback off to the side again) 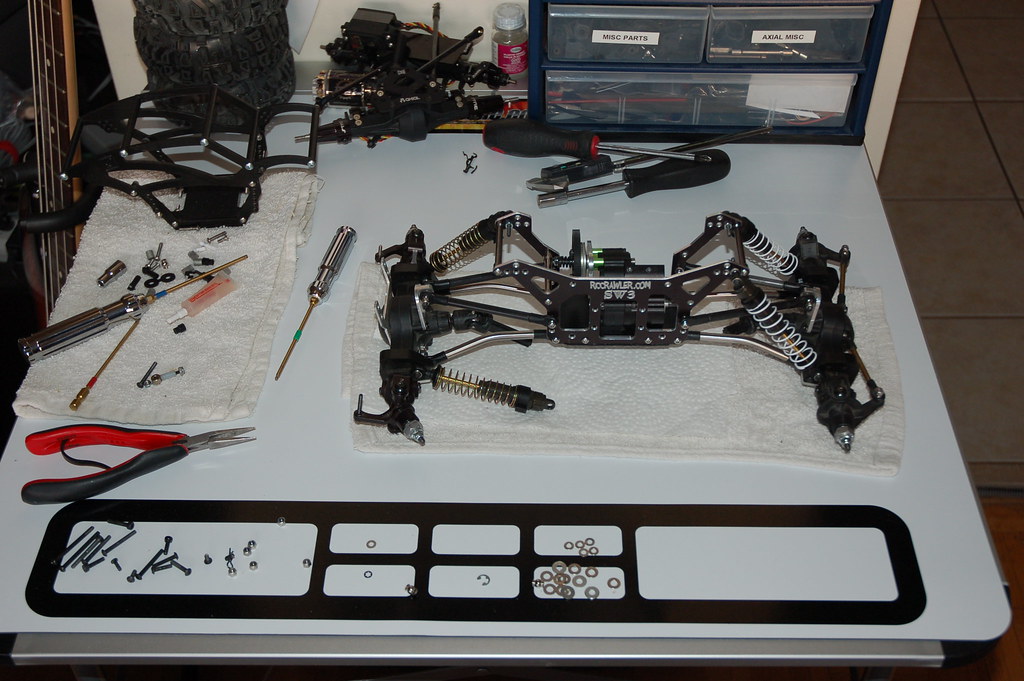 So this would now bring us up to 2017 to this past week on when I FINALLY sat down to finish installing everything. Additional parts from previous : - Billet Works Design Upper link / Servo / Battery plates for front and rear - RC4WD straight axle kit - JeepinDoug C cups (not installed as of yet) - Holmes Hobbies Torquemaster Pro 35T 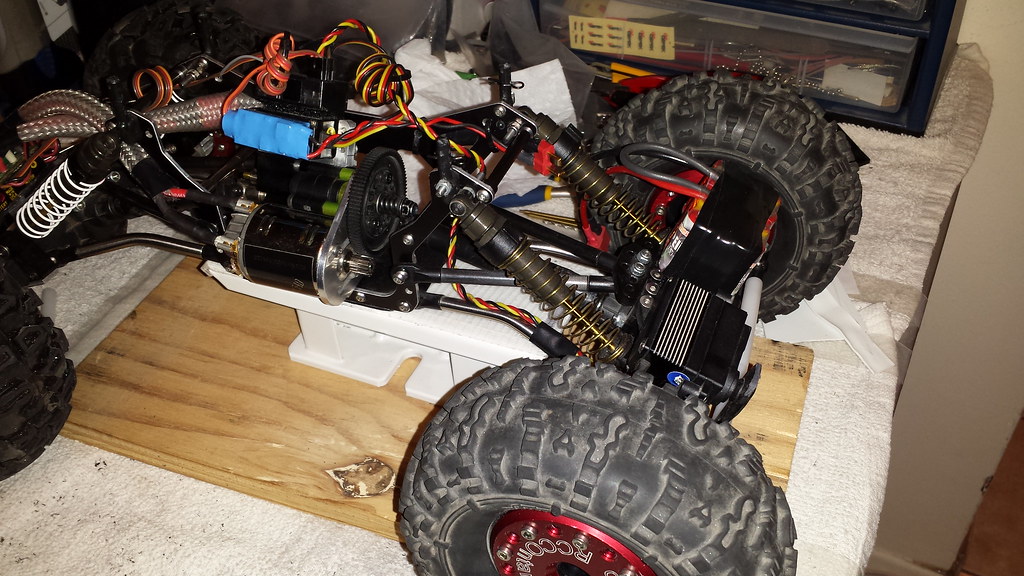 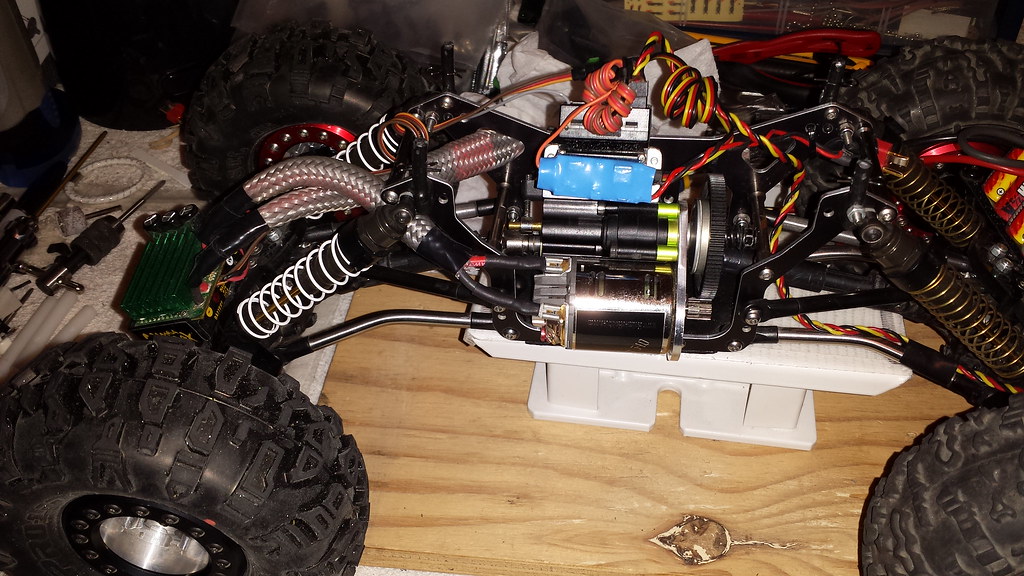 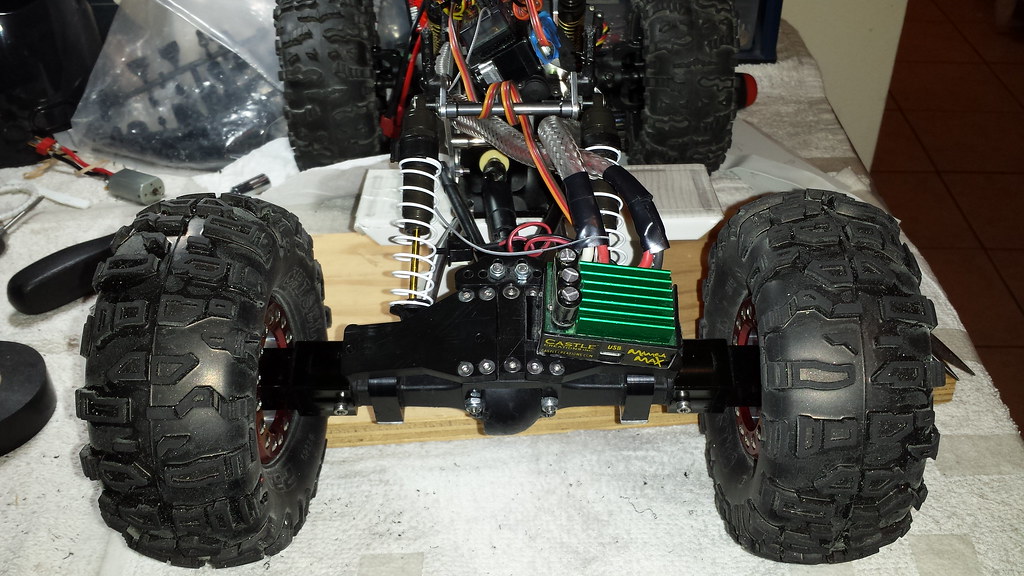 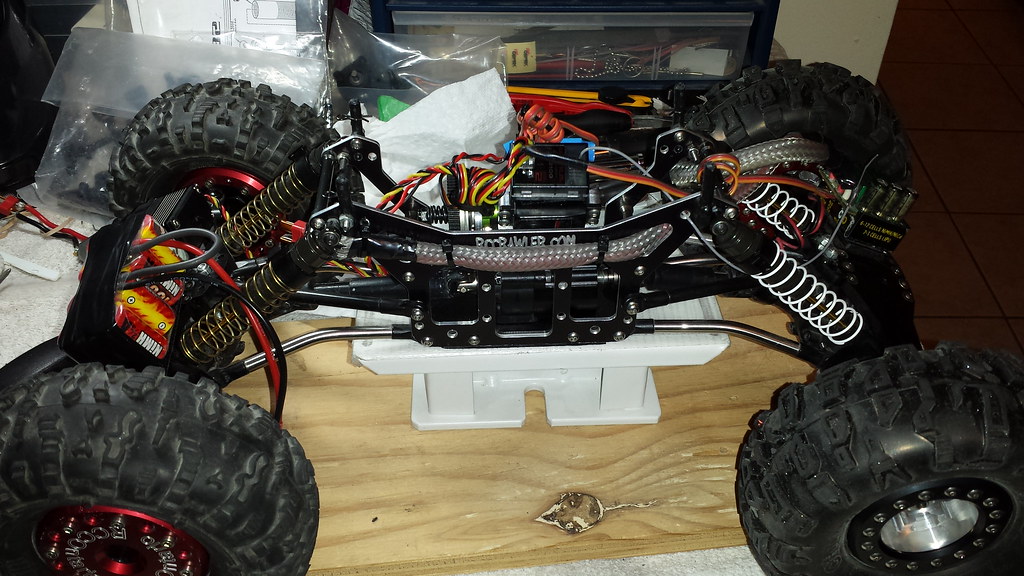 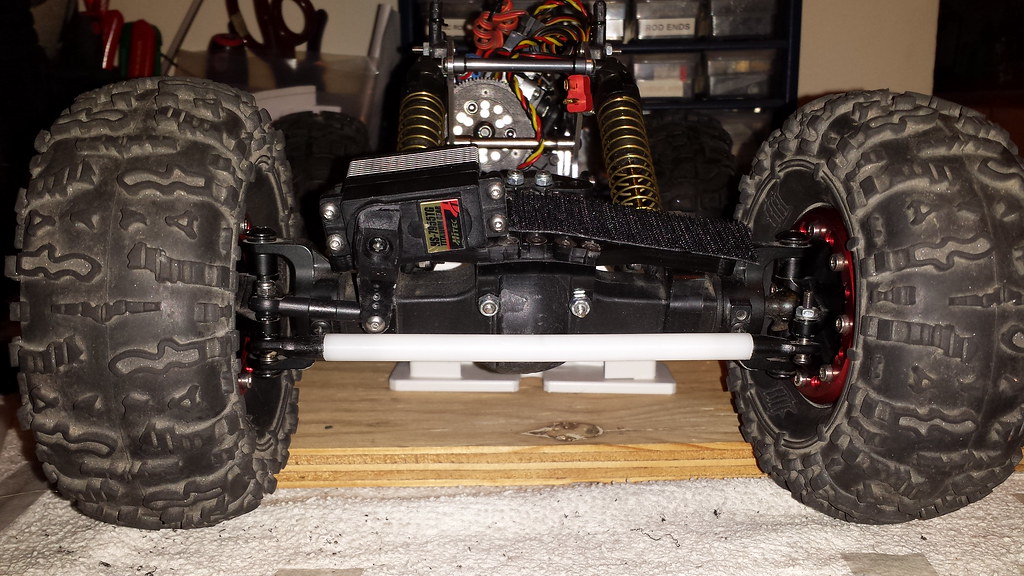 If anyone is wondering, the white wire covering is actually from a lavatory supply line (from the wall to faucet). I work for a plumbing sales company and took some samples, hacked them up and used them for the crawler. For anyone that took a look at my thread, thanks! I'm not sure how much I will be updating it from here.. |
|
| |
|
03-06-2017, 08:44 PM
| #74 | |
| Rock Stacker Join Date: Jan 2017 Location: Bakersfield
Posts: 86
| Quote:
Keep the WK's alive Sent from my iPhone using Tapatalk | |
|
| |
|
03-07-2017, 02:21 PM
| #75 |
| Quarry Creeper Join Date: Dec 2012 Location: Pioneer, 95666
Posts: 397
|
Considering how long the WK has lasted so far, I'm sure this forum will still be here in another eight years Last edited by makya; 03-07-2017 at 11:25 PM. |
|
| |
|
03-07-2017, 03:54 PM
| #76 | |
| RCC Addict Join Date: Aug 2007 Location: Toronto, Canada
Posts: 1,122
| Quote:
| |
|
| |
|
| |


 Linear Mode


