| |
| |||||||
 |
| | LinkBack | Thread Tools | Display Modes |
 05-06-2011, 08:34 PM
| #1 |
| RCC Addict  Join Date: May 2008 Location: Green Bay
Posts: 1,138
| Super Shafty 2.2 Conversion Review With the opening of Super Shafty and all the great upgrade parts coming from them, I thought it would be a good idea to give a review of the items I purchased and installed on my 1/6th scale Willys. I picked up several items from them, 2.2 Short Length Lock Outs #SS-102, Diff Spool #SS-107, Rear 2.2 conversion Dog Bones #SS-105, Front 2.2 conversion Dog Bones #SS-104 and Front "Stub Carriers" #SS-106 along with some stock Kyosho parts. 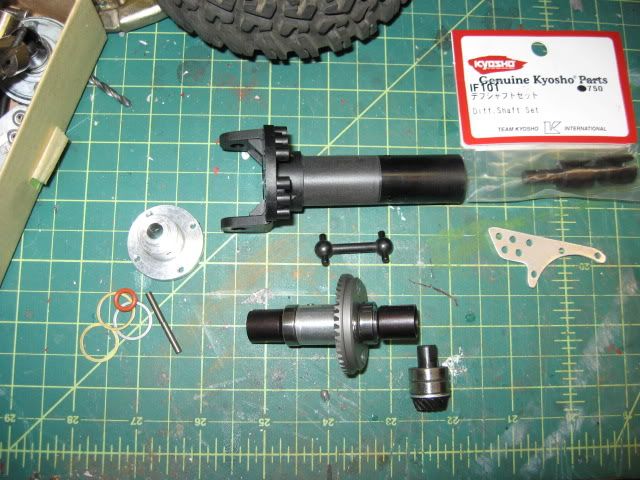 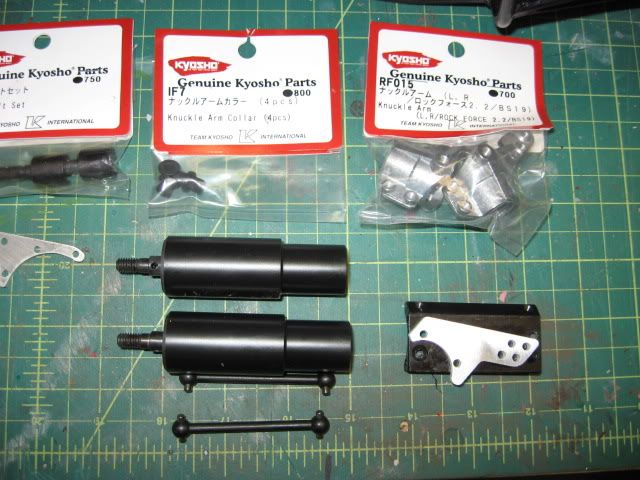 Finish on all parts was great, no complaints at all. Assembly went smooth on the rear lockouts. The only thing needed was some sanding on the outer diameter for the cut down side to slip in easily. This is normal though and is not because anything was incorrectly made. This is a huge improvment to the looks compaired to stock. 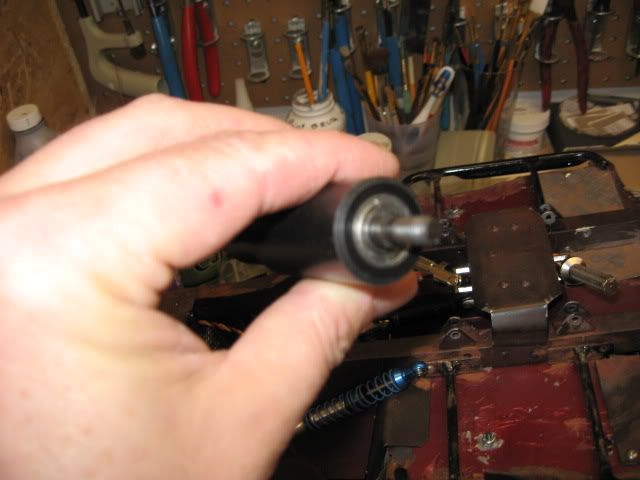 The diff spool is well made and a needed upgrade, all parts needed come with it minus ring gear. Stock one will bolt right up but I chose to go with the Kyosho Helical set Part #MA050. Dog bones are nice and beefy and fit the way they should, another good upgrade even for stock width applications. 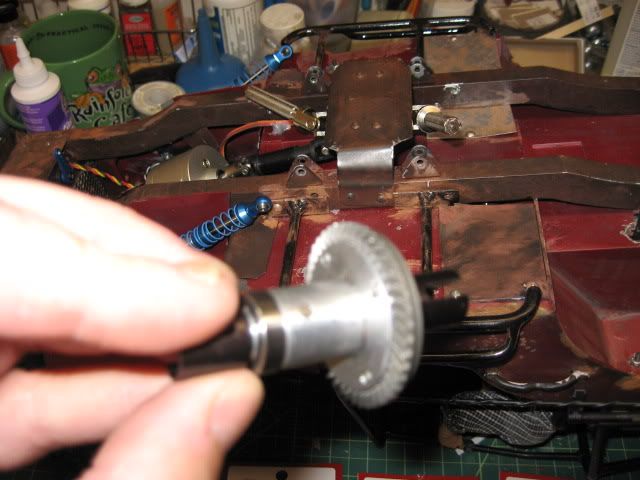 All in all, the rear went together great, looks perfect under the Willy and will outlast the WK or Axial most run today. I give it a big thumbs up overall. 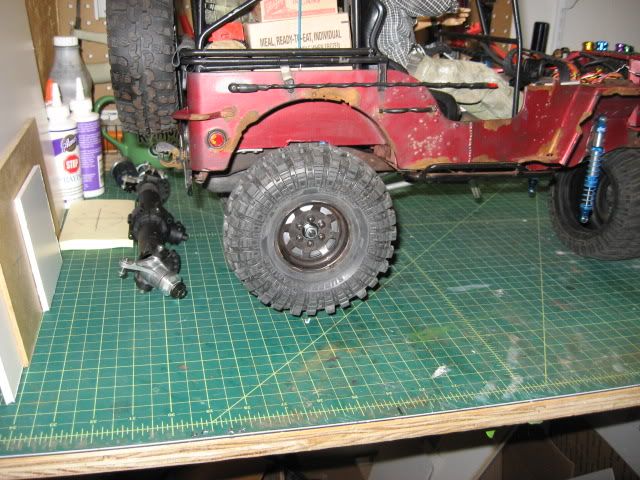 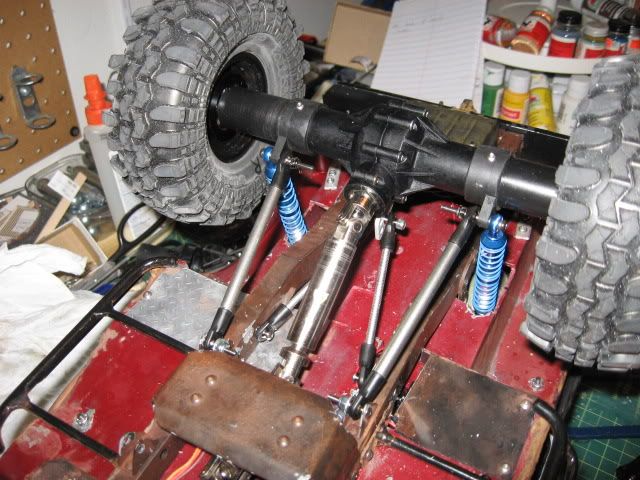 Watch for the next review .Front 2.2 offset conversion. Thanks go out once again to Super Shafty for getting these much needed items out on the market. Last edited by reddevildemo; 05-12-2011 at 09:21 AM. |

|  |
| Sponsored Links | |
| | |
|
05-06-2011, 11:53 PM
| #2 |
| Rock Crawler Join Date: Sep 2010 Location: Keego Harbor, MI.
Posts: 951
|
WOW..... Your build looks SICK as HELL That rear axle fits perfect under there...........Thanks for the review  But can I see more pics of the chassis & body? From what I can see that chassis looks BEEFCAKE And that body is..........WELL.............awesome !!!! Cant wait to see video of this thing rolling down the trails Very Nice.........Two Thumbs up Best Regards V8 |
|
| |
|
05-07-2011, 08:15 AM
| #3 |
| RCC Addict Join Date: May 2008 Location: Green Bay
Posts: 1,138
|
Thanks Rick, your parts all fit it perfectly, about a 3rd of the tire sticks out which is just what I wanted. Here are more pics of the chassis from when built. It is solid alum. 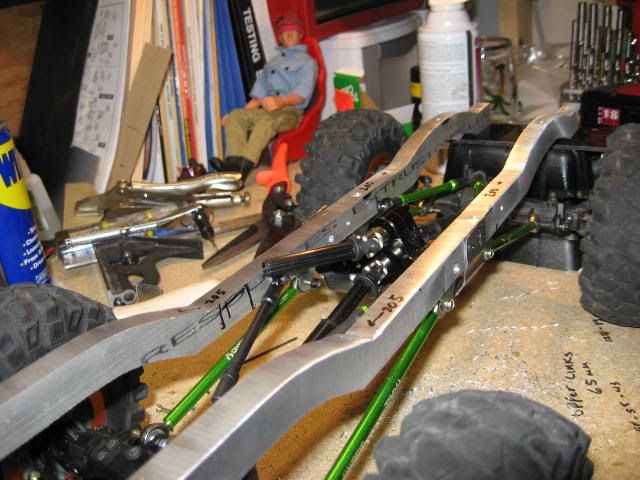 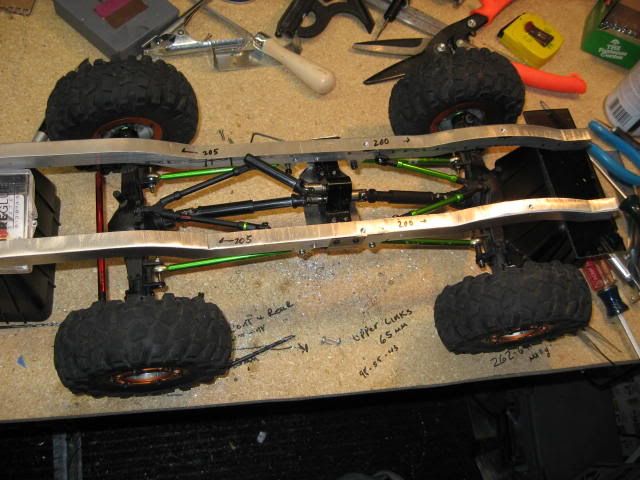 I'll get some more current ones later today. |
|
| |
|
05-07-2011, 09:33 AM
| #4 |
| SuperShafty.com Join Date: Jan 2008 Location: Visalia CA
Posts: 2,902
|
wow, that is beef, that must be at least 1/2" if not near 1" stock! might need some lightening holes great review too buddy. thanks for showing us these awesome parts in a build. |
|
| |
|
05-07-2011, 11:45 AM
| #5 |
| RCC Addict Join Date: May 2008 Location: Green Bay
Posts: 1,138
|
Thanks, the from is only 12mm wide and 15mm tall, not bad for weight compared to the rest of the rig, everything is 3/16 solid rod, need to keep try and keep the weight low and the frame helps.
|
|
| |
|
05-12-2011, 09:20 AM
| #6 |
| RCC Addict Join Date: May 2008 Location: Green Bay
Posts: 1,138
|
Time to continue the review with the front end now. This time I picked up the Front stub carrier for the 2.2 conversion part #SS-106 and Servo Mount with Upper Link #SS-103. Rick was kind enough to include some other great goodies as well. First thing you do is decide where you want to cut. I took the easy route and made one cut on the long side down to the gussets for the "Stub Carrier" and very short dog bone and use a stock length "Hub Carrier" for the other side with a stock short side dog bone. Key is to use JB Weld at the joint. Thanks to Rick for that awesome tip !! In vice drying 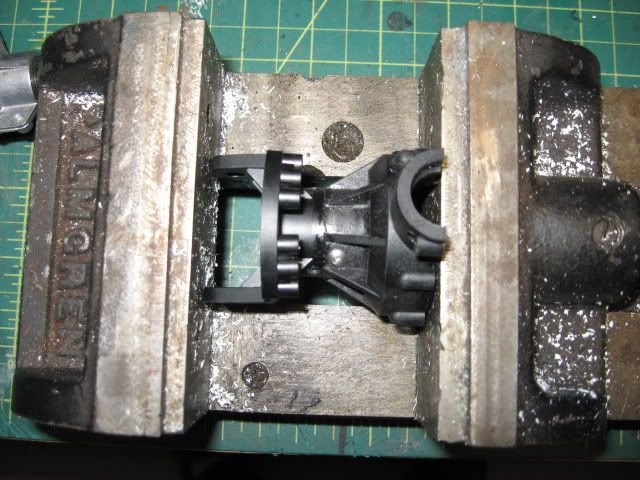 Assembled. Width is a perfect match to the rear. 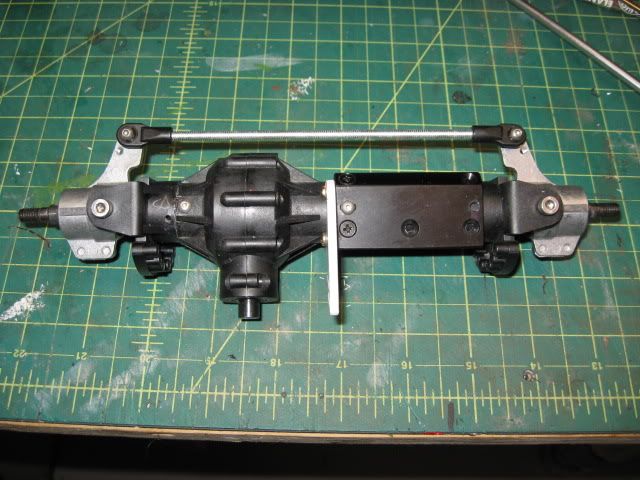 Mounted up with my link locations  Poser shots 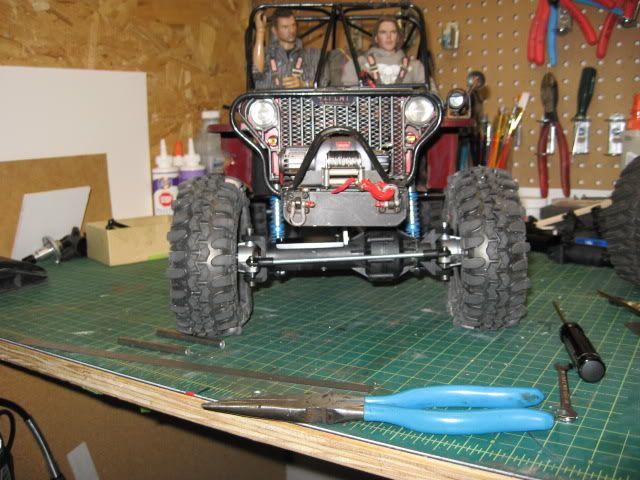 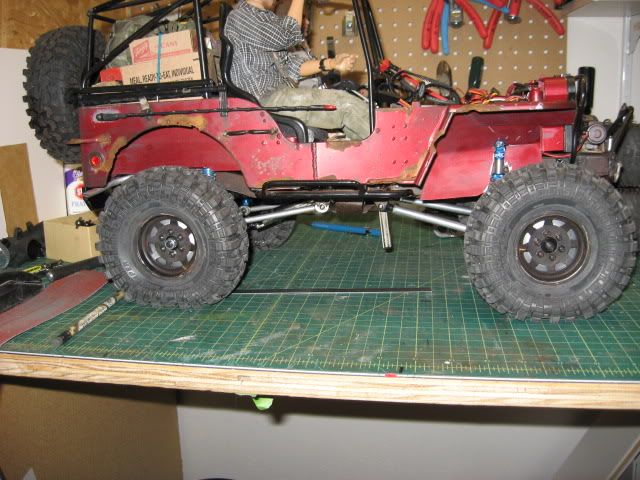 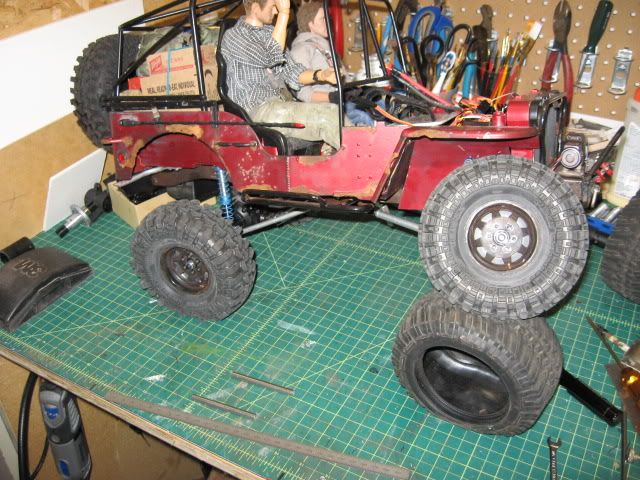 All the parts I have recieved as well as the video instructions have been perfect, no fit issues and finish is great. I think Super Shafty has opened up a whole new aspect to scale and super crawlers with the products they are supplying. Thanks go out to V84x4 for all his help and to Super Shafty for all the great parts. Thanks for looking and hope it helps people out. |
|
| |
|
05-12-2011, 12:47 PM
| #7 |
| RCC Addict Join Date: Dec 2007 Location: Rochester Hills
Posts: 1,773
|
That is one sick Willy's Nice work man.Later, Farmer |
|
| |
|
05-12-2011, 03:43 PM
| #8 |
| RCC Addict Join Date: May 2008 Location: Green Bay
Posts: 1,138
|
Thanks Farmer.
|
|
| |
|
05-12-2011, 03:44 PM
| #9 |
| SuperShafty.com Join Date: Jan 2008 Location: Visalia CA
Posts: 2,902
|
that is an awesome review man. you totally deserve all these good products on that awesome build!!! i am really diggin the willy body too. time to make some super scalers with these axles |
|
| |
|
05-12-2011, 04:18 PM
| #10 |
| Rock Crawler Join Date: Sep 2010 Location: Keego Harbor, MI.
Posts: 951
|
This is for sure a very sick build....... Would love to see some "Scale" video of it cruzin thru the trails.... I especially like the rust.......... Is this a special technique or did you leave it in the salt and snow for 10 of years?  GREAT JOB V8 |
|
| |
|
05-12-2011, 04:34 PM
| #11 |
| RCC Addict Join Date: May 2008 Location: Green Bay
Posts: 1,138
|
Thank you both very much. The rust? well....it's a secret !! No it was pretty simple, takes some time but most is just waiting between coats. Then follow up with weathering powders, not chalks but powder. The powder is a color pigment and stays on and can be thinned nicely with rubbing alcohol. Here is a vid that I used for the major rusting. http://www.youtube.com/watch?v=IhSDc...e=channel_page I just finished up weathering the axles and other new items. I will get picks up in the build thread once it is dry. |
|
| |
|
05-13-2011, 06:06 PM
| #12 |
| SuperShafty.com Join Date: Jan 2008 Location: Visalia CA
Posts: 2,902
|
thats a cool video man. you did a really good job with yours too. i am looking forward to the paint you put on the axles! |
|
| |
|
05-13-2011, 08:04 PM
| #13 |
| RCC Addict Join Date: May 2008 Location: Green Bay
Posts: 1,138
|
Thanks mj. No paint at all. I use color weathering powders and an India ink/alcohol mix for all the weathering.
|
|
| |
|
05-13-2011, 09:23 PM
| #14 |
| SuperShafty.com Join Date: Jan 2008 Location: Visalia CA
Posts: 2,902
|
wow, you might as well have been speaking Klingon, i have no idea what that stuff is. guess its time to use some Google. ............ ah now i get it. so are you making a shelf queen or a running rig Last edited by mjderstine; 05-13-2011 at 09:43 PM. |
|
| |
|
05-14-2011, 06:11 AM
| #15 |
| RCC Addict Join Date: May 2008 Location: Green Bay
Posts: 1,138
|
No shelf queens here....well after I run them and break them, they do sit on the shelf a while waiting to get fixed. |
|
| |
|
05-14-2011, 06:52 AM
| #16 |
| TEAM MODERATOR   Join Date: May 2004 Location: Tennessee
Posts: 10,855
|
Isn't the front diff on a Heep supposed to be on the passenger side? Just playin.... That is a pretty sweet scaler. I'm glad we have all these sweet parts for Kyosho axles now/again. I need to build something new. Hmmmm
|
|
| |
|
05-14-2011, 08:06 AM
| #17 |
| RCC Addict Join Date: May 2008 Location: Green Bay
Posts: 1,138
|
Well not when it's been upgraded !! Duh .  I did it this way for better steering geometry to be honest with you. But when upgrading, it can go either way depending on what your running gear is. |
|
| |
|
05-14-2011, 08:26 AM
| #18 | |
| TEAM MODERATOR Join Date: May 2004 Location: Tennessee
Posts: 10,855
| Quote:
Right right. | |
|
| |
|
05-14-2011, 09:12 PM
| #19 |
| I wanna be Dave  Join Date: Jan 2006 Location: Iowa, the antirecreation state!
Posts: 2,227
|
Great build RDD Or should I call it rebuild. Nice review too. Rick is doing one hell of a job with ALL this new T/MF stuff. Very cool of him to take the time and design and produce all these sick parts. All at the one stop shop!!!And Toyota guy, it depends on the year and model too |
|
| |
|
05-15-2011, 10:18 AM
| #20 |
| RCC Addict Join Date: May 2008 Location: Green Bay
Posts: 1,138
|
I don't want to fill this thread with build pick, Willys is finished, check here for updated pics with completed weathering. Yes...ANOTHER 1/6 Willy** 1/4/12 3 Linked front and more** |
|
| |
|
| |


 Linear Mode


