| |
 01-25-2011, 02:24 PM
| #21 |
| Pebble Pounder Join Date: Jan 2009 Location: Lafayette, LA
Posts: 169
|
Alrighty im finally ready to do some crawling. Got my rovers and wheels mounted and weighted. Went threw 2 different trials of weights from the LHS, lucky they let me return the first set. The second set i just went with and it looks like it works. According to the package there was a total of 6 oz, so i split there difference between the two fronts and it crawls the couch even better then before. So now its time to put it on some rocks finally. And to call up ShellJeep for some much needed help on setup and well hes jus a cool guy. So yeah pics to fallow...
|

|  |
| Sponsored Links | |
| | |
|
02-02-2011, 09:13 PM
| #22 | |
| RCC Addict   Join Date: Jan 2010 Location: Lafayette
Posts: 1,077
| Quote:
You in? Ready to begin? | |
|
| |
|
02-03-2011, 08:37 AM
| #23 |
| Pebble Pounder Join Date: Jan 2009 Location: Lafayette, LA
Posts: 169
|
No i didnt break anything, it was posed anyways. Theres nothing wrong with the whiskers, well i dont think there is. Yes i am in and freezing my balls off. Today i might possibly have time, have a couple things around the house i need to take care of. But tomorrow looks a lot more promising. So ill call you if something comes up. Thanks
|
|
| |
|
02-06-2011, 03:44 PM
| #24 | |
| Quarry Creeper Join Date: Dec 2010 Location: lakeville Mn
Posts: 268
| Quote:
| |
|
| |
|
02-06-2011, 03:57 PM
| #25 |
| RCC Addict Join Date: May 2010 Location: Los Altos, California
Posts: 1,509
|
nice mini! cant wait to see this thread expand  |
|
| |
|
02-06-2011, 05:18 PM
| #26 |
| Pebble Pounder Join Date: Jan 2009 Location: Lafayette, LA
Posts: 169
|
Yes their are foams, jus the stock ones that came with the rovers. Ive been told thatt the crawlerinovations foams are the best, so in the future i will get those. Yes im waiting to expand this thread too. Im just working more now which is weird for this time of year. and then when im home im busy doing things and cant connect with a local buddy(shelljeep) to get some extra help on setup and actually run on some real rocks and not a couch. But i can tell you those rovers and the weights in the front makes it climb like a champ now. Does it matter where on the rim i should put hole. And i assume to just use the smallest drill bit i got to help keep dirt and such out. I would say water but this rig will never see water or any kind. im gonna try to make the stock electronics last as long as i can. Thanks for the interest...
|
|
| |
|
02-06-2011, 05:30 PM
| #27 |
| RCC Addict Join Date: May 2010 Location: Los Altos, California
Posts: 1,509
|
i say try to make holes in the center of the bead wheel, and you want it 180 degrees apart. dirt wont really get in.. ive been crawling my mini on dirt, and the foams push it out, or the weight keepts it out or it just doesnt go in |
|
| |
|
02-06-2011, 09:07 PM
| #28 |
| RCC Addict Join Date: Jan 2010 Location: Lafayette
Posts: 1,077
|
DRill an 1/8 to 3/16 hole 180* apart like the other guy said. I also vent my tires, 3 1/8" holes on the inside side wall. My goal is to vent the setup so completely that you don't hear the air woosh out when you give it a quick squeeze. Make the foam do all the work. And yes, Crawler Innovation single stage 1.9 foams work best for the 1.9 rovers.
|
|
| |
|
04-11-2011, 03:30 PM
| #29 |
| Pebble Pounder Join Date: Jan 2009 Location: Lafayette, LA
Posts: 169
|
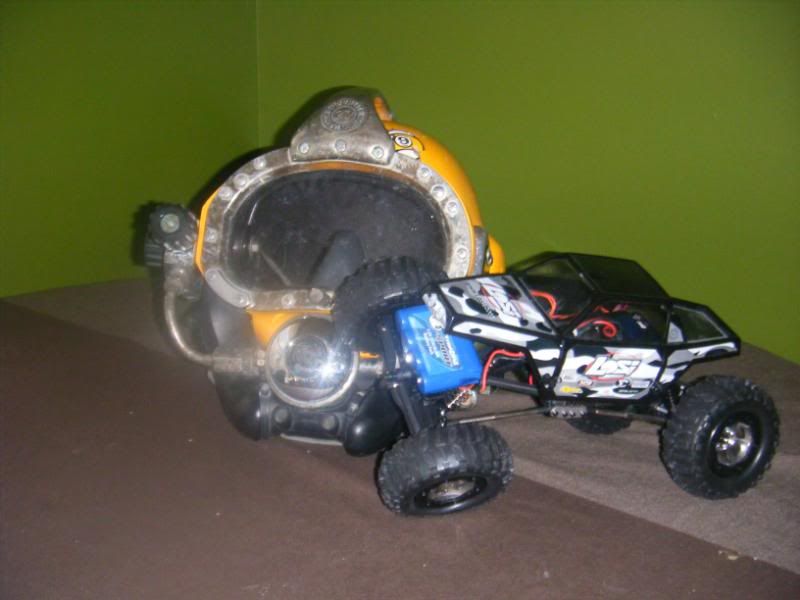
Well thanks to ShellJeep i finally got my MRC dirty. Hes got a great rock setup. Had this thing on the shelf for two year or more since i got it. and today was the first it got dirty and what a day that was. Within the first minute or less i blew the stock rear lockers. So that was great but acording to shelljeep it crawled pretty good with just 3 wheels and for a new guy to the rocks like i am. So i stayed at it found lines that i could take and couldnt. Had some touches and roll overs here there but i had a blast. Way better then what a couch could do. So now that body had some scratchs the tires are dirty and the axles and a bit scuffed up. Oh the servo saver fell apart too. So at that point i tried shells MRC which is way built compaired to mine and got to see what mine will be capable of. So now with the stuff i have to replace and the new chassis that was generously given to me by shell, i have some work cut out for me this week to get this thing back in action and back on the rocks. Oh now i want a XR10 too so im gonna be putting up some pics of some airsoft stuff that im gonna be looking to get rid of, cuz im on super budget right now. So look forward to picks of the chassis build soon and hopefully this week ill be up and running again at some point. Thanks shell and thanks everyone else for looking at my thread. Have a good day.
|
|
| |
|
04-11-2011, 06:57 PM
| #30 |
| Quarry Creeper Join Date: Feb 2009 Location: Rockaway
Posts: 489
|
haha it only takes a couple seconds on the rocks to become completely addicted. Cant wait to see the progress pics. |
|
| |
|
04-11-2011, 06:58 PM
| #31 |
| Newbie Join Date: Dec 2010 Location: South
Posts: 1
|
Wish I would've kept my Superlite.... Where do you all crawl in LA? |
|
| |
|
04-11-2011, 08:21 PM
| #32 |
| Pebble Pounder Join Date: Jan 2009 Location: Lafayette, LA
Posts: 169
|
Hoyt, hopefully this week i can start the build. i wanna at least make it driveable first then go from there. gotta figure out how the links work and so forth, cuz i think that will be the hardest part, doing this all on budget too, which is a budget that doesnt exist at all. Akoni i love my superlite. I had one of the deepsea hats and well i have a superlite now. I crawled at Shelljeeps house. i dont know if he wants me telling people where he lives and what not. But im sure you could look him up on here under ShellJeep and go from there. I just happen to work at the same company as him. Hes an awesome dude, hooked me up big time. So yeah hope you all have a good night. |
|
| |
|
04-15-2011, 09:17 AM
| #33 |
| Pebble Pounder Join Date: Jan 2009 Location: Lafayette, LA
Posts: 169
|
Well im starting the rebuild of my rear diff. And got it all pulled apart and was taking the diff apart and just broke the head off a screw. Is this a major issue or will i just have to replace it. And does anyone now what size phillips head screw works best for the diff screws. Oh yeah what type of diff lube should i get for it too... thanks
|
|
| |
|
04-15-2011, 10:21 AM
| #34 |
| Pebble Pounder Join Date: Jan 2009 Location: Lafayette, LA
Posts: 169
|
ok so i just broke another screw on the same side of the diff. is this gonna be a problem or do i have to get a new ring. cuz i dont have the tools or know how to extract the broken screws. So someone please help.....
|
|
| |
|
04-15-2011, 01:47 PM
| #35 |
| Pebble Pounder Join Date: Jan 2009 Location: Lafayette, LA
Posts: 169
|
OK diffs rebuilt. That was tuff. rear diff broke heads off two screws. Front got all four out on one side the other side i lost 3 of the screws to the mighty powers of locktite. So from what i read use a soldering iron to loosen the locktite. Well i dont have a soldering iron so i want as far as boiling the diff in water and well that didnt work at all. Also i used a dremel to get the stock plastic locker out, thinking that would free up some room when i boiled it. Next thing i did was drill the heads off which was nice cuz it would tighten the screw with the extra room with the diff removed. so i kept drilling till all 3 screw heads were gone. Then i serach the house for super glue. From what ive read thats all you need in an emergency to hold the diff together since they sit housed in the axles. So now im gonna move onto building the GC-3 chassis and have a few brews...so pics should depending on how far i get today, since ive been working since like 8 or 9 this morning.....
|
|
| |
|
04-18-2011, 11:25 AM
| #36 |
| Pebble Pounder Join Date: Jan 2009 Location: Lafayette, LA
Posts: 169
|
So this is where im at now. Im not gonna complain cuz the chassis was free but its missing tons of the screws. i have found a kit online that can replace all the screws but im just not in the mood to wait at all. So ive been traveling the LHS to just a lil luck. So here it is with missing nuts holding the chassis together but at least your get the idea. 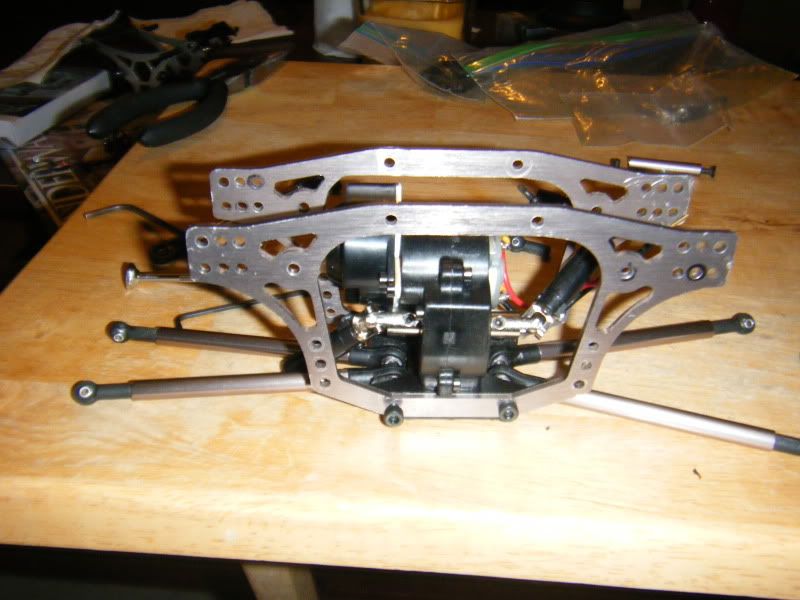 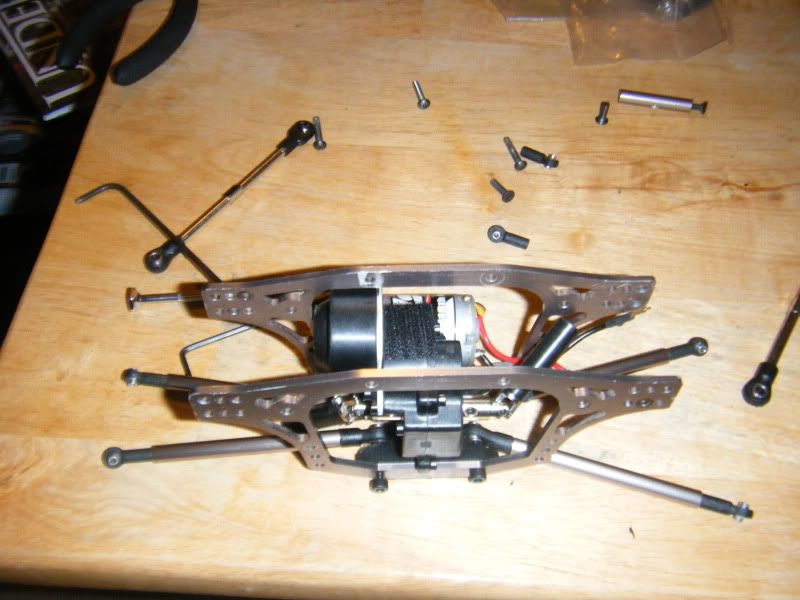 |
|
| |
|
04-18-2011, 05:11 PM
| #37 |
| Pebble Pounder Join Date: Jan 2009 Location: Lafayette, LA
Posts: 169
|
Ok so with the trip to the LHS and a trip to True Value hardware. I found more or less what i needed and got this far. Didnt think it would take me all day to just finish this thing. But one thing to say is. The right tool for the job is a big key in everything. The lil screws that hold the servo plates to the axles were a pain and stripped all three of my allen wrenches. so i ended up cutting them a bit for new metal. so that sped things up a lot. So next it figuring on how im gonna mount the stock body. And put the electronics in which im thinking about tryin to mount them on the body some how but that might be too hard or just throw them on the links. So now on to the pics. 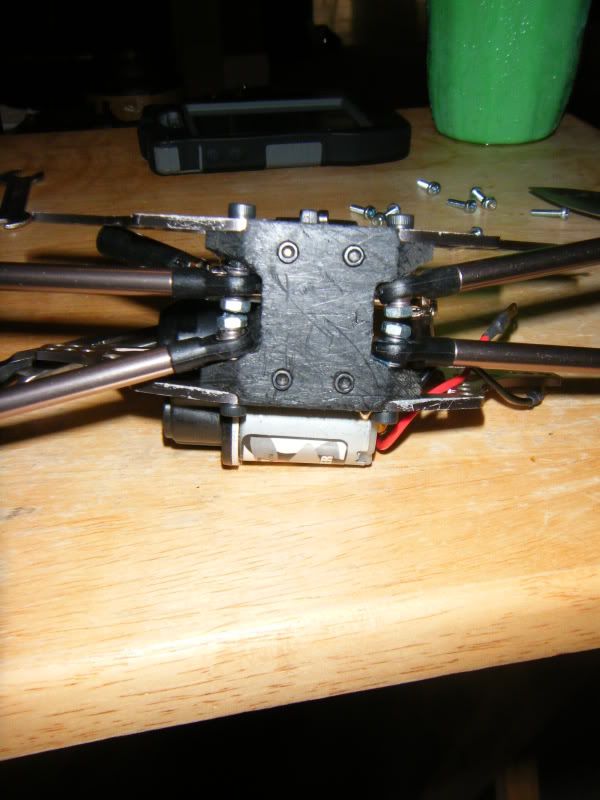 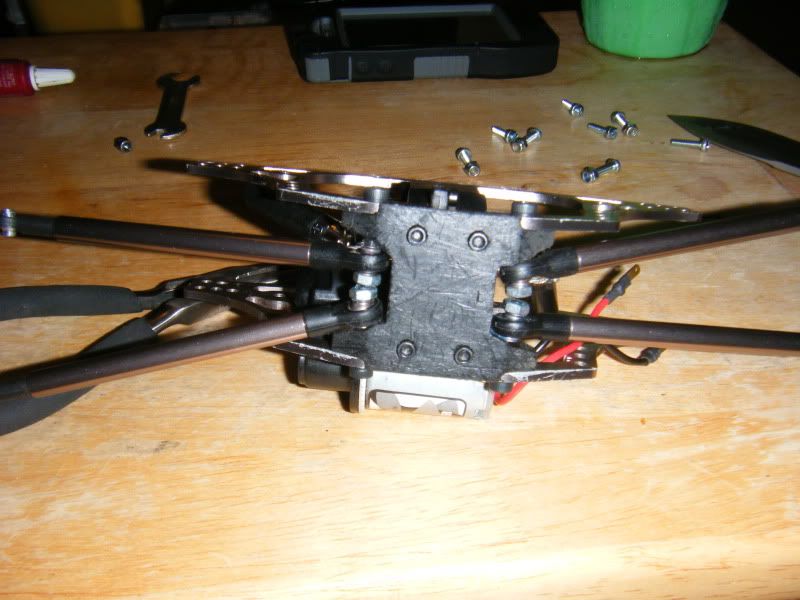 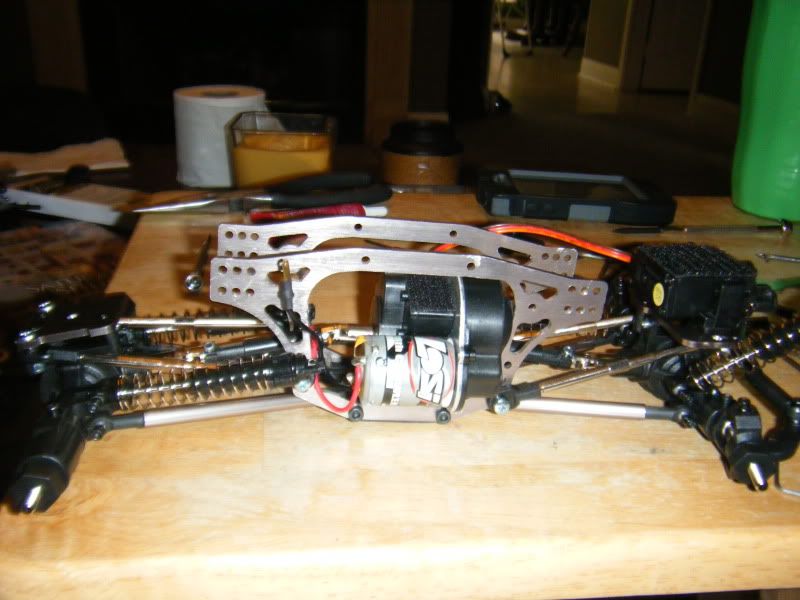 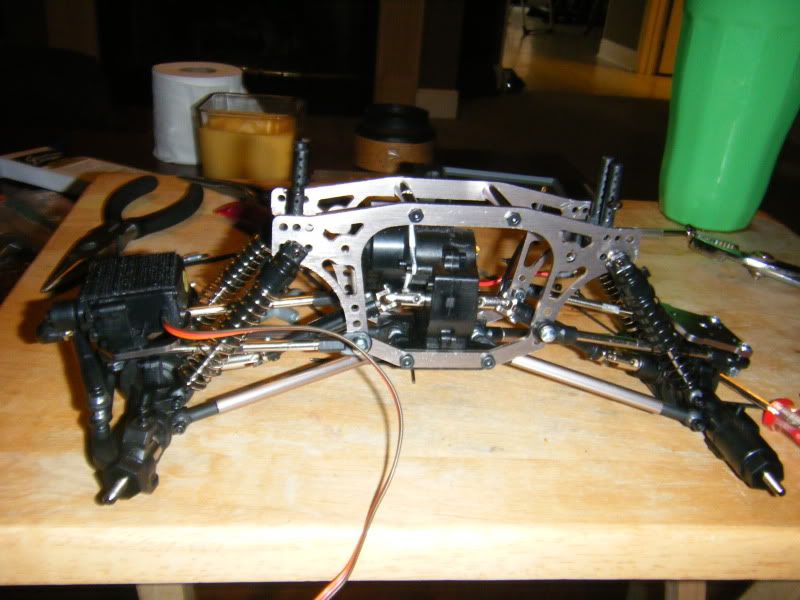 Last edited by DareDiver; 04-18-2011 at 05:53 PM. Reason: more info |
|
| |
|
04-18-2011, 07:23 PM
| #38 |
| RCC Addict Join Date: Jan 2010 Location: Lafayette
Posts: 1,077
|
Make a lexan tray for your front lowers and put the lipo there. Make a tray for your rear lowers and place some of the electronics there. Try to get a lil seperation between the esc and rx if you can. Don't put the electronics on the body, it will be a pita later, not to mention increased hard impacts compared to having it on trays. How does it flex? Do you have smooth action everywhere or do you need to clearance a few things? Taking time on the bench to make it smooth will make a big impact on how it does in the rock garden. Looks good man, not criticizing, just offering up suggestions. Glad to see you have made so much progress. |
|
| |
|
04-18-2011, 07:35 PM
| #39 |
| RCC Addict Join Date: Jan 2010 Location: Lafayette
Posts: 1,077
|
And don't sweat the diffs either. Since you are using the solid style aluminum lockers, you don't "need" the screws, or super glue, to hold it together.
|
|
| |
|
04-19-2011, 10:29 AM
| #40 |
| Pebble Pounder Join Date: Jan 2009 Location: Lafayette, LA
Posts: 169
|
Well i was gonna cut up a flimsy cutting board cuz i dont have any thin lexan sitting around. So i just mounted them on the chassis for now. and it doesnt seem like theres enough room on the upper links to fit much there. I found some lil spacers that moved the shocks out a bit which help free up some rubbing on the links and the shocks. But for the most part i think the rig flexes pretty good and freely. So just waiting for the rock garden now. Oh and gonna mount the body today too. So thanks for all the help again. Oh and i still put some super glue on the diffs cuz it was such a pain in the butt to take apart. So thats about it. 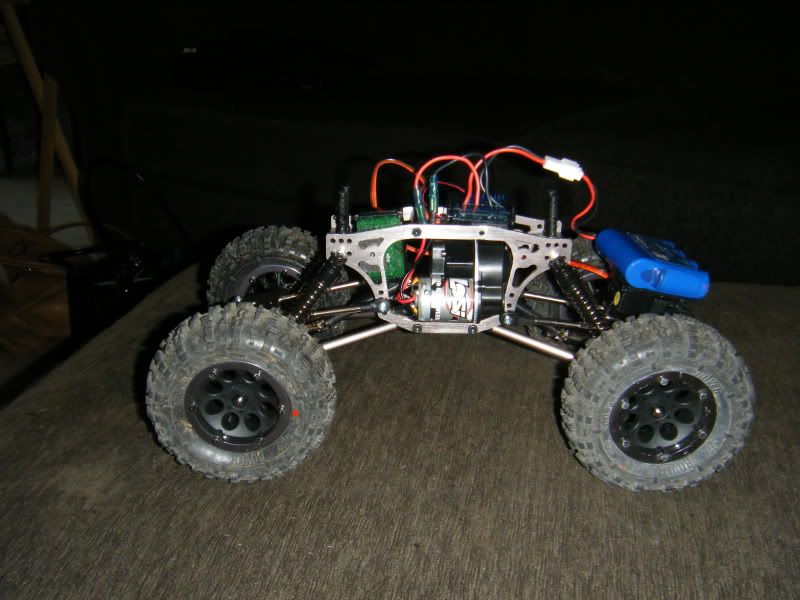 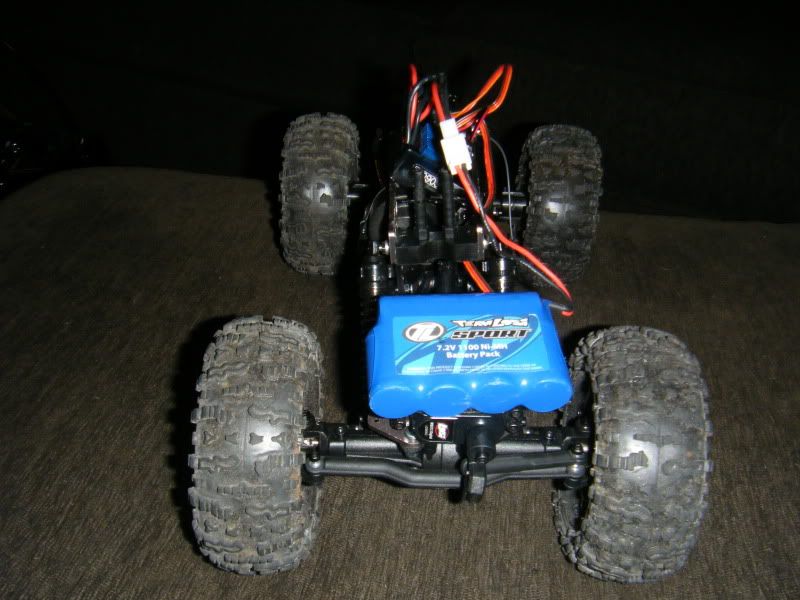 And i know Shelljeep said to seperate the Rx and the esc but im a bit lazy right now so i put them here. 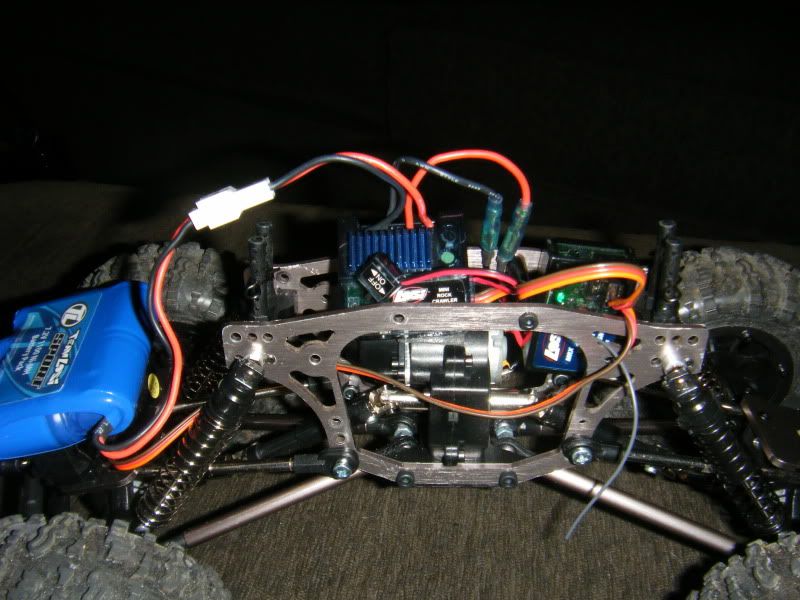 |
|
| |
 |
| Tags |
| losi, mrc |
| |


 Linear Mode


