| |
| |||||||
 |
| | LinkBack | Thread Tools | Display Modes |
 04-22-2013, 05:26 AM
| #1 |
| Quarry Creeper Join Date: Apr 2012 Location: Lansford
Posts: 432
|
Even though I have not even had a chance to try to fly my piper due to weather, or any plane for that matter I had some free time and can't sit still... So I decided to scratch build another plane. I am using some foam skills I learned on the piper and going more in depth. This is larger and will integrate some balsa and once structure nears completion I will get a good idea of weight and order the correct plane electronics to jam in here. I'm trying to keep this lightweight for it's size, it will be 5 channel to include flaps, and I hope to end up with a cool extremely ugly but realistic looking slow flyer. So here is my inspiration. This was a plane I downloaded for MS FSX and then "painted" with my own design with a made up livery. I will try to replicate this aircraft with my build.  So to help with my design I searched the web and found these dimensions: 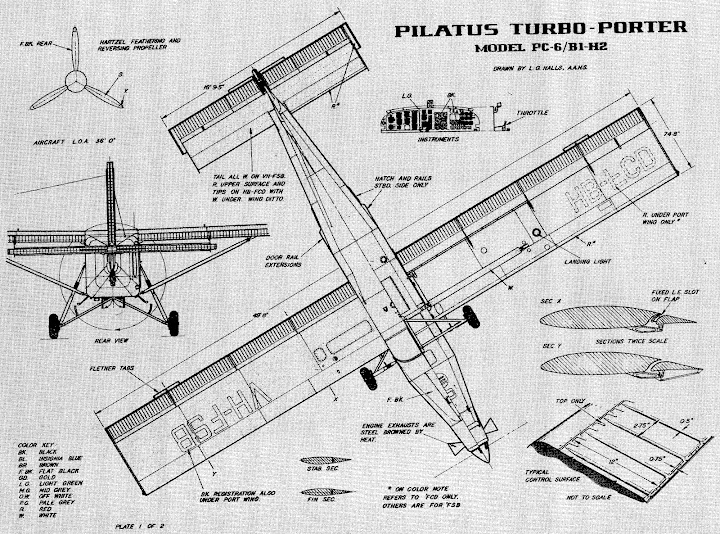  I then decided around 36" is the wingspan I wanted. Keep it small so it doesn't need to be super strong and I can build it using materials I already have. This small size should also keep the electronics cheap, but big enough to make it so it's not tiny fiddley work to get some good detail. I found 1/16 scale got me in this range with 37.25" wingspan. So I began scaling dimensions down and coming up with my own build as I go. For the wings I used 3mm cellfoam for the skin, 3/16" cellfoam for the ribs, and 1/8" x 1/2" balsa for the spar. Wing is not a perfect shape, but it's pretty good. The whole trailing edge will be cut and control surfaces made. Flaps on the inside half and ailerons on the outside half. So when making these I should be able to correct the trailing edge shape.   Got the wing wrapped and began the fuselage. The sides are 3/16 cellfoam and the bottom is 3/8" cellfoam.  Then after working on this for about 6 hours I ran out time. I am keeping the wing and back off the plane until I get electronics mounted and wiring/control rods routed. This will allow me to keep it all internal. The front I put some 3/8" bulkheads in and glued the nose together. When I decide on motor I can cut this open, make my firewall and use the front part as a cowl. This way I can make sure I don't cut too far back, or too short depending on the motor I need. I beefed up the center section of the fuselage with more 1/8" x 1/2" balsa to allow me to cut out the windows.This will give the strength needed to tie the wing into the fuselage. I also beefed up the wing the same way in this area so I can attach it with screws. I can make my own windows and a partial interior. The support here is not yet completed, and the rear has not been completed. I will build in support as I build the vertical and horizontal stabs so nothing floppy here. Then glue the rear roof down once electronics installed.    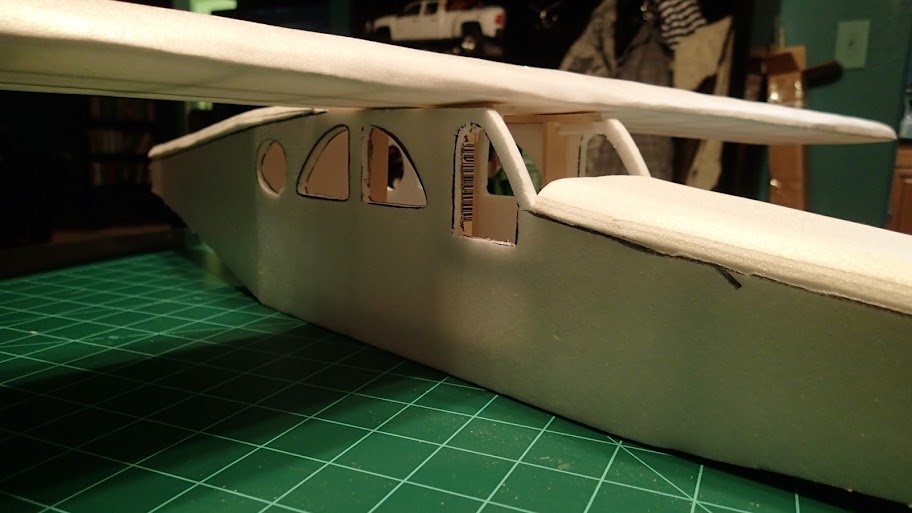  I am pleased with my progress and I'm liking the way it looks. It's pretty darn lightweight too. Hoping to keep it this way and fly real slow. I'm gonna be working long hours for a while, so I probably won't have any time to work on this for a week or 2. As soon as I get the hinges and some more wire for control rods I'll do some more and post the update! |

|  |
| Sponsored Links | |
| | |
|
04-29-2013, 04:40 AM
| #2 |
| Quarry Creeper Join Date: Apr 2012 Location: Lansford
Posts: 432
|
I made my tail and all my control surfaces. I used basswood I got from my LHS. It's heavier than foam, but it's pretty darn strong. Inside the tail I put a piece of basswood with some basswood stiffeners under it. I can cut holes in this and mount my elevator/rudder servos. After I position and mount the servos, then I'll cut out some of this with a dremil to lighten it up a bit. I still need to make my servo horns, pushrods, landing gear, windows, bit of interior, and paint. Then it'll be ready for electronics. I got my tires for this. 2" dubro low bounce tires and a 1" dubro tail wheel. My axles are in the mail. I also ordered all my electronics. I wanted this to have ample power. I looked online and saw similar sized planes with 2836 through 3630 motors. So I ordered a 3630. Should give plenty of power. I also ordered 9g servos, a 50 amp esc(bigger than needed, but I won't need to worry about it), and an 1800 mah 3S lipo.I also ordered the correct prop mount and motor mount as well as 5 different props I can try ranging from a 8x5 3 blade up to a 10x6(recommended for this motor). Should go pretty good. 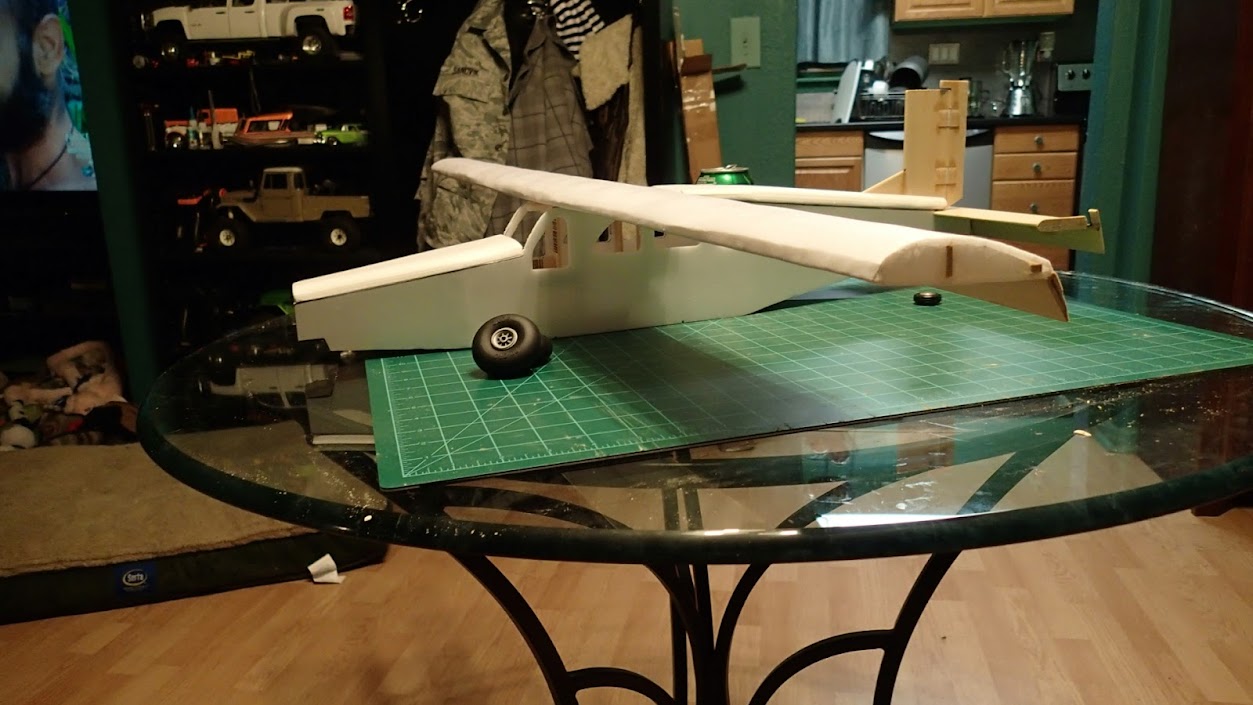   |
|
| |
|
05-02-2013, 02:08 AM
| #3 |
| Quarry Creeper Join Date: Apr 2012 Location: Lansford
Posts: 432
|
Tonight I had some extra time after work, so I bent up my gear. The wheel stop collars and axles should be here tomorrow so I wanted to get the plane ready to accept them! The front is .070 aluminum. I bent it up from one flat piece and cut out the center so it lightens up some and looks proper. It's nice and stiff, but should still allow a little spring. The motor I got has a 10" prop as the recommended prop, so I wanted it to sit high enough to clear the ground. I made the gear about 1" taller than it should be for scale for that purpose, but doesn't look goofy. I also made it so the mounts are the scale width for the outside of the tires. This way I have a slightly footprint once axles and tires installed so it'll be a bit more stable on the ground... Since I have never flown I figured this might help with take off and landing, especially since it's taller than the real deal. I put a piece of 1/8" basswood inside for the gear to screw onto. I left it removable for now so I can drill and install axles before permanantly mounting it. Once they are installed it will also be glued so nothing loosens up on the foam. I measured and marked and used a square on the fuselage to help ensure the gear is straight and square. 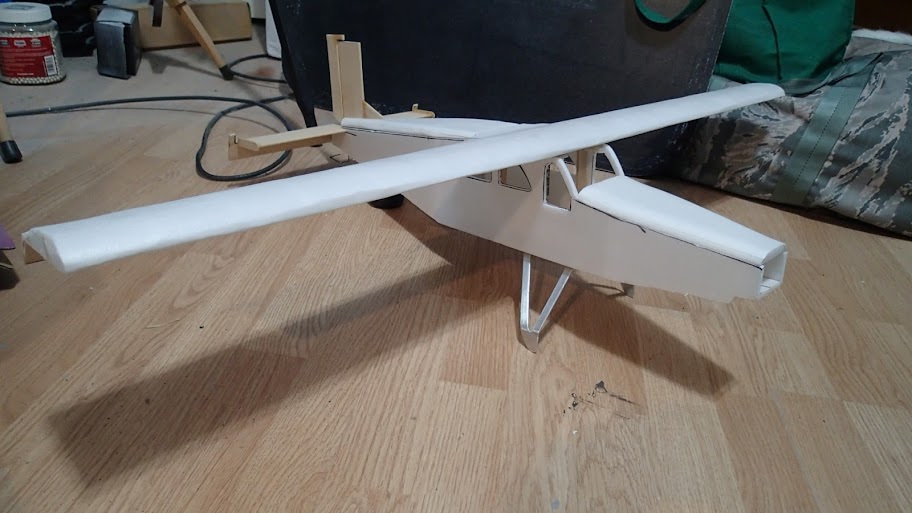 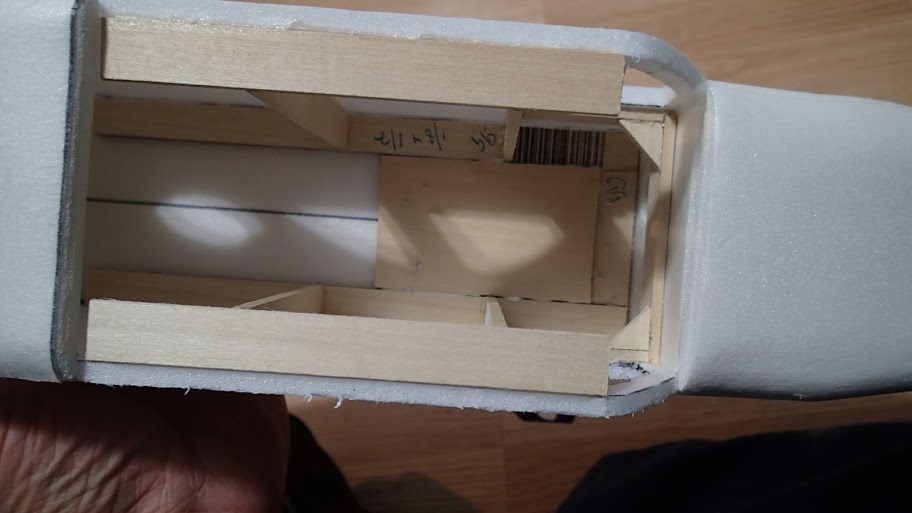 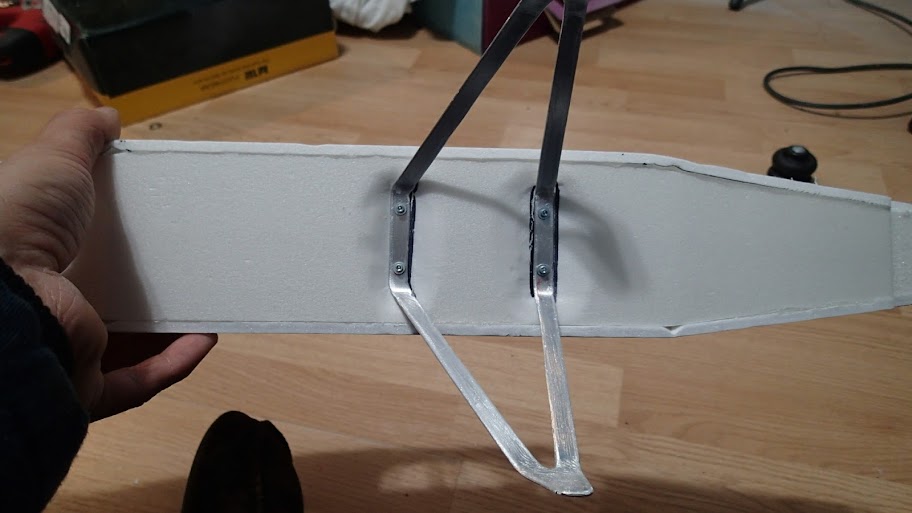 The rear I wanted to keep it simple. I didn't want control rods and brackets and stuff. Since I used wood for the tail I figured to help save some weight and since the tail is built tough I would try and mount my tail wheel directly onto the rudder. I first drilled a hole and turned it into a small slit in the horizontal stab and fuselage. Then I bent up the top of the music wire to fit around the lower hinge. I inserted the straight lower portion into the hole and then bent the lower half. I made it kick back so this would act as a spring and take some shock off the tail. I then used Shoe-goo to glue it onto the rudder, and also added some shoe goo over the hinges to help ensure they stay on. After some though I think I can cut the centers out of the fixed portion of the stabs and cut some foam to fill them in. This will further reduce weight in the tail. I don't think it NEEDS weight reduction, however it is a plane and the more the merrier. Doing this I can leave a .5" frame around the outside of the stabs and this will remove enough wood to make up for the entire vertical stab. I'll get on that after wheels. I'm excited to see that! LOL. Then once I moun the foam there, and mount my servos in the tail I can then do the same to the piece inside. Maybe this weight reduction will help keep my battery a little further back making it easier to decide on where to make my hatch.      Also I had done 3 different paint schemes on this for FSX back when I did that. I'm kinda torn at which one I want to do on this. I'm leaning on orange and think it would be easiest so see, but I also like the others(which would be easier to paint), and the redbull scheme is actually a real paint scheme. Take a look and let me know which you prefer! Maybe some input would help me decide!  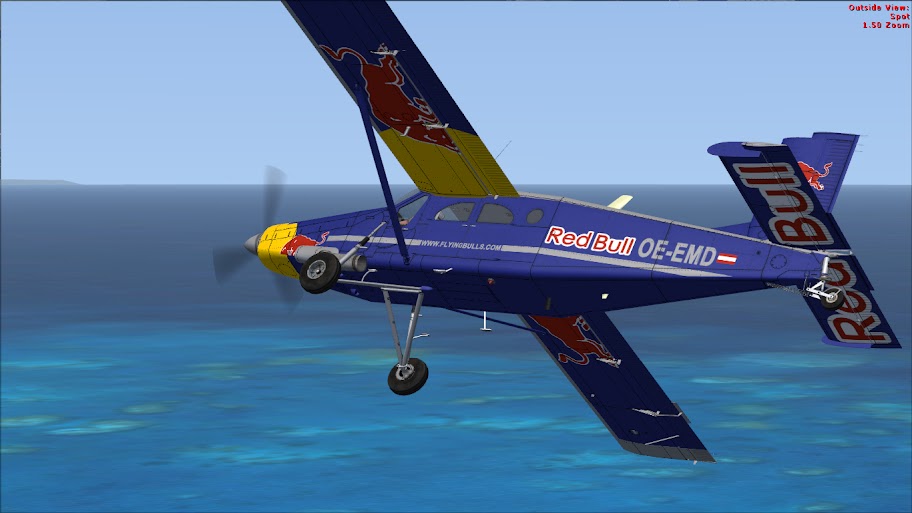 Last edited by makaveliks; 05-02-2013 at 02:35 AM. |
|
| |
|
05-04-2013, 04:56 AM
| #4 |
| Quarry Creeper Join Date: Apr 2012 Location: Lansford
Posts: 432
|
This will definitely not have the thrust issues my cub has! Made my firewall and nose reinforcements. Also mounted the motor, got it wired up, and tested with the 4S I plan on using with this. Did some reading up online and with this combo and prop I should be in the ballpark of 1.5KG of thrust. All my electronics only weight 527g. My airframe is considerably lighter than that. I have not weighed it, but the motor and battery alone feel heavier than the airframe. As it sits right now(with no servos) with the battery placed over the landing gear CG is a little far forward. With my tiny servos and rear weight reduction I plan the CG should not move very far back and be perfect. I will need to now figure out either how I will attach the wing or make a battery hatch in the side. I was planning on using glue and screws to hold the wing on. I still like this idea, So I think I will make a door on the side to pop the battery in. I will cut out the area I want it in, then build a small structure around the cutout to reinforce the area. I will do this after mounting servos though so I can double check CG. 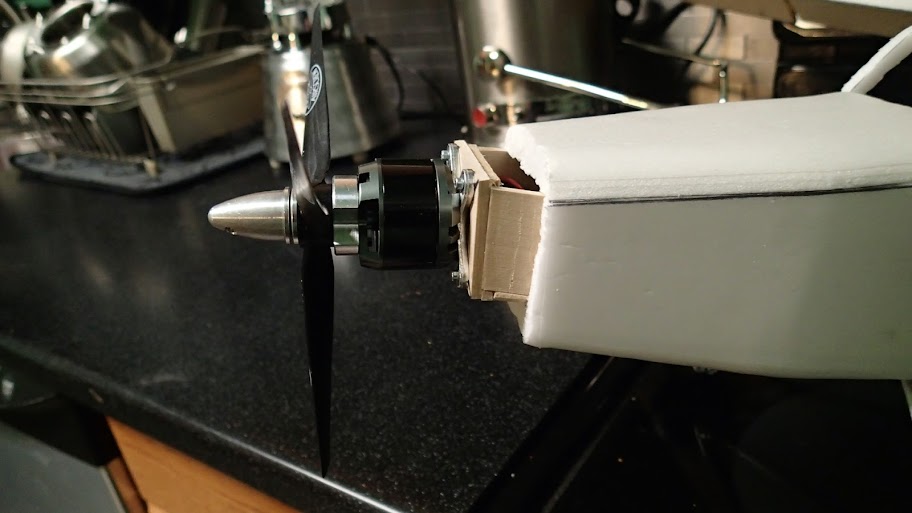   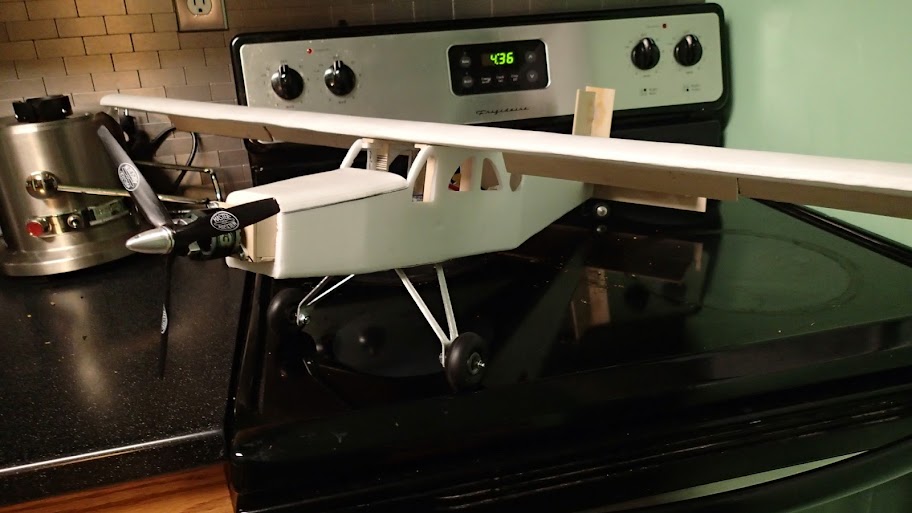 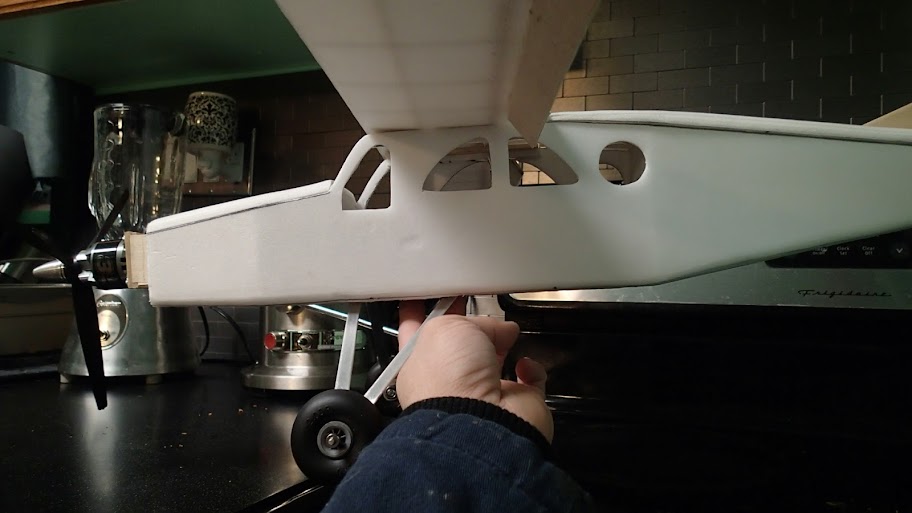  |
|
| |
|
05-24-2013, 04:04 AM
| #5 |
| Quarry Creeper Join Date: Apr 2012 Location: Lansford
Posts: 432
|
I decided to go with my typical overkill... Big motor, no weight reduction on the rear, and extra reinforcement to the foam. It's almost ready for flight test. Just needs paint and a windshield. I figure I'll just use the windshield as a hatch since the battery fit's nicely through it. I mounted my servos for the rudder and elevator. 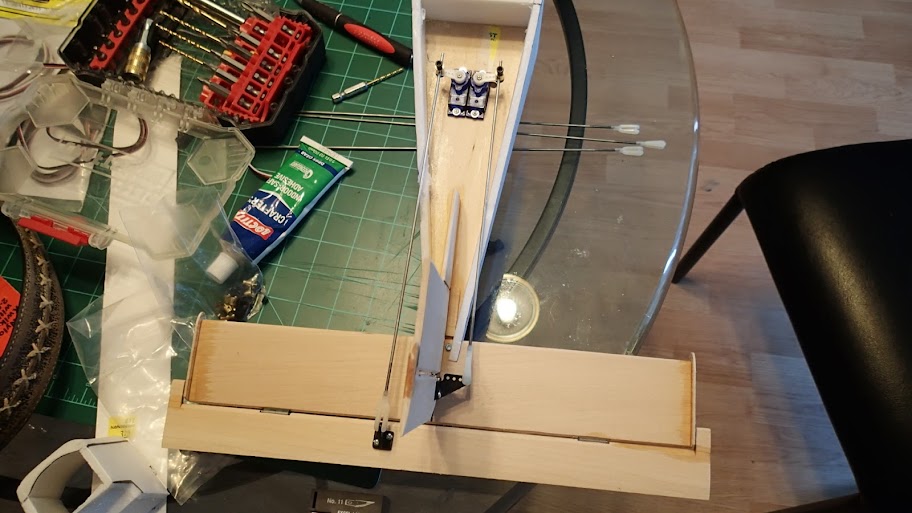  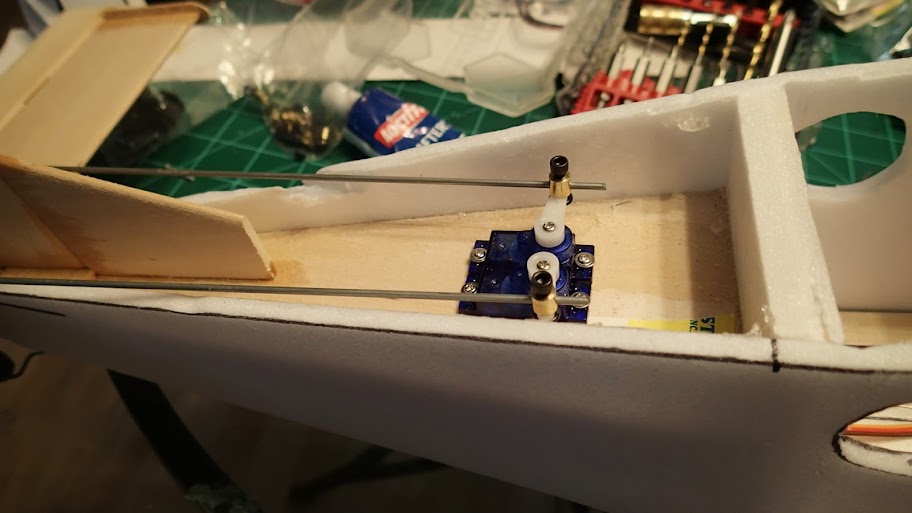 Also mounted the aileron and flap servos. Then mounted the wing with 6 self tapping allen screws. 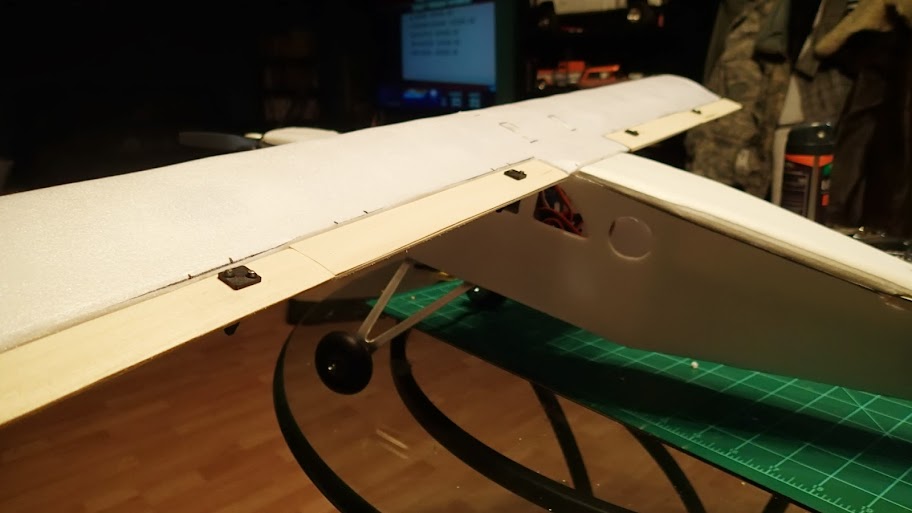 Half flaps. 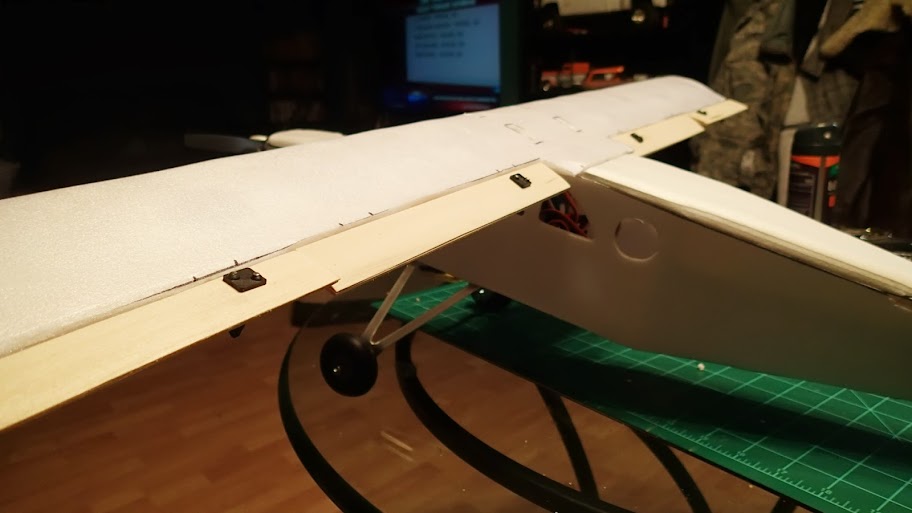 Full flaps.  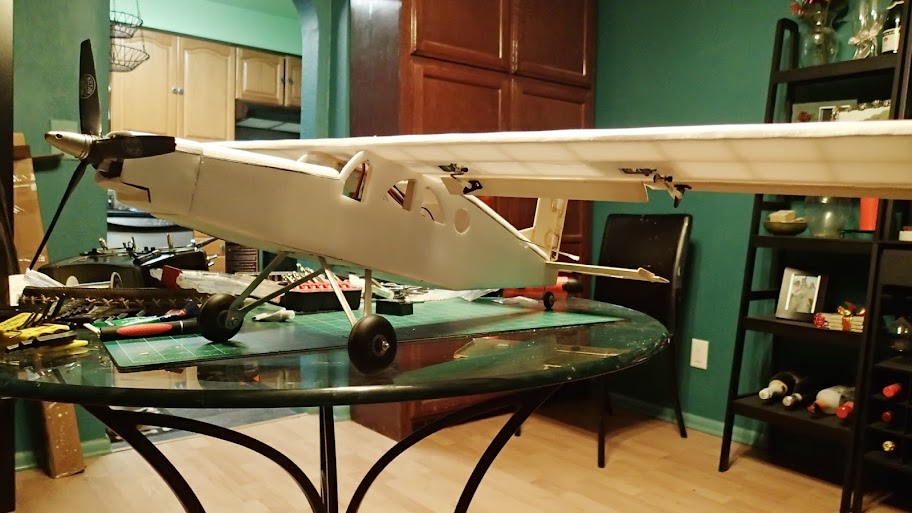 The nose cowl is just the cut off nose. It slides over the motor and mount nice and snugly so it's not loose.  To mount servos flush I cut out the lower skin between 2 ribs and the front and rear spars. I then rubber cemented the servo to the upper skin and cut out a foam filler to tightly fit around the servo. This filler is glued to the wing in all directions and rubber cemented to the servo. I then glued the skin back over with an area cut out for the servo arm and the bit of servo that wouldn't fit between the upper and lower skins. I cut a slit in the lower skin to jam the wires in and then glued it back shut.  Last to stiffen the parts, give a stronger skin, cover any gaps, and make a smooth surface I used Packing tape with fibers in it. I removed the wing and wrapped it so the fibers go wing tip to wing tip and this stiffened the wing drastically. I also wrapped the fuselage nose to tail. I then glued and screwed the wing on and then taped over the screw holes. Last for the wing supports that will keep the wings from folding up I used fiber tape folded over itself to be 1/4" wide. I then taped it to the bottom of fuselage and lower wing skin. These wings are rigid now! If there was any doubt about folding, it's all gone! I just hope these stiffeners don't catch too much wind and effect flight much. If they do I'll have to cut them off and use music wire. After all of this I used a heat gun to shrink the tape and pull out any wrinkles and make sure it's nice and tight. 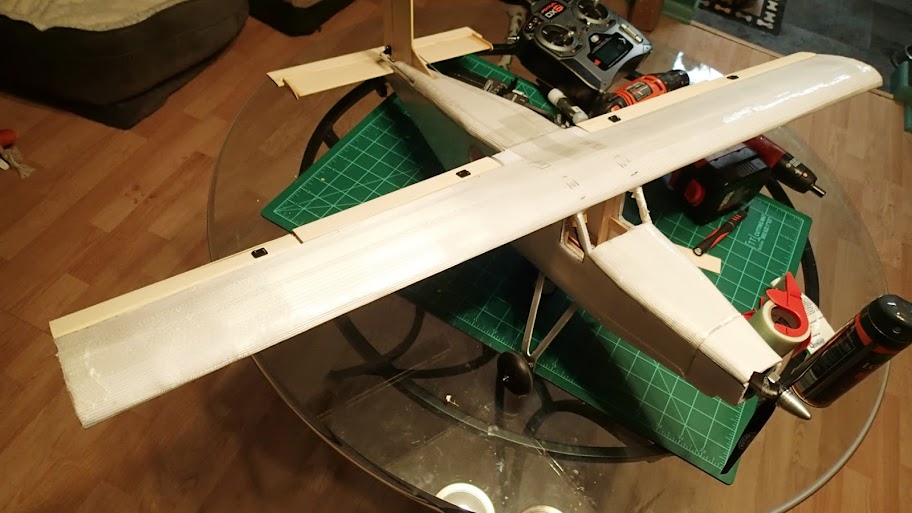 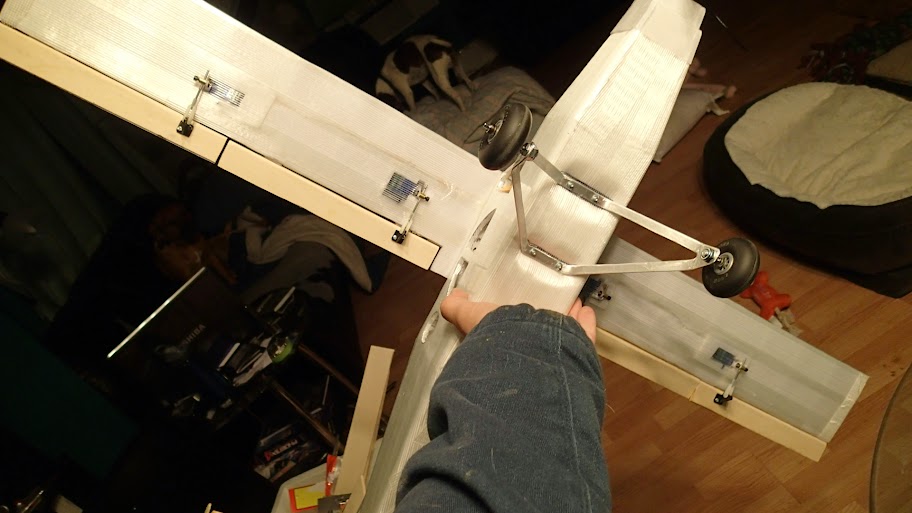   And now a video of the ops check. Even holding the plane I can not go near full throttle. It's a lot of power! I don't think full throttle will ever be needed. Holding the plane vertically at half throttle I have to hold the plane DOWN! LOL. In this video I just gave enough throttle to spin the prop. PC-6 Ops Check - YouTube |
|
| |
|
06-01-2013, 08:35 AM
| #6 |
| Quarry Creeper Join Date: Jul 2009 Location: West GA, USA
Posts: 280
|
Nice work!
|
|
| |
|
04-03-2014, 11:04 PM
| #7 |
| Newbie Join Date: Oct 2009 Location: Colorado Springs
Posts: 4
|
Great work! Thank you for posting all of the details! I have done some RC ground stuff (AX-10) and I am now looking at getting in the air. I am a huge aviation fan. I fly alot of FSX. The PC-6 is one of my favorite aircraft. The "lofty" nature is fun a relaxing. I will ease myself into flying, however, my goal is to build a PC-6 like aircraft with FPV (first person view). One of the huge factors that brought me to RC crawling was that I could find an AX10 as a kit.... when all other RC vehicles were RTR. I feel even more drawn to flying RC because DIY is more available with foam and electric flight. Thanks again for your post!!! |
|
| |
|
 Scratching a Pilatus PC-6 Porter - Similar Threads
 | ||||
| Thread | Thread Starter | Forum | Replies | Last Post |
| Scratching my head over a motor issue...thoughts? | BC Racing | Electronics | 12 | 09-19-2010 09:03 AM |
| PPE Porter Engineering AX-10 parts | vdubman | Chit Chat | 1 | 02-13-2009 10:41 PM |
| |


 Linear Mode


