| |
| |||||||
 |
| | LinkBack | Thread Tools | Display Modes |
 08-18-2010, 08:19 PM
| #21 |
| Quarry Creeper Join Date: Jul 2010 Location: Independence
Posts: 368
|
well i got the first run on the 540's. seems to be ok. had to move the shocks out as far as I could due to them hitting the motors. They still hit a little causing articulation to be a litte bindy. also tires hit pretty bad but oh well not sure what to do about it. might have to get some different shocks or try to mount stock ones back on the lower links but i would rather not do that. it has some more speed but not alot. only 55t so wont be too fast. stock exc seems ok but once in awhile the rig will stop...but then i can pull trigger again and it will work. not sure what thats about. all electronics are stock so I am sure it has something to do with that. Thinking I am going to see how long the stock gears will last before i put the steel ones in. I havent done any real crawling with it yet. Need to find a place. just been driving in back yard over small logs and such. need to go to a dam and give it a true test. That will have to wait for a few days. keep you posted.
|

|  |
| Sponsored Links | |
| | |
|
08-27-2010, 04:30 PM
| #22 |
| Rock Crawler Join Date: Jul 2009 Location: waterville
Posts: 525
|
well i have some pics of link setup with 540's as well as shocks. i have no knowledge with the stock chassis due to how i went about the build. 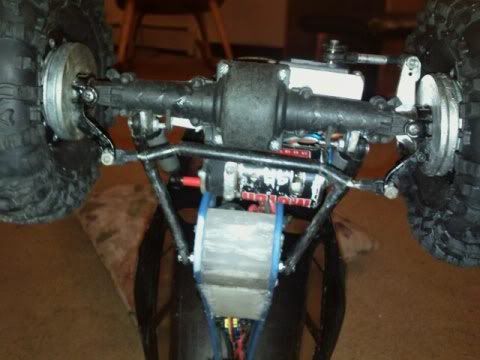 pic one. the belly! i moved my lower links to the out side of the link mounts on the axle. i have bent links in the front so this is how i had to do it with these links. you can also see that i put some mild bends in the links so the end links wouldn't bind and hit the motor. mine are more drastic then anyone will most likely have to go due to very short links. they clear, but not by much with this chassis. you could probably get away easily with straight front links . 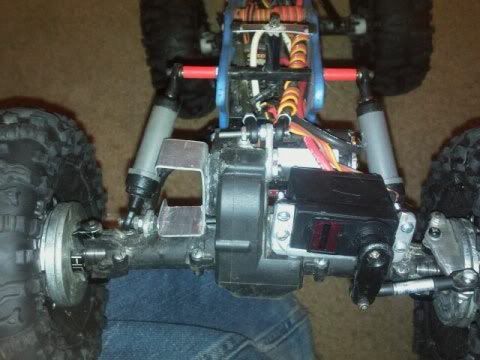 the front view of the shocks. they are mounted to the axle shock brackets i made. for added clearance i added spacers on bottom for more clearance.im running a full droop setup that also helps here. i have run sprung setups as well with 540's with other chassis's so it can be done. jr104 has also made it work as well, so he might be able to help shed some light on this too. 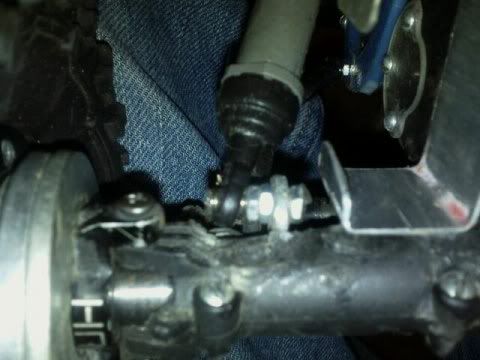 close up 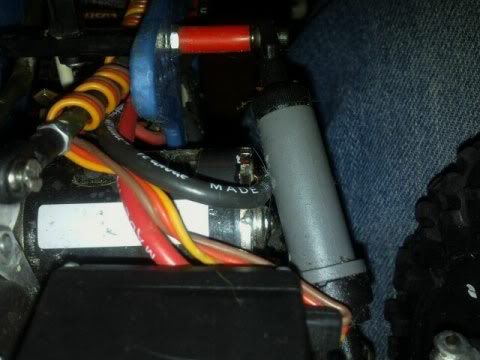 its very close fit. i have no binding. at the top you can see my spacers for getting the shocks out farther. 2'' wide chassis so something had to be done. 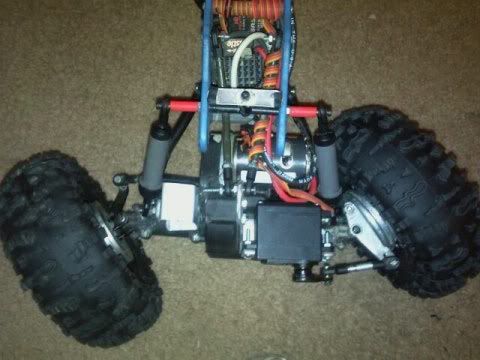 tire rub is minimal , but i have wheel spacers in the front. i will have to see what i can find for cheap spacers to throw up here. i made mine if anyones having issues, post up some pics to give us an idea of your setup and it will help us point you in the right direction. shocks or links. |
|
| |
|
08-27-2010, 06:56 PM
| #23 |
| Quarry Creeper Join Date: Jul 2010 Location: Independence
Posts: 368
|
whats the thing on the side of your gearbox? looks like it could hold a battery pack or something. like the clear ispection cover for pinion. what u use for shock spacers on chassis? explain the shock mount for the axles you made. also you have wheel spacers how did you have enough threads to mount rims? I want the spacer too. dont want weight in wheels. no springs on shocks? hows that work?
|
|
| |
|
08-27-2010, 10:33 PM
| #24 | |
| Rock Crawler Join Date: Jul 2009 Location: waterville
Posts: 525
| Quote:
i did the covers to keep an eye on gear wear and mesh. my battery holder for my lipos. 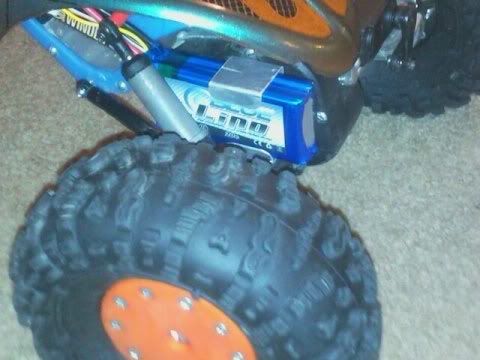 shock spacer on the chassis is just some fuel line cut to length needed with a nut glued in place so the fuel line doesn't compress when tightened down. 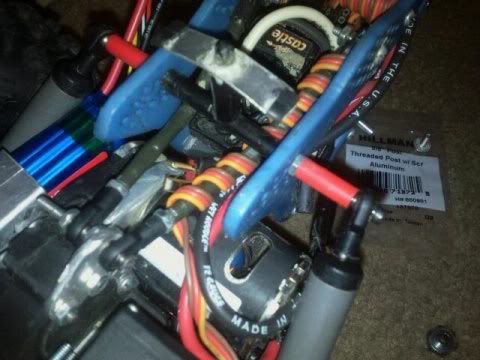 the shock mounts on the axle are cut from 1/8'' aluminum. bottom hole bolts to the axle. the 3 on top are adjustment holes. the moon cut part follows the curve of the housing so it doesnt move. its just bolted to the outside of the link mount. 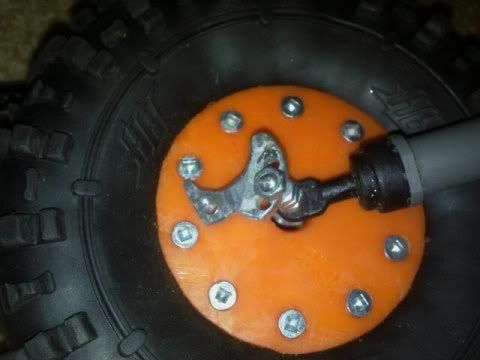 my wheels spacers!compared to stock. they are basically a 3 piece hex. your basic plastic hex(black) nylon spacer in the center with pin slot drilled, then a plastic sleeve over the nylon spacer so i wouldn't loose the pin. i drilled 2 1/16'' holes in the hex and nylon spacer and pressed in pins. they have worked perfectly. no issues yet. i had made a full set, but i only felt the need for them in the front so they were donated to my buddies axial so i wouldn't have to listen to him cry about tire rub  . . 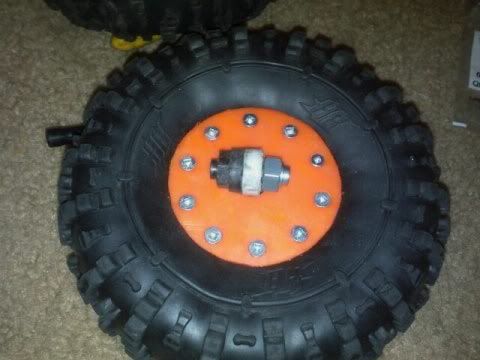 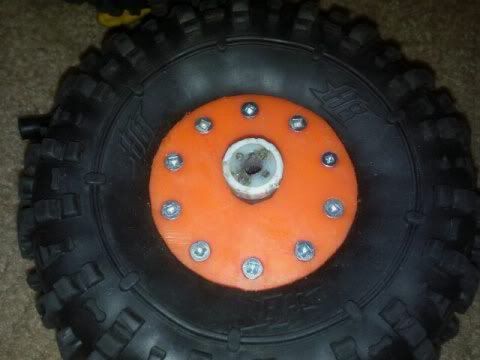 for the extensions i have used two different setups. one is a post extension and the other is an aluminum threaded post that will thread right on your axle stub. i did cut a groove for a flat screw driver . i have searched high and low for steel ones, but no luck. the extension has lasted longer, but they are aluminum and strip if over tightened repeatedly. i did have to ream out the hex for these to fit into. both of these can be found at any hardware store , home depot, and lowes. 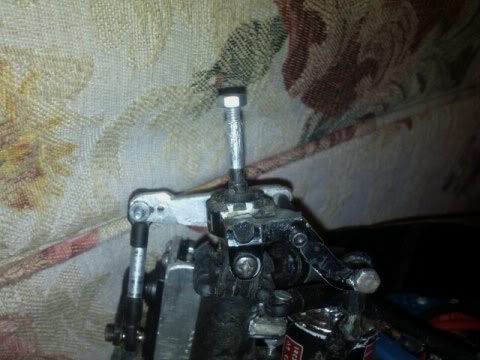 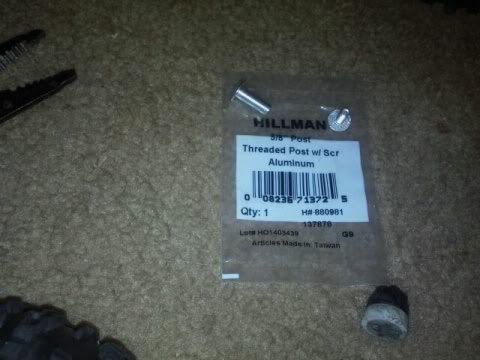 with the wheels spacers in place i can manage to use washers ranging from .5-2 oz. a pieces on the knuckles.i was gluing them to the knuckle, but now i just let them ride on the hex. im running 4.5 oz. on each side without the drivetrain taking as much strain with more weight. kinda like the stock motors getting really hot with weight in the wheels and they run cooler without. im not worried about heat. i have already managed to twist and bend up a few dogbones with the 540's in. 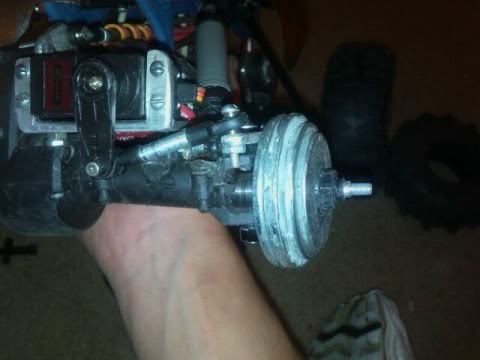 as far as my shocks, they have springs inside of the shock body. they keep the shock compressed.i have played with other springs, but what i have in now works the best so far. you could even go with a sprung internal setup instead of an outer spring to gain more room if needed. a pic of a setup i ran sprung with 540's. the chassis shock mounts need to be longer. like i said though im not familiar with the rs10 chassis. 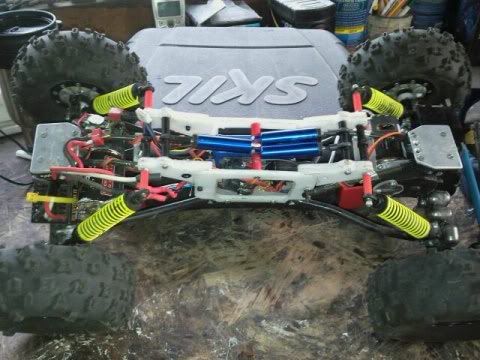 hope this helps you out ctracy. | |
|
| |
|
08-28-2010, 09:04 AM
| #25 | |
| Pebble Pounder Join Date: Apr 2010 Location: Brighton, MI
Posts: 175
| Quote:
My esc started that pausing crap too. Tried moving and swapping out rx/tx and still had the same issue. guess its time to upgrade to a sidewinder or HH br-xl. Hows that plastic perch on your axle holding up now that your links are mounted on the outside? Looks like it could bee too much stress for that one piece of plastic, especially with 540s. I still have the stock plastic gears in my 540 setup but keep shearing the diff pin. I replaced it with a hardened pin that was a bit bigger from Ace and drilled out those crappy little screws and used bolts/nuts to hold it tight. Think I might have to sneak into the shop on campus and make some aluminum backing plates for mine. I'll post pics when I get around to it. Ride looks sweet BTW!  I really like your servo mount, looks burly. I really like your servo mount, looks burly.
| |
|
| |
|
11-20-2010, 11:50 AM
| #26 |
| Newbie Join Date: Oct 2010 Location: Memphis
Posts: 18
|
on the motor swap do i need to move the little capacitor looking things from the stock motors to the new ones?
|
|
| |
|
11-20-2010, 12:21 PM
| #27 |
| Rock Stacker Join Date: Oct 2010 Location: Summerville
Posts: 88
|
Jwo, How did you make those axle brackets for your shocks?
|
|
| |
|
11-21-2010, 02:00 PM
| #28 |
| Rock Stacker Join Date: Dec 2009 Location: windsor
Posts: 86
|
nice. do you know of any where that mod parts ca be bought?
|
|
| |
|
11-21-2010, 02:00 PM
| #29 |
| Rock Stacker Join Date: Dec 2009 Location: windsor
Posts: 86
|
like website wise
|
|
| |
|
11-21-2010, 04:04 PM
| #30 | |
| Quarry Creeper Join Date: Nov 2009 Location: gilbert az
Posts: 199
| Quote:
Last edited by jr104; 11-21-2010 at 04:15 PM. | |
|
| |
|
11-22-2010, 09:40 AM
| #31 |
| Quarry Creeper  Join Date: Sep 2010 Location: In Tha Mountains
Posts: 211
| JWO is a PIMP |
|
| |
|
| |


 Linear Mode


