| |||||||
Loading
 |
| | LinkBack | Thread Tools | Display Modes |
| |||||||
 |
| | LinkBack | Thread Tools | Display Modes |
| | #1 |
| Pebble Pounder Join Date: Nov 2015 Location: Gilsum, NH
Posts: 126
|
Been coming up with a few things to accompany my D90. Thought I would put them together in one place. First are the Sand Ladders. For one reason or another I don't care for any I've seen on the market and being a simple plank at heart, I decided to make a set and save a few bucks. I cut 3 pieces of Bass Wood that's 1cmx.5cm to 6 inches long to be the vertical plank itself. Then cut five 3mm slats, three on one side and two offset on the other side. Glued it all together with wood glue then stained them. These puppies are strong! 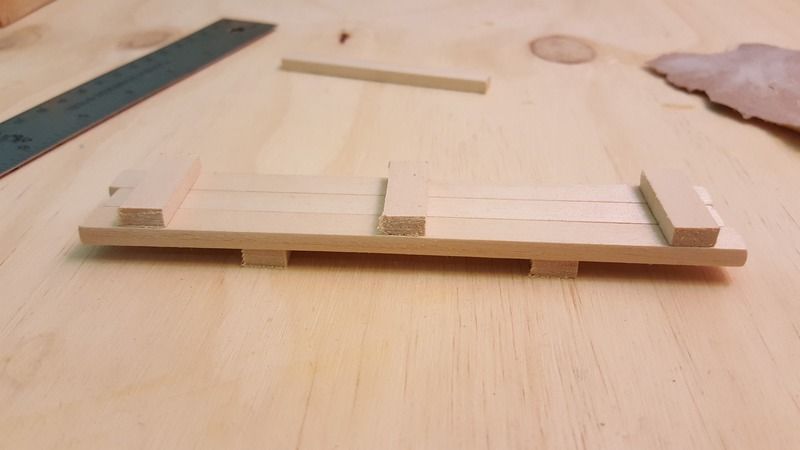 Made one 6" and the other 5". 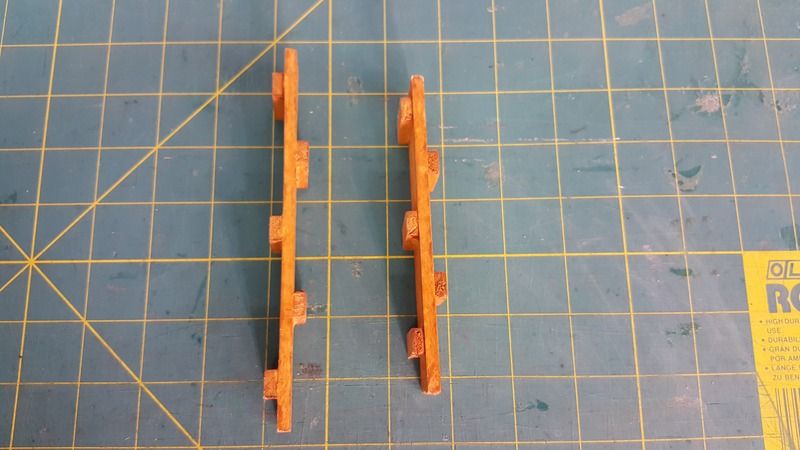 The offset slats work absolutely perfect. They hold and hang on objects really well. If one side doesn't grab, the other usually will. All while basically giving the tire a ladder to walk up the other side. 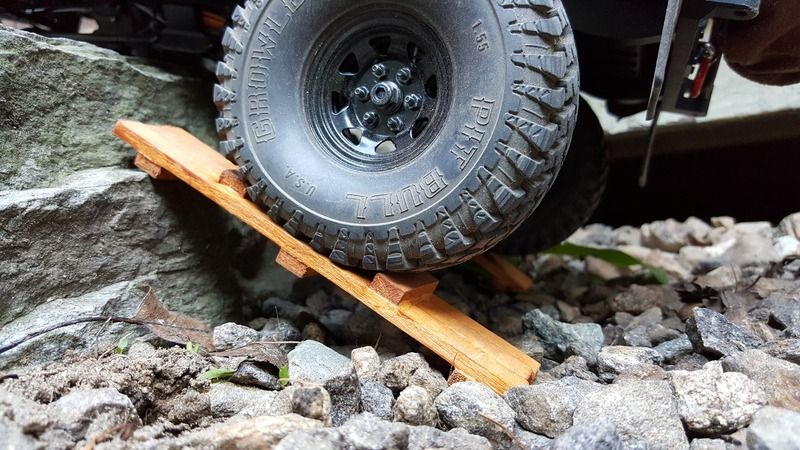 I think they give a nice old school touch as well. 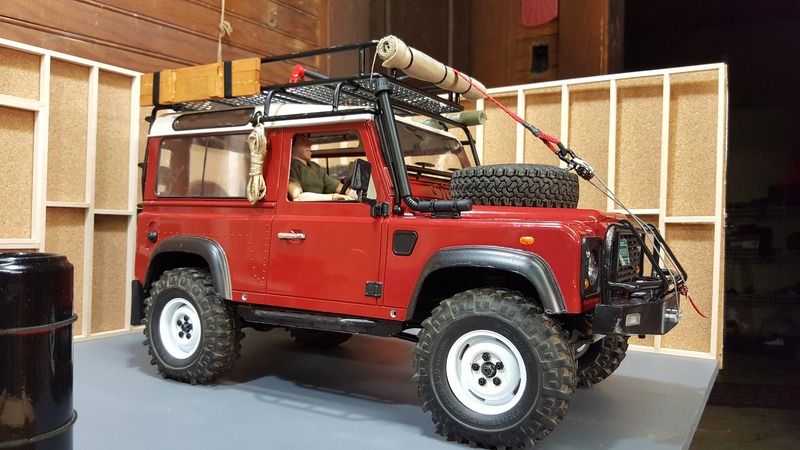 Last edited by 2kind; 07-12-2016 at 07:25 PM. |
| |  |
| Sponsored Links | |
| | #2 |
| Pebble Pounder Join Date: Nov 2015 Location: Gilsum, NH
Posts: 126
|
To keep the wood theme going, I also made a couple crates for the luggage rack. Both made from the same Bass Wood as the ladders. The first of which is a smaller army style ammo crate. Still big enough to hold most any recovery gear you may be bringing with. 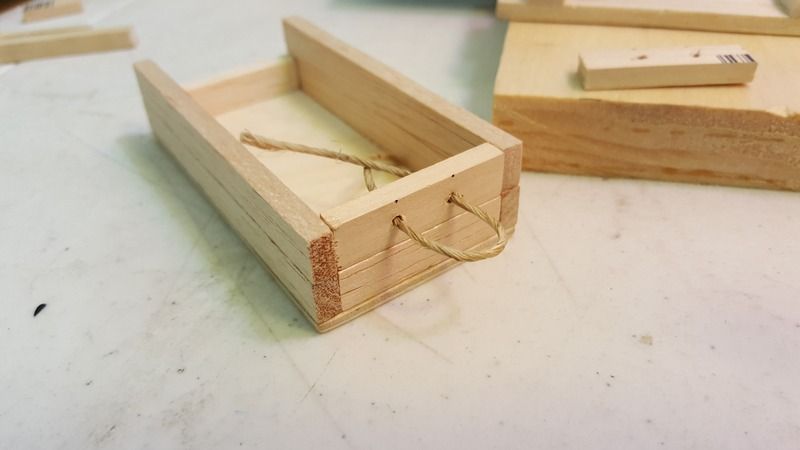 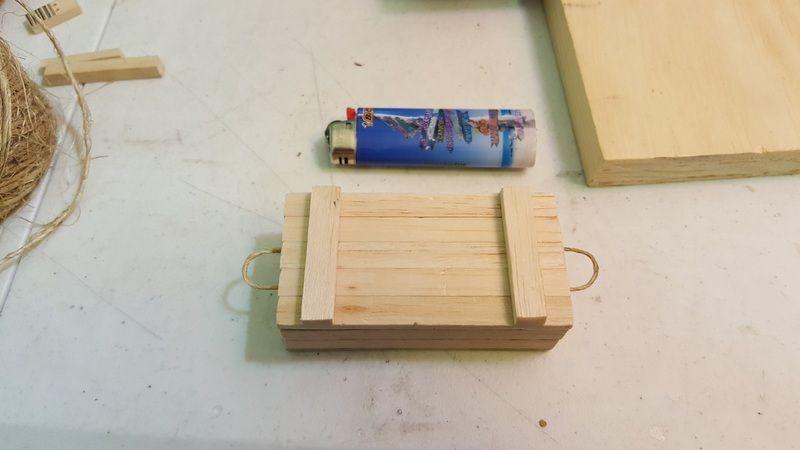 The other, a larger, slightly different, though pretty run of the mill shipping crate. 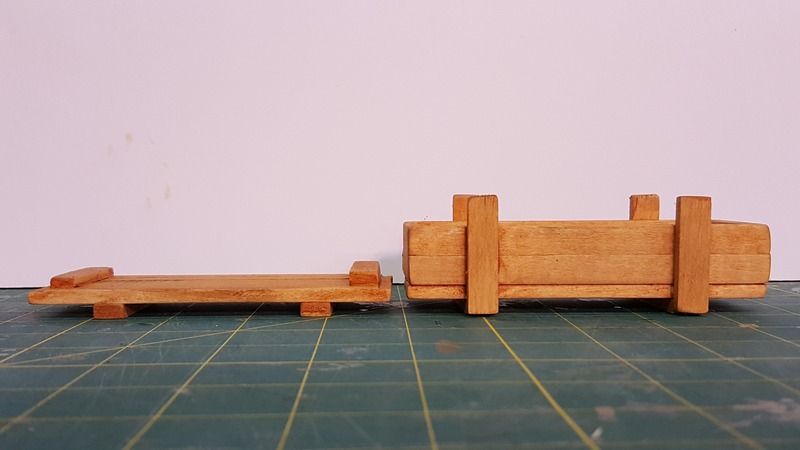 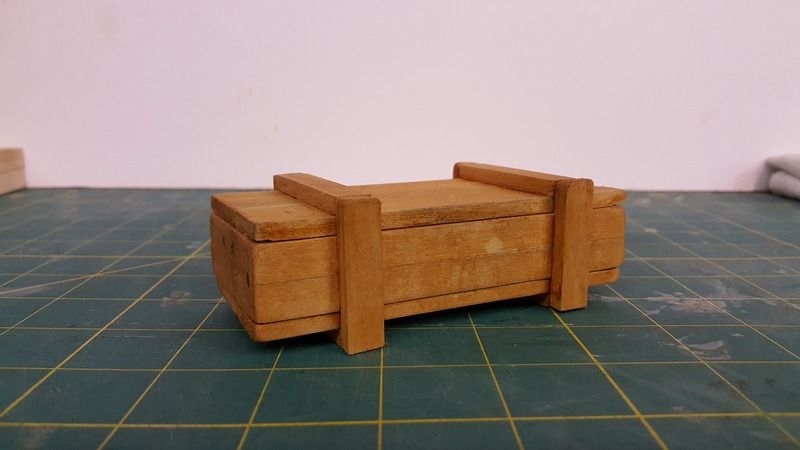 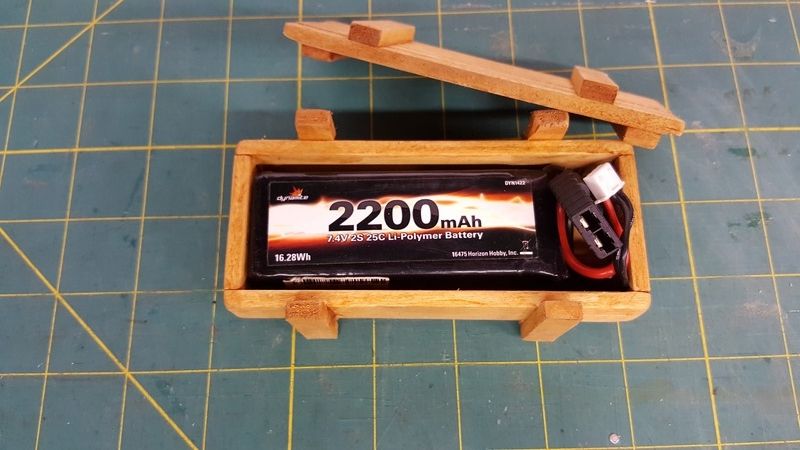 Size comparison of the two along with my 1/8 scale standard pallet. 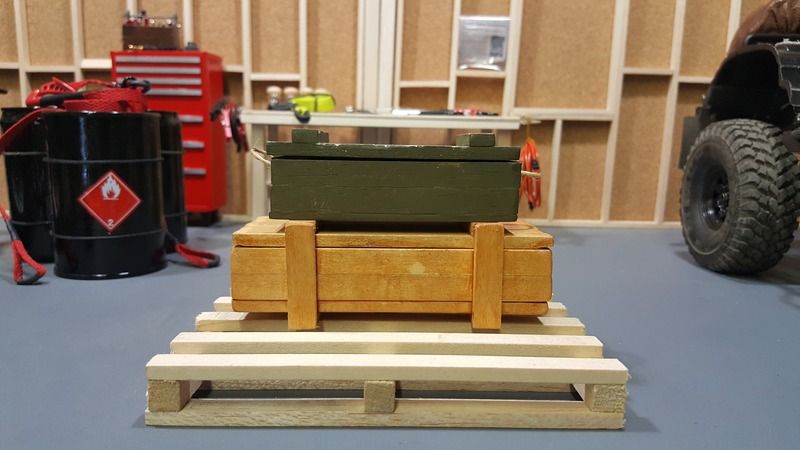 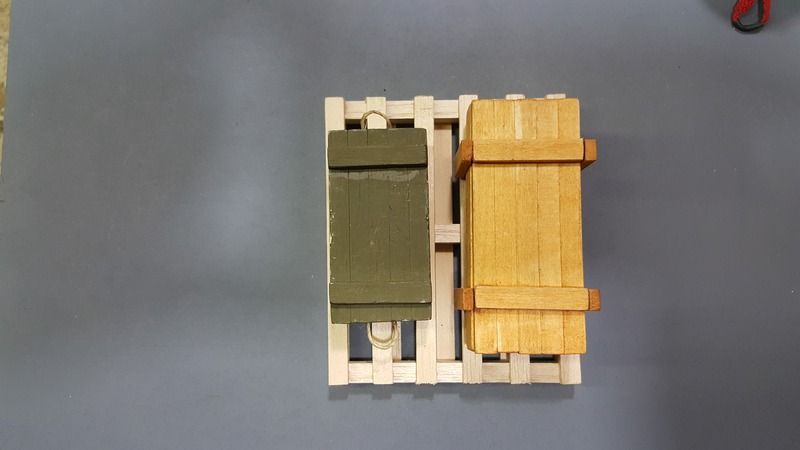 Last edited by 2kind; 07-12-2016 at 07:32 PM. |
| |  |
| | #3 |
| Quarry Creeper Join Date: Jun 2015 Location: Petaluma, Ca
Posts: 237
|
That is very smart usage of the crate to hold a battery. Nice work.
|
| |  |
| | #4 |
| Pebble Pounder Join Date: Nov 2015 Location: Gilsum, NH
Posts: 126
|
Thanks Rerebuilder! Big fan of your work! End game for the D90 is a battery/crate combo like that. Sitting in the rear cargo hold of the interior with a cut out rear door. One day there will be no more need for the hell which is mounting a Defender body |
| |  |
| | #5 |
| Quarry Creeper Join Date: Jun 2015 Location: Petaluma, Ca
Posts: 237
|
Once I saw that crate it gave me the idea to do the same as you plan on doing but I would be powering a flood light set that I had just picked up. What are the dimensions of that battery pack? Thanks I have just started trying to make my own accessories I think it is more rewarding when you can doing them yourself.
|
| |  |
| | #6 |
| Pebble Pounder Join Date: Nov 2015 Location: Gilsum, NH
Posts: 126
|
Building something that ends up your personal best, is such a good feeling. And honestly man, your Scale Accessories thread is the reason I started this one. I really hope I'm not stepping on your piggies by doing so. Also wasn't sure if you wanted others to share on yours as well. Please though, let me know if I am. Plus, I tend to be a bit winded so figured it best to start my own. It would seem that finding actual factory dims. on this pack is out of my reach. My measurements: L - 90mm without leads W - 33mm H - 19mm Shipping crate's holding (inside) dimensions: L - 107mm W - 41mm H - 20mm That crate just happen to take that pack for a size comparison shot. Do to the way it was constructed you loose 5mm of height on each end in side. The battery fits but the lid will not close all the way and you need to stuff the leads in past the point of comfort. Something smaller like a Deans connector would help a bunch. I would want your chosen pack in hand when starting the build for sure. Depending on the layout of your interior, it will most likely need to sit sideways in the cabin. Which 86'ed a few ideas I had for accessing the battery cables, but we'll work something out. 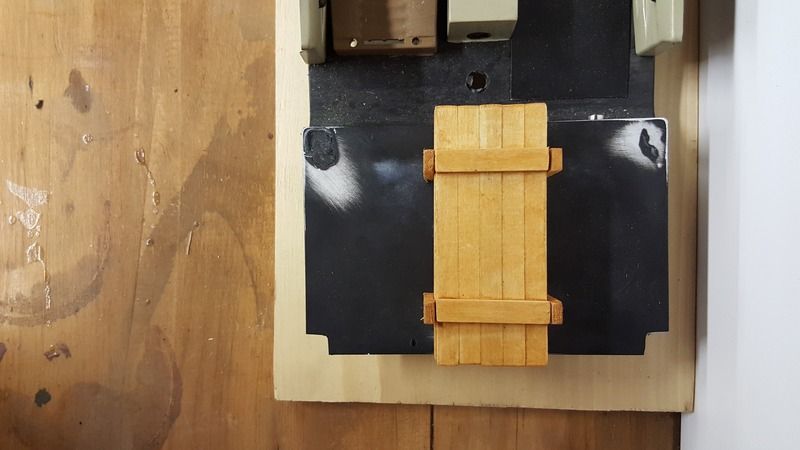 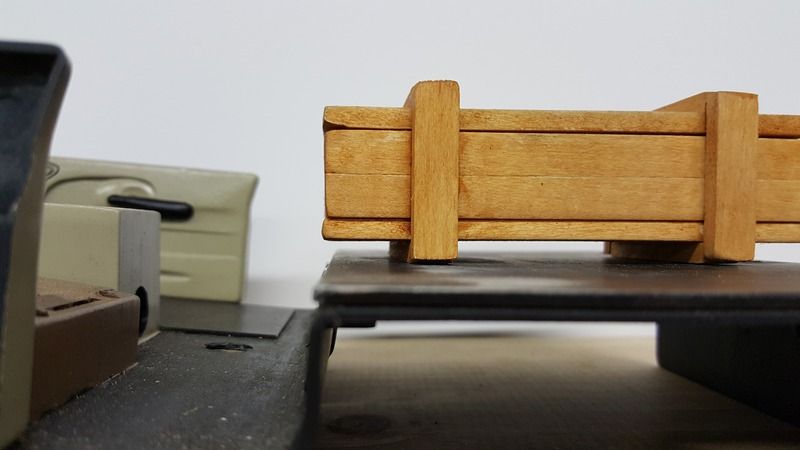 Sitting sideways though, there is plenty of room. Allowing not only a bit more freedom of design, but a slightly larger crate as well. 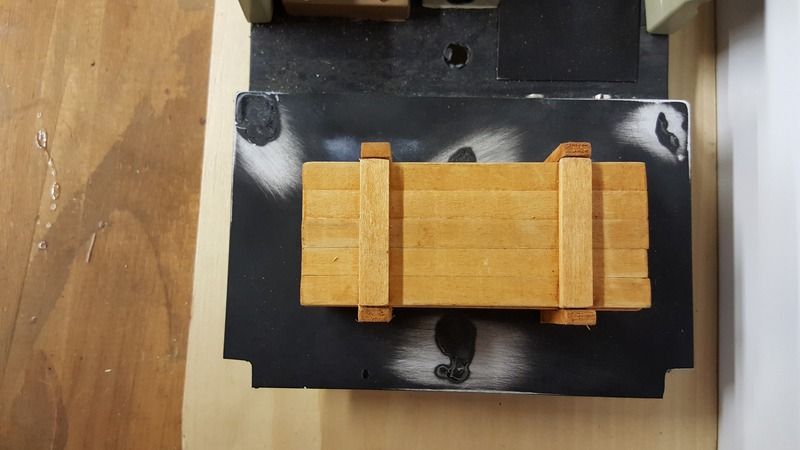 Obviously battery size will determine crate size. That pack was powering my whole rig. With the newly added lights, we'll see how it does. This whole idea may go up in smoke. Last edited by 2kind; 07-12-2016 at 07:35 PM. |
| |  |
| | #7 |
| Newbie Join Date: Oct 2013 Location: indiana
Posts: 42
|         The adress stamp works great I actually just bought a custom adress stamp for these.$7 on ebay for 20 letters in a line, up to 3 lines.Since I was limited to 20 letters I settled on "2 CARTRIDGE 120MM HE FOR USE IN M1 MBT" I'll post some updates when the stamp arrives Last edited by THX_138; 07-26-2016 at 10:17 AM. |
| |  |
| | #8 |
| Pebble Pounder Join Date: Nov 2015 Location: Gilsum, NH
Posts: 126
|
Loading up the Beast looks like much fun! I like the ammo idea a lot. The lil bits in the crate are really nice touch.
|
| |  |
| | #9 |
| Pebble Pounder Join Date: Nov 2015 Location: Gilsum, NH
Posts: 126
|
Strolling trough Michael's a while ago I came across these tiny clothespins. You get roughly 10-15 in a pack for a couple bucks. Thought they might make a decent scale hand clamp or a big pair of alligators for a set of jumper cables. 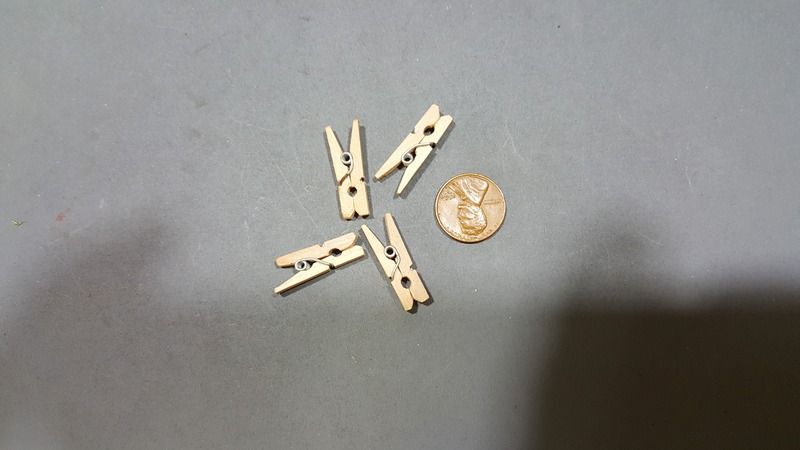 I used a cheap set of headphones for the wire. The kind where two wires are molded together works great because you can separate the ends a bit just like 1/1's. Though you most likely will have to hand paint the red one. I opted to peel them apart for sake of ease. After painting, I just glued things in place. The glue is a messy. Next go around I will solder the wires right to the little metal bits in the clothespin. 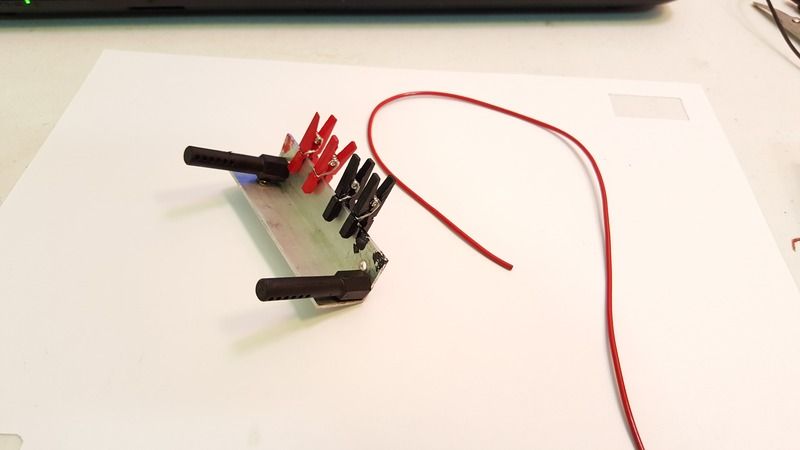 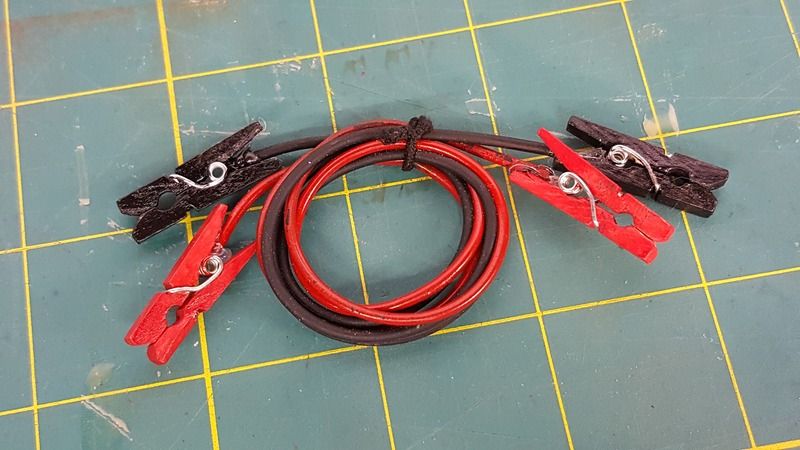 Took another set of headphones and tried to make your classic 25 foot orange extension cord. On most, both end of the wire have a rubber like molding around it. I snipped off each end at the blue line to preserve a plug like shape. 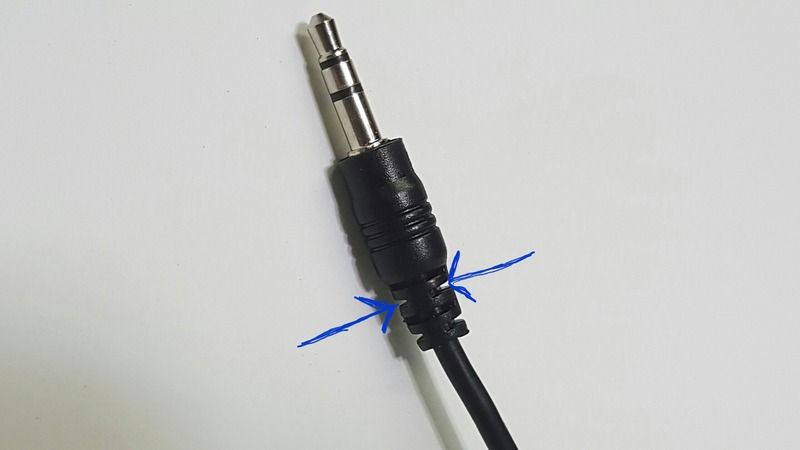 Left a bit of actual wire itself exposed on one end. After taping those up I then sprayed the wire a nice bright orange. 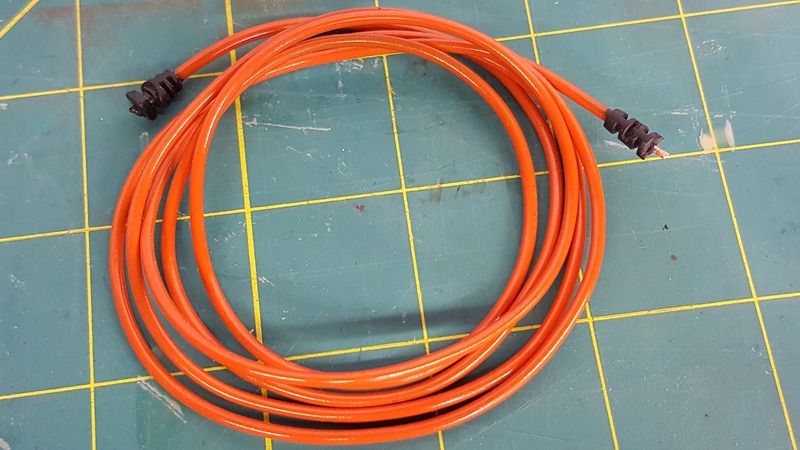 Still need to make a small converter box to go along with them. 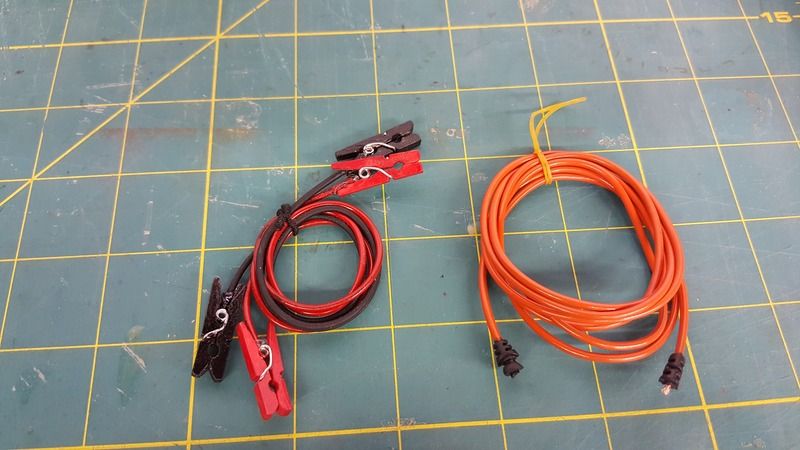 The scale doesn't seem too bad... 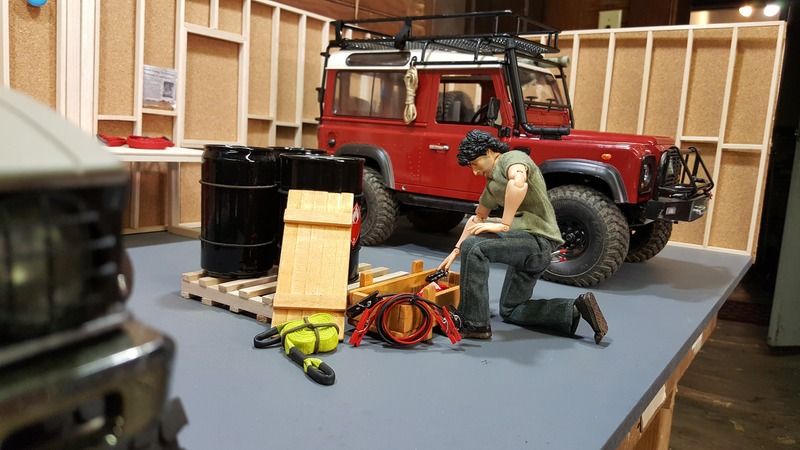 Last edited by 2kind; 07-12-2016 at 07:40 PM. |
| |  |
| | #10 |
| Quarry Creeper Join Date: Jun 2015 Location: Petaluma, Ca
Posts: 237
|
Nice work on the cables and extension cord. The clothes pins do fit the part for the jumper cables. I tried looking through my Michael's for them but couldn't find what section they where in. I have plans for there use. Keep up the good work your rig looks good also.
|
| |  |
| | #11 |
| Pebble Pounder Join Date: Nov 2015 Location: Gilsum, NH
Posts: 126
|
I've made a few straps out of shoe laces and heat shrink tubing. If you have access to a sewing machine it will make the process much faster and result in a stronger strap, I imagine. Pretty simple, just cut to length what size strap you want. I melted the ends to prevent fraying. Then slip 2 pieces of shrink tube on each end before sewing. One inside the loop for added look and strength and the other to clean up the sewn bits. 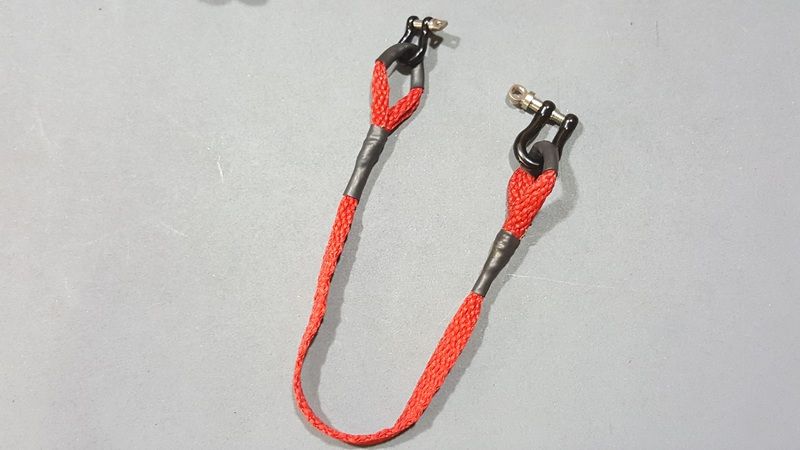 Using laces not only allows you to tailor to your needs, but your rig as well. The shorter one is for my snatch block and anchor. The other is for anything else that may come up while on the trails. 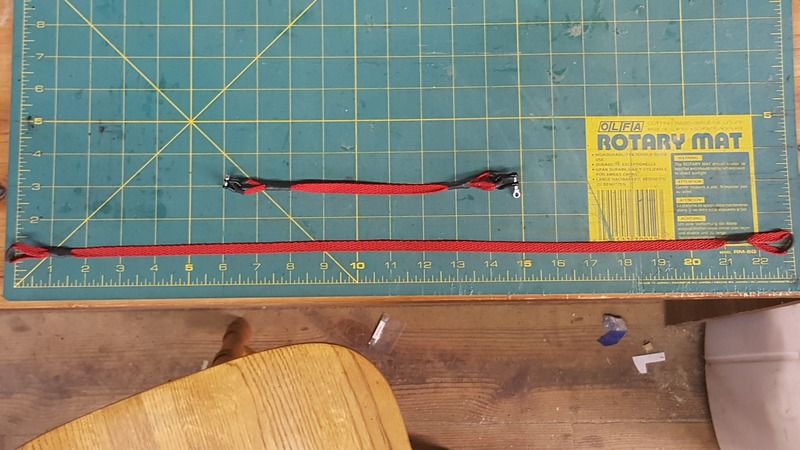 Last edited by 2kind; 07-12-2016 at 07:41 PM. |
| |  |
| | #12 | |
| Pebble Pounder Join Date: Nov 2015 Location: Gilsum, NH
Posts: 126
| Quote:
I found them in the wood craft area hanging on the wall in small cellophane packages along with other tiny wooden trinkets. I'm planning on making another pass through today. If so, I'll snag a shot of the section for you. | |
| |  |
| | #13 |
| Quarry Creeper Join Date: Jun 2015 Location: Petaluma, Ca
Posts: 237
|
Like the straps I have been thinking of making some of my own and the way you did yours was also how I thought of doing them.
|
| |  |
| | #14 |
| RCC Addict  Join Date: Jan 2016 Location: Kelowna, BC
Posts: 1,274
|
I love your ingenuity, you've some really great looking stuff made up here. I've made straps in much the same manner but where you suggest a sewing machine, I used a couple drops of CA glue. Works like a charm! |
| |  |
| | #15 | |
| Pebble Pounder Join Date: Nov 2015 Location: Gilsum, NH
Posts: 126
|
Hey Cycleguy, Solid Idea with the stamp. Just for a heads up, a little over twice the price you can pick up something like this. Never used one before though. May pick one up myself. https://www.amazon.com/Cosco-Self-In.../dp/B00006IB7K Quote:
Helps when one of your biggest childhood influences was this man,  I debated the glue method when it came to the straps. In the end I doubted its holding ability. Sewn by hand with the right thread and ten minutes you can almost equal the lace strength. | |
| |  |
| | #16 |
| Pebble Pounder Join Date: Nov 2015 Location: Gilsum, NH
Posts: 126
| Bro tip: Talk to the Ladies in your life. They have the experience and Ins on so many skills, tricks, tools, materials and hardware that are greatly beneficial in this part of the hobby. Disclaimer: It may not bring you closer like One would think. I've learned quite a bit about the wonderful world that is Sewing. Having access to a machine really opens up doors, as far as willingness goes. My skills and the things I'm doing are nothing you can't do by hand, it would simply take longer. I've had this netting for awhile now. Salvaged from a beach bag of sorts it's light weight, strong and good for many different projects. 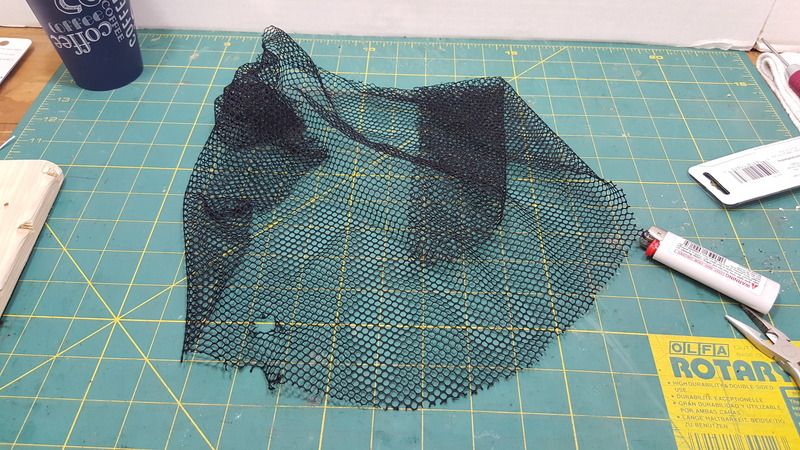 The design is pretty strait forward though much more time consuming than one would imagine. I started by cutting a square out of the netting. Then cut four 7"x1" rectangles of black cloth that would be folded over to sandwich each side of the net to create a reinforced boarder. Once pined in place I sewed the pinched edges together, two times each side. 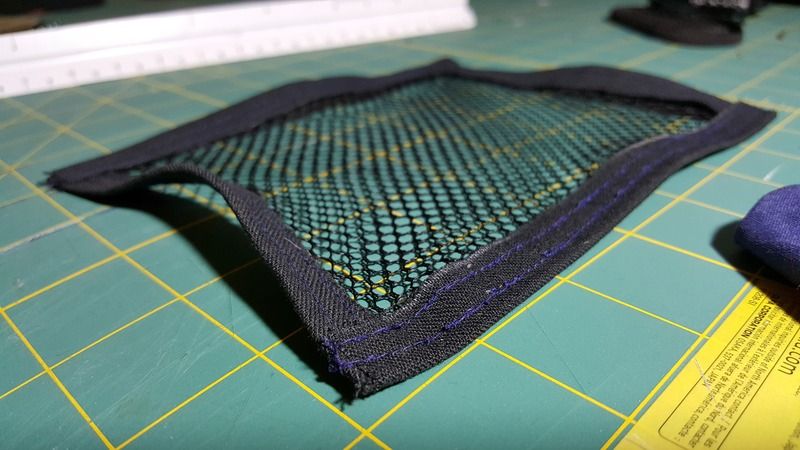 With the added boarder it's now strong enough to use one of my new favorite things, Grommets. They require a special tool to install, I believe. The one I have easily punches a hole through atleast 4 layers of decent fabric and attaches the grommet aswell. grom·met (ɡrämət): An eyelet placed in a hole in a sheet or panel to protect or insulate a rope or cable passed through it or to prevent the sheet or panel from being torn. 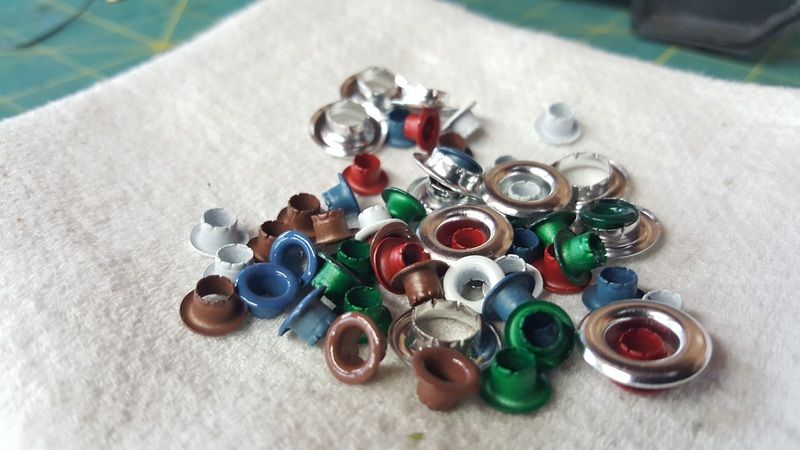 For a first attempt I'm happy. The boarder is far to wide, wrong thread color and I've tracked down 2mm gunmetal grommets to use next round. The brown ones used are almost 4mm. 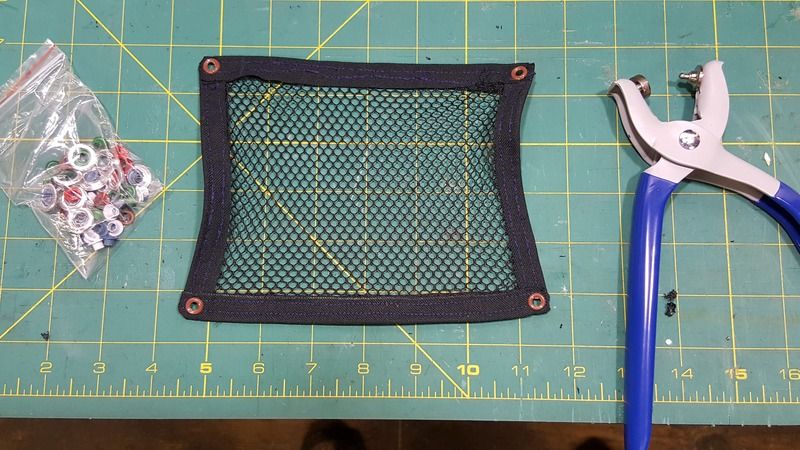 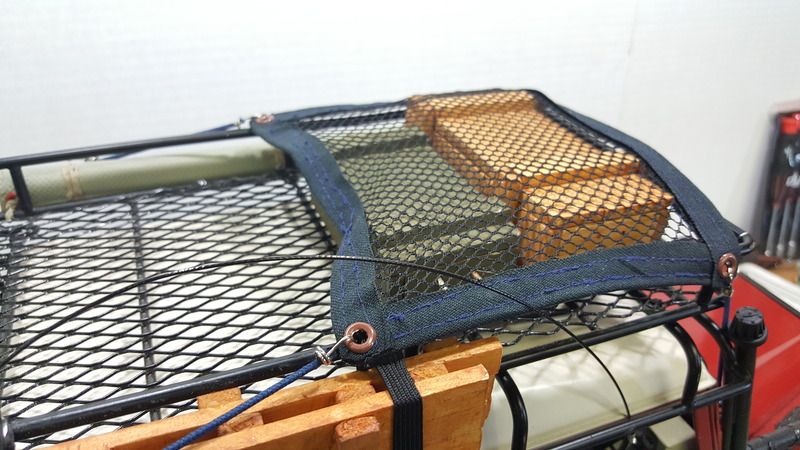 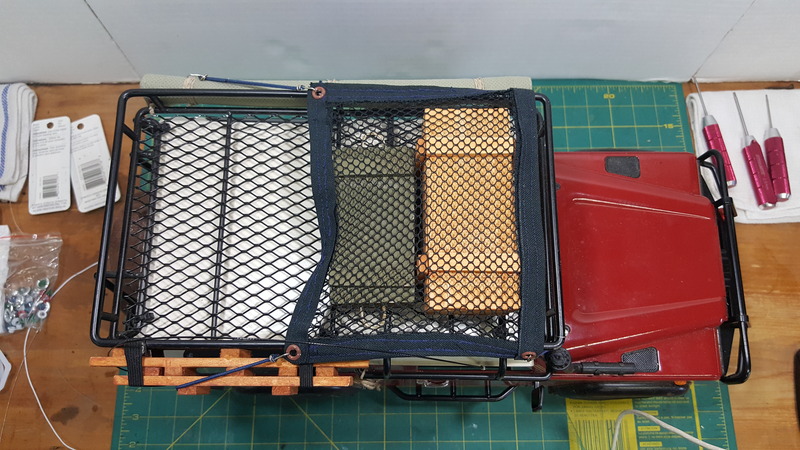 The grommets also came in handy for a different project. You may have noticed the material rolled up and tied to the roof rack. Those are my interpretation of tarps. My favorite material of choice so far is a reusable groceries bag. Light, strong, nice texture, cheap, and come in a variety of colors. 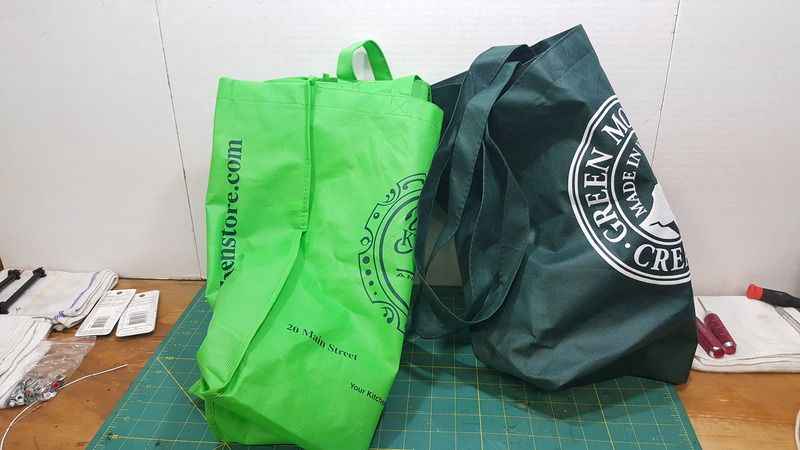 Once cut to desired shape and size, I reinforced all the sides by folding them over before sewing. Makes for a cleaner looking end product. These also use the almost 4mm grommet. Red was a bad choice but they will need to be redone with the 2mm later on. 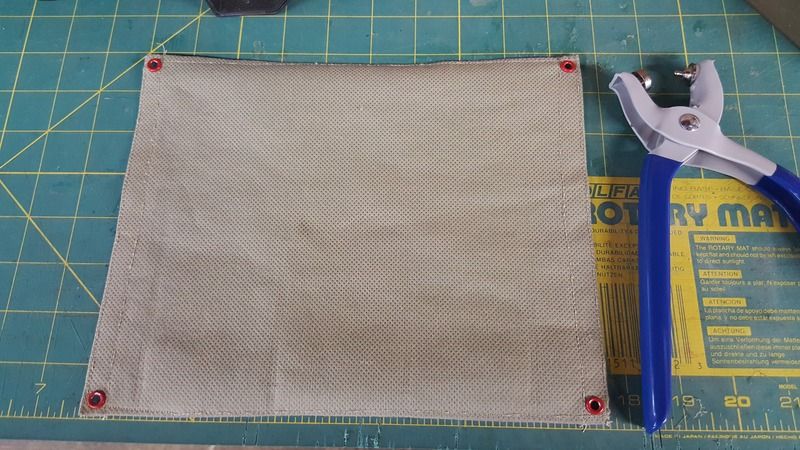 With the help of a small dowel just roll it up and secure with method of choice. Mine happen to be some small twine cuz at every scale it looks like twine. 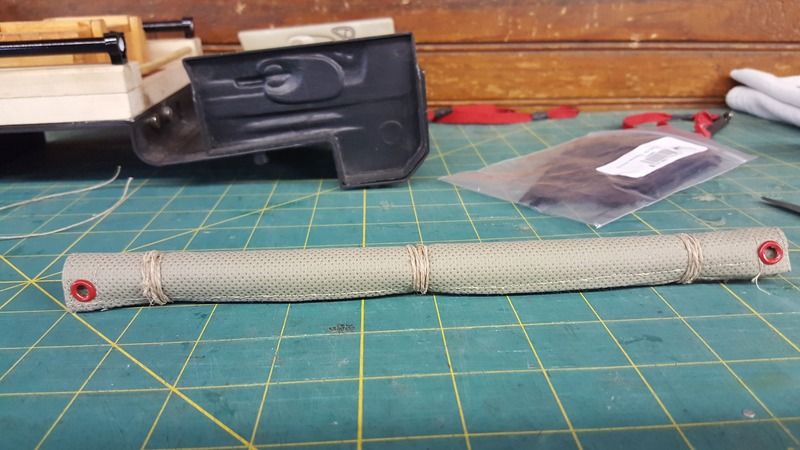 Same goes for mounting which was my sole purpose for adding grommets. The material hanging above the windshield is from a pair of khaki shorts. It's heavier and doesn't roll as tight but the color and texture really help sell the canvas tarp look I was going for, IMO. 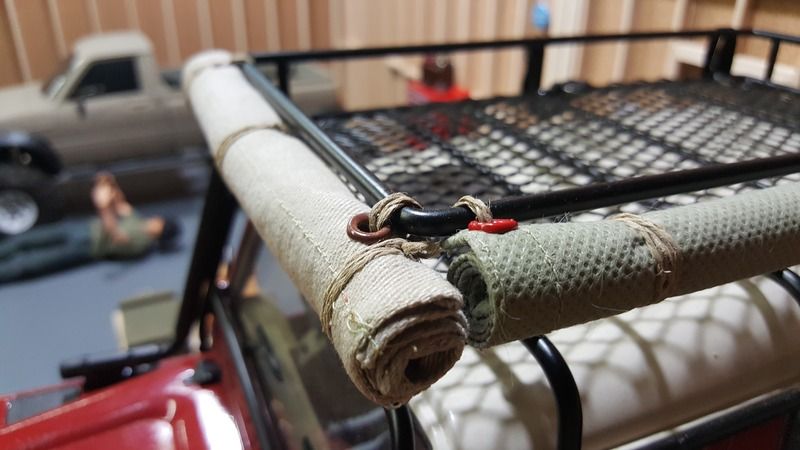 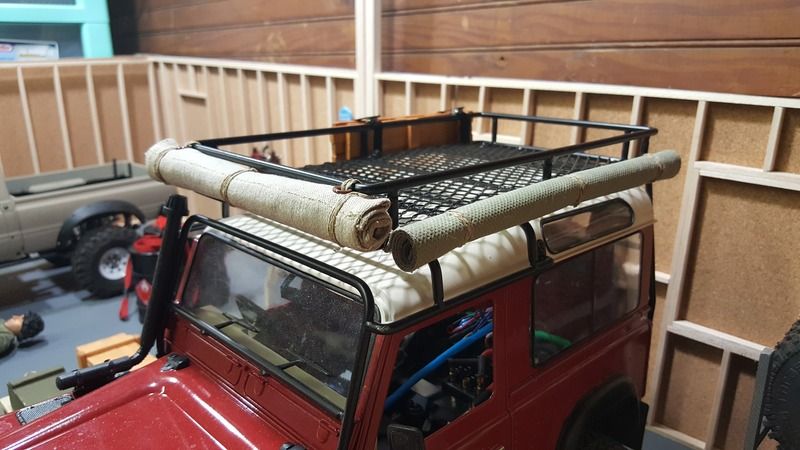 Last edited by 2kind; 07-17-2016 at 02:13 PM. |
| |  |
| | #17 |
| Rock Crawler Join Date: Feb 2010 Location: in a Fishbowl watching time go by
Posts: 923
|
Funny I'm working on the same project...
|
| |  |
| | #18 |
| Pebble Pounder Join Date: Nov 2015 Location: Gilsum, NH
Posts: 126
| |
| |  |
| | #19 |
| Pebble Pounder Join Date: Nov 2015 Location: Gilsum, NH
Posts: 126
|
For almost a year now this has been (for me) the epitome of sleeper technology. 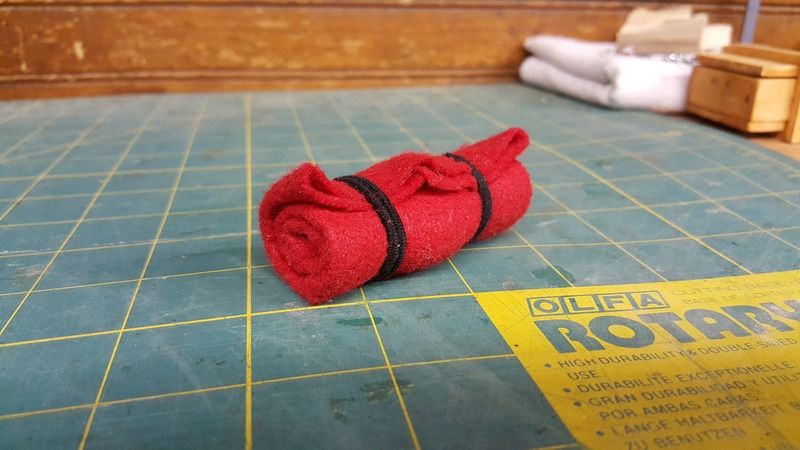 I'm proud to say, That no longer holds true. As someone that makes things far more difficult than need be, the other night I set out to see just how complex I could make that folded in half, rolled up, piece of felt. So far I've used a couple old rain jackets, some fleece sheets and some regular cotton fabric sheet. A windbreaker like material gave me the best results. Next I cut out two equal rectangles. Each of a different design and material. 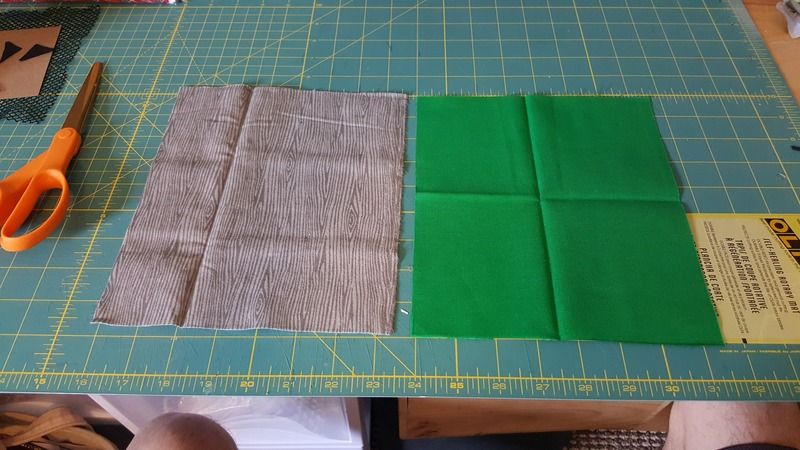 At this point you want the product face side turned in for both sides. Once laid directly atop one another, sew them together all but one side. Preferably a short end. This is to allow the first reverse of two that take place. Also, for stuffing the bag. 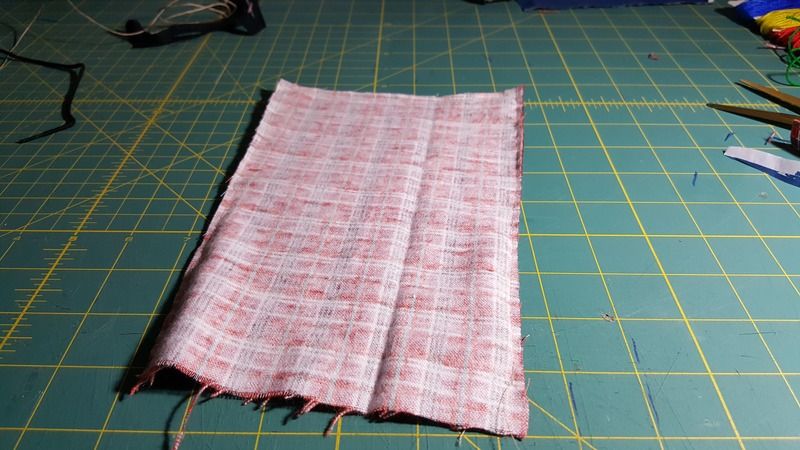 Next I was able to turn the now one piece inside out thanks to not sewing up the last side. 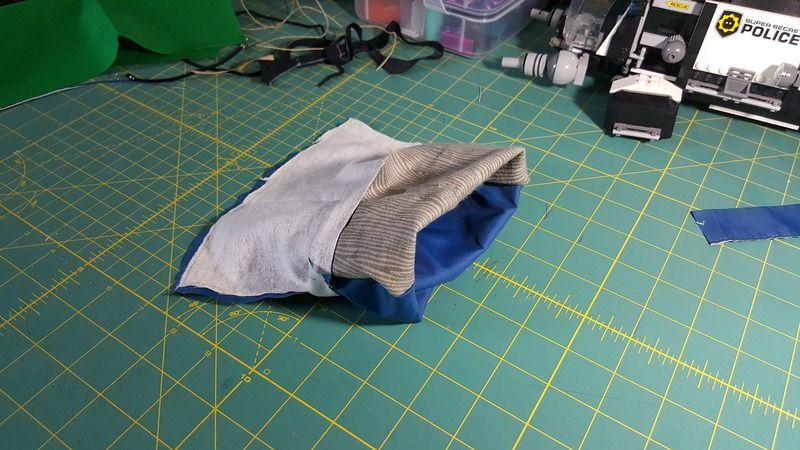 Stuffing came next. Nothing but the best for my little guys so a down pillow was sacrificed to the hobby gods and the stuffing commenced. Don't over stuff. When done sew the end closed so you are left with a pillow full of feathers, or what have you. 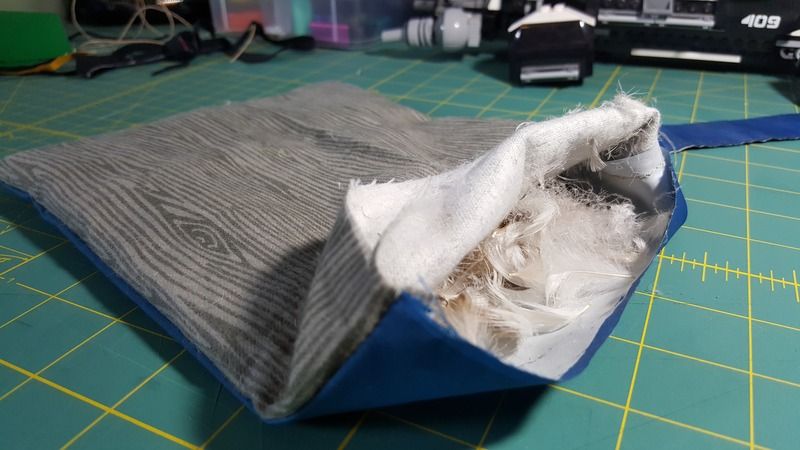 This is the second reverse stage. Fold the pillow in half, lengthwise so the outside material is sandwiched in the middle. 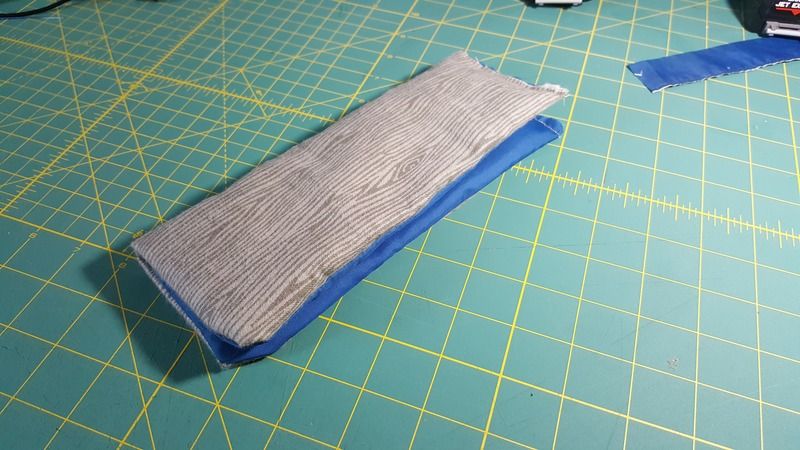 Here I took some elastic cord, made a loop, and set part of it intercepting the sewing needle. Then folded it all back together. 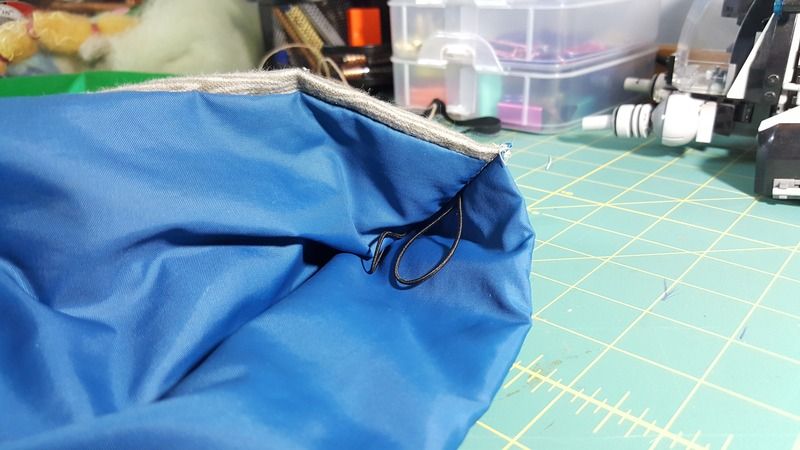 Starting at the crease, I sewed the bottom then up the last side leaving about an inch or so from the top to flop around, unzipped so to look. 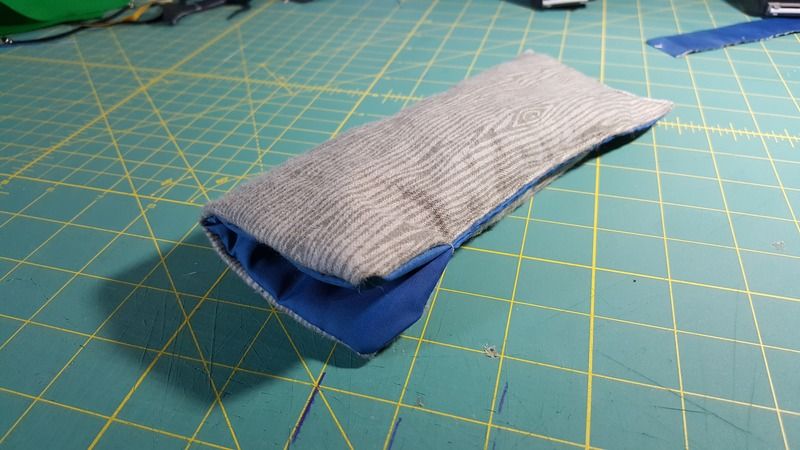 Only thing left to do was reverse it all. Pretty satisfied with what emerged. 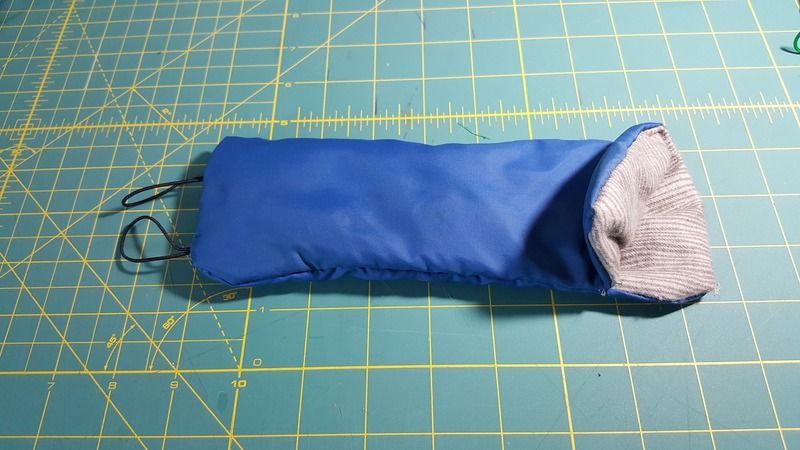 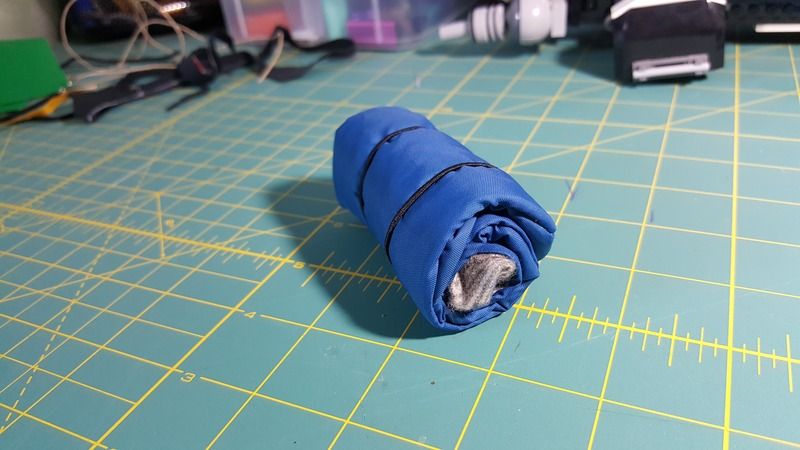 By the time I was done messing with the design, I had a whole stack of bags made. Partial to the yellow and the blue to its left myself. There's still room for improvement and I've got a couple ideas for my next attempt that didn't make it into the last. I really like how they turned out though. From Left to Right, Earliest to Latest model. 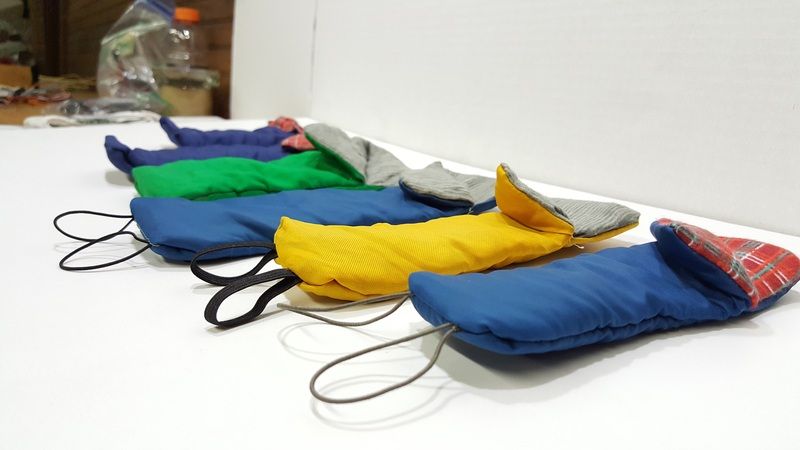 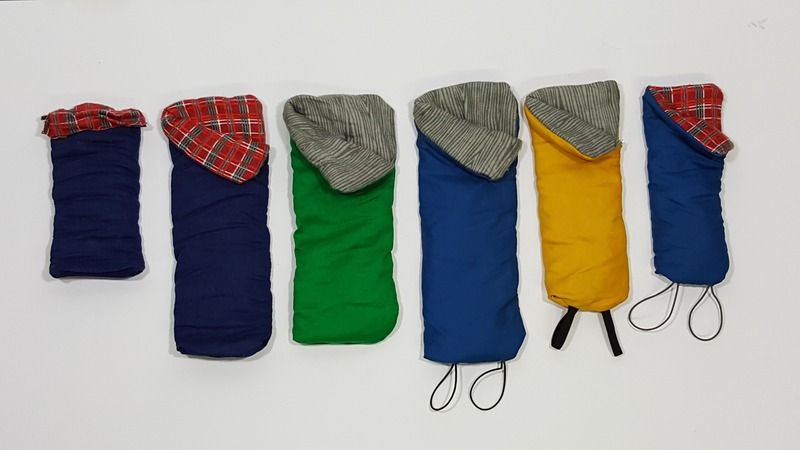 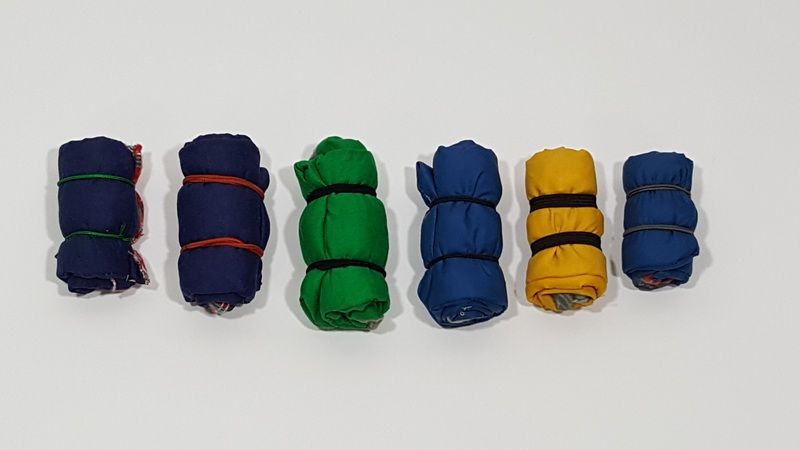 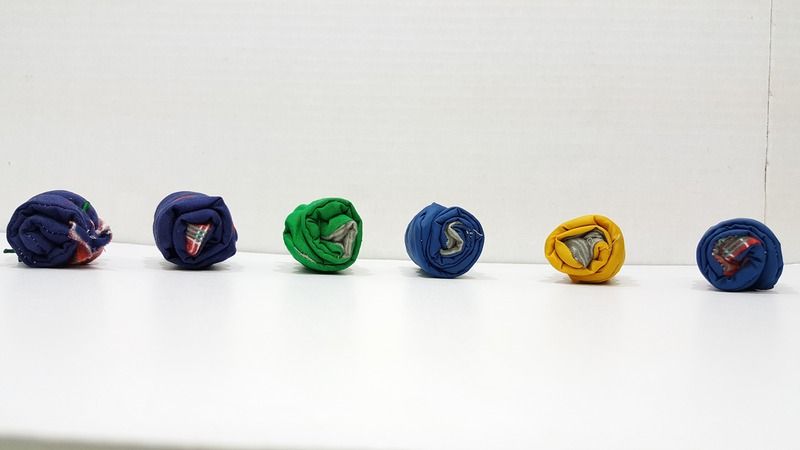 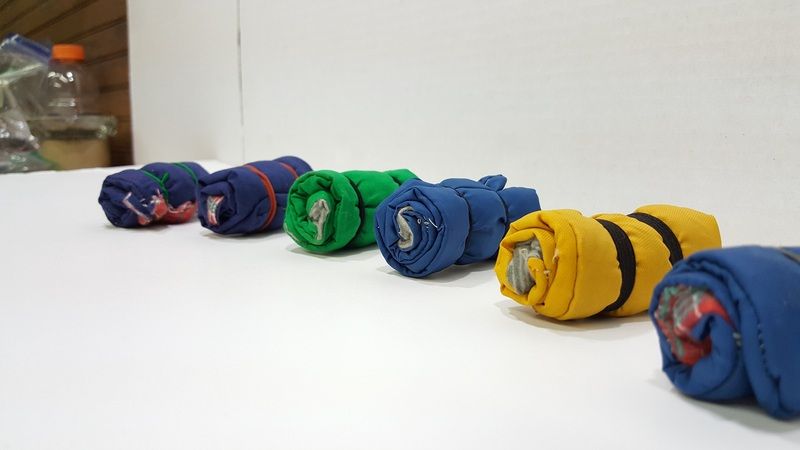 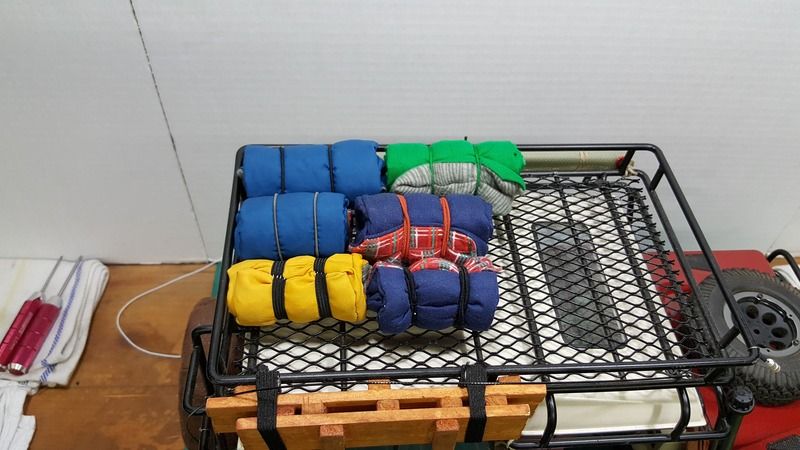 |
| |  |
| | #20 | |
| Newbie Join Date: Oct 2013 Location: indiana
Posts: 42
| Quote:
 I found some styrene I beams this week, they've been really handy after I cut the top off to make a styrene T.Its a really easy way to make raised vents for heaters, air cooled motors, chainsaw chains, etc.  [IMG]http://uploads.tapatalk-cdn.com/20160717/13 Last edited by THX_138; 07-24-2016 at 08:29 AM. | |
| |  |
 |
 DIY Scale Accessories/Others - Similar Threads
 | ||||
| Thread | Thread Starter | Forum | Replies | Last Post |
| 1/10 Scales accessories share in Diy sharing | pp783ppp | Scale Accessories | 9 | 01-25-2015 01:57 AM |
| 2 DIY accessories | Arnel | Scale Accessories | 6 | 12-05-2013 02:09 AM |
| DIY accessories | jezzami101 | General Scale Talk | 3 | 04-15-2013 05:07 PM |
| |