| |
| |||||||
 |
| | LinkBack | Thread Tools | Display Modes |
 10-09-2008, 06:57 AM
| #21 |
| Pebble Pounder Join Date: Jul 2008 Location: Denver
Posts: 148
|
Yes, the upper link mounts at the axle and the lower shock mounts have me slightly concerned. But the lower links werent too expensive, so I may order different ones and rework the shock mount, and I can always get different upper mounts in the future. I just want to get this thing running! The stickers were printed up by a friend of mine in Denver, when I was working at the Denver Spoke, I would put them on all the high end, above 2000 dollars, bicycles I would build. I just have a few still laying around so I thought I'd throw one on this guy. Thanks for all the input, and I hope to be crawling soon! |

|  |
| Sponsored Links | |
| | |
|
10-09-2008, 07:55 AM
| #22 |
| I wanna be Dave  Join Date: Oct 2006 Location: Martinsburg WV
Posts: 2,781
|
I'm setting up a Hustler now, it came with simple plastic cable clamps and 8 1/4" aluminum collars to mount the shocks to the links. At first I thought "how hokey is this??" but decided to set them up as a mock up, just to see what they'd look like and how sloppy they'd be. I was really surprised how solid they were once they were tightened in place, they seem to be up to the task. The trick is to use a solid shock cap, with no ball end, and finding the right size hardware (I'm using 4 rear shocks from a Sportwerks Mayhem buggy, with internal springs from Losi Mini-T shocks) These are nothing more than a cable loop like you'd install in an electronic device to keep the wiring away from moving parts. I've seen them in PC's, scanners, printers, stuff like that. I know you can get them at Rat Shack, probably at Lowes/Home Depot also. The aluminum collars with set screws, you'd probably have to hit up McMaster-Carr for those, but I'd bet my paycheck they have them. Your LHS may have some also depending on their stock. The stickers are a great idea for a high-end custom built bike. That shows the buyer that you care about what you do. I really miss wrenching on bikes (my last mechanic job was with Guthrie Bikes in downtown SLC Utah, the oldest bike shop in the nation in the same location - there's one older shop in Mass. but they've moved 3 times in their history. The basement of Guthrie's is like a bike museum) I wish you could make a decent living at it, I'd still be doing it if you could... Last edited by Big Mike; 10-09-2008 at 08:03 AM. |
|
| |
|
10-10-2008, 06:54 AM
| #23 | |
| Pebble Pounder Join Date: Jul 2008 Location: Denver
Posts: 148
| Quote:
As for the shock mounts, I had picked up a set of white nylon cable holders, and some locking collars I thought would fit. They said the I.D. was 1/4 inch, but they did not fit around the link. Without the collars they just slid up and down on the link, so I did it this way. I originally wanted to mount the shocks on the axles, but couldnt find an easy way to do that. | |
|
| |
|
10-24-2008, 07:21 PM
| #24 |
| Newbie Join Date: Jun 2008 Location: Central NJ
Posts: 31
|
I like it  |
|
| |
|
12-24-2008, 08:45 PM
| #25 |
| Pebble Pounder Join Date: Jul 2008 Location: Denver
Posts: 148
|
So, its winter. There is 2 feet of snow outside my house right now. What else to do but work on the rig? So I gave the rest of my tie rods the aluminum tubing treatment. If you notice in my earlier pics the rears were using the stock red rod ends. They look better now. I also wanted it to look more realistic so I made myself some tube bumpers out of the rest of the 1/4" tubing I had laying around. Then one day I was at the check out line at wally world and I had an idea, a quick jaunt over to the sporting goods section and I found these 3-LED replacements for Mag lights, score! I used the plastic seal from under a coca cola bottle cap for lenses, just trimmed them to fit, and I have a set of headlights, and boy are they bright! For the switch I decided to mount it up front like its the control box for my winch, which is a long chainring bolt from a bicycle. I have a lot of bike parts to play with. I do want to swap out one of the leads with a red wire so its a little more noticeable. I just didnt like the way the doors and rear deck looked through the clear lexan, too glossy, so I cut up and old backpack for some canvas material and covered the doors, rear deck, and the roof with said materail to give it the soft-top, soft-door look. I am pleased with the way it turned out. Just cant wait to get out and drive it, when is spring coming? 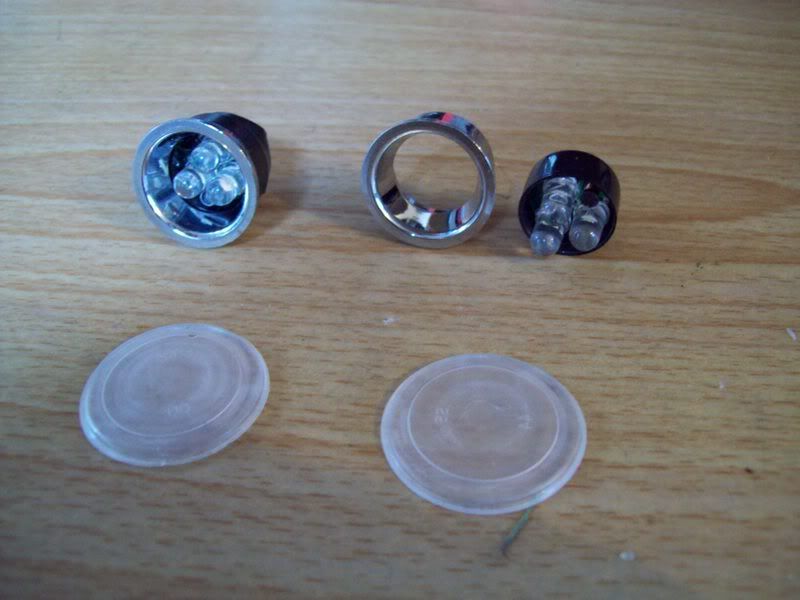 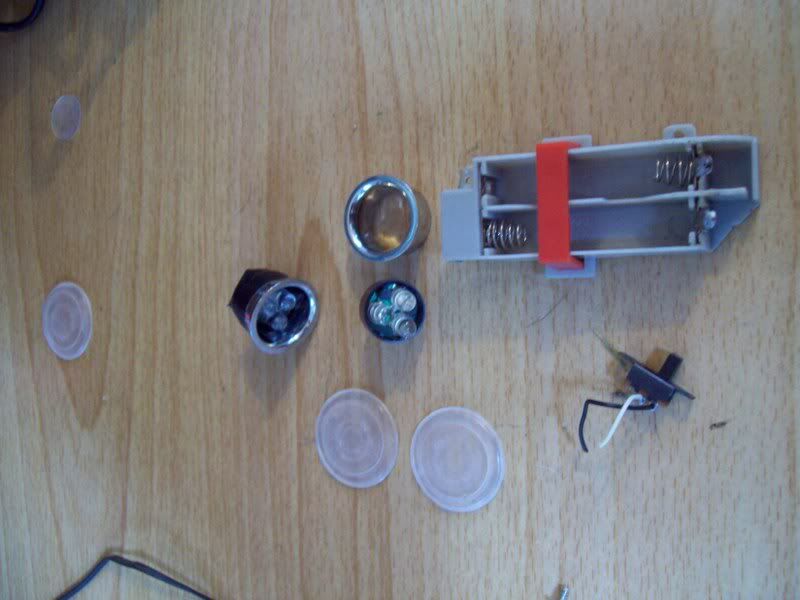  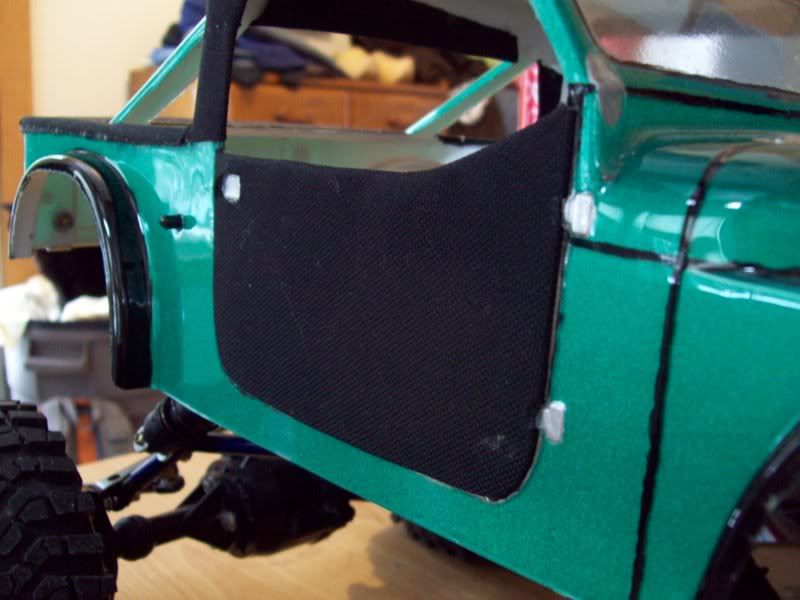 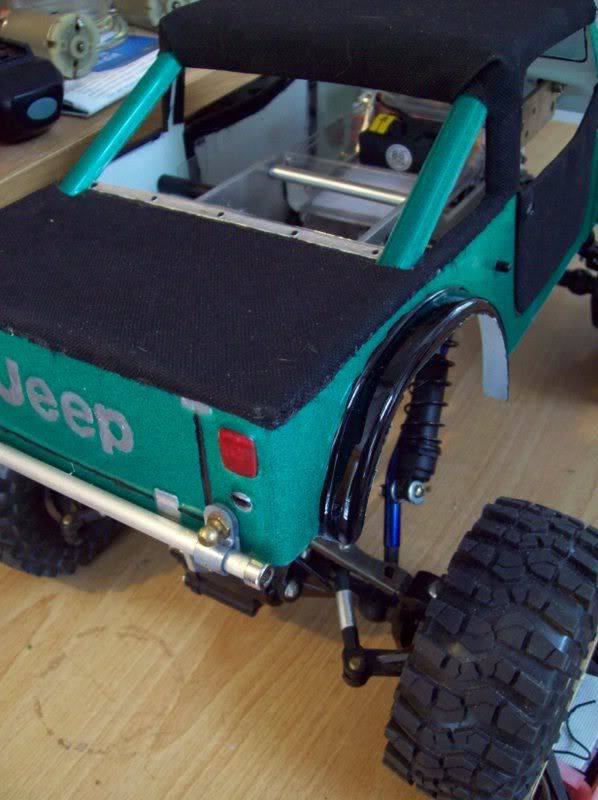 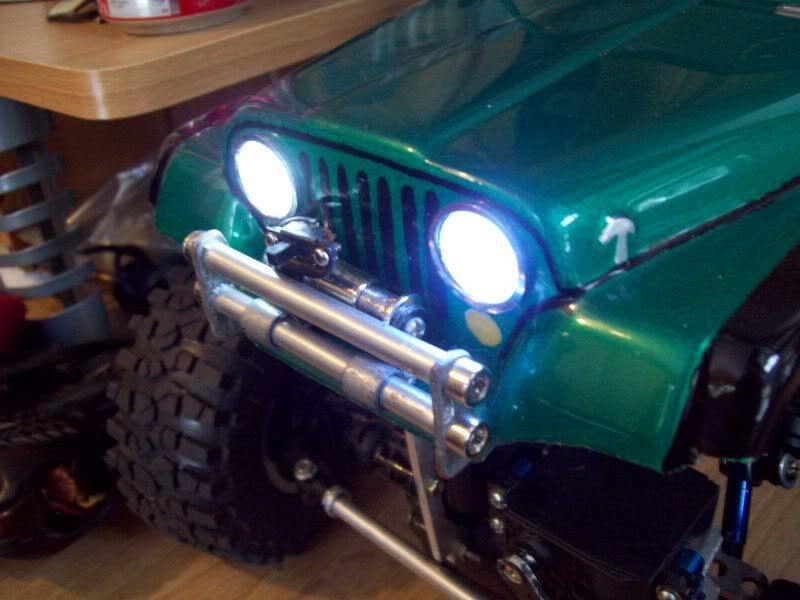 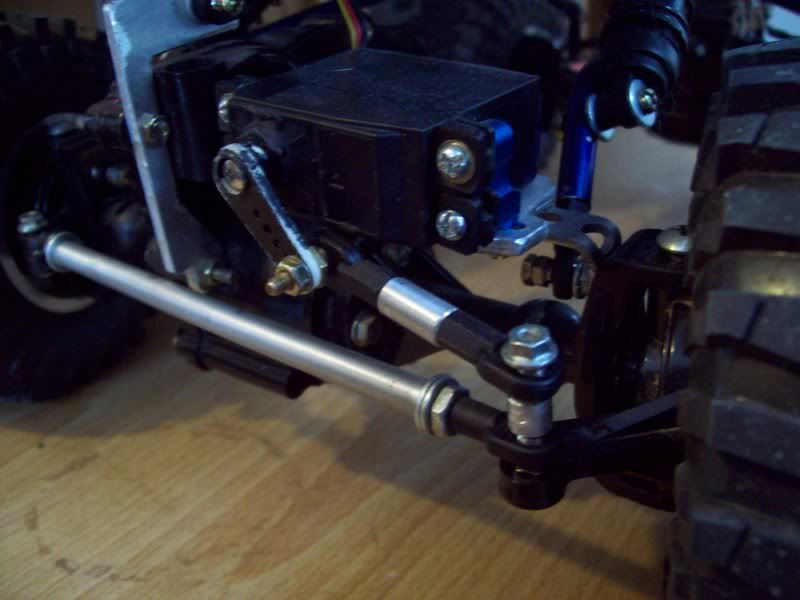 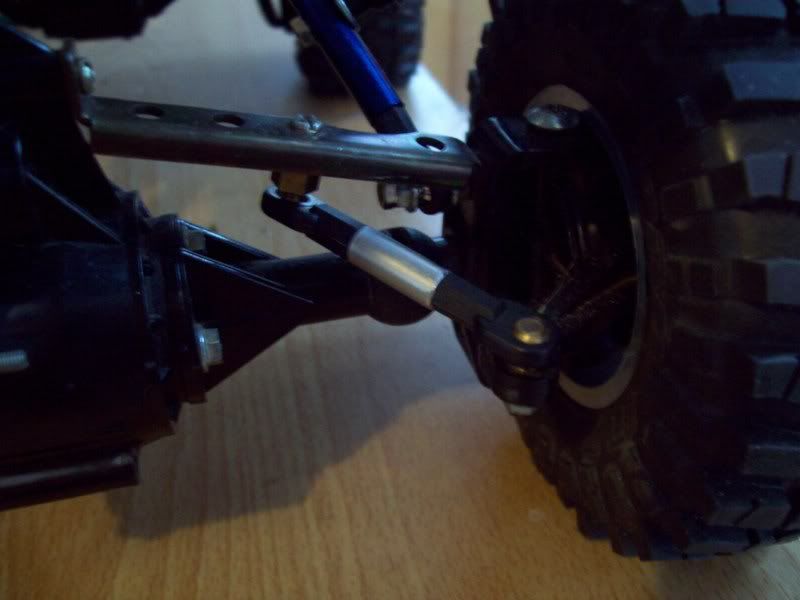 |
|
| |
|
12-24-2008, 11:23 PM
| #26 |
| Quarry Creeper Join Date: Apr 2008 Location: Fondy, WI
Posts: 498
|
you stole my idea about adding material to the lexan to make a more realistic top! it looks really good. i like your idea with the headlights. gotta love jeeps!
|
|
| |
|
01-09-2009, 07:13 AM
| #27 |
| Pebble Pounder Join Date: Jul 2008 Location: Denver
Posts: 148
|
Yeah, I'm sure someone else out there already had this idea, but I hadn't seen one out there. I originally wanted to build a "frame" and do a retractable style top for the whole rear of the body like real jeeps, but my fab skills aren't up to par for such a project just yet. Has anyone out there done this before? Something like this 1:1 http://www.quadratec.com/Assets/Imag...4/78884-lg.jpg |
|
| |
|
07-15-2009, 05:53 PM
| #28 |
| Pebble Pounder Join Date: Jul 2008 Location: Denver
Posts: 148
|
Well, It RUNS! And just over a year in the making. I will have pics/specs soon, maybe even a vid. All I can say is I am quite impressed with this things capabilities, and with a little tweaking I'm sure it will be a great performer. |
|
| |
|
07-19-2009, 07:53 PM
| #29 |
| Pebble Pounder Join Date: Jul 2008 Location: Denver
Posts: 148
|
It was a year in the making. Over the winter I didnt have much to do, so I worked on my rig. First was getting the steering the way I wanted, the short arm from the servo just wouldn't give it enough throw, so I reworked the mount and installed a longer tie rod to the other side, plus added a brace from underneath the servo to the case. When I installed the adjustable mounts, I had an issue with the high clearance arms hitting the motors, so I put my homemade links on the bottom and connected the shocks in the traditional way. The high clearance links are now on top, but will be replaced once my delrin links show up. I got a smoking deal on an LRP Ai super reverse speed control, 25 bucks shipped!, so that is now housed along with the reciever in the water tight radio box up high on the chassis. I am using the cheapest pistol type radio Futaba makes, made even cheaper by the miracle of ebay, so was the charger and batteries, a tower peak charger and four batteries for 30 shipped! This is definitely a budget build, but it performs better than I imagined! Poser shot: 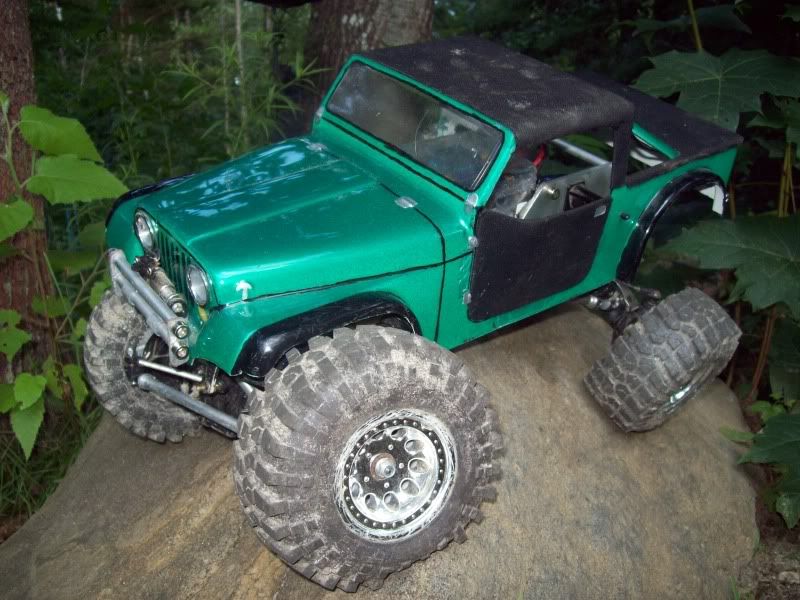 Ride height fully weighted: 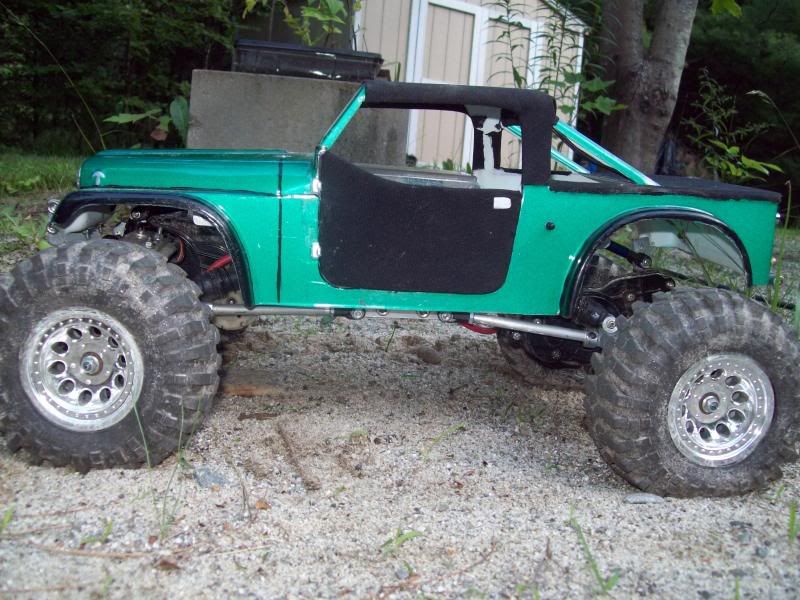 Radio box, siliconed shut:  Shock mount and servo mount: 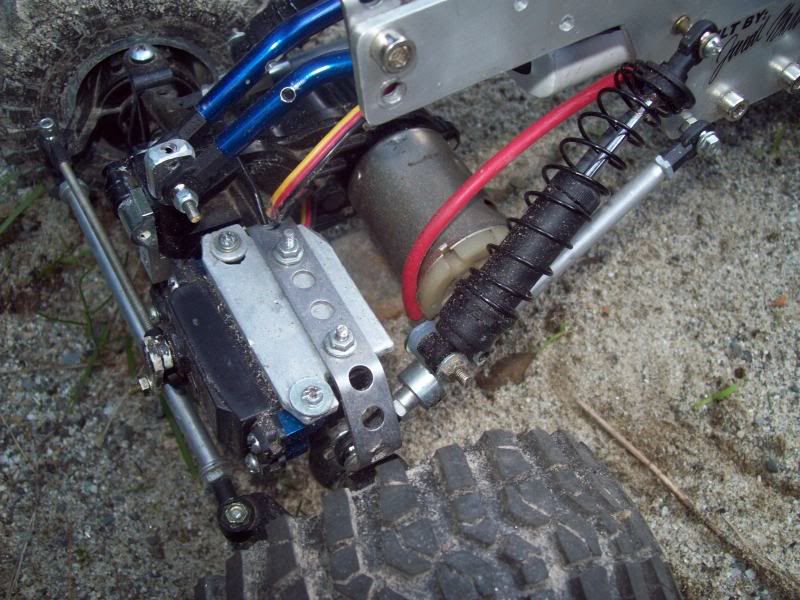 Lower shot of servo, here you can see the brace from the bottom: 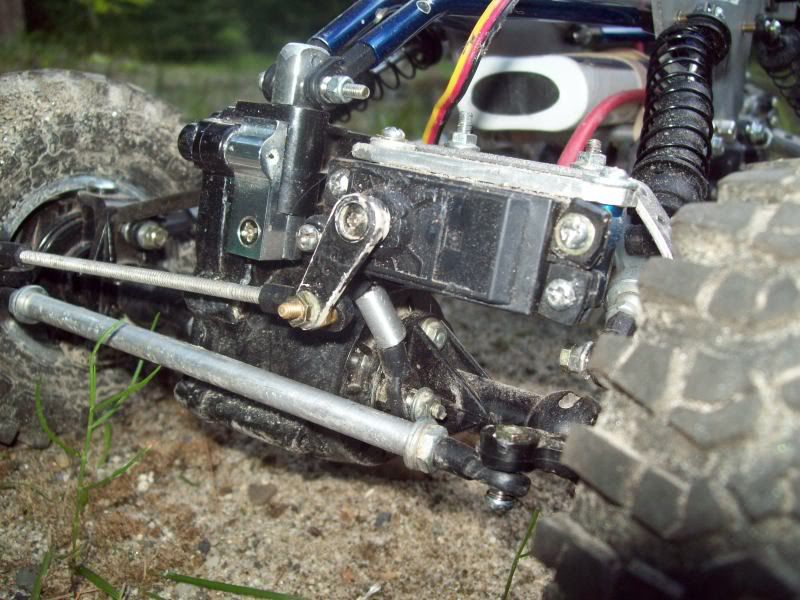 As always, its a work in progress. I have been driving and beating on it for a couple of days. It definitely takes a beating, but I have had some breakage. I have a fun course in my backyard with a few challenging lines, I have been impressed by this thing. Not much clod stall, though I do notice it some times. The stock 540 cans have plenty of torque, and I am glad I went with 8 tooth pinions. The Flatirons grip really well, even on wet slippery rocks. I cant wait to start on my next project, a tuber/scaler. Happy crawling! |
|
| |
|
10-08-2009, 10:19 AM
| #30 |
| Rock Stacker Join Date: Oct 2009 Location: Camp Hill
Posts: 76
|
How much does that thing weight?
|
|
| |
|
10-11-2009, 08:28 PM
| #31 | |
| Newbie Join Date: Jan 2008 Location: BAMA
Posts: 30
| Quote:
| |
|
| |
|
| |


 Linear Mode


