| |
| |||||||
 |
| | LinkBack | Thread Tools | Display Modes |
 08-22-2009, 03:21 PM
| #1 |
| Rock Crawler Join Date: Jan 2007 Location: Tuscaloosa
Posts: 855
|
I bought my CC-01 off ebay as a Pajero. I built the kit and have tweaked on it for a year or so. This summer we had a comp at Little Rock City with a CC-01 class. My little blue 'jero took home the trophy. Ever since then I have been thinking about putting a new body on it. Today I was walking through Target and found a New Bright LR3 sitting on the shelf for $49.99. Somehow it found its way to my house. Below is a link to the original build thread for chassis info. Blue Pajero getting ready for the summer scale comp This is how it looks as a LR3. 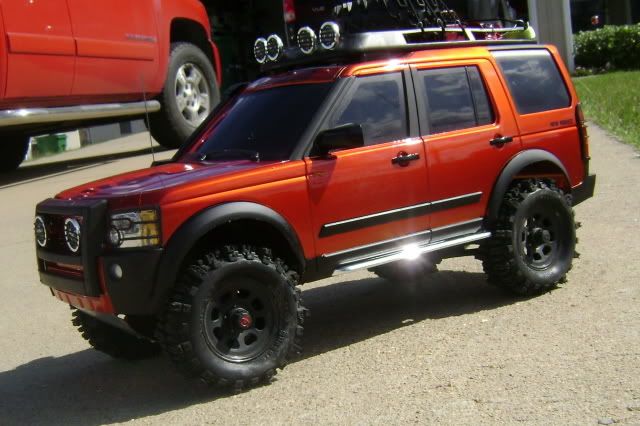 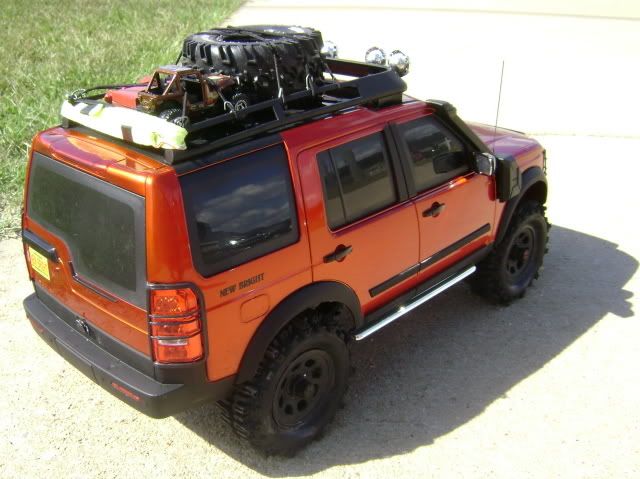 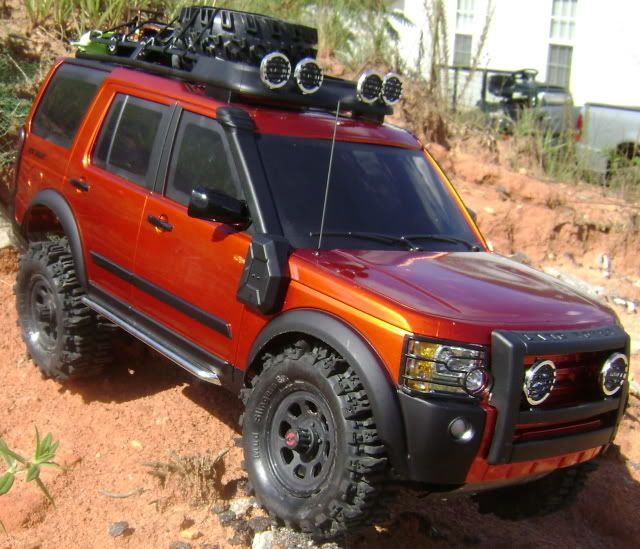 The body is mounted with two screws through the top of the wheel well that go into the holes used to hold the body on the New Bright chassis. I have lights and some more details to add later. Last edited by nascarkeith; 09-12-2009 at 08:23 PM. |

|  |
| Sponsored Links | |
| | |
|
08-22-2009, 04:23 PM
| #2 |
| I wanna be Dave Join Date: Aug 2007 Location: santa monica
Posts: 3,687
|
me likey!
|
|
| |
|
08-22-2009, 06:03 PM
| #3 |
| Rock Crawler  Join Date: Apr 2008 Location: Wrightsville, PA
Posts: 627
|
very nice!
|
|
| |
|
08-23-2009, 07:24 PM
| #4 |
| On the lookout for Rocks  Join Date: Mar 2006 Location: Monroe, Louisiana
Posts: 3,711
|
Way to make use of the "Cash for Clunkers" program. Now go out and scratch it up.
|
|
| |
|
08-24-2009, 06:42 PM
| #5 |
| RCC Addict Join Date: Mar 2009 Location: In a very dark cave can't you tell...
Posts: 1,708
|
Great looking truck and I love the little details to your rig. That scale down RC Truck up top was a great looking touch.  |
|
| |
|
08-31-2009, 07:15 AM
| #6 |
| Rock Crawler Join Date: Jan 2007 Location: Tuscaloosa
Posts: 855
|
Thanks to some good info from Pantablo and a trip up to the hobby shop, I got the stuff I needed to put a clear windshield in the LR3. 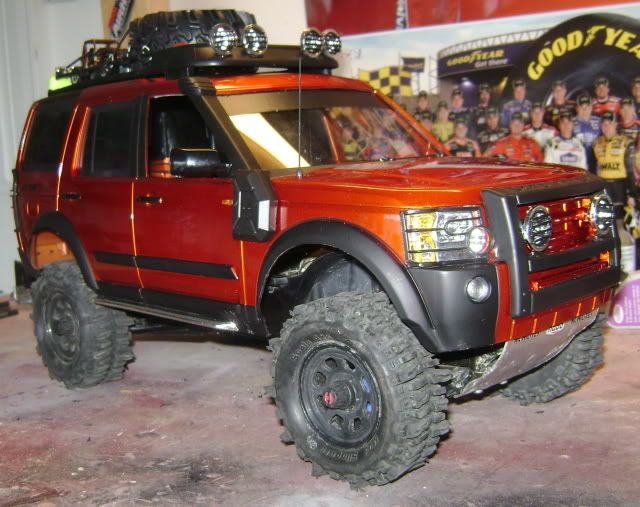 I cut the stock windshield out and replaced it with 0.60 lexan. Right now it is held in with hot glue because it sets up quick but I plan to go back and reinforce it with some Shoe Goo. I cut the side windows out and left the holes empty so it looks like the windows are rolled down. I plan to put some sort of interior in it. At least 2 seats and a dash. If I can get that much installed I will go from there. I also picked up the parts for a driveshaft. I tinkered with making a metal one but found it to be easier to just use Traxxas parts. They are laying on the workbench waiting for me to have time to build and install the driveshaft. I have had a couple pm's about how I mounted the body so here are pics of my mounting set up. 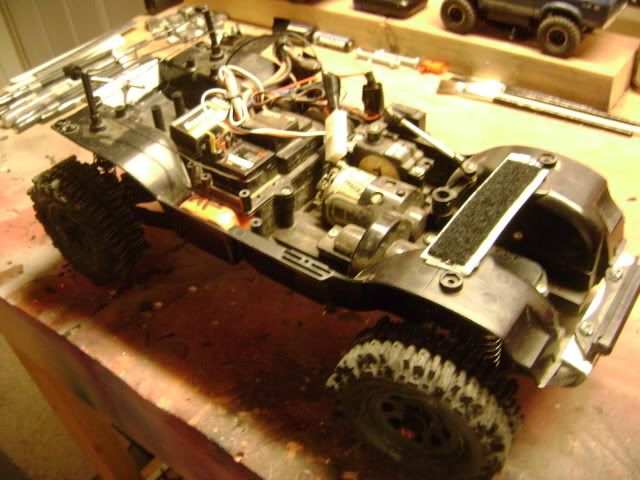 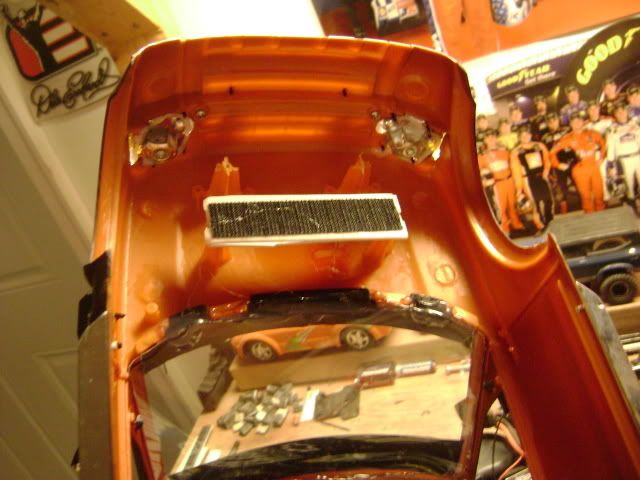 I used strips of styrene attached to the chassis wheel wells and to the stock mounting posts on the body. I attached the strips with screws and used mounting tape across the styrene to build up the height even with the top of the screw heads. I cut out a hole for the tape to fit around the screw head and covered with velcro. 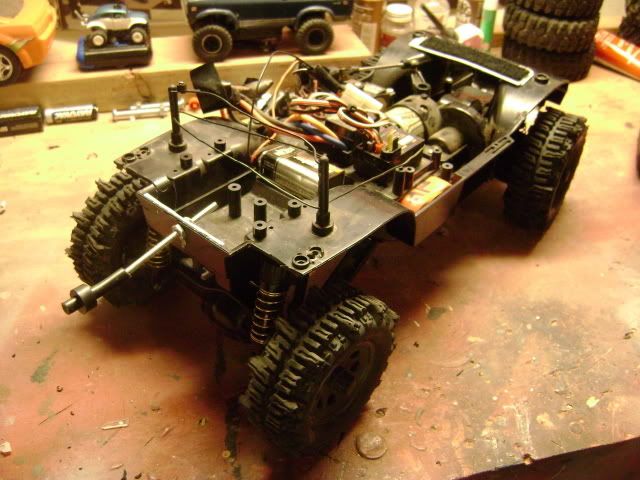 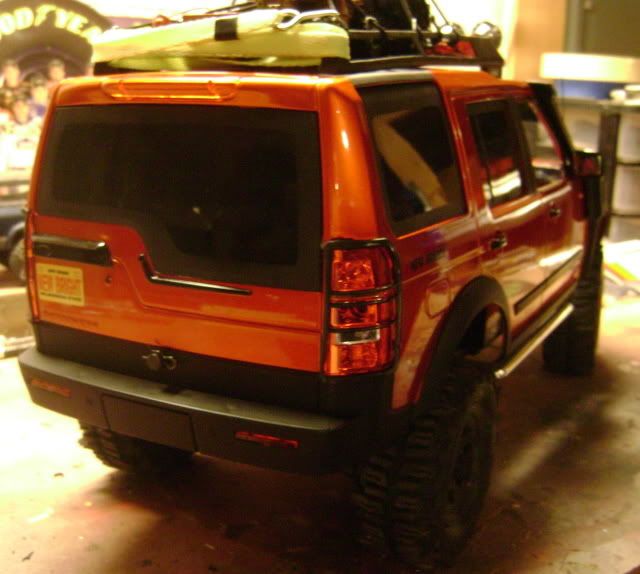 For the back I used threaded rod to extend the body posts and attached it to the chassis with some nuts on the threaded rod. It flexed a little too much for my liking so I had to stiffen the chassis with a piece of styrene Shoe Gooed in place. The single body post sticks out in the middle in the black area so it isn't that noticeable. While I was working I added a few more scale accessories. 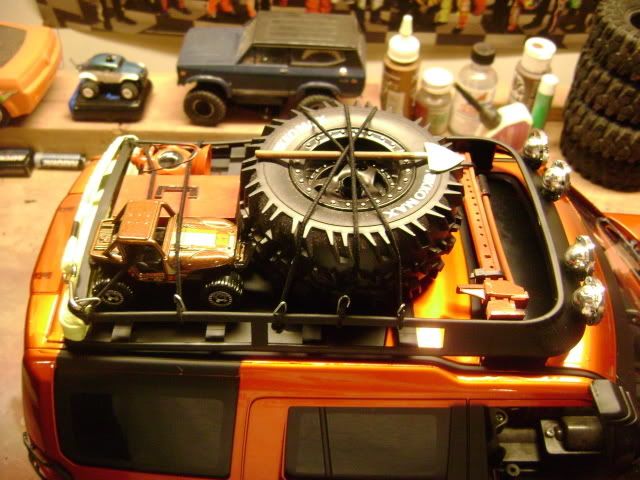 I added a Hi-lift jack and shovel. The spare is non-functional so I count 7 scale points right thar! Last edited by nascarkeith; 08-31-2009 at 07:17 AM. |
|
| |
|
09-01-2009, 06:46 AM
| #7 |
| Rock Stacker Join Date: Jun 2009 Location: singapore
Posts: 65
|
Looks GOOOOOD! Now how bout a video of it in action? |
|
| |
|
09-04-2009, 12:15 PM
| #8 | |
| Rock Crawler Join Date: Jan 2007 Location: Tuscaloosa
Posts: 855
| Quote:
I gotta get it all finished up and take some poser pics before I go out scratching that shiny paint. | |
|
| |
|
09-12-2009, 08:20 PM
| #9 |
| Rock Crawler Join Date: Jan 2007 Location: Tuscaloosa
Posts: 855
|
I got a break from teaching and coaching to work on a little rc stuff so here is a small update. I used the Traxxas parts I picked up to build a driveshaft so its a driver again. While I was at it I rearranged the electronics to fit them under the floor board of the interior I will be putting in. I cut the 2 posts sticking up in the back out and covered the recessed area with some styrene. That is where the ESC and receiver are mounted. The 9 volt for the lights was relocated to the front. I had the lights wired to a tamiya connector on the Pajero body so I could remove it if I needed to. That is the plan with the LR3 as well. 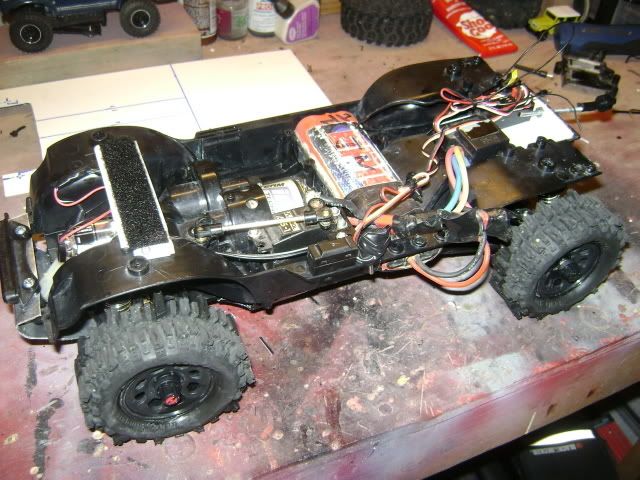 Then, I cut a piece of styrene for the floorboard. It attaches with screws through the body post holes. In the rear I have 2 body posts to run the antenna through. When everything is blacked out you want see that. 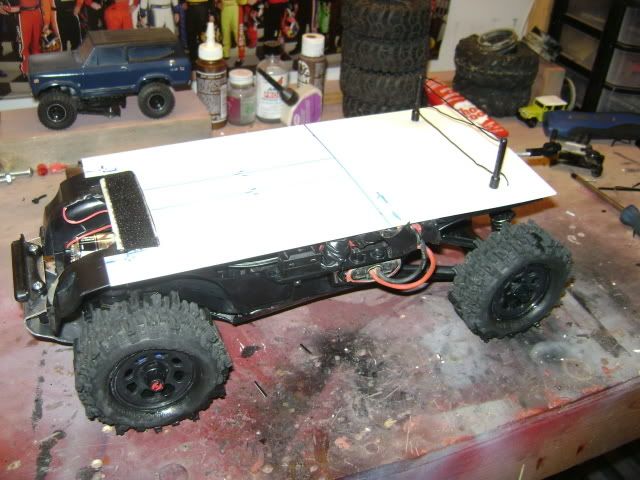 I plan on building a dash and attaching it to the body. The floorboard will have seats and a center console. Probably gonna add a driver figure as well. Last edited by nascarkeith; 09-12-2009 at 08:24 PM. |
|
| |
|
09-12-2009, 08:46 PM
| #10 |
| Pebble Pounder Join Date: Nov 2008 Location: Reno NV
Posts: 100
|
Can you take a photo of the body mounts a little closer, I need to mount my lR3 on and dont know how. Thanks James ps mainly the rear as the front is clear |
|
| |
|
09-13-2009, 06:52 PM
| #11 | |
| Rock Crawler Join Date: Jan 2007 Location: Tuscaloosa
Posts: 855
| Quote:
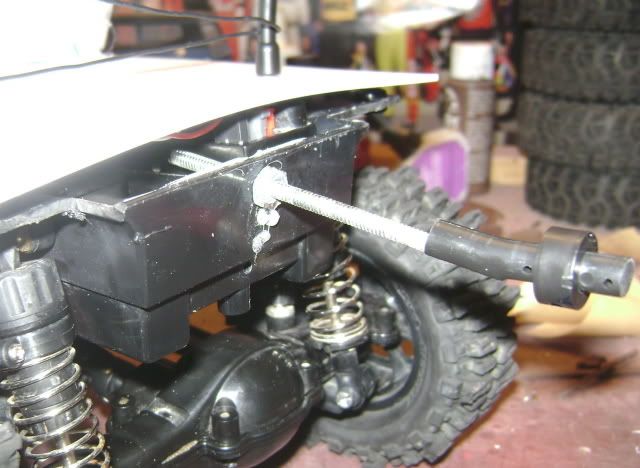 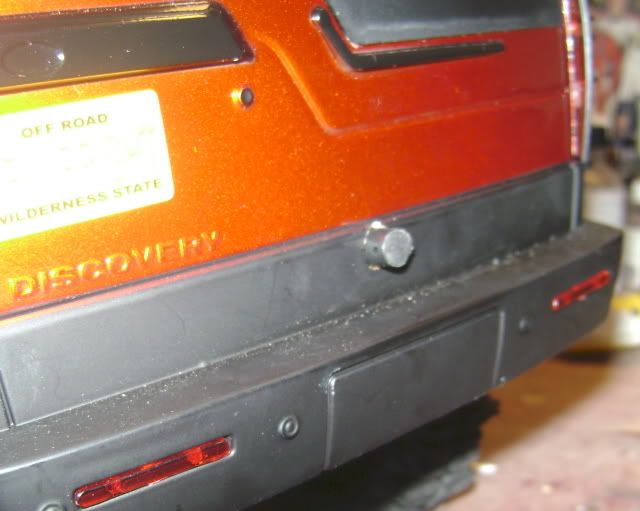 I took a piece of styrene and glued it in place on the back of the chassis to reinforce it. Then, I drilled a hole and ran threaded rod through it to extend a generic body post I had laying around. I secured the threaded rod with nuts on both sides of the chassis. After all that, I drilled the hole in the body post to fit the threaded rod and put it on. The body post runs through a single hole in middle of the body. I hope all that helps. Here is a little update on the interior. Its a little rough but some filler and sanding will fix that. 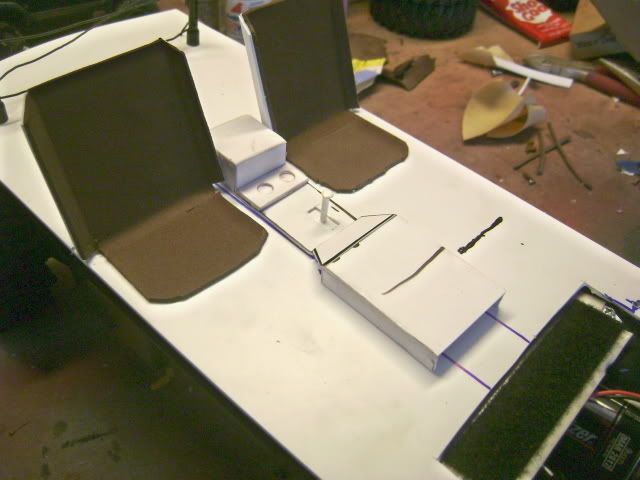 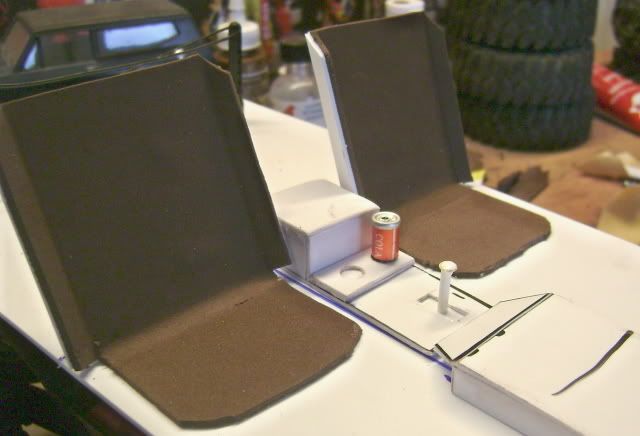 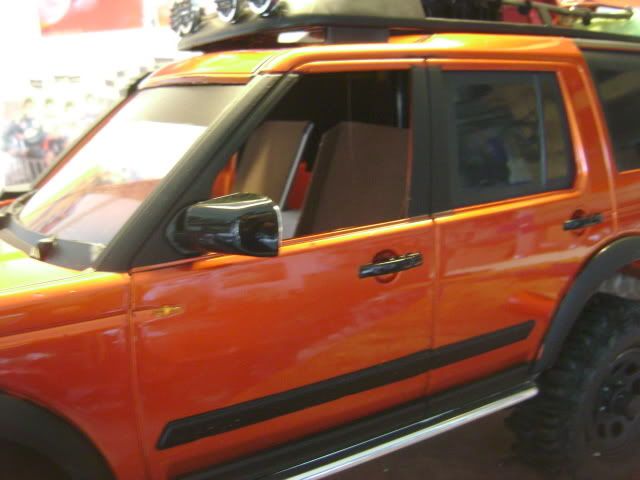 I made the console, cup holders, and shifter out of styrene. The seats are styrene covered with sticky back foam. There is a lot left to do but I think its a good start. | |
|
| |
|
09-13-2009, 06:57 PM
| #12 |
| Pebble Pounder Join Date: Nov 2008 Location: Reno NV
Posts: 100
|
That helps, Thanks The interior looks great, keep up the good work |
|
| |
|
11-09-2009, 08:57 AM
| #13 |
| Rock Crawler Join Date: Jan 2007 Location: Tuscaloosa
Posts: 855
|
I had some time over the weekend to work on the LR3. I got the interior finished up and added me a driver. 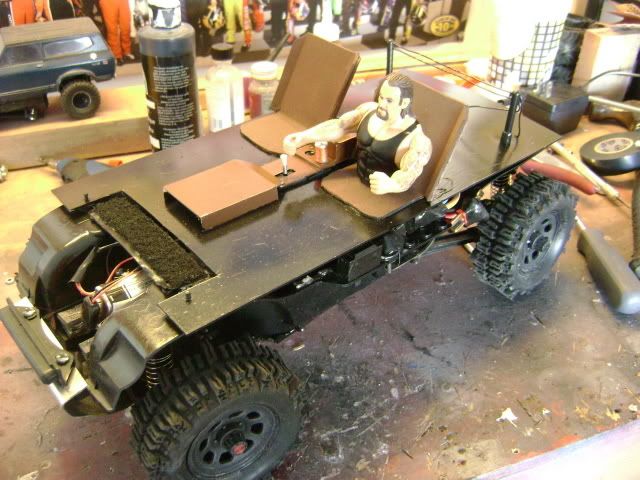 I think the interior looks pretty good with the body on. 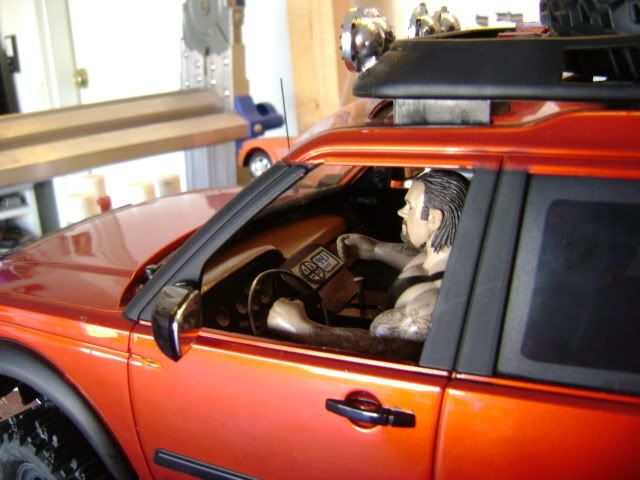 With things finished up it was time for a little crawling. 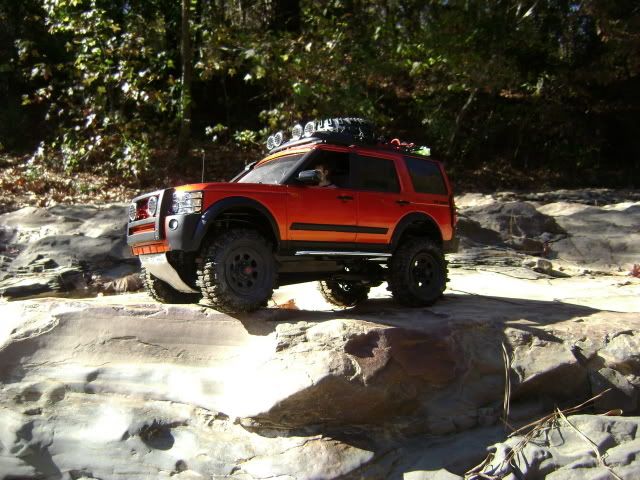 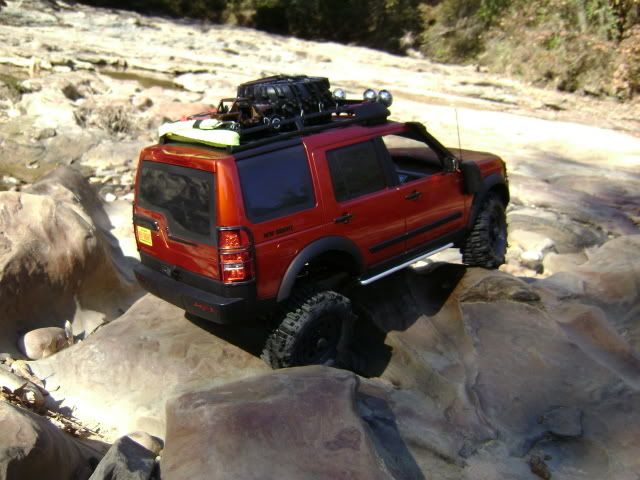 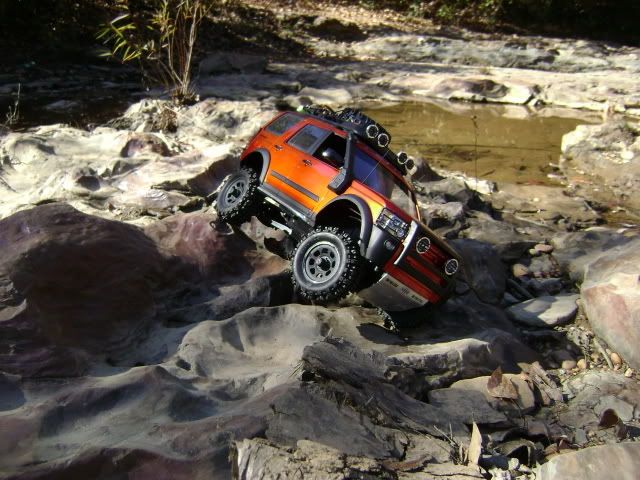 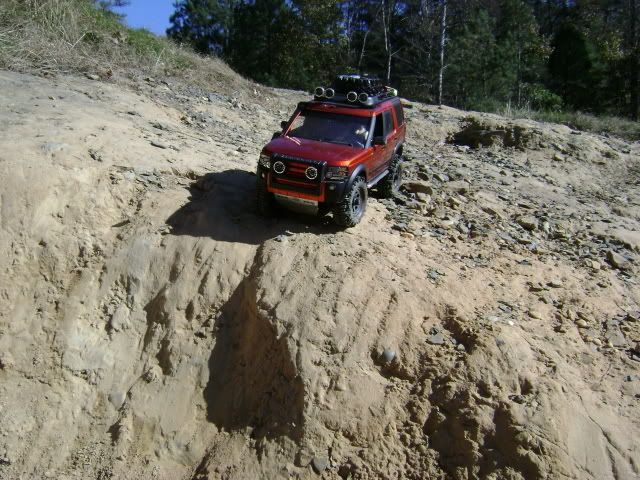 |
|
| |
|
11-10-2009, 05:29 AM
| #14 |
| Newbie Join Date: Nov 2009 Location: WOODSTOCK
Posts: 27
|
that is pretty cool. Do you have any issues running your antenna that way with limited distance? I'm seeing it alot lately and did not know if there was an added bonus to it. Thanks |
|
| |
|
11-10-2009, 08:40 AM
| #15 | |
| Rock Crawler Join Date: Jan 2007 Location: Tuscaloosa
Posts: 855
| Quote:
No problems at all. Added bonus is you don't see it. | |
|
| |
|
11-10-2009, 10:01 AM
| #16 |
| I wanna be Dave Join Date: Aug 2007 Location: santa monica
Posts: 3,687
|
That looks really good!
|
|
| |
|
11-12-2009, 09:38 AM
| #17 | |
| Rock Crawler Join Date: Jan 2007 Location: Tuscaloosa
Posts: 855
| Quote:
| |
|
| |
|
11-12-2009, 10:01 AM
| #18 | |
| I wanna be Dave Join Date: Aug 2007 Location: santa monica
Posts: 3,687
| Quote:
 I just have the one...Range Rovers, thats another story... | |
|
| |
|
11-12-2009, 07:09 PM
| #19 |
| Rock Crawler Join Date: Jan 2007 Location: Tuscaloosa
Posts: 855
| |
|
| |
|
11-14-2009, 06:45 AM
| #20 |
| Quarry Creeper Join Date: Aug 2009 Location: australia
Posts: 230
|
hey man great vid an well done on the build i think i need an lr3 now thanks lol
|
|
| |
|
| |


 Linear Mode


