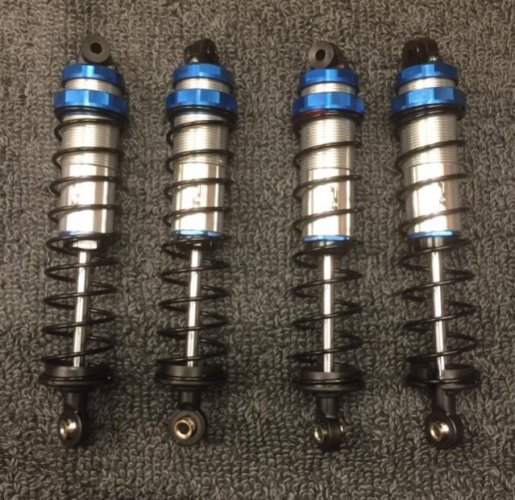
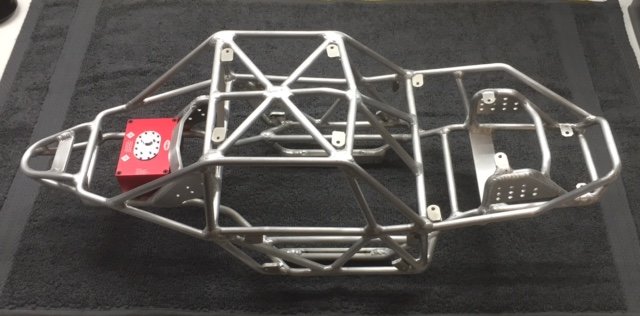
I finished getting my ESC shelf fabricated, and my SCX10 bomb proof tranny assembled and installed today. I actually made some decent progress on the BGR Bomber today! "thumbsup"
The ESC shelf that I fabbed up was pretty simple. I'm using the DMG tranny adapter plate in the BGR Bomber so I can run a SCX10 tranny.
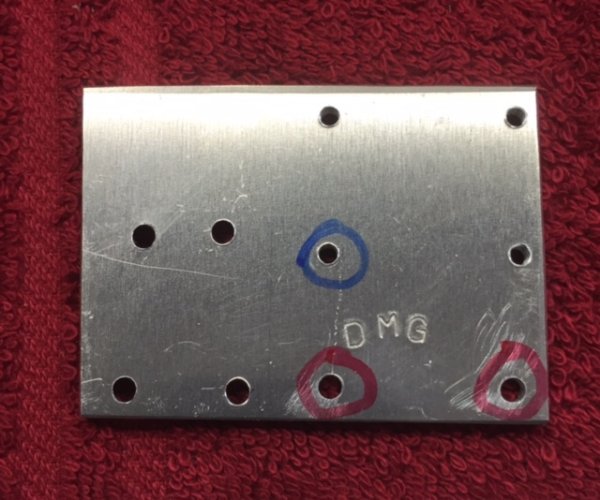
I had to mock the SCX10 tranny up on the DMG adapter plate and install it on the Bomber skid. This had to be done to figure out where I needed holes drilled for the long, internally threaded spacers. I used a black sharpie and made reference marks for the top of the ESC shelf. After mocking it up, I figure out that I would use one existing hole in the DMG adapter plate, and I would have to drill two other holes myself.
The two holes that I have the red circles around, where the ones that I had to drill. I drilled them with a 1/8" bit.
The one hole with the blue circle around it is an existing hole in the DMG adapter plate. It's actually one of the threaded holes that attaches the adapter plate to the Bomber skid.
I found some 25mm (.98") internally threaded aluminum spacers on RC4WD. The only ones I could find in that length were anodized black. So, with some Greased Lightning and about 20 minutes, I had the anodizing removed and had raw aluminum spacers!
I'm using three of the four spacers that came in the package.
With the holes drilled in the DMG adapter plate and figuring out that I was going to use one of the existing threaded holes in the adapter plate, I found a piece of 1/6" aluminum that was 1 1/2" wide. I cut it down to 1 1/2", so it ended up a square at 1 1/2".
I positioned the 1 1/2" X 1 1/2" piece of aluminum on the adapter plate, using the black sharpie reference marks to get it where I wanted it. I clamped the two pieces together so I could make marks to drill the holes in the 1 1/2" X 1 1/2" piece of aluminum, which will be the top of the ESC shelf.
After marking where the holes needed to be drilled, I pulled the clamps off and drilled three 1/8" holes in the top of the ESC shelf, and counter sunk them.
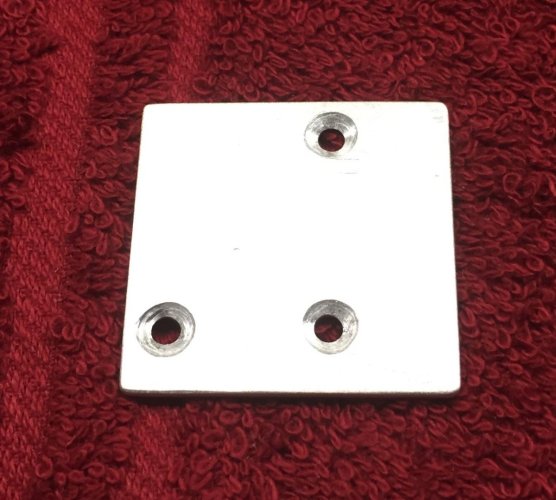
After a little sanding and clean up, the components for the ESC shelf were completed!
Now I had to assemble the tranny and get it mounted to the DMG adapter plate.
I decided to use the SCX10 tranny with extended rear outputs. Going this route is so much easier!
Here's what the tranny consists of....
VP clear anodized aluminum SCX10 tranny housing
SuperShafty Ultimate motor plate
HR hardened steel top gear
Robinson Racing hardened steel idler gear
Robinson Racing hardened steel diff gear
Crawler Innovatios extend outputs (5mm shafts)
Locked Up RC slipper eliminator kit
Avid RC Revolution bearings
Duratrax 56t 32p plastic spur gear
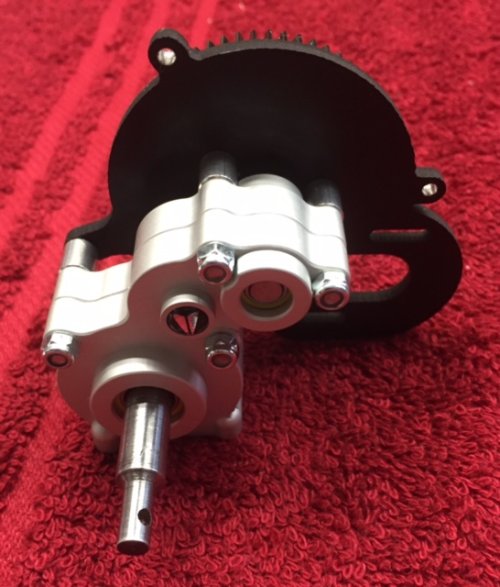
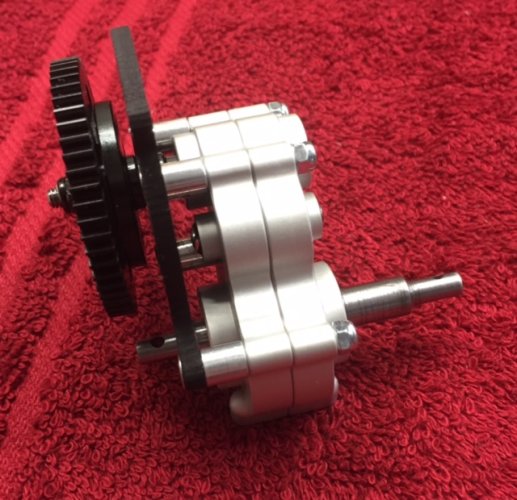
I installed the tranny on the DMG adapter plate, and then I installed two of the three 25mm aluminum spacers.
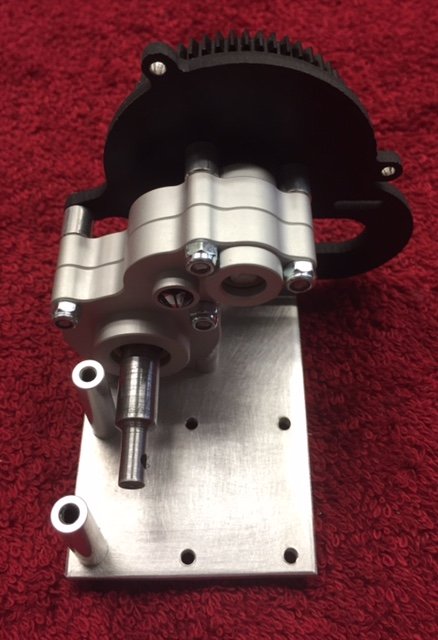
Then I installed the adapter plate, tranny and ESC shelf assembly onto the Bomber skid. After that was installed, I added the third 25mm spacer. I used a longer screw so when it was put through the Bomber skid and threaded through the adapter plate, I had about 8mm of exposed threads to screw on the third 25mm spacer.
The last thing was to installer the top of the shelf onto the three spacers! The tranny and ESC shelf was now complete!
I was kinda proud of myself after it was finished! LOL!! I didn't think it turned out too bad! It's very rigid, and should be plenty of room to mount a nice size ESC on it, and fit under the Bomber interior panel!! :mrgreen:
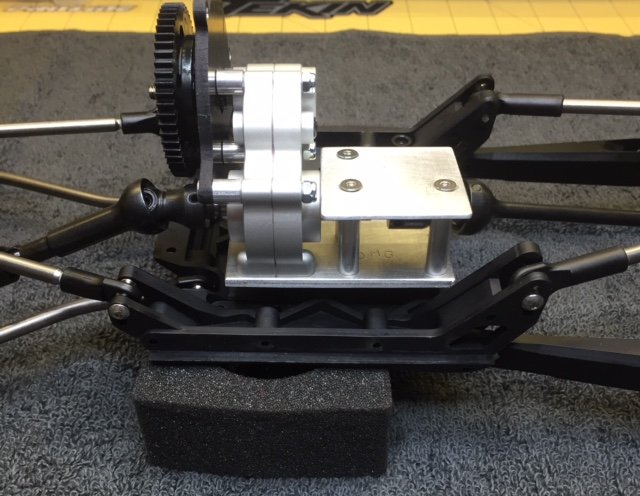
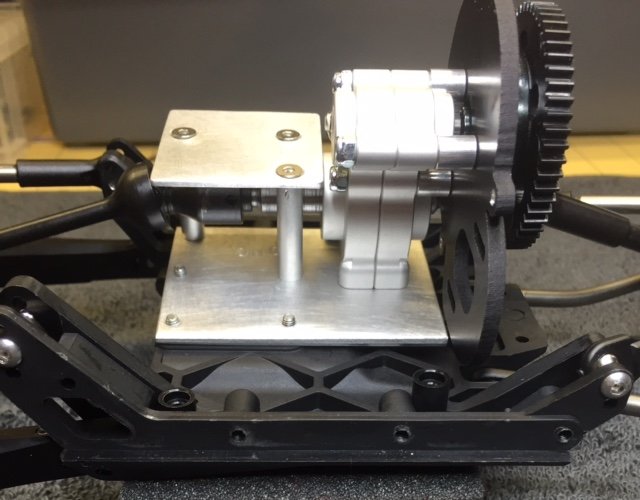
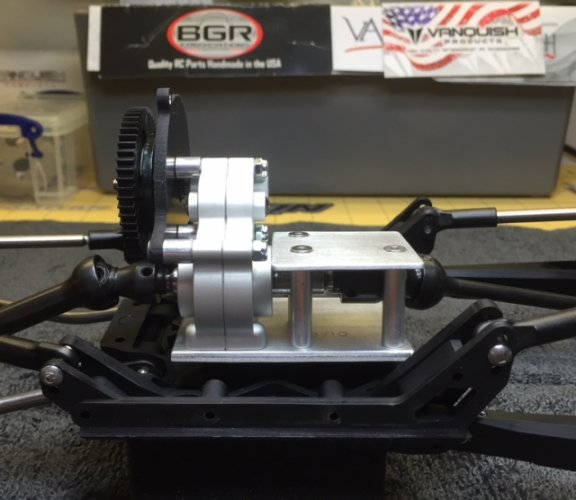

The extended rear output and MIP Yeti rear drive shaft easily clears the ESC shelf!!
Here's a full view of the drivetrain (without motor and ESC)!!

Next up....
Getting oil in the Pro Line Pro Spec shocks and getting them mounted.
Mount the RC4WD aluminum fuel cell to the chassis.
Get the VP sway bar installed on the chassis.


