• Welcome to RCCrawler Forums.

    It looks like you're enjoying RCCrawler's Forums but haven't created an account yet. Why not take a minute to register for your own free account now? As a member you get free access to all of our forums and posts plus the ability to post your own messages, communicate directly with other members, and much more. Register now!

    Already a member? Login at the top of this page to stop seeing this message.

2-shot's BGR Fabrications Bomber Build - "Bombdiggity"

Good stuff sir. Much amounts of awesome in that cage. BGR is shipping mine Monday.

ESC mount is nicely engineered. Stealing that one! ;-)


Thank ya, sir!!

Yeah, after you get your BGR chassis, you'll spend a day or two just admiring it!! Then you'll start building!! [emoji106]
LOL!!


Sent from my iPhone using Tapatalk
 
I'm going to get one just as soon as I get the other 11 RC projects I have waiting done! LOL! Meanwhile I'll live vicariously through you and the "Bombdiggity" build!


Ahhh yes!! The Bombdiggity!! Bill and I came up with that name when he was building the prototype!! LOL!!!


Sent from my iPhone using Tapatalk
 
@ the driveshafts hitting, thanks! It only makes sense to stick with a tranny I already know and have parts for. SCX tranny then.

@ the trailing arms, LOL! I want trying to point it out, but I was trying to find out if there was an advantage of having them oriented that way.

Thanks for the help!
 
@ the driveshafts hitting, thanks! It only makes sense to stick with a tranny I already know and have parts for.

@ the trailing arms, LOL! I want trying to point it out, but I was trying to find out if there was an advantage of having them oriented that way.

Thanks for the help!


I agree! So much easier, in my opinion! Plus the DMG adapter plate isn't expensive, so you might as well!
The only thing with running the SCX10 tranny, you'll need a set of extended output shafts. Basically the same setup if you were to run a SCX10 tranny in a Wraith.

Oh! I know you weren't pointing them out!! LOL!! No worries with that!!
I'm glad you said something, or I would have ran them upside down!!
Nope! No advantage to running them upside down (to my knowledge). Just me not paying attention!! [emoji4]

If you have any more questions, or see something that doesn't look quite right, please don't hesitate to ask (or even point it out)!! [emoji106]


Sent from my iPhone using Tapatalk
 
If you have any more questions, or see something that doesn't look quite right, please don't hesitate to ask (or even point it out)!! [emoji106]

You know somebody's gonna say what doesn't look right is that it's on your workbench and not mine.

Looks awesome so far. Looking forward to more progress.
 
So... I got the trailing arms flipped over and installed correctly! [emoji106]
I feel like such a doofus! LOL!!
Thanks to fatroofus for inquiring about the trailing arms being installed upside down! [emoji106]

I was having an issue with the rear axle not articulating side to side like it should. So, a couple of very helpful guys on a VP Facebook page helped me figure that problem out.
Come to find out, I had the pivot balls too tight in the trailing arms! I thought that I had them loose enough when I assembled them, but I was wrong!!
Now I have great articulation in the rear axle!
Time to move on!

Updated pic of the trailing arms installed correctly.

6aef6f45018116f1bce2169cd619b5dd.jpg


Sent from my iPhone using Tapatalk
 
I just wanna give a shout out to ScaleReady and fr8cture for their help last night!
Thanks again, guys! [emoji106]


Sent from my iPhone using Tapatalk
 
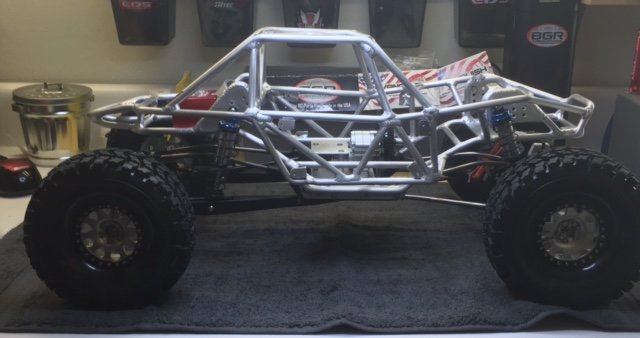
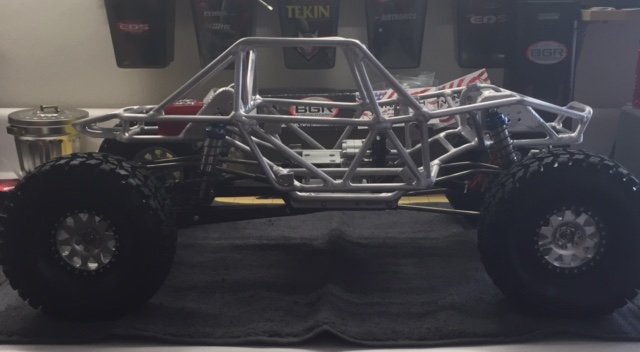
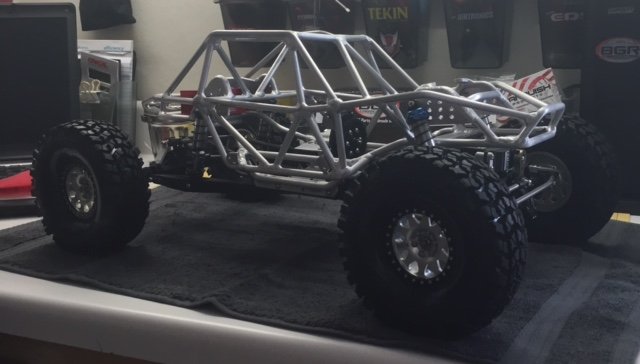
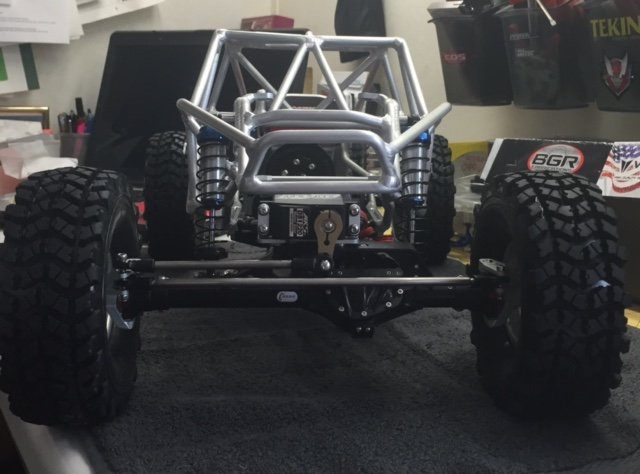
Ok.., So, I couldn't help it!! My curiosity got the best of me!! :mrgreen:

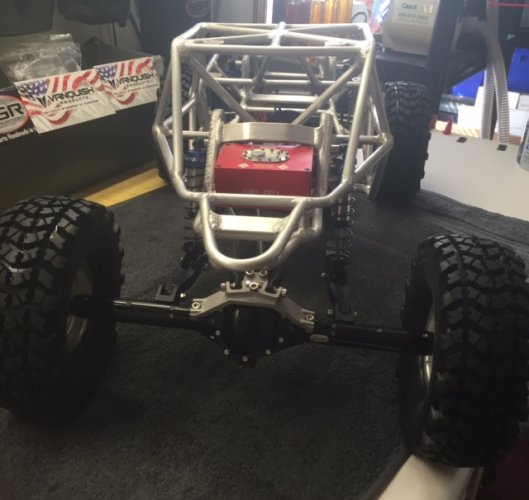
I have this aluminum BGR Bomber chassis that's pure artwork, just sitting there looking pretty! Then, I have this Bomber skid with all of these nice parts attached to it!
I gotta see what those two look like together, with some wheels and tires on it!! :twisted:

Please excuse my pics. They're not the best, I know! The lighting on my work bench isn't real great, especially for taking pics.
Also, please excuse my cluttered work bench. It always starts out clean and organized before I start a big build, but once I get into the build, it becomes cluttered! :ror: By the time the build is finished, you can see the bench top!! :lmao:

As it sits now, I would like to lower the ride height on the front and rear, just a tiny bit. I still have to add my motor and esc to it. Plus the 3s lipo in the front, and the spare wheel and tire on the back. Those will add some more weight to it, so I'll wait and see what those do for the ride height, before I make any big adjustments.


mockup1.jpg

mockup2.jpg

mockup3.jpg

mockup4.jpg

mockup5.jpg
 
I was one of those guys on facebook. (Eric) :ror: Looking sweet.

Edit: I see you figured out my screenname above. :lmao: :mrgreen:
 
I was one of those guys on facebook. (Eric) :ror: Looking sweet.

Edit: I see you figured out my screenname above. :lmao: :mrgreen:

:lmao: Yeah, I kinda put 2 and 2 together!! I saw stuff that you had for sale on here, and then saw it on FB for sale! That's how I figured it out! :ror:

Thanks for the compliment! I appreciate it! "thumbsup"
 
Those pictures are great, and like you said; the silver link mount does tie it all together well.

I have not used the pro-spec's myself, and i love powerstrokes. I think I will need to try some now after seeing yours. "thumbsup"

And yep, I have outputs for days from SuperShafty.com. I guess I need to hit up DMG! :twisted:
 
I'm waiting on some parts, so hopefully I'll be posting more build pics and info within the next couple of days!

Stay tuned...


Sent from my iPhone using Tapatalk
 
I had the day off from work today. My wife was at work and the kids were at school, so I had the house to myself! :twisted:
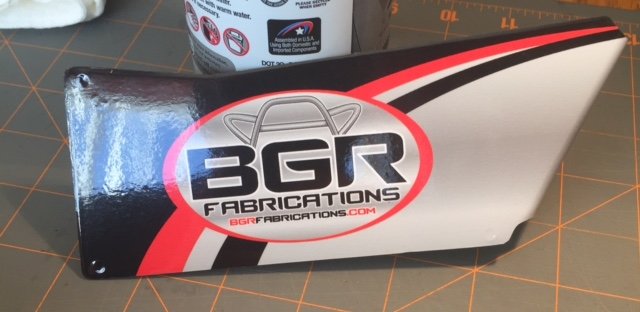
It was a good opportunity to get some work done on the Bombdiggity! "thumbsup" I figured it would be a great time to get the custom BGR Fabrications skins installed on the body panels.
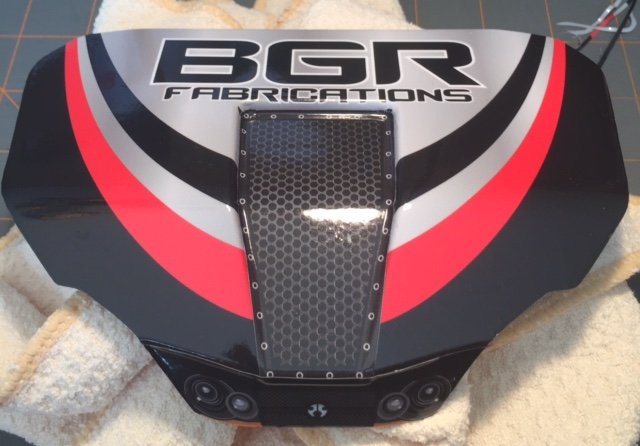
The skins are from FreqEskinz. They did an awesome job on the design! Bill and I wanted something custom, but nothing too "busy" in the design. FreqEskinz came through with a sleek looking design that accents the raw aluminum chassis!

I'm using the stock Lexan side panels and hood, on the BGR Bomber chassis. The stock Lexan roof panel doesn't fit the chassis well, due to the roof being a little wider on the BGR Bomber chassis. Bill ripped me out an aluminum roof panel that fits the chassis! "thumbsup"
I did have to trim the hood panel so it would fit the BGR chassis, as you'll see in the pics. The side panels only needed some slight trimming to get them to fit.

I painted the Lexan panels black, as normal. I didn't paint the aluminum roof panel. No need to paint the aluminum if your using skins on the body. I actually painted the panels last weekend, so they had all week to cure. I gave all of the panels a good washing with dish soap and water, and let them dry. I cleaned the outside (the skins side) of the panels with denatured alcohol right before I started installing the skins. This is recommended in the installation instructions that came with the skins.

I started with the two side panels, being they were the easiest. The skins went on the panels great! They're simple to install, you just have to take your time with them. Patience is the key with these! After I applied the skins to the two side panels, I spent a little time working out any air bubbles, trimming the skins around the outside of the panel, and clearing out the mounting holes.
I was really pleased with the outcome on the two side panels! "thumbsup"

skinz 1.jpg
skinz 2.jpg


After the side panels, it was time to attack the hood! I knew the hood would be the most difficult skin to install, due to the hood design, and the skins being in 3 pieces!
After a quick wipe down with denatured alcohol, I started installing the hood skins. The hood took me a little longer, but I expected it would.
skinz 3.jpg

Last was the aluminum roof panel. This one was a bit easier than the hood. The aluminum roof panel is primarily flat, so the skin went one without any issues!
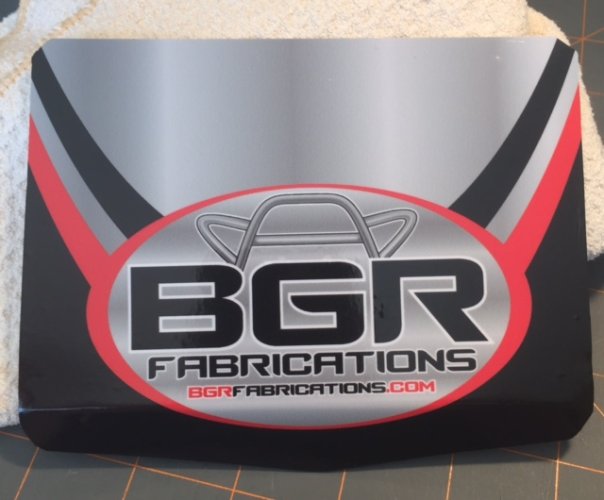
skinz 4.jpg

After the panels were finished, I had no other choice but to mount the panels on the BGR chassis to get the full effect! ;-)
I have to say, I was even more pleased with the final product! I am going to add a couple small Vanquish Products decals to the skins! "thumbsup"
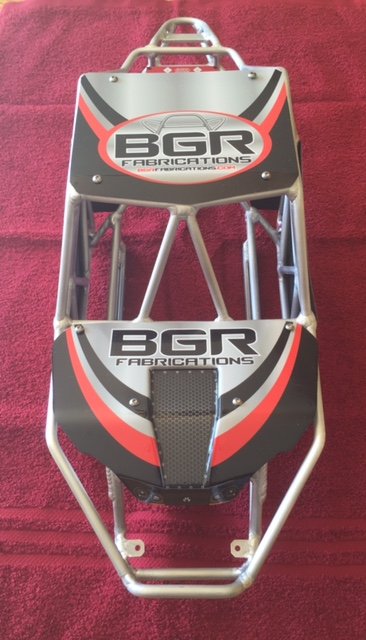
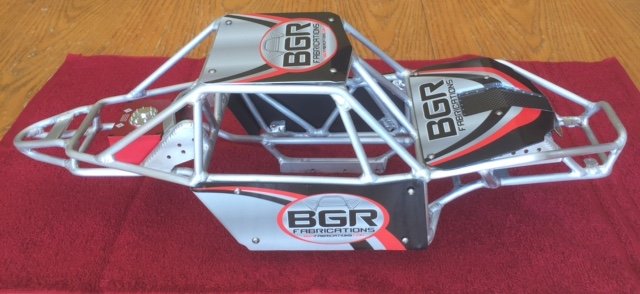
skinz mockup1.jpg

skinzmockup2.jpg

So far, the build has been going great - no major hurdles yet! I've had a few small things here and there, but nothing major!

Next on the agenda is getting the Bomber interior panel trimmed to fit the chassis. I want to get this completed tomorrow (Saturday) and ready for paint. We're supposed to have a couple really nice days next week, so I would like to get the interior panel ready to go! "thumbsup"
 
:shock::shock: "thumbsup""thumbsup"

That turned out amazing. As you said not too busy but blends with that chassis perfectly. Looking forward to more.

For us custom chassis noobs what are these small hurdles you ran into?
 
:shock::shock: "thumbsup""thumbsup"

That turned out amazing. As you said not too busy but blends with that chassis perfectly. Looking forward to more.

For us custom chassis noobs what are these small hurdles you ran into?


Thanks Mike! [emoji1303]

I couldn't be any happier with BGR custom skins! I think FreqEskinz nailed it!

Honestly, the small hurdles I ran into were from things other than the custom chassis. Bill completely mocked up his prototype, so he and I knew exactly what needed to be done on the build, as far as the chassis was concerned.
The small hurdles I ran into were things like esc placement (esc shelf I made), a small issue with the VP Yeti trailing arms (which was my fault), and getting the interior panel trimmed properly to clear the tranny and fit the chassis correctly (there again, my issue).

So the small hurdles I ran into, were things that was my fault, or I knew that it would take some minor "engineering" to accomplish.


Sent from my iPhone using Tapatalk
 
So.... It's been a little while since I've posted any updates! I've been super busy with family stuff (the kids mainly)! :ror:

I've been working on getting the stock Bomber interior panel trimmed up, so it will fit in the BGR Bomber chassis. This has taken a lot more time than what I was anticipating, but I finally got it! "thumbsup" I got it all trimmed up, and and painted Saturday! I'm going to let the paint cure for a few more days, then I'll apply the decals and get it installed in the chassis! The interior fits tight in the chassis, but it's going to take a little "engineering" to get it completely secured. I have a couple ideas for it, so we'll see what happens.

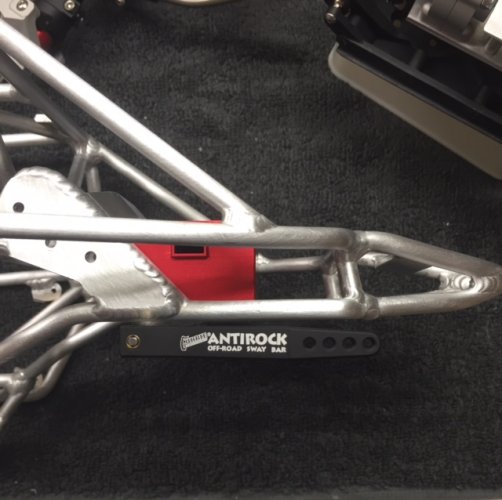
As for tonight, I had a few minutes of "me" time, so I got my Currie anti rock sway bar installed. The directions say to let the blue loctite cure for 24 hrs, on the sway bar set screws. So, I'm gonna let it sit over night and let the loctite cure.

Currie sway bar.jpg

Bill is welding me up a T-handle for my spare tire. I should get that in a few days. "thumbsup" I can get the hole drilled for the 4mm bolt and T-handle.

After the interior is installed, I can start getting the electronics mounted and wired up. "thumbsup"
 
Back
Top