| |
| |||||||
 |
| | LinkBack | Thread Tools | Display Modes |
 02-07-2012, 08:55 PM
| #1 |
| Rock Crawler Join Date: Apr 2005 Location: Upland
Posts: 546
|
So I've had this Nikko Toyota truck body for a while and decided to do a build project. The body is smaller than the normal Tamiya Hilux body so 1.55 wheels is perfect. Here are the rough specs: - RC4WD 1.55 wagon wheel beadlocks - Proline 1.9 Super Swampers that have been cut down and glued - Nikko Toyota cab - RC4WD planetary transmission and transfer case - Losi MRC axles (upgraded) - Axial chassis with custom tube work - Plus more that I haven't thought about yet Here are a few iPhone photos so this thread isn't completely useless. I'll take better quality photos as I get more done. 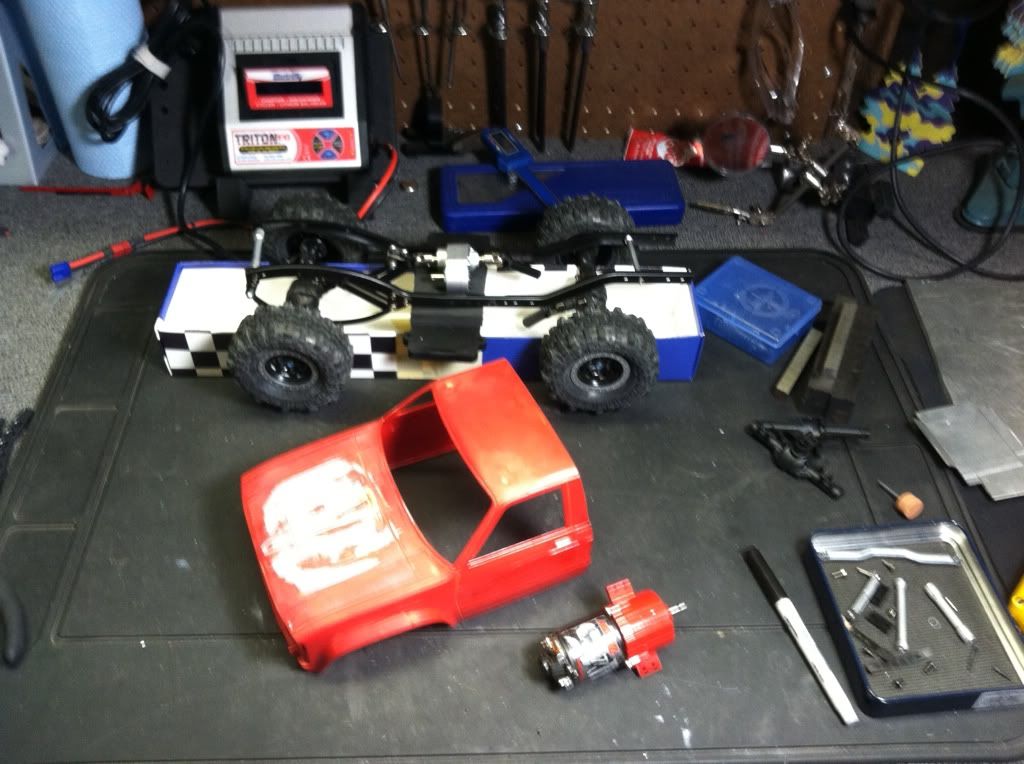 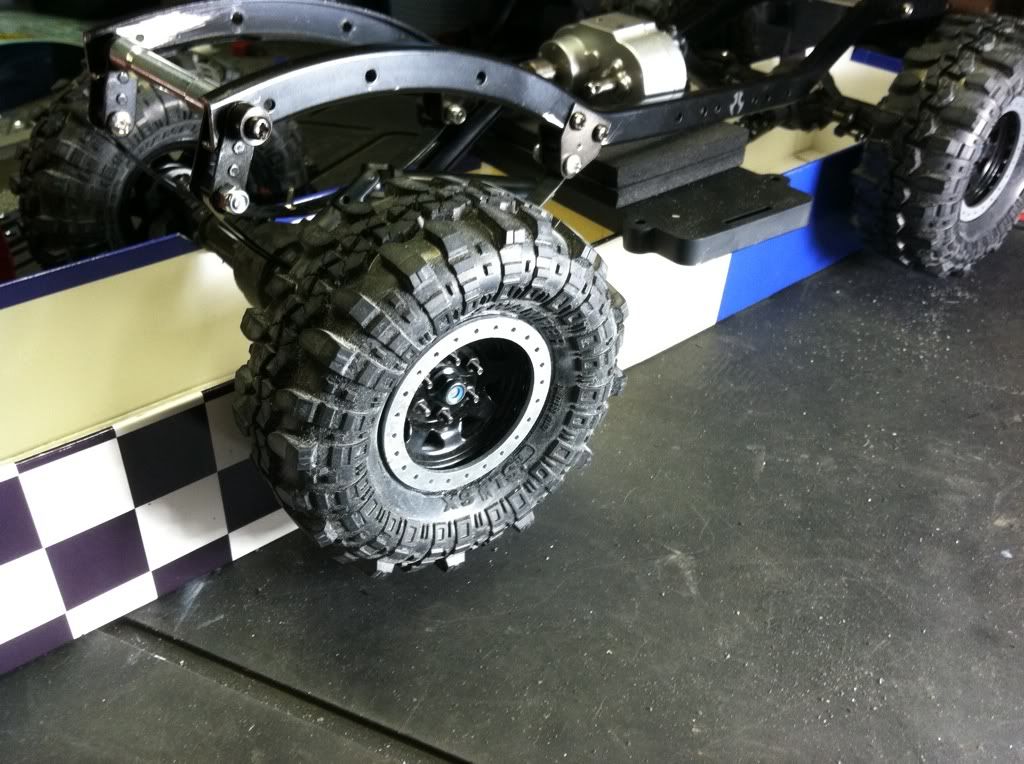  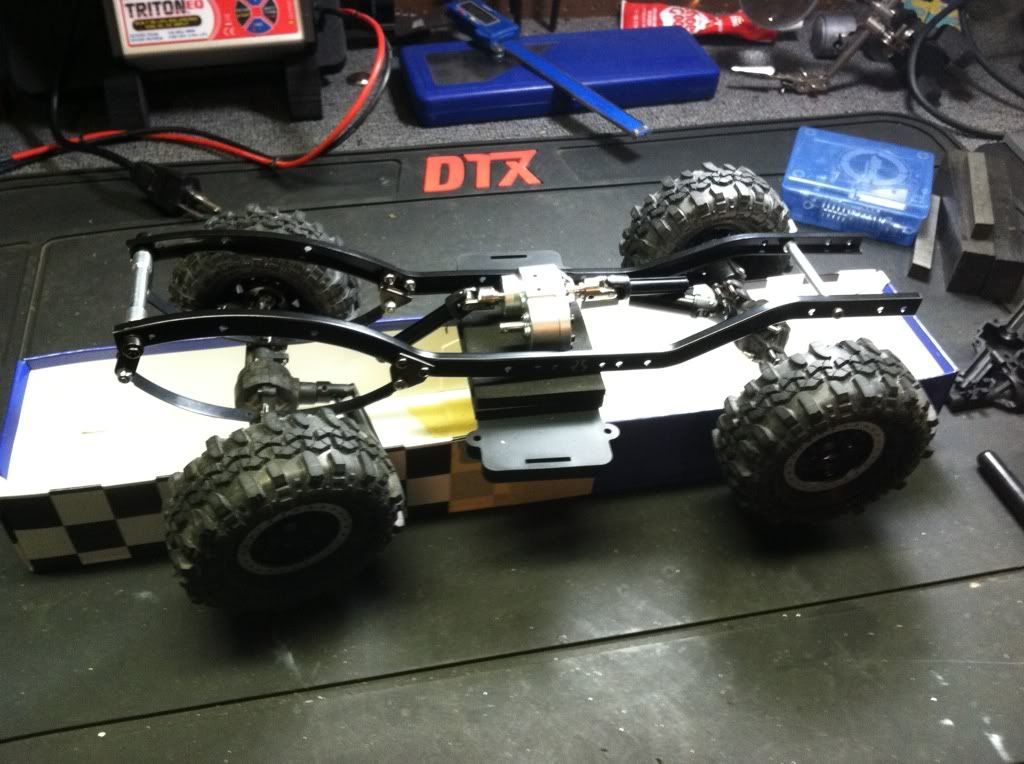 So that's my start. Any input and suggestions would be greatly appreciated. I only hope this project comes out half as good as some of the other builds ive seen. There are some talented builders on here. This will be my first project that will involve tube work and brazing so I may have questions for some of you expert builders. Till next time. |

|  |
| Sponsored Links | |
| | |
|
02-10-2012, 01:55 AM
| #2 |
| Newbie Join Date: Jun 2011 Location: Nampa
Posts: 6
|
Looks to be the makings of a kick ass Yota!looking forward to more build pics.let us know how the planetary and killer transfer case set up works  |
|
| |
|
02-10-2012, 07:30 AM
| #3 |
| Rock Stacker Join Date: Nov 2011 Location: weswt branch mi
Posts: 63
|
looks good. i have the same body that i plan to build some day.
|
|
| |
|
02-10-2012, 08:33 PM
| #4 |
| Rock Crawler Join Date: Apr 2005 Location: Upland
Posts: 546
|
So just a tiny update today since I only had about an hour in the garage this afternoon. I decided to shave the necessary plastic from the front axle. I had already shaved the stock MRC upper link mount and post on top of the axles. But since I was doing a leave spring front end I decided I didn't need the lower link mounts... so off they came. I left the stock shock mounts to use as a place to mount the axle to the leafs. I've decided to take a cue from Chino63 and use his method of bolting the axle to the springs. (Thread seen here) I think this will be the new standard of adapting leaf springs on these axles. So it's off to the computer to measure and draw up some parts. I'll also be drawing up my center skid plate/transfer case mount. Here are a couple of photos. 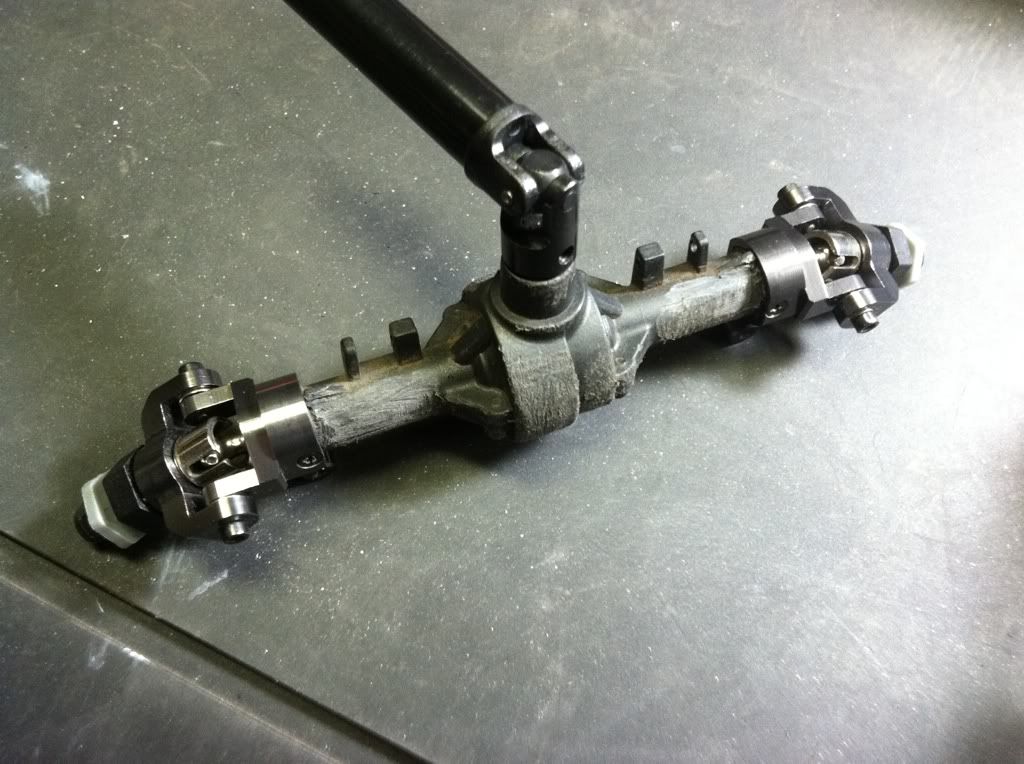 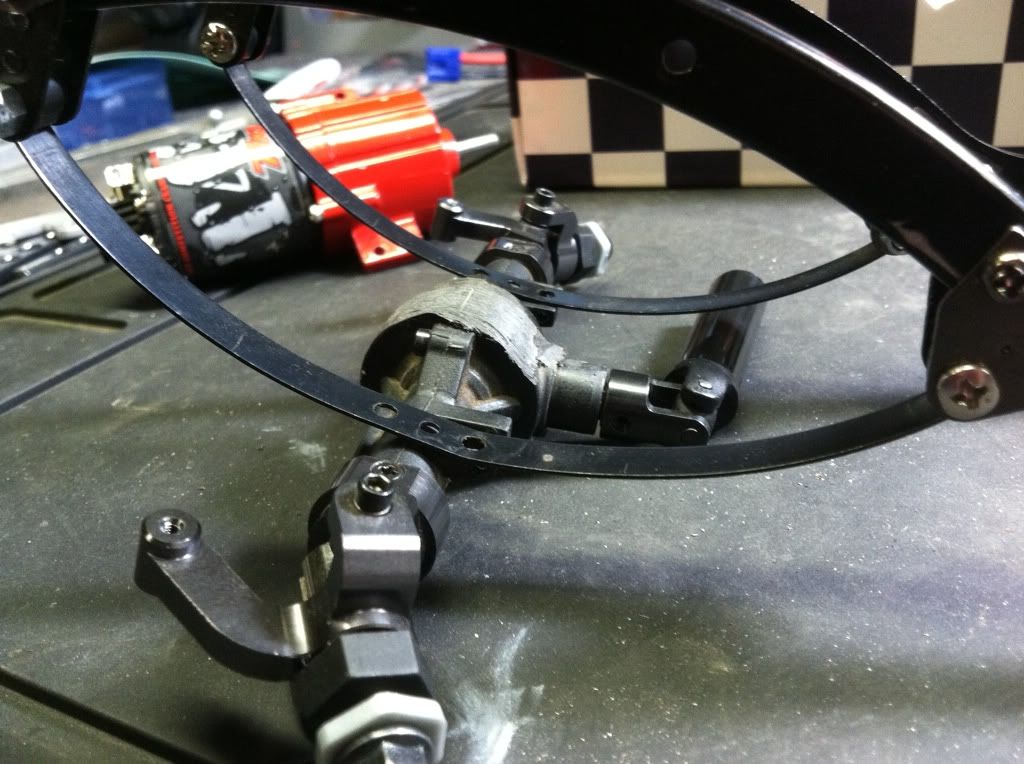 I still haven't set up my photo area so again, I apologize for the bad lighting and iPhone pics. |
|
| |
|
02-10-2012, 09:17 PM
| #5 |
| I wanna be Dave Join Date: Dec 2006 Location: Where the sheep run scared.
Posts: 3,008
|
What are you doing to connect the mini axles to the regular sized outputs on the transfer case? Meaning what are you using for driveshafts?
|
|
| |
|
02-10-2012, 10:25 PM
| #6 | |
| Rock Crawler Join Date: Apr 2005 Location: Upland
Posts: 546
| Quote:
| |
|
| |
|
02-12-2012, 05:45 PM
| #7 |
| Rock Crawler Join Date: Dec 2008 Location: Marengo, Ohio
Posts: 980
|
You can use traxxas villain yokes on those shafts so they fit the MRC axle. I'll be watching as i have one of these bodies to work on, gonna do a bit of styrene work to it. |
|
| |
|
02-12-2012, 09:43 PM
| #8 | |
| Rock Crawler Join Date: Apr 2005 Location: Upland
Posts: 546
| Quote:
I'm going to be doing quite a few first for me on this build. First time brazing up some tube work and modding the body with some styrene. The body will be getting a rear fire wall, half doors and custom interior. I haven't decided if I'm going to dovetail the front or not. I may just leave it as is on this one. | |
|
| |
|
02-14-2012, 07:58 PM
| #9 |
| Quarry Creeper  Join Date: Oct 2010 Location: LOS ANGELES
Posts: 266
|
It's looking good and i'm sure with all the custom work your going to put into it its going to be a cool looking rig . |
|
| |
|
02-16-2012, 04:28 PM
| #10 |
| Rock Stacker Join Date: Jan 2012 Location: Houston, Tx and Auburn, AL
Posts: 89
|
great looking build so far. subscribed
|
|
| |
|
02-16-2012, 11:08 PM
| #11 |
| Rock Crawler Join Date: Apr 2005 Location: Upland
Posts: 546
|
Thanks for the compliments, they're motivating. Well if any of you guys are like me you like to see updates no matter how small. I only have time to work on this during the weekends so it may be a little slow. But I did get a chance to sit at the computer this week to draw up some parts. I drew up a template for the leaf spring mount based on Chino63's design. I also drew up the template for the skid plate/transfer case mount. I'll post images of those when I'm on my computer again. I do have some photos of the test fitting of the skid with my paper mockup. 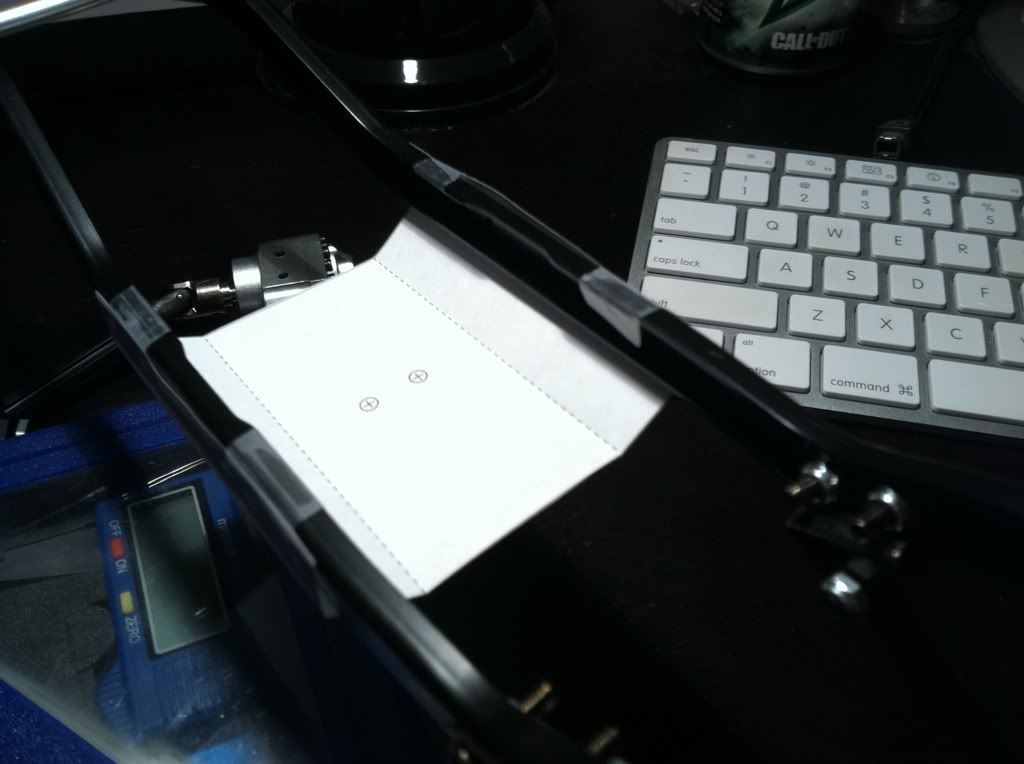 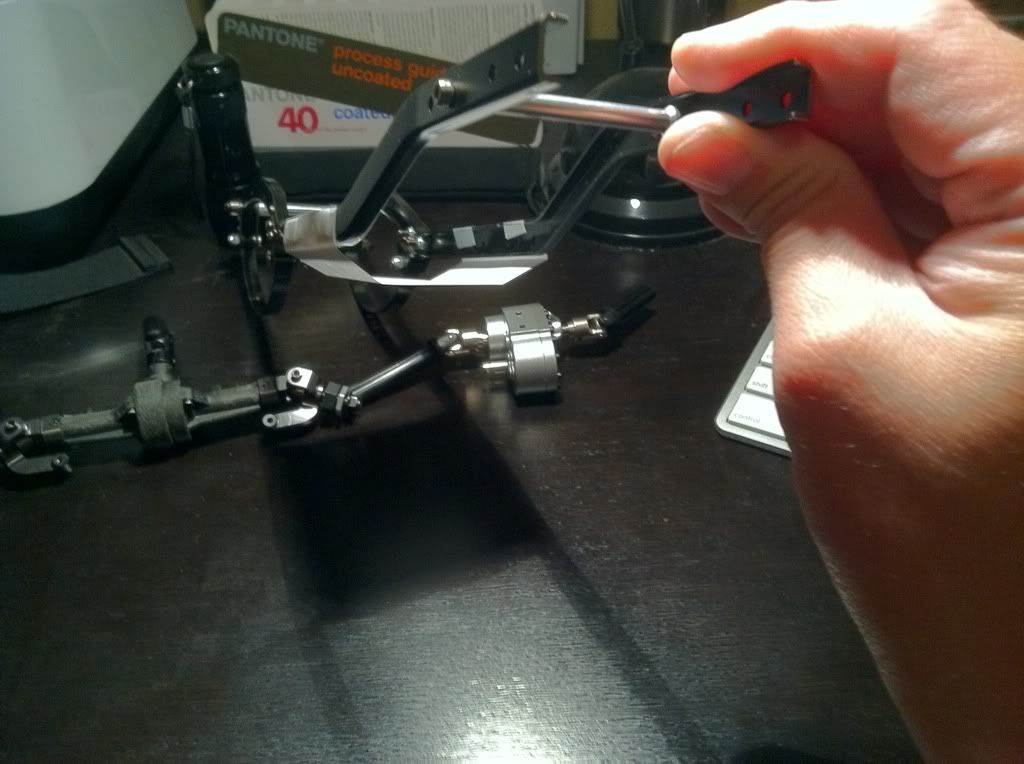 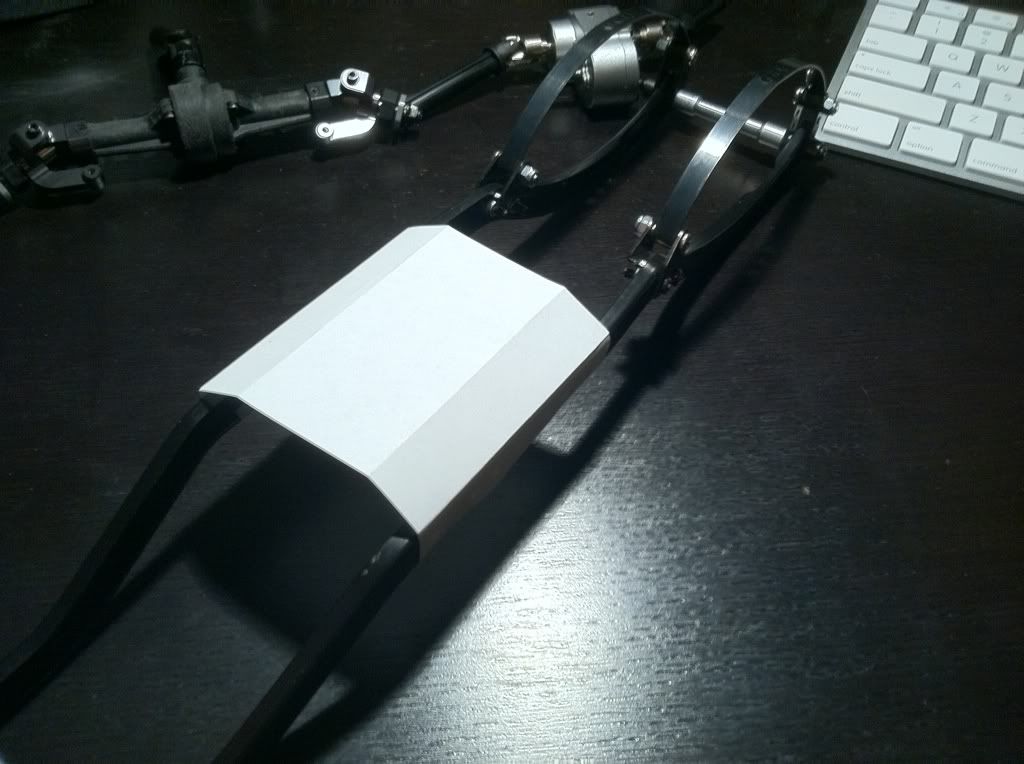 I also browsed the interweb for some ideas on my bed design. I found two I like a lot. I do think I'm leaning toward more of the flatbed style like the one in the second photo. What i like about it is that it gives me the perfect spot to put the battery . Any thoughts or suggestions?  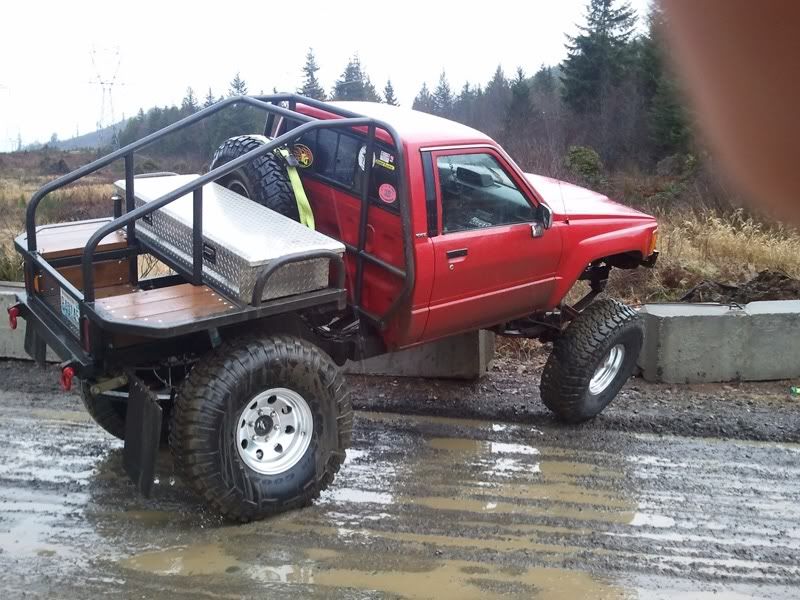 Last edited by OGmicromonster; 02-21-2012 at 11:09 PM. |
|
| |
|
02-17-2012, 12:56 PM
| #12 |
| Rock Crawler Join Date: Oct 2004 Location: The thumb
Posts: 788
|
I like the bed in the last pic also. This is going to look really nice man!
|
|
| |
|
02-27-2012, 12:06 AM
| #13 |
| Rock Crawler Join Date: Apr 2005 Location: Upland
Posts: 546
|
So I haven't had too much time to work on this thing, but I did get a few minutes today. So I decided to do some body work. The person I got the body from patched the hood where the blower stuck through. However it was a bit on the sloppy side. They used some CA and Shoo Goo with some laminated styrene. There was no way it was going to hold up once I hit the trails. So to prevent the patch from cracking, which it was already doing, and falling apart i felt it needed to be redone. So today with my limited time I removed the patch. Here's the patch before. As you can see there is a crack following the joint all the way around the patch. 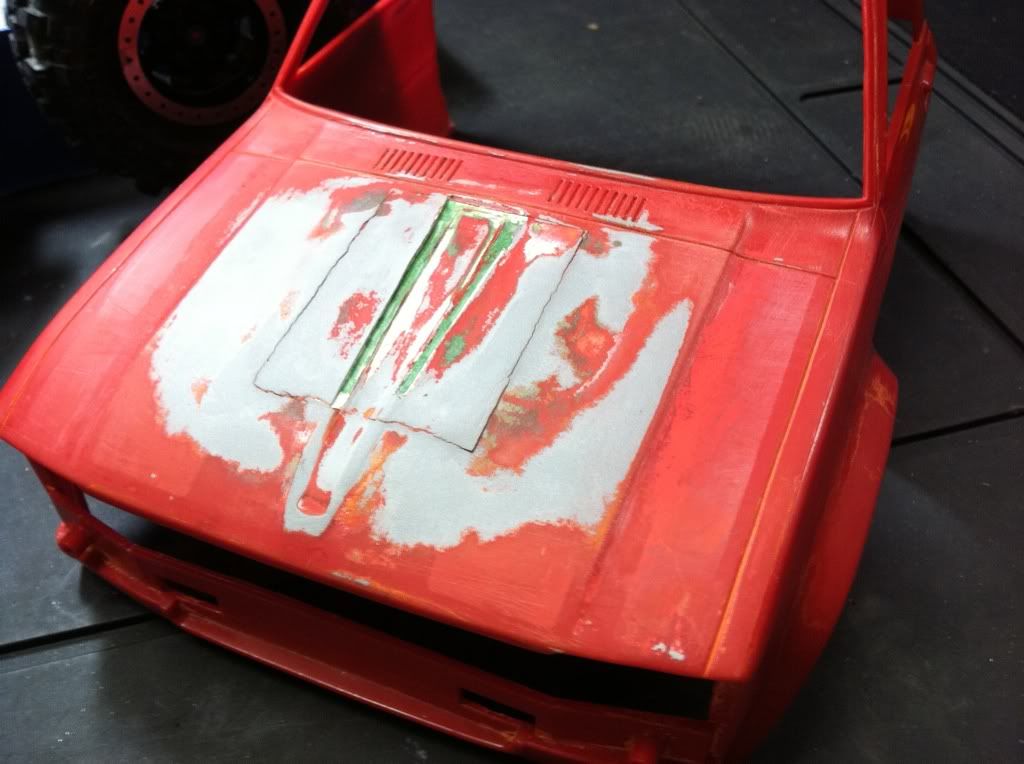 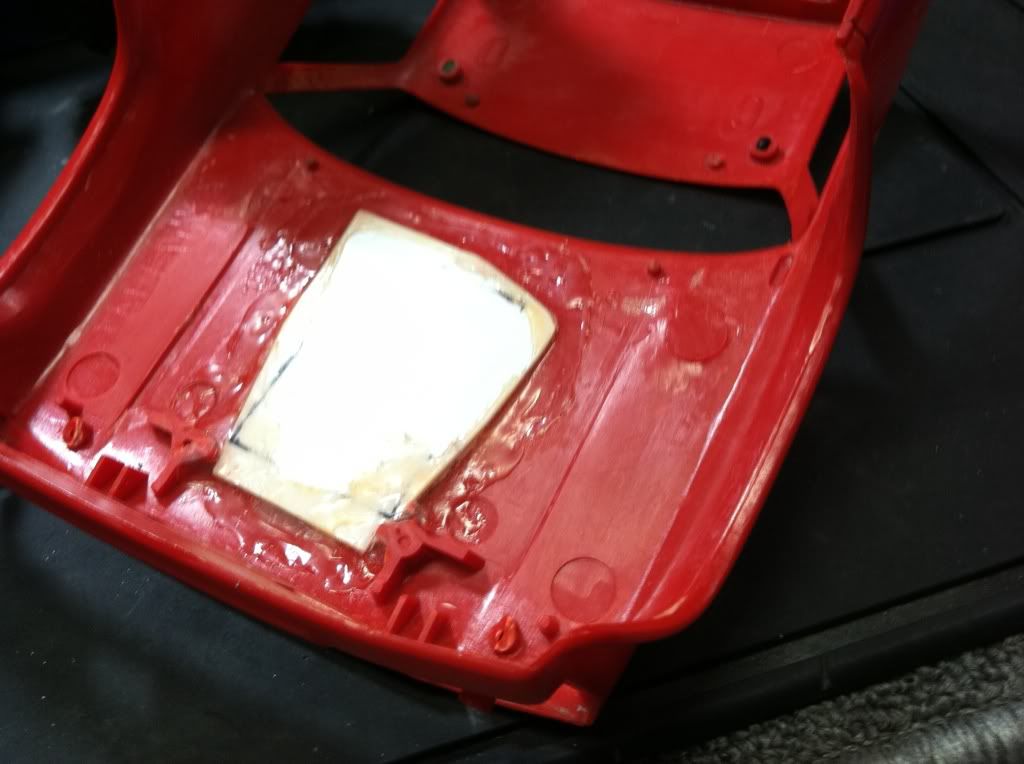 All that was needed was to run an Xacto blade around the backside of the patch through the thin layer of Shoo Goo. Then I just pryed it up with a small screw driver to crack the CA and used a pair of pliers to pull the remaining Shoo Goo off.  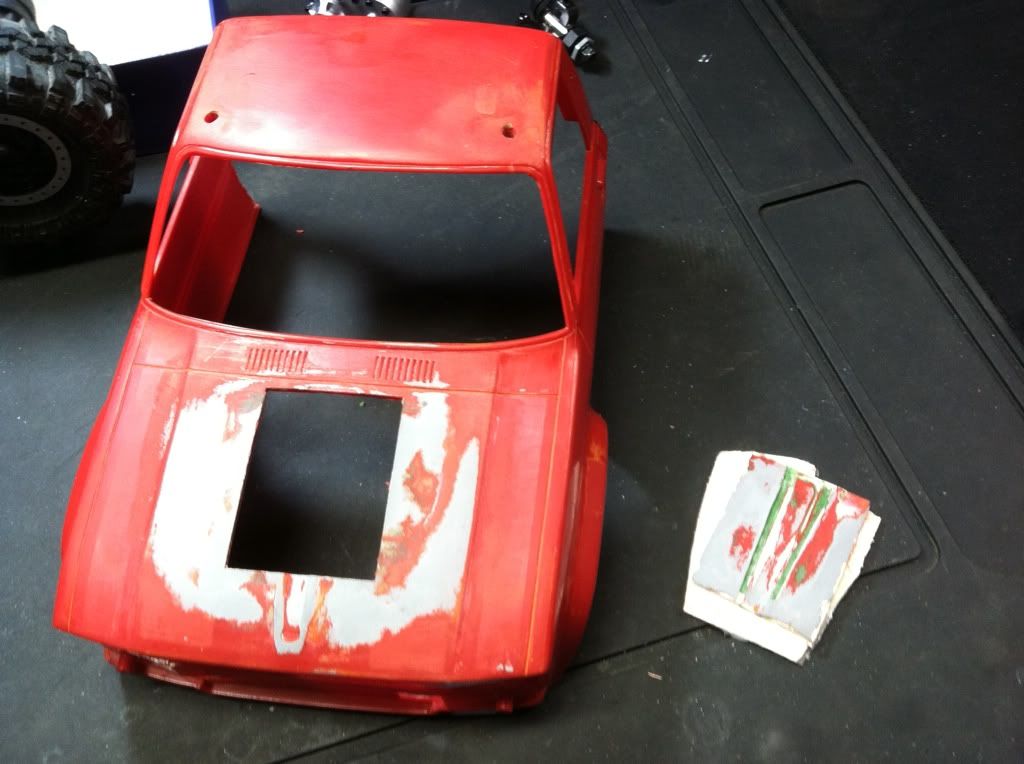 So now I just need to clean the body up with some sand paper. But before I do that I need to build the rear firewall and cut my half doors down. So I guess I need to do a little shopping for some styrene and styrene glue. So that's where I'm at now. Hopefully next weekend I will have more time in the garage to make some good progress. Untill then... Last edited by OGmicromonster; 02-27-2012 at 12:11 AM. |
|
| |
|
02-27-2012, 08:46 AM
| #14 |
| Rock Crawler Join Date: Feb 2011 Location: Williston
Posts: 850
|
looking good! Wish I knew how to use a computer program to mock up parts! Keep the updates rolling in~ L.R. |
|
| |
|
02-27-2012, 10:40 AM
| #15 | |
| Rock Crawler Join Date: Apr 2005 Location: Upland
Posts: 546
| Quote:
I just use Adobe Illustrator. It's probably the easiest program to mock up parts with in my opinion. Here are the drawings I did for the skid/transfer case plate and leaf spring mounts. I just print these out on full sheet label paper, rough cut them out with some scissors and stick them on the material the parts will be made out of. Then I go to work on them. The leaf spring mounts are just the side profile, the rest of the part is just the thickness with some holes drilled and tapped (3mm) to mount the leafs to. When I make the parts I'll post the whole process. The dotted lines on the plate are the folds or bends. (This image is not the correct scale BTW. If anyone wants the file at the proper size just PM me.)  Last edited by OGmicromonster; 02-27-2012 at 10:58 AM. | |
|
| |
|
02-27-2012, 10:52 AM
| #16 |
| Rock Crawler Join Date: Feb 2011 Location: Williston
Posts: 850
|
not applicable to my build per se' but cool none the less! I may try to do something with delrin for my leaf mounts and radius arm mounts though!
|
|
| |
|
02-28-2012, 07:53 PM
| #17 |
| RCC Addict Join Date: Nov 2007 Location: CALI "209"
Posts: 1,970
|
Looks good so far, I like what you did with the axles.
|
|
| |
|
02-28-2012, 10:13 PM
| #18 | |
| Rock Crawler Join Date: Apr 2005 Location: Upland
Posts: 546
| Quote:
| |
|
| |
|
03-04-2012, 03:43 AM
| #19 |
| Rock Crawler Join Date: Apr 2005 Location: Upland
Posts: 546
|
Well I was able to spend a few hours in the garage and it was a very nice day outside too. So, I made some good progress on the Yota. I made the skid/transfer case mount and started filling in the patch on the body. For those interested here is my process for making my parts. First I design and layout the part in Adobe Illustrator and print it out on 8.5x11 label paper. 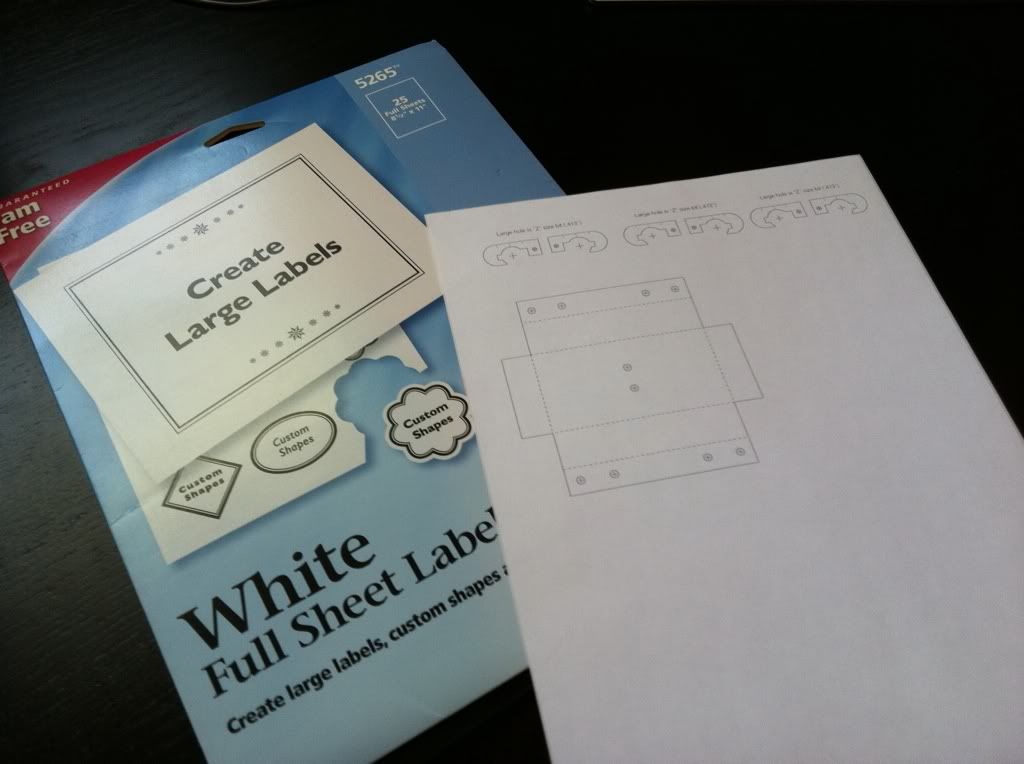 Then I cut out the part I want to make off the label with some scissors leaving a bit of extra paper so I can see all the lines. 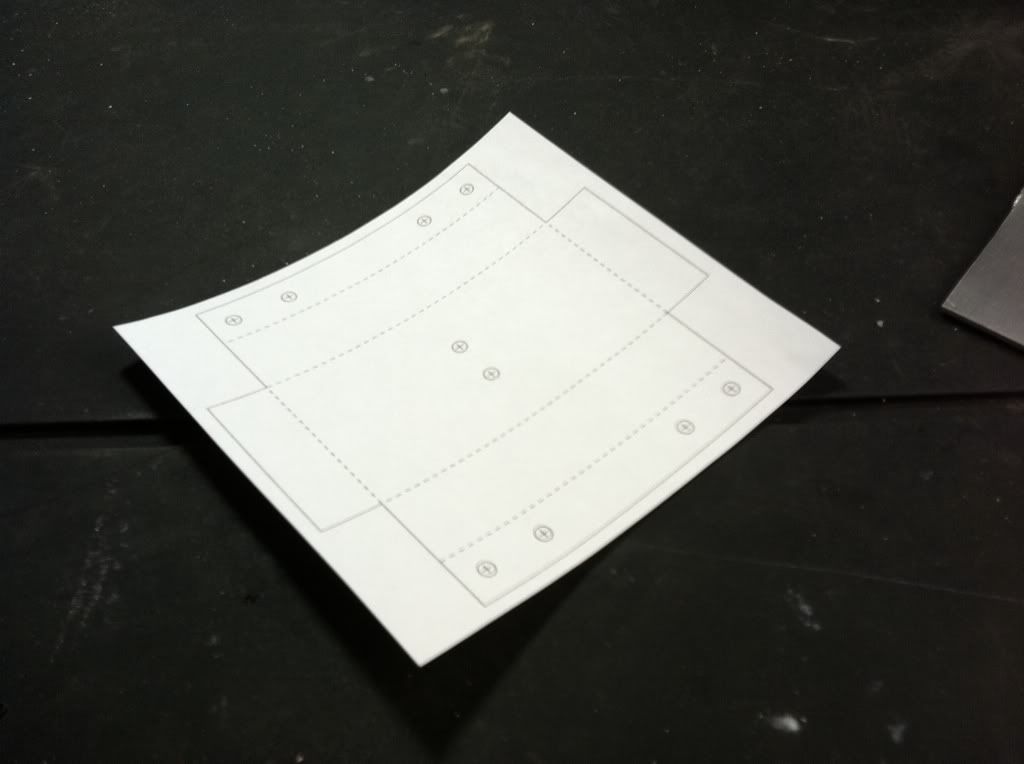 Next peel the backing paper and stick it on my material, center punch all the holes and cut it out using either a Dremel or bandsaw. After is all cut out I mount the part in a vise and clean up all the edges with some files. 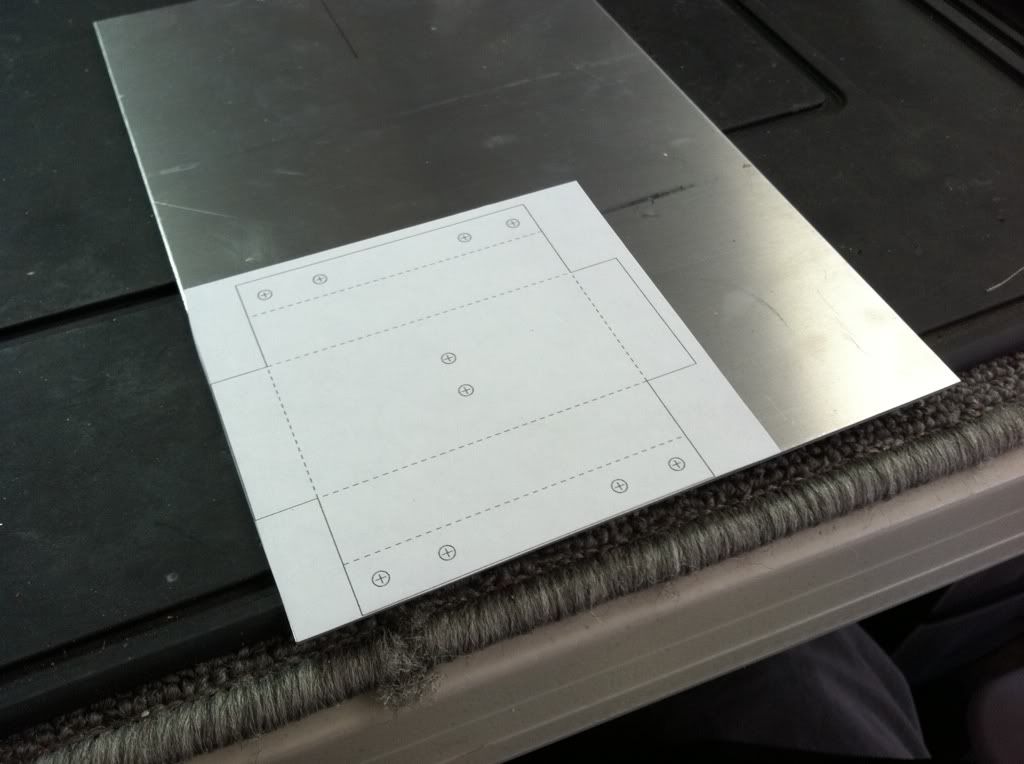 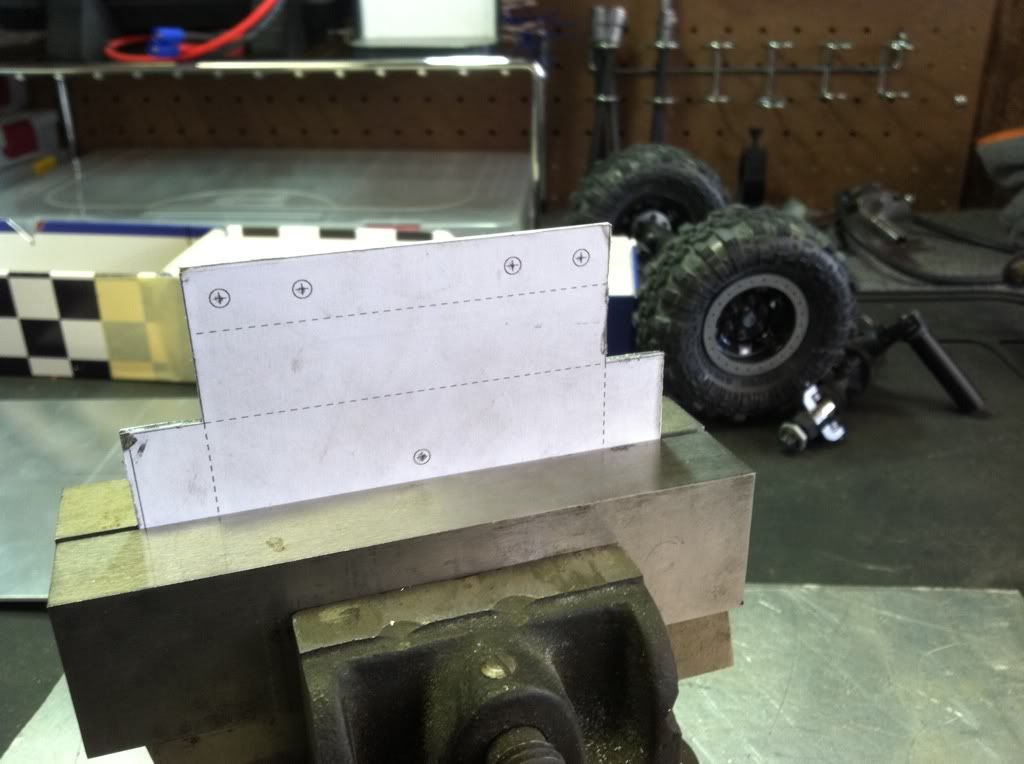 Then drill and countersink all the necessary holes. (this is the top side, the second photo is the bottom. I leave the paper on with the dotted fold lines.) 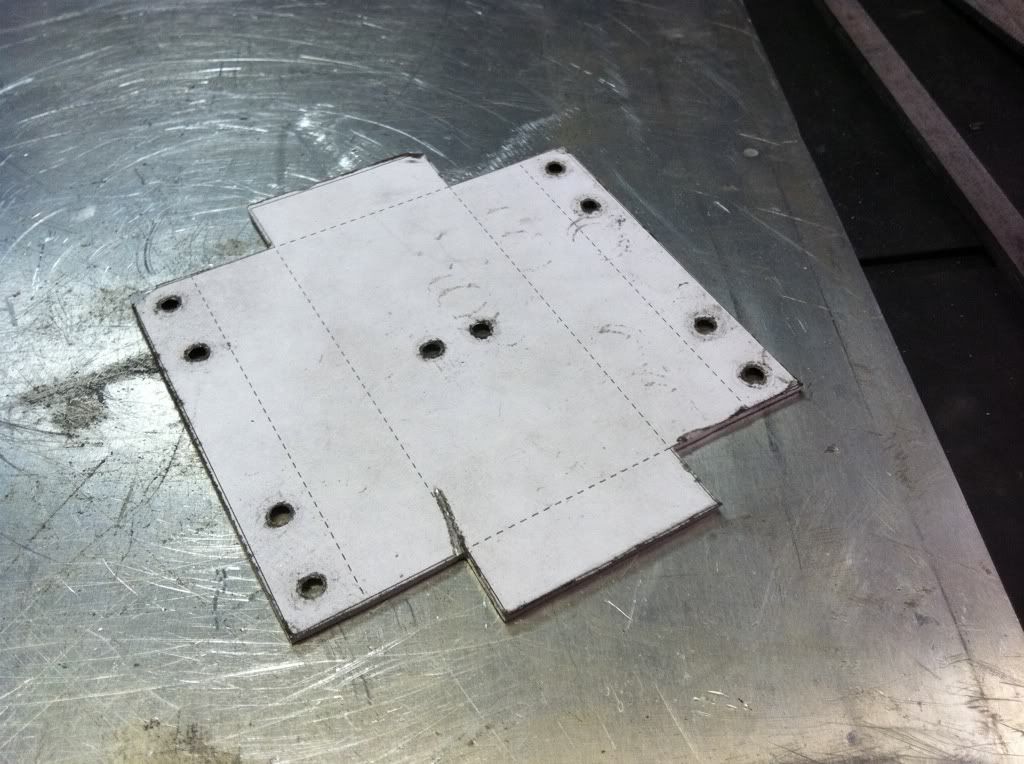 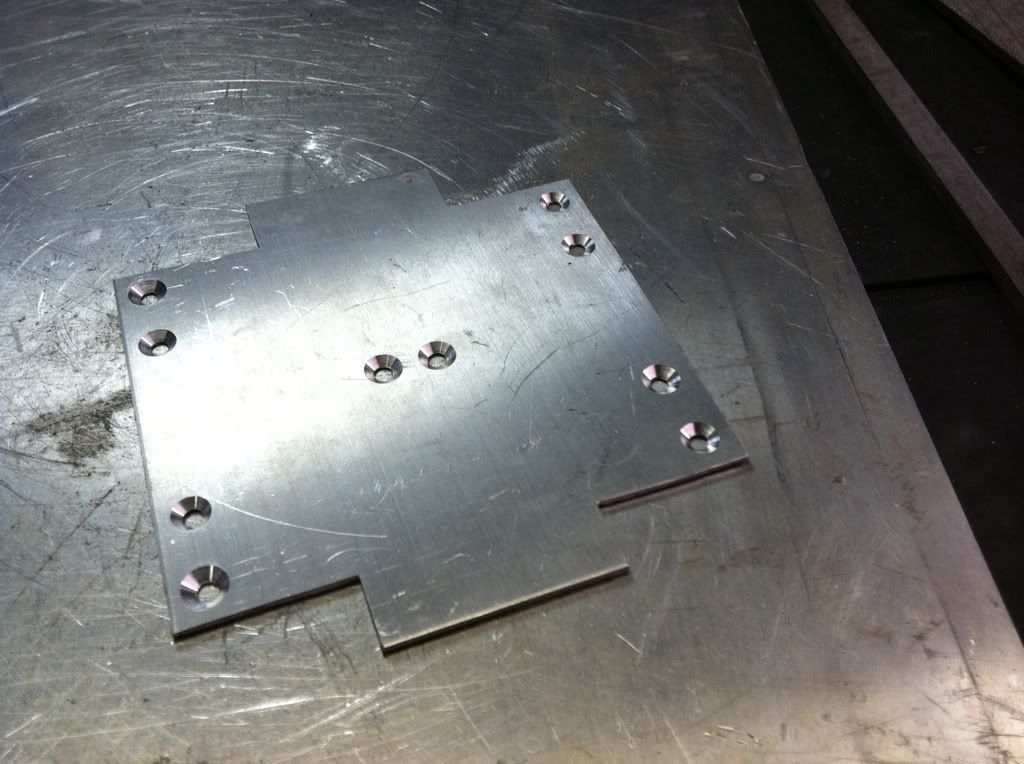 For the skid plate I needed to bend it in a few places, so using some steel blocks, a urethane mallot, and a vise I gently formed the skid. 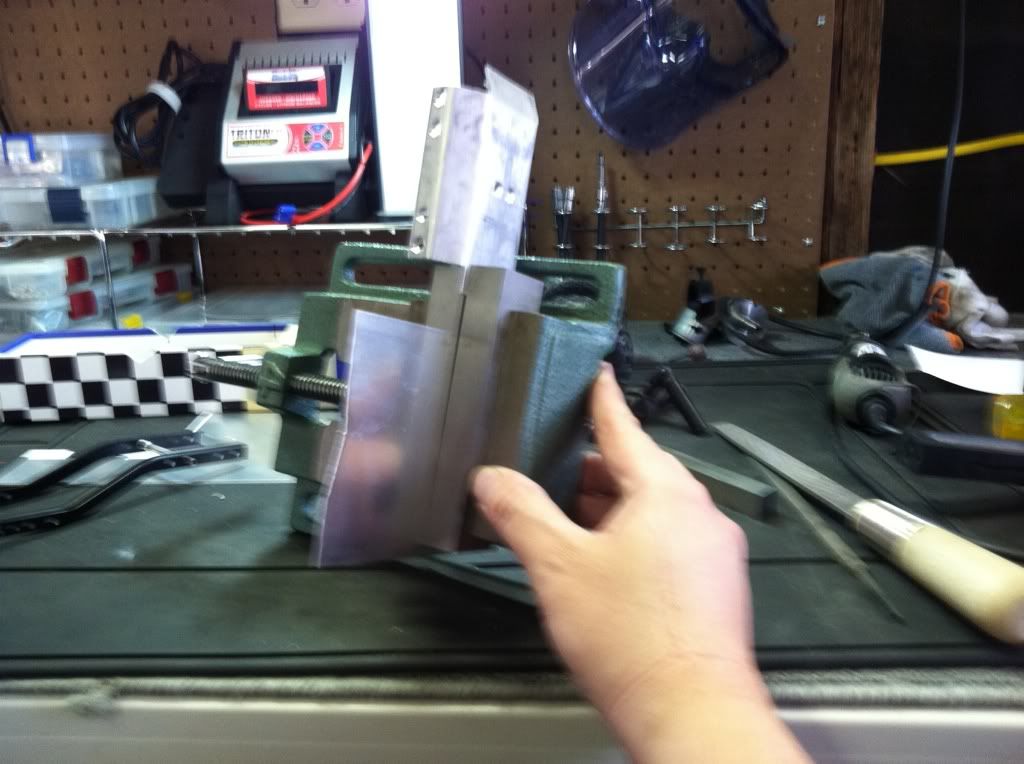 Here are a few photos of the finished center plate.  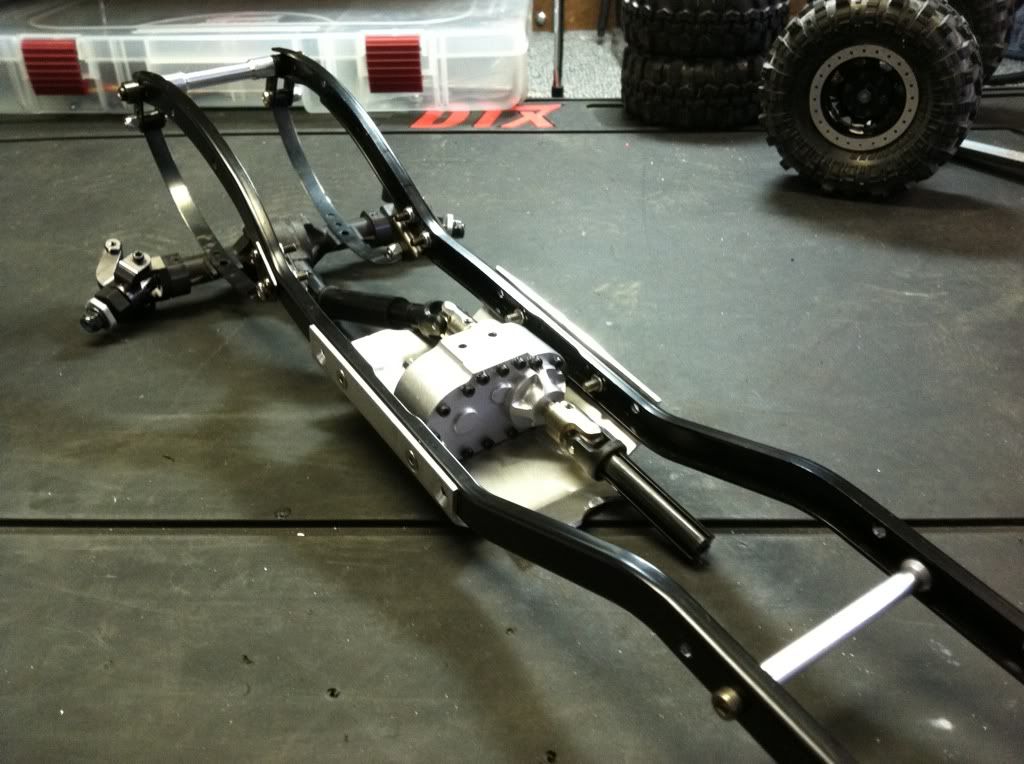 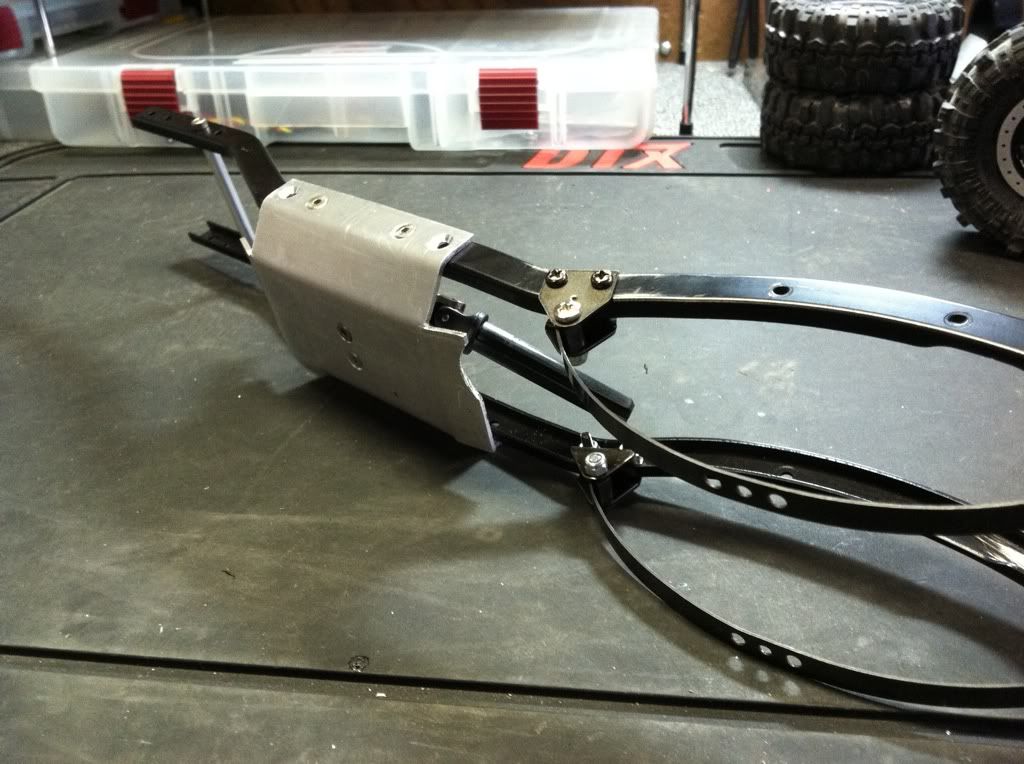 I didn't have the right size material to make the leaf spring mounts so I'll head over to the metal supplier and get some. I'll make those on Monday. Since I didn't make the leaf spring mounts I continued working on the body. I started putting the new patch on the hood and filled in two holes in the roof. Next is to build the rear fire wall and cut down the doors. 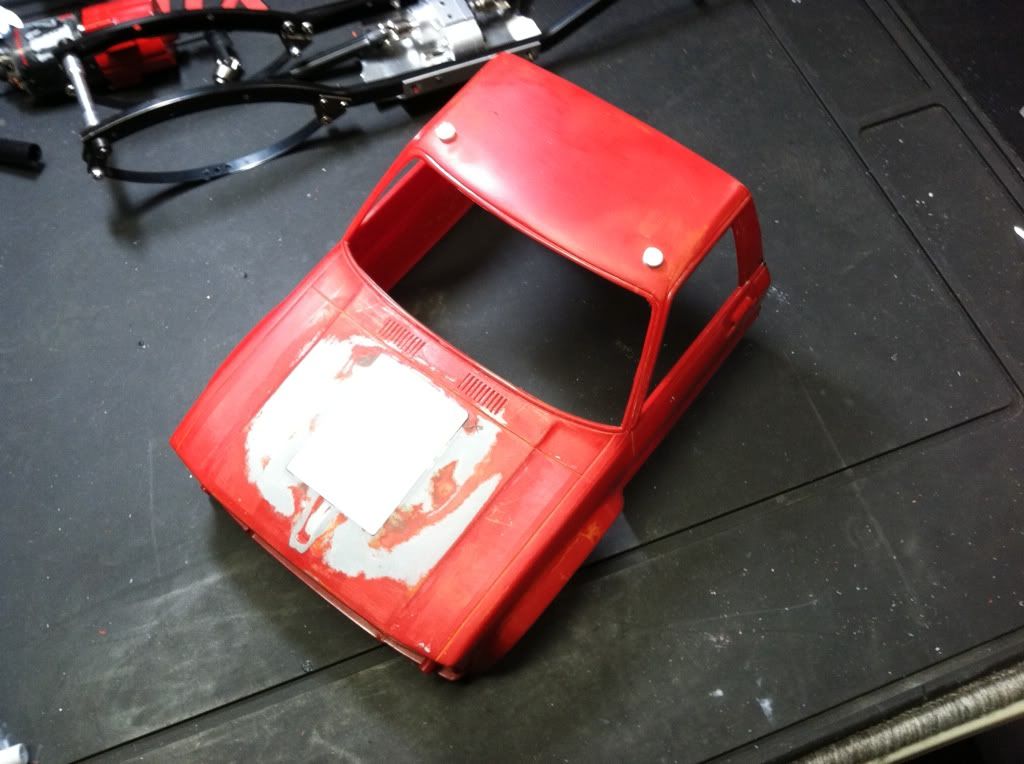 I do have a question for those styrene experts though... What do you guys use as filler for any small gaps and/or to smooth things out? The plastic modeler pros at my local hobby shop suggested using two part epoxy putty. They said modeling filler would just crack. Bondo would work, but I would guess its not cheap and comes in a fairly large quantity. More than I need for sure any way. Any input would be greatly appreciated. Until next time... Last edited by OGmicromonster; 03-04-2012 at 03:53 AM. |
|
| |
|
03-05-2012, 08:58 AM
| #20 |
| Rock Stacker Join Date: May 2009 Location: grand junction
Posts: 50
|  |
|
| |
|
 Build I must. 1/12 Yota Truggy - Similar Threads
 | ||||
| Thread | Thread Starter | Forum | Replies | Last Post |
| CC Yota truggy | dkchance74 | Duratrax Cliff Climber | 12 | 09-10-2013 09:53 PM |
| Yet another Yota truggy | Jester666 | 2.2 Scale Rigs | 94 | 08-23-2010 03:48 PM |
| My Dovetailed Yota Truggy Build | Going Up! | 1.9 Scale Rigs | 25 | 08-22-2009 08:59 PM |
| My Yota Truggy | atvdude775 | 1.9 Scale Rigs | 10 | 05-21-2009 11:16 PM |
| Yota truggy | SACCO | 1.9 Scale Rigs | 48 | 01-28-2009 11:23 PM |
| |


 Linear Mode


