| |
 06-18-2013, 10:12 PM
| #21 | ||
| Pebble Pounder  Join Date: Aug 2012 Location: bonney lake
Posts: 162
| Quote:
Quote:
| ||

|  |
| Sponsored Links | |
| | |
|
06-18-2013, 10:20 PM
| #22 |
| Pebble Pounder Join Date: Aug 2012 Location: bonney lake
Posts: 162
|
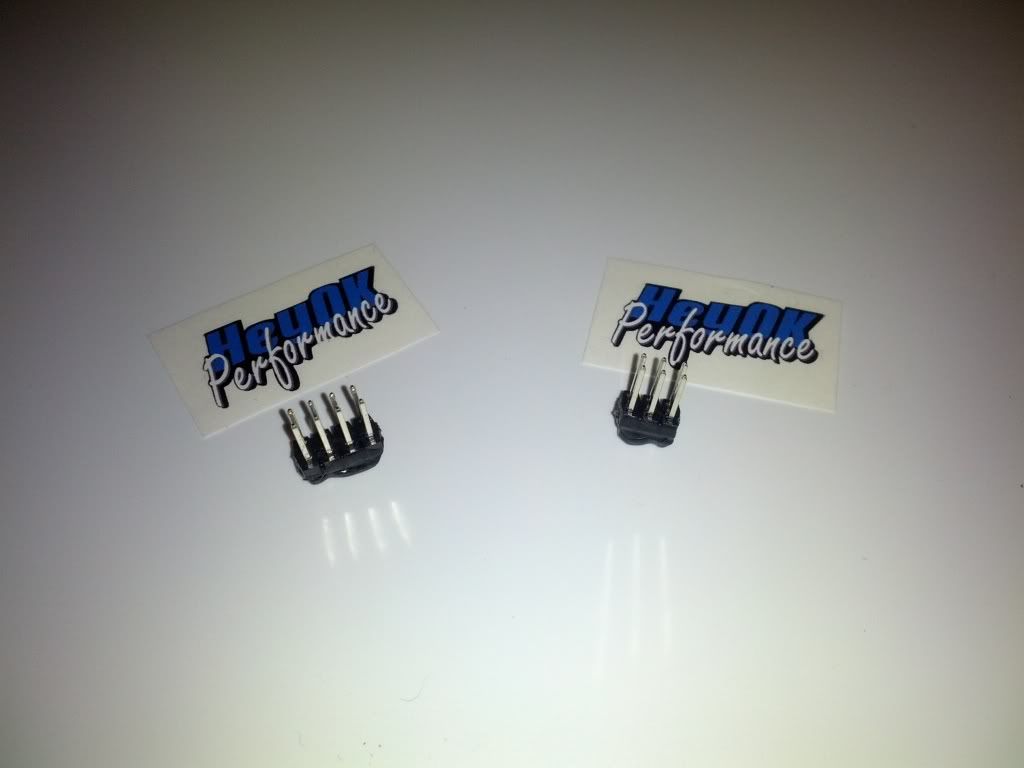
Time to get it wired up... Man this took some time to get it done as clean as I could... Like I said class 1 rig so I didn't want to see and wire on the rig... I got some 1/8" & 1/4" braided wire loom from http://www.cabletiesandmore.com/ExpandableSleeving.php... Like $0.23 a foot so it pretty cheep... Wired up the tekin fxr and cc bec... The ESC is zip tied to the rear cross member and the bec is in the "gas tank"... After I got all the wire trimmed up I then put the braided loom on b4 making my final solder connections... As for the servos I'm running them off the bec so I used a hey Ok distribution block for my ground and power then just ran the signal to the rx.... But this is what I came up with.... 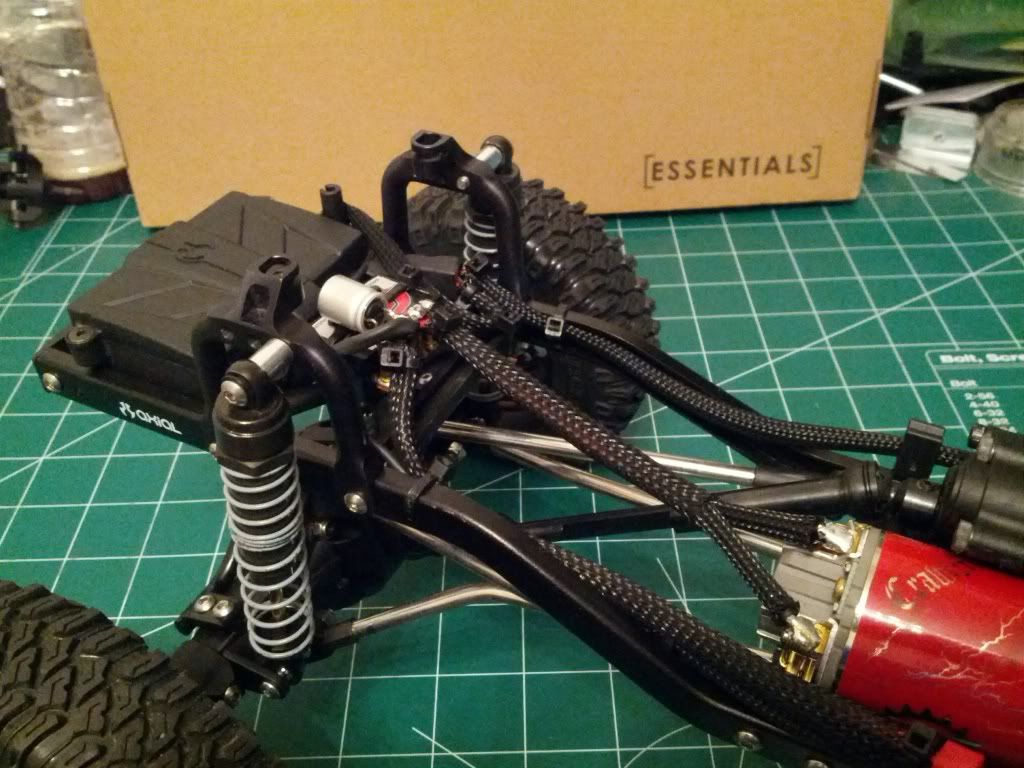 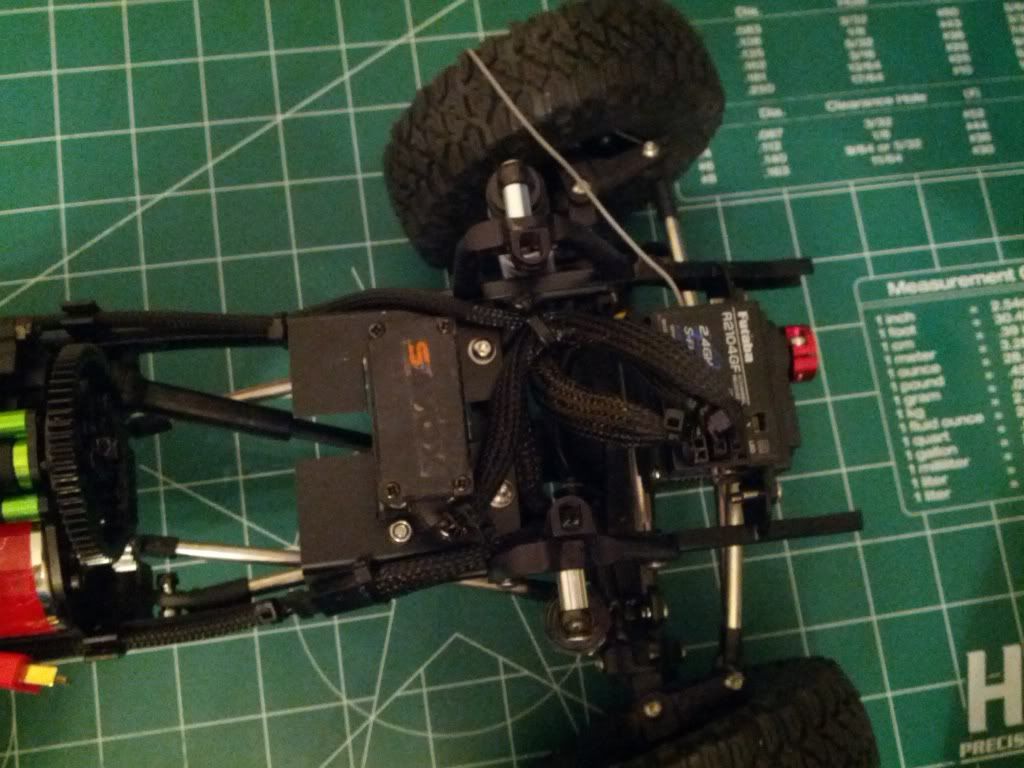 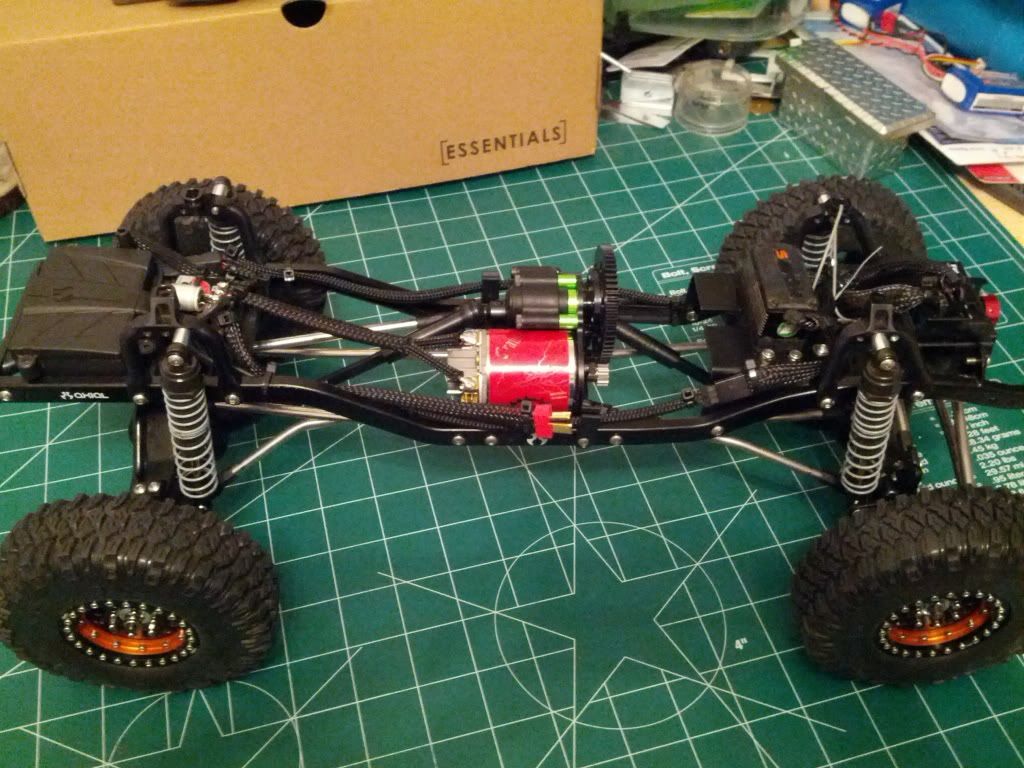 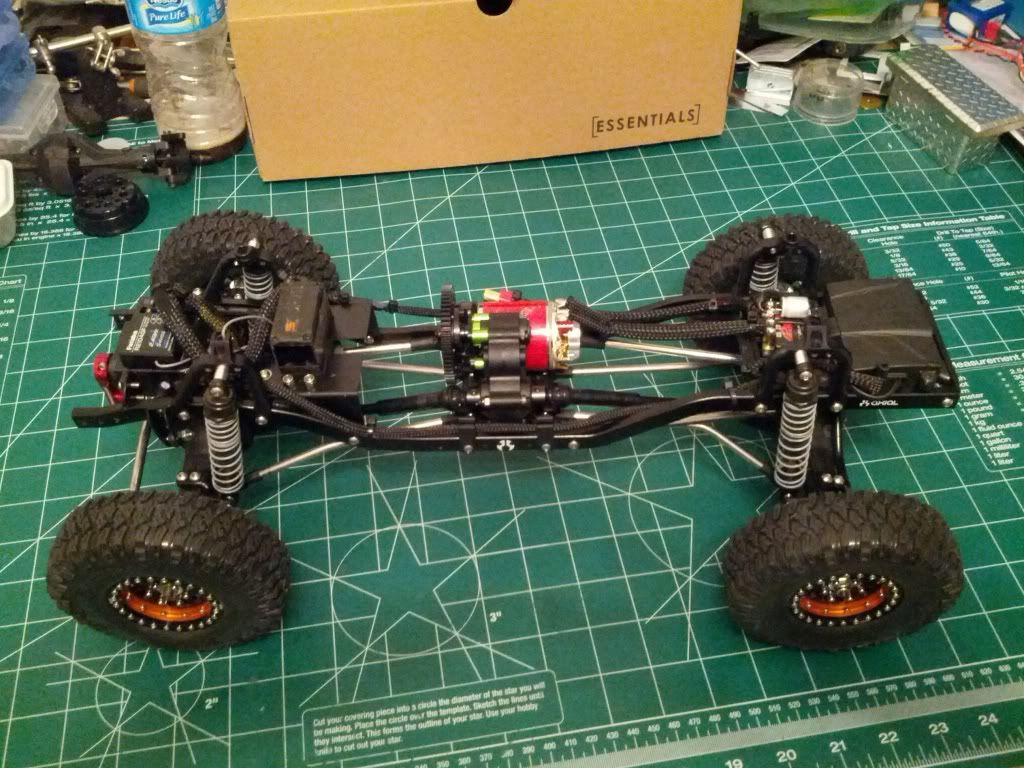 What you guys think? Is it hidden enough? |
|
| |
|
06-19-2013, 01:42 AM
| #23 |
| Pebble Pounder Join Date: Apr 2013 Location: Nacogdoches
Posts: 107
|
Nice job on the wire management. I particularly like the wire loom material. I'm going to keep an eye on this build.
|
|
| |
|
06-25-2013, 10:39 AM
| #24 | |
| Pebble Pounder Join Date: Aug 2012 Location: bonney lake
Posts: 162
| Quote:
Been supper busy with work lately haven't had much time to work on it... I'll be back at the grid soon tho... | |
|
| |
|
01-09-2014, 05:11 PM
| #25 |
| Pebble Pounder Join Date: Aug 2012 Location: bonney lake
Posts: 162
|
With scale nationals coming up im trying to work my butt off on this thing... I will hopefully have the front bumper wrapped up by tomorrow... As we all know I'm pretty anal when it comes to building stuff... Take too long. Here's another scrap brass bumper I'm working on. Top to the bumper... 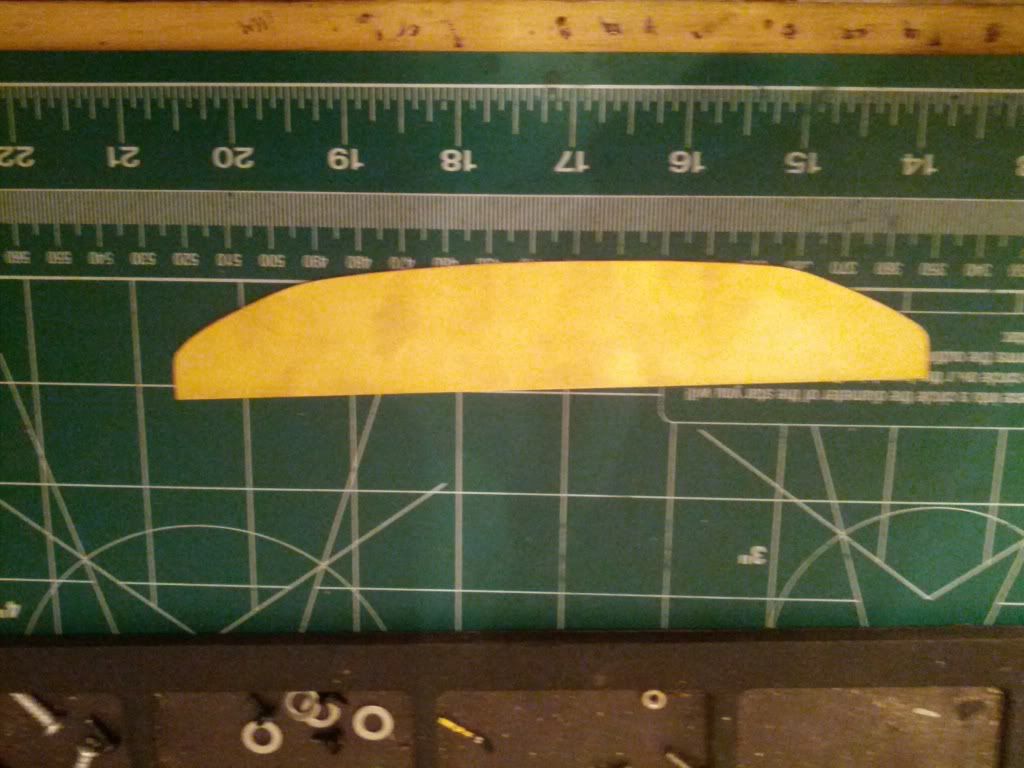 I used these to give me angle on the bumper so it wasnt square.. 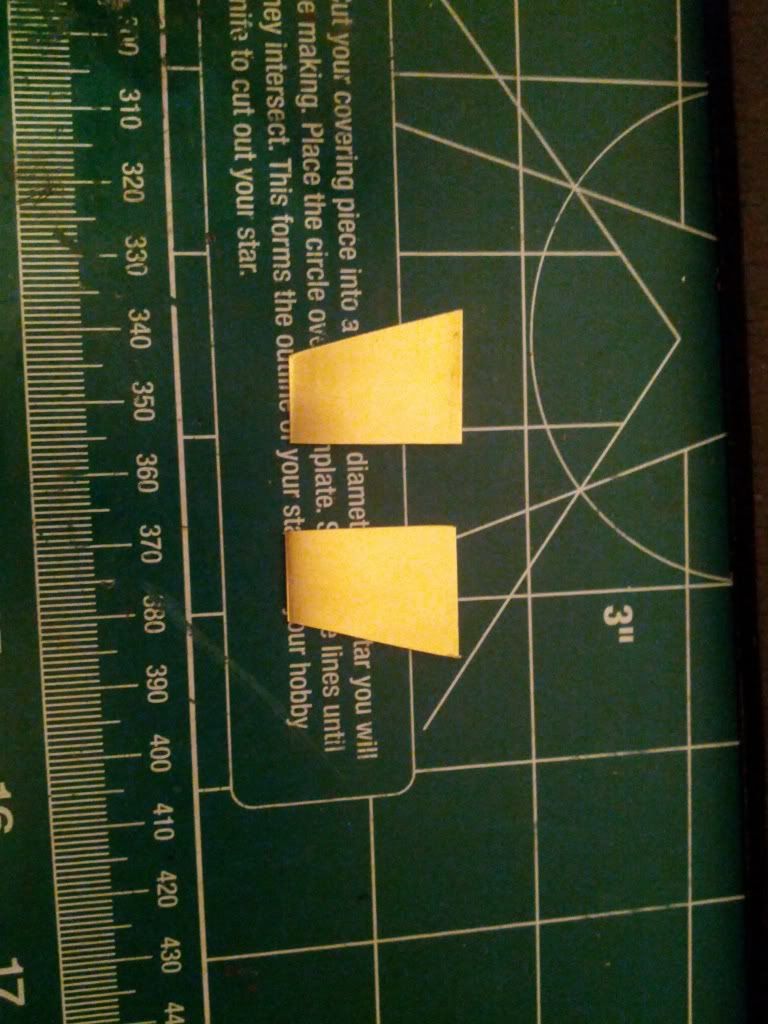 Face to the bumper... 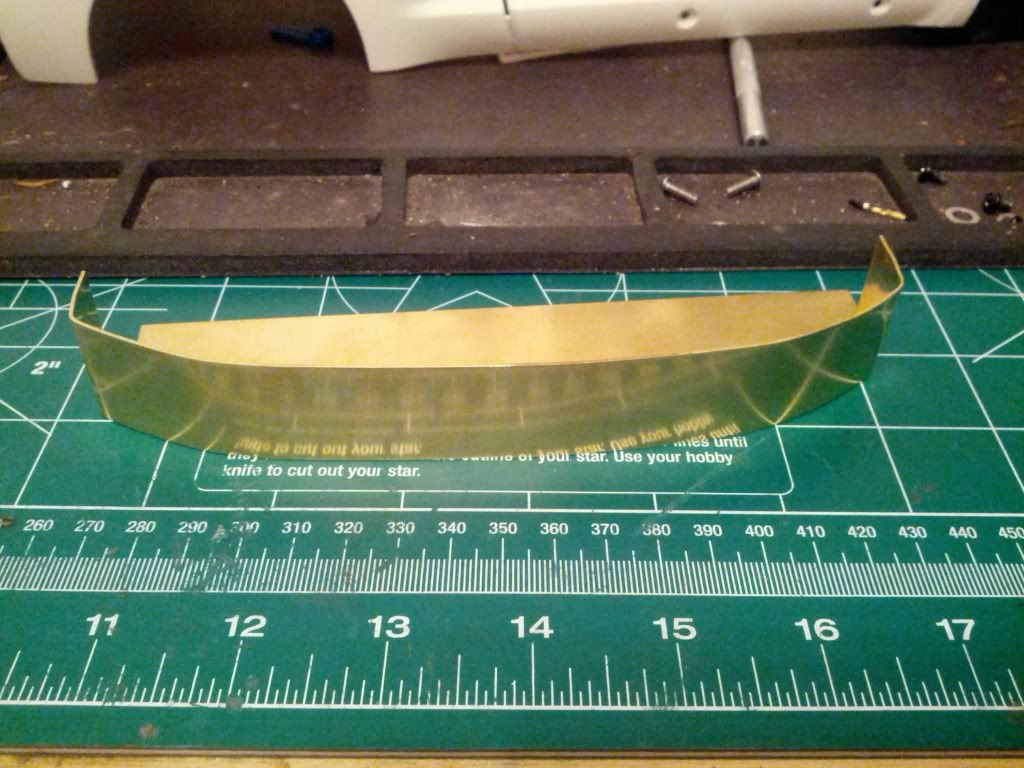 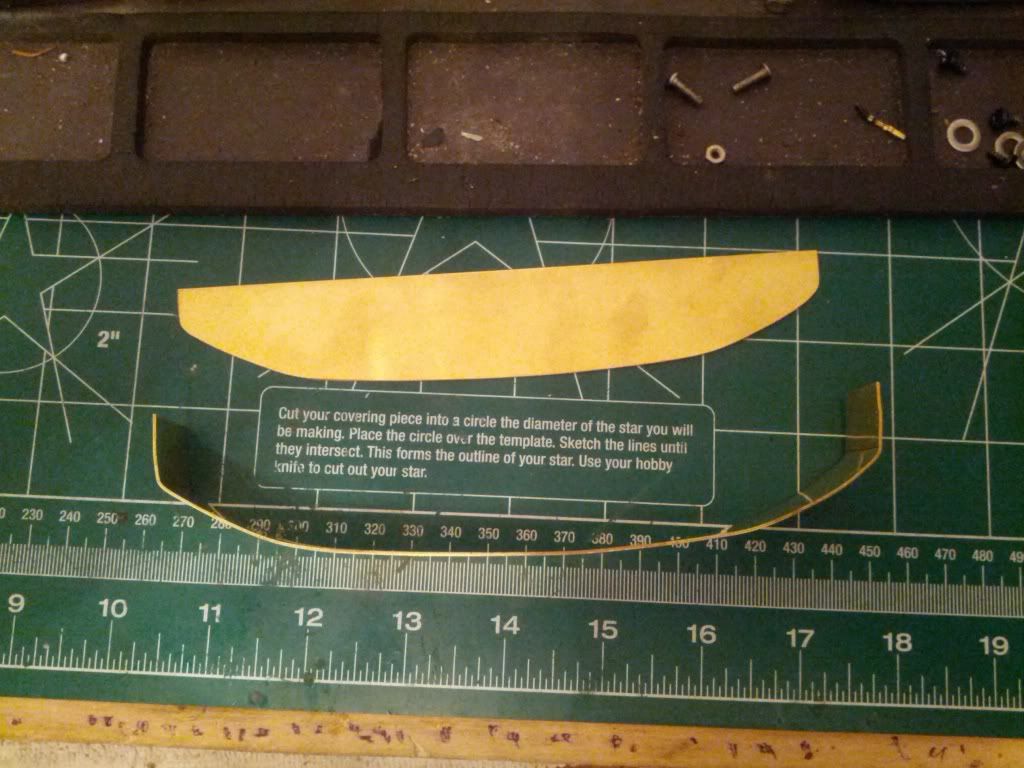 Got them soldered together.. 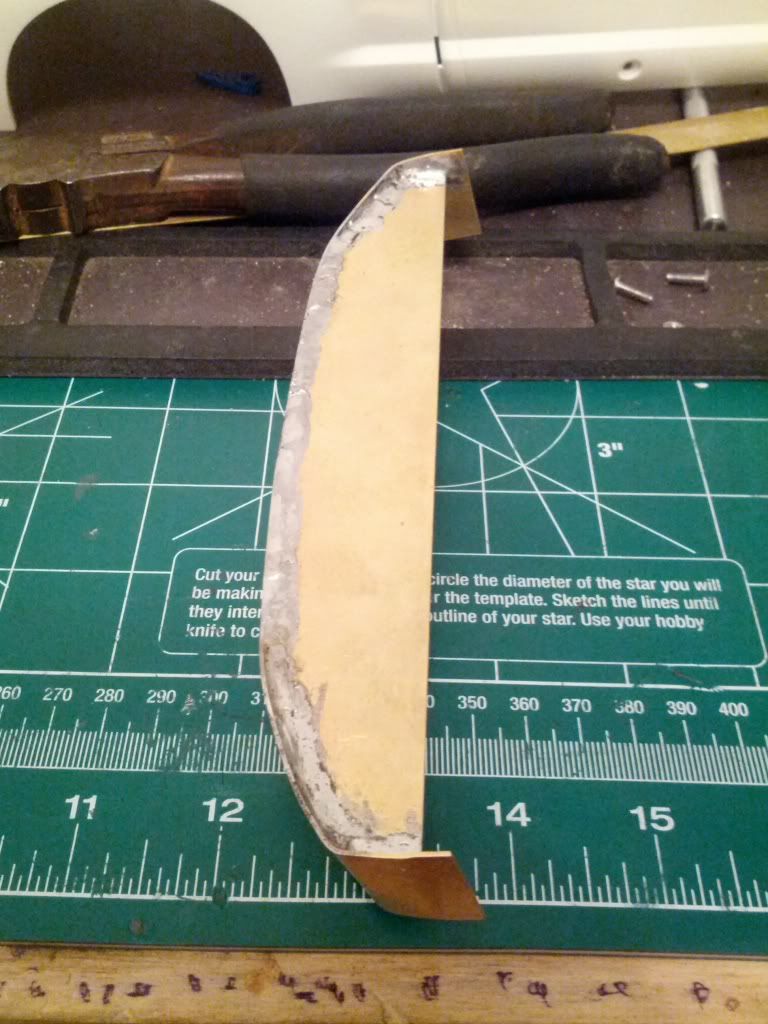 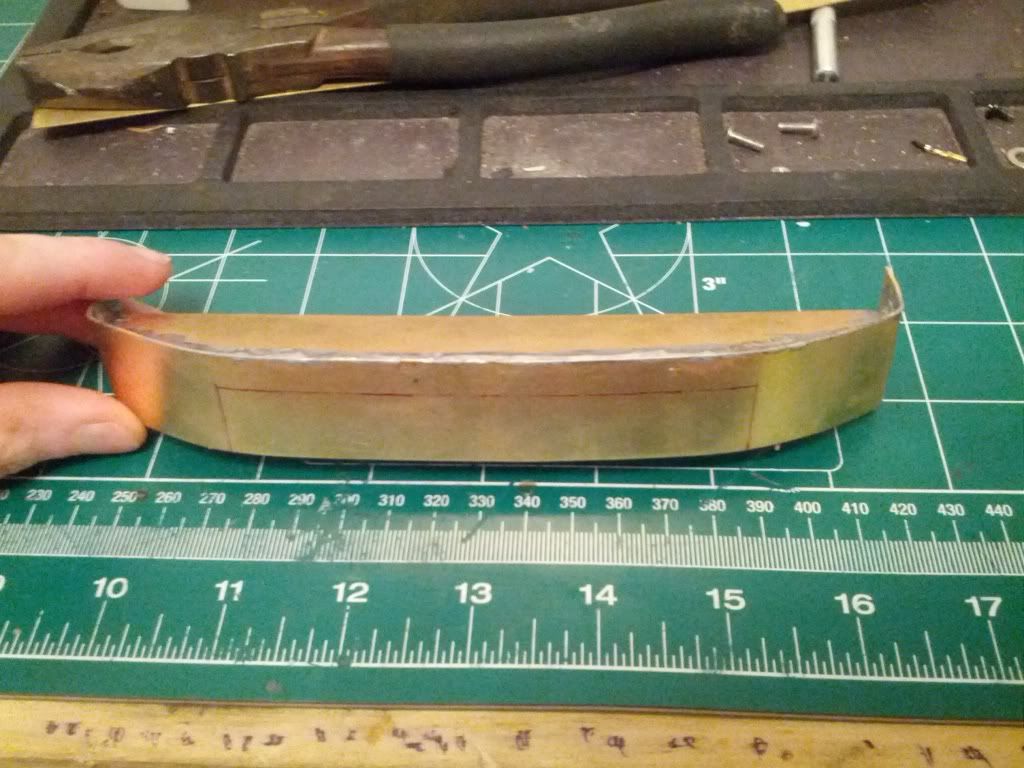 Last edited by BoostFreak; 01-09-2014 at 09:55 PM. |
|
| |
|
01-09-2014, 09:57 PM
| #26 |
| Pebble Pounder Join Date: Aug 2012 Location: bonney lake
Posts: 162
|
At this point I knew I wasn't gunna like it so I drew some line for a cut out. All cleaned up.. 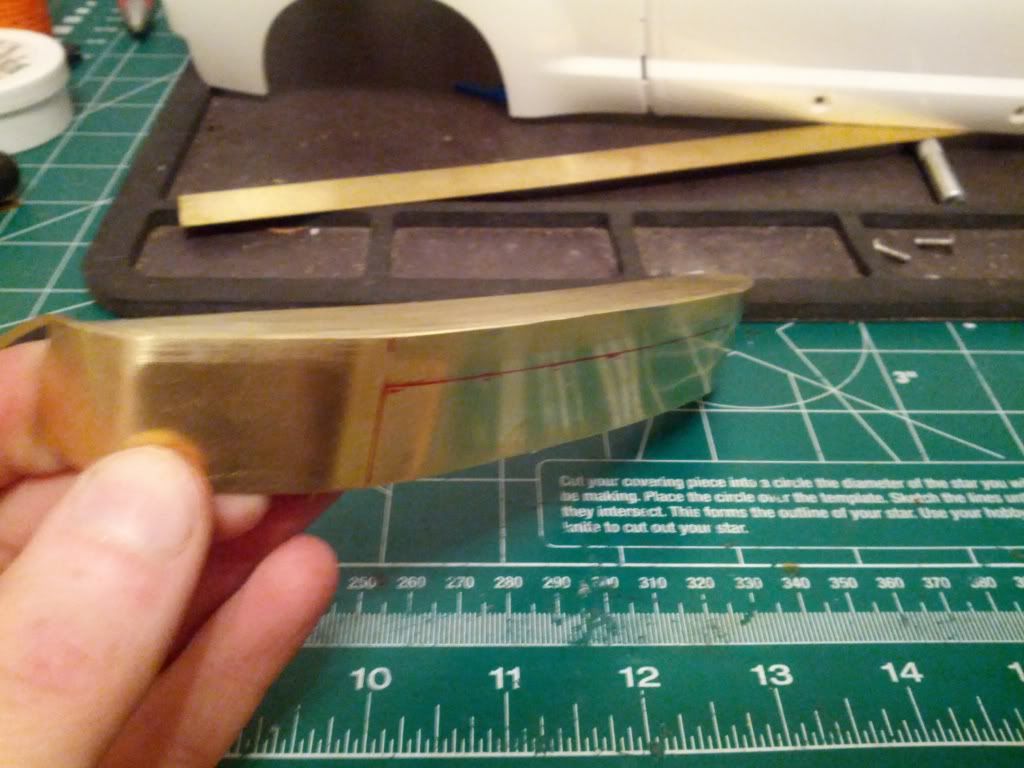 Once I got the 1/2"x4 1/4" cut out I tried but contour a piece of bass with a bend in it to fill the hole... Didn't like that either. So I contour a 1/8" piece of rectangle stock to give it more depth and a push bumper look to it. After talking to Dev on the phone and emailing him pics seeing what he Thot. Then proceeded to use the first piece for a skid plate.. 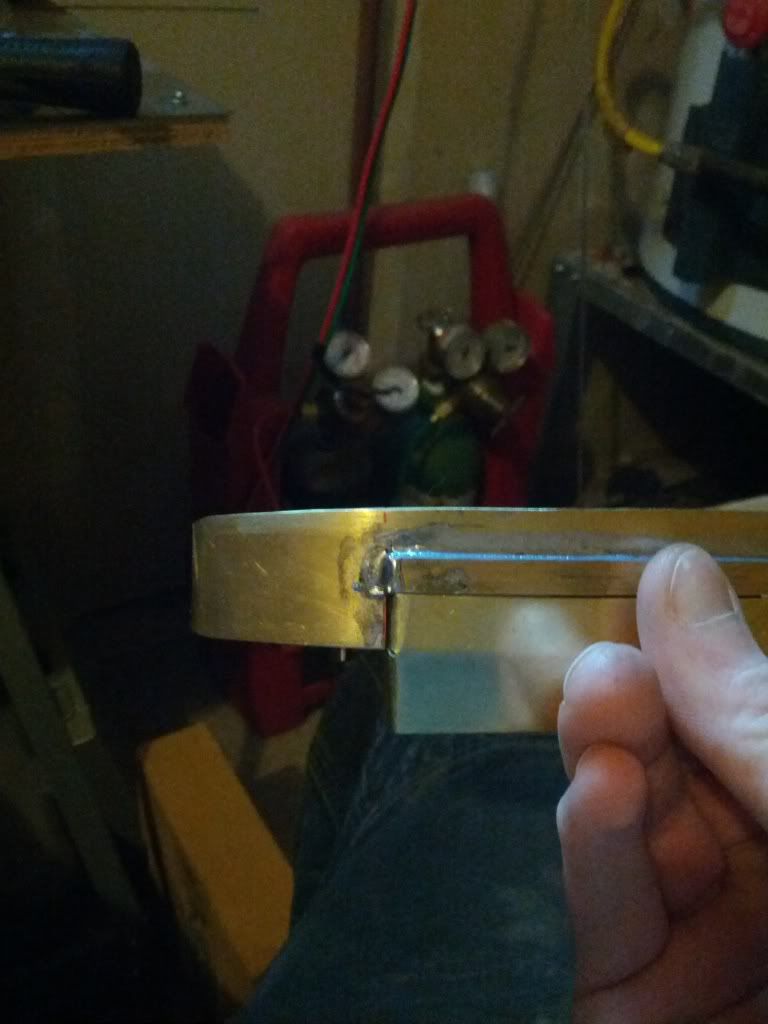 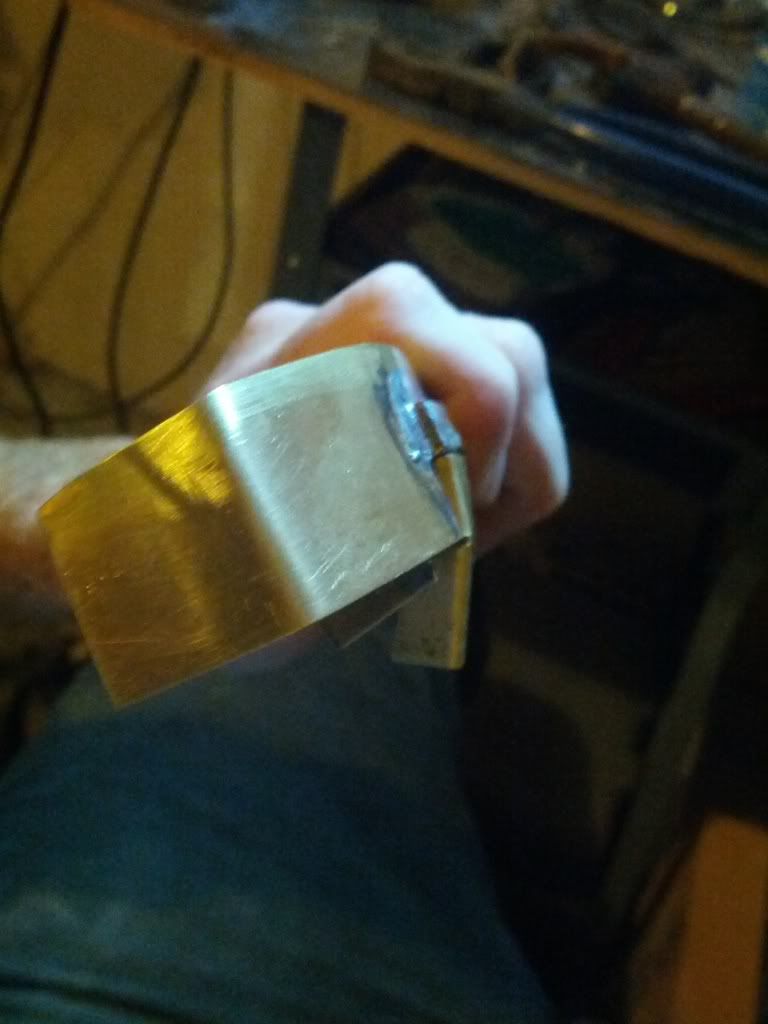 This piece was super hard to contour and conform to the bumper... After some serious contouring and more bending to give it a little more horizonal for pop up I started to solder it on... 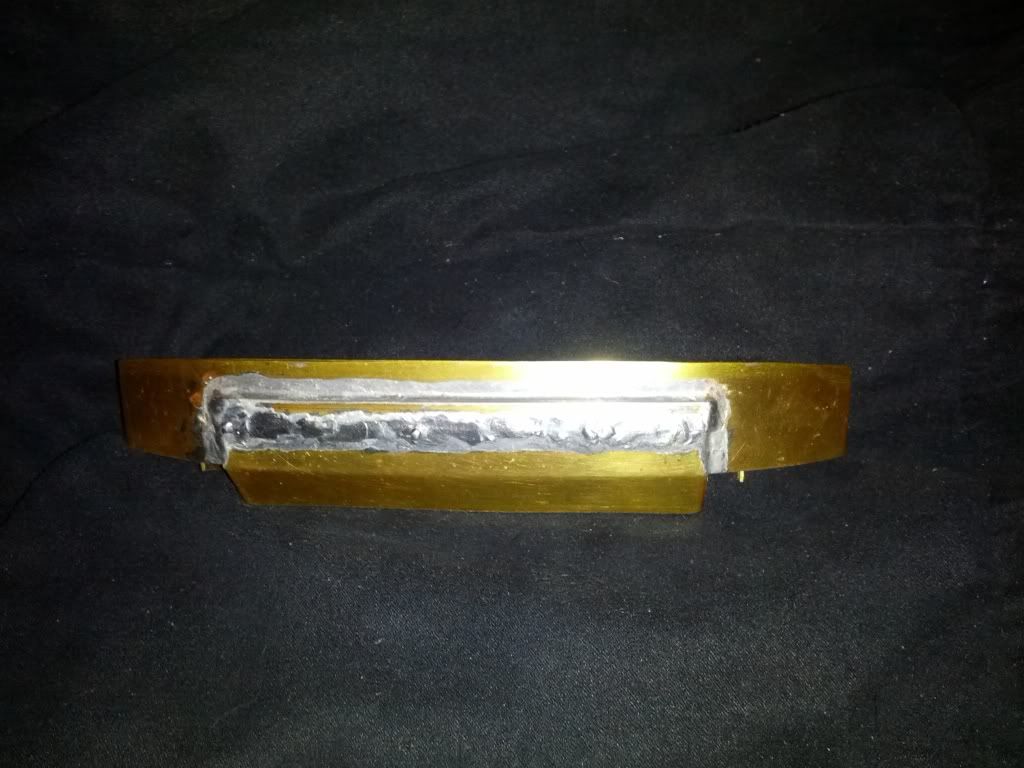 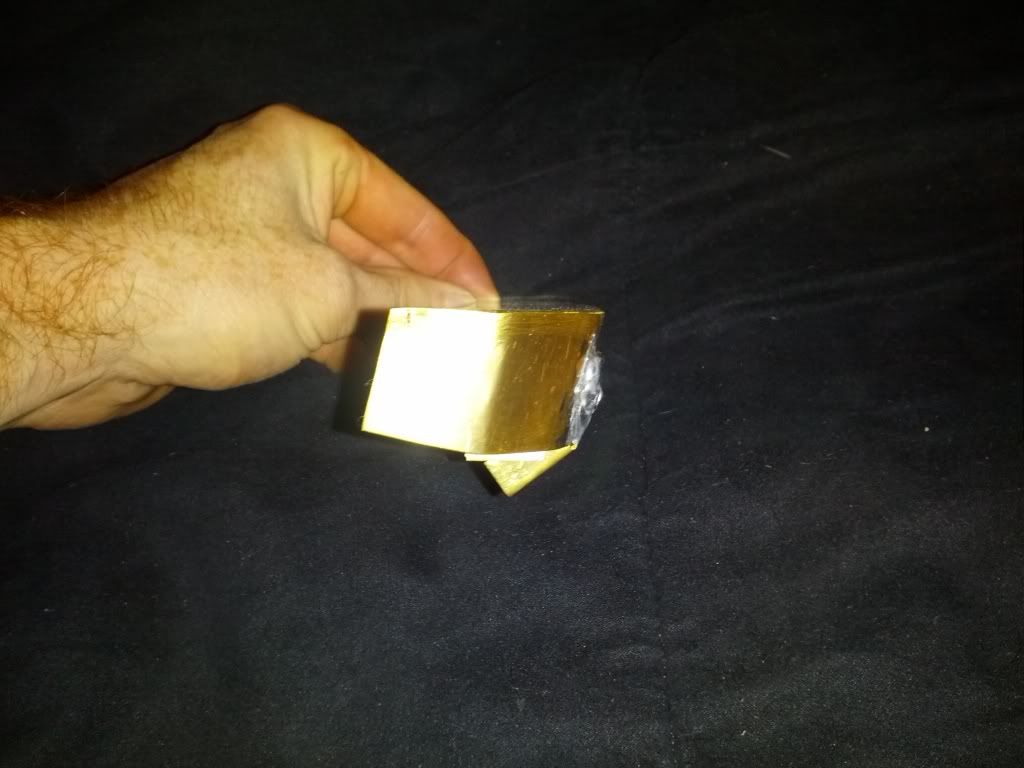 Sent from my Galaxy Nexus using Tapatalk |
|
| |
|
01-11-2014, 01:28 AM
| #27 |
| I wanna be Dave Join Date: Aug 2006 Location: under a rock and a hard place
Posts: 5,443
|
Those pics don't do the bumper justice, show them the cleaned up version  oh, and, GO HAWKS oh, and, GO HAWKS |
|
| |
|
01-13-2014, 07:34 AM
| #28 | |
| Pebble Pounder Join Date: Aug 2012 Location: bonney lake
Posts: 162
| Quote:
Sent from my Galaxy Nexus using Tapatalk | |
|
| |
|
01-13-2014, 07:34 AM
| #29 |
| Pebble Pounder Join Date: Aug 2012 Location: bonney lake
Posts: 162
|
Got the bumper cleaned up, it was still really boxy so I decided to cut some angles in it. 1 to make it not as boxy and 2 for some clearance on turning radius. Cleaned up... 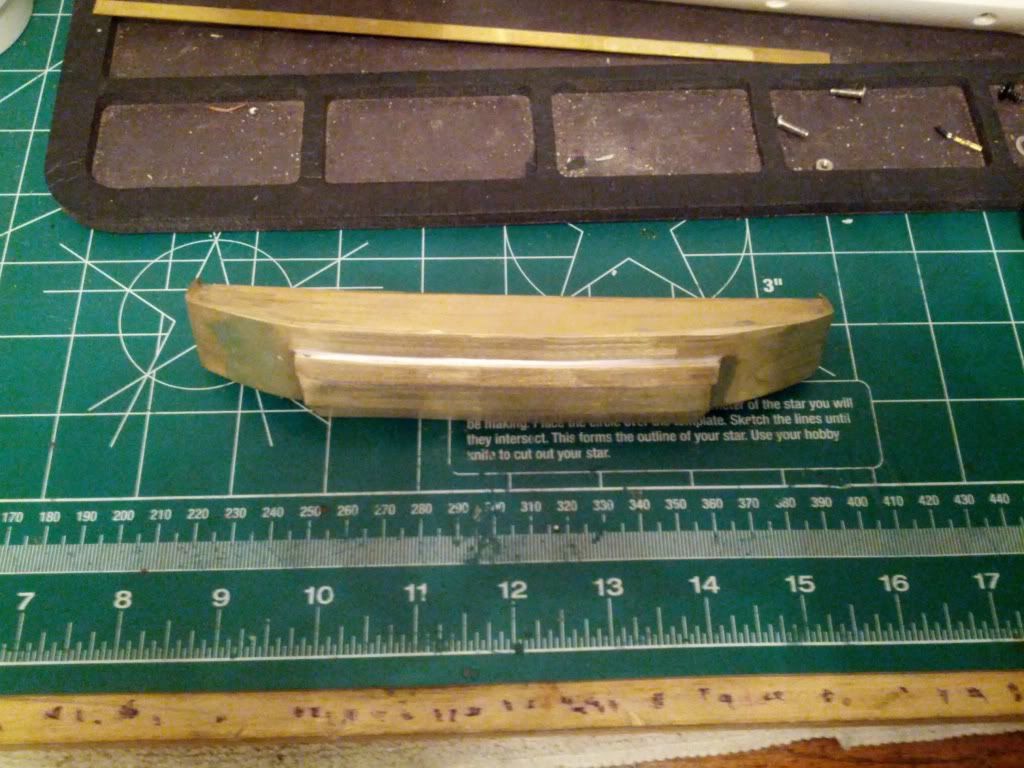 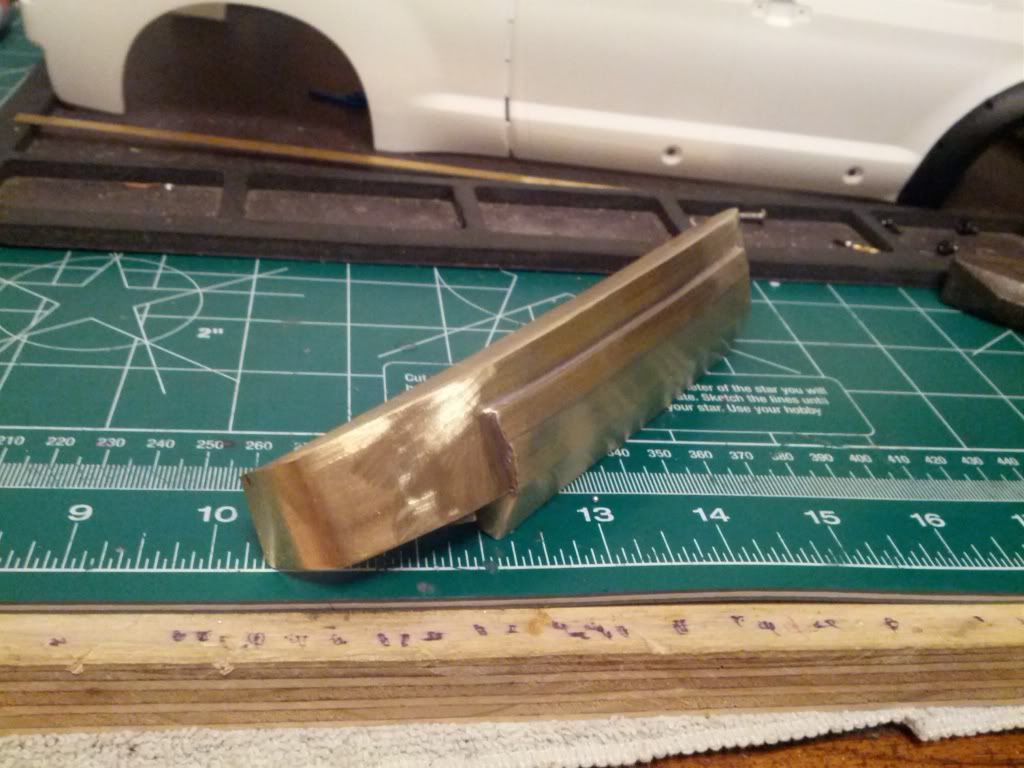 Cut angles... Front view 2 different angles.. 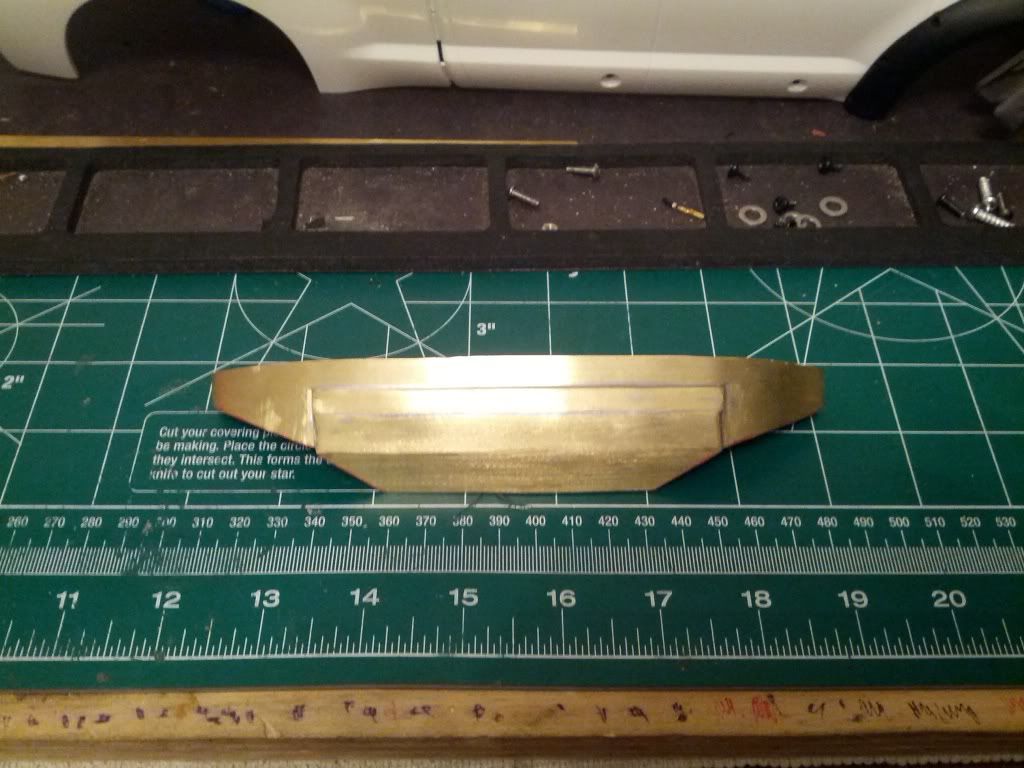 Side view same looking angles... 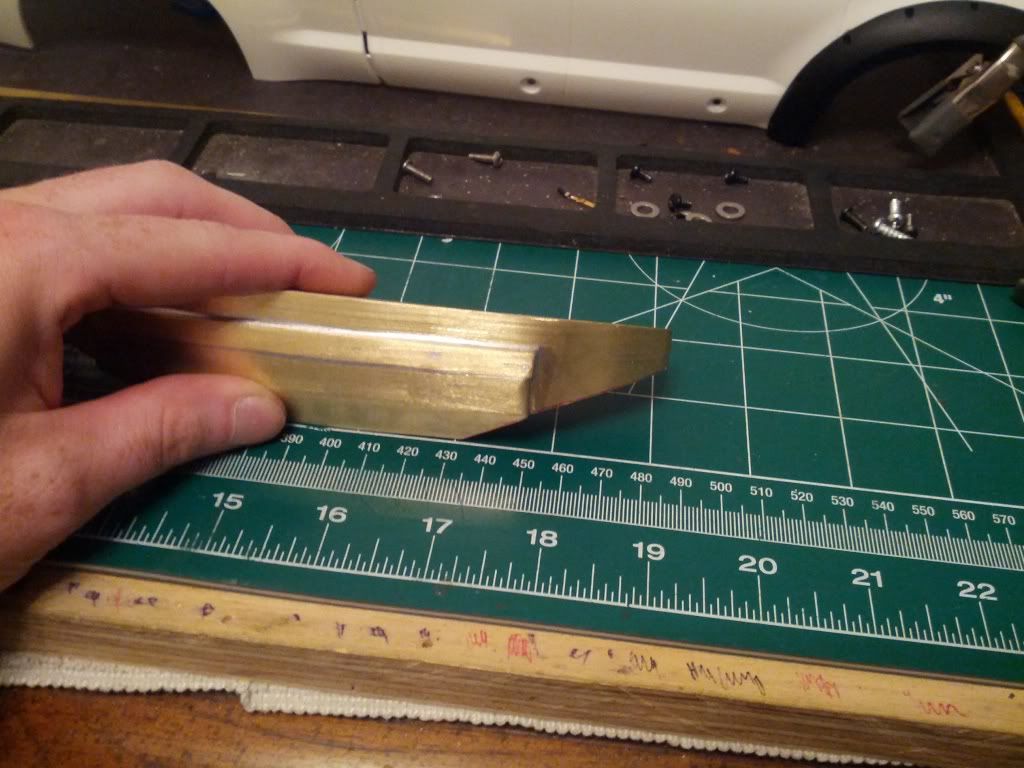 Boxed in to hide the inside of bumper.. 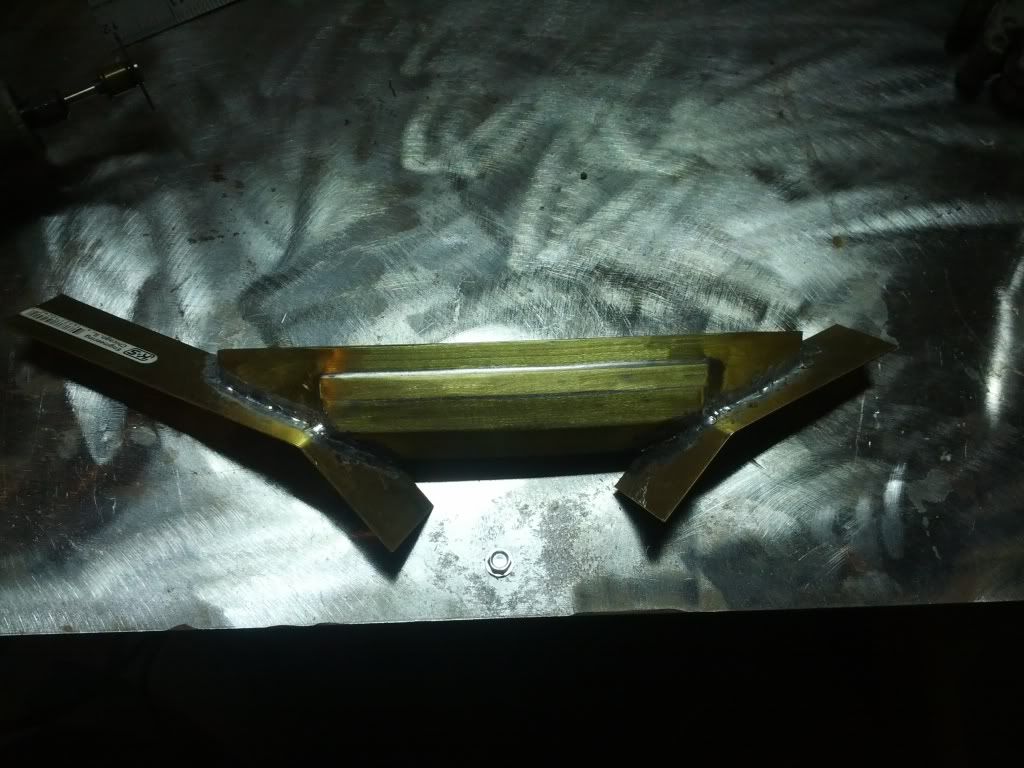 Cleaned up.. 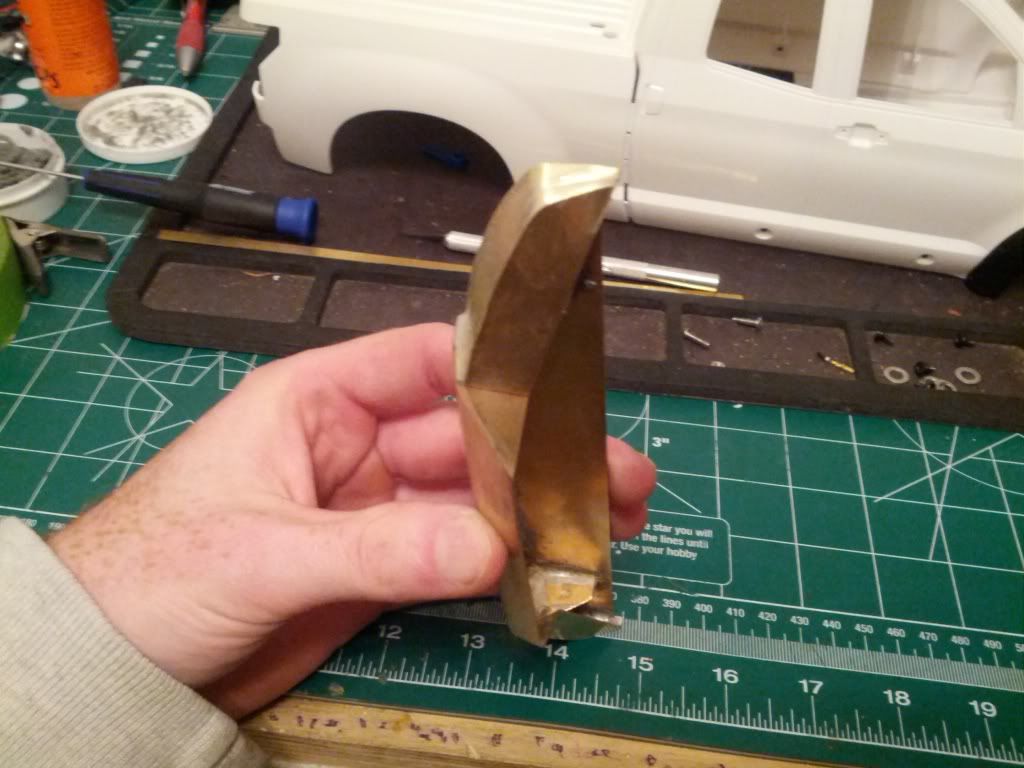 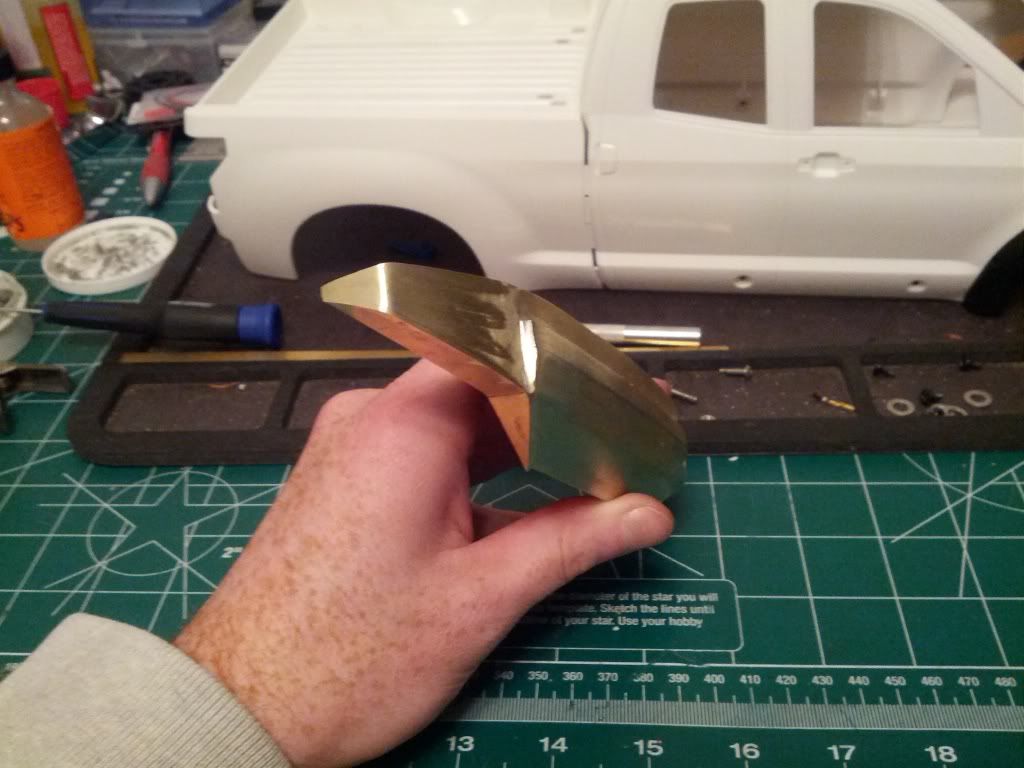 Sent from my Galaxy Nexus using Tapatalk |
|
| |
|
01-13-2014, 07:55 PM
| #30 |
| Rock Crawler Join Date: May 2012 Location: Washougal
Posts: 625
|
Looks great Marcus! Makes me want to try my hand at building some cool bumpers too .
|
|
| |
|
01-13-2014, 10:25 PM
| #31 |
| Pebble Pounder Join Date: May 2013 Location: Nobleboro
Posts: 158
|
Love that bumper..Good job. What a clean looking rig. I' m really digging this. Guess I have to try and make some bumpers as well. Doesn't take a lot to plant a spark, its the follow through...lol. Keep up the good work!
|
|
| |
|
01-13-2014, 10:34 PM
| #32 | ||
| Pebble Pounder Join Date: Aug 2012 Location: bonney lake
Posts: 162
| Quote:
Quote:
Sent from my Galaxy Nexus using Tapatalk | ||
|
| |
|
01-13-2014, 11:48 PM
| #33 |
| Rock Crawler Join Date: Sep 2011 Location: Sandusky, Ohio
Posts: 655
|
That's one of the cleanest wiring job's I've seen on an RC ! Nice fab work on the bumper too !
|
|
| |
|
01-14-2014, 07:54 AM
| #34 | |
| RCC Addict Join Date: Oct 2006 Location: crawlifornia
Posts: 1,612
| Quote:
Your rig looks very nice and clean. | |
|
| |
|
01-14-2014, 09:17 AM
| #35 | |
| Pebble Pounder Join Date: Aug 2012 Location: bonney lake
Posts: 162
| Quote:
Sent from my Galaxy Nexus using Tapatalk | |
|
| |
|
01-14-2014, 09:22 AM
| #36 | |
| Pebble Pounder Join Date: Aug 2012 Location: bonney lake
Posts: 162
| Quote:
 I always throw some shrink tube around them also to keep it a little more hidden and tight together.. 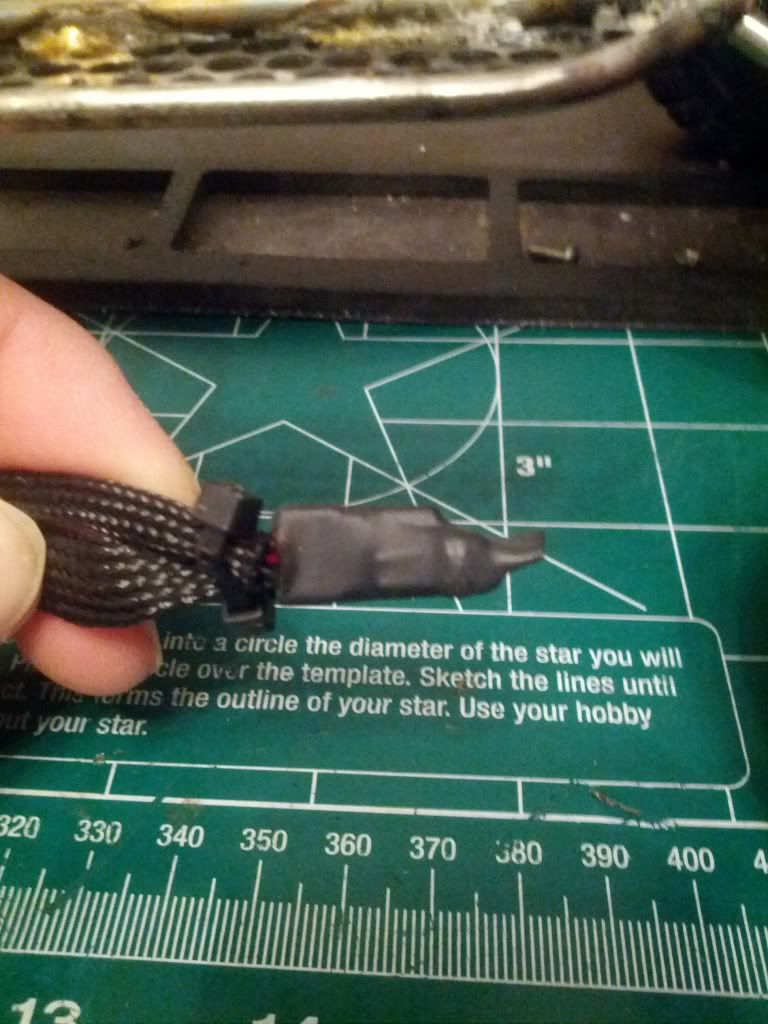 Sent from my Galaxy Nexus using Tapatalk | |
|
| |
|
01-14-2014, 06:29 PM
| #37 |
| Rock Crawler Join Date: May 2012 Location: Washougal
Posts: 625
|
[QUOTE=BoostFreak;4627837]Thanks Sam! You should do it!! I would love to some more awesome brass bumpers.. There light and also fairly cheap if you build them your self... You going to Nat's in ut? That's the plan, we need to get this voodoo dollar back to you guys somehow. On second thought maybe we just leave it in UT |
|
| |
|
01-15-2014, 08:41 AM
| #38 | |
| Pebble Pounder Join Date: Aug 2012 Location: bonney lake
Posts: 162
| Quote:
Sent from my Galaxy Nexus using Tapatalk | |
|
| |
|
01-15-2014, 08:44 AM
| #39 |
| Pebble Pounder Join Date: Aug 2012 Location: bonney lake
Posts: 162
|
Got the bumper mounted... Had to stick it out farther then what I initially planned due to turning and tires colliding with the bumper.. Pain in the butt to get those 2 holes drilled to the chassis holes... 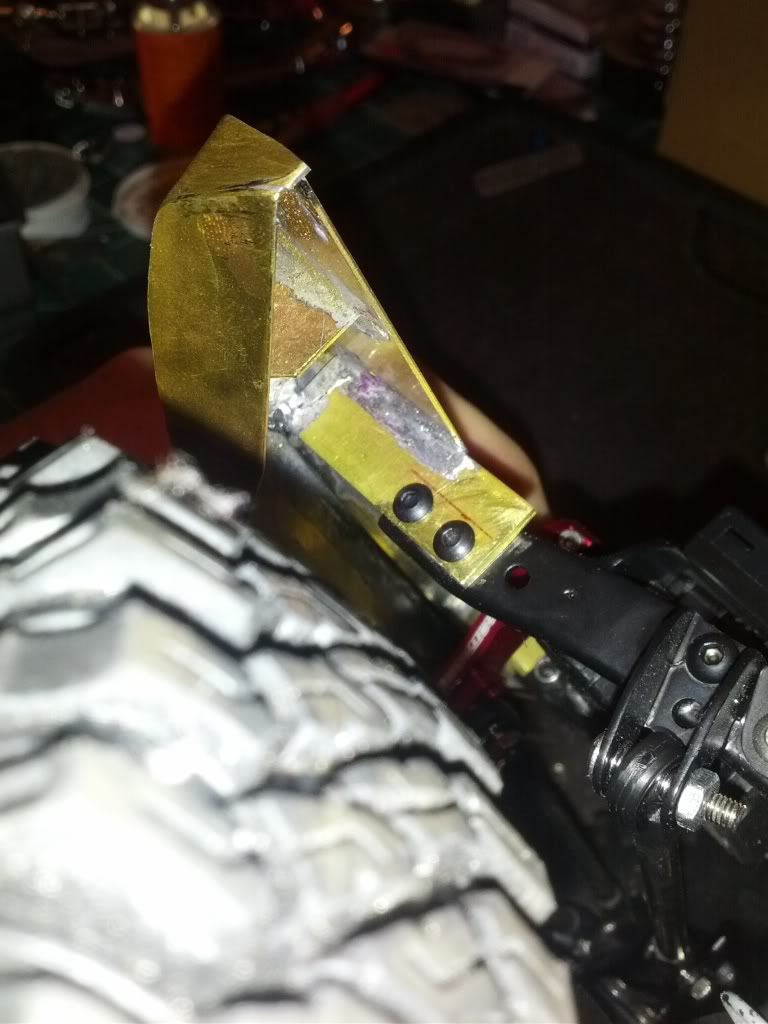 Front shot... 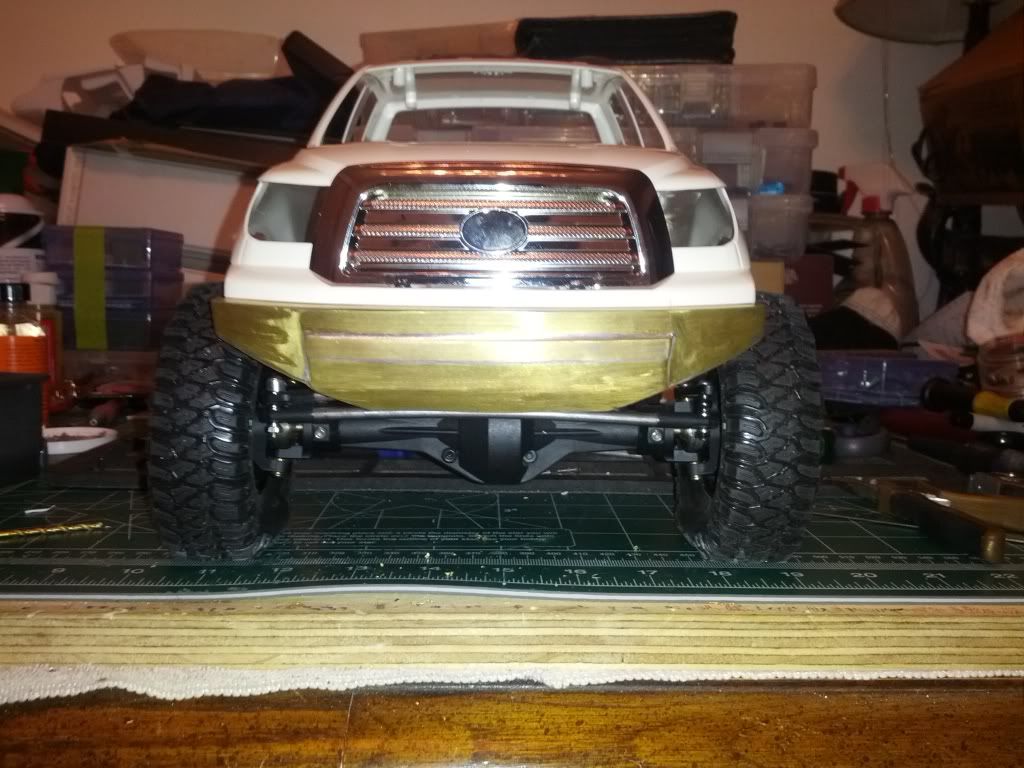 Once I got it mounted then focused on the front body mount. Drilled some holes in the body then into the bumped.. 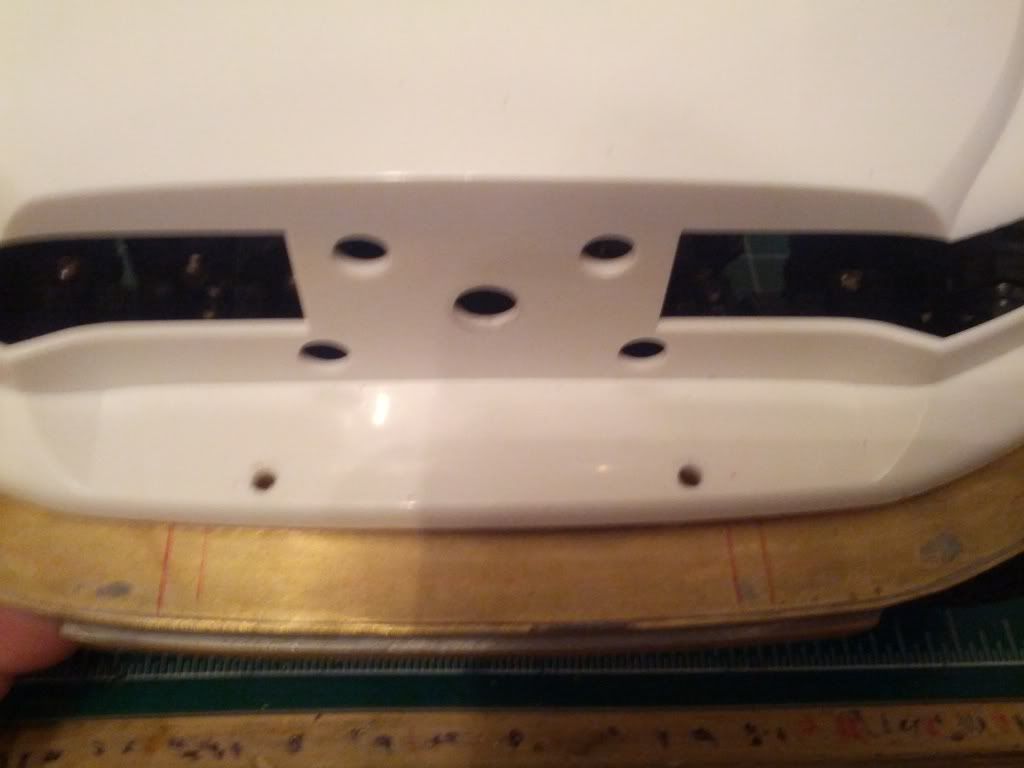 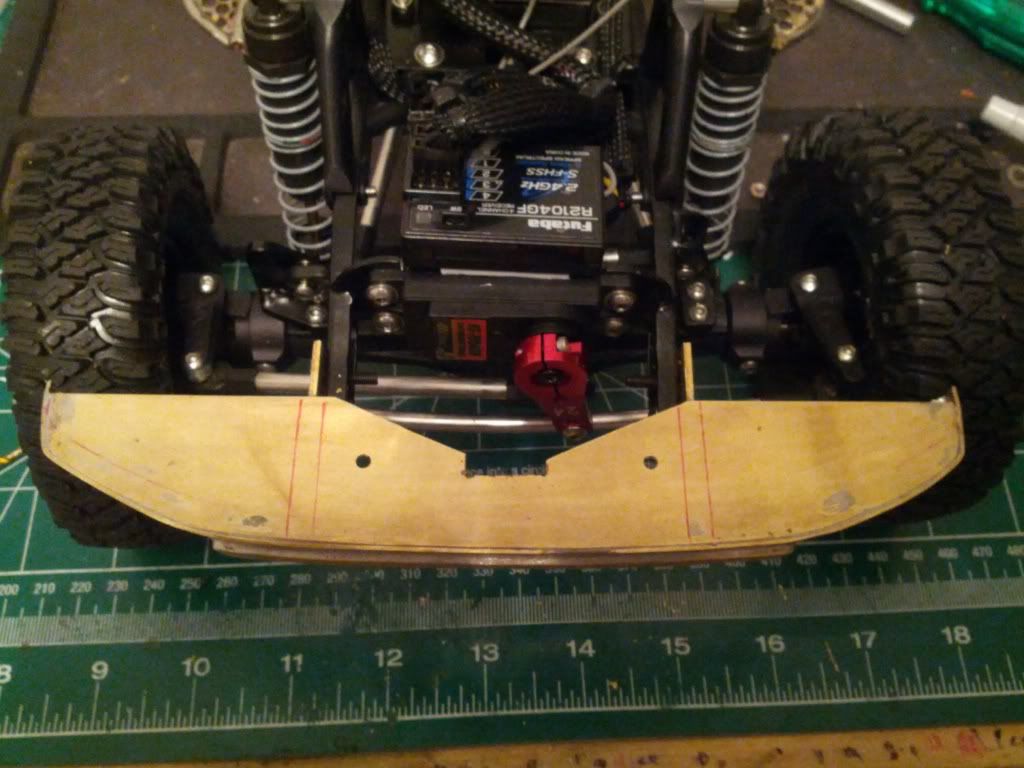 Tapped the holes in the bumper to make sure everything was line up the soldered brass nuts on to it to strengthen it.. 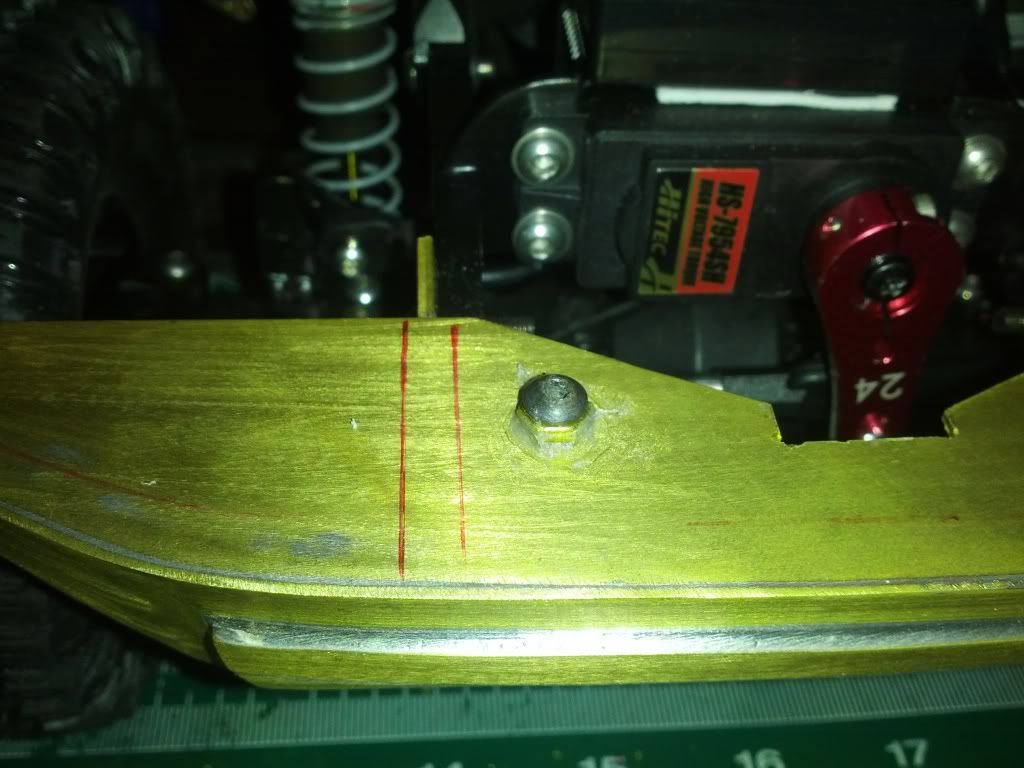  Put together.. 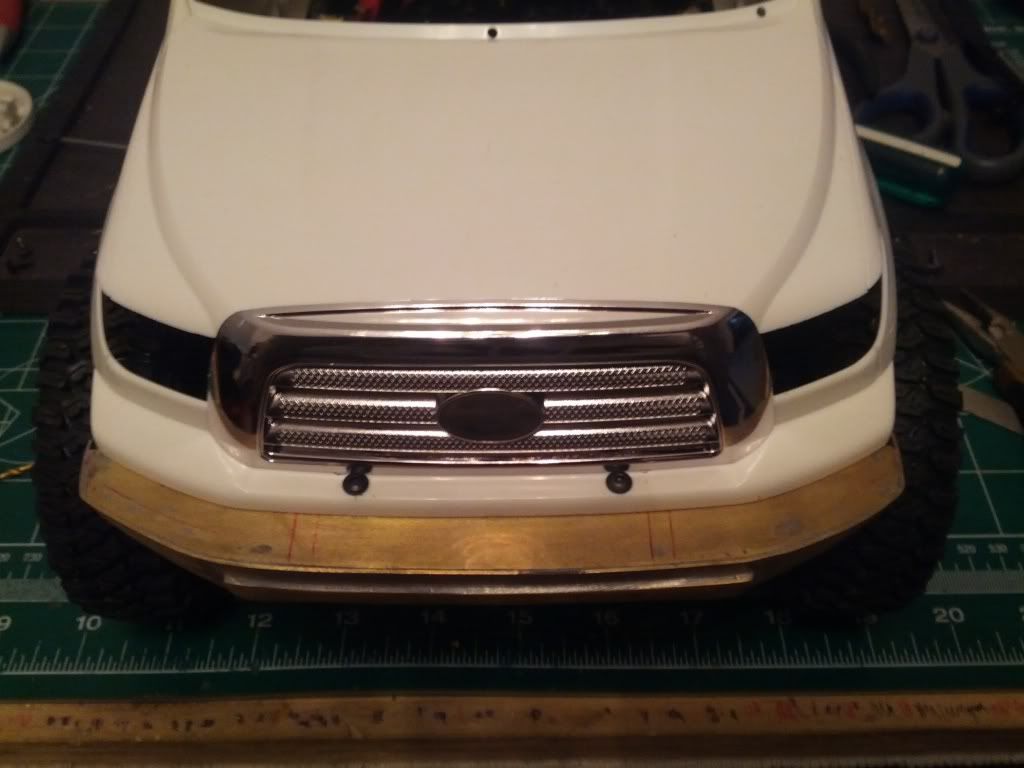 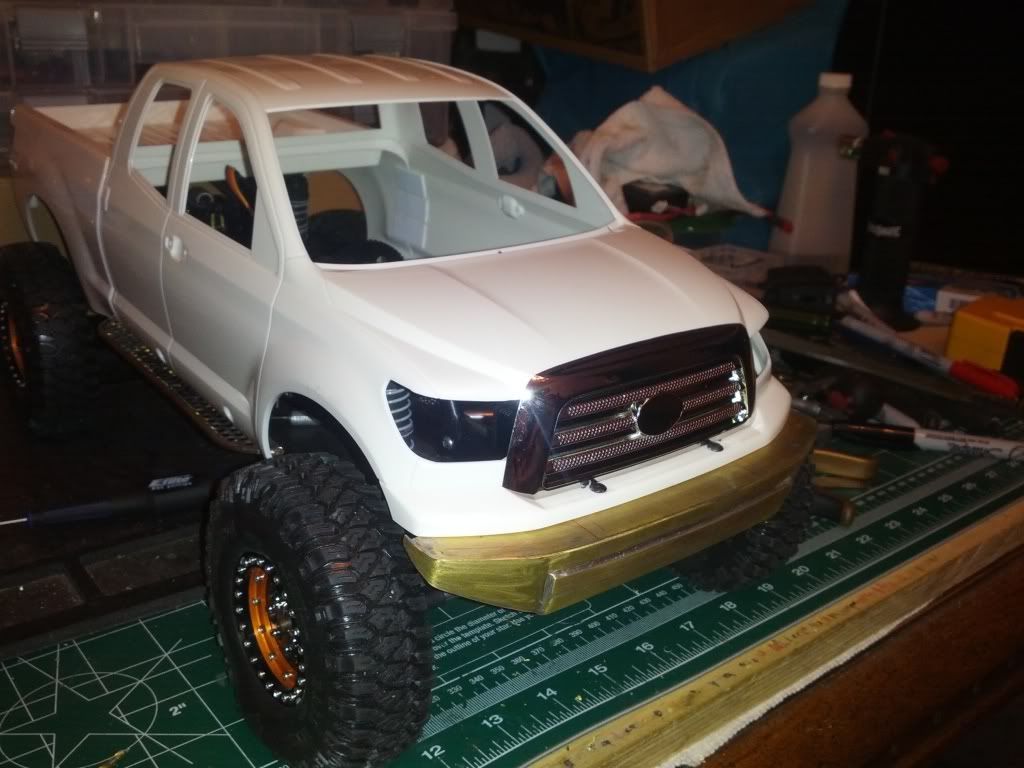 Sent from my Galaxy Nexus using Tapatalk |
|
| |
|
01-15-2014, 08:46 AM
| #40 |
| Pebble Pounder Join Date: Aug 2012 Location: bonney lake
Posts: 162
|
Next major thing I need to work on is the drop bed. But when I first wired up this rig I didn't think about that and put the ESC on the rear cross member and all the wires too for the bec. Decided to make a new esc plate... Seen Dev do this on a couple of his rigs so I tried my hand at it.. .030 lexan bent to shape and a little extra for some strength.. 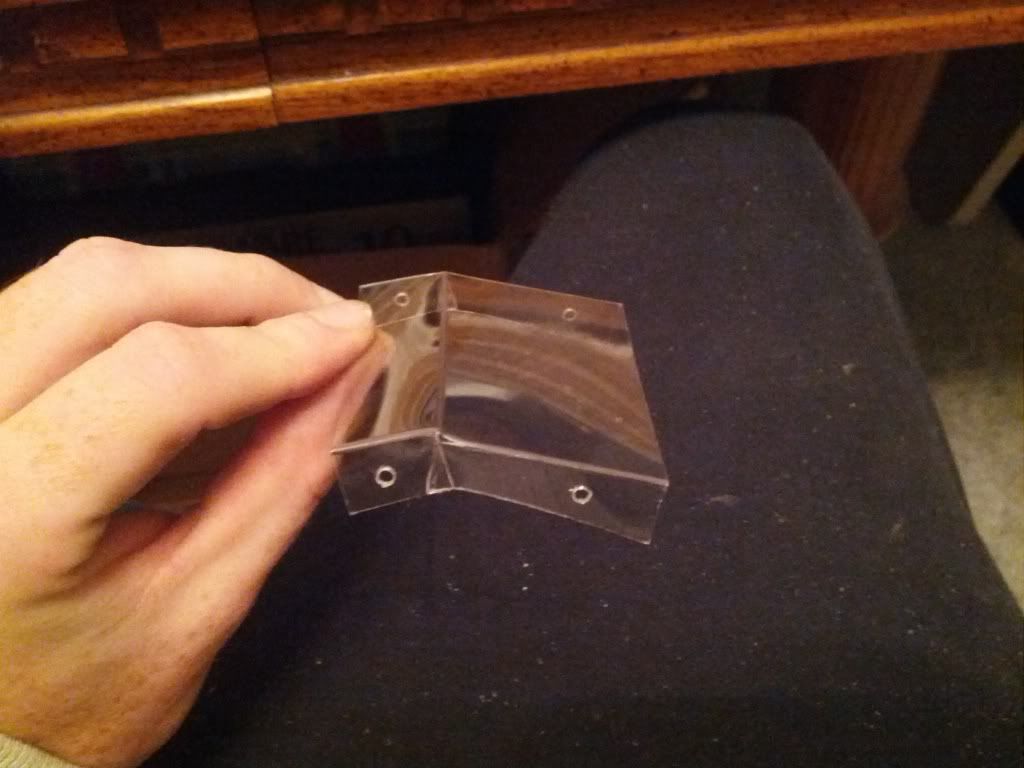 Just drilled a couple holes in the chassis to secure with some 3mm screw's and nuts.. 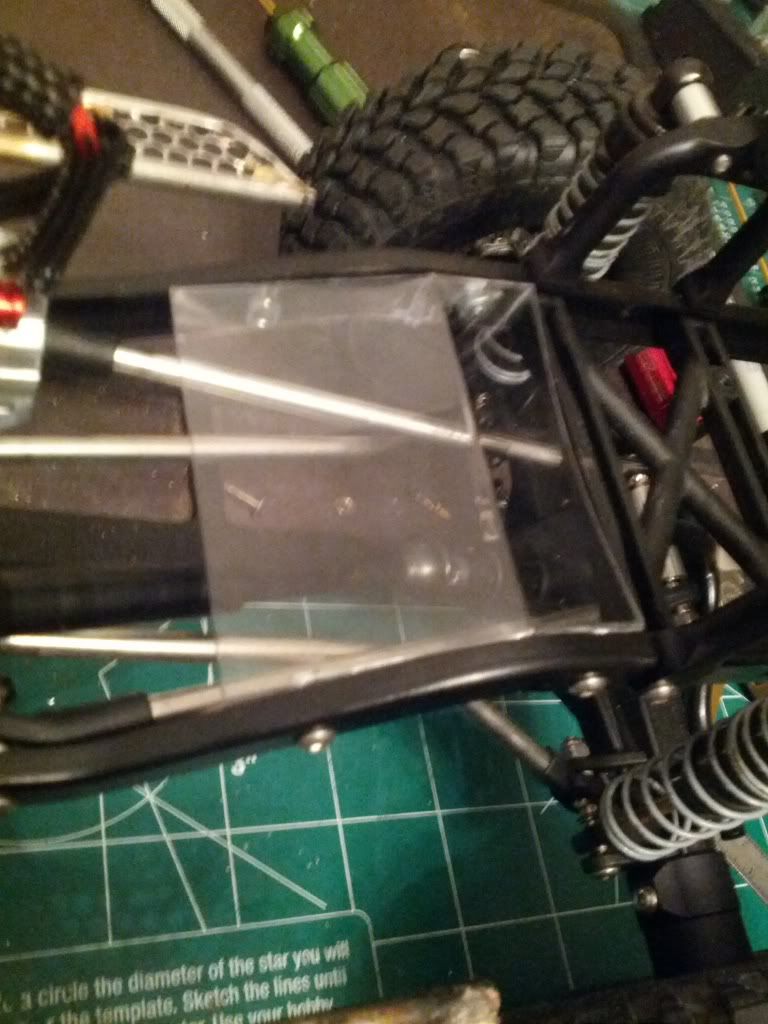 Then the nasty part came of rewire all and to get the bec wires under the x member and to the fuel cell. 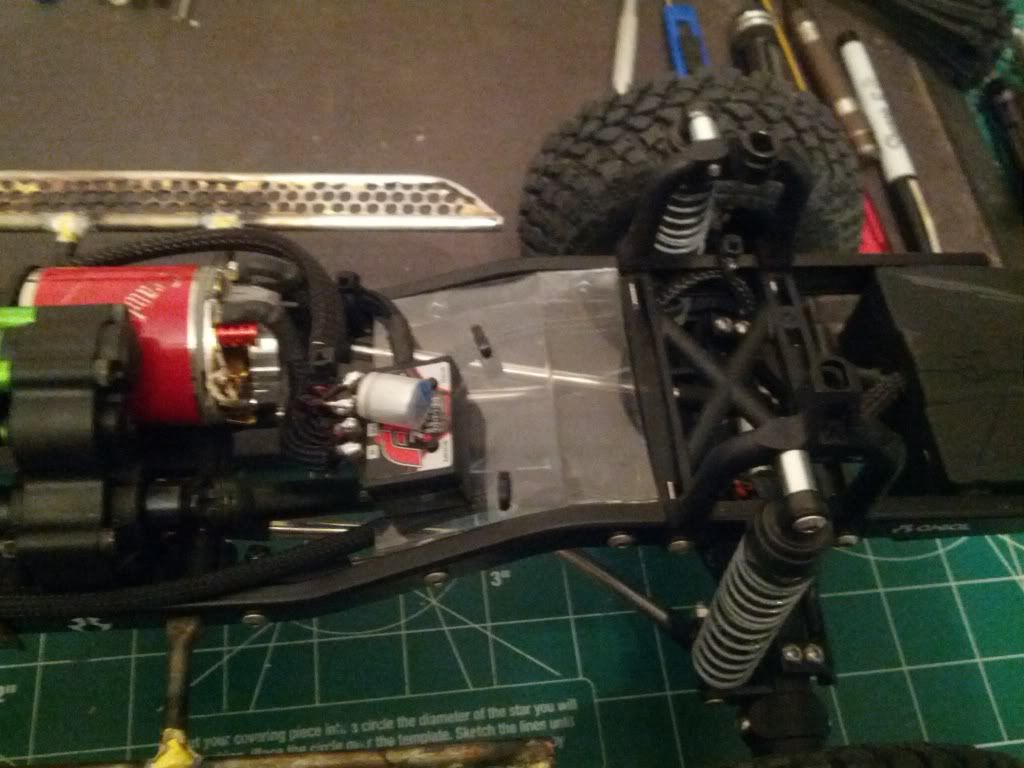 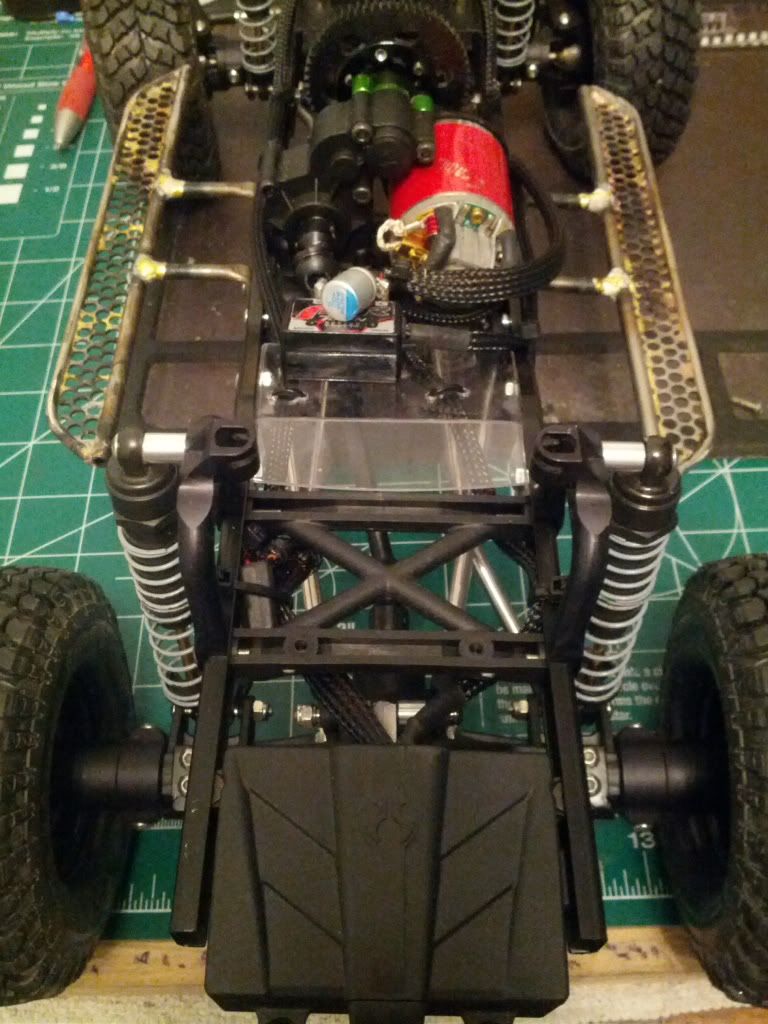 Only thing left for wiring is possibly shorting the battery wires when I get that established Sent from my Galaxy Nexus using Tapatalk |
|
| |
 |
 Absolute KAOS!! - Similar Threads
 | ||||
| Thread | Thread Starter | Forum | Replies | Last Post |
| CI kaos on losi sportsman | Tgreer | Team Losi Comp Crawler | 3 | 07-28-2011 09:54 PM |
| what is the absolute narrowest body available? | BrandonW | Newbie General | 4 | 05-20-2008 03:37 PM |
| Starting from absolute scratch... | 79DUG | Tamiya Clod Buster | 3 | 11-21-2004 12:02 AM |
| |


 Linear Mode


