| |
| |||||||
 |
| | LinkBack | Thread Tools | Display Modes |
 10-02-2008, 08:03 PM
| #21 | |
| I wanna be Dave Join Date: Aug 2007 Location: santa monica
Posts: 3,687
| Quote:
| |

|  |
| Sponsored Links | |
| | |
|
10-02-2008, 08:03 PM
| #22 |
| Rock Stacker Join Date: Jun 2007 Location: Layton
Posts: 79
|
How thick of styrene are you using |
|
| |
|
10-02-2008, 08:50 PM
| #23 |
| Quarry Creeper Join Date: Sep 2008 Location: Detroit
Posts: 330
|
Very nice work. I am building a blackfoot clubcab right now and this helps. Awesome work.
|
|
| |
|
10-02-2008, 09:47 PM
| #24 | ||
| I wanna be Dave Join Date: Aug 2007 Location: santa monica
Posts: 3,687
| Quote:
better pic of the window surrounds earlier: 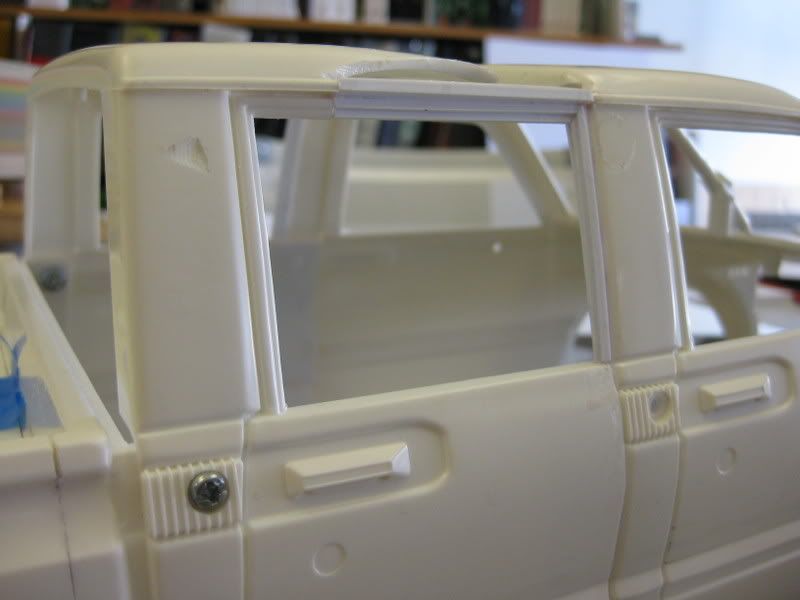 Quote:
f150 stepside crew cab build (blackfoot) | ||
|
| |
|
10-02-2008, 09:53 PM
| #25 |
| Pebble Pounder Join Date: May 2007 Location: Long Island, NY
Posts: 164
|
Damn, i remember when you first built that 4 door commander. You beat that thing uppp. Your amazing with hardbodies and this thing is going to be awesome!
|
|
| |
|
10-02-2008, 10:35 PM
| #26 |
| Rock Stacker Join Date: Jun 2007 Location: Layton
Posts: 79
|
Man thats a lot of different sizes but i guess if it looks as good as yours its worth it. Yours looks awsome hope mine turns out as good as yours.  Thanks for your help Thanks for your help |
|
| |
|
10-02-2008, 10:51 PM
| #27 | |
| I wanna be Dave Join Date: Aug 2007 Location: santa monica
Posts: 3,687
|
thanks! Quote:
0.040 is the thickest I usually use, and then only in straight long structural pieces (like reinforcing the seams between the front and rear cabs or the roof which I know will get abused, lol). I also layer in some instances, starting with paper thin styrene then working up to a stronger thickness. | |
|
| |
|
10-03-2008, 10:23 AM
| #28 |
| Rock Stacker Join Date: Jul 2007 Location: Lansing
Posts: 90
|
Another kickazz crewcab eh Pablo? The Blackfoot was sweet (I chopped up a cpl of them to copy you but never got it done) but this is something else I wanna see what magic you work on this one.
|
|
| |
|
10-03-2008, 10:36 AM
| #29 | |
| I wanna be Dave Join Date: Aug 2007 Location: santa monica
Posts: 3,687
| Quote:
you have chopped up blackfoots?! send them my way and I'll see what I can do for you. Maybe we can barter for stuff if you have something I need.... | |
|
| |
|
10-03-2008, 01:12 PM
| #30 |
| Rock Stacker Join Date: Jul 2007 Location: Lansing
Posts: 90
|
I want to give it a shot first, I think I can pull it off but if I get stuck It's good to know you have my back . It's just sitting on the back burner until I get other stuff sorted through. Enough about me though what chassis are you using or are you going to fab your own again?
|
|
| |
|
10-03-2008, 01:58 PM
| #31 | |
| I wanna be Dave Join Date: Aug 2007 Location: santa monica
Posts: 3,687
| Quote:
This body is going on the jeep crew cab chassis. I started with a K2-3L, then had to recut new alum chassis pieces to accommodate the interior. This hilux will not have an interior though.  tamiya touring car shocks, TLT axles, pede trans. | |
|
| |
|
10-03-2008, 02:30 PM
| #32 |
| I wanna be Dave Join Date: Aug 2007 Location: santa monica
Posts: 3,687
|
got the door handle recess roughed in and some prelim sanding done. filling the mounting holes now. damn there are lots of them... 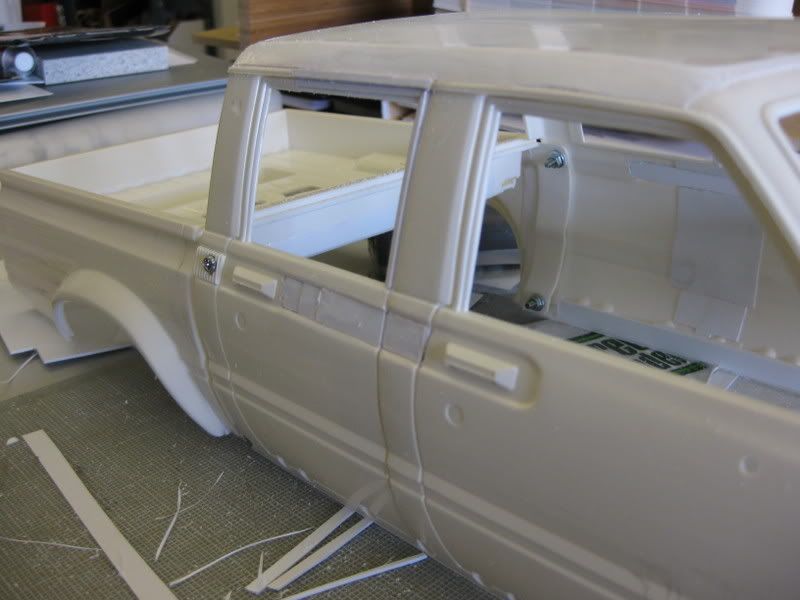 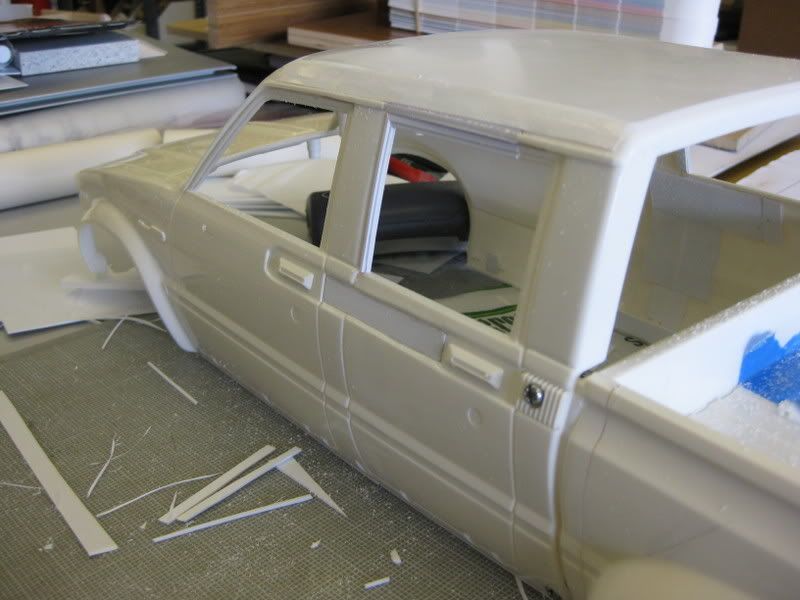 |
|
| |
|
10-03-2008, 02:39 PM
| #33 |
| Tire&Foam Extraordinaire   Join Date: Jun 2007 Location: C.I. Compound, Tyler, Texas
Posts: 5,601
|
That is coming along nicely .Are you gonna do a drop bed? What about the back window area? I don't like how they did the back window on the hilux. I want to change that on my hilux, I just haven't had the time or focus to actually do it. Very cool build pantablo. |
|
| |
|
10-03-2008, 03:18 PM
| #34 |
| I wanna be Dave Join Date: Aug 2007 Location: santa monica
Posts: 3,687
|
Thanks. No plans for a drop bed. the chassis this is going on has the jeep crew cab, and on that the drop bed prevents me lowering the body to a reasonable height. I dont feel the need on this to do a drop bed. I'll just texture and paint flat black as is. The rear window? You mean how you have to paint part of the glass to be body color? That doesnt bother me here. Trying to keep it simple. I'll install it as its supposed to be... |
|
| |
|
10-03-2008, 03:43 PM
| #35 |
| I wanna be Dave Join Date: Aug 2007 Location: santa monica
Posts: 3,687
|
the big stuff is done. now more filler, more sanding, more filler, etc...and some details to attend to (like filling the 18 mounting holes, lol)...  |
|
| |
|
10-03-2008, 07:47 PM
| #36 |
| Quarry Creeper Join Date: May 2008 Location: Lafayette, Indiana
Posts: 277
|
Looks amazing! You should crew cab the new tundra's whenever they come out.
|
|
| |
|
10-03-2008, 07:58 PM
| #37 |
| RCC Addict Join Date: Dec 2007 Location: Calgary
Posts: 1,575
|
wow! great job on joining the two
|
|
| |
|
10-03-2008, 08:19 PM
| #38 | |
| I wanna be Dave Join Date: Aug 2007 Location: santa monica
Posts: 3,687
|
thanks again guys. Quote:
maybe that body gets the opposite treatment-make it a single cab long bed, lol... | |
|
| |
|
10-04-2008, 11:32 PM
| #39 |
| I wanna be Dave Join Date: Aug 2007 Location: santa monica
Posts: 3,687
|
filled a bunch of holes. used the parts tree from the bed hole to plug the mounting holes, then a bit of putty.  also filled the bed holes and added a detail around the bed I think is sorely missing on the tamiya vs the 1:1...  minor filling and some sanding remains. Have to repair a problem I have with the roof too...grrr... |
|
| |
|
10-05-2008, 12:24 AM
| #40 |
| Rock Crawler Join Date: Jul 2007 Location: los angeles
Posts: 539
|
wow pablo look at you go. looks great. |
|
| |
|
| |


 Linear Mode


