| | #1 |
| Rock Crawler Join Date: Jan 2013 Location: Australia
Posts: 541
|
Hi. Me again, with another Class 1 build. I was looking around the interwebs for 1:10 body options. I wanted a hard body and something a bit unique. A random eBay search popped up a Unimog hard body that was quite detailed from a Chinese seller. I took the gamble and fired up Paypal and soon it was on it's way down under. About 2 weeks later a big box arrived and I eagerly opened it up. 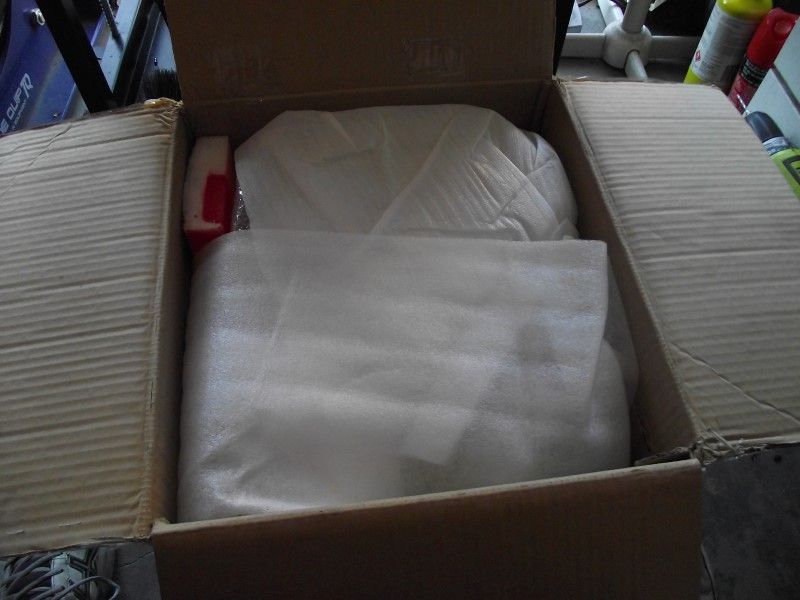 Every thing was well packed and I was bloody happy with what I got. 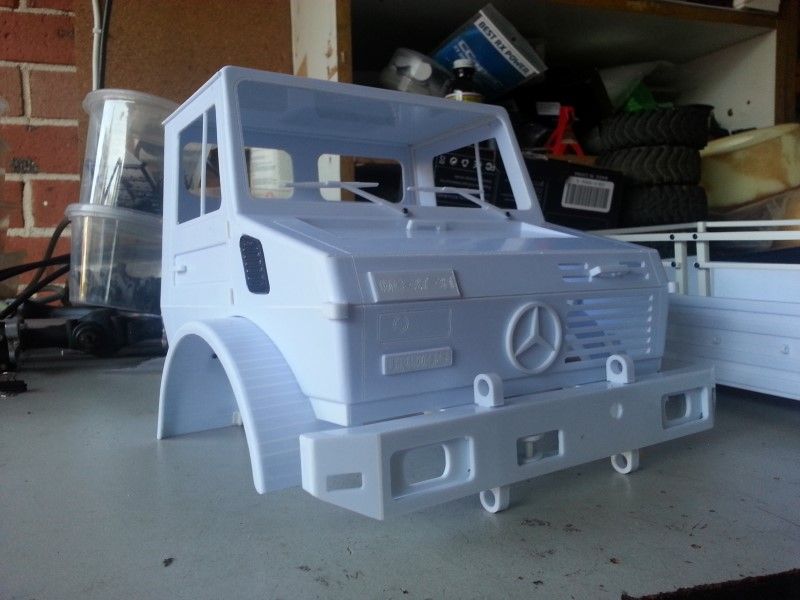 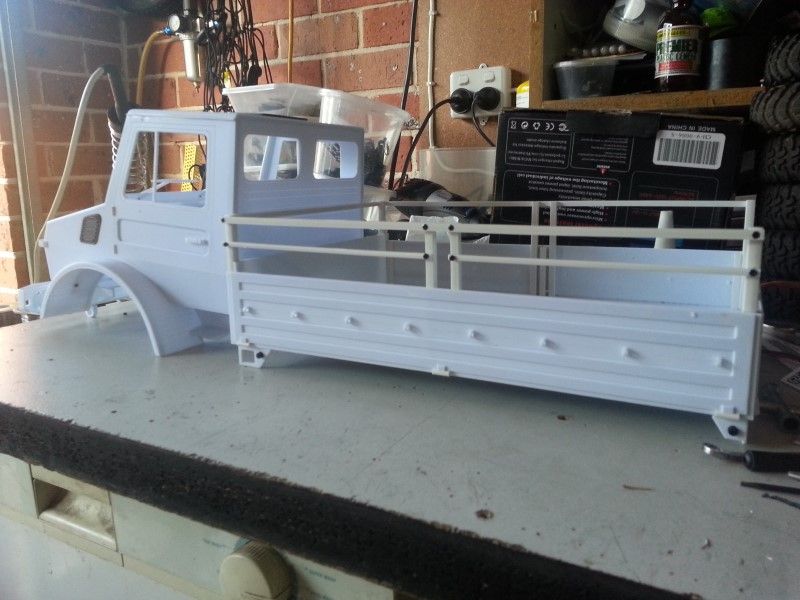 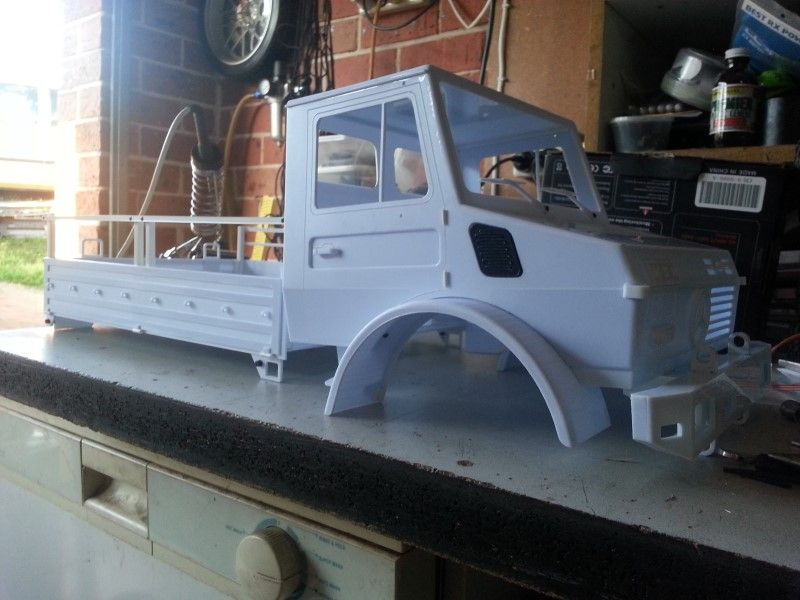 And, all these bits, with the exception of the wheel, are also included. 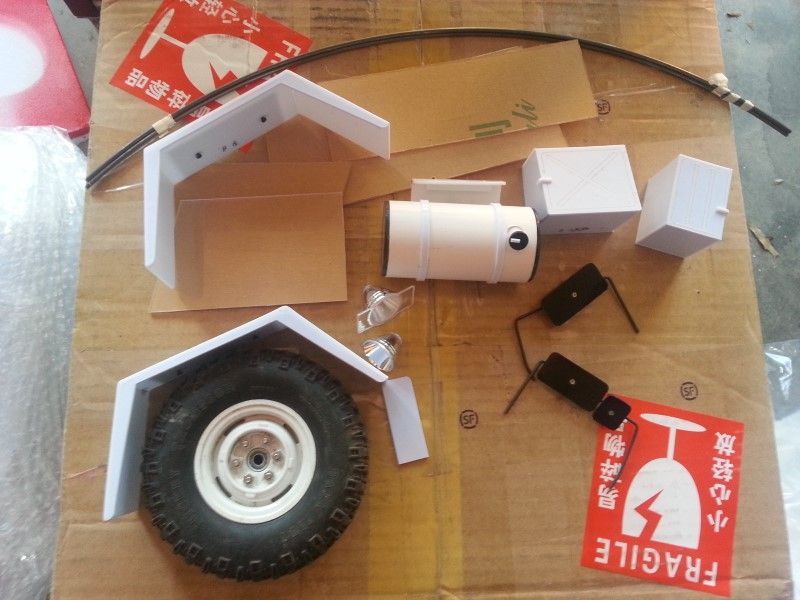 I grabbed an SCX10 axle and sat the cab over it. 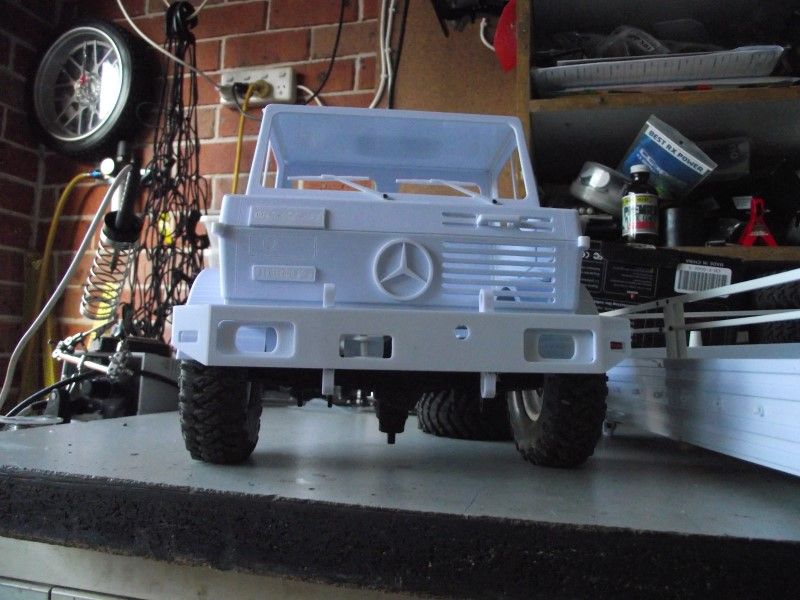 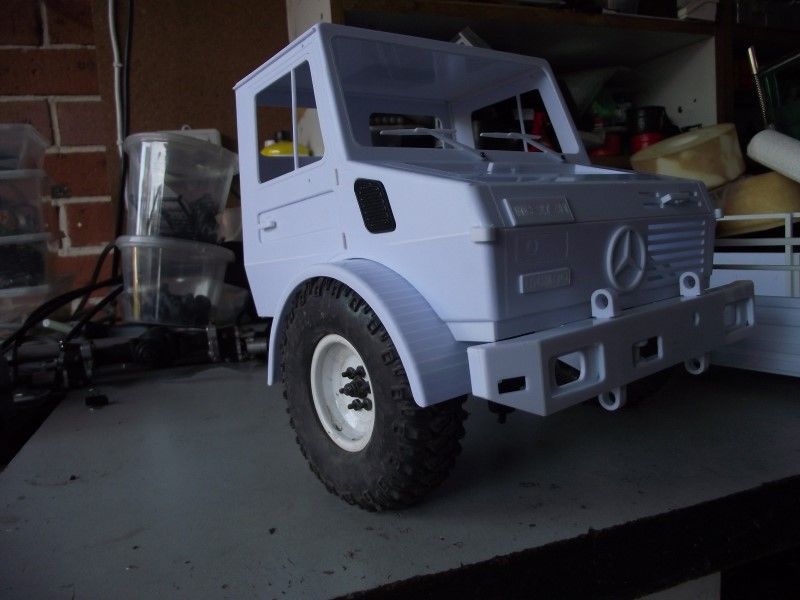 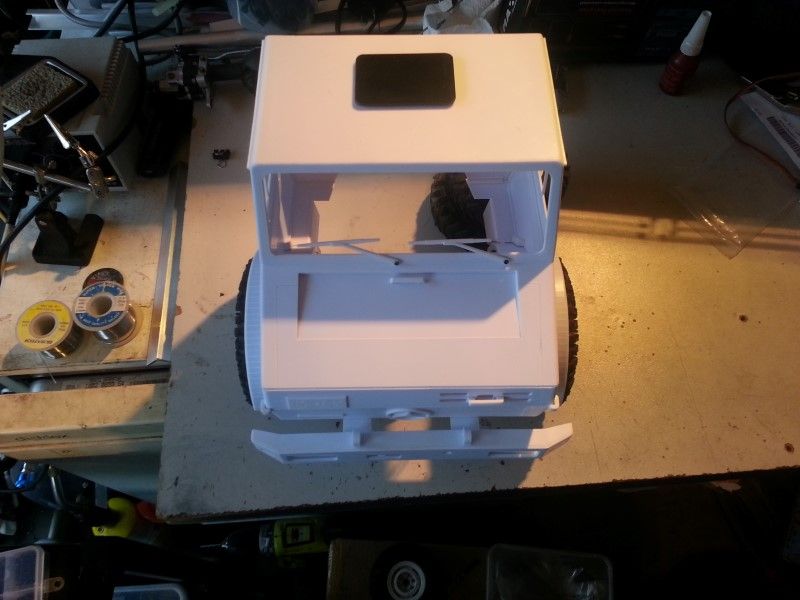 As you can see the body is a perfect fit, and appropriately scaled too. As for construction of the body, it appears to be CNC milled parts that are then hand assembled. The structure is very rigid and strong and has a high level of detail. The intention is to fabricate an interior from Styrene to suit and I have an appropriate theme in mind too. I hope you enjoy following along and as always, your comments and suggestions are very welcome. Cheers H2Micr0 |
| |  |
| Sponsored Links | |
| | #2 |
| Pebble Pounder Join Date: May 2009 Location: San Antonio
Posts: 126
|
very nice.whats the sellers i.d. ? very interested.
|
| |  |
| | #3 |
| Jeep whore  Join Date: Aug 2008 Location: Florida
Posts: 1,042
| |
| |  |
| | #4 |
| RCC Addict Join Date: Jul 2012 Location: Oreganastan
Posts: 1,151
|
Lots of details there. What wheelbase you running? Sub'd |
| |  |
| | #5 | |
| Rock Crawler Join Date: Jan 2013 Location: Australia
Posts: 541
| Thanks. See below. Quote: Bingo, that is the seller. They didn't have the camper type rear when I got mine though. I like that one. Cheers H2Micr0 | |
| |  |
| | #6 |
| Quarry Creeper  Join Date: Sep 2008 Location: NW San Antonio
Posts: 435
|
Very cool...
|
| |  |
| | #7 |
| RCC Addict Join Date: Jun 2009 Location: Australia
Posts: 1,703
|
Well all i got to say being one of Bens close mates i get to see stuff often before it apears in the threads. He got a cew tricks up his sleave for this build. But no spoilers from me  |
| |  |
| | #8 |
| Rock Crawler Join Date: Jan 2013 Location: Australia
Posts: 541
|
OK, so I have cool body. Now what to use for a chassis. Don't really have a chassis laying around begging to be used . . . . . . Or do I?????? 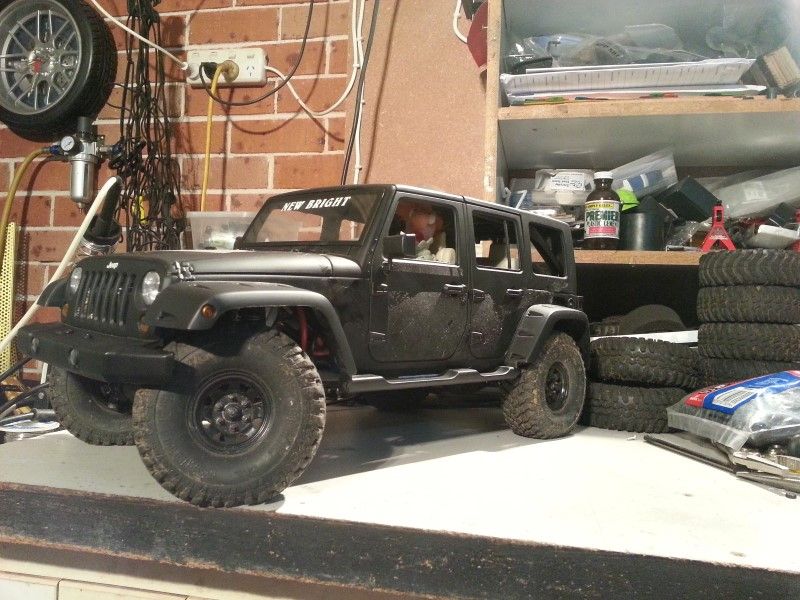 Yes, I know that is a Jeep. But it is ONLY a Jeep. And seeing as a Unimog is more interesting than a Jeep, the Jeep looses it's Chassis Awwwwww. This is an SCX10 chassis with the wheelbase extended to 324mm to suit the Newbright body. Has a front motor mount with transfer case. I rejigged the electronics locations, moved the battery and build a couple of brackets to mount the body. Bolted on some appropriate wheels with Class 1 spec tyres and left the wheel base at 324mm. 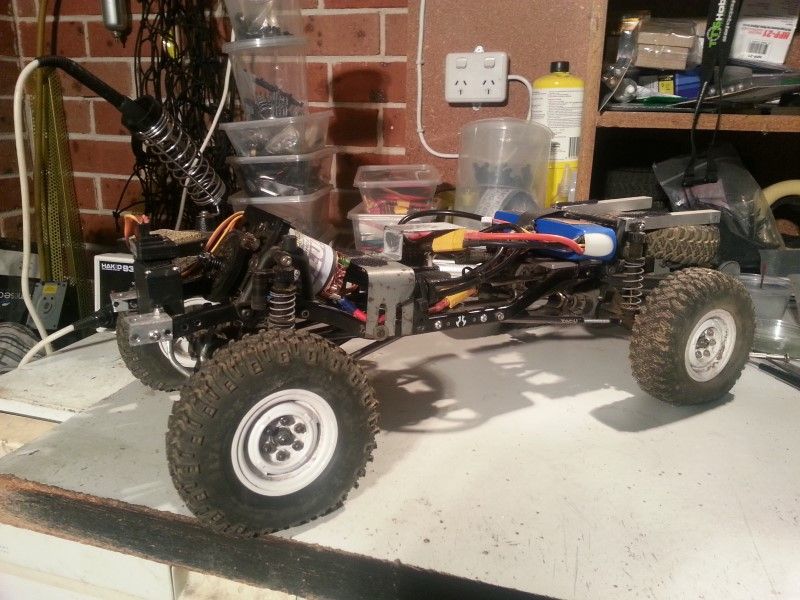 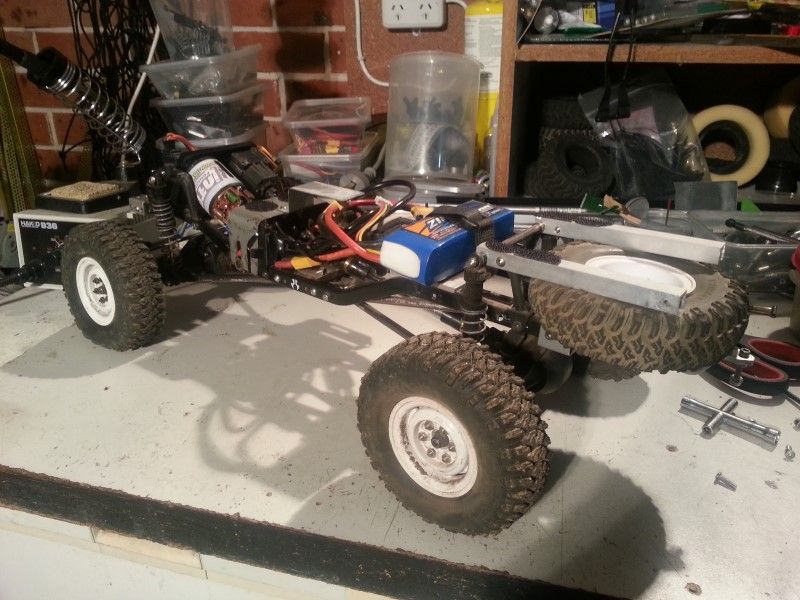 Obligatory Flex shots. 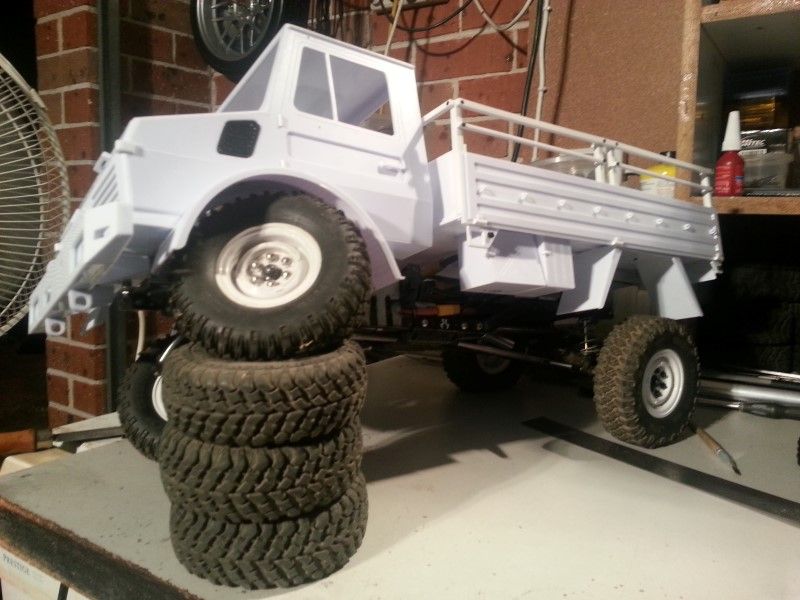 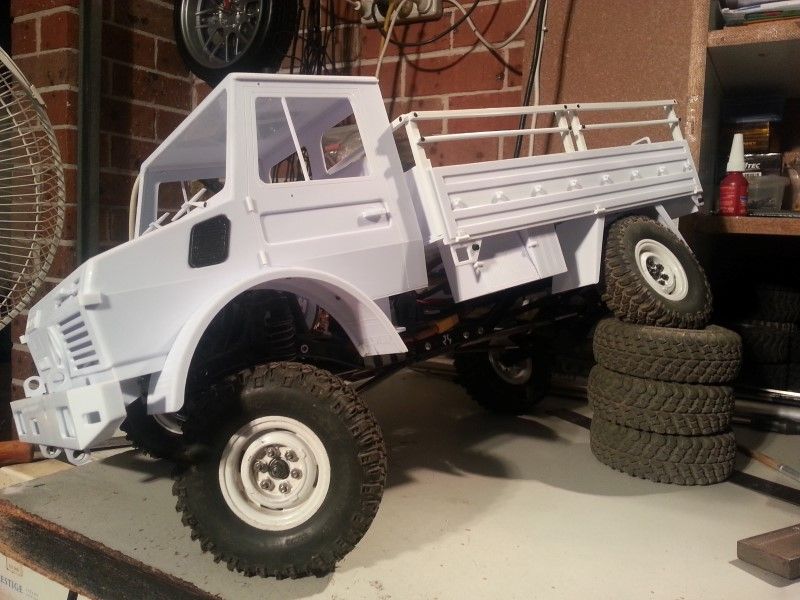 Time to take it for a test run. 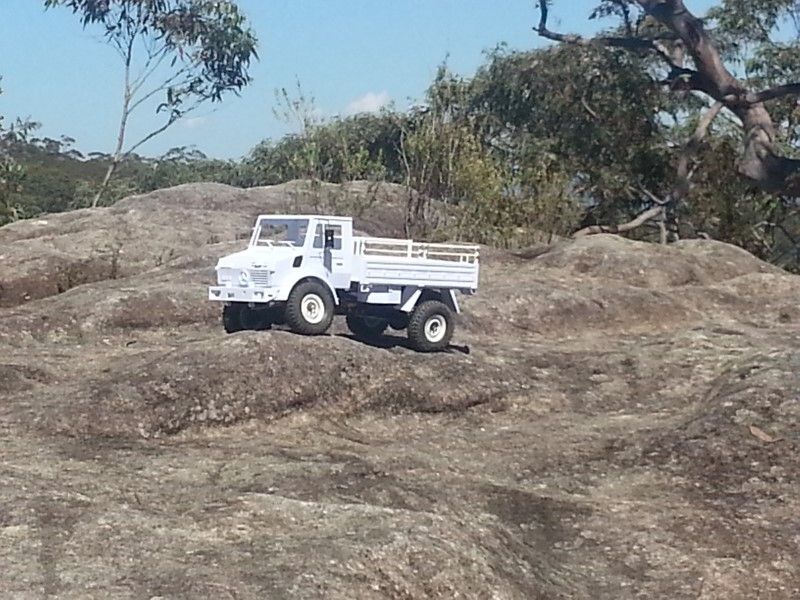 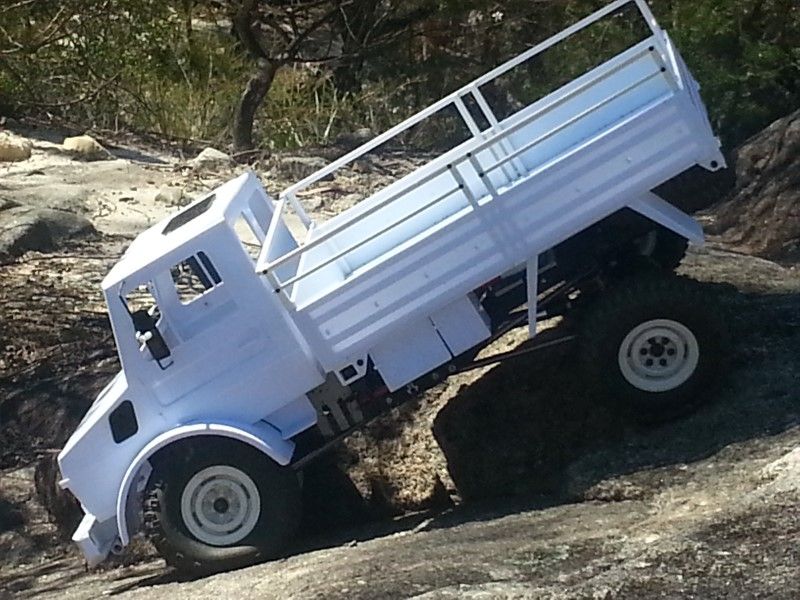 And a video of it in action on the test run. https://www.youtube.com/watch?v=H2dopmK0pd8 Very pleased with how it drove. Cheers H2Micr0 |
| |  |
| | #9 |
| Quarry Creeper Join Date: Jul 2011 Location: westchester,il
Posts: 279
|
Wow!!!!!! Now thats cool  |
| |  |
| | #10 |
| RCC Addict Join Date: Jun 2009 Location: Australia
Posts: 1,703
|
Hey Brady i inagine in a scaler the original position of the spare due to the physical size of the tyres available it msy be hard to locate in the original position and retain crawlability of the rig.
|
| |  |
| | #11 |
| Rock Crawler Join Date: Jan 2013 Location: Australia
Posts: 541
|
With the first test run out of the way, and Mog goodness proven, it was time to find a purpose or theme for this rig. Everyone said to me, paint it Olive Green, make an army truck, put some camouflage on it. Nup not my thing. Plenty of those already in the RC Mog world. I had been collecting odds and ends as I came across them and while I didn't know what I was going to do with some of this gear, suddenly it all came together. The Mog kit came with metal rods to be used for a canopy, so I bent them to shape and used the canvas type material from a Supercheap Auto shopping bag and made a canopy. 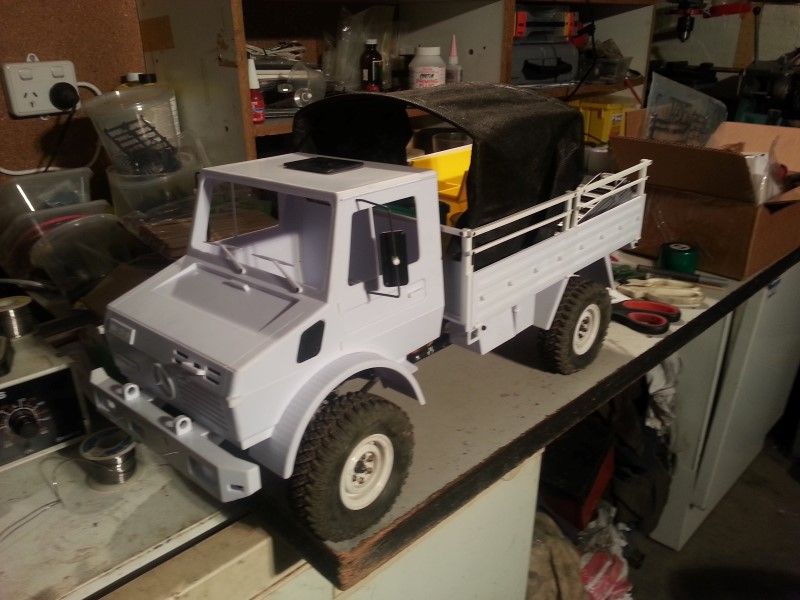 Used a stapler to quickly hold it together. I will 'borrow' a needle and black thread from the lady of the house one day and finish it up. Grabbed my odds and ends and applied liberally in the back. 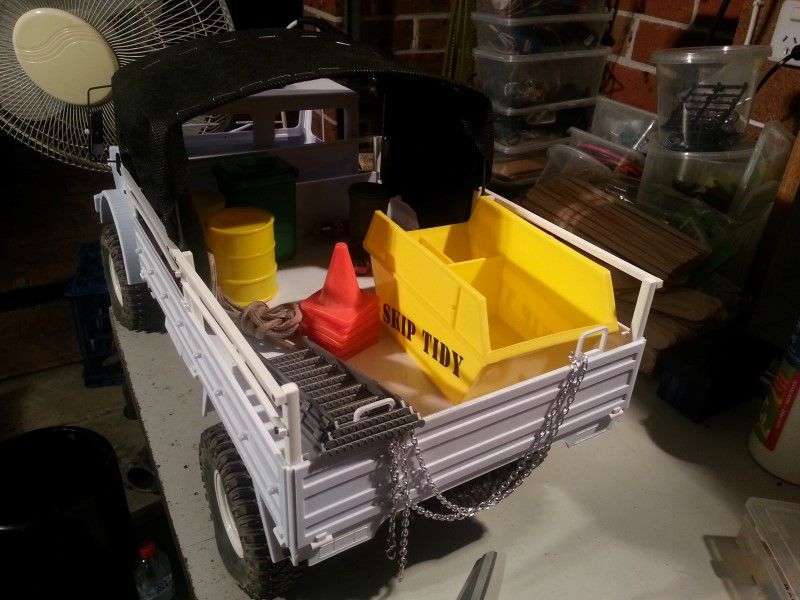 Yes, I like where this is going. Found some more suitable items and added them in too. 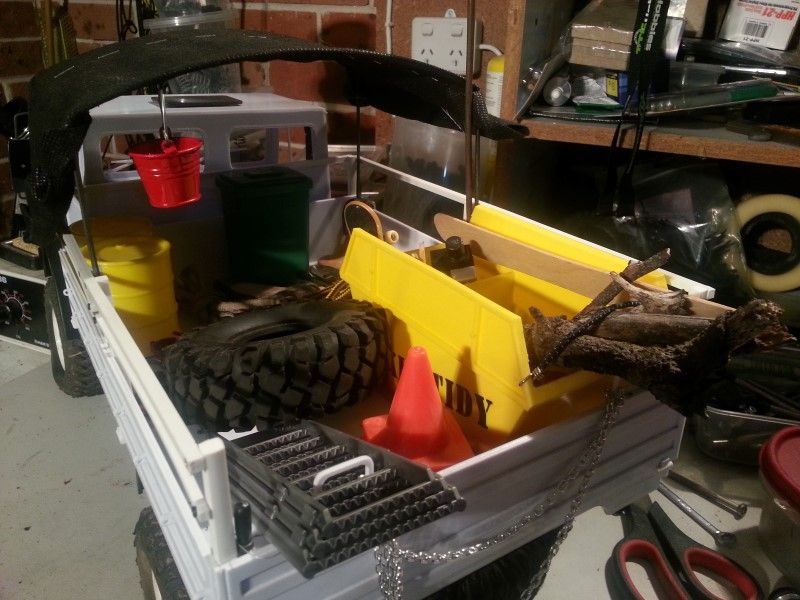 Now I already had the box trailer but brazed up a mesh cage that sits in the back to compliment everything. 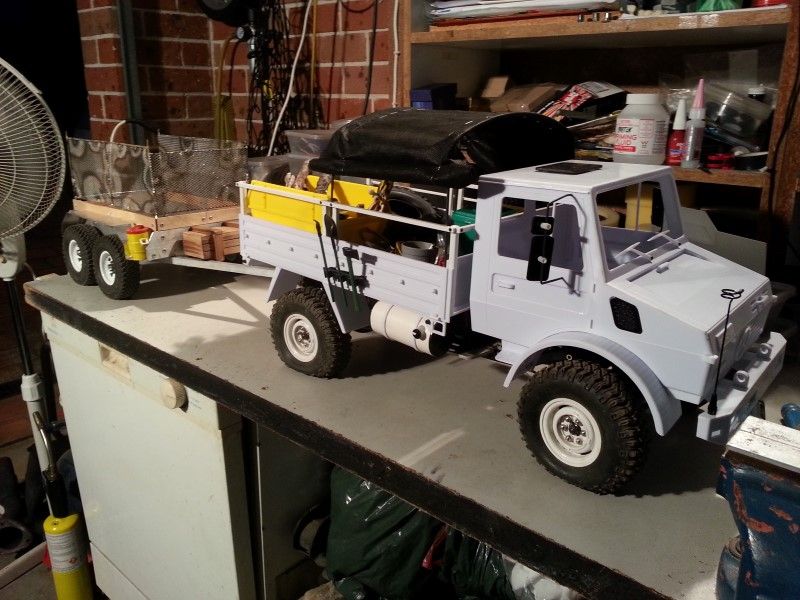 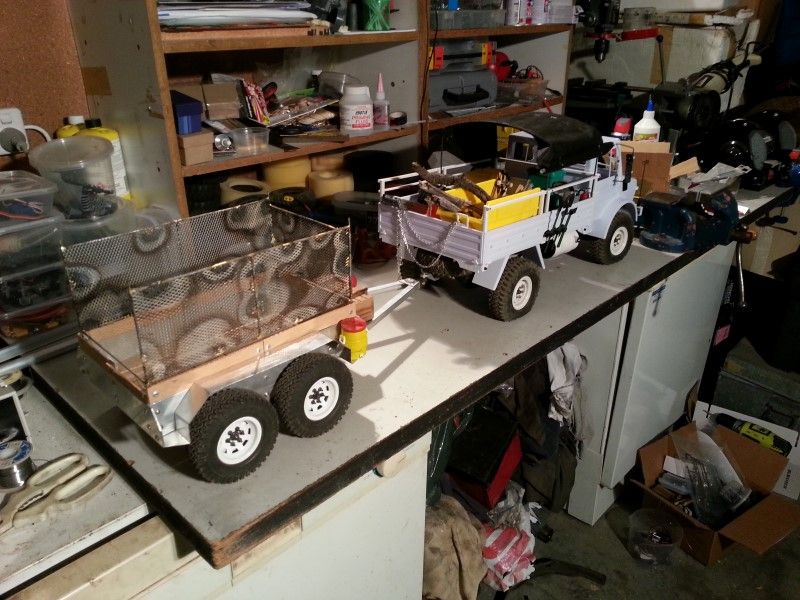 I painted the fenders and under tray parts black and fabbed up a hitch to pull the trailer. 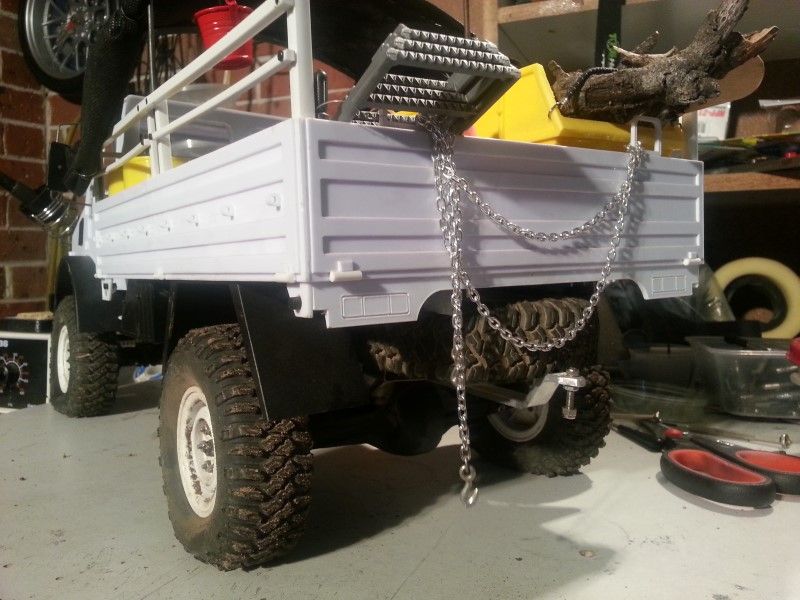 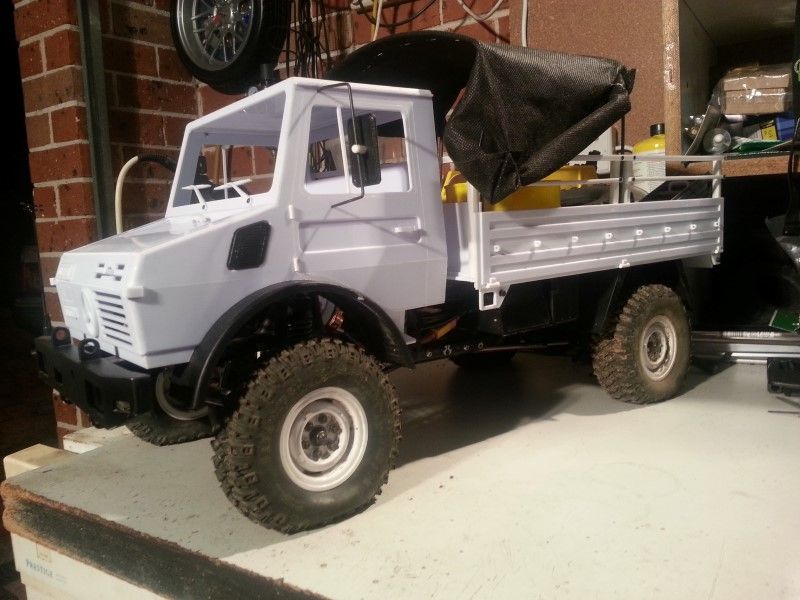 Oh, and this is Claude, the Owner Driver of this one man Handyman business. 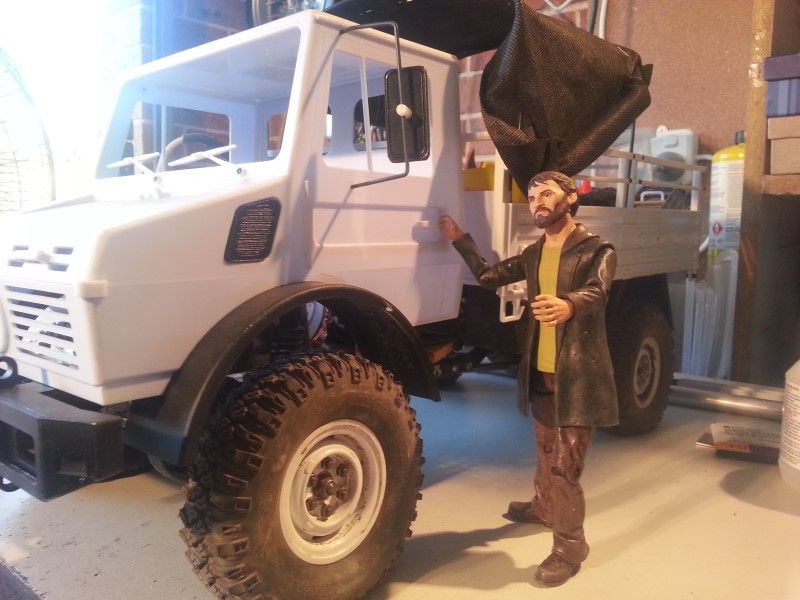 I am still deciding on colours for this build, but I would like to have a go at a worn and weathered finish. I guess we will find out as we go. A suitable company logo etc will also be applied at the appropriate time. Comments and suggestions are always welcome. Cheers H2Micr0 |
| |  |
| | #12 | |
| Rock Crawler Join Date: Jan 2013 Location: Australia
Posts: 541
| Quote:
While I was happy with how well the Mog handled out on the rocks, there were a couple of things bugging me about this build. This is the first thing I didn't like. 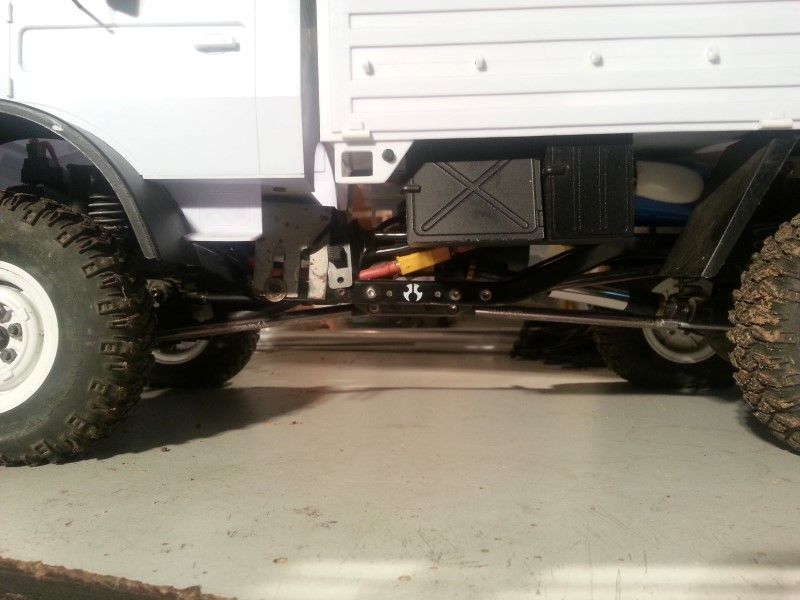 See how low the skid plate and chassis go? Not at all Mog like, and the breakover really wasn't that good, especially for a Mog. So I decided I would do a custom Chassis for the Mog. More on that later. Now, if I am changing the Chassis, I will need to fabricate new links. Hmmmm, if I am going to do that there is that other aspect that needed changing. I mean, a Mog is unique for a variety of reasons, but one of the more well known things is??????? All together now . . . . . . Portal Axles!!!!!! Now the funny thing is that on my very first rig, a Honcho, the first major mod I did was to install GMade R1 Portal axles. 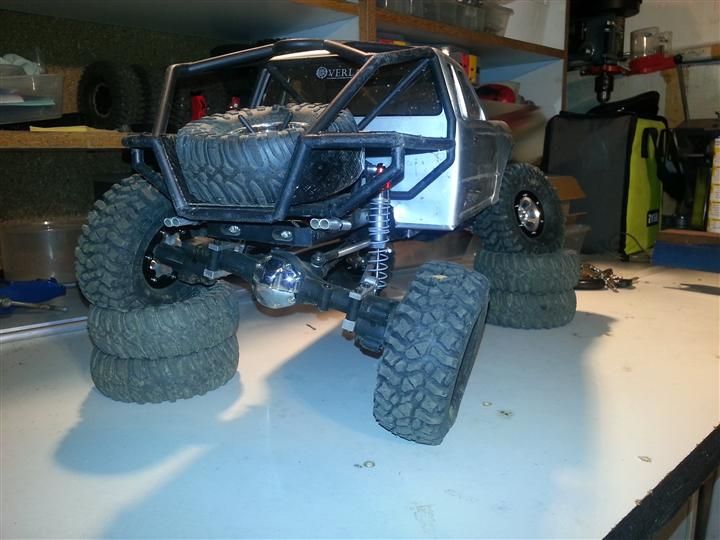 I comped this rig with these axles for around 12 months, and during that time upgraded them about as far as one can. I had all the alloy upgrades, 7 degree, castor steering, modded alloy knuckles to provide better steering, and CVDs. In the end I retired them from the Class 2 comp beating as there were no options for OD/UD and the steering just wasn't as good as modded SCX10 setup. When I first got the Mog body, I did try them under the cab to see if they would fit. SCX10  GMade R1 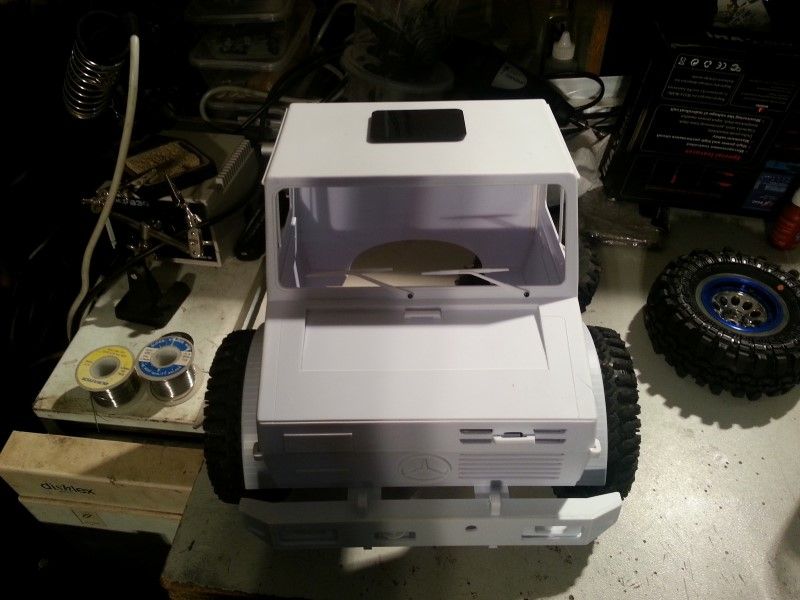 Waaaaayyyy to wide for a class 1 build. Then doing some reading recently I stumbled across a Cherokee build that had narrowed R1 axles under it. VERY INTERESTING. If he can do that, then so can I. Stripped down R1 housing 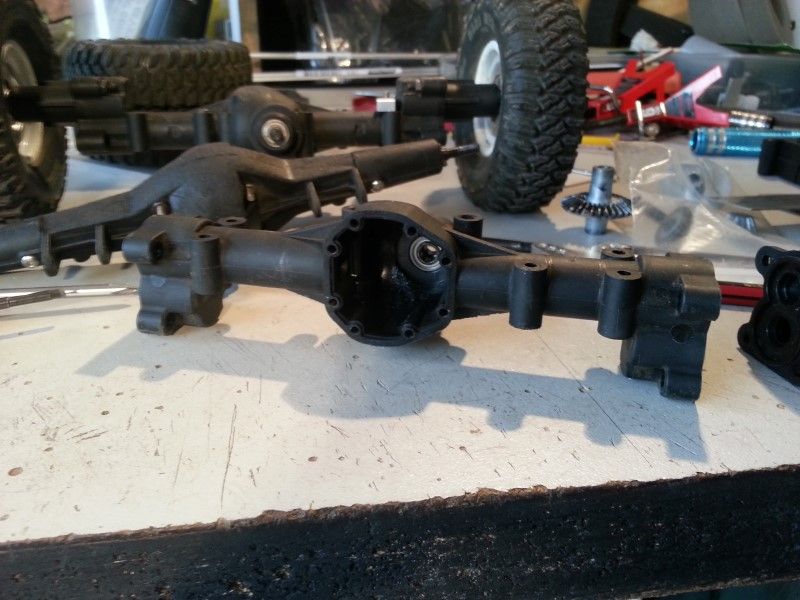 A quick hack job with the dremel. 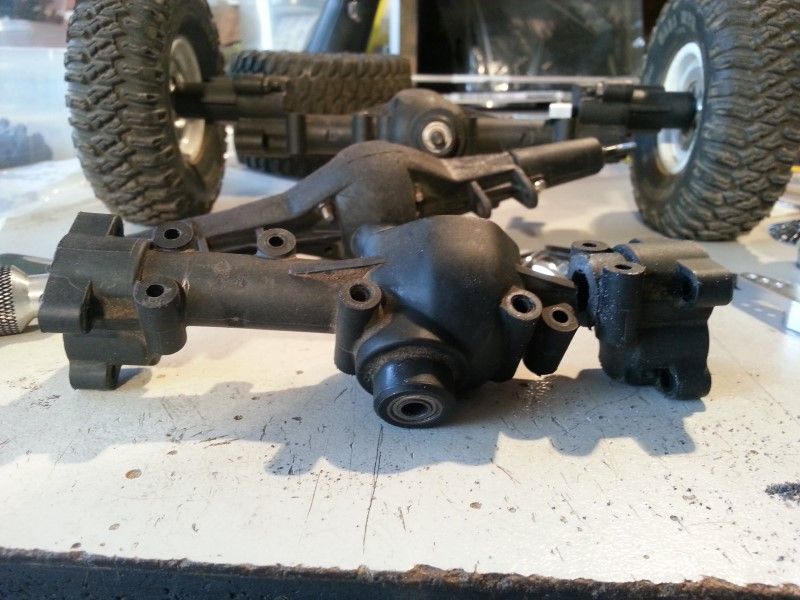 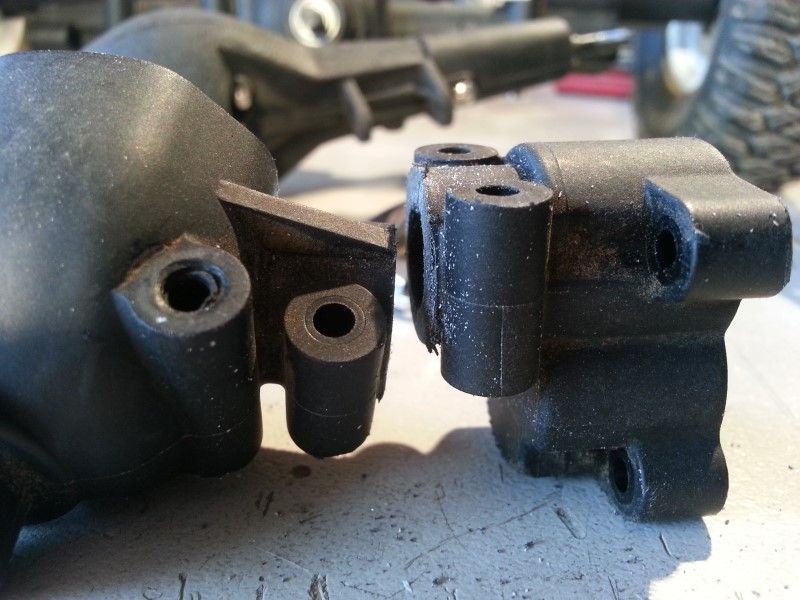 And the same for the other side. 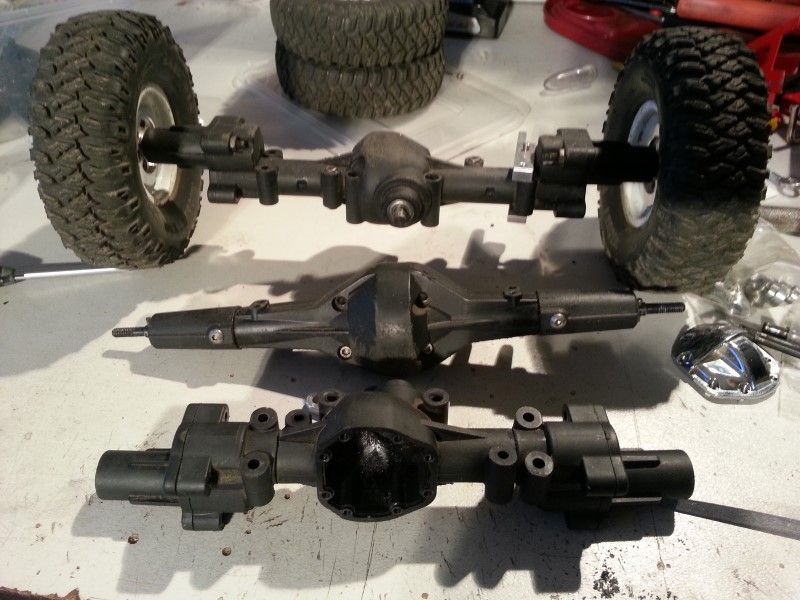 Some 10mm OD alloy tubing cut to length and inserted inside the axle. 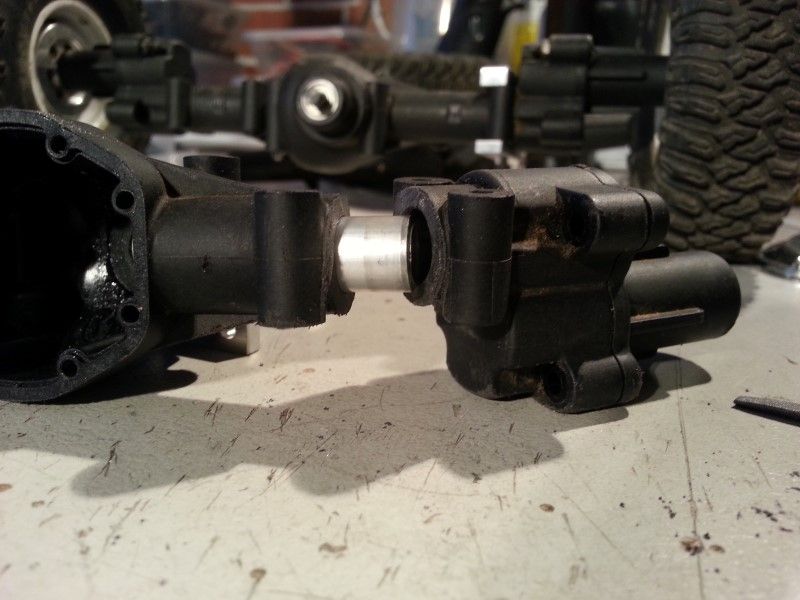 Drill and tap 4 2.5mm holes per side and use some short M3 screws to hold it all together. 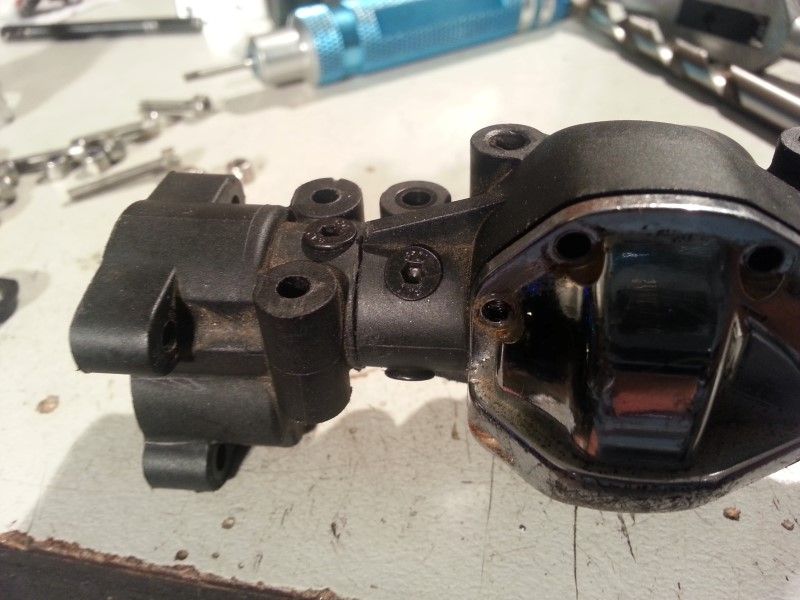 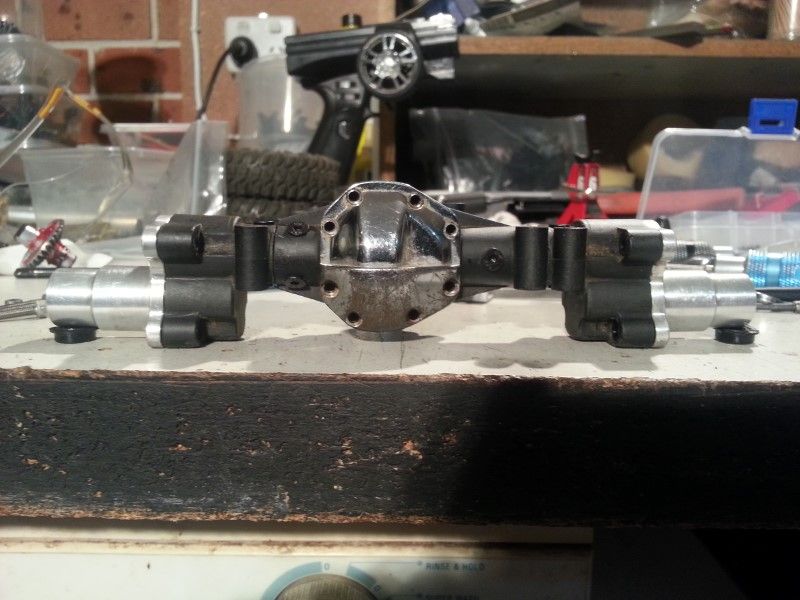 Seems I didn't get any photos of the axles, which were shortened and new flat ends filed to let them slip easily into the diff center. Sounds easy, but is rather fiddly and time consuming. All assembled. 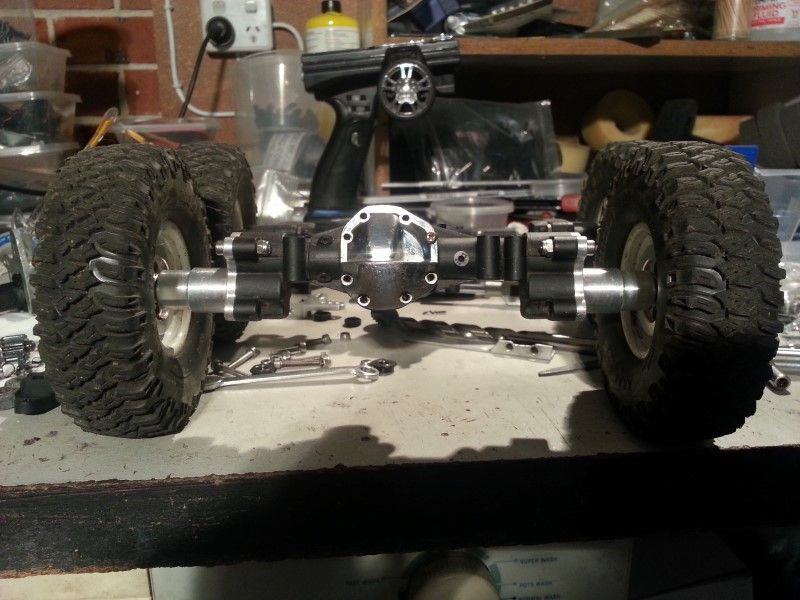 Comparison with stock width R1. 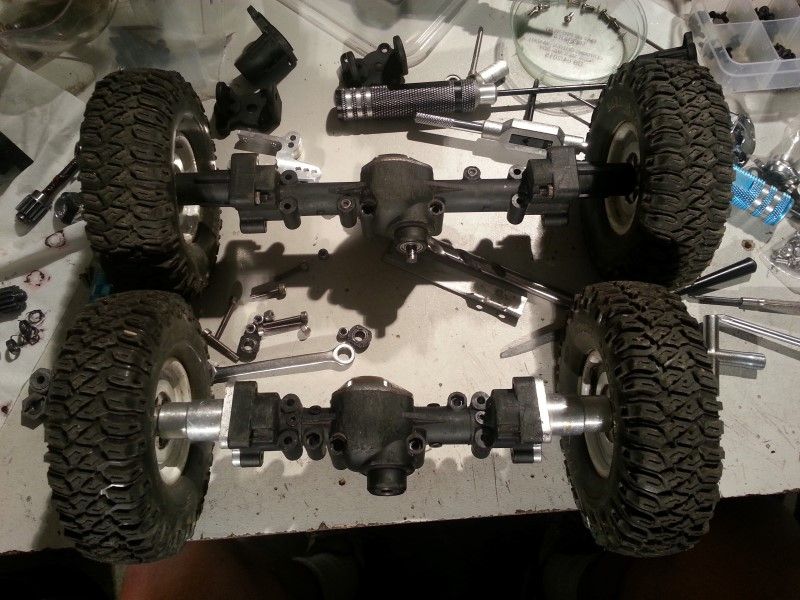 Comparison with SCX10. 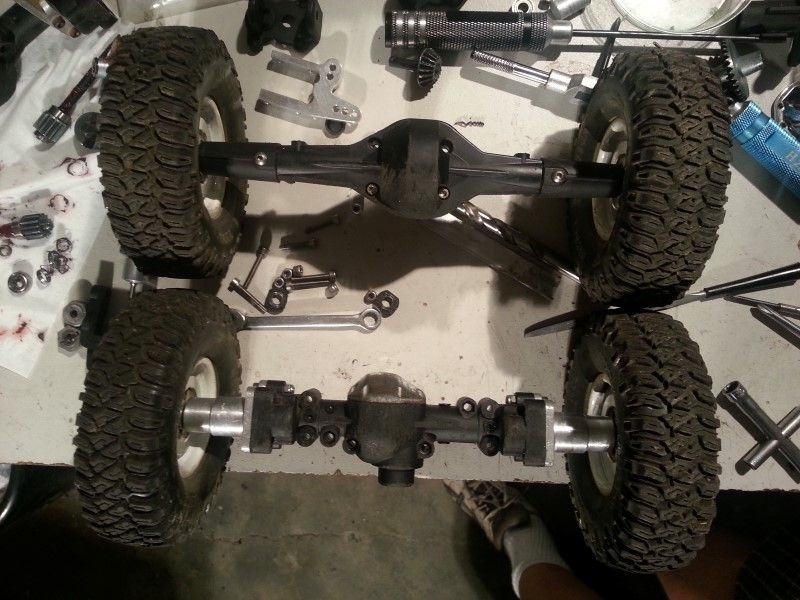 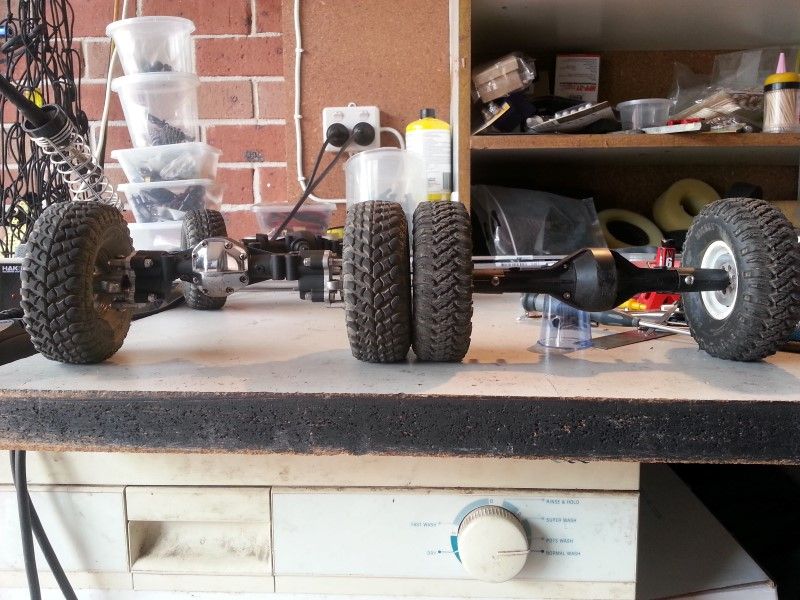 And then repeated the process for the front axle. 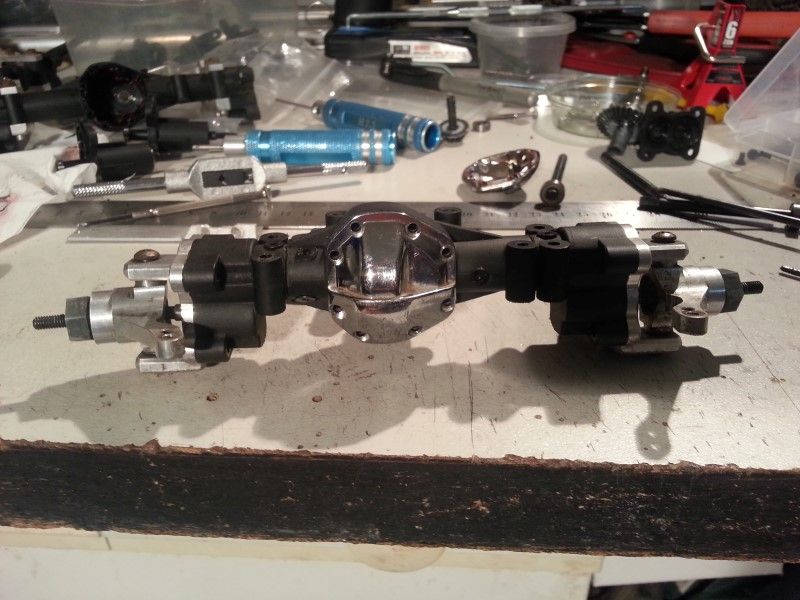 All Done! 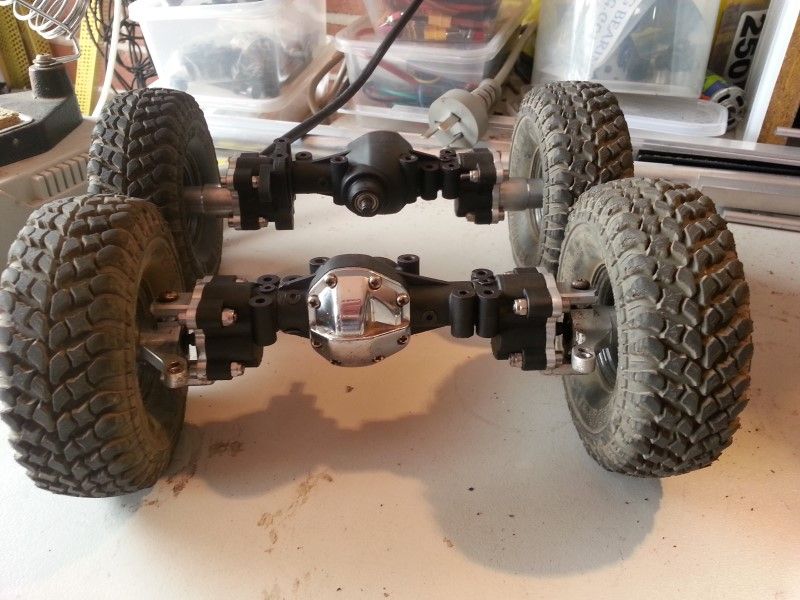 Now I can move on with the chassis. Cheers H2Micr0 | |
| |  |
| | #13 |
| Rock Crawler Join Date: Jan 2013 Location: Australia
Posts: 541
|
I have decided on a business name for the Mog. The Aussies out there will get this but not sure about all you foreigners. "Shilby Rite HandiMog" ************************************************** ******* This is my first attempt at using my own chassis. However, this should be pretty easy on a Mog. I went to Bunnings (local hardware chain) and purchased 2 1 meter lengths of 3mm x 10mm alloy flat bar. Under $10 for both bits. Win!!!! I trimmed the rails longer than I anticipated I would need, and used a spare SCX10 skit to mock up and start to get a feel for how this will go together. 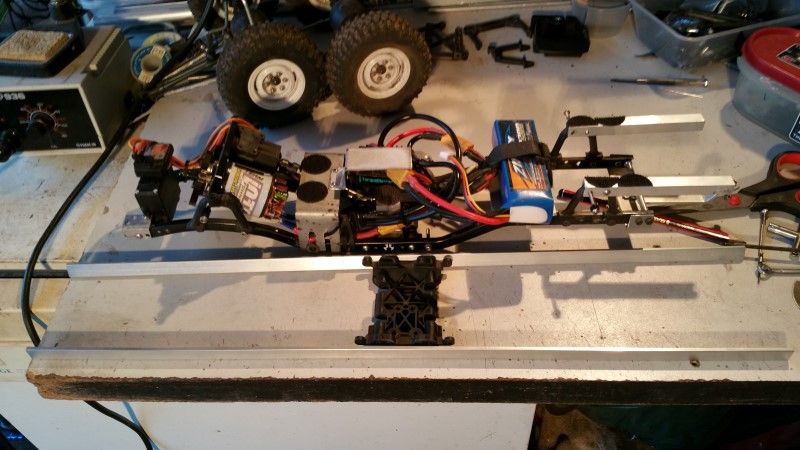 I marked and drilled mounting holes for the skid in the middle close to the position in the above pic. However, after much testing, sitting, thinking, more testing, I ended up moving the skid forward so the trans and motor would sit under the seat area in the cab. 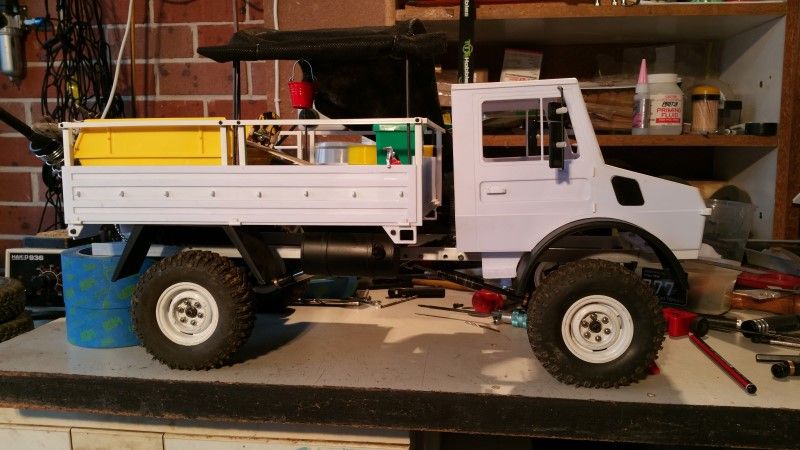 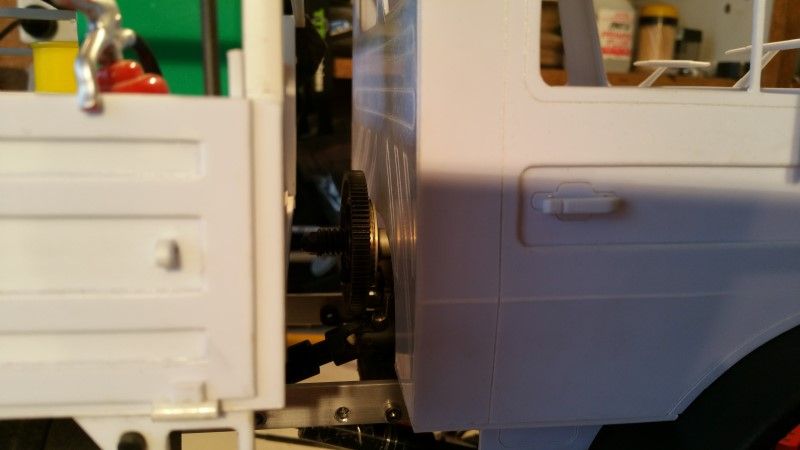 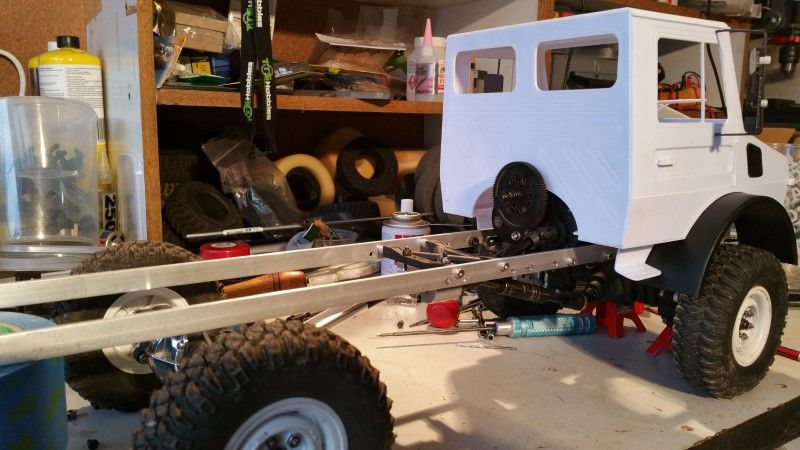 Next I had to determine the position of the front axle in relation to the chassis so i could work out link lengths and mount locations. I also had to establish where the shocks would mount to on both the diff and the chassis and ensure there would be sufficient room for articulation. 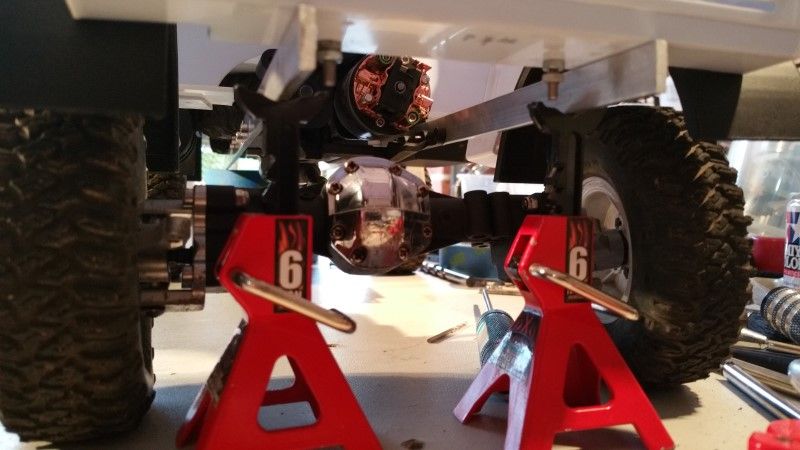 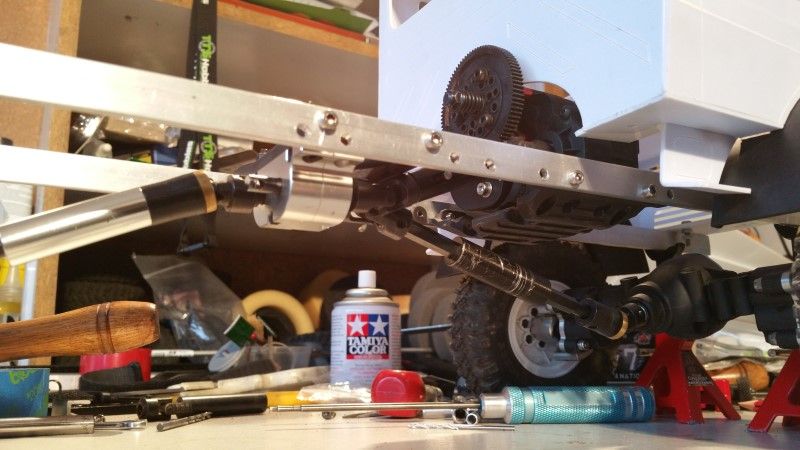 I went with a 3 link + panhard setup. I wanted to make sure the shock towers would not be too tall for when I start on the interior. It is likely I will relocate the shock tower. 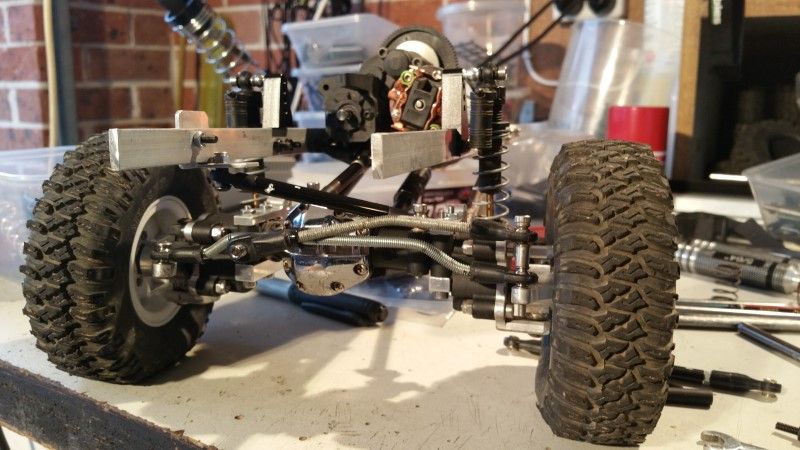 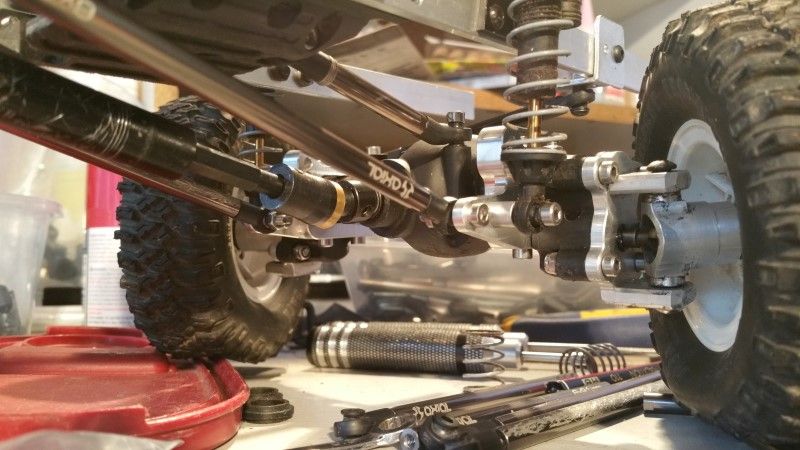 The transfer case is located inverted under an SCX10 rear cross brace with the use of some spacers. 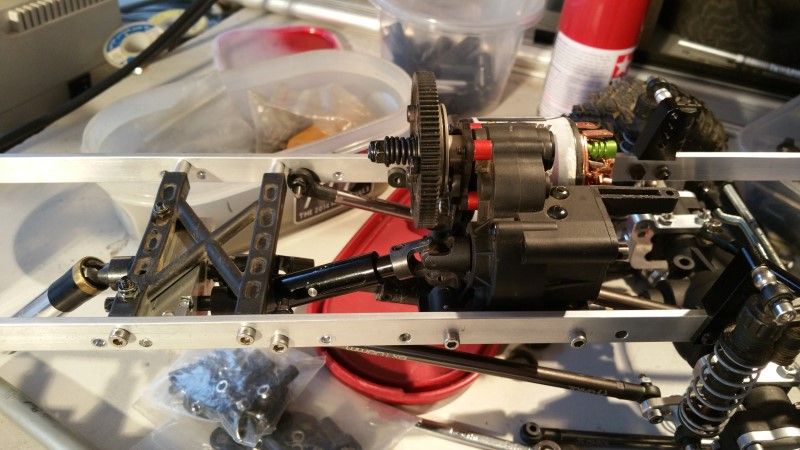 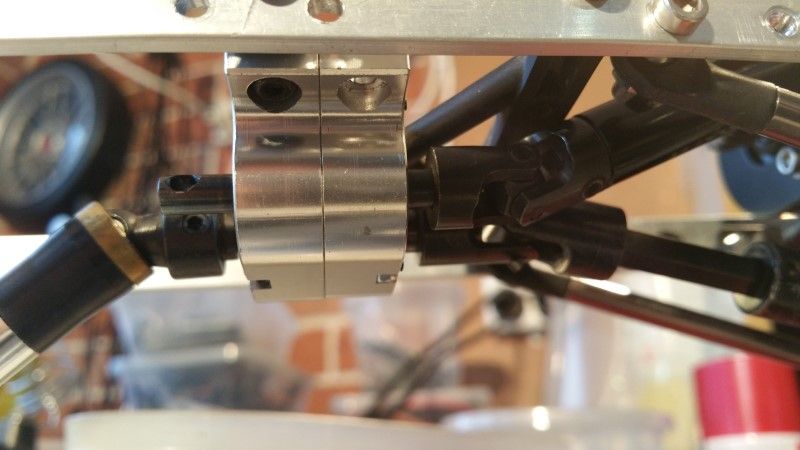 Next will be the rear axle. I will also detail the issues involved with using the R1 alloy link and shock mounts on the narrowed axle. Then the HandiMog will be standing on it's own wheels again. Claude should stop whining at me, I hope. Cheers H2Micr0 |
| |  |
| | #14 |
| Rock Crawler Join Date: Jan 2013 Location: Australia
Posts: 541
|
With the front portal done and in position on the chassis, it was time to complete the rear. I learnt a few lessons adding the link and shock mounts to the axle and will go into a bit more detail here. When narrowing the portals I used short screws counter sunk into the housing. This holds the completed assembly together firmly. 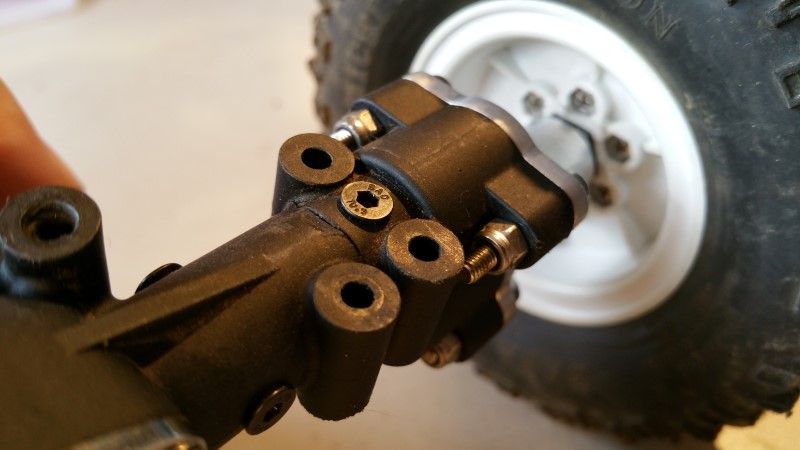 However when I went to slide the alloy link mounts into their correct position, this is what I found. 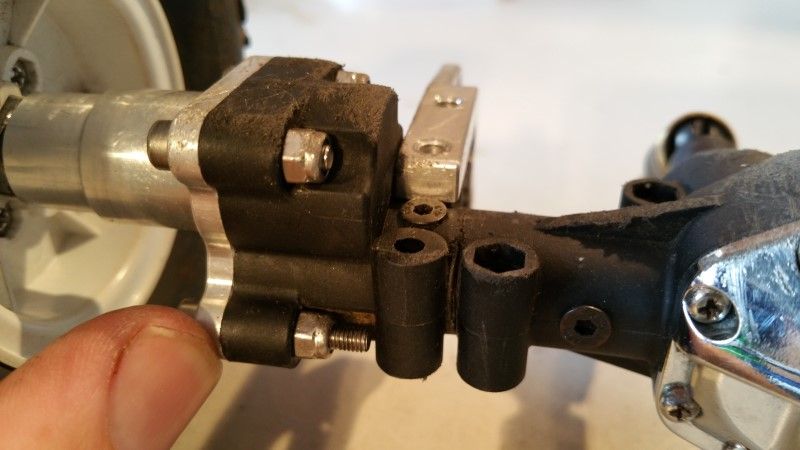 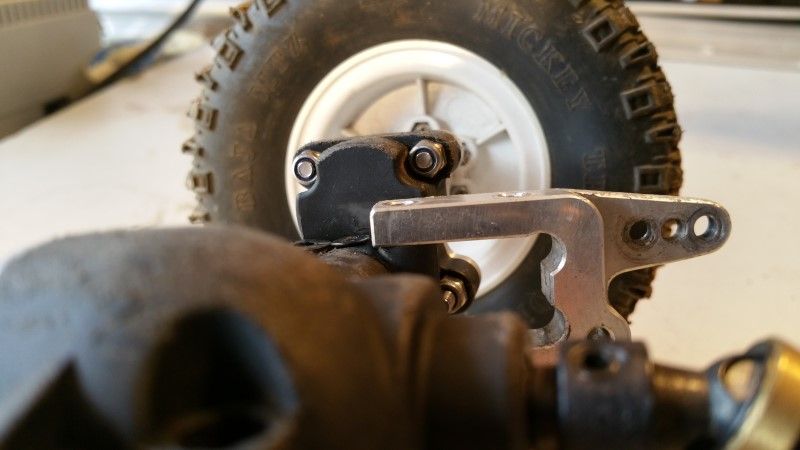 As you can see in the above pictures the screws sit too high and prevent the link mount from sliding into the correct location. To alleviate some of the issue, I removed the screw and by hand using a larger drill bit I enlarged the counters sunk hole in the axle housing. 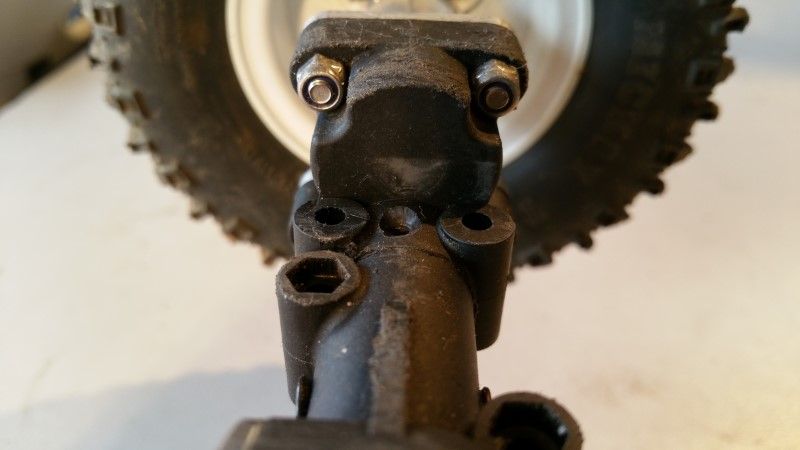 This of course allowed the screw to go further into the hole reducing the amount the head of the screw protruded above the axle casing. However, what I discovered when working on the front axle, is that the screw was too long and actually locked the axle into place inside the alloy tube. So, I removed the screw, threaded on an M3 nut and then placed it into a vice. 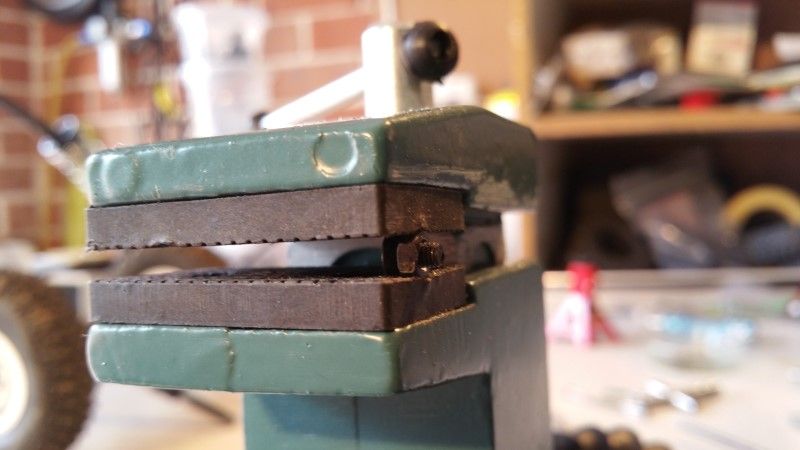 I then used a flat file and filed the end of the screw and shortened it by 1 - 2mm. 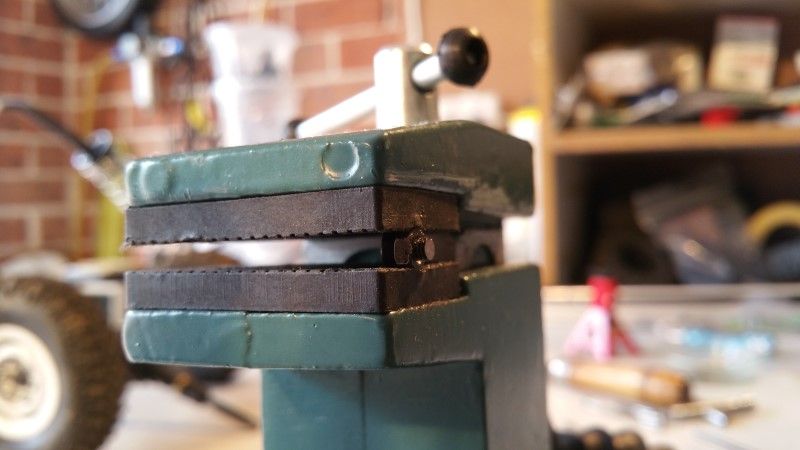 The M3 nut is then removed and corrects any damage to the thread as you take it off. Caution is advised as the screw and nut are both HOT after being filed. The new shorter screw is then placed back in the housing. You will need to do this for all four screws. However this still does not allow for enough clearance to slide the alloy link mount into position. I didn't want to make the countersunk holes any bigger as that could adversely effect the strength of the join. What I decided to do was to clearance the center part of the alloy link mounts. Placing them into a vice, I carefully filed a small area approx 1mm deep on inside faces of both the top and bottom brackets. As per this pic which shows on part filed. 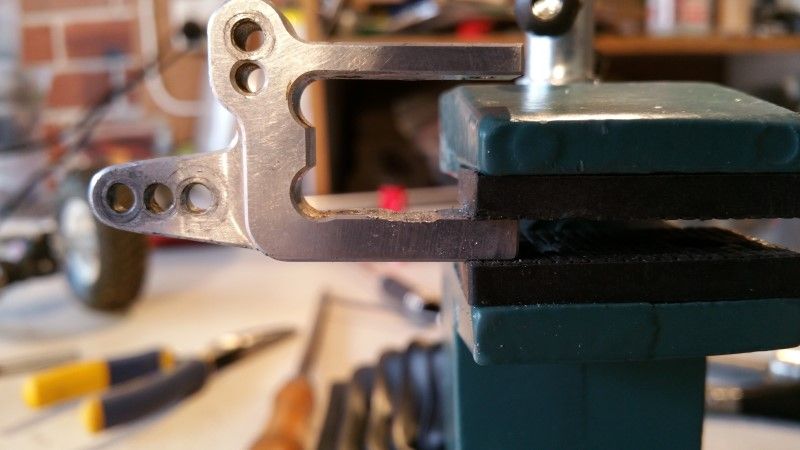 Then I could slide the alloy mount in beside the correct location. 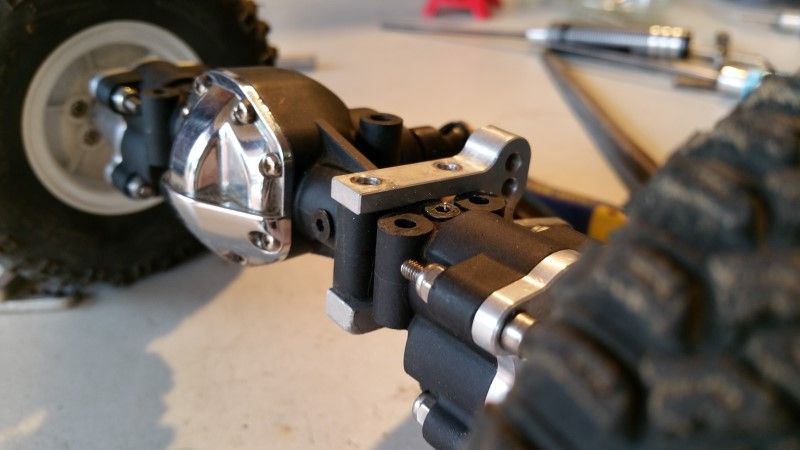 And carefully slide sideways towards the correct location and bolt it all together. 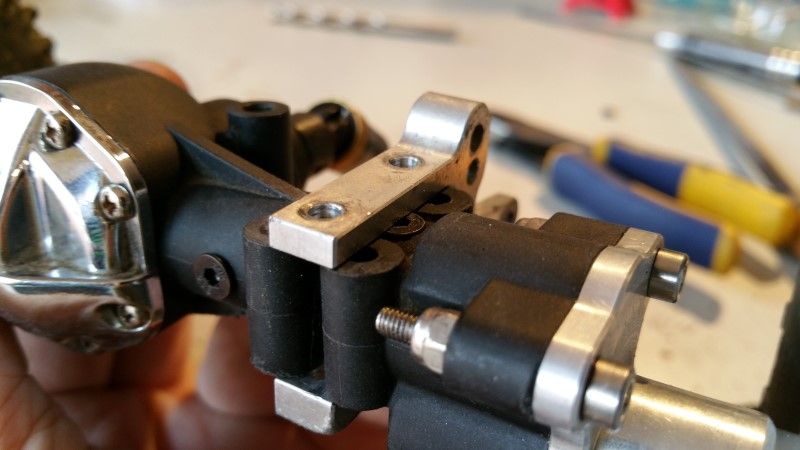 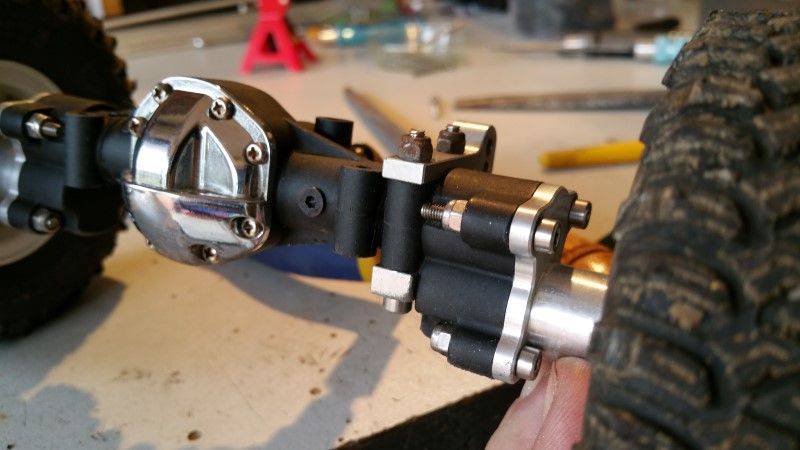 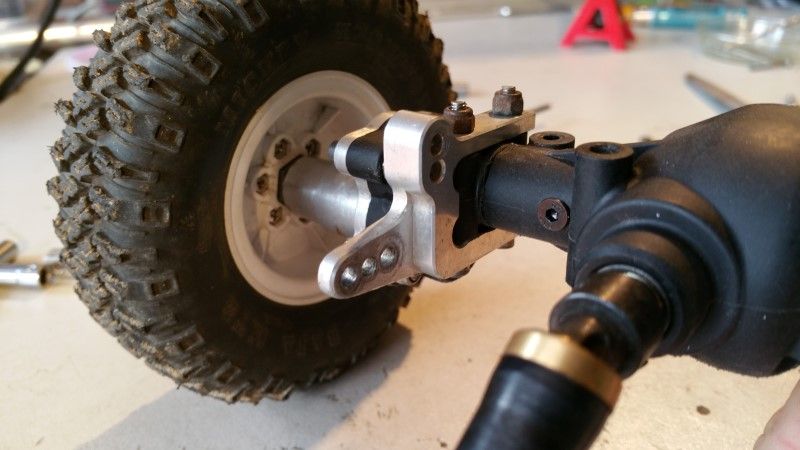 On the narrower side, I needed to carefully remove part of the support plastic, and remove the screws before I could slide the alloy mount into position. 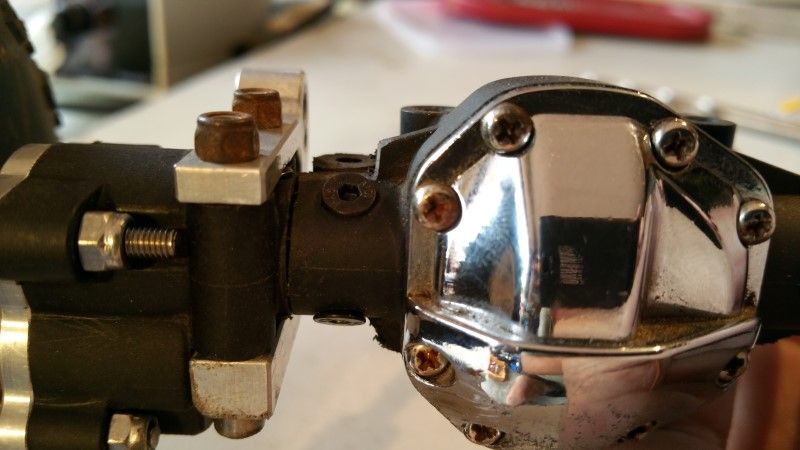 With this done I was able to set up the links and shock mounts for the rear axle. 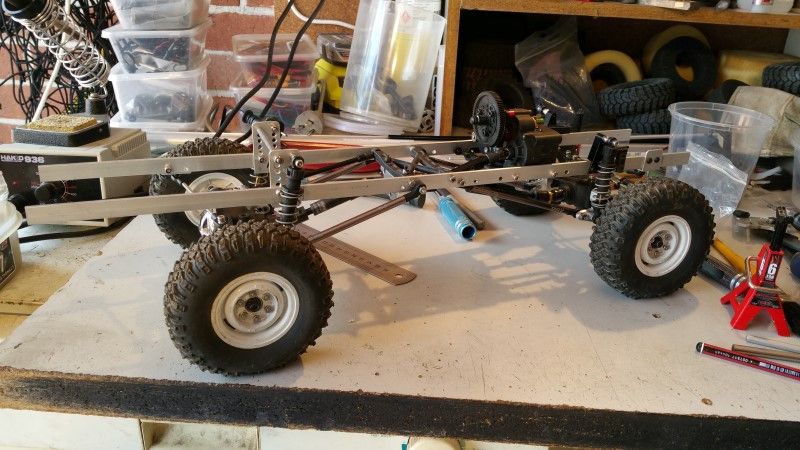 I again went with a 3 link + panhard bracket. 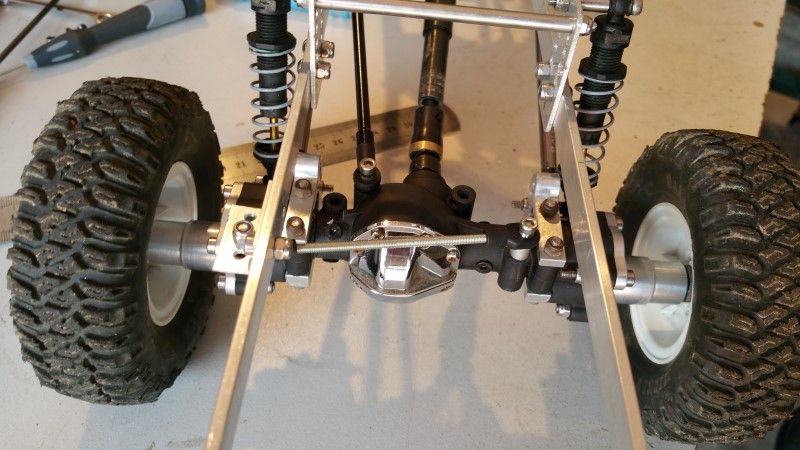 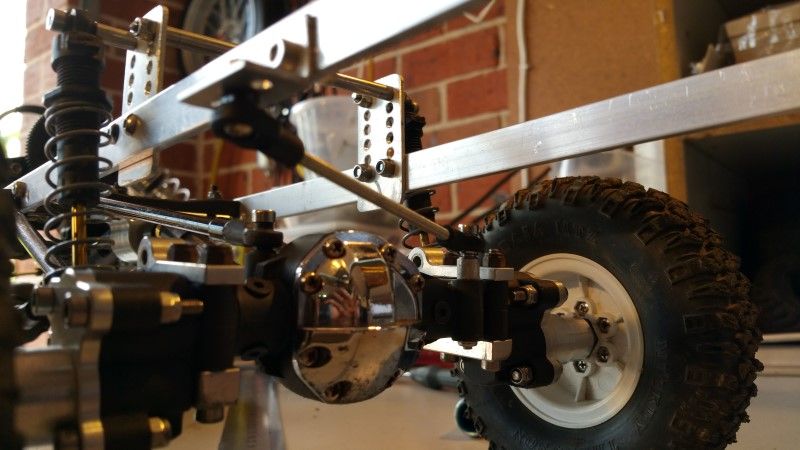 I had to shorten the rear drive shaft by 4mm to prevent it binding. 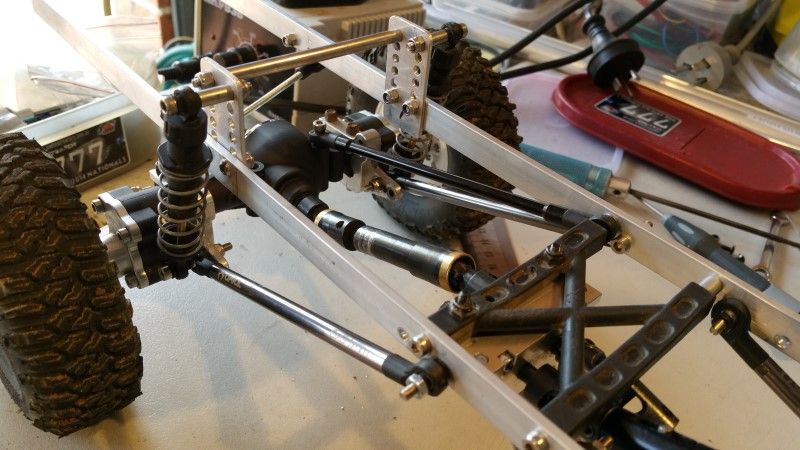 I have a bit of work setting the shocks up how I want but so far I am quite happy with the articulation and range of movement. As I add weight things will change accordingly. Next I will install the servo and a battery tray, followed by the body. Cheers H2Micr0 |
| |  |
| | #15 |
| Rock Crawler Join Date: Jan 2013 Location: Australia
Posts: 541
|
Now that the HandiMog was set up as a roller, I of course had to add some electrics and to a bit of yard testing. No video I am sorry. But, what this testing proved was that the link geometry was less than desirable, so I set about doing something about it. This issue was that on articulation there was a LOT of axle twist/walk or what ever you want to call it. In addition because of the angle of the lower links the wheels moved further away from center on compression making it difficult to centrally locate wheels in a wheel arch. This is how I initially mounted the lower links. 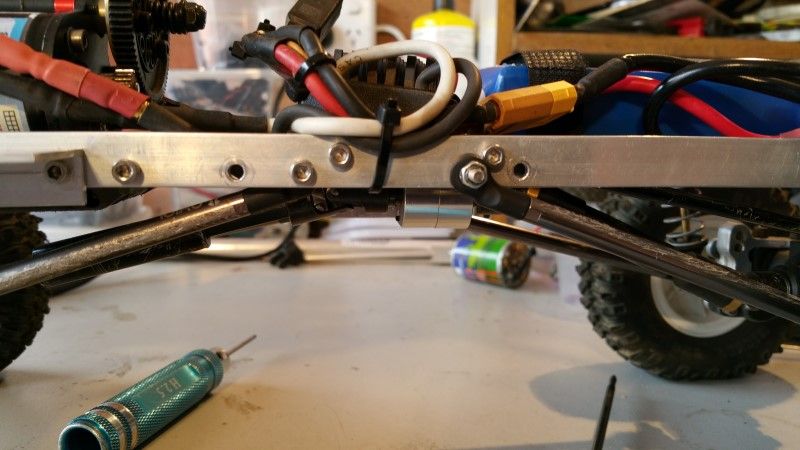 As you can see the transfer case hangs below the lower link mount points. This means I can safely lower the link mount points without any real loss of ground clearance and achieve a much better geometry layout. I fabricated side brackets to make this happen. 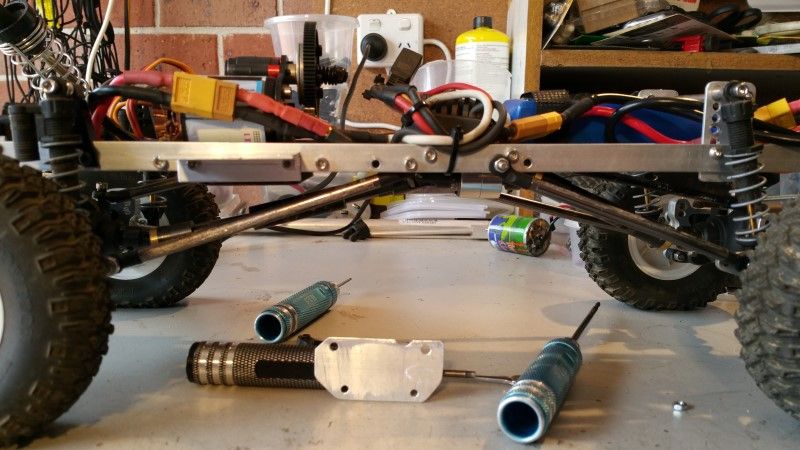 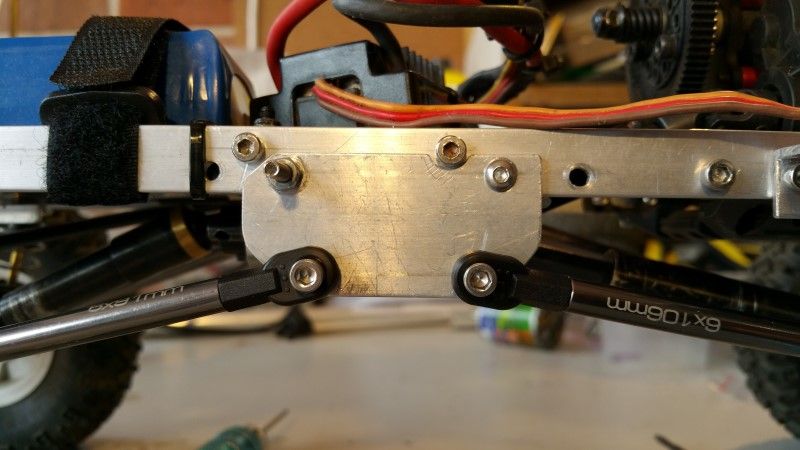 Much better. 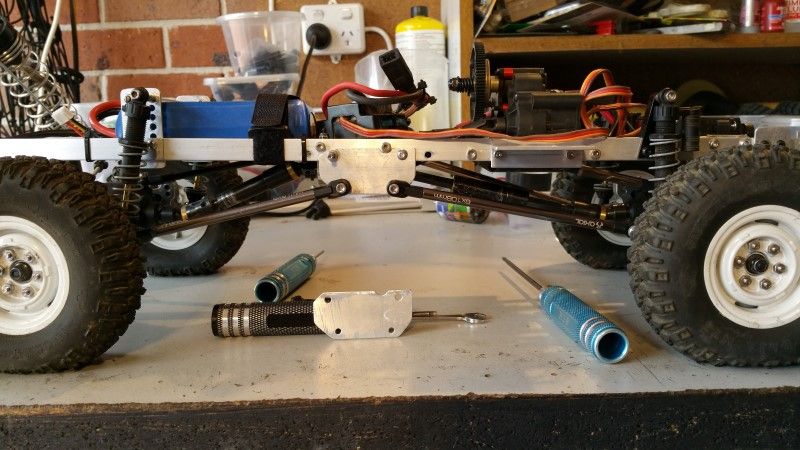 This is how I mounted the servo. 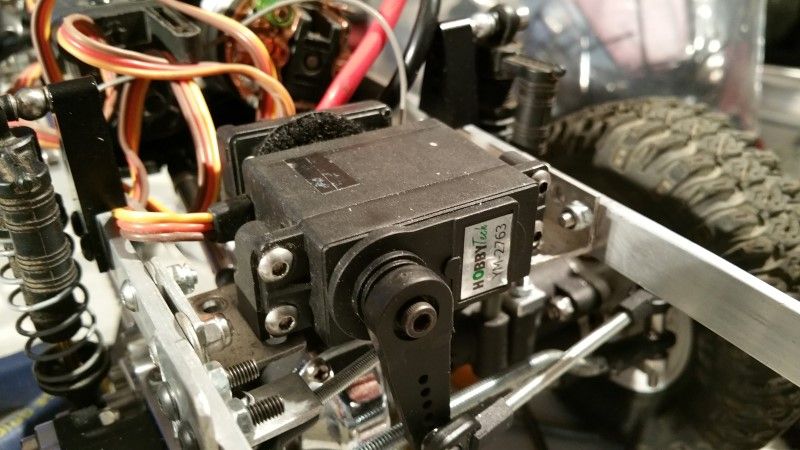 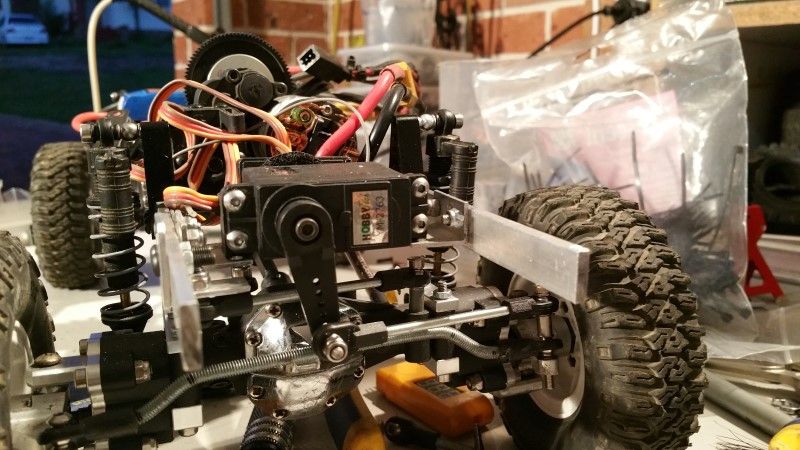 Just some simple alloy angle brackets. I then played around with mounting the cab and the tray. The tray tilts back for access to the battery. The cab is bolted into place. 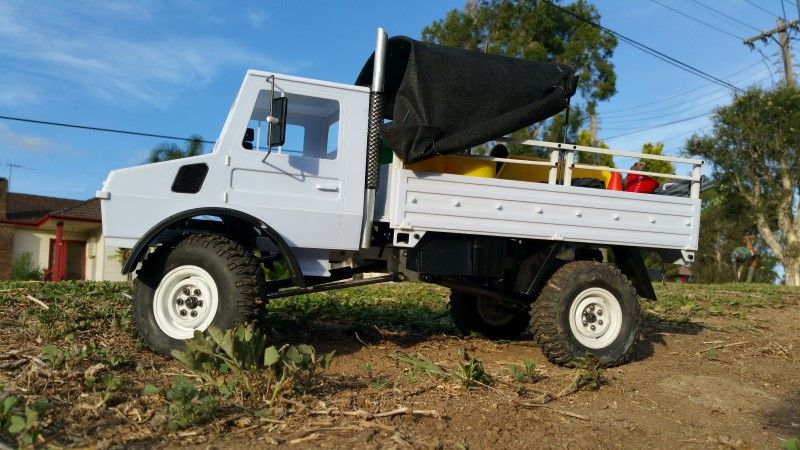 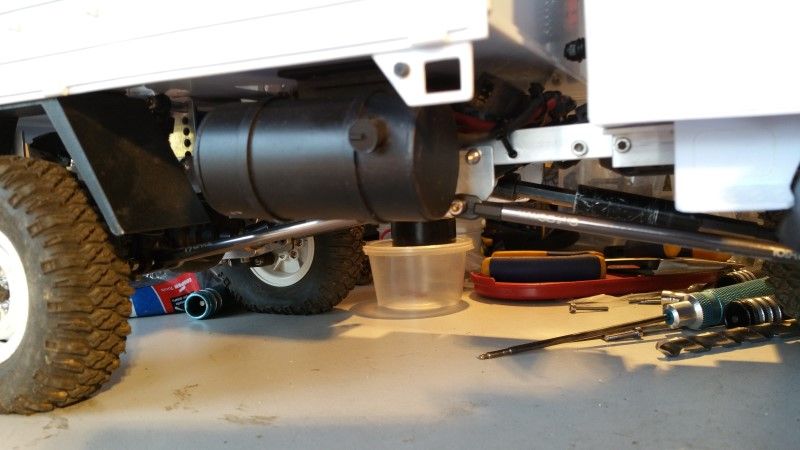 And of course the Portal axles under the Mog body look right at home. 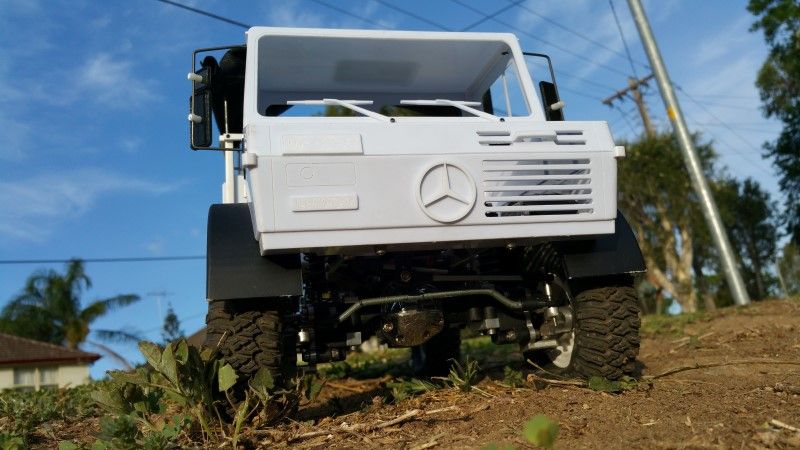 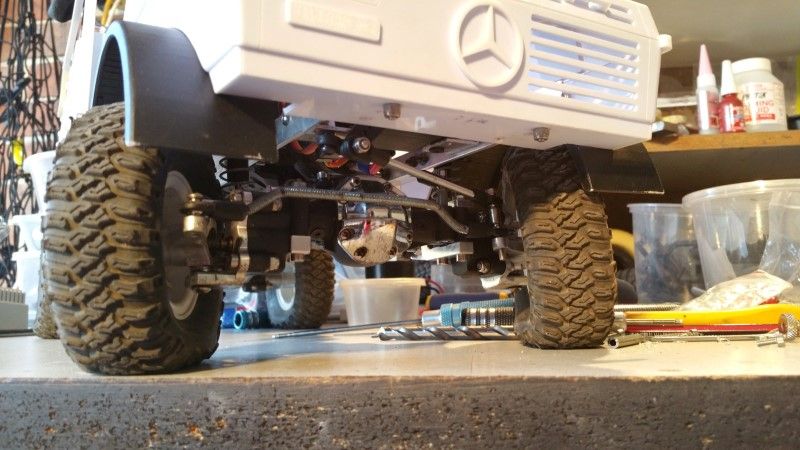 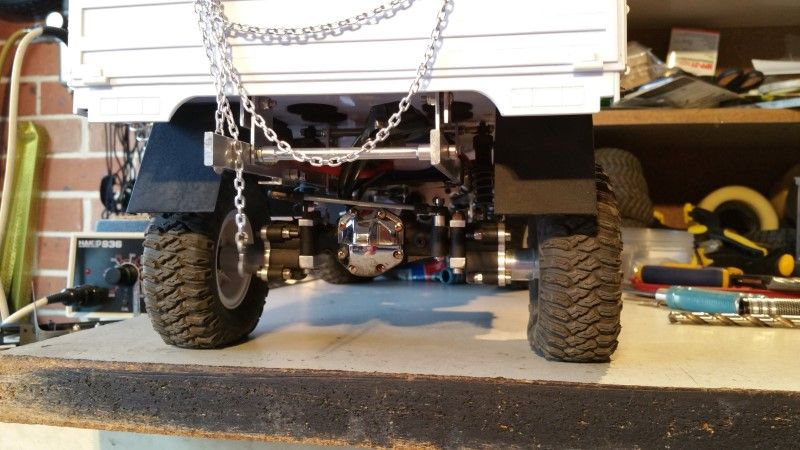 Still plenty more detail work to do, but as it stands it is a driver. Cheers H2Micr0 |
| |  |
| | #16 |
| RCC Addict Join Date: Jul 2012 Location: Oreganastan
Posts: 1,151
|
Very nice work. Great work on the portals. The axles look very scale to me. I am not familiar with Mog axles, they do just look at home and beefy. How durable do you feel that body is? Are you painting or staying white? |
| |  |
| | #17 |
| I wanna be Dave Join Date: May 2011 Location: Lost in Oregon
Posts: 4,450
|
This build is right up my alley....don't like something??? Modify it....tweak it...fab it    nice job |
| |  |
| | #18 |
| Rock Crawler Join Date: Jul 2011 Location: USA
Posts: 624
|
Awesome build!! I love the body and great work on narrowing the portals!!  |
| |  |
| | #19 |
| Newbie Join Date: Jan 2015 Location: Atlanta
Posts: 12
|
Ordered the body with the full box. Subscribing to this thread to follow your build and to get ideas. I also have the SCX10 Jeep and am bored of how it looks.
|
| |  |
| | #20 | ||||
| Rock Crawler Join Date: Jan 2013 Location: Australia
Posts: 541
| Quote:
Still undecided on colour at the moment. Quote:
Not enough builders or fabricators any more. I try to do a bit of both, and make a rig my own. Glad you like it. Quote:
Quote:
More to come as I get to it. Cheers H2Micr0 | ||||
| |  |
 |
 H2Micr0's Unimog U1300L - Similar Threads
 | ||||
| Thread | Thread Starter | Forum | Replies | Last Post |
| The DSPro Unimog U1300L Class 2, Milex Cab announcement! | rbgerrish | 1.9 Scale Rigs | 99 | 03-20-2023 09:06 PM |
| H2Micr0's D110 'The Brigadier' | H2Micr0 | 1.9 Scale Rigs | 72 | 05-02-2017 12:50 AM |
| H2Micr0's FJ45 Troop Carrier | H2Micr0 | 1.9 Scale Rigs | 43 | 03-25-2016 12:25 AM |
| H2Micr0's FJ '40 Shorty' Trail Rig | H2Micr0 | 1.9 Scale Rigs | 33 | 01-25-2016 02:29 PM |
| H2Micr0's Tandem Box Trailer | H2Micr0 | Scale Accessories | 7 | 04-04-2014 12:33 AM |
| |