| |
| |||||||
 |
| | LinkBack | Thread Tools | Display Modes |
 10-06-2008, 08:30 PM
| #1 |
| RCC Addict Join Date: Jun 2007 Location: Indian Village Pontiac
Posts: 1,910
|
Well, been talking about this for a bit now, so its time to put up or shut up. I was lucky enough to score a brand new chassis from a brand new Vendor, TK-Twister. I spent about 3 weeks studying the different aspects of this new design and realized that it is going to force me to do something I have not thought of until now. I personally have always liked plenty of controlled articulation and this rig requires short shocks and limited articulation. I was not sure I was going to like it, but as it turns out I love IT!! Anyway here is the required list of goodies: TK-Twister GEN2 Chassis Axial Transmission 90t Spur 13t Pinion VF Dig(Now DNA) Custom Dig Servo Mount Revo Shocks 30wt Oil (Internal Sprung Droop Front, Typical Yellow Sprung Rear) Axial Axles Bonus Line Pre-production Lockers Axial CVD's Up Front RCP Axial Rear Stainless Straight Axles RCP Axial Rear Axle Adapters RCP Axial Max Clearance Knuckles RCP Axial 2 Postion Clockable Axle C's TCS Boomerang Rear Link Mount Custom Front Batter/Servo/Link Mount Traxxas Steel D-shaft Yokes Traxxas D-shafts Dogman Delrine Dog Leg High Clearance Lower Links Custom Delrine 1/4" Upper Links Traxxas Rod Ends Part #1942 Losi 8 Rod Ends(To lengthen Revo Front Droop Shocks) More on that later ThunderPower 1320mAh 20c Burst 3s Lipo CC Mamba Max ECS CC BEC Set to 6.2v 35t Handwound Motor Custom Upper Link Radio Tray Hitec HS5955TG Steering Servo Hitec HS225MG Dig Servo Spektrum SP3100 RX Spektrum DX3R TX JConcepts "Stage Killah" #0057 Lid Painted by me I think that will do it. Now a teaser pic of it completed 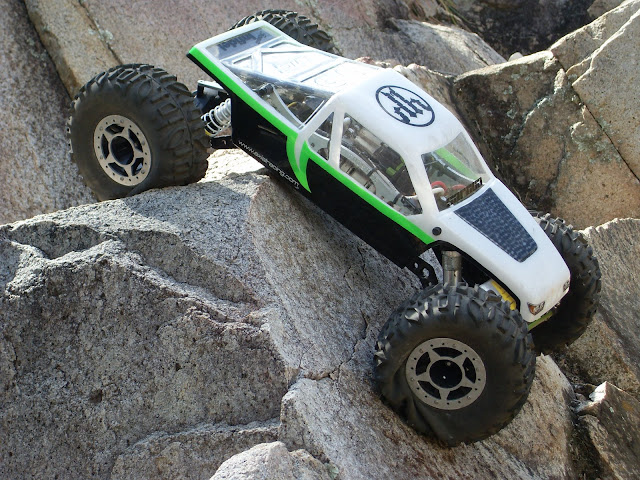 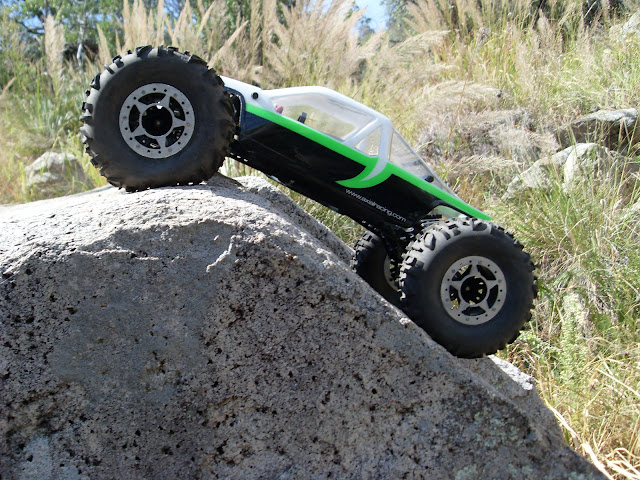 Thats it!! Last edited by The Real Dogman; 10-30-2008 at 01:08 AM. |

|  |
| Sponsored Links | |
| | |
|
10-06-2008, 08:40 PM
| #2 |
| Rock Crawler Join Date: Apr 2008 Location: Rancho Cucamonga
Posts: 520
|
Let's see some body off pics. |
|
| |
|
10-06-2008, 08:42 PM
| #3 |
| RCC Addict Join Date: Jun 2007 Location: Indian Village Pontiac
Posts: 1,910
|
Soon Enough!! Soon Enough!!
|
|
| |
|
10-06-2008, 08:57 PM
| #4 |
| Quarry Creeper Join Date: Dec 2006 Location: dot com
Posts: 362
|
Looks great dog, make sure you elaborate more on those lower links too  |
|
| |
|
10-06-2008, 09:00 PM
| #5 |
| I wanna be Dave Join Date: Aug 2008 Location: cape crud... will you be my friend
Posts: 2,102
|
that thing should be able to suck up some bumps. nice work man, looks quite capable. |
|
| |
|
10-06-2008, 09:33 PM
| #6 |
| Pebble Pounder Join Date: Aug 2008 Location: San Diego
Posts: 190
|
Set up sounds sweet and looks great. I can't wait to see her topless.
|
|
| |
|
10-09-2008, 09:29 PM
| #7 |
| RCC Addict Join Date: Jun 2007 Location: Indian Village Pontiac
Posts: 1,910
|
Ok guys, Some naked pictures before we get into the tech of it!! 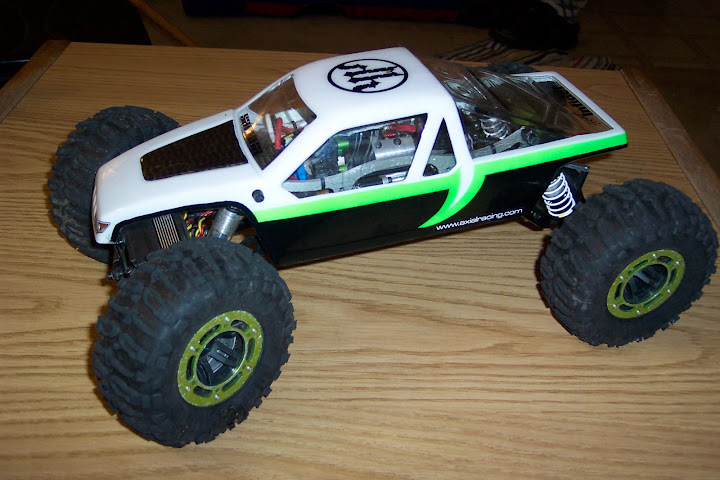 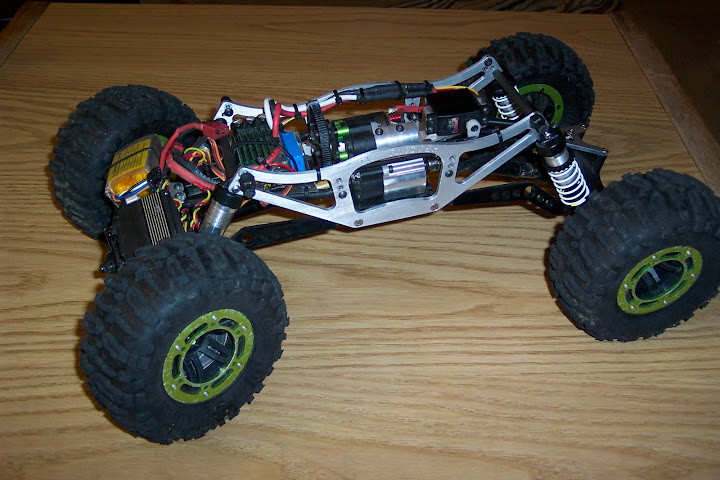 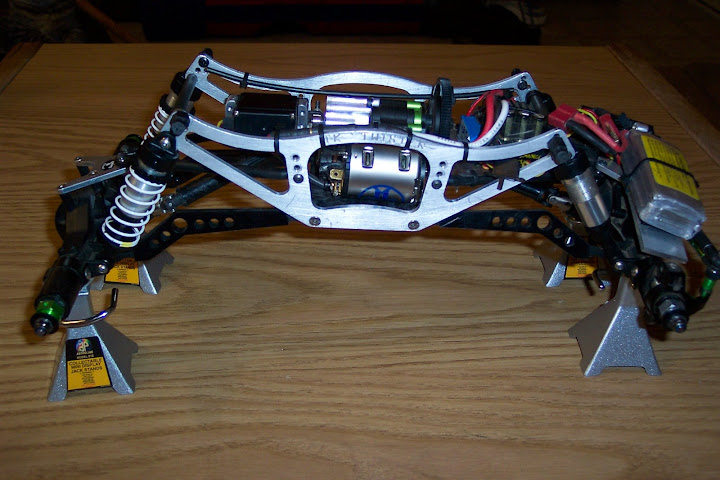 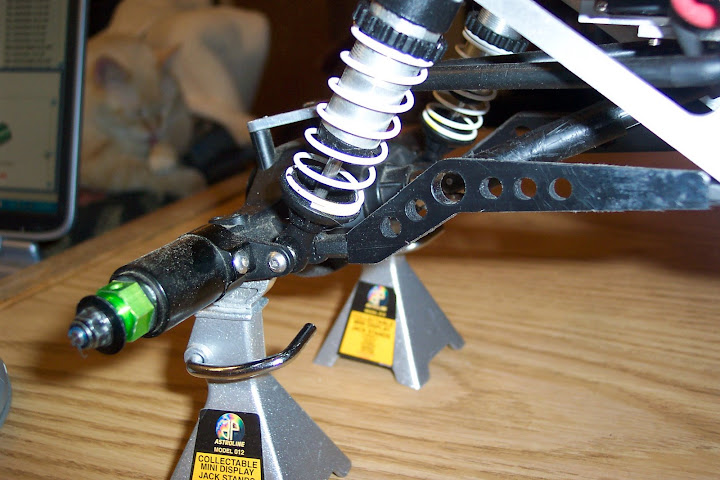  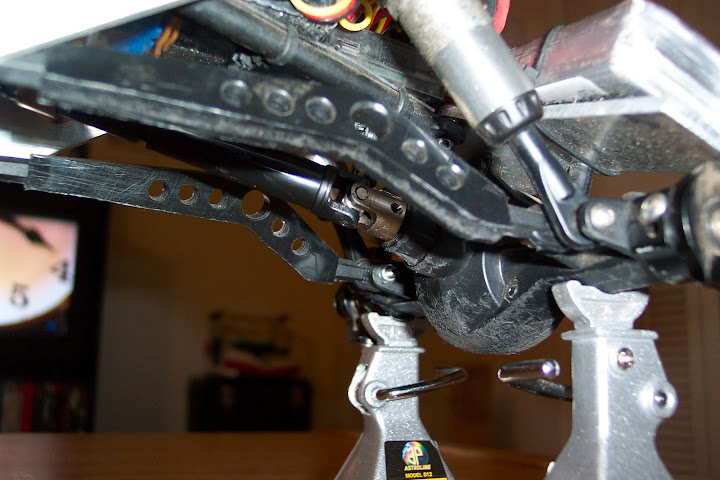  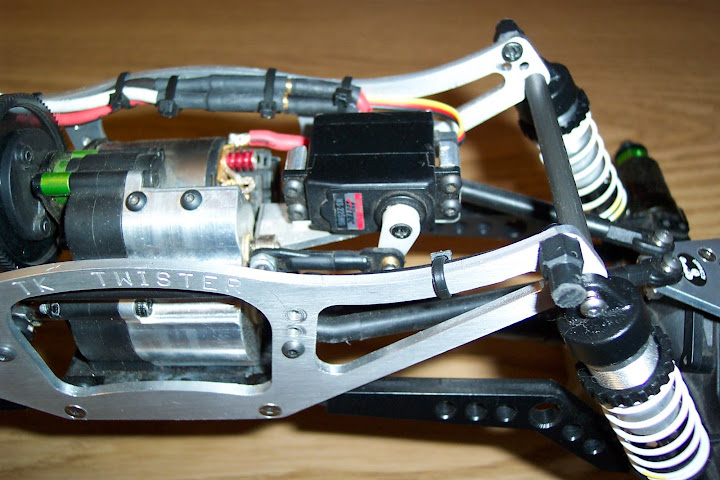 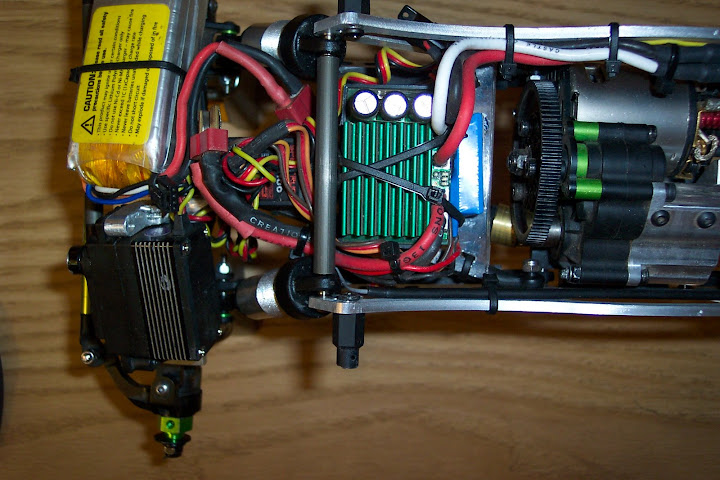 Got any questions before I move on to the tech and piece by piece break down?? |
|
| |
|
10-10-2008, 08:40 PM
| #8 |
| Rock Crawler Join Date: Jun 2008 Location: Clinton,Michigan
Posts: 908
|
man I love that body. The colors and design look great. |
|
| |
|
10-11-2008, 05:48 AM
| #9 |
| Rock Crawler Join Date: Jan 2008 Location: Cotati
Posts: 704
|
Looks great! How do you like those lower links?
|
|
| |
|
10-11-2008, 08:50 AM
| #10 |
| RCC Addict Join Date: Jun 2007 Location: Indian Village Pontiac
Posts: 1,910
|
Thanx Guys, I love the lower links it took all of 1 hour to design and cut them out on the CNC. I saw everyone having issues with their high clearance lower links interferring with the shocks and then it hit me one day when I was talking to the Flyin Hawiian here in my living room how to solve that problem. Now I think I can invert the shocks, but we will see. And the paint scheme is my scheme, I had that on my last body and have tried to get e few other local guys to paint that scheme on a couple other bodies for me, but they just couldn't get it right. So I did this one and glad I did. Next one I might try to have one of the painters here do it since they seem to grasp the concept of torn back sheet metal. More to come today.. This build thread is going to be a lil different than most. Last edited by The Real Dogman; 10-11-2008 at 09:00 AM. |
|
| |
|
10-11-2008, 09:59 AM
| #11 |
| RCC Addict Join Date: Dec 2005 Location: Tucson
Posts: 1,190
|
I will never work
|
|
| |
|
10-11-2008, 10:32 AM
| #12 |
| RCC Addict Join Date: Jun 2007 Location: Indian Village Pontiac
Posts: 1,910
|
Hey Chris, did you ever get those 2 Revo shocks from Dustin??
|
|
| |
|
10-11-2008, 03:01 PM
| #13 |
| Pebble Pounder Join Date: Aug 2008 Location: San Diego
Posts: 190
|
I'm pretty sure you I have helped me in making my decision of what body I will be running on my rig.
|
|
| |
|
10-11-2008, 05:32 PM
| #14 |
| RCC Addict Join Date: Jun 2007 Location: Indian Village Pontiac
Posts: 1,910
|
Here are a couple shots of the chasis plate I cut next to the prototype chassis. I felt the the droop/sprung setup I plan to use would work best with the shock angle laid down to about were the first set of holes where, so I cut the rest off. Then I plan to keep the rear shocks out side of the chassis, since they will be sprug and I want as much stability out back as possible. The front is another story since it wil be setup for droop. I plan to tuck the front shocks inside the frame to help with leverage and movement of the front axle. I feel that if you are going to run this type of suspension, then you need to weight the front and let it articulate while the stiff rear more or less floats or follows the front. But I dont want the front to move too much or extend while making a steep climb or while trying to power out of a bind, so will install internal springs. But more on that later. So you now you have most of the logic this rig will be built by. The pics of the chassis plates  Last edited by The Real Dogman; 10-11-2008 at 05:42 PM. |
|
| |
|
10-11-2008, 05:42 PM
| #15 |
| Quarry Creeper Join Date: Jun 2007 Location: Tucson
Posts: 299
|
Looks good Lee it was nice seeing it work on the rocks.
|
|
| |
|
10-11-2008, 05:58 PM
| #16 |
| Rock Crawler Join Date: Aug 2007 Location: Tucson
Posts: 584
|
Beatiful build thread. I like your links. I need to go do some r&d myself. I am starting the chassis manufacturing this coming week
|
|
| |
|
10-11-2008, 06:03 PM
| #17 |
| RCC Addict Join Date: Jun 2007 Location: Indian Village Pontiac
Posts: 1,910
|
Now, let's talk about the lower links. I wanted Delrin High Clearence links but didn't want to add alot of weight while making them as ridgid as possible andI liked what some of the examples I have seen so far, like Kamikazis and Axial's aluminum version. However, I did not see that they had adressed the interferenc issues I knew I would encounter with the Revo Shocks I plan to run. And while discussing this with Flying Hawiian, the answer came to me, Why not point the rod end straight away from the axle then angle the link up for clearence. I drew one up in AUTOcad and ran it on one of the CNC machines at work. After about a couple hours or so I had these. Dont they look like a dog's leg, a little?? 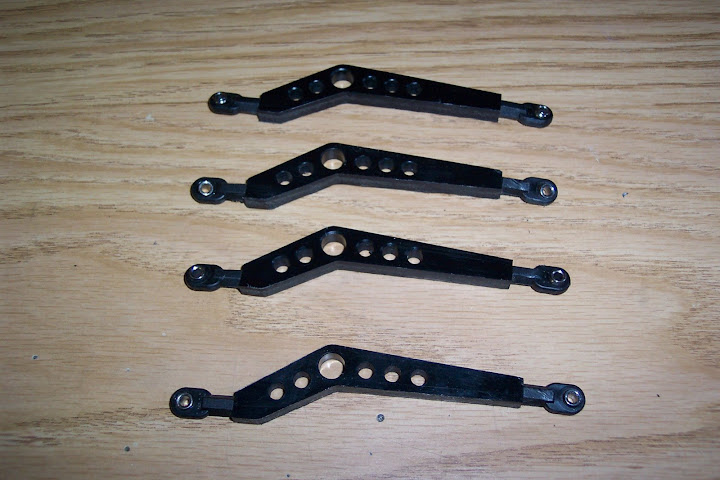 Last edited by The Real Dogman; 10-11-2008 at 09:16 PM. |
|
| |
|
10-12-2008, 12:13 PM
| #18 |
| RCC Addict Join Date: Jun 2007 Location: Indian Village Pontiac
Posts: 1,910
|
Well, I spent the night considering whether or not I was going to get into tearing the axles down since they are from The Axe 07-08 Winter Series and 2008 Summer Series comprig. They seem and feel strong, and this will give me a good oppurtunity to what 2 seasons of Hard comping has done to these axles. Now keep in mind I added a few things to them so technically the only Axial OEM parts left in them are the housings, ring and pinions, bearings, hex's and wheel nuts. If you look closely you can see these axles aren't slouches. And they seem to spin nicely  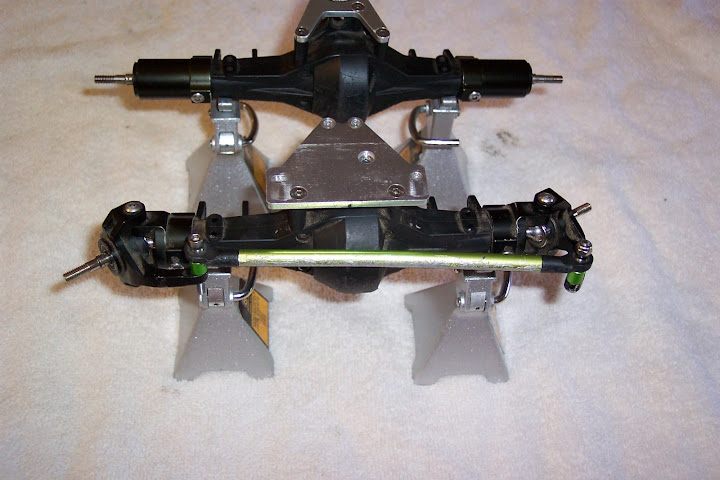 Time to get greasy! I think I will do the rear axle first. Be back with some pics in a few minutes Last edited by The Real Dogman; 10-12-2008 at 01:00 PM. |
|
| |
|
10-12-2008, 03:20 PM
| #19 |
| RCC Addict Join Date: Jun 2007 Location: Indian Village Pontiac
Posts: 1,910
|
Upon opening the rear case, it becomes very apparent that despite all the abuse my 3s Lipo and 35t motor and my heavy trigger finger has put to the rear axle it has held up extremely well!! Although there were a few grains of sand inside the case, all bearings spin freely with no noticable slop/wear. The ring and pinion gears being the only internal OEM part left(besides the bearings), I was pleasantly suprised to see no decernable wear or chips in the teeth. And the contact pattern between the R&P was just perfectly centered. No new needed parts here!! But on my list of upgrades for this season is definitely a set of hardened steel R&P. A few pics 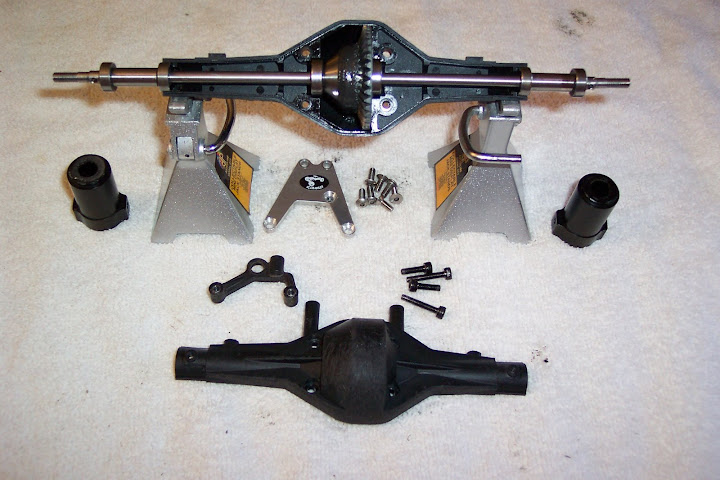 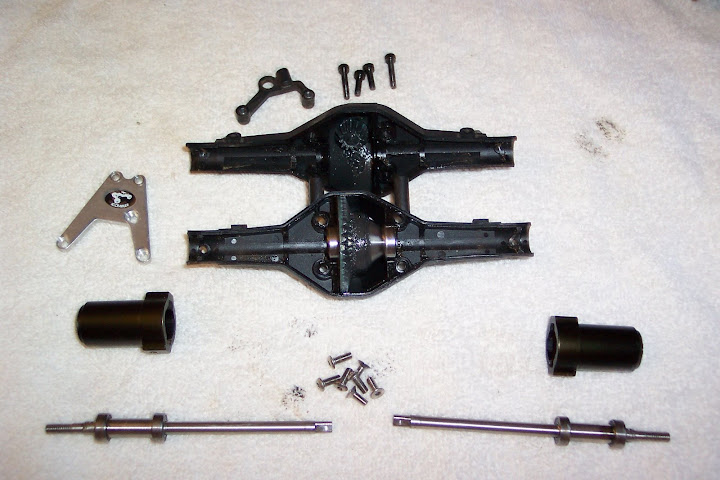 As you can see in this pic below, the RCP Stainless Steel drive shafts are holding up remarkably well considering they have been bent and bent back straight countless times. But they are also holding up well to the Bonus Line Steel Lockers!! I will need to get a new set of axles at some point before these break from fatigue of being bent so many times, but they dont seem weak at all, it still takes quite a bt of force to bend them back. So I will run them just a bit longer!! And I have the security of knowing I will not get a DNF by way of broken rear axle. Way to go RCP!! Love these axles!! 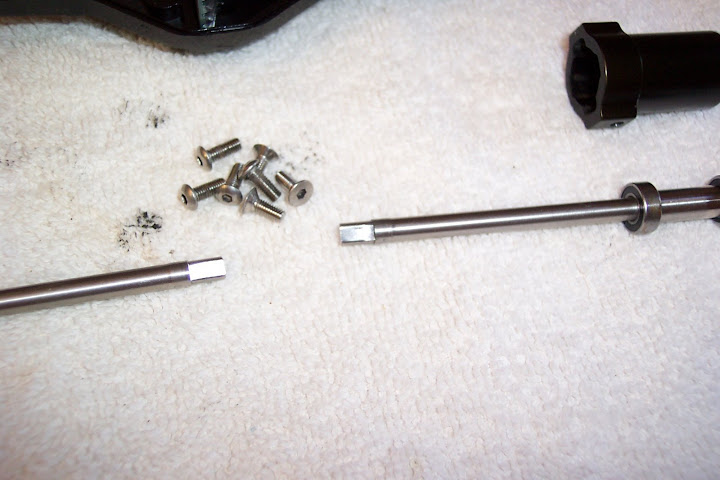 The Bonus Line Lockers are the heart of these axles, and I can say without question, these are the last set of lockers these axles will EVER need!! And to think, these are the preproduction units!! I dont think I will ever need the spare set in my box!!! Just look and at those double-D holes, No Wear!!!! 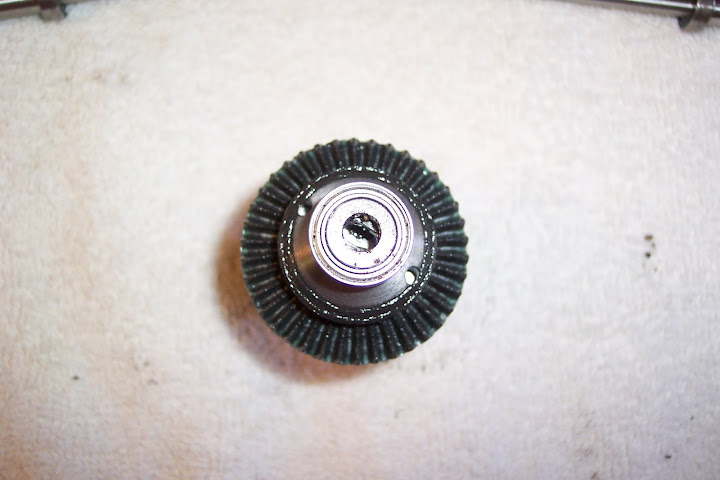 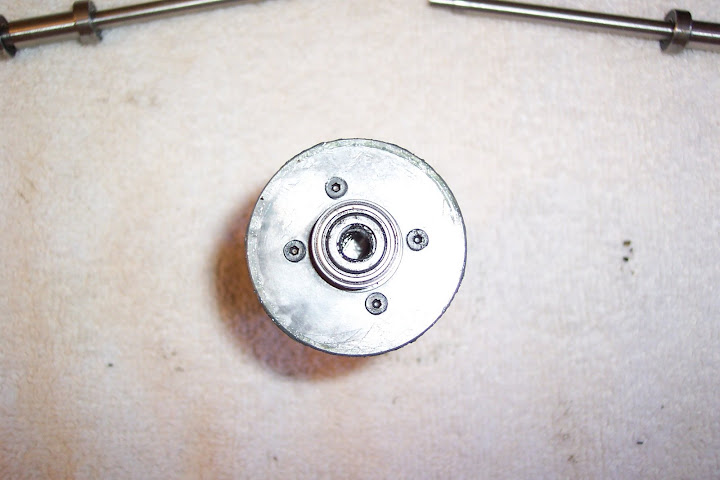 It's a keeper!!!! And now, let's see how the front Axle is holding up!!! Last edited by The Real Dogman; 10-14-2008 at 03:50 PM. |
|
| |
|
10-13-2008, 01:43 AM
| #20 |
| RCC Addict Join Date: Jun 2007 Location: Indian Village Pontiac
Posts: 1,910
|
The front axle was pretty much the same thing, no wear. Even where I had to hack on the passenger side CVD to get it to seat completely into te Bonus line locker. The Chrome on the other CVD hase been chipped of the double-d where it insert into the Bonus Line Locker, but there was no wear!! Rock Solid!! Good Job Alan and Axial!!!!. 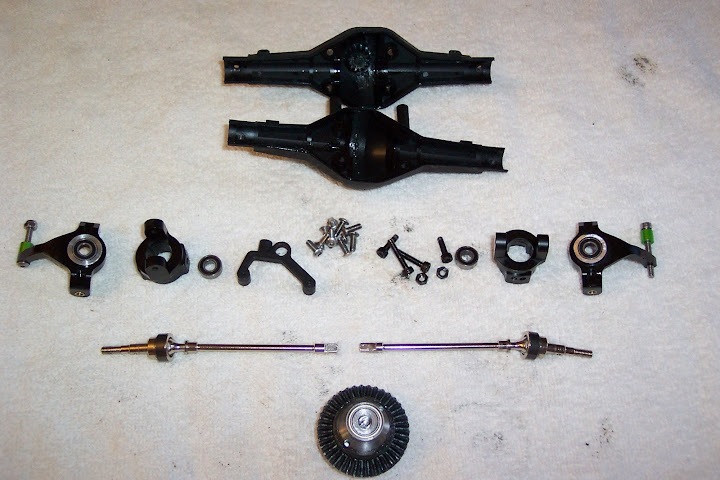 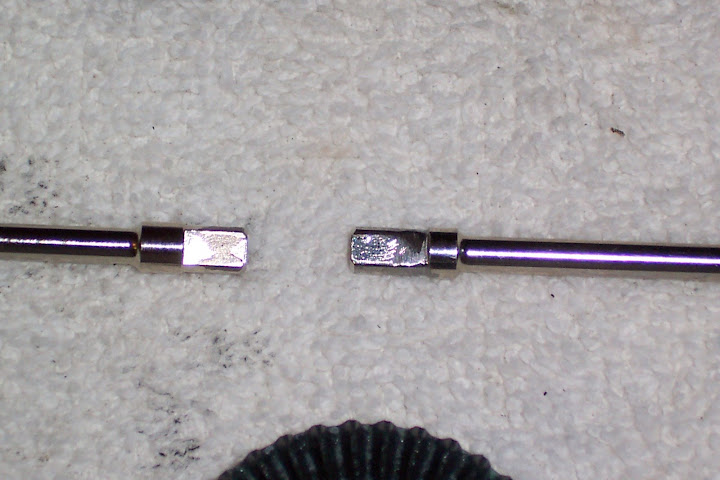 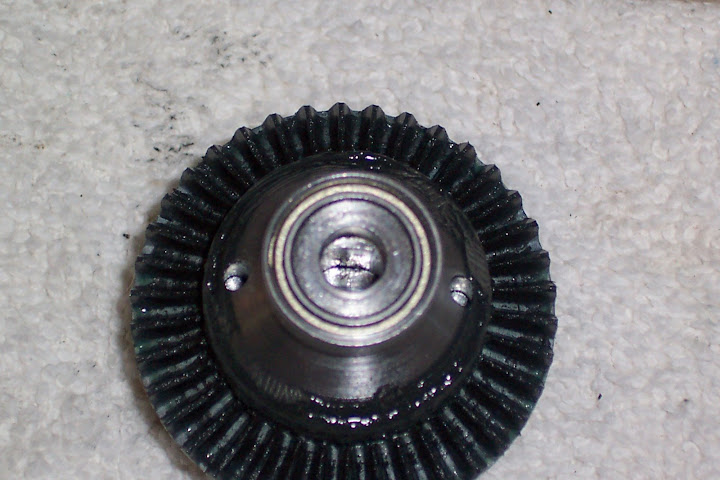 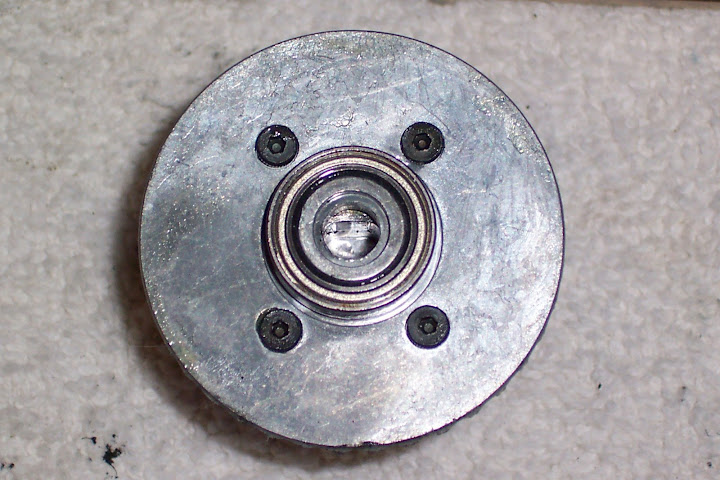 The CVD's Faired very well with all the abuse they have been put thru, although one of the pins did get a lil tweaked a couple quick blows with the hammer fixed her right up. 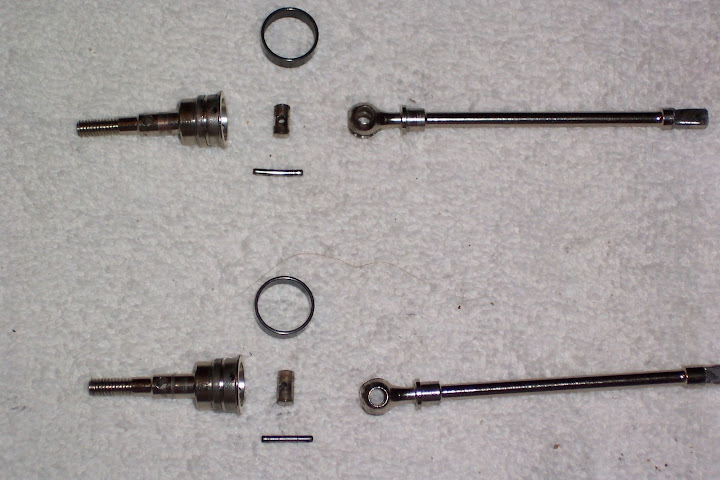 Now for the Servo mount/Battery Plate. I wanted to mount everthing as far forward and as low as possible on this chassis so I had to mount both the 3s Lipo and the 5955tg on the front axle, which required a new mount. I felt to mount everything low I needed to get the servo and batt low as well so I saw a few guys make a plate that spanned the front axle and bent down to lower CG. The major flaw I saw with this setup is the servo and batt were always too close the tires during turning. but moving the Servo closer to center caused the inside mount holes move over top of the flat portion of the plate. I knew that was going to require a custom servo mount, But couldn't get to the CNC for this one, so wittled the mount out of some 1/4" thick aluminum. Sweet little mount too.  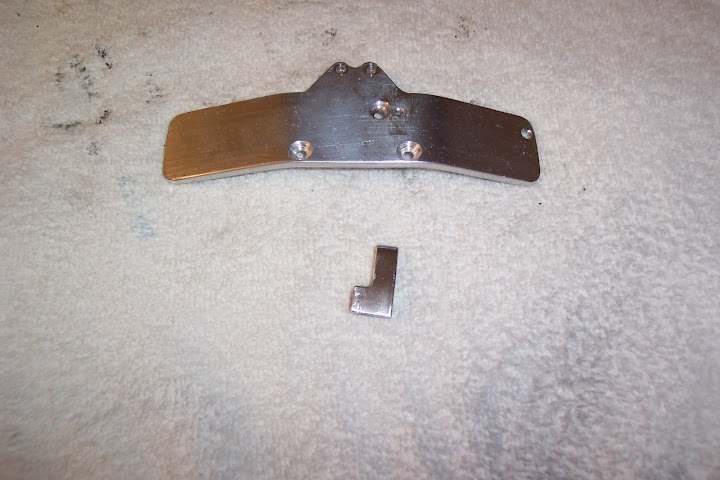 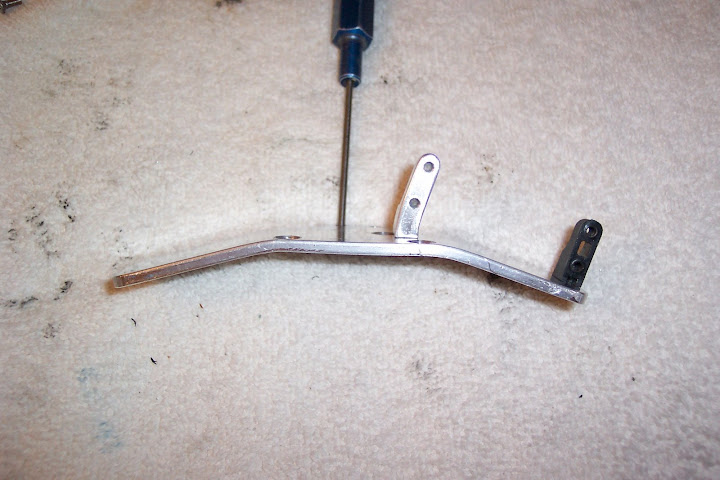 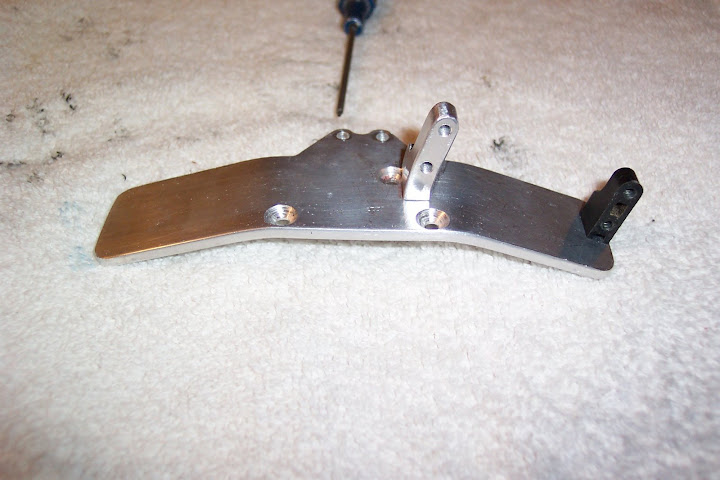 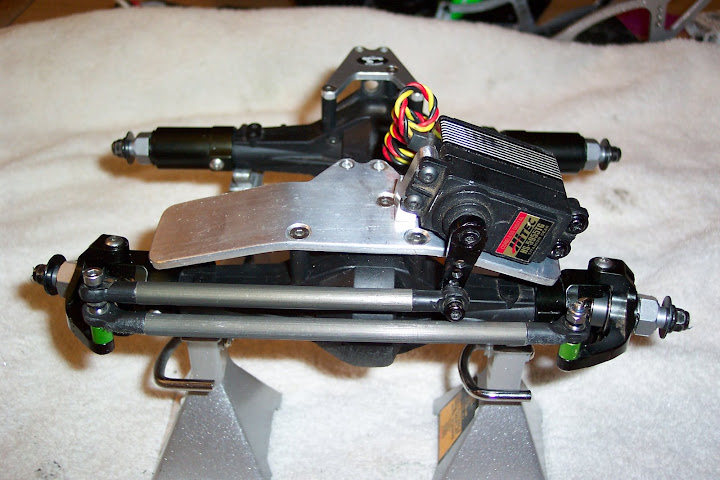 OK thats it for tonight I will move on to the shock in the morning!!! Last edited by The Real Dogman; 10-13-2008 at 09:40 AM. |
|
| |
|
| |


 Linear Mode


