| |
| |||||||
 |
| | LinkBack | Thread Tools | Display Modes |
 06-25-2010, 11:59 AM
| #41 |
| Quarry Creeper Join Date: Mar 2010 Location: SF East Bay
Posts: 451
|
Time for some much needed updates. It was just a matter of time--the steering knuckle finally broke. I was always wondering where the cracking noises were coming from when I was in a bind, and low and behold, it was this:  Bought some Golden Horizons knuckles at the discount bin at Hobby Town--$12.00!!! Parts for AX10s are getting really cheap now I suppose...  Make sure you use a little threadlock on the screw holes. Mine were machined a little too thick, so when I cranked the screws down, the steering would bind. I had to use the Loctite 242 gel so it would stay put and not drip into the universal joint. It allowed me to just screw in the bolt "snug" and let the magic of modern chemistry do its work.  While I was at it, I took the advice of countless folks and re-attached the drag link/steering linkage with the nut on the top-side for addtional clearance: Before:  After:  Combatting torque twist. Since I found myself cranking the pre-load collars on the "comp" shocks, I went back to the stock "ARTR" shocks since it had the firmer springs that I wanted. To get back to the same ride height as the "comp" shocks, I simply put a slightly longer internal limiter inside the shock between the piston and the shock body. I also "fine tuned" the flex by moving the shocks more "inward" using the inner most holes in the chassis. It now crawls more to my liking:  Big Problems: After this past Thursday's comp, I found that the Integy Prospeed system might be on its last legs. I have not been running an external BEC, but the ESC has been cutting all power in even very low stress situations. In all fairness, the crawler has inadvertently been dunked in water twice--once by my dog, and once by my bad driving. So, it may be time to upgrade to a nice brushed system and an external BEC:  From previous build: $633.25 GH Alloy Knuckles: $12.00 New ESC/Motor/BEC: TBA The Bottom Line: $645.25 |

|  |
| Sponsored Links | |
| | |
|
07-01-2010, 12:30 AM
| #42 |
| Quarry Creeper Join Date: Mar 2010 Location: SF East Bay
Posts: 451
|
While waiting for my new ESC and motor to show up, I decided to install Gunnar's now famous (or infamous) body mount kits. The kit is beautifully elegant in its simplicity--not only that, but it came with an instruction sheet as well. There is at least three of everything that you may need to mount your body and lots of extra parts for that custom fit.  While installing the kit, I decided to remove the battery bracket and drop a little weight up top. I replaced the bracket with the same width spacer that came in a parts tree with the original ARTR kit. The alloy chassis spacer can also be replaced by a spacer from the body mount kit. I can now also ditch the body posts on the side of the chassis for extra clearance.       I drilled a few holes on the body that way I can move the body later to a forward/rear position as I change things further.  The final nut to secure the body. I was now also able to trim some more of the body for additional clearance.    From previous build: $645.25 Gunnar's Body Mounts: Priceless!!! (free) The Bottom Line: $645.25 |
|
| |
|
07-01-2010, 12:02 PM
| #43 | ||
| Rock Crawler Join Date: Dec 2009 Location: Jersey Strong!
Posts: 564
| Quote:
Quote:
Nice thread you've put together. | ||
|
| |
|
07-01-2010, 12:22 PM
| #44 | |
| Quarry Creeper Join Date: Mar 2010 Location: SF East Bay
Posts: 451
| Quote:
That servo actually is O.K. upon further inspection; the servo horn just stripped out and Hitec said it works fine, hence I subtracted it from the cost but failed to explain as to why it worked out that way--nice catch. Speaking of which, my Tekin FX-R setup just came in from the UPS man just in time for tonight's mini-comp. Write up on that coming soon. | |
|
| |
|
07-01-2010, 08:16 PM
| #45 |
| Quarry Creeper  Join Date: Jun 2010 Location: 801 El Capital
Posts: 434
|
I as well would just like to say nice thread. I will be watching.  |
|
| |
|
07-02-2010, 09:57 AM
| #46 | |
| No idea what I'm doing Join Date: Oct 2008 Location: Underground, CO
Posts: 4,529
| Quote:
Nicely done | |
|
| |
|
07-02-2010, 10:02 AM
| #47 |
| Newbie Join Date: Jun 2010 Location: Northern CA
Posts: 28
|
Hmmmm... Removing parts from the build price seems kinda shifty, unless you're re-purposing them for another project (all the money still got spent, right?) Then again, if I do that, I can shave darn near $50 off the cost of my crawler too! SCORE!! And I'm sorry to hear about the integy, I was really considering that set up myself, but I decided to stay brushed and use a Sidewinder, it's been pretty good so far. Again, thanks for the thread! |
|
| |
|
07-03-2010, 07:14 PM
| #48 | |
| Rock Crawler Join Date: Dec 2009 Location: Jersey Strong!
Posts: 564
| Quote:
| |
|
| |
|
07-04-2010, 05:03 PM
| #49 |
| Rock Crawler Join Date: Dec 2008 Location: Fortuna Calif.
Posts: 997
|
I like the way your are going about this build. This is kinda the way I built my first AX-10 just kept making improvements as I went along. Iam thinking of building another shafty and will use your thread as a guide line, Thanks. Kind of did a full circle thing with the AX-10 then a Berg and now back to a AX-10.
|
|
| |
|
07-08-2010, 01:25 PM
| #50 |
| Quarry Creeper Join Date: Mar 2010 Location: SF East Bay
Posts: 451
|
Some quick updates: Tekin FXR and Castle BEC installed. The main thing about this upgrade is that my rig no longer shuts itself off when in a moderate to heavy bind. Just about everyone has installed these on their crawler, but a few things to note is that when soldering, on large metal posts like on this crawler, it's important to have a hot soldering iron (60 watts or hotter) or preferably one where you can adjust the wattage. This will allow you to heat a local area faster and prevent the heat from travelling too far and damage/melt parts further down the line. I used a cheapie RadioShack clamp on heat sink on the wire posts when soldering on the wires. I also clamped the heatsink on the capacitor leads to make sure I didn't melt that thing from the start. Since it's really easy to solder on the ESC, I also just soldered the motor leads directly instead of using a connector.    Shady math? +$20 from ram_tough's typo catch With that in mind, here's the tally: From previous build: $645.25 Typo: + $20.00 Delete Integy Brushless System (now living in an SCX10): - $95 Add Tekin FXR / 35 T System: + $115.00 The bottom line: $685.25 |
|
| |
|
07-09-2010, 12:52 PM
| #51 |
| Quarry Creeper Join Date: Mar 2010 Location: SF East Bay
Posts: 451
|
Need to do some catching up with the updates on this build. LiPo Power and Low CG Battery Plate. Possibly one of the most useful upgrades that one can do to their crawler. Not really knowing anything about crawling a few months ago, I still knew that you had to keep the CG of any car as low as possible (unless you want to build it to tip over easily). I know there are a few holdouts still not using LiPo, but if you're serious about competing, you need to ditch the stick packs and split packs and get yourself a nice LiPo setup. I've had LiPo packs in my crawler since the beginning. There is a higher upfront initial investment, you'll need a LiPo compatible charger and ESC with voltage cutoff. However, you get rid of at least half the battery weight, move the rest of the battery weight onto the front axle where it's needed, and you gain voltage (if you get 3s power) for wheelspeed. Even if you decide not to go with a BTA or Low CG battery plate, having a small battery pack will lower your CG if you mount your battery on the front tri-link area using a lexan plate and some velcro. Now to the battery plate. This is the STRC plate with optional 4-link mounting holes built in. Fairly straightforward installation as the photos show:   Contents of the bag.  Before  After From previous build: $685.25 STRC Battery Plate: $13.00 The Bottom Line: $698.25 |
|
| |
|
07-10-2010, 06:45 PM
| #52 |
| Tossin' Salad Join Date: Jun 2010 Location: Petaluma
Posts: 1,826
|
I cant view the pics in this thread. |
|
| |
|
07-16-2010, 10:29 AM
| #53 |
| Quarry Creeper Join Date: Mar 2010 Location: SF East Bay
Posts: 451
|
I've been neglecting this thread for a few weeks now because of a few new toys, but here are some much needed updates: Vanquish Dig: There are already quite a few threads here relaying how to assemble and set up this dig unit, and the instructions are good, so I'll just cover some of the main points of the install.  What you get in the package  Even though the main dig housing is pre-assembled, I took it apart as shown so that I can grease the dog engagement gears--if you didn't, you would miss the part facing away from the transmission, and you wouldn't get sufficient grease on the groove that the gear runs on.  What comes out of the stock tranny.  What goes back into the tranny. Note that the longer diff outdrive goes on the side toward the dig housing. Also note that the first dog gear that you install will have a tiny allen that is 1/20" or .050" in size. I got my allen set from Radio Shack, as most stores don't carry them in that small of a size.  Assembled and ready to go back into the crawler after installation of the servo linkage. After using this for a times, quite a few new lines will now be available to your rig. I would say that if you are setting up your chassis for comp use, that this will possibly be in the top 3 of upgrades that will make a difference to how your rig will perform. From previous build: $698.25 Vanquish Dig: $84.00 Spektrum S200 Servo: $0.00 (came with DX3E stock) The bottom line: $782.25 Last edited by K.O.M.; 07-16-2010 at 10:59 PM. |
|
| |
|
07-16-2010, 01:38 PM
| #54 |
| Newbie Join Date: Jan 2008 Location: colorado springs
Posts: 33
|
So are you not using your Hobbico CS170 servo on this rig? Is it for sale?
|
|
| |
|
07-16-2010, 01:57 PM
| #55 |
| Quarry Creeper Join Date: Apr 2010 Location: BEHIND THE WHEEL////MOAB
Posts: 281
|
Great minds think alike.... I like your style |
|
| |
|
07-16-2010, 02:01 PM
| #56 | |
| Ex Nor-CalRCRC slave 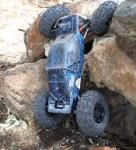 Join Date: Dec 2008 Location: San Mateo, CA.
Posts: 2,242
| Quote:
So, why would you think that? In the few posts above this, he clearly shows the CS170 mounted on the rig(well, somewhat clearly). He has not stated that the servo is broken, or not using it, or that is for sale. I'm not hounding you on purpose, it's that I'm just wondering why you post these questions, especially since you've been a member for a while, and can read and understand K.O.M.'s posts. Last edited by gunnar; 07-16-2010 at 02:27 PM. | |
|
| |
|
07-16-2010, 02:31 PM
| #57 |
| Shelf queen  Join Date: Aug 2008 Location: Internet
Posts: 5,857
|
I'm really enjoying your bottom line updates at the end of your upgrade posts. That alone is priceless |
|
| |
|
07-16-2010, 02:39 PM
| #58 | |
| Newbie Join Date: Jan 2008 Location: colorado springs
Posts: 33
| Quote:
| |
|
| |
|
07-16-2010, 06:21 PM
| #59 |
| Rock Crawler Join Date: Jul 2010 Location: St. Albans
Posts: 507
|
Nice build I can't wait to get my crawler and start modding it. Been in the hobby for about the same amount of years and have always been into goin fast. Now my friends got me into crawling. Can't wait to crawl.
|
|
| |
|
07-16-2010, 09:04 PM
| #60 | |
| Ex Nor-CalRCRC slave Join Date: Dec 2008 Location: San Mateo, CA.
Posts: 2,242
| Quote:
EDIT: I want to expand on the above answer, as I was at work and only had a minute to respond. When I first saw this site, I was hooked, and read roughly 6 hours a day for about 10 weeks, after that, I chose my dog's name as a screen name and joined. In all that time I was learning. I continue to do that today. In all my builds, you can see me learn in the way I start something, then change it, and change it again. Sometimes it's an improvement, sometimes not, but believe me, this site is just so good, that if you take the time to really absorb the info, and put your knowledge to use, you won't have to ask too many questions, you'll just create and have fun. Or you'll get frustrated and quit. Last edited by gunnar; 07-17-2010 at 12:32 AM. | |
|
| |
|
| |


 Linear Mode


