| |
| |||||||
 |
| | LinkBack | Thread Tools | Display Modes |
 10-12-2010, 05:52 PM
| #1 |
| Rock Stacker Join Date: Aug 2008 Location: tamworth, nsw, australia
Posts: 93
|
I've finally gotten my grubby little hands on a FASTBACK chassis from UGC, very nice piece of work that.....first hurdle to overcome...the tranny pokes it's bum out the side. looking at the FASTBACK build threads I see ax10 trannys being used, leading me to the question. What is the mod, the process to get that thing in there cleanly? I'd like to use the ax10 tranny as I'm impatient and don't wanna have to order one and wait for it from the US. I'm itching to get into this thing. any help / advice would be muchly appreciated. links to builds with pics even better, I tend to understand and adapt things better visually thanx all. |

|  |
| Sponsored Links | |
| | |
|
10-12-2010, 05:54 PM
| #2 |
| Rock Crawler Join Date: Jul 2009 Location: boise
Posts: 587
|
how does it not fit is my question, pics could be helpful. i didnt have any problem at all with the tranny fitting, maybe you have the skid pointed the wrong way? the motor is supposed to stick out the side a little bit if thats what you are saying, its because the narrow skid. |
|
| |
|
10-12-2010, 06:08 PM
| #3 |
| Sometimes, I make things.   Join Date: May 2009 Location: Mt. Upton
Posts: 1,043
|
Do you have a motor bolted to the trans? W/ most small pinions the only thing that will stick out will be the motor plate and that can be trimmed down easily.
|
|
| |
|
10-12-2010, 06:23 PM
| #4 |
| Quarry Creeper Join Date: Oct 2008 Location: Valley Village
Posts: 304
|  You'll get it...  the tranny case in this pic is an Integy case, same dementions as stock. Sounds like yours is flipped. Good luck! the tranny case in this pic is an Integy case, same dementions as stock. Sounds like yours is flipped. Good luck!
|
|
| |
|
10-13-2010, 03:26 PM
| #5 |
| Rock Stacker Join Date: Aug 2008 Location: tamworth, nsw, australia
Posts: 93
|
yeah the motor sticks out the side witht the tranny flipped around 180* from the stock ax10 position, so the spur faces forward, as in other pics in other threads. it's sitting much like yours cornsnake. this being a narrower skid plate and the tranny being 180* from stock position it was always gunna happen just hadn't considered it till I seen it. I'd like to get that motor back within the chassis somehow, seems to me to be a bit pointless and against the design of the FASTBACK to let the motor hang out like that. seem to recall reading the tranny being flipped eliminates TT, or at least minimizes it? thinking if I redesign a motor plate to change the position of the motor to sit more snuggly against the tranny? being at work(you lazy man get back to work) and not having it here in front of me I'm not sure if it can be done or not. it's no worry, I make work, I just use naughty swear word + kick doggy. being male i'll have a go, screw it up multiple times, then buy another skid and tranny that WILL fit. It's no fun without the frustration tho.. |
|
| |
|
10-13-2010, 05:38 PM
| #6 |
| I wanna be Dave Join Date: Dec 2009 Location: Lady Lake, Fl
Posts: 2,128
|
If you just trim the motor plate even with the motor, it barely sticks out at all.
|
|
| |
|
10-13-2010, 07:17 PM
| #7 |
| No idea what I'm doing Join Date: Oct 2008 Location: Underground, CO
Posts: 4,529
|
It will hang out a bit. To get a narrower skid, some compromises have to be made. Having the motor hang out, or have a wide skid is the compromise. Once side panels are on (mandatory for rule requirements) the motor is quite protected. Even without rules, side panels are a good idea to protect your motor. Shoot us some pics of your setup |
|
| |
|
10-13-2010, 07:17 PM
| #8 |
| Rock Stacker Join Date: Aug 2008 Location: tamworth, nsw, australia
Posts: 93
|
getting the 9 inch grinder out now to trim that motor plate. should i take the tranny out of the chassis first? thanx billj, that was my initial thought, didn't wanna hack into it without clarifying it first, no LHS, all orders takes weeks from overseas on a seperate issue, titanium is a mongrel to drill and tap for links |
|
| |
|
10-13-2010, 08:17 PM
| #9 |
| Rock Stacker Join Date: Aug 2008 Location: tamworth, nsw, australia
Posts: 93
|
all done, plate trimmed back. went in good, just looks like a fat chick wearing hipster jeans now; it's got a bit hanging outover the side that should be inside  back onto those damned ti links, gunna match up to the old Alu links, cut a thread for the rod ends to screw straight on to. fingers, eyes, toes, testes crossed.... |
|
| |
|
10-19-2010, 03:54 PM
| #10 |
| Rock Stacker Join Date: Aug 2008 Location: tamworth, nsw, australia
Posts: 93
|
suppose this had better be my build thread...... been heading home every day for "lunch" to keep working on this thing, coming along nice. gunna get some pics up hopefully today. parts lists- UGC fb (obviously) UGC d-link in back stock ax10 rims (for now) FXR esc stock ax10 tranny w/hardened gear set + diy solid steel ouputs mg996 servo ( i feel dirty just admitting to that losi 4" shocks w/white springs (gold on their way) INTEGY shafts 3RACING knuckles YEAH RACING c's DIY front servo/battery/4-link plate MIP cvd's HD ring/pinion underdrive option DIY titanium lower links (fronts @ 105mm, rears @ 129mm) 3s lipo still to come / in the post- STRC straight aqxle adaptors HR gold springs to be ordered- CC bec and link HITEC 7950 some decent wheels and tires( whatever budget aka: wife alllows) working in a trades technical college plumbing workshop has LOTS of benefits; materials, time, tools.... I've just come across a heap of what looks like delrin , scrap to practise plastic welding. servo guard ?? hoping the rod will be ok for upper links / steering links.as there are those that have walked this road before, any suggestions, ideas, tips will be recieved with much appreciation. Negative comments will make me cry, go home and drink too much and be a bad husband and father, I'll get depressed and may have thoughts of self-harm and will most likely watch DR. PHIL in an attempt to validate my existance. more to come....... |
|
| |
|
10-19-2010, 09:07 PM
| #11 |
| Rock Stacker Join Date: Aug 2008 Location: tamworth, nsw, australia
Posts: 93
|
pics as promised.... what it WAS what it is NOW  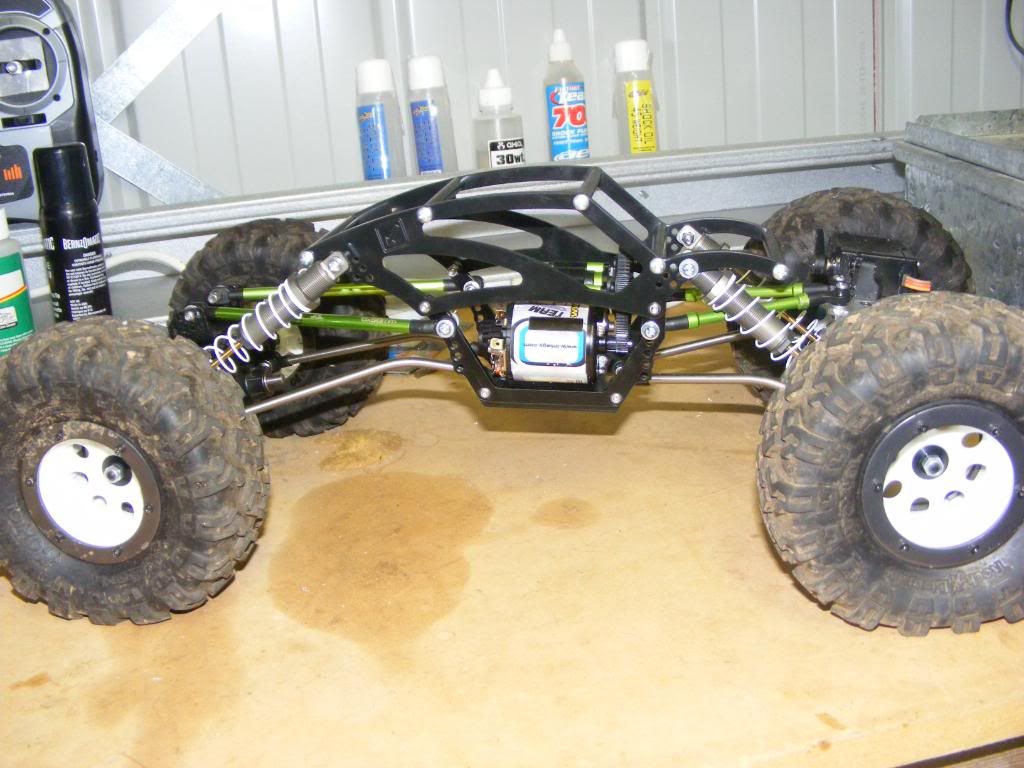 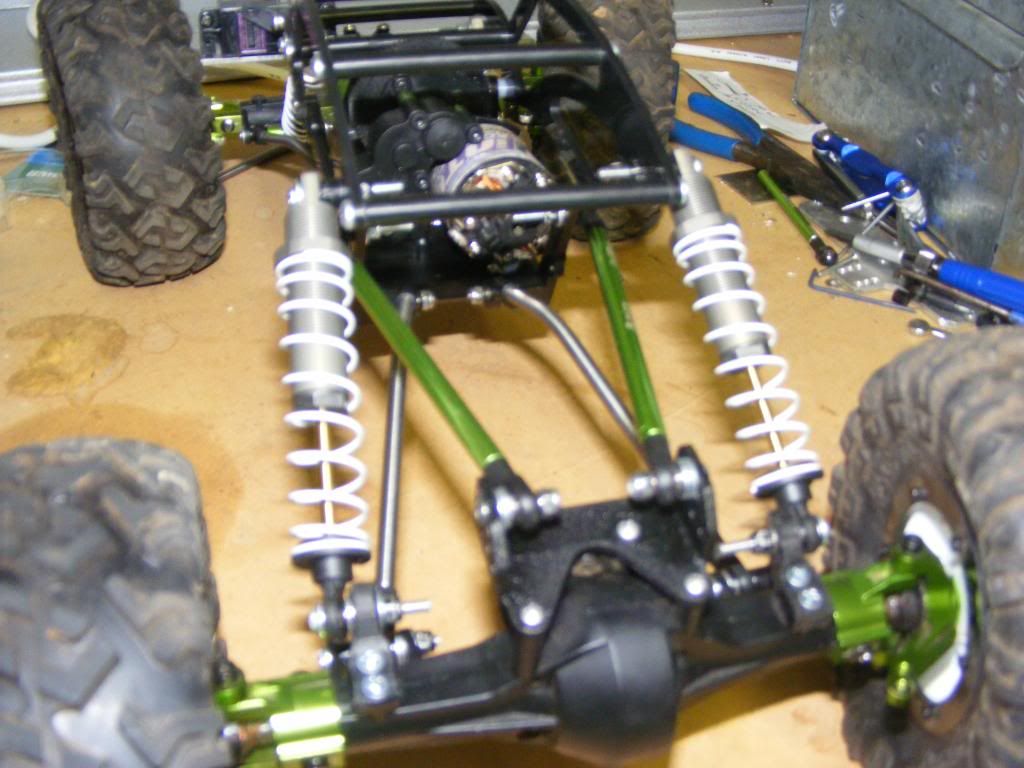 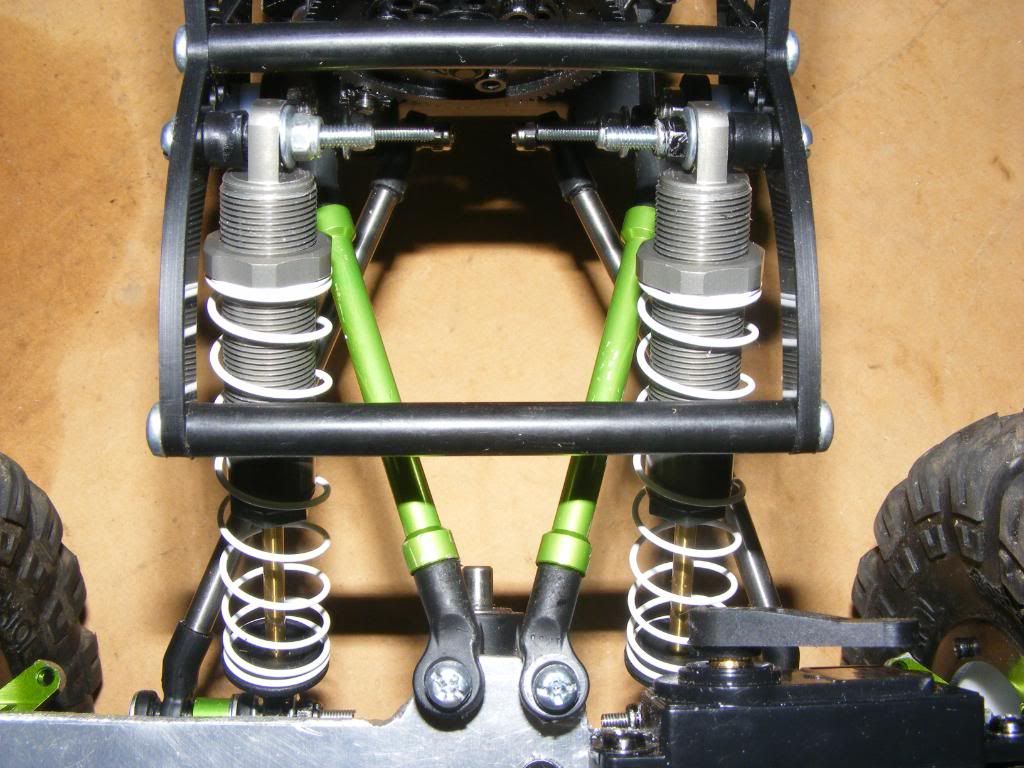 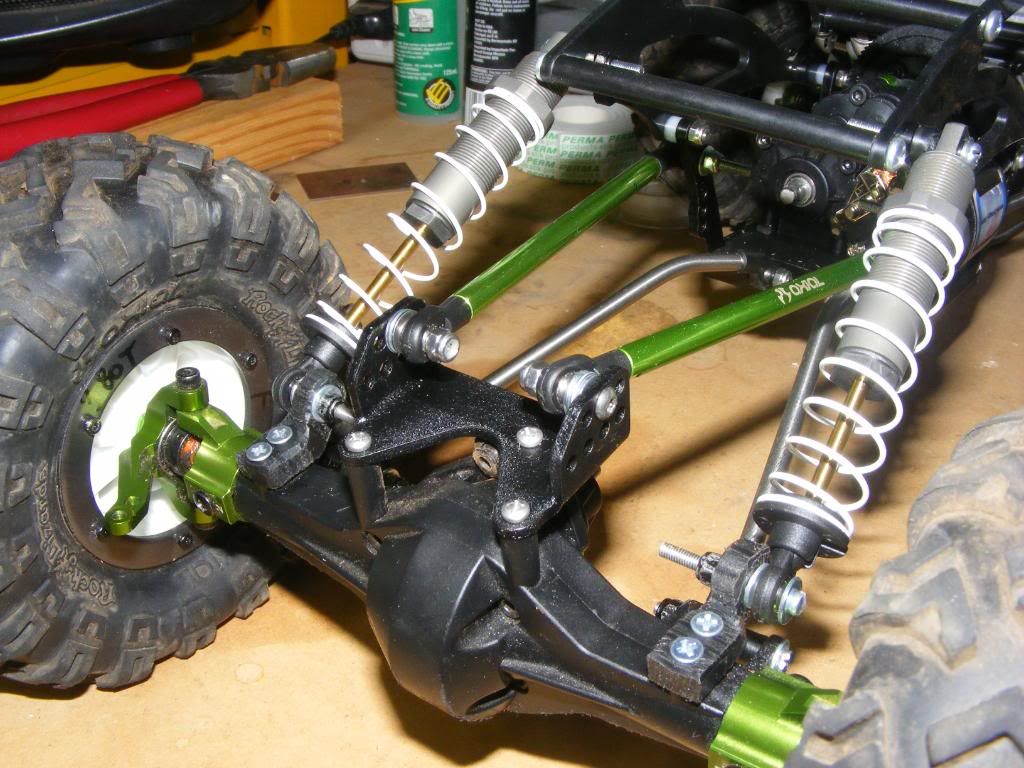 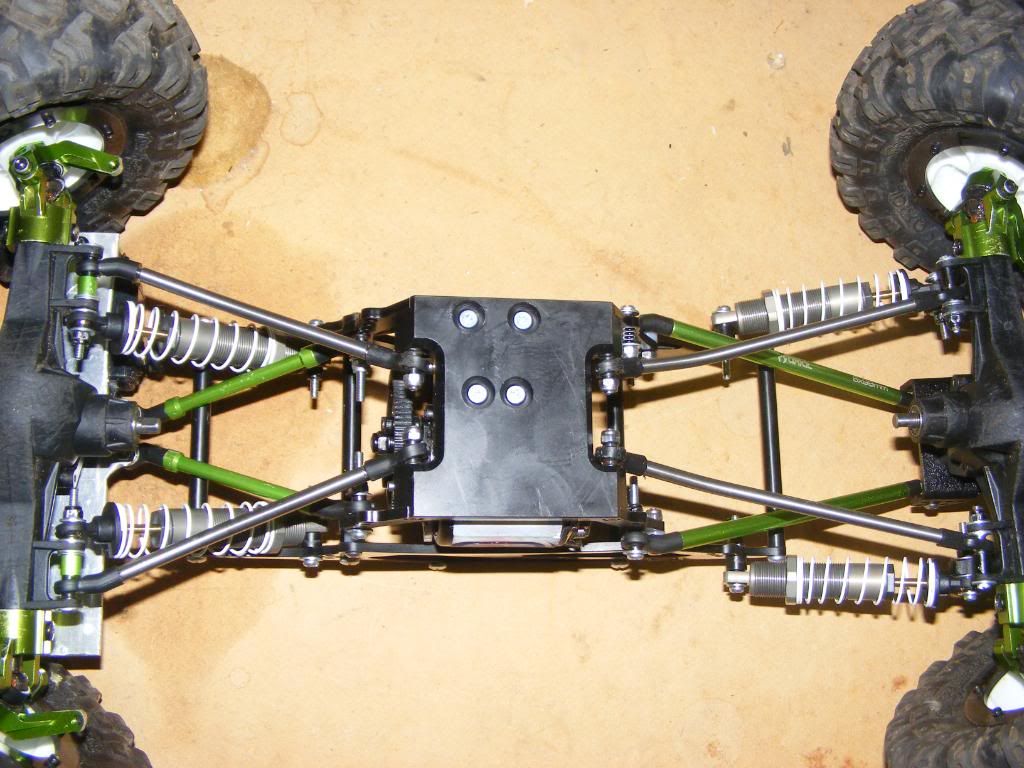 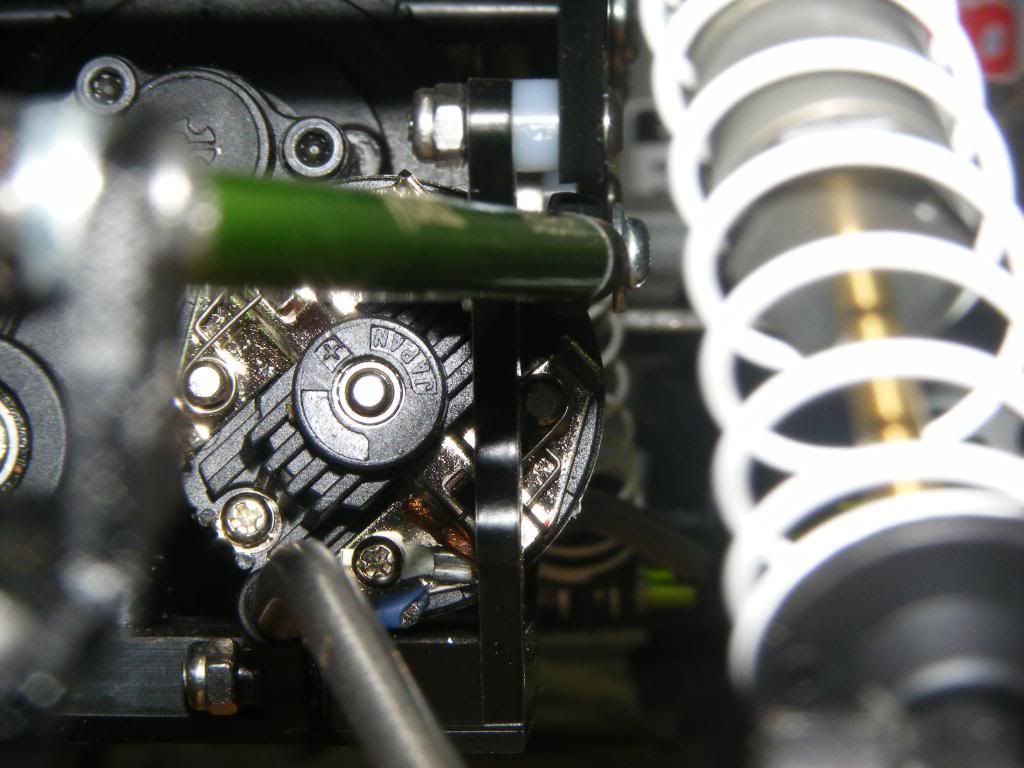 the motor side after trimming the plate 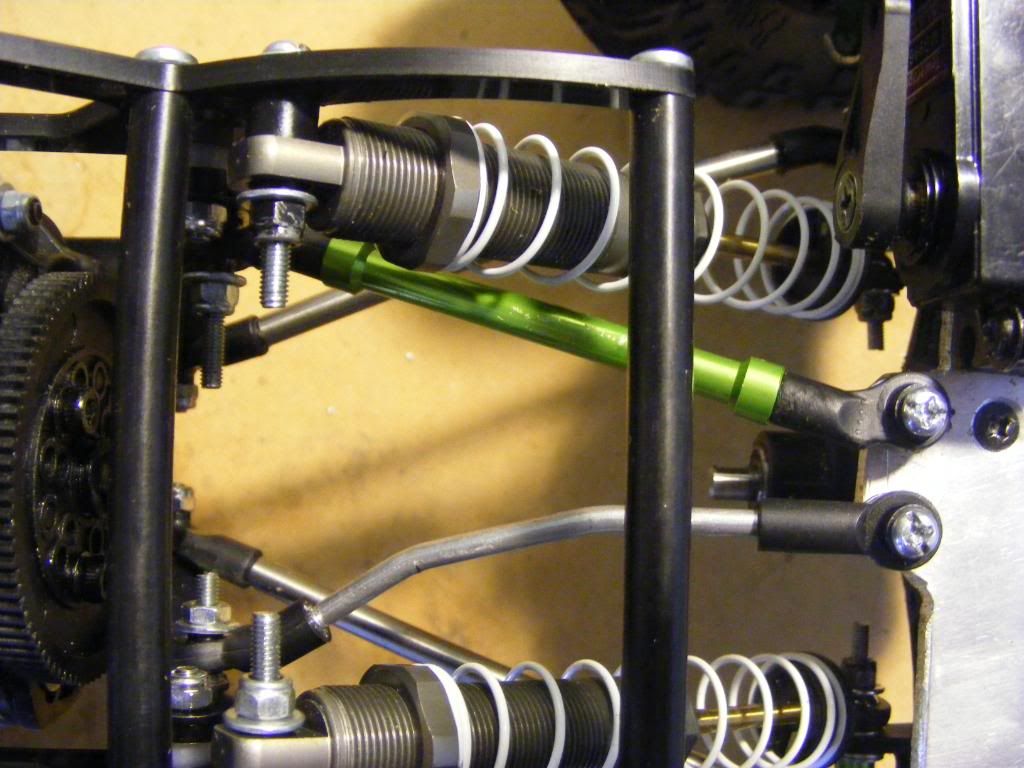 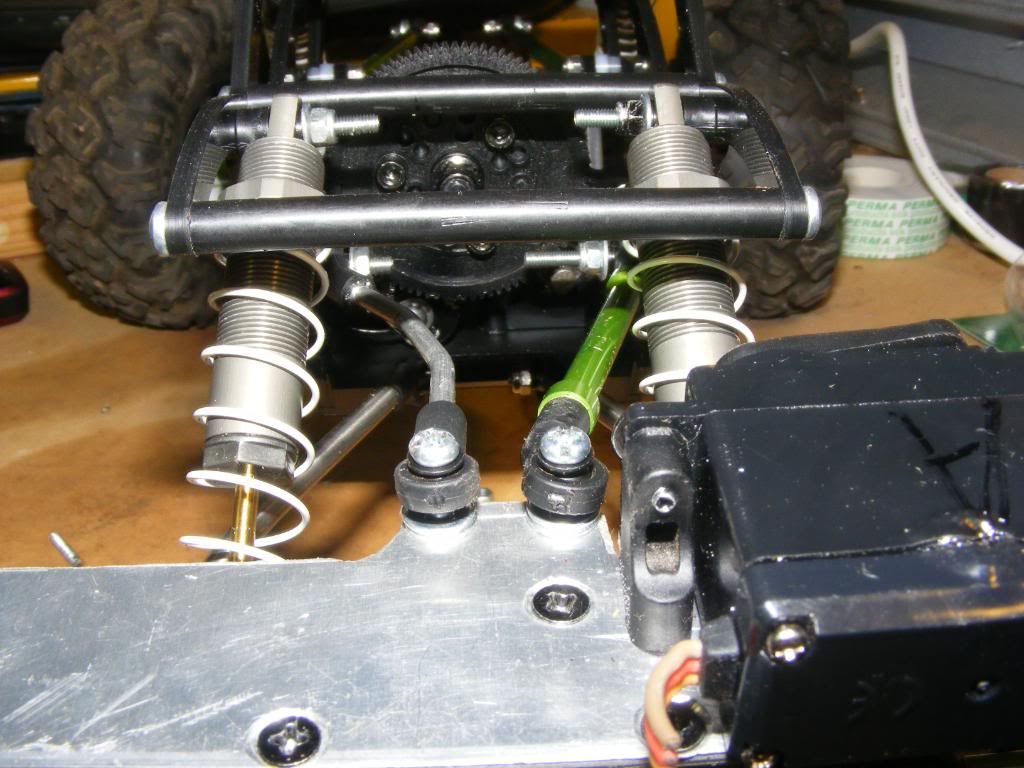  wasn't happy with front links binding up against shocks, mocked up a link from aluminium brazing rod, bent to suit so no binding has added approx 100mm /4" articulation height. I may not use all of that 100mm, but at least I know it won't bind. making the upper links now at work from 4.75mm titanium, not an easy material to bend precisely and cut a thread and maintain uniformity, but I WILL prevail. Last edited by slowlearner; 10-20-2010 at 04:46 PM. Reason: attached images wrong, changed as per set out elsewhere on forum. |
|
| |
|
10-19-2010, 09:21 PM
| #12 |
| Quarry Creeper Join Date: May 2010 Location: South Central AR
Posts: 199
|
Looks like your rear lower links need to be flipped around. Looks good! |
|
| |
|
10-20-2010, 03:26 PM
| #13 |
| Rock Stacker Join Date: Aug 2008 Location: tamworth, nsw, australia
Posts: 93
|
rassum frassum frikkin frakkin gawdDAMMIT!! it's always the little things that get missed, funnily enough that's what the missus says in the bedroom..... thanx mate, must have had a brain fart that day. that's a quick enough fix. front upper titanium links finished last night and installed. those couple kinks has freed up the articulation nicely. one of my initial concerns with the link/shock set-up was the way the front was being hindered. those losi shock being 4" worried me a bit, i'm used to a bit more travel with the stock ax10 bodies. the longer travel suits me well, as the sort of driving i do is boulder about head size, not so much rock formations as I see most comps being run on. next project is getting the INTEGY shafts to the right lengths. Anyone have some dimensions as a starting point? |
|
| |
|
10-20-2010, 06:29 PM
| #14 |
| Quarry Creeper Join Date: May 2010 Location: South Central AR
Posts: 199
|
You need to do the shock mod on them. Cut the upper ring off drill a hole for a M3 bolt and bolt up a rod end to it. Make sure to use some sealant on the bolt and end. It makes a huge difference in articulation!
|
|
| |
|
10-20-2010, 08:31 PM
| #15 | |
| I wanna be Dave Join Date: Oct 2007 Location: Scumrise, Flooriduh
Posts: 5,181
| Quote:
I would add a longer piece of tubing through the top though so it has a bit more room for side travel. | |
|
| |
|
10-20-2010, 09:18 PM
| #16 |
| Rock Stacker Join Date: Aug 2008 Location: tamworth, nsw, australia
Posts: 93
|
great minds think alike DICKYT......went home at lunch for more work on the build, spaced the shocks off the chassis with 2 washers, 1.9mm both sides, just enough to free the shock from binding on the chassis at full stuff. got the front shaft cut down quick and easy, cut 22mm off it, ground a flat spot and drilled a small hole for the grub screw to grab onto. brought the rear shaft into work with the off-cut from the front shaft, asked a welding teacher to TIG it on, shaft now resembles a candle, melted the shaft |
|
| |
|
10-21-2010, 02:35 PM
| #17 |
| Rock Stacker Join Date: Aug 2008 Location: tamworth, nsw, australia
Posts: 93
|
shafts done....spent a couple hours turning down some scrap to 8mm/6mm to fit the INTEGY shaft ends, didn't quite get it all finished before home time...went home to start looking at the BTA, realised I had some 5.4mm titanium rod lying around. The INTEGY shafts are 6mm, 5.4mm went in nicely, only 0.3mm slop either side once the grub screws tightened down. Had to drill thru the rod for a pin for shaft travel/slide then cut to length. Gunna have to do the front shaft now that that was so easy. sorry no pics for now, camera playing silly buggers. hope to have pics up of shafts, front upper links, BTA (if theres more than 24hours in day this weekend) and some other diy gems soon.
|
|
| |
|
11-03-2010, 04:42 PM
| #18 |
| Rock Stacker Join Date: Aug 2008 Location: tamworth, nsw, australia
Posts: 93
|
finally got's it all done...camera working again and pics taken...amazing what fresh batteries will do... almost done, power leads yet to be cut to length here. 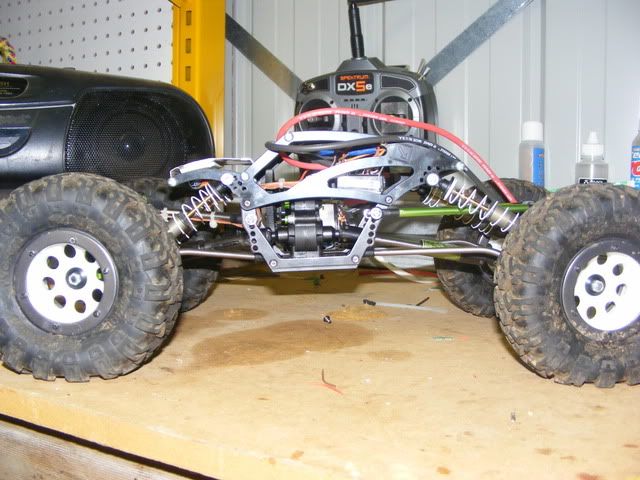 front upper links done and bent up to clear the shocks 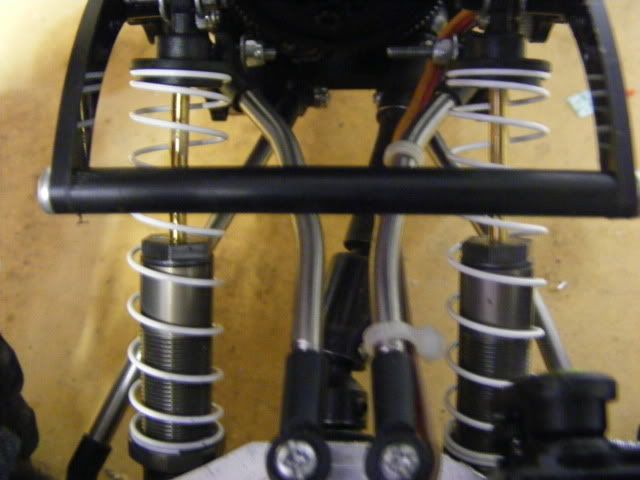 front upper links flexing, nowhere near shocks. 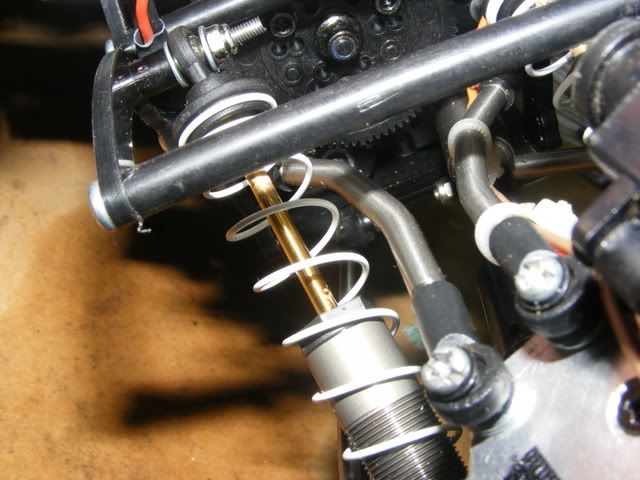 flex shots... 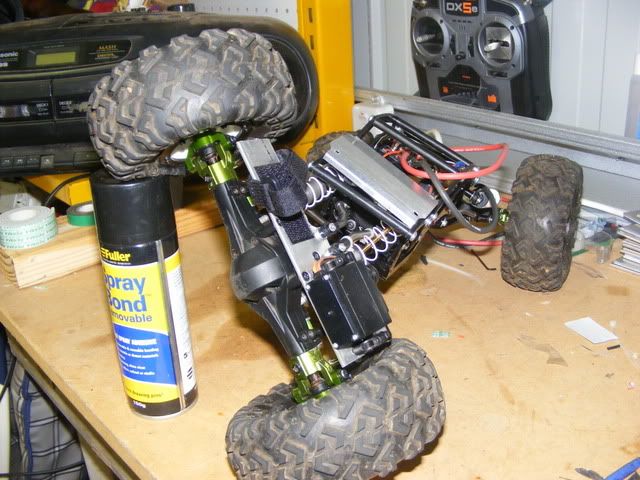 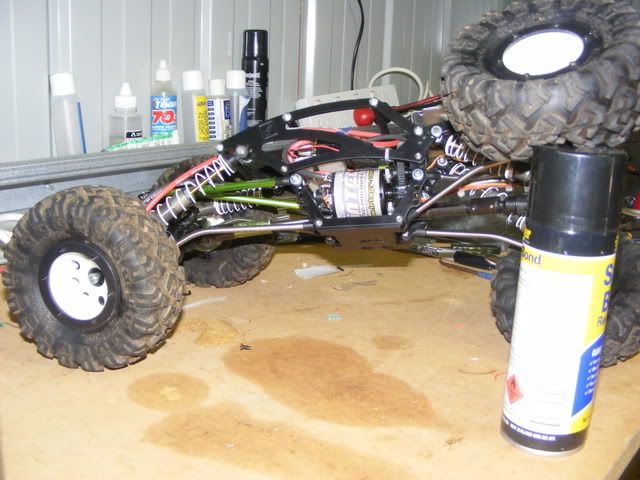 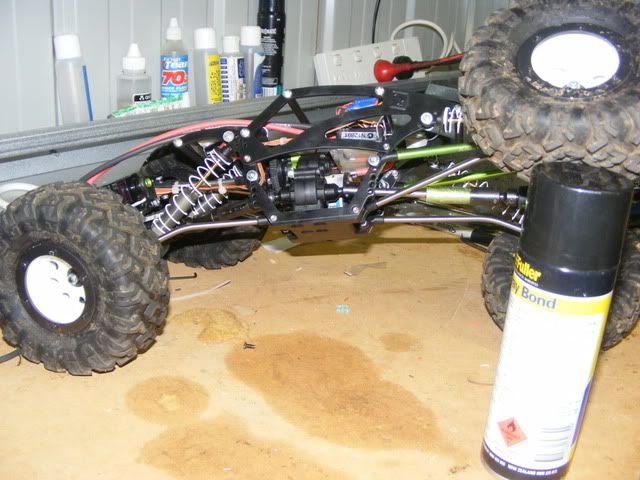 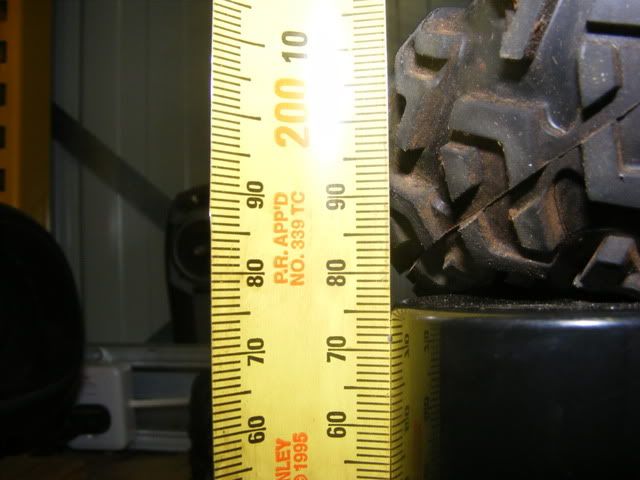 |
|
| |
|
11-03-2010, 04:47 PM
| #19 |
| Rock Stacker Join Date: Aug 2008 Location: tamworth, nsw, australia
Posts: 93
|
electrics mounting time..bit of juice bottle cut to length across width of chassis. 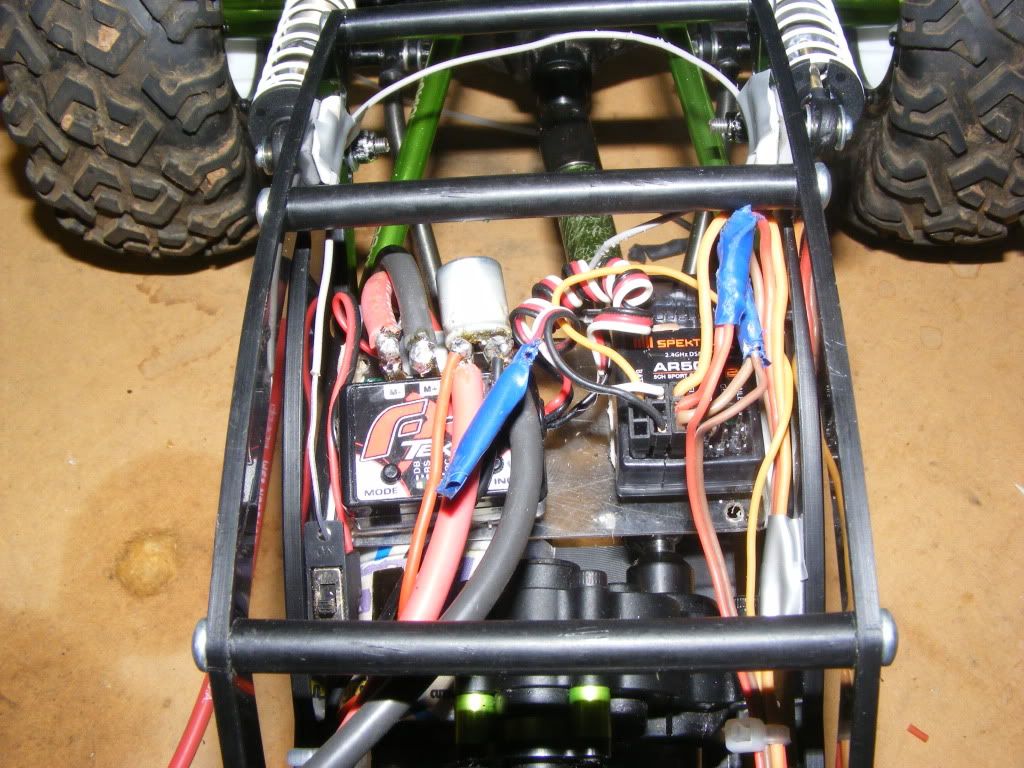 bec hiding under front hood. routing wiring was tricky... 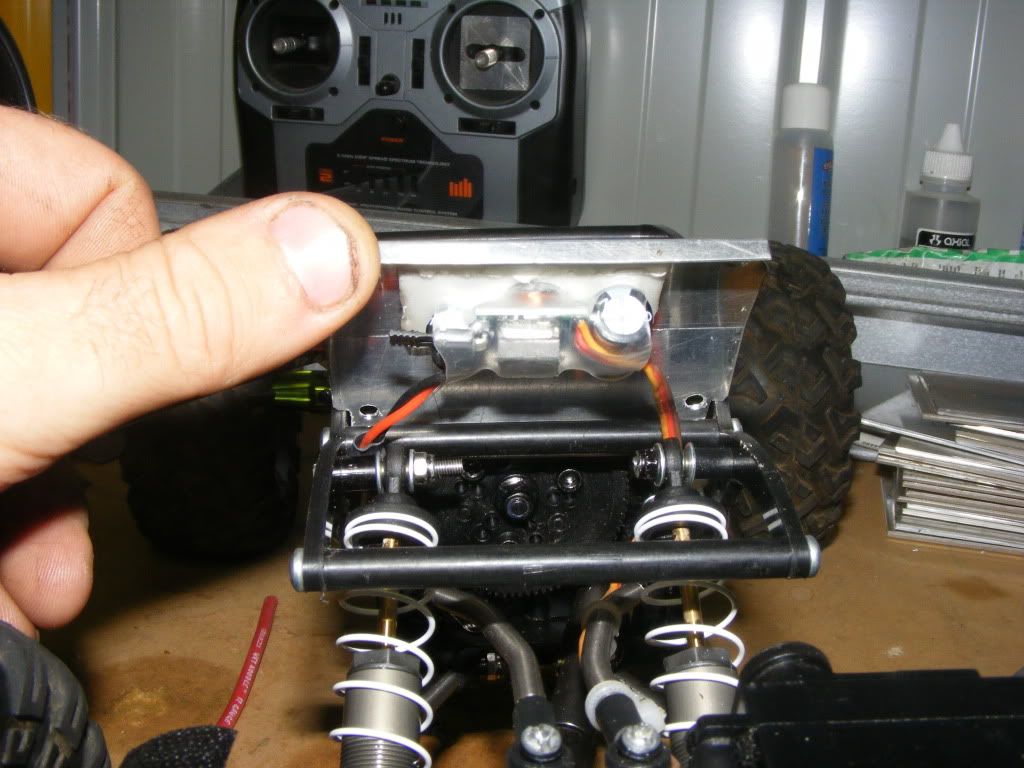 |
|
| |
|
11-03-2010, 04:50 PM
| #20 |
| Rock Stacker Join Date: Aug 2008 Location: tamworth, nsw, australia
Posts: 93
|
body panels, 22gauge aluminium, side panels yet to be done. 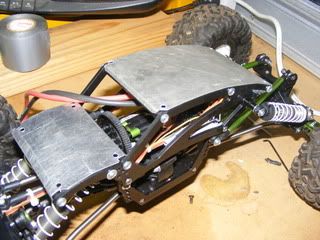 ride height.. 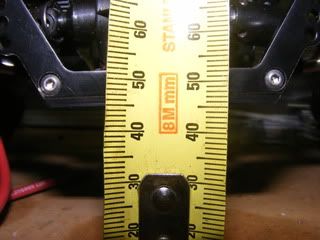 |
|
| |
|
| |


 Linear Mode


