| |
 10-21-2009, 06:51 PM
| #21 |
| Newbie Join Date: May 2004
Posts: 3
|
hows that steering workin for you?
|

|  |
| Sponsored Links | |
| | |
|
10-21-2009, 06:57 PM
| #22 | |
| RCC Addict Join Date: Nov 2008 Location: never been
Posts: 1,317
| Quote:
| |
|
| |
|
10-21-2009, 06:58 PM
| #23 |
| I wanna be Dave Join Date: Mar 2009 Location: sittin in the sky
Posts: 4,630
|
looks great ive always liked chevys! nice trailer too! could a guy talk ya into making one that holds a comp rig?? im diggin the leafs on the trailer. GREAT build!  |
|
| |
|
10-21-2009, 09:56 PM
| #24 | |
| RCC Addict Join Date: Dec 2007 Location: Calgary
Posts: 1,575
| Quote:
you have a PM | |
|
| |
|
10-23-2009, 10:19 AM
| #25 |
| Quarry Creeper Join Date: Aug 2008 Location: Orange City
Posts: 203
|
x2 on the great looking combo i'm jealous |
|
| |
|
10-23-2009, 11:42 AM
| #26 |
| Newbie Join Date: Nov 2008 Location: Frederick
Posts: 38
|
One of the best Blazers I have seen. VERY COOL !!!
|
|
| |
|
10-24-2009, 08:27 AM
| #27 | |||
| I wanna be Dave Join Date: Jun 2007 Location: Canada, eh.
Posts: 2,919
| Quote:
Quote:
Quote:
Been working on the interior. So lots of styrene dust and glue fumes    Dashboard made up. I scratched my head on this for a while, but figured out the best way was to make the dashboard separate from the rest of the interior.   As you can see in the next pic, the dashboard attached to the underside of the hood with a few pieces of velcro. Nice thing is I can adjust its position slightly without moving the whole rest of the interior.  Got a driver too. Got this as a pair, my son got the other guy. My wife was right, this is just Barbie for men  Obviously, the seats aren't secured yet. Interesting thing about the new Recaro seats, is that they're different in shape from the older ones. About the same size, but if you've got an older style one and want another for a pair, keep in mind they won't match completely.  More work to come, lots of sanding and filling. Need to pick up an Axial interior and exterior kit. Then need to make up gauges, work on the seats, etc. etc. I'm looking for suggestions on the interior colour. Might possibly do the dash and console in diamond plate. I've seen this on some aftermarket Blazer dashes. | |||
|
| |
|
10-24-2009, 08:34 AM
| #28 |
| RCC Addict Join Date: Dec 2007 Location: Calgary
Posts: 1,575
|
Great work Chris, it's taking shape nicely, looking forward to seeing what else you have planned. Isn't Styrene dust/shaving the best? |
|
| |
|
10-24-2009, 08:38 AM
| #29 | |
| I wanna be Dave Join Date: Jun 2007 Location: Canada, eh.
Posts: 2,919
| Quote:
As you can see, I do have a lighting system, which is currently just hanging out of the side of the truck. I have some other parts on their way too. By the time everything is added, this truck is going to weigh 20 pounds | |
|
| |
|
10-24-2009, 09:59 AM
| #30 |
| Rock Crawler Join Date: Jul 2009 Location: Little Rock, Arkansas
Posts: 542
|
That is an awsome rig! Great job on the build! It's definetely now one of my favorite scalers on this site. |
|
| |
|
11-10-2009, 06:39 AM
| #31 |
| I wanna be Dave Join Date: Jun 2007 Location: Canada, eh.
Posts: 2,919
|
Not a lot of progress on this. Between being super busy at work and being sick, the rc side of things have been sitting for a while.   Interior is finished and has the filler on it. Just need to sand and paint it now. Decided on sticking with the green theme and going with green and black with some silver highlights. Waiting to paint it until I put in the gauges Krawler Konceptz are doing up for me. Added in mirrors, windshield wiper, and got a clod bowtie repro grill off of ebay and fit it in the front. I'm impressed with this grill. For being a resin repro, it's got a lot of detail. I've got a couple of questions that I think others can help with Second, with the grill being resin, when it comes to painting is there anything different I need to do compared to painting styrene, or do I use the same primer, paints, etc.? More to come. |
|
| |
|
11-10-2009, 09:43 AM
| #32 |
| RCC Addict  Join Date: Dec 2007 Location: On The Lake
Posts: 1,449
|
Damn Chris, your Blazer and trailer really turned out nice Dibs on the trailer if you ever sell itPainting resin parts is really no different than painting styrene. Wash it to make sure any mold release agent is gone, then sand, prime and paint like you would styrene.... at least that's what I did with resin parts for model airplanes when I was building them |
|
| |
|
11-10-2009, 10:00 AM
| #33 |
| I wanna be Dave Join Date: Sep 2005 Location: Dirty South
Posts: 4,064
|
Here is some pics of the grill in my K5 . I used the repro grill plus a 4x4x4 grill . I found that 1 grill liked abit being wide enough . So I cut thru the headlight buckets on the repro grill . Then I cut thru the grill on the 4x4x4 . This added maybe 1/16" to each side of the grill when I glues it back together . 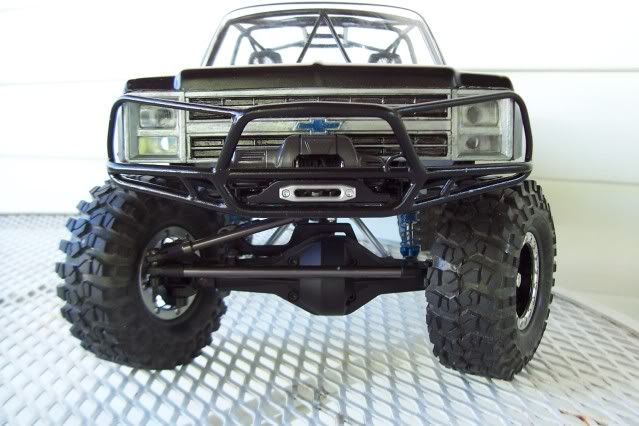 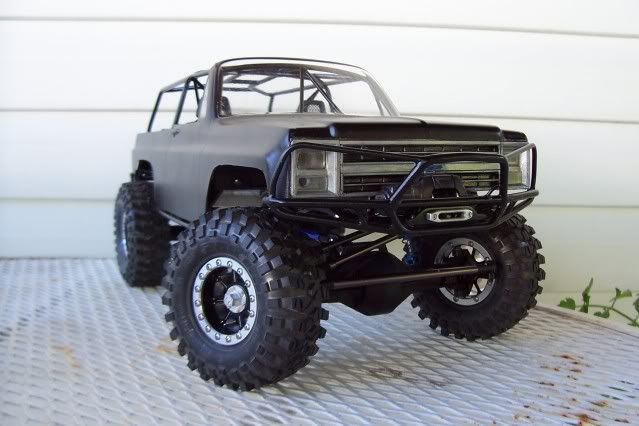 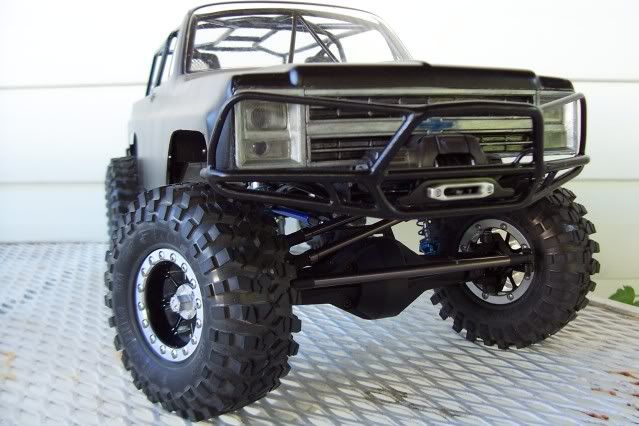 Much better than the old sticker !! 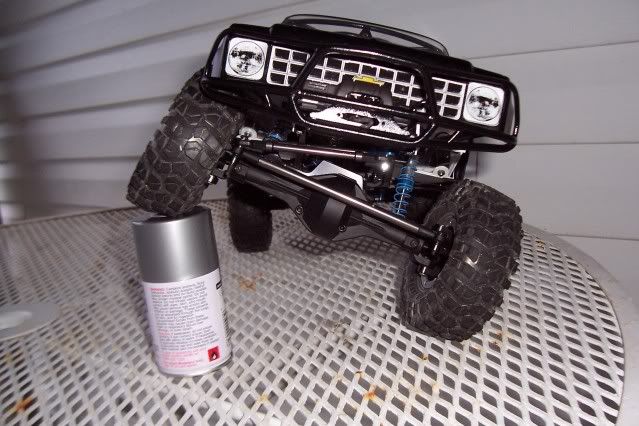 |
|
| |
|
11-10-2009, 10:11 AM
| #34 | ||
| I wanna be Dave Join Date: Jun 2007 Location: Canada, eh.
Posts: 2,919
| Quote:
Thanks for the tip on painting. I have a second grill here, just in case... Quote:
I did steal your idea for the back of the seats. Not pictured, but I took a dremel to them and got rid of all of the excess crap, cut and painted some thin styrene flat black and glued it to the back. Gives it a nice clean finished appearance. | ||
|
| |
|
11-10-2009, 02:19 PM
| #35 |
| Newbie Join Date: Jun 2009 Location: Cologne, Germany
Posts: 17
|
Very nice build, it is motivating me to continue on mine. My Blazer will be blue with a white top. Unfortunately I already purchased the Pro-Line bumpers, they'll have to do, although yours look much nicer and sturdier. I like the roof rack and especially the trailer. Again, very nice and clean work. respect. SDI makes rubber fender flares for Chevy bodies and Ford, the Chevy ones being a little more square. I'm just not sure how to mount them to a Lexan body. I have their Ford flares on my F-350 but that is a plastic body, the mounting was easy. Best regards, Thomas |
|
| |
|
11-19-2009, 06:45 AM
| #36 |
| Newbie Join Date: May 2009 Location: Bark River
Posts: 42
|
Looks great!!! what rear body mounts did you use? They look the same as another build on here, just wondering for my Blazer I'm working on. Thanks!! |
|
| |
|
11-19-2009, 08:33 AM
| #37 |
| Newbie Join Date: Aug 2009 Location: Knoxville, IA
Posts: 38
|
Having patience and the skills really pays off. That's a very sweet rig.
|
|
| |
|
11-19-2009, 11:53 AM
| #38 | |||
| I wanna be Dave Join Date: Jun 2007 Location: Canada, eh.
Posts: 2,919
| Quote:
Quote:
Having said that, the mounts I used before were stock SCX mounts. Just added in styrene on the body posts and held the body in place with velcro so no body post holes had to be drilled. Quote:
One pic with the new tires and rims on:  I've been working on frames for others, so haven't done anything else with this rig for the moment. Last edited by ecoli; 08-31-2010 at 02:06 PM. | |||
|
| |
|
11-19-2009, 06:18 PM
| #39 |
| Pebble Pounder Join Date: Nov 2009 Location: Twin Cities
Posts: 123
|
"I've got a couple of questions that I think others can help with The stock turn signals are in a few different places depending on options of the truck. If the front bumper has the option of lights they are there, is not then they are often in the grill almost hidden behind it in the bottom outside corners. If you want a great site for reference of the Blazers you can look up the replacement parts at www.LMCtruck.com (unless you are lucky enough to own the real deal like myself I will be posting my own build as soon as I get some pics of the front end (which still has to be assembled). Mine is going to be an 85 which means the Pro-line body has the wrong fender running lights, wrong front end, and of course there is the issue of no rear bumper. Hopefully I will have a thread up within a week, in the meantime I hope lmctruck helps you with reference! Enjoy! |
|
| |
|
11-19-2009, 06:31 PM
| #40 |
| RCC Addict Join Date: Dec 2007 Location: On The Lake
Posts: 1,449
|
Blazer looks badazz with the new wheels and tires on it, Chris I think you're gonna love those Rok Lox tires. Got 'em on my Bronco and they are the best tires I've used to date |
|
| |
 |
| |


 Linear Mode


