| |||||||
Loading
 |
| | LinkBack | Thread Tools | Display Modes |
| |||||||
 |
| | LinkBack | Thread Tools | Display Modes |
| | #1 |
| Quarry Creeper Join Date: Dec 2015 Location: San Diego
Posts: 244
|
A bit of a introduction, I've been into RC for a while. I started racing RC offload trucks and buggies in about the first time in 1985ish. Started out with a RC10 when it first came out. This was after a couple of years of flying RC planes. Got out of RC around 1990 and got back into racing in 1998. I've always been a Associated guy. Today I race a AE B5M in stock and modified as well as Tenno EB48.3 and a SCT410. I started flying RC helicopters about a year and half ago and had a fleet of hell's ranging from a Trex 150 DFC to a Trex 550 DFC. A few months ago I decided to get out of hell's and been slowly selling off the fleet since. I'm down to a a Trex 150, Trex 250, Trex 450 and a heavily "upgraded" Blade 300X. The 300X however will off to a new home Saturday. All that said; a week or so ago I bought my first scale "crawler". After looking for a while I decided on a Axial Jeep Wrangler G6. I picked the G6 because it looked to come with a few "upgrades" that I thought would save me a little money on the build. The plan WAS to simple build the kit and keep it stock out of the box. You know what they say about plans... add to that when it comes to RC (and mountain bikes by the way) i suffer badly with "upgrade titis". Suffice it to say, had I known a week ago what I know now (which is next to nothing still) I would have bought the least expensive Axial scx10 kit and gone from there. I would be several hundred dollars ahead right now... Oh well... it all about fun and so far I'm enjoying the build and can't wait to see where this takes me. All that said, I've never done a build thread before. While this won't be a really detailed build thread, I though i'd post up a thread and a few pics as build out the G6. I mentioned I know next to other about scale or crawlers in general. So if you guys see something I might do differently that might be better please let me know. If you have any other suggestions along the way please post them in the thread. I'm learning as I go so anything you guys have to offer is welcome. Before I post up the first installment of the build; I want to give a thank you to Zack at RPP. I searched around all the LHS's here in San Diego and really didn't find anyone with a good knowledge base on scale/crawler and not a single shop has very much inventory. I ran into RPP hobbies through a on-line search, called and chased with Zack for about a hour early this week he gave me a quick education and good deal of information. I ordered up everything you see in the first picture of my next post from RPP thanks to Zack and that got me on my way. Thanks Zack and RPP... |
| |  |
| Sponsored Links | |
| | #2 |
| Newbie Join Date: Dec 2015 Location: Midwest
Posts: 8
|
I'm right here with you! I'm building my first crawler tomorrow, also chose the G6 kit to build. I built and raced 1/10th scale electric trucks, 2wd buggies, and 4wd buggies about 7 years ago and loved it, but it was a fad here in southern Indiana. Now I've got a few buddies that all dove into crawling with scx10s, wraiths, and even 1 bomber! Let the fun begin! |
| |  |
| | #3 |
| Quarry Creeper Join Date: Dec 2015 Location: San Diego
Posts: 244
|
So a quick first post, then I'm going to get back to building. But first a little correction. In the intro post I think said that I spoke to Zack at RPP early this week. Actually it was late last week and my order arrived Monday this week. You'll also probably notice my build is a little out of order from the manual. That's because I'm waiting on upgrades that I decided on after going through the manual as I started the build. Things like some upgraded lockers etc... Anyway, here's where it all began... 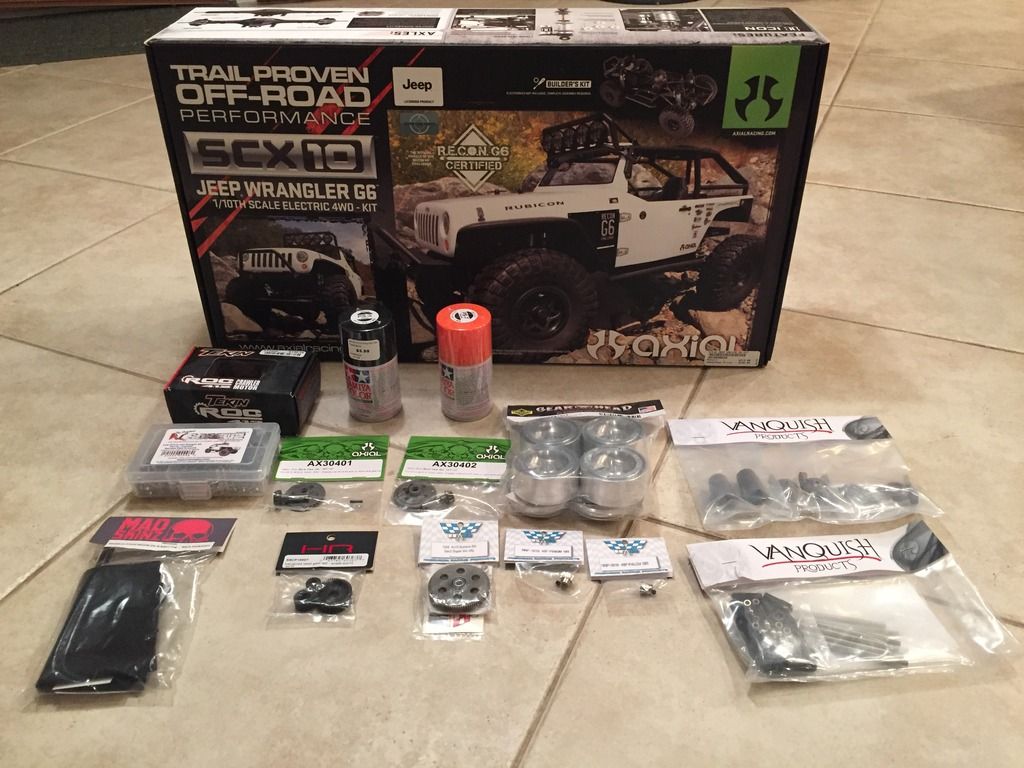 All of this arrived from RPP Monday afternoon (except the paint that I bought locally) and since I've put in several additional orders for more "upgrades". Did I mention I have a serious issue with upgrade itis... I'm going to run there G6 bushless on 3S using Tekin RX8 Gen 2 ESC driving the Tekin ROC 412 1800KV motor. Up front the steering will be handled by a Hitec HS-7955TG running at 6V putting out 333 oz-in of torque at .15 sec/60* speed. I started the build Tuesday night. I building a bit out of order from the manual because I'm still waiting on Locked Up RC FI spools I ordered Tuesday. The Axial Universal Joints to replace the front dog bones came in yesterday, so as I get the LURC FI's I can build the front and rear axels. So I started the build with the shocks. 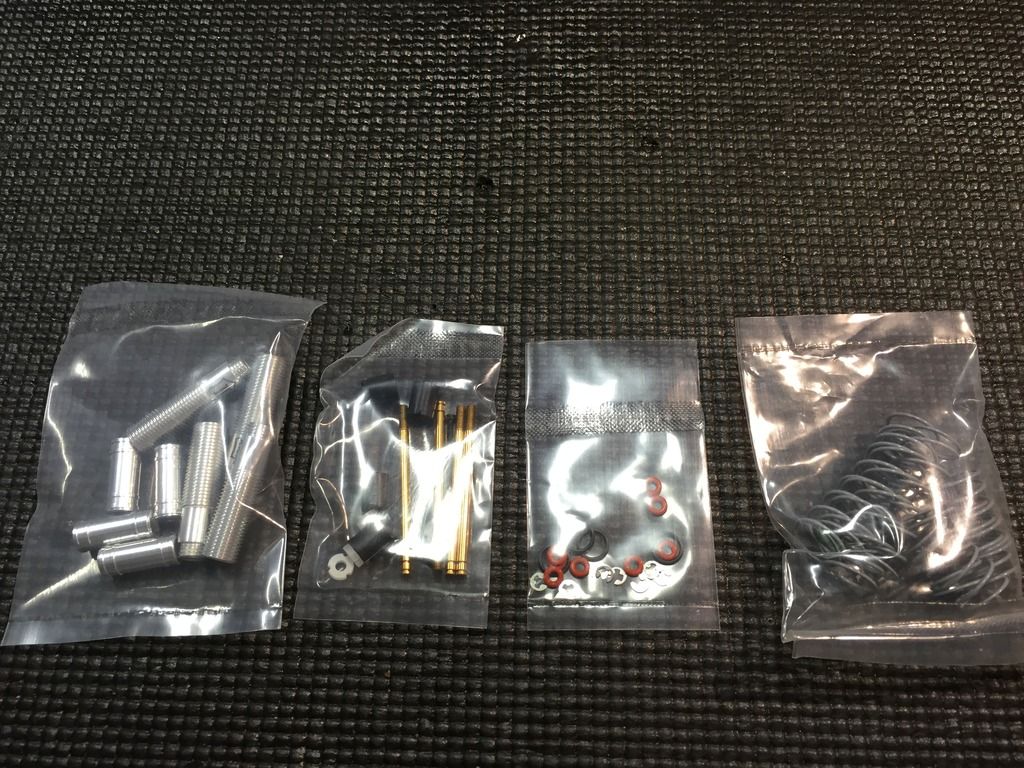 Over the years I've gotten pretty good at building shocks. On race days/nights I can usually tear down and rebuild 4 shocks in about 30 minutes or so. I have to say though I struggled a bit with these. They remind me of the "old school" AE shocks from back in the days of the T3 trucks and B3 buggy. Those things were a bitch to bleed and get set up with very little to no rebound and these proved, at least for me to be much the same. I first made the mistake of building them according to the manual, which meant I filled them and bled them with the limiters on. This lead to a huge amount of rebound and very stiff shock stroke. I figured that out pretty quick though and pulled them apart and re-built them without the limiters. Other than the mess of the shock oil running everywhere they came out pretty good and overall I'm happy with them... 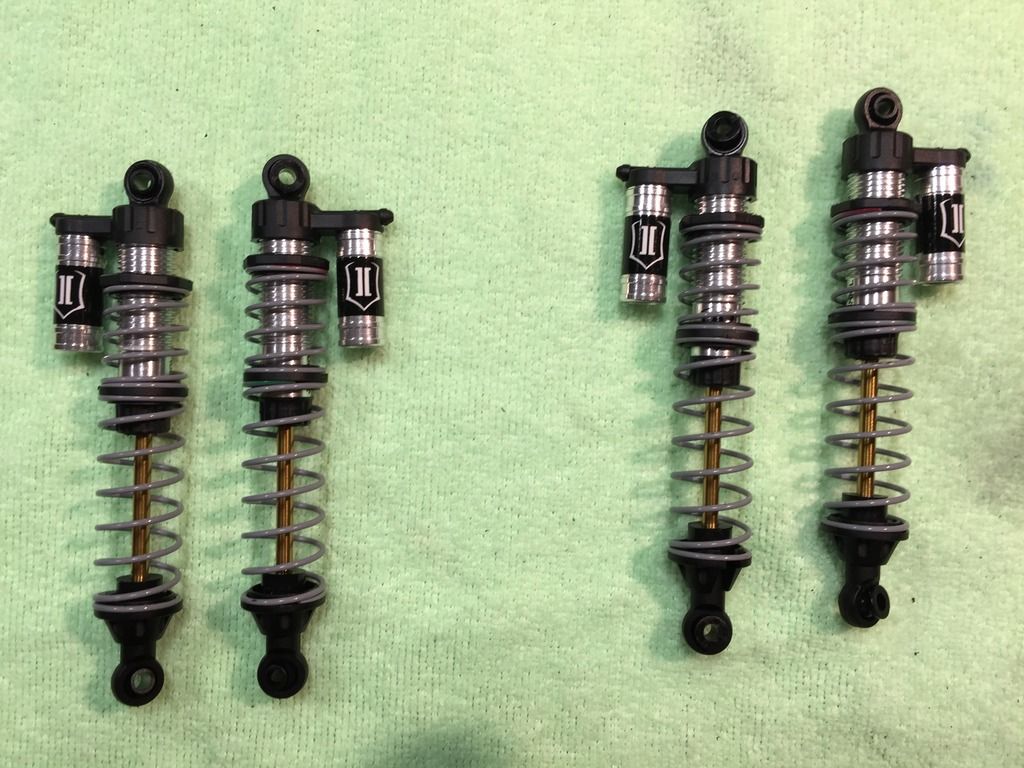 I have to say though i would be much easier if there were bleed screws in the caps. I went with the "stock" 30wt oil in the front shocks and used AE 32.5 wt in the rear. My thought is to try and keep the rear from squatting a bit and to transfer weight to the front as power comes on. I'd ratter do it with different springs, but I can't seem to find any other springs than those that came in the kit. Also, I'd like to have metal eyelets in the rod ends and aluminum caps. Does anyone know where I can find these? Nest up was wheels and tires. I ordered in Gear Head 1.9 AL bead lock wheels...  I mainly ordered these because to the weight. I thought that the more weight I can get over the wheels and the lower I can get it the better the G6 will be at crawling. I also liked the looks of these. When I took these out of the package, my first thought was yep... these things are really heavy. Hopefully not too heavy. I think they push 4 oz's each; that's a lot more rotating mass than I'm used to. The Hitec servo will get a workout pushing and pulling on these. I'm also impressed with the overall quality and workmanship of these wheels. When they are assembled and the tires mounted on them they look, at least to me, very much like full scale wheels. I've never worked with bead locks before, but these went together pretty fast and easy.... 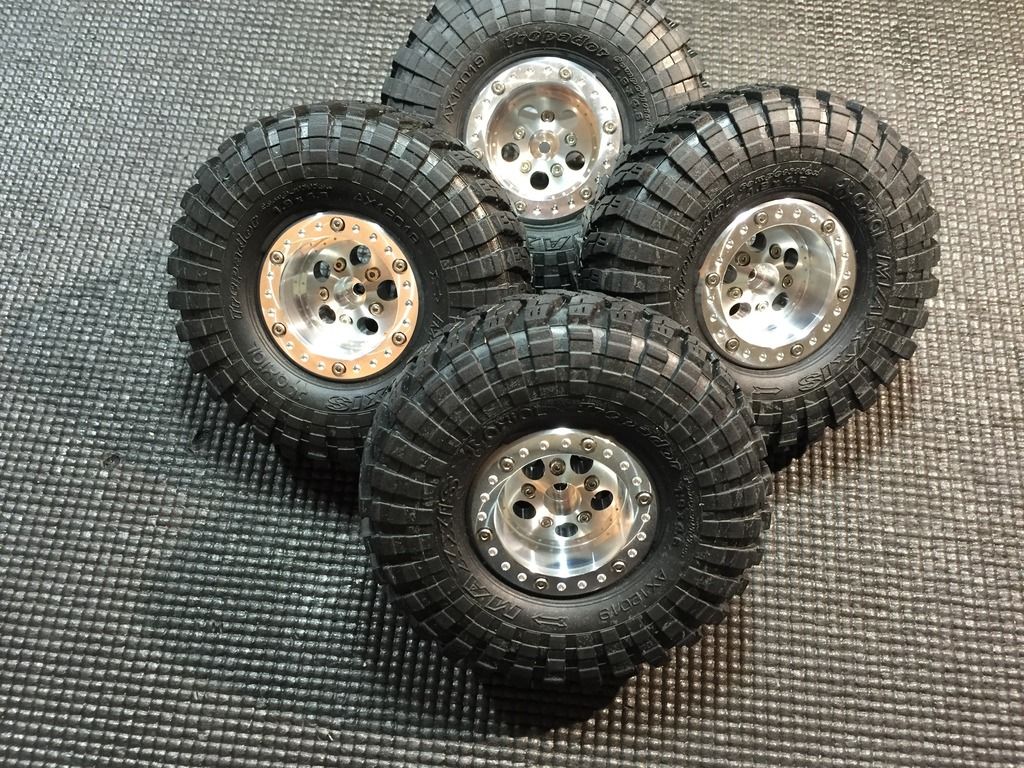 I mounted the stock tires on them, which from what I've read are supposed to be okay tires. I think they look pretty good. From there I moved on the transmission. The trans was pretty easy and straight forward. I only had one builder induced problem. When I put the top gear together I slid the gear over the drive pin from the outside of the top shaft, the short side. When the trans went together there was a lot of play in the top shaft and a huge gap between the motor mount and the slipper/spur gear. I knew I had done something wrong, but for the life of me I couldn't figure it out. I went over the steps in the manual over and over and it just didn't click what I had done. I finally did a YouTube search and found a G6 build series of video's. I watched the trans build and within the first minute I saw what I did. Fortunately tearing the trans apart a fixing my issue was only about a 20 minute exercise. I also learned just how soft the plastic in this kit is. It MUCH softer than other RC car/truck kit I've ever built before. I didn't strip anything, but just taking the screws the hold the skid plate to the bottom of the trans caused the holes to be a lot more lose when I put the screws back in. That little exercise caused me to order a Vanquish AL trans case today. As soon as it comes in I'll be switching out the stock plastic case for the Vanquish case. No more lose plastic screw holes. I also ordered a set of spare frame cross members and a skid plate just in case. Anyway, finished up the trans build last night... Other than the one issue I caused it was pretty easy... 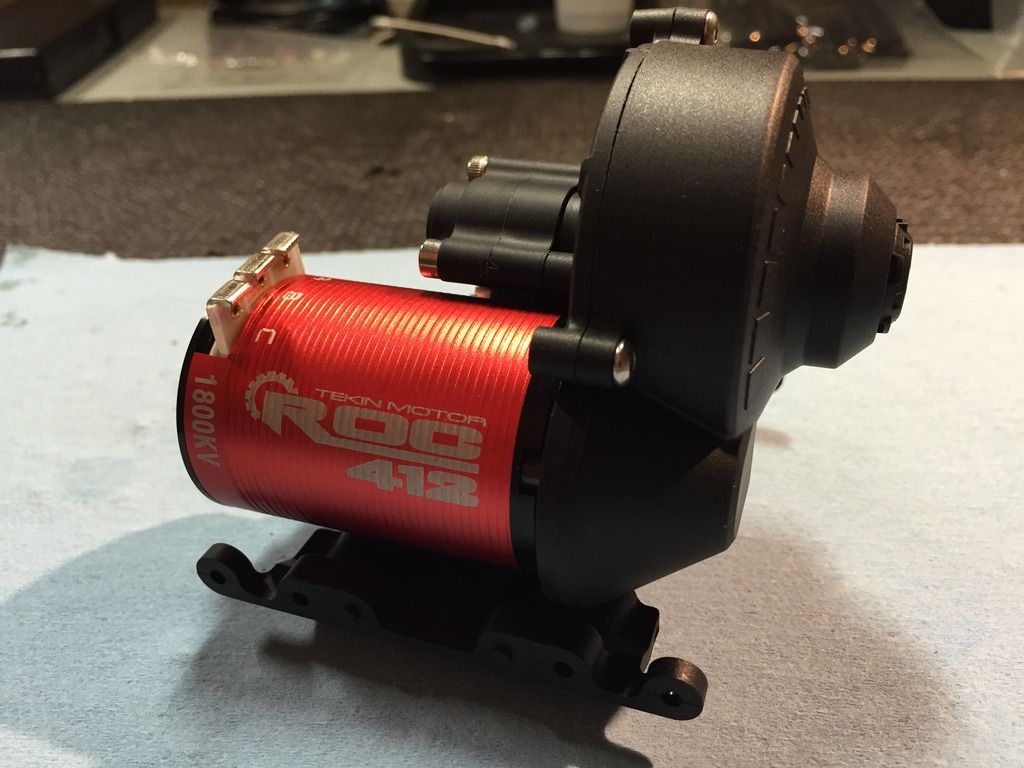 I also worked on and finished up the Vanquish Ti suspension links last night after I complete the trans build... 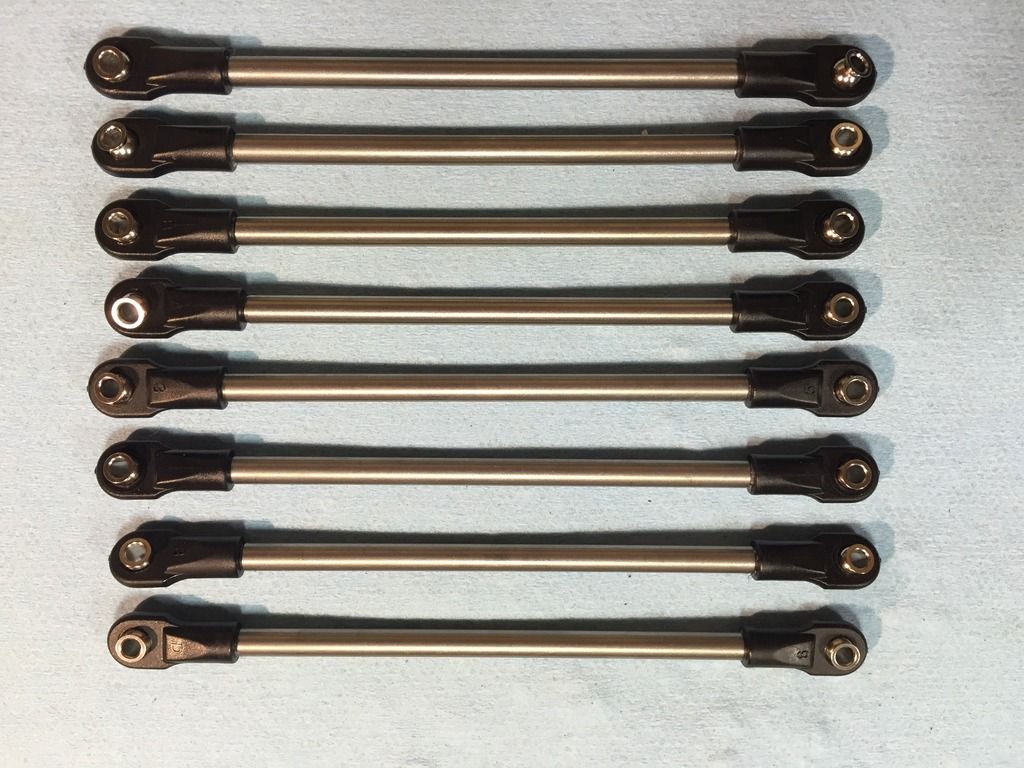 I like the look of these and they seem to be a good grade of Ti. I got them mainly because I thought they might be a little more durable than the hollow AL lower link tubes that come with kit and they have to be better than the plastic upper links. This afternoon I assembled the basic frame. I have a set of AL shock hoops on the way and some Gear Head adjustable shock mounts on the way. I'll switch out the stock parts when those arrive. I mainly wanted to get the frame together so that I can mark the body mount hole locations in preparation for painting the body. :'m also working on some custom boxes for the electronics and the frame together to plan that out. Plus theres not much else I can do until I get the LURC FI spools. Here's look at the just completed (ok partially completed) frame... 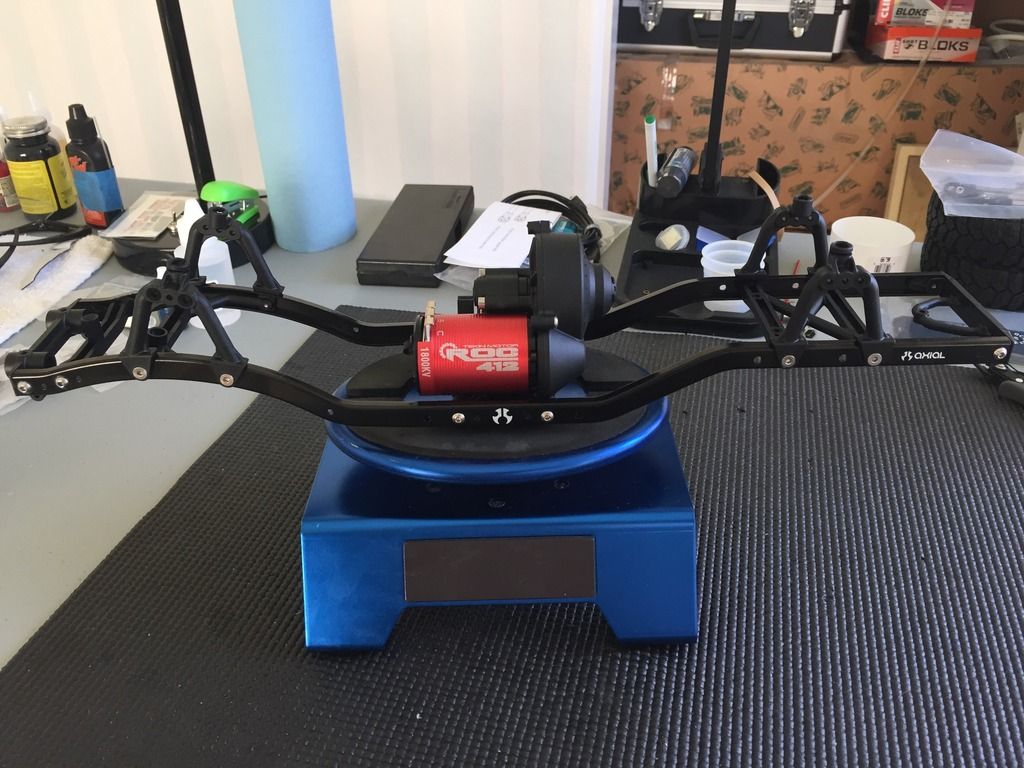 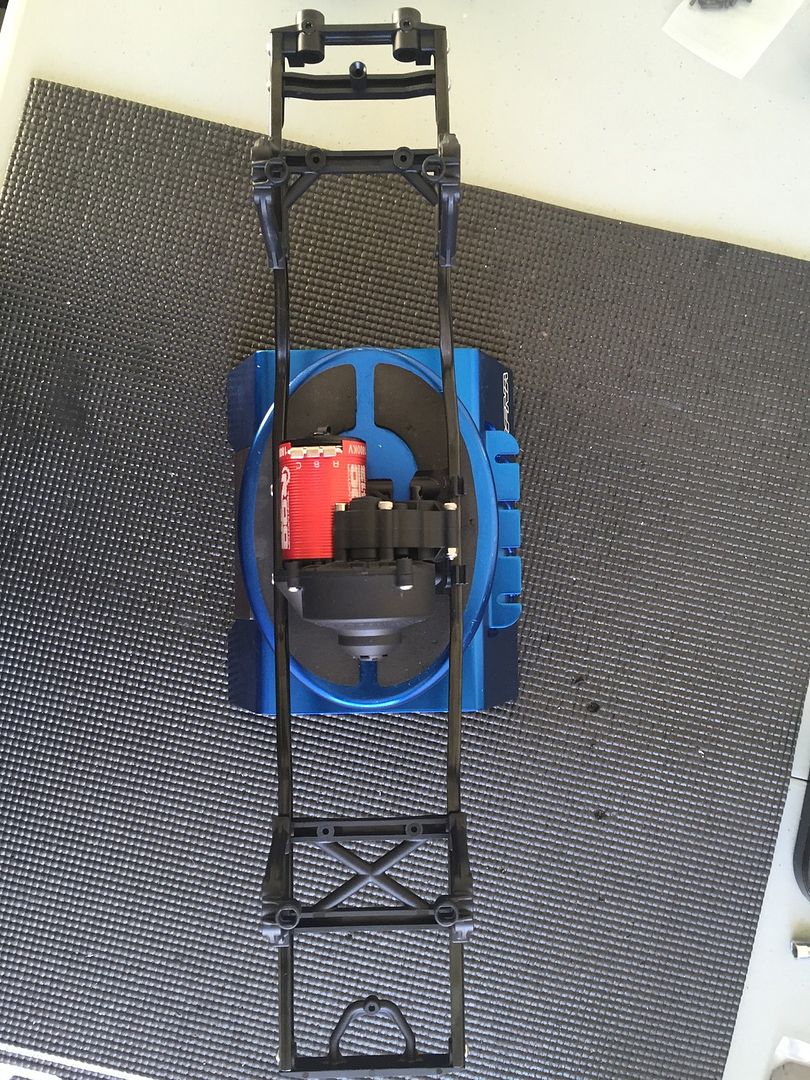 A couple of things I'm on the fence about and could use some help with... 1> I'm looking at getting the Vanquish DIG... any thoughts on the value of putting it on the G6 right now? 2> Is the RX8 Gen 2 ESC overkill. It's a pretty big ESC and is the main reason for looking at a "custom" electronics box. The main reason I'm thinking of using it is for it's BEC it has a 7.5 amp BEC. That should run pretty much anything I add to the G6 I would think, including the big servo. I thought about using a Tekin RS Gen 2. It will run 6V and 5.5 amps continuous. However I plan to add a winch and at least a string of 5 LED's for the light bar. The max current draw from the servo is 4.2 amps at 6V when fully stalled. Would 5.5 amps be enough for the servo, lights and winch without adding a external BEC, which I really don't want to do... hence the RX8... 3> What winch would be good. I'm considering the big winch from RC4WD and I'd like to control directly from my Airtronics M12 TX.. Thanks for the help. And if any of you guys see anything I can do different or better or have any other suggestions please don't hold back..... |
| |  |
| | #4 | |
| Quarry Creeper Join Date: Dec 2015 Location: San Diego
Posts: 244
| Quote:
I gave up racing last night to stay home to work on the G6... | |
| |  |
| | #5 |
| Rock Crawler Join Date: Jan 2012 Location: middle TN
Posts: 612
|
Looking good so far. I can't really comment on the electronic's question because I use castle esc's. I did notice you didn't mention what foams your using. I would suggest a good set of dual stage foams. The stock foams in those treps are a joke.
|
| |  |
| | #6 | |
| Quarry Creeper Join Date: Dec 2015 Location: San Diego
Posts: 244
| Quote:
Yeah, I forgot about the foams, I actually meant to ask that question. I put the stock foams in for now. However they are open cell foams, one density and look to be maybe a medium firm foam. They don't look to be the greatest quality foams. My thoughts are to finish off the build, get a final weight and put a couple packs on it to kinda get feel for it, then figure out what foams to run. I was looking at all the foams on the RPP site, there's a ton of them and I have no idea what I'm looking at. I don't yet even understand all the sizing, other that the difference between 1.9 and 2.2. I see the numbers on my tires say 1.0x4.5. I assume 4.5 is the tire diameter, so I would need a 1.0 X 4.5 foam ? From there though I have no idea what to look for. Is there like a "standard" all around foam ? | |
| |  |
| | #7 | |
| Rock Crawler  Join Date: Jan 2008 Location: P-TOWN
Posts: 748
| Quote:
 | |
| |  |
| | #8 |
| Quarry Creeper Join Date: Dec 2015 Location: San Diego
Posts: 244
| Thank you. I've got a few more small things I need to order from RPP. I'll grab those foams on the next order.
|
| |  |
| | #9 |
| Quarry Creeper Join Date: Dec 2015 Location: San Diego
Posts: 244
|
The Locked Up RC FI spools came in yesterday along with the parts from second RPP order. I built up the front and rear axels last night. While in general the axel assembly was prett easy, it ended up taking me several hours to build the front axel assembly. I struggled a bit getting the knucles on properly which led to everything attached to them not going on correctly. The manual, while okay, is a little less tha clear. It relies on pictures as most manuals do of course but some of the pictures have perspective that is a little less than optimal. I'm also installing quite a few upgrades so the parts I'm using don't necessarily match the drawing. What tripped me up was the knucles have a long and a short leg that the hubs attach to. There is also a left and a rights side hub, which thankfully are marked on the Vanquish hubs. The problem I had was that while I had them n the correct sides, which made the angles match the picture; I had the upside down. The long attachment point was on the top. This was not at all clear just by looking at the picture in the manual. The problem was a combination of poor perspective of the drawing and the Vanquish part being different from the stock part. It It tetralogy took me a coup,e hours to figure it out. Once I had it though it was about a 30 minute build from there to having both front and rear assembly's done. Getting started… 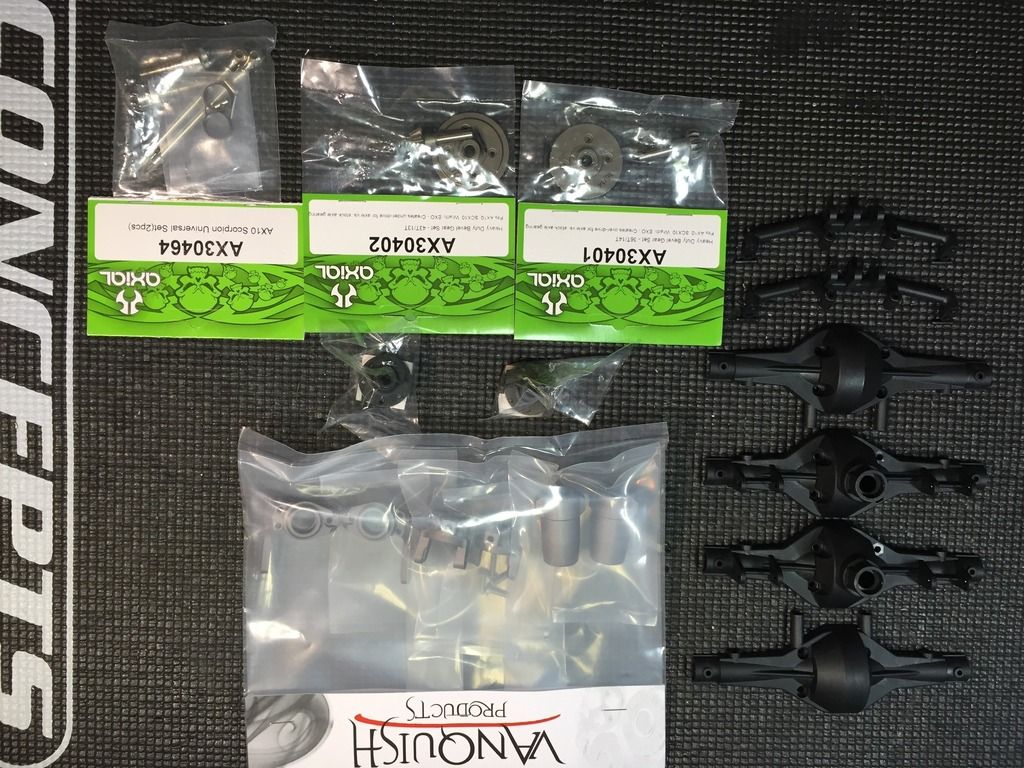 The major parts laid out ready to start the build 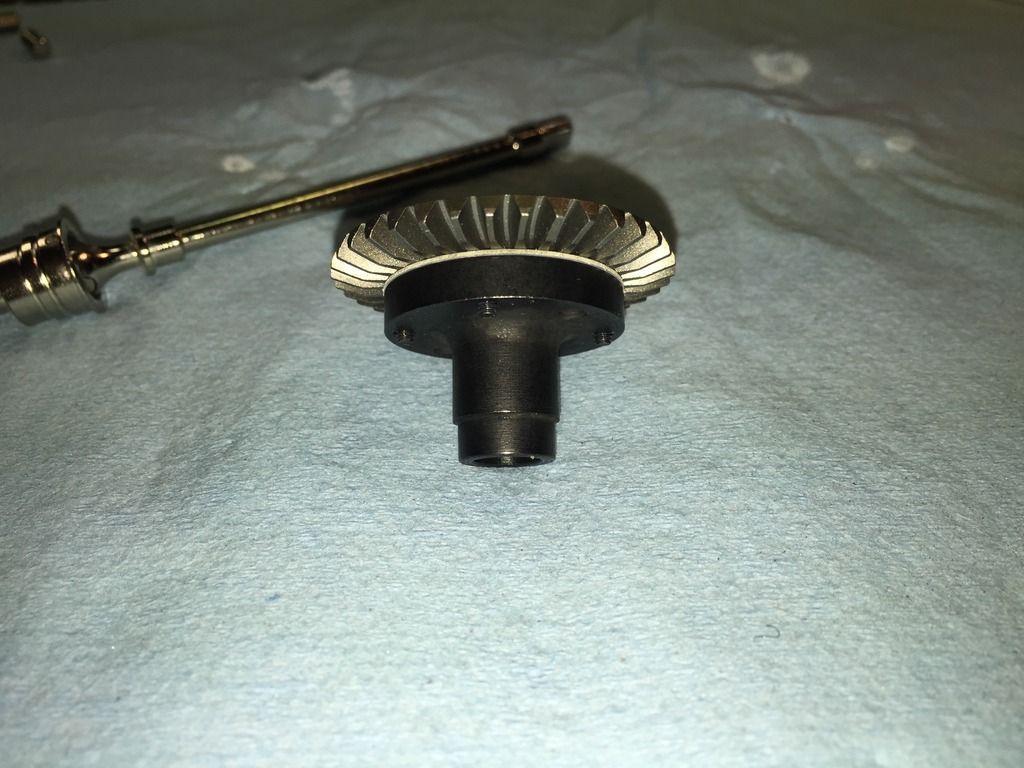 The CVD's and the first diff done in about 30 minutes. Building the diffs with stock lockers and axels would have taken much less time. The LURC spools are very tight. Each axel has to filled to get them to fit tightly in the spool. The tight fit will be great for having less slop than stock, and the parts will will likely wear less quickly. The trade off however is that there is no way I'll the axels out if I need to without tearing down the entire assembly. The CVD build were straight forward, a lot of school parts here. I'm not using the stock dog bones on the front end, I'm using the upgraded CVDs, they are the Axial CVDs. Overall the quality of these "upgrades" isn't great. It's not horrible, but material, fit and finish isn't what I'm used to with other RC kits. I completely built the CVDs firs. I late learned that should have waited to complete them with Axel inserted into spool and in the housing. There's no way to get the hob carrier over on with the CVD's assembled. I didn't have to worry about taking them apart however as the fit of the parts is so poor that if you just handle them they literally fall apart in your hands. The "collar" that keeps the pins in is not even a light press fit, it just rests on the CVD and falls off anytime you pick it up or anytime you don't have the CVD vertices with that collar on the bottom. When collar falls off even just enough to cover the pins; the pins which are also a very sloppy fit drop out and CVD assembly falls apart in your hand. My plan is to replace the CVDs with Vanquish parts which I hope are better quality. By the looks of the fit and finish of the Vanquish parts I have I'm questing they will be far better quality than the Axial parts. I also used LURC brass bushings in the hub carriers in place of the stock steel bushings. This added to the assembly time as each of those bushings had to lapped to fit. It took a while to get the fit right, the effort however was worth it. The hub carriers fit snugly on the knuckles, with no slop and they move freely with no binding at all. So after far longer than it should have taken here's the completed assembly's… 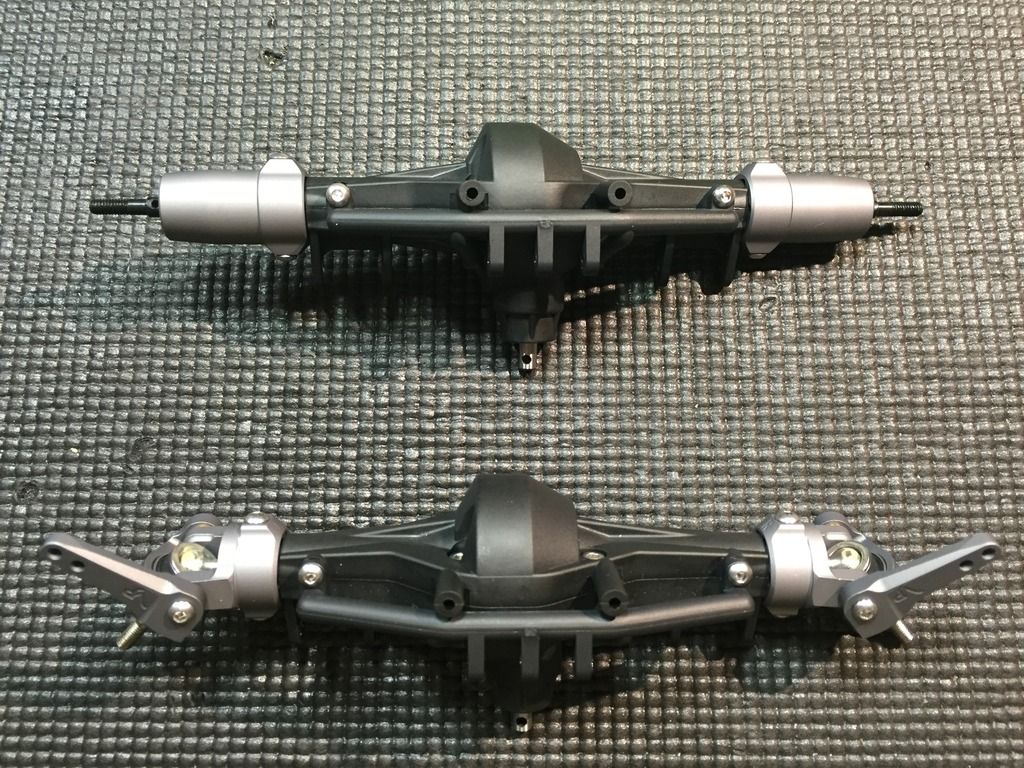 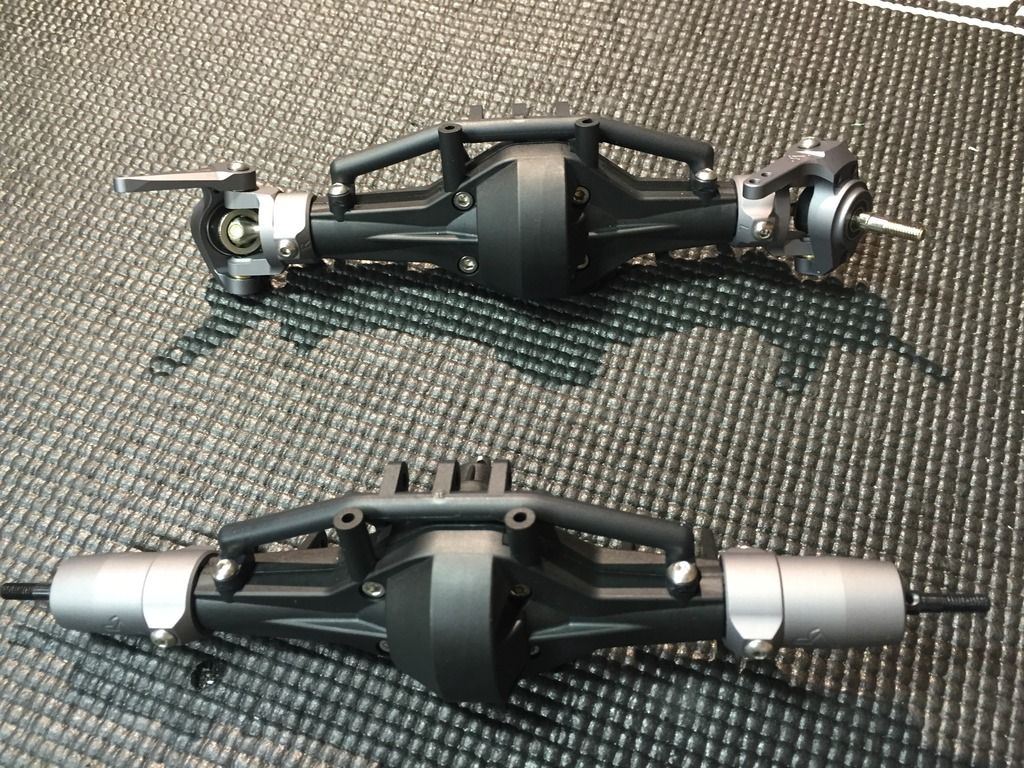 My impression of the Axial kit so far is that the build isn't too complicated, especially in comparison to my other "race" builds. The usefulness and the information in the manual could be a lot better however. That said, it's really a minor point as the manual is okay, and most of the "issues" I'm seeing is more related to the use of upgraded parts that don't match the pictures in the manual. The quality of the parts in the Axial kit itself are okay, but just okay. The plastic is very soft and there's a lot of it. The fit and finish of many of the parts isn't very good. In comparison to other kits I've built in the same price range, the quality is quite poor in comparison. In comparison to the upgraded parts that I have from other manufacturers, especially the Vamquish parts the stock parts a very sub par. Understanding that I'm comparing a kit that is made to go slow and have a good amount of "give" to kits that are made to be light, fast and have fairly tight tolerances so as to handle well, and crash well at high speed, I might be a little overly critical of the Axial quality. In general I'm pretty happy with the G6 so far and looking forward to getting it finished up. I have the final upgrade order due in Tuesday (at least for the initial build) so, time permitting I hope to have the G6 finished by the end of next week. Oh, my apologies for the first picture being upside down. It's something with the photo bucket link. I tried to fix it but no matter what I do it keeps posting upside down. |
| |  |
| | #10 |
| Quarry Creeper Join Date: Aug 2013 Location: Wijnandsrade, NL
Posts: 357
|
I like it! You have some nice goodies there man! Curious what you will be doing in terms of styling (colors, body, decals).
|
| |  |
| | #11 | |
| Quarry Creeper Join Date: Dec 2015 Location: San Diego
Posts: 244
| Quote:
If I send it out it will look similar to this … 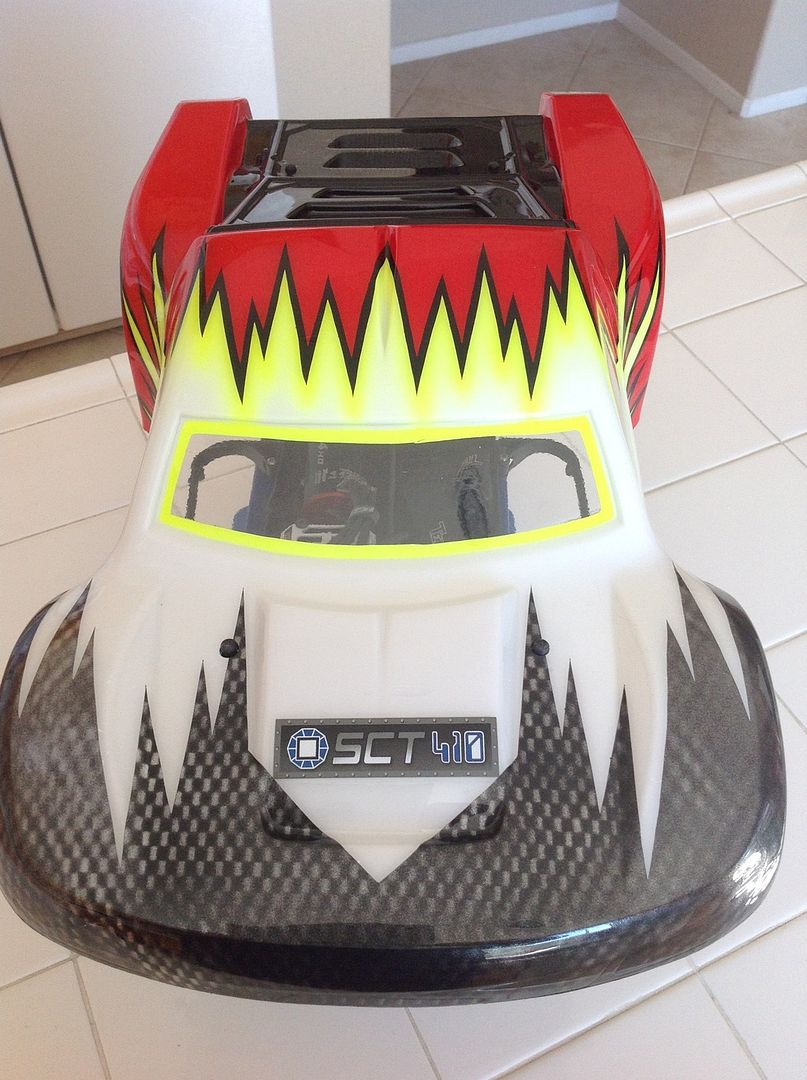 If I do it myself it will be two color paint. The main color will be Itialian red (Ferrari Red) with gloss black for the trim. I bought some Poison Spider hood and door decals for it and I'll use a few of the de als that come with the kit if I do it myself. | |
| |  |
| | #12 |
| Quarry Creeper Join Date: Dec 2015 Location: San Diego
Posts: 244
|
Other than scale looks, is there advantage or dis advantage to installin the servo on the frame vs the axel ?
|
| |  |
| | #13 |
| Newbie Join Date: Nov 2015 Location: Port Charlotte, FL
Posts: 40
| |
| |  |
| | #14 | ||
| I wanna be Dave Join Date: Oct 2010 Location: Caldwell ID.
Posts: 4,328
| Quote:
Quote:
You won't loose much if any articulation performance with a properly set up 3link /panhard. For ease of use a 4link axle mounted servo is hard to beat. | ||
| |  |
| | #15 |
| Rock Crawler Join Date: Jan 2012 Location: middle TN
Posts: 612
|
If you ever get into scale comps you get extra points for having the servo chassis mounted. Mine is chassis mounted (VP) an still flexs quite nicely.
|
| |  |
| | #16 |
| Quarry Creeper Join Date: Dec 2015 Location: San Diego
Posts: 244
|
A quick update on the build... Got a few more "upgrades" from brown santa (ups) and USPS Monday. Vanquish Trans case... 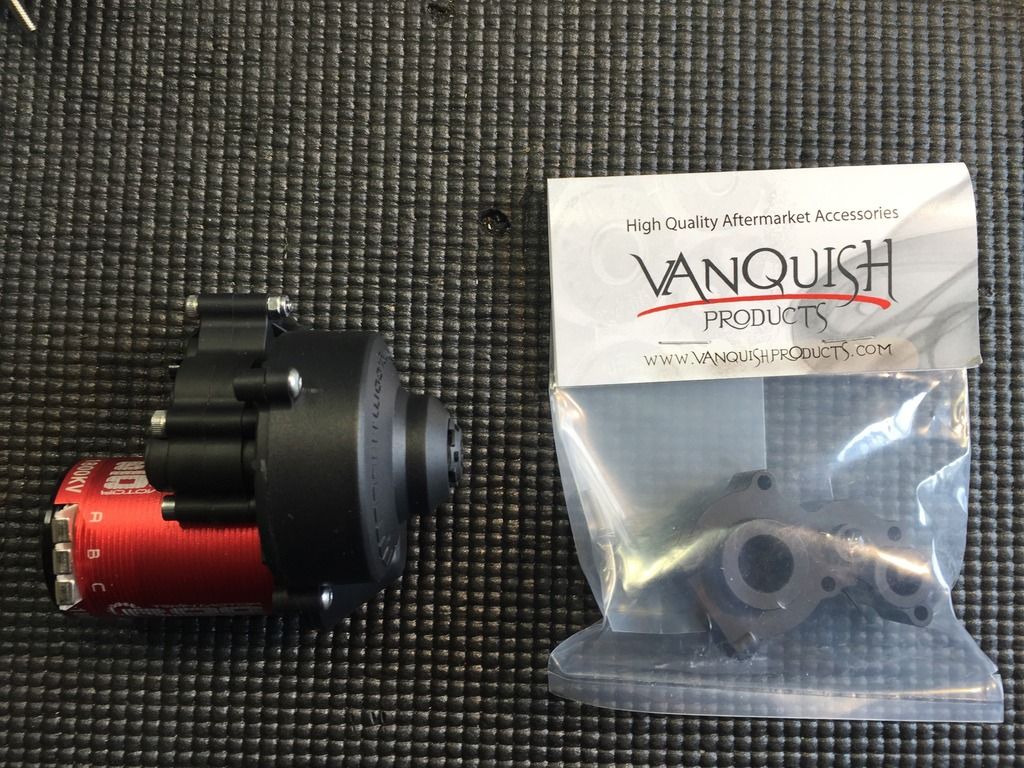 Jenvne Racing Recon Brick Battery mount... 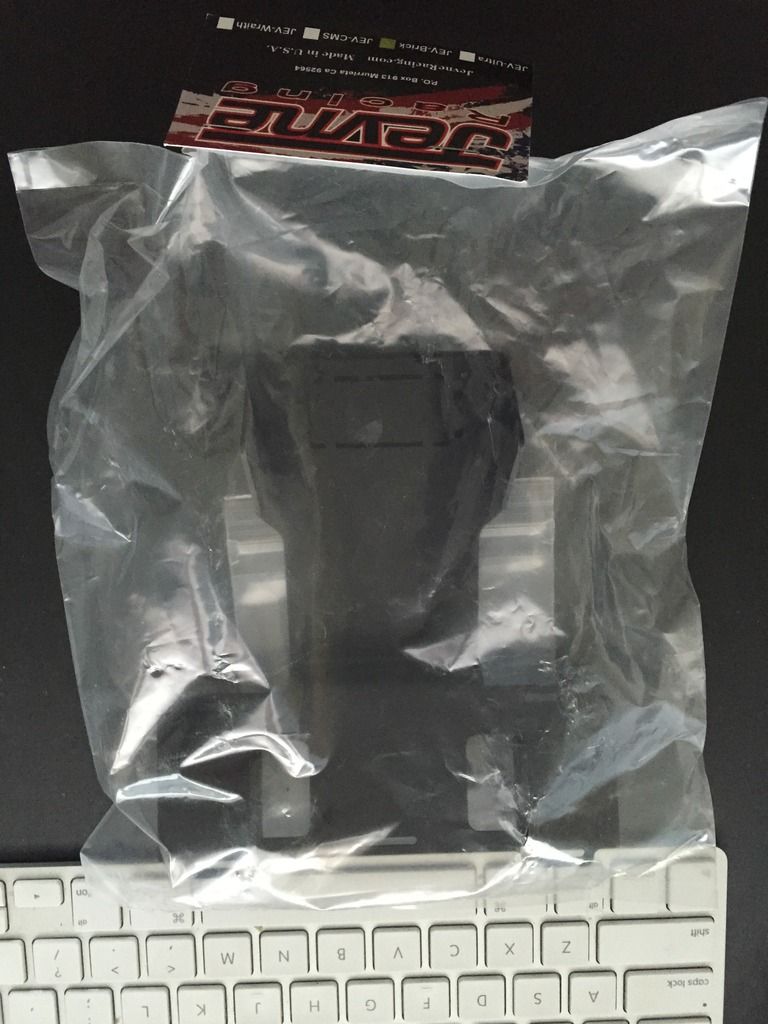 So, basically last night I set about tearing apart a good deal of the work I've done. I change out the trans case to the Vanquish aluminum trans case because I just wasn't happy with the quality of the plastic trans kit trans case. The plastic is very soft, I felt that if I had to remove the motor a couple times I would just end up replacing the trans case. Also it just didn't feel very solid to me. So... out with plastic and in with the aluminum... I think it looks better is more importantly I think it is functionally better... 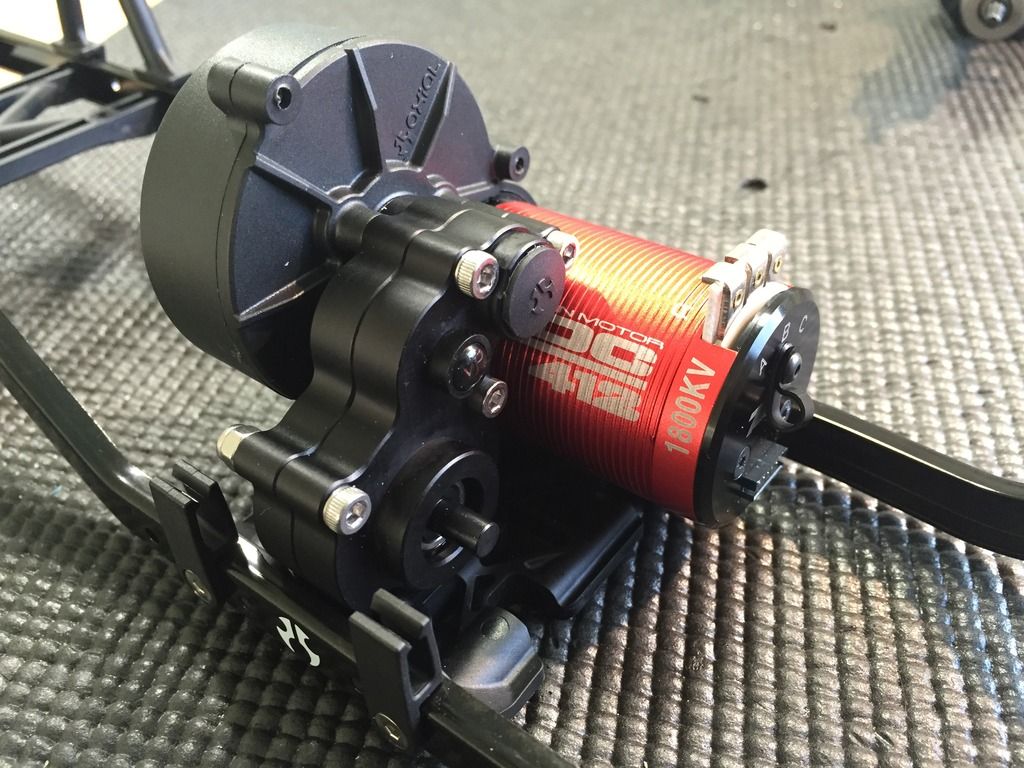 Next, my plan was to run a Tekin RX8 Gen 2 ESC, I say "was" because you'll soon see that the plan has changed... The RX8 is a 1/8 scale ESC and it BIG, finding a safe place to mount it was proving to be a challenge. I also thought that the chassis is a little flexy... is that a word?) so I searched for a solution to both. I found the Jeneve battery mount through a google search and then found it in stock at RPP. After another conversation with Zack at RPP about battery mounts, battery placement, winch's and a few other things, I ordered up the Jeneve. I picked this one because 1: it gives me a lot of room to mount electronics on top of it, and, 2: I plan to add a winch, probably next week. Not sure what type of winch, but this gives me the option of a nice easy mount for servo winch if I go that route. It also stiffened up the chassis quite well. Enough in fact that I was able to make a couple modifications and drop out the cross brace that sits behind the front bumper mount. I also dropped out the cross brace the the shock towers screw into. I place of the soft plastic I used nyloc nuts to attach the shock towers. Here is the Jenene mount unbaked and ready to install. The material and workmanship is really nice and the finish is beautiful... well made upgrade! 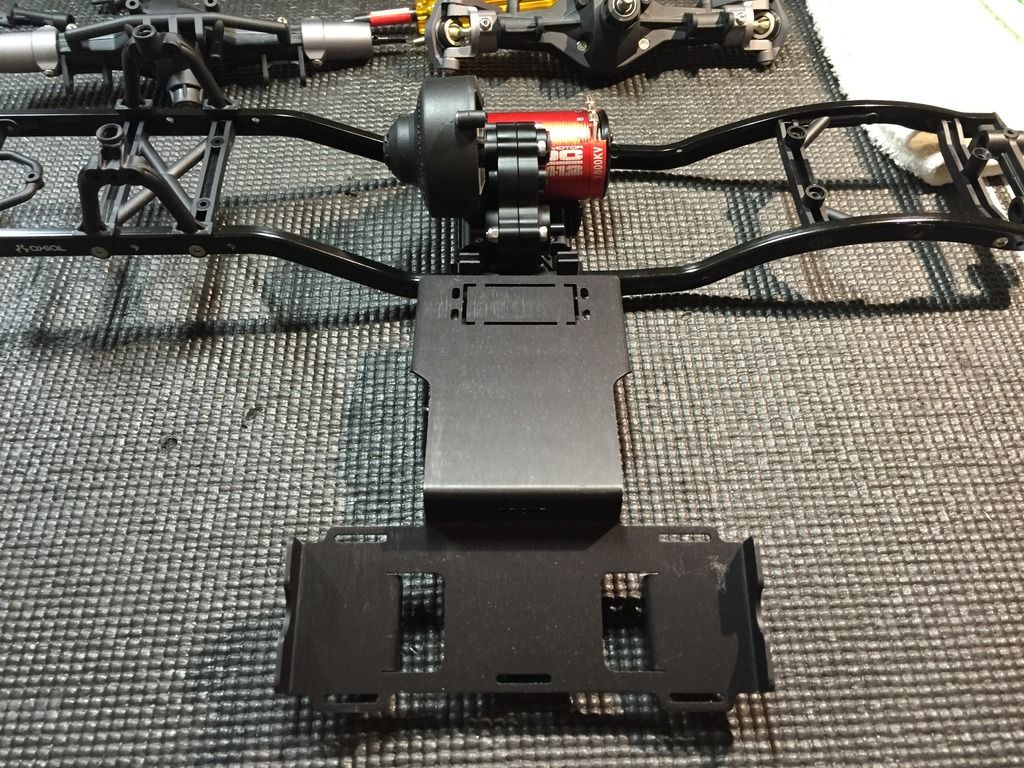 I did need to open up two existing holes in the chassis and drill to new holes ( the new holes are really not necessary, but adding those two screws took even more flex from the chassis. This mount took just a few minutes to install and fit perfectly... 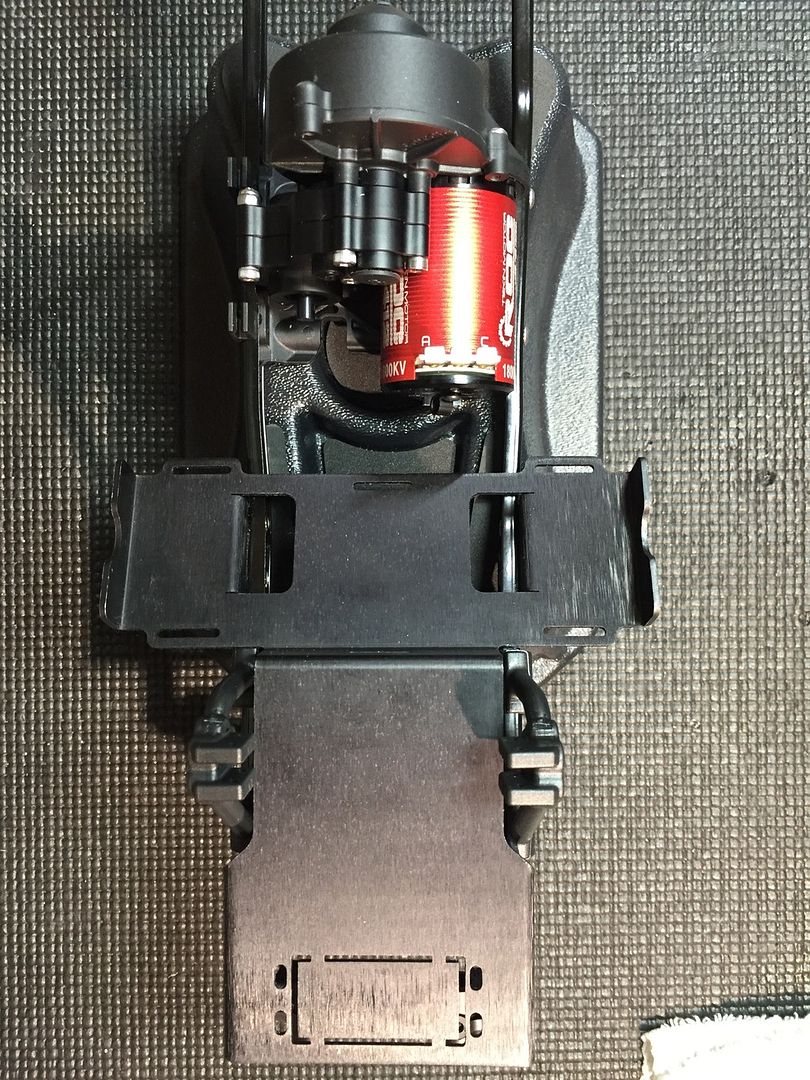 You can see from the bottom the knock out to mount a servo winch. 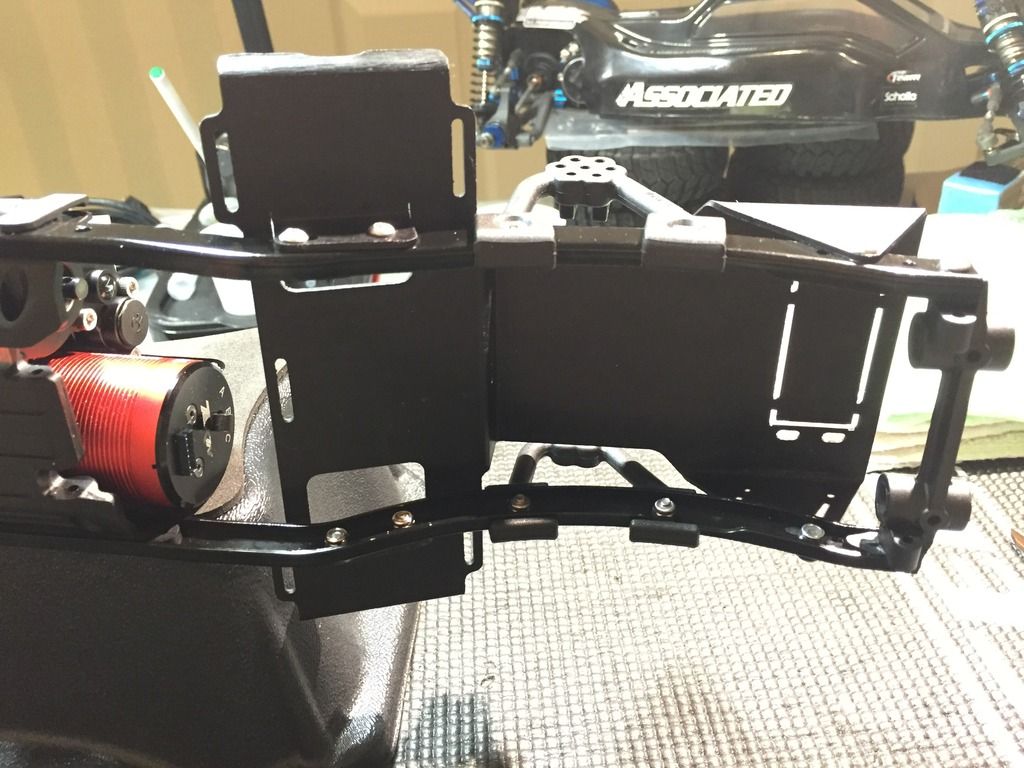 You can also see the nyloc holding on the shock towers and that I've removed the two cross braces. The front of the chassis is nice and stiff now. The back end still flexes a lot... but... there's a plan... Shock mounts? I've been torn about the cost to benefit value of adding aluminum shock mounts. I found the RPM shock mounts on RPP's site and liked the way they wrap the frame rails, the baby post system is also more sturdy than the stock shock mounts system. I ordered up a set and installed the front mounts with the new battery mount. You can see how they wrap the from rails in the picture. While they are a bit stiffer, and HUGE improvement over the stock mounts, there is still flex from the plastic. I'm still on the fence about aluminum shock mounts. I'm not sure that eliminating this little amount of flex in the shock towers will result in a improvement that will offset the cost of the shock mounts. If any of you can give me some input on aluminum vs plastic shock mounts in a crawler I would be grateful. 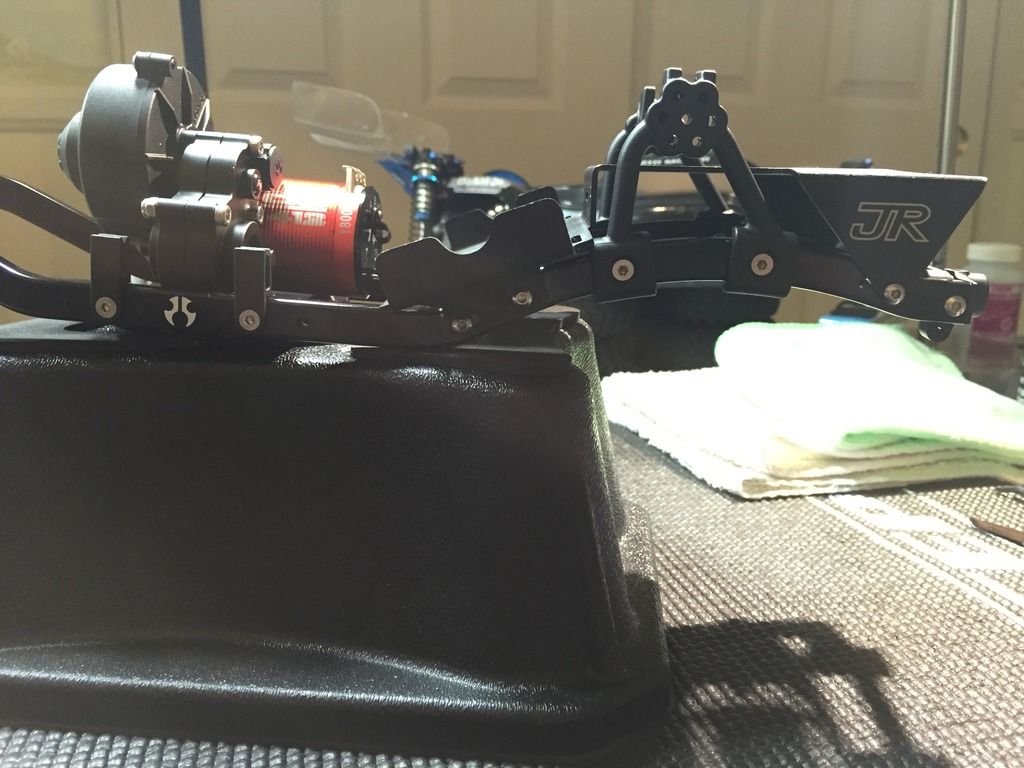 Last, I built out the roll bar (cage), front bumper and the drive lines. The roll cage went together pretty easily and, well, looks like a roll cage.. 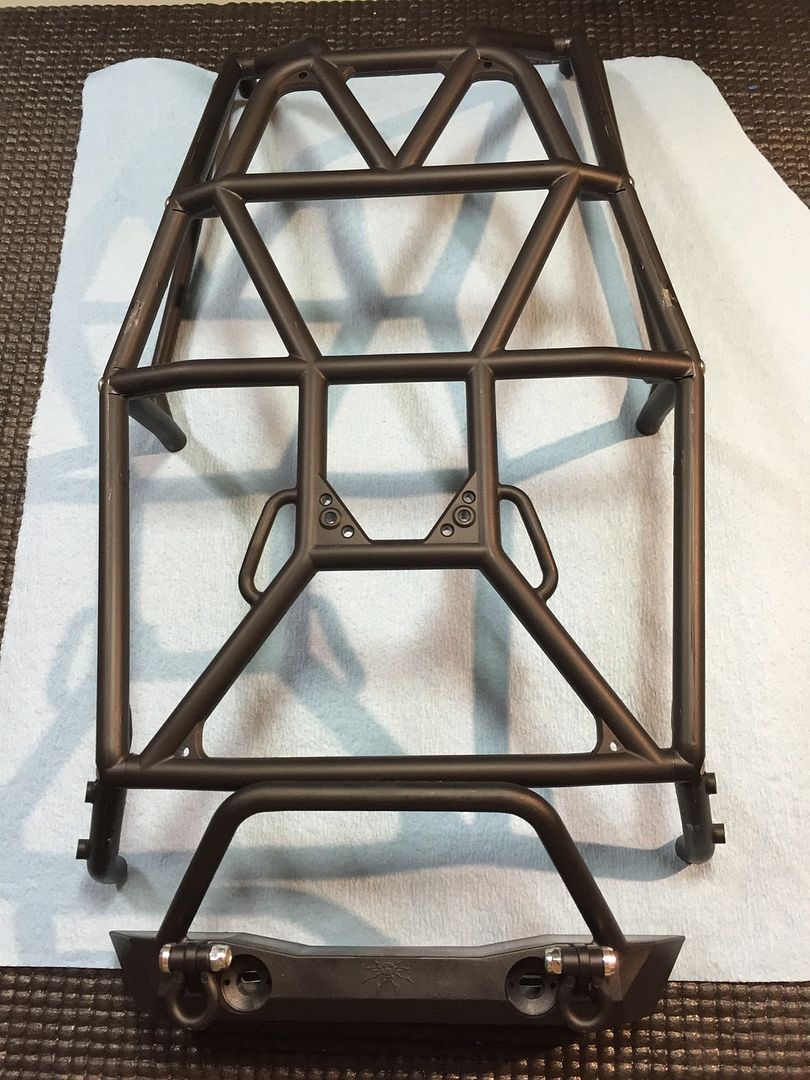 I did a small amount of "custom" work on the tow hooks so I could dress them up a bit with nylock nuts, I also did it because I figured the small screws holding the hooks on were sure to back out and cause the loss of the tow hook. For drive lines I went with MIP drive lines.. These things are beefy and doubt I'll break them, something else might break, but I don't think these drive lines will... 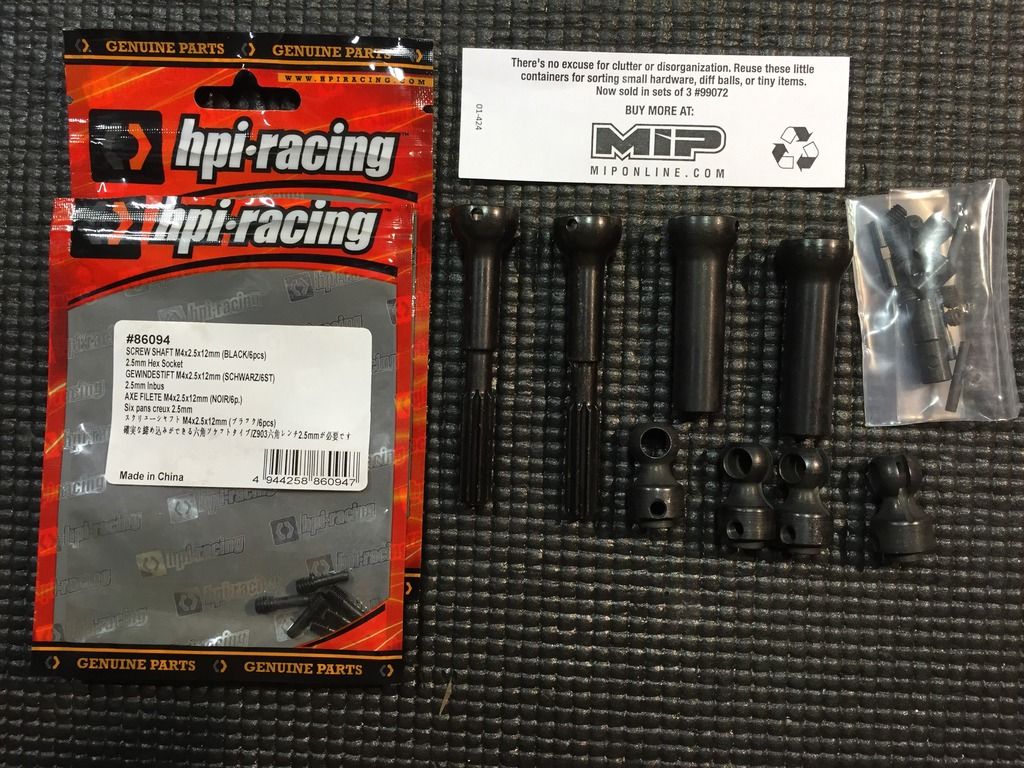 I actually ordered the wrong drive lines when I placed the order. I somehow missed that MIP has actually made a set of drive lines with hardware specific to the through pin design Axial is now using to the SCX10 G6. You'll notice on RPP site a note that if you use these on the G6 you'll need to order a bag of Traxxas threaded pins to make them work. The Traxxas pins are a little long and stick out on both sides of the drive line. Doing a little digging on google I found the HPI pins in the picture. These pins are identical in size to the Traxxas pins except the are a little shorter. Just short enough in fact that the mount with nothing sticking out. 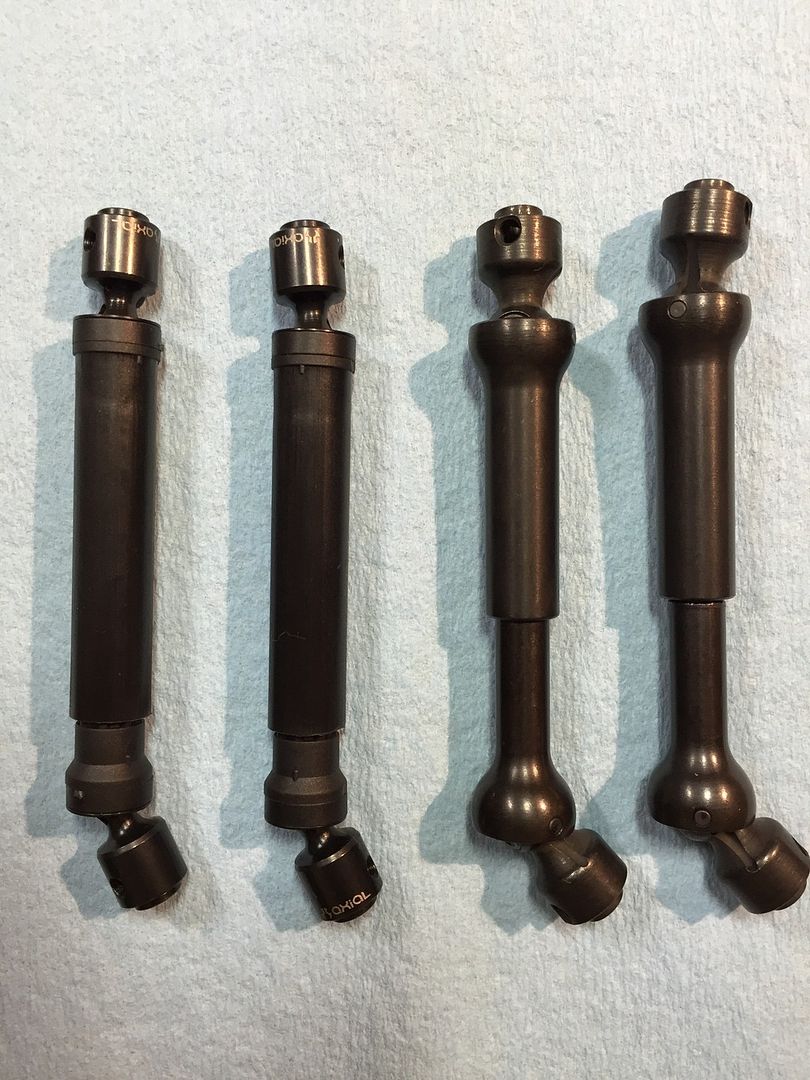 I also built up the stock drive lines so that I could see the difference, and of course self justify the money I spent on the MIP's. You can see in the picture there is a big difference between stock and MIP... Last edited by Dwill; 12-23-2015 at 05:30 PM. |
| |  |
| | #17 |
| Quarry Creeper Join Date: Dec 2015 Location: San Diego
Posts: 244
|
Today, the last of the parts order came in. Now I can finish up the build and pretty much everything done except the winch (and maybe some lights). I need to make up my mind about which winch to go with. Scale, or, servo... I'm starting to understand that a servo winch is stronger, but, I'm not sure yet how much that matters to me over the looks of scale. Any ideas or input on winch type ? After adding the Jevene battery mount the back in of the frame was still flexing a lot more than the front, and I just don't like all the plastic on the frame. I decided to add aluminum front and rear bumper mounts and a aluminum rear cross brace. I got these STRC parts from RPP... 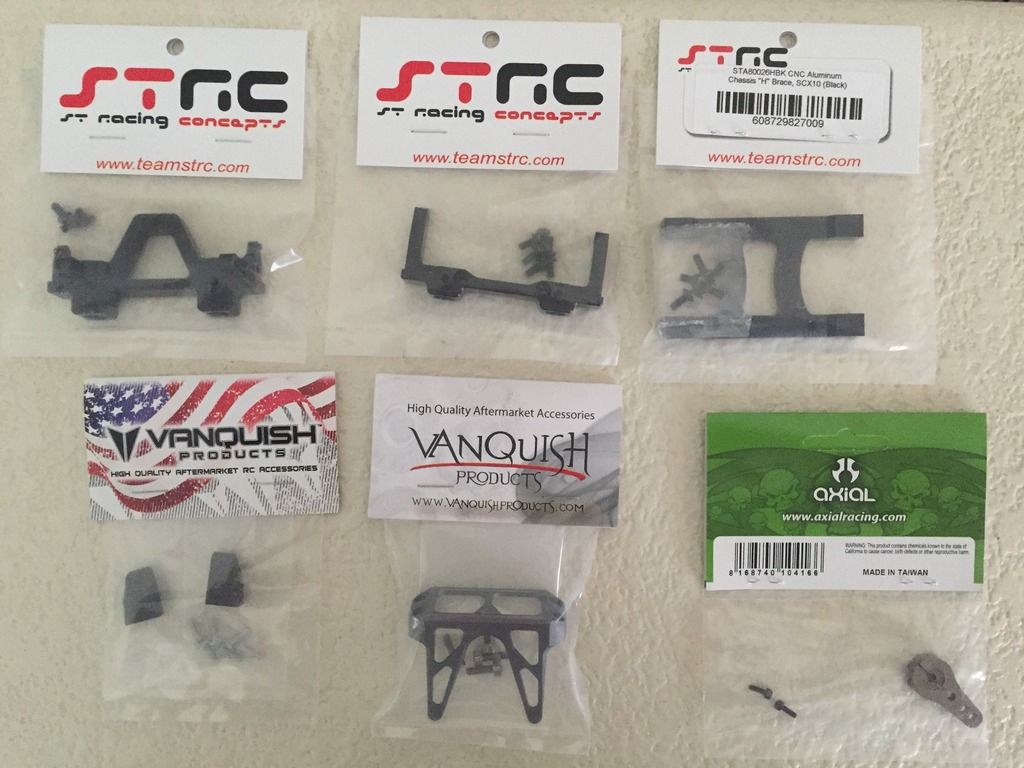 I also pick up a Vanquish "servo armor" piece for no functional reason really, I just like it, and a aluminum servo horn. Looks like I'll be tearing down the Gear Head bead locks as well. I decided that I get some good foams after asking around on here on watching a few Youtube vids of the stock foams in action... 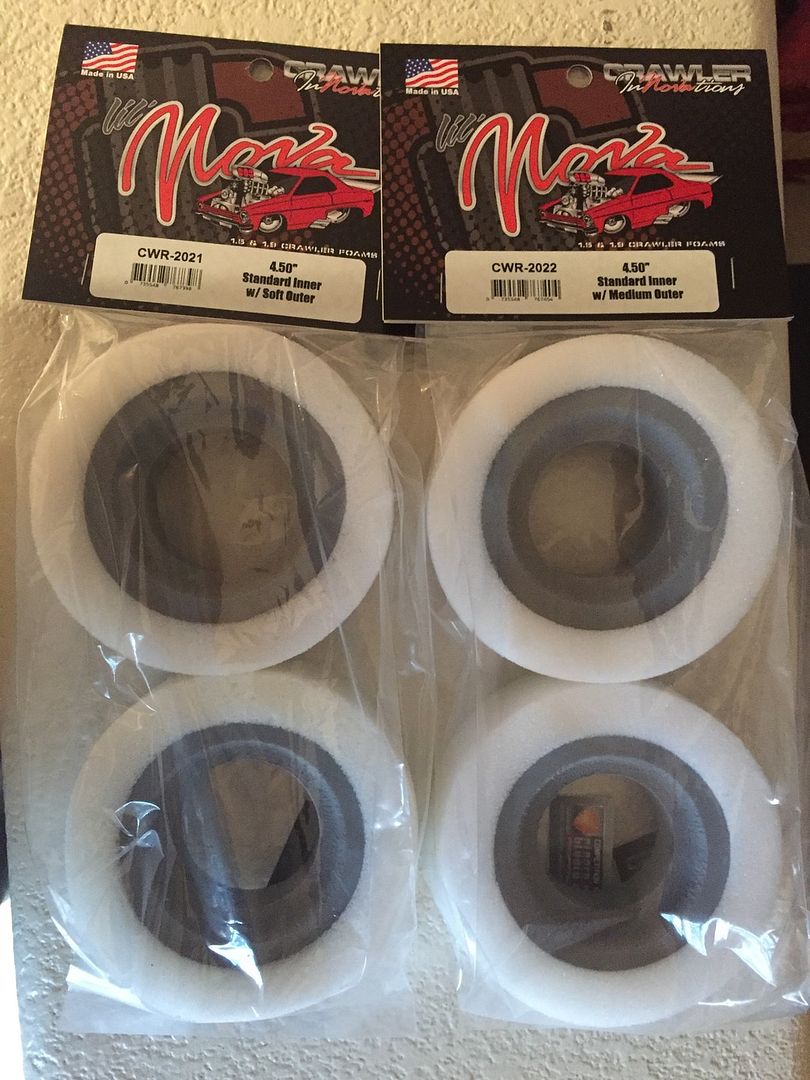 And finally I abandoned the idea of using a RX8 in the crawler. The thing is just to big and just couldn't come up with a good, family safe place to mount it. I really didn't want to spend money on another ESC when I have a perfectly good one sitting unused, but I broke down and did it anyway. Since I'm changing out the ESC I decided to get a stronger servo as well. I got lucky and found both the servo and ESC at a couple LHS's. Was about to get ESC price matched with the Amain price and I'm not sure what was up with there price of servo... I even asked the price twice to be sure there wasn't a mistake. I got the servo for $69.00 I'm going to run the servo at 7.4 volts and it'll put out over 400 oz/in of torque at that voltage. Now I'm not as worried about the weight of the wheels and tires on the front end.. 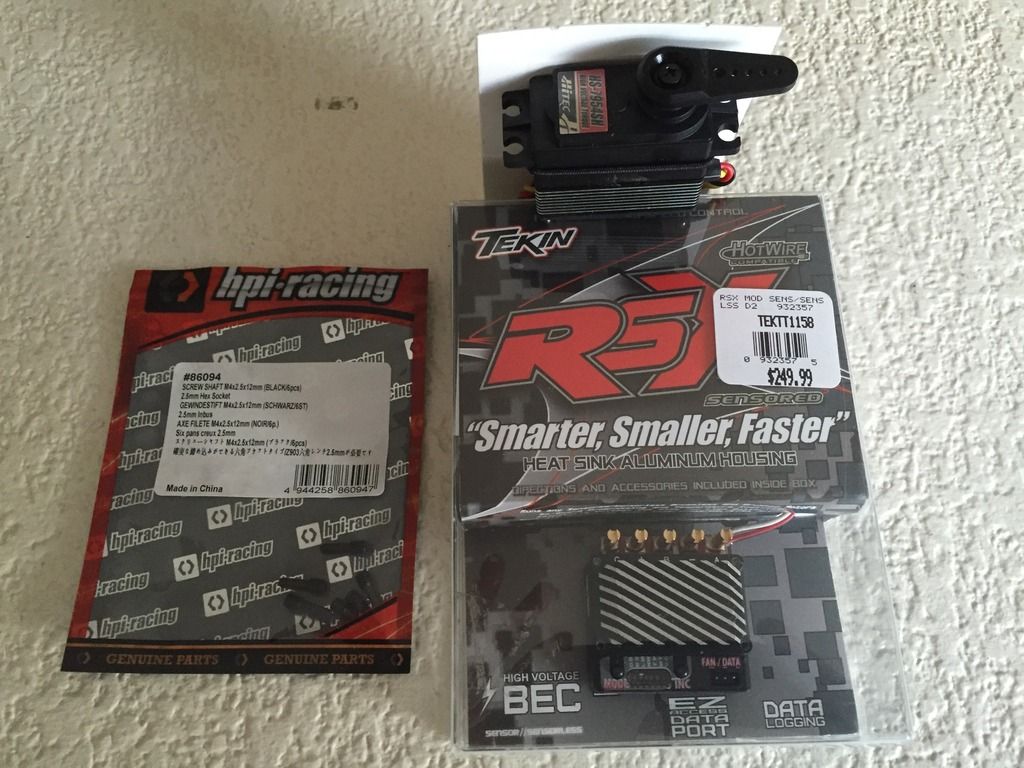 So, that's about all the parts I need to finish up, except, as I mentioned the winch. I'll need to paint the body, so hopefully I can a winch on order this week, paint the body over the weekend and have the winch in next week. If that all works out I can install the electronics early next week and be on the road with the G6... For now though, I in for a long night of building... |
| |  |
| | #18 |
| Rock Crawler Join Date: Mar 2006 Location: Dogpatch
Posts: 811
|
Very nice build.You must have been a good boy this year!
|
| |  |
| | #19 |
| Quarry Creeper Join Date: Dec 2015 Location: San Diego
Posts: 244
| |
| |  |
| | #20 |
| Quarry Creeper Join Date: Dec 2015 Location: San Diego
Posts: 244
| |
| |  |
 |
 ...SCX10 Jeep Wrangler G6 Build... - Similar Threads
 | ||||
| Thread | Thread Starter | Forum | Replies | Last Post |
| WYD's STRC SCX10 Jeep Wrangler build | wyd | Axial SCX-10 | 57 | 01-28-2016 09:48 AM |
| Fu's SCX10 Jeep Wrangler G6 build | MikeFu | Axial SCX-10 | 5 | 11-18-2015 04:14 PM |
| ***Chicklet's Jeep Wrangler SCX10 G6 Build*** | chicklet | Axial SCX-10 | 67 | 03-12-2015 06:03 PM |
| DMS1 SCX10 Jeep Wrangler G6 Falken to Hilux Build | dms1 | Axial SCX-10 | 14 | 09-30-2014 10:13 PM |
| ScaleFreak - Axial SCX10 Jeep Wrangler G6 Build | Joe Ferguson | Axial SCX-10 | 27 | 06-07-2014 04:42 PM |
| |