| |
 05-24-2013, 01:48 PM
| #61 |
| I wanna be Dave Join Date: Nov 2009 Location: Houston
Posts: 2,004
|
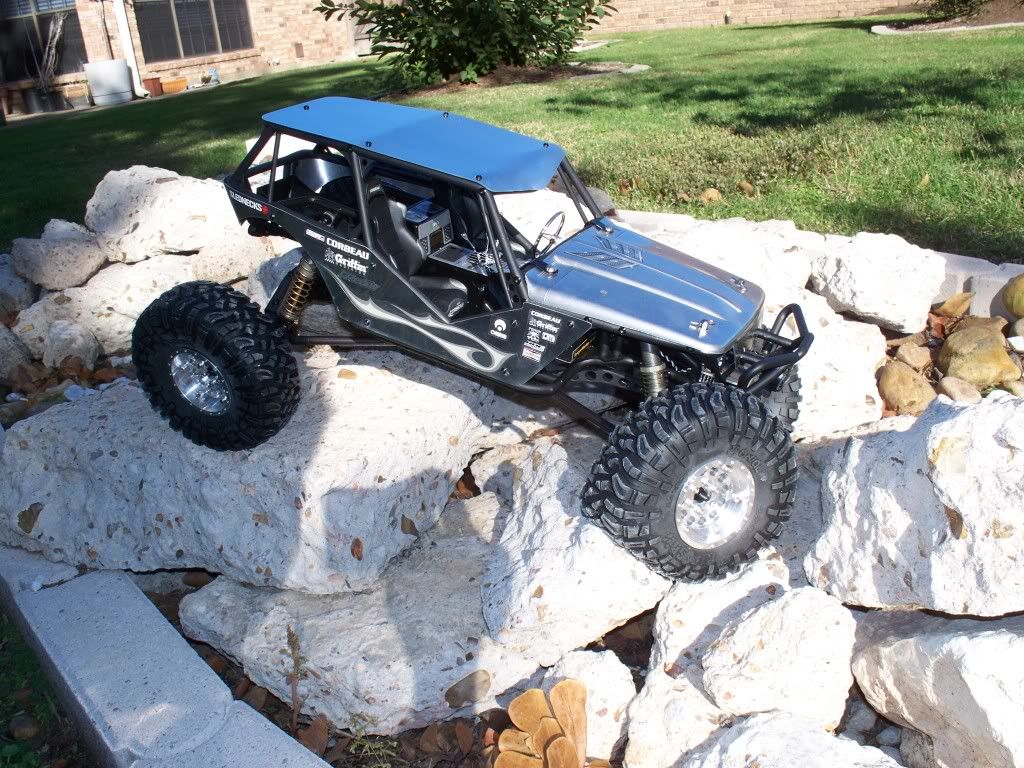
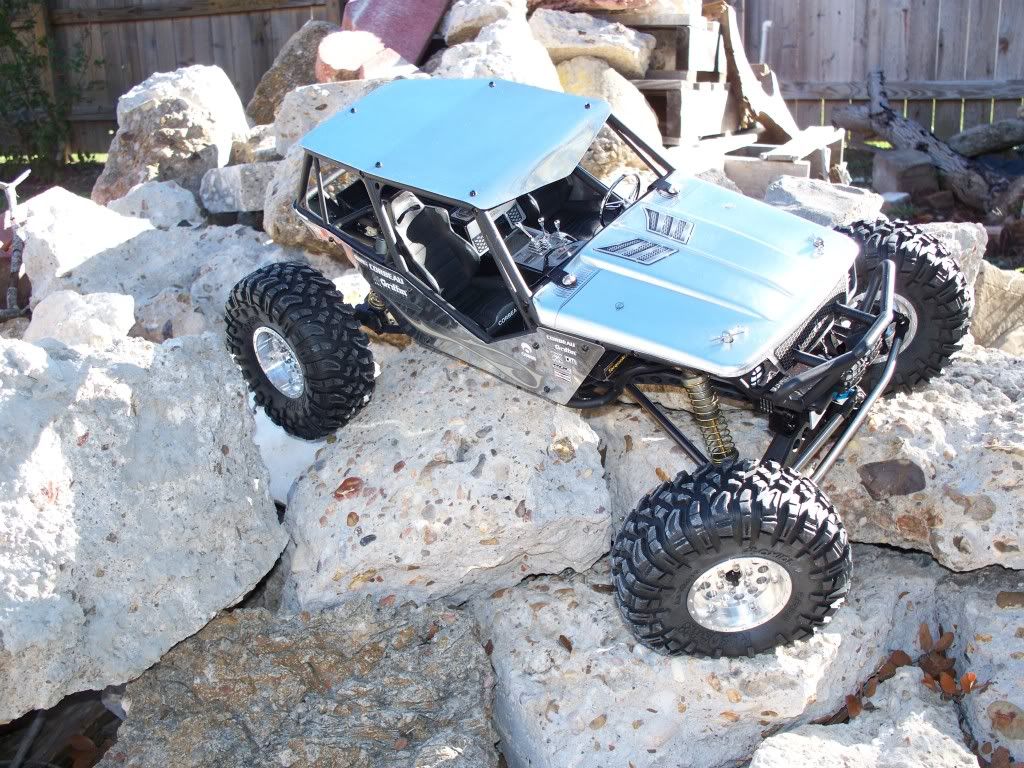
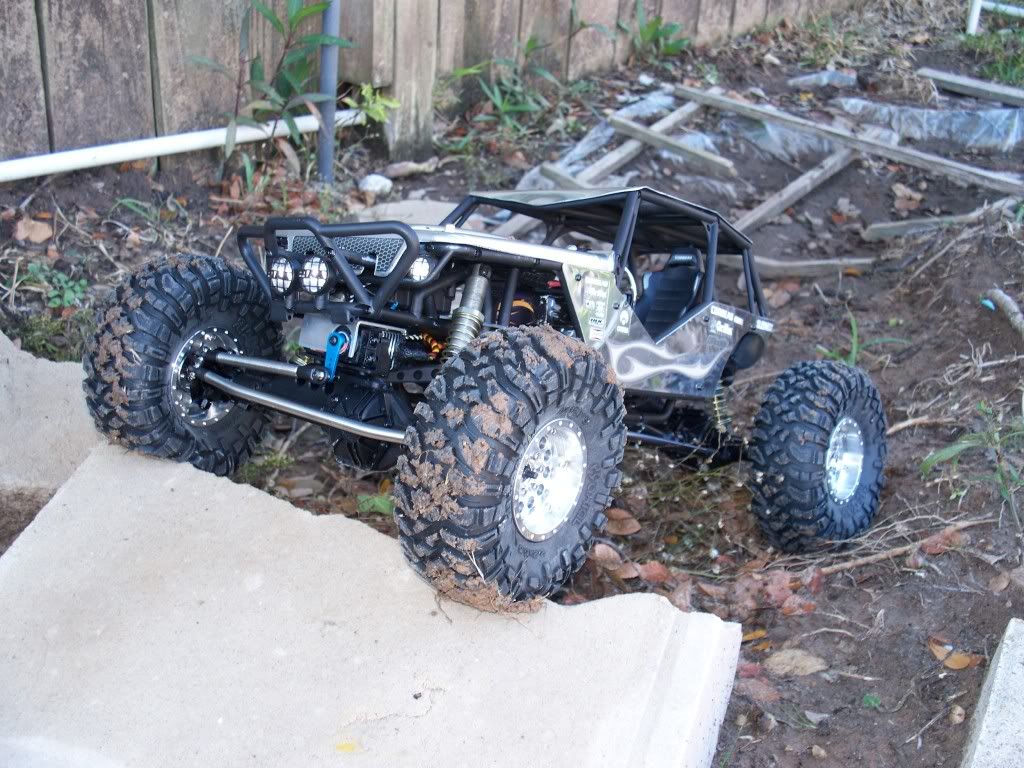
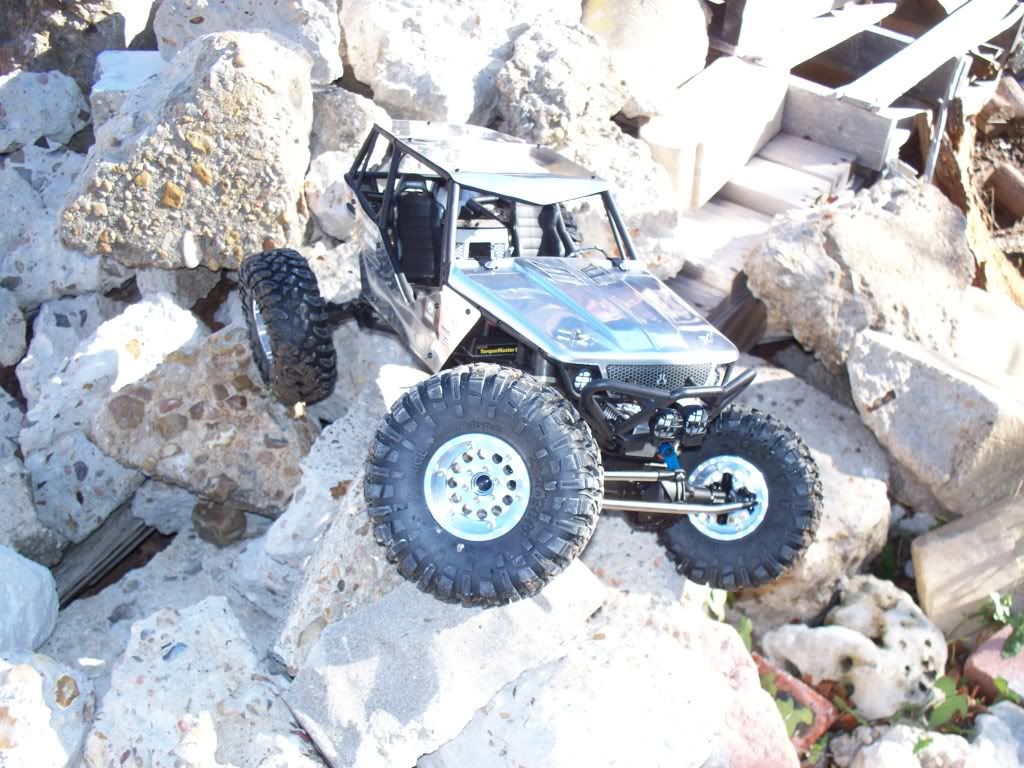
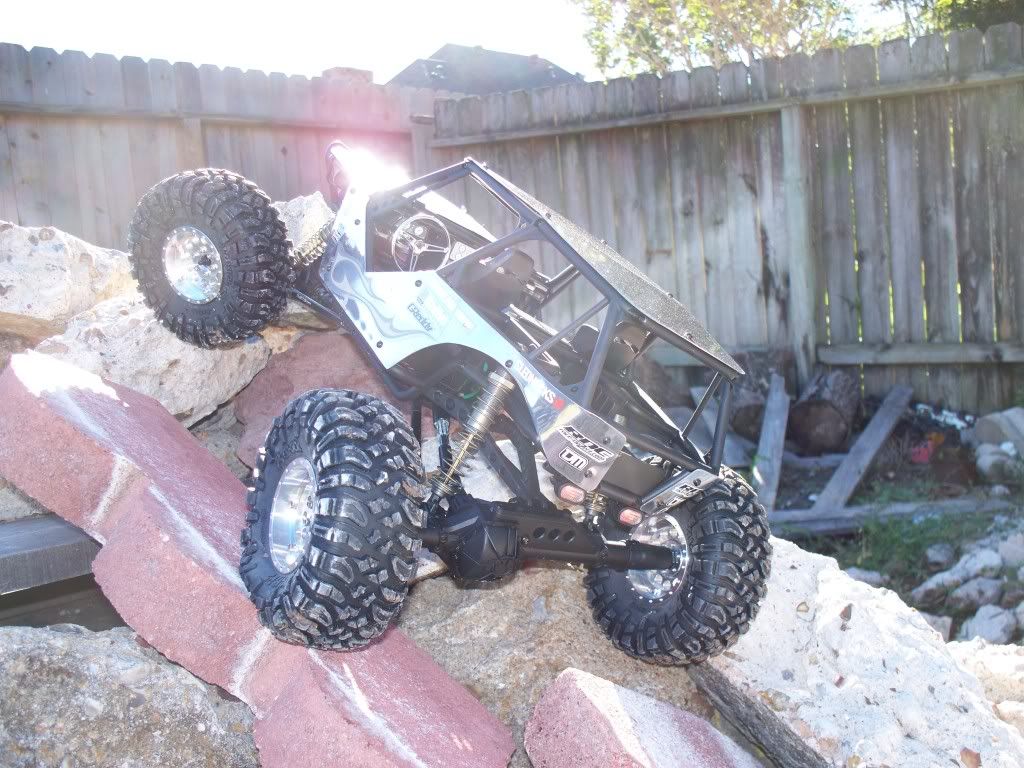
That Holmes 35T built for CrawlerMafia for his sporty truck I currently have in there is actually super freaking fast. I'd estimate 12-15mph on concrete with all that aluminum! With the droop kit even without sways it just won't flip over!! Thank you Pitbull 2.2''s with the reinforced sidewalls and thank you CI for the closed cell foams. RIDICULOUS HANDLING!! I'm going to gear it down it's got so much wheel speed it's retarded. Torque is incredible too! I love John's motors!! |

|  |
| Sponsored Links | |
| | |
|
05-27-2013, 07:10 AM
| #62 |
| I wanna be Dave Join Date: Nov 2009 Location: Houston
Posts: 2,004
|
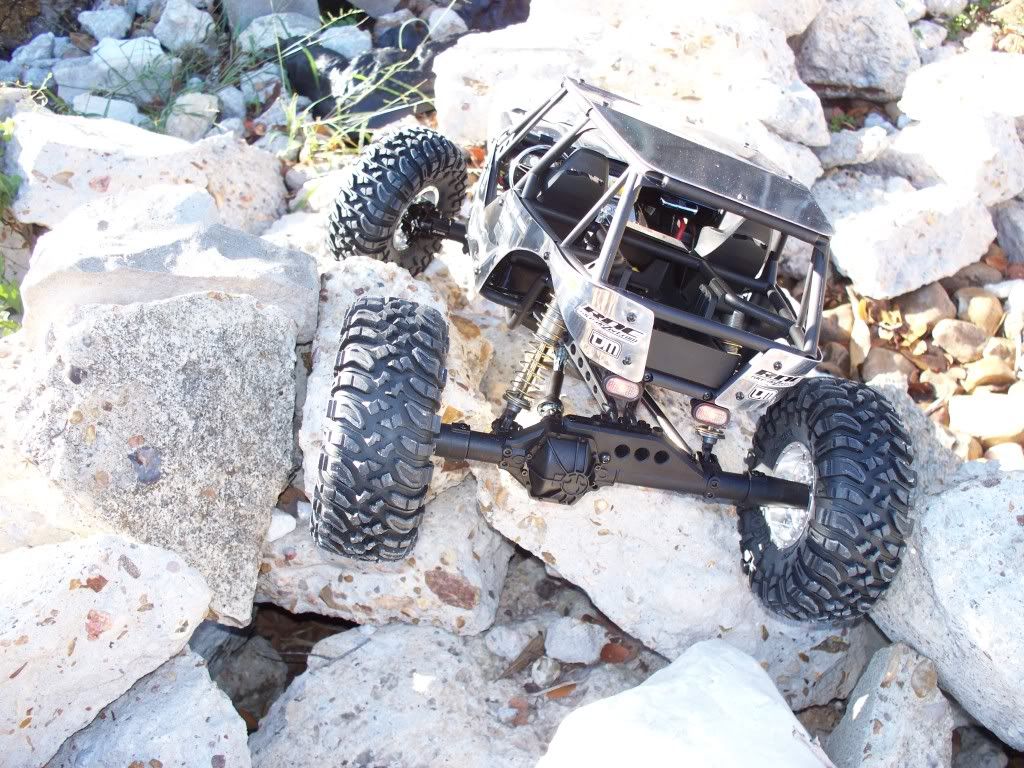
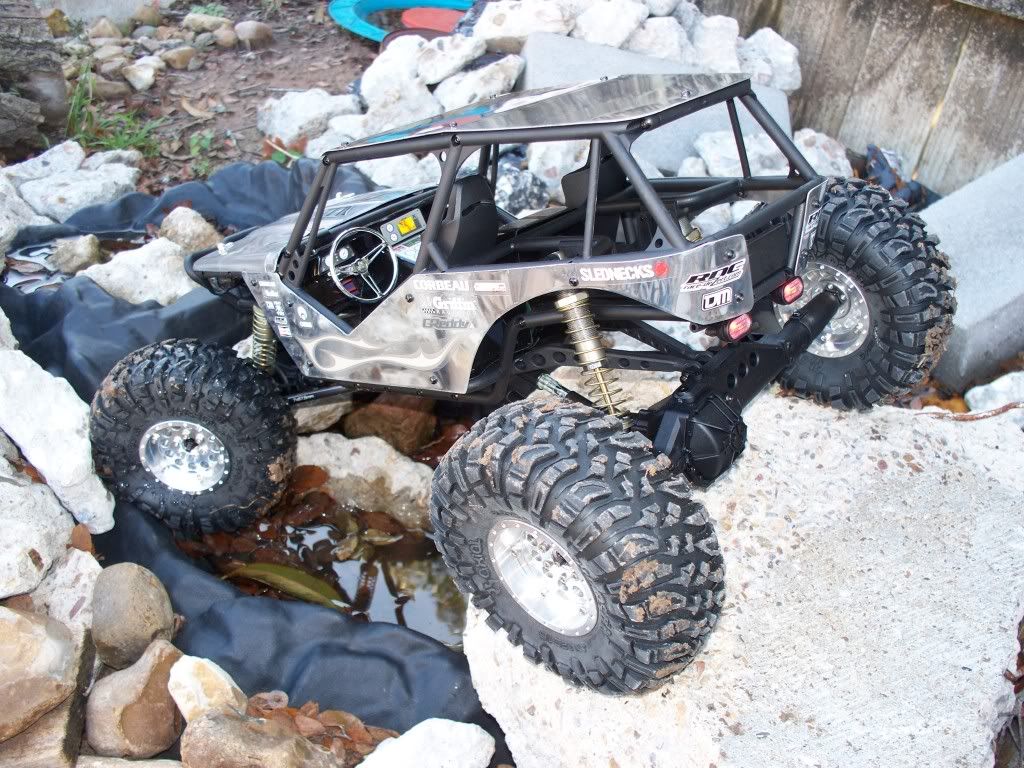
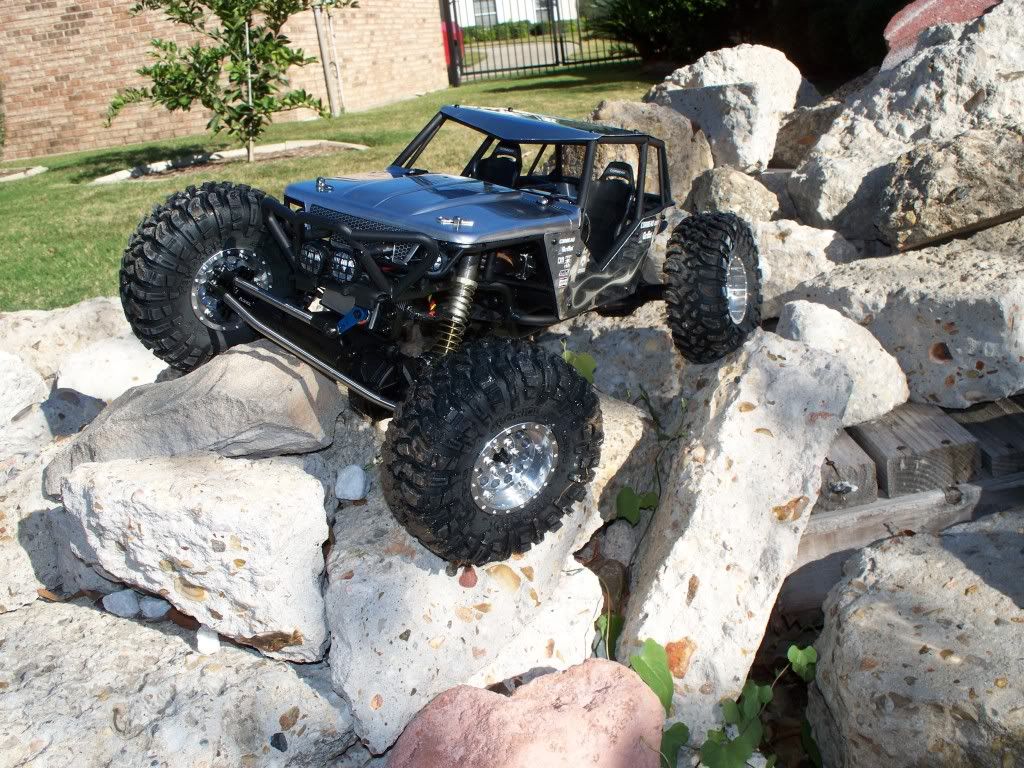
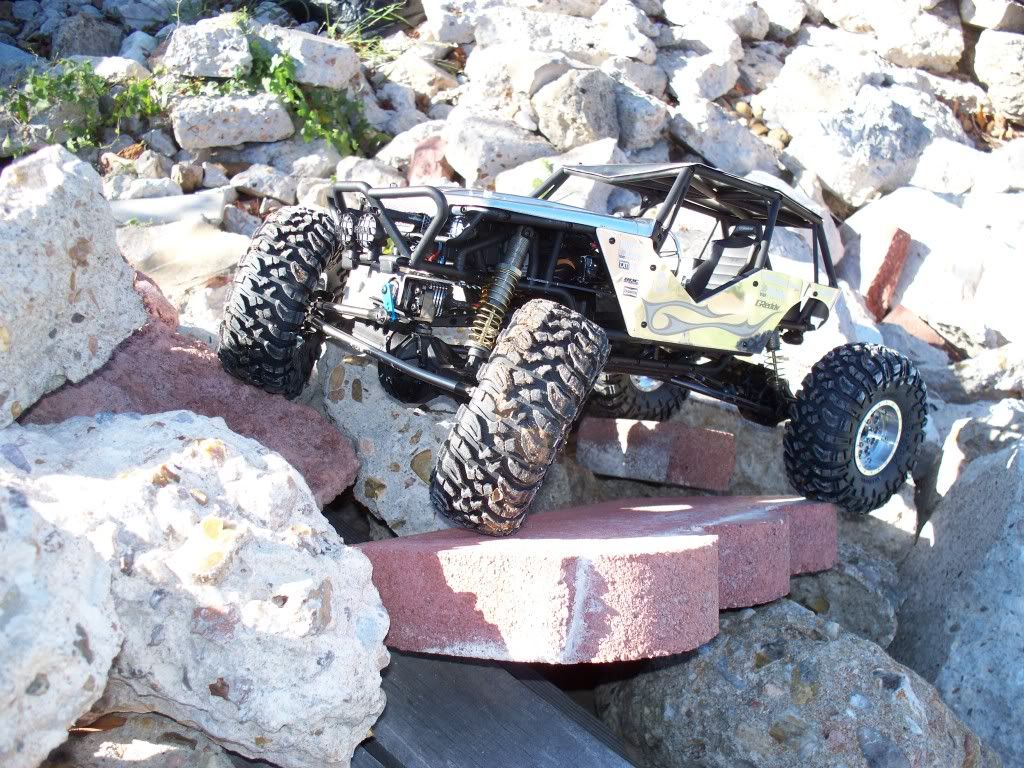
Started to do some tuning this morning with preload and shock position. Also redid the steering links so no more binding on the servo horn or the chassis cage/bumper area. Only thing is since I'm running a little toe out up front this causes a little rubbing on the springs but not enough to be an issue I hope! Also another issue I came across was accidentally drilling through the front posts too close to the bumper so I had to make new clip tie downs. Unfortunately the droop kit still hits the underside of the hood and I wouldn't feel comfortable cutting through such a nice aluminum hood blindly! Plus it probably wouldn't look too clean either. Pics of the broken lexan Spazstix Mirror Chromed stock hood and the shakedown run this morning:           |
|
| |
|
06-02-2013, 06:44 PM
| #63 |
| I wanna be Dave Join Date: Nov 2009 Location: Houston
Posts: 2,004
|
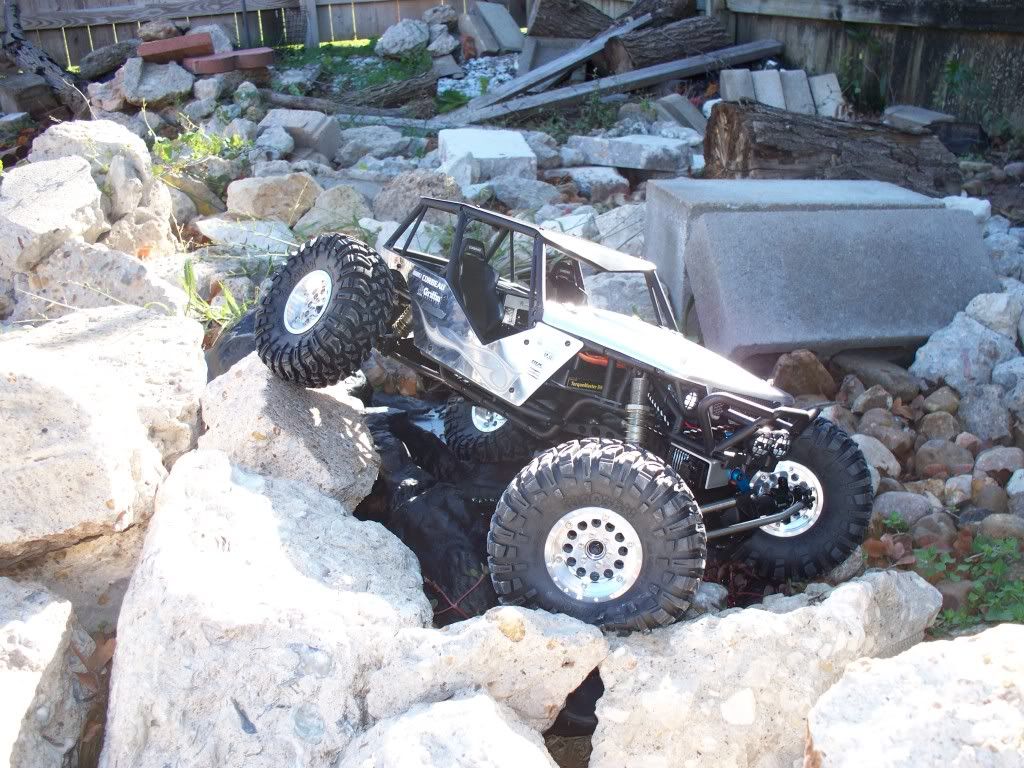
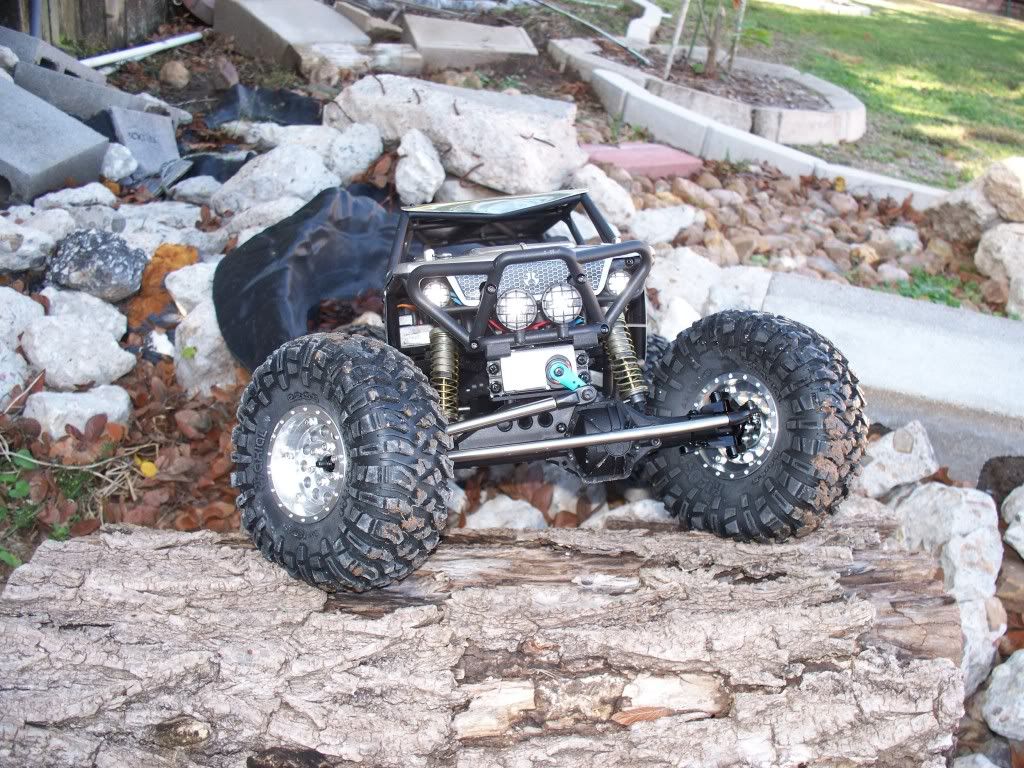
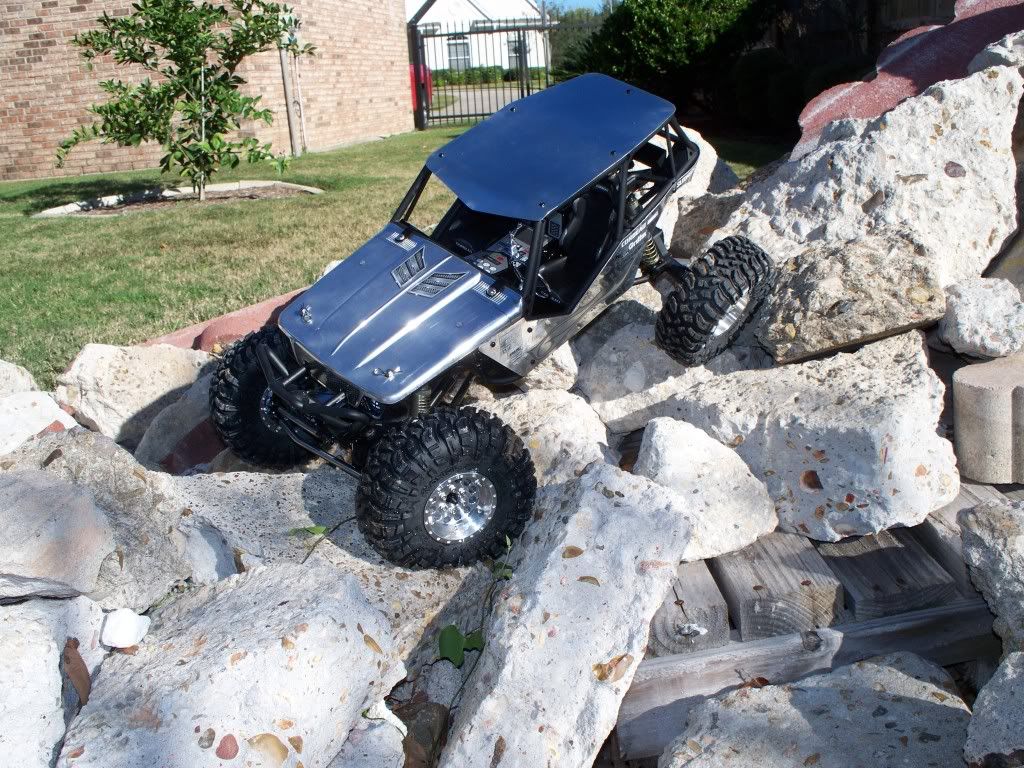
Had to regear dropped 2t on the pinion running a 12/56 setup all that aluminum, steel, and scale stuff really weighing it down. Now to think how I can make the hood flush but that droop kit gets in the way. Seems like I have to cut out a couple of sections for the braces. Might move the esc to the passenger footwell area... Damn the 35T Holmes motor is right at 158 F running roughly half the pack of the 1850mah 3s MaxAmps pack "True 100c" pack. BRXL w/CC BEC tempted out at 94 F which is okay and the lipo was barely warm. Might have to drop to 10T or 11T on the pinion if I want to run the entire pack.... Well some pics for yall on the test course:    I don't know if I am a fan of that toe out. Sure it helps but it really throws off the scale look. What do yall think? Last edited by alexchen86; 06-02-2013 at 07:19 PM. |
|
| |
|
07-07-2013, 09:55 PM
| #64 |
| I wanna be Dave Join Date: Nov 2009 Location: Houston
Posts: 2,004
|
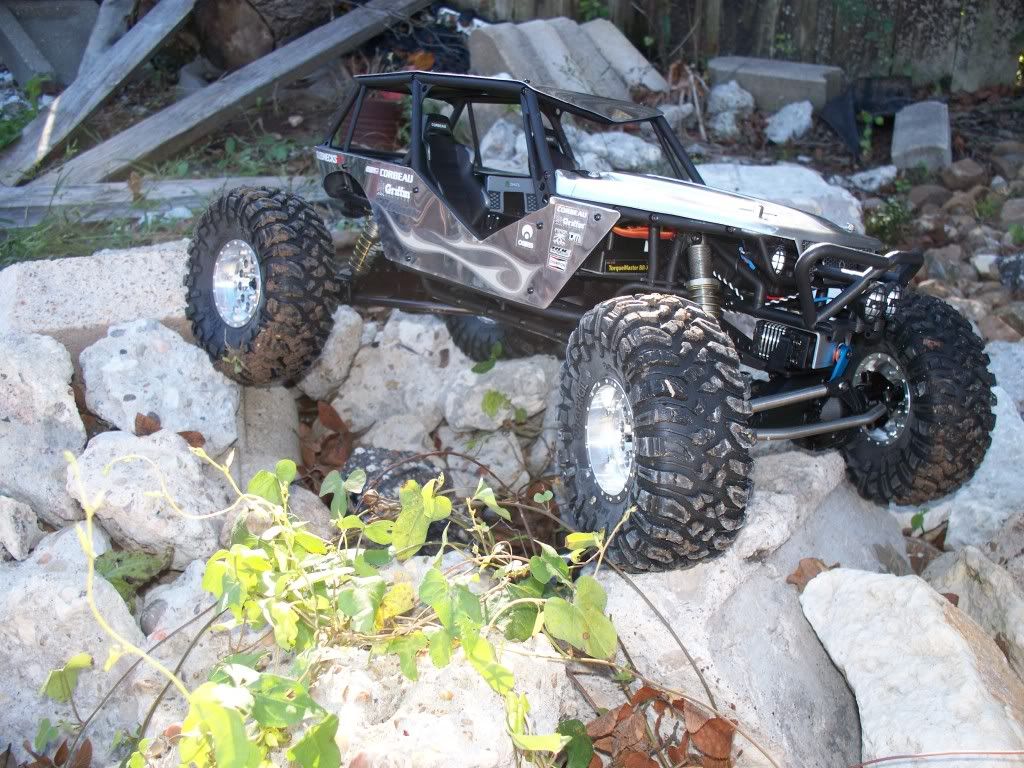
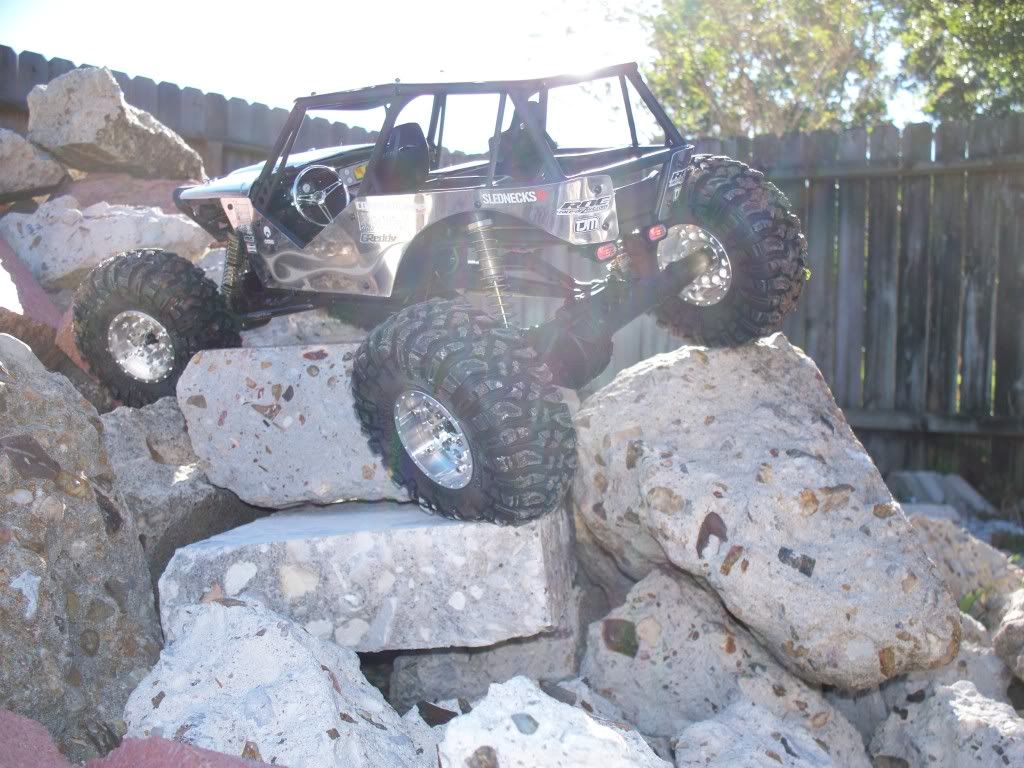
Another shake down run update this morning. Refreshed the tranny, MIPs, HD both diffs, and gave the aluminum hood some polish but I'm goings to need a machine to get the shine like the rest of my panels. Latest update was I threw on a VP Cms with no panhard lol. Why? I just don't feel comfortable jumping a Wraith without 4 link...that and I have plastic axle housings. If I had the aluminum ones I might give the panhard a shot. Anyways taking it off going back to servo on axle might look into the Dinky mount....oh and finally found almost the perfect gearing 9/56 with the current weight of my Wraith running a 35t Holmes handwound to hit LVC on my 1850 3s pack! I may up it to 10t or 11t for a tad more wheel speed. |
|
| |
|
07-08-2013, 01:51 PM
| #65 |
| Rock Crawler  Join Date: May 2013 Location: Somewhere in space
Posts: 931
|
Very nice wraith you have their! Mine has a few more upgrades on it but doesn't look as good as meaning the paint and all of that mine is a little scratched up but that doesn't matter, good job and keep up the good work! - axial 4x4 crawler
|
|
| |
|
07-09-2013, 10:19 PM
| #66 |
| I wanna be Dave Join Date: Nov 2009 Location: Houston
Posts: 2,004
|
Yup this build was definitely the easiest in terms of overall customization and ease of building. I did not have to do much tuning adjustment as the basic Wraith steering and suspension geometry is near perfect for bashing and trailing with the electronics up front and just minor lowering. At this point I think I am content with this rig. I have a 1.9 scx10 axles Wraith with full BGR cage and towers I'm working on now. Look up my build thread "Orange Crush Ultra 4" |
|
| |
|
05-12-2014, 06:06 AM
| #67 |
| I wanna be Dave Join Date: Nov 2009 Location: Houston
Posts: 2,004
|
Well got tired of the spare in the back so I used some aluminum polished it up, found a faux motor and headers off eBay, making a little delrin board to mount everything. Also will be installing a leftover radiator off an Exo build a while back.....Not sure yet I may still have room for a spare if I move the motor further back. We'll see...      Also installed some dualed mufflers off a Tamiya Tundra SCX10 build I had for a while... |
|
| |
|
06-18-2014, 01:48 PM
| #68 |
| I wanna be Dave Join Date: Nov 2009 Location: Houston
Posts: 2,004
|
Once you think you are done with a rig....you just want to add more LOL. Need help where should I mount the fuel cell and the motor? I put a styrene bed in the rear for somewhere to rest the items. It used to have a spare 1.9 Flat Iron from some SCX10....Thinking bout either putting the fuel cell back there and running some hoses or somehow fitting the motor back there without it breaking. OR stick with the Flat Iron? Btw added rear trophy truck lights...couldn't find red LEDs. Yellow would have to do. I also rewired the broken headlights and turned one pair to rock lights up front. Then added scale goodies into the cabin along with a polished aluminum support or the huge tanks LOL. Coupled with a smaller bottle of nitrous on the console lol!! I think she's done for now....maybe a bigger power plant coming later. Currently it's Holmes TM 35T with a SS Bombproof Tranny and loaded axles. Rock lighting up front:  Rear Exo Light Bar with yellow lenses: (kinda tacky?)  Potential idea for the aluminum hand crafted hood (but it would break my heart to cut into it!!)  Rewired all LED's, fixed broken front bumper, replaced both front lights and lens protectors:  Still debating if I want to mount these rally car style day lights. They are 5mm white...maybe use them for cabin lighting?  Exo front 5 LED lightbar about to be installed next it will be 5 x 5mm White:  Random Scale Stuff I am using:  Revamped interior:  Passenger side revamped interior:  Now where to mount the motor and also the fuel cell? Motor in the rear and fuel cell in the cabin? Fuel cell mock up mounted vertical towards the motor (fuel lines will be added):  Motor sitting on top of the fuel cell just for pics (I will build a styrene box to raise it as the motor sits a little too low for my tastes if I mount it in the rear).  Fuel cell in passenger area (may have to cut it down and mount it on the passenger floorboard):  Fuell cell mounted horizontally (this is my second favorite especially if I raise the fuel cell higher a bit) Thoughts??  This is the motor resting on the styrene floor flush. Offers most protection but you can't really see it.  And this was how it was originally before I started scaling out the rear.  Thoughts or suggestions? |
|
| |
|
06-18-2014, 03:33 PM
| #69 |
| Rock Crawler Join Date: May 2013 Location: Somewhere in space
Posts: 931
|
Super cool rig you have there, I wish my blacked out wraith was that nice lol I beat the crap out of mine so that's why haha.
|
|
| |
|
06-19-2014, 12:27 AM
| #70 |
| I wanna be Dave Join Date: Nov 2009 Location: Houston
Posts: 2,004
|
Same here I blast through mud, water, bang on rocks, jump rocks, jump dirt lol.....every scaler I build is built for demolition derby!! Check out my Lucifer 2.2 KOH Buggy which is my first real scale build....that thing weighed 11 pound rtr all TIG welded steel, powder coated, aluminum paneling all done by hand, custom interior, lights, you name it. Ran it off a limestone cliff about 8-10' in the air and it landed nose down right on the front bumper. Noting broke nothing bent. Just rocked it back and forth in reverse and forward and kept going lol. Big thanks the Jerry (the DMG) who was able to work closely with me to build the chassis and the panels. The whole back and forth communication was excellent. Came out so much better than I expected! |
|
| |
|
06-19-2014, 12:55 AM
| #71 | |
| I wanna be Dave Join Date: Nov 2009 Location: Houston
Posts: 2,004
| Quote:
Favorite rig so far goes anywhere I want it to go...and if I can't climb it then I can definitely jump it LOL. | |
|
| |
|
06-20-2014, 09:52 PM
| #72 | |
| Rock Crawler Join Date: Sep 2012 Location: Pasadena
Posts: 595
| Quote:
Pro4 HD, it pushes my 11lb beast | |
|
| |
|
08-17-2014, 04:21 PM
| #73 |
| I wanna be Dave Join Date: Nov 2009 Location: Houston
Posts: 2,004
|
Updates well swapped out all bearings with TFE, tons of scale stuff because I was bored and I never realized I had so much junk just laying around. Went shoe goo and acrylic paint crazy LOL. Repolished the aluminum hood with Blue Magic wheel polish and holy smokes that stuff is amazing!! The hood is almost as shiny as the panels which were machine polished! Cleaned the Holmes custom spec motor but it really needs a be rebuilt soon. I would drop in the MMP/Tekin Pro4 HD setup into this rig but that's going into my 1.9 Wraith Orange Crush that will be built for nothing but retard speed, drag racing, jumping, and just general all around rock bashing. Yes rock bashing. Not rock racing or crawling but straight up full speed jumps and slams lol. Oh and finally found and appropriate name for this project after like 2-3 years LOL. Blindside Lucy....blindsided by the obnoxious amount of aluminum chrome polishing you need shades on to drive this rig! Or prepare to start squinting your eyes half the time LOL. Blindsided by the extravagant amount of money never calculated into the build. And Lucy because I just like that name...plus it's a very popular southern female name. Welcome to Texas where the country boys and city folk somehow mix in a way that I would not want to live anywhere else! |
|
| |
|
03-25-2015, 08:29 AM
| #74 |
| I wanna be Dave Join Date: Nov 2009 Location: Houston
Posts: 2,004
|
Time for some updates. I think this rig is done.... Last outing:      Redid the interior, added CarterFab inside fender wells up front, added more scale stuff, added a custom polished piece of aluminum paneling in the cab to mount the scale items, added faux motor/blower and mounted it, added scale dualed exhaust, added rear LED light bar off an Exo rear end, redid front bumper lights as they shorted out. Currently rebuilding the Torquemaster 35T, rewaterproofing the BRXL and Castle BEC, rebuilding the Losi 4" big bores 45wt front 50wt rear, replacing all bearings with Team Fast Eddy, deep clean/relube, possibly refreshing the interior with diamond plate aluminum as well.... Might be selling it soon!! Last edited by alexchen86; 03-27-2015 at 11:40 PM. |
|
| |
|
05-08-2015, 09:38 PM
| #75 |
| I wanna be Dave Join Date: Nov 2009 Location: Houston
Posts: 2,004
|
Out of sheer boredom and seeing some sweet scale aluminum diamond plating for I guess model trains or scale styrene accents for model train stuff. I decided to pick up a few sheets since my Wraith could probably use more chrome right? Lol! So cut them out pretty rough job...since the interior was literally broken in several places and I definitely do not want to build/paint another ridiculously priced lean Wraith interior. Went ahead with the usual shoe goo and wall tape reinforcement repairs that I always do on off road high speed basher rigs. Amazingly despite how terrible the damage was it was perfectly repaired! Plus the aluminum diamond plating definitely helped rigidity where most of the damage was besides below the two seats. The rear end motor and scale stuff were cleaned up and repainted as necessary. The dash I redid with a couple of coats of black PlastiDip spray and reglued the passenger handle and fixed up the steering wheel with new paint and oddly enough Gearheads RC skull sticker fits perfectly dead center of the Wraith steering wheel lol! Then I had a few gauge pods I stocked upon from Corey a RPP so went ahead and tried to make the dash more 3d rather than just stickers...even added a rectangle diamond plate cutout for the center dash. Additional decals I believe we're FreQSkinz also from RPP. I also rebuilt all 4 Losi 4" big bores with Team Associated 45wt and Losi 2 hole pistons, new seals, green slime, all that good stuff! Front I've kept Losi whites and rear I am trying a new spring setup off a Vaterra Uno rear black medium which is a tad firmer than the Losi whites. Also I've upgraded the lower stock kit aluminum links to BMRC titanium lowers with Revo rod ends. I believe my uppers are steel and I think R2j made that set also Revo rod ends. All bearings have been replaced with Team Fast Eddy's Wraih bearing kit as the stick bearings have lasted a few years by now. I reinforced the rear shock mounts by tying in a threaded aluminum rod between the two rear droop plates. The Wraith tranny and all internal Robinson gears were completely degreased and lubricated with Associated black grease and all bearings replaced with TFE bearings as well. I have yet to tear into the axles to do maintenance but they are long overdue as well. The aluminum hood was also cleaned repolished with Blue Magic. I may go over it again to blend better with the sheen of the rig's mirror panels. Electronics are still the same 7950TH servo, rewaterproofed Holmes BRXL with a rewaterproofed CC BEC @ 7.4V, rebuilt Holmes Torque Master 35T stand up brushes and new motor bearings. Onto the pics:       A rig can always be better just depends on your wallet size! Ahhh! Last edited by alexchen86; 05-08-2015 at 09:44 PM. |
|
| |
|
05-11-2015, 02:52 PM
| #76 |
| Rock Crawler Join Date: Oct 2013 Location: The Netherlands
Posts: 538
|
looks great i like the interior
|
|
| |
|
05-14-2015, 11:04 PM
| #77 |
| I wanna be Dave Join Date: Nov 2009 Location: Houston
Posts: 2,004
|
Lol nothing but cheap diamond plate aluminum next to the styrene section at your LHS! Great way to rebuild and repair your torn up lexan interior if your Wraith has been beat up, flooded, overheated, and broken as many times as mine has! Bezels for the gauges are the same ones I always use from RPP. Cool thing about the gauges is you can use a highlighter to color the faces before cutting them out and fixing them onto the bezels using clear nail polish to create a glass effect. Also gives your interior more depth instead of just decals. Sent from my iPad using Tapatalk |
|
| |
 |
| |


 Linear Mode


