| |
| |||||||
 |
| | LinkBack | Thread Tools | Display Modes |
 01-11-2009, 10:14 AM
| #21 |
| Newbie Join Date: Jul 2008 Location: RGV, TX
Posts: 32
|
What battery are you going to use? I like the way you set up the servo mount I think I am going to have to do the same. -Eddie |

|  |
| Sponsored Links | |
| | |
|
01-11-2009, 09:11 PM
| #22 | |
| Rock Crawler Join Date: Dec 2005 Location: Tulsa, Oklahoma
Posts: 857
| Quote:
Got the front end done today, drag link, upper and lower links, also got the dig set up. I'll try and get the rear finish tomorrow, just 4 links to go and mount the electronics, then I can give it a shake down run I'm thinking of just leaving the links and parts how they are, it gives it a home made look with all the tooling marks and everything in them 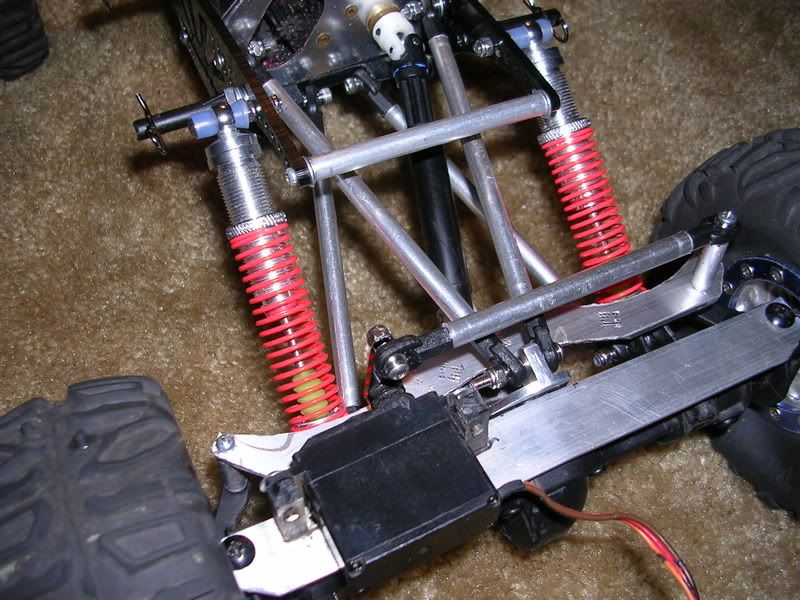 Gotta clean up the link, And the trans apparently it has some carpet fibers on it  Don't mind the electronics 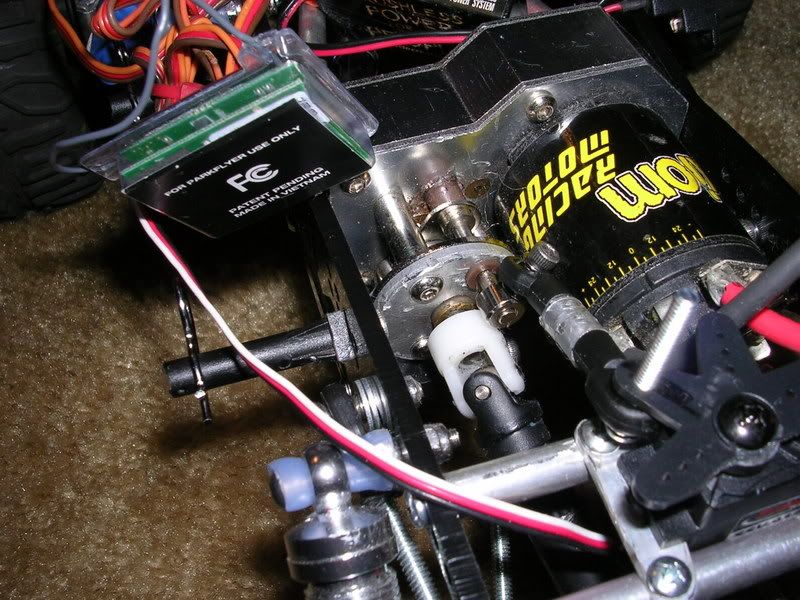 Thanks, Shaun Last edited by Shaun; 01-11-2009 at 09:18 PM. | |
|
| |
|
01-12-2009, 11:28 PM
| #23 |
| Rock Crawler Join Date: Dec 2005 Location: Tulsa, Oklahoma
Posts: 857
|
Got the rear finished. The servo I had for the dig turned out to be dead, I guess I have to do with out dig for a while, since I don't have the money for a HS-225MG. 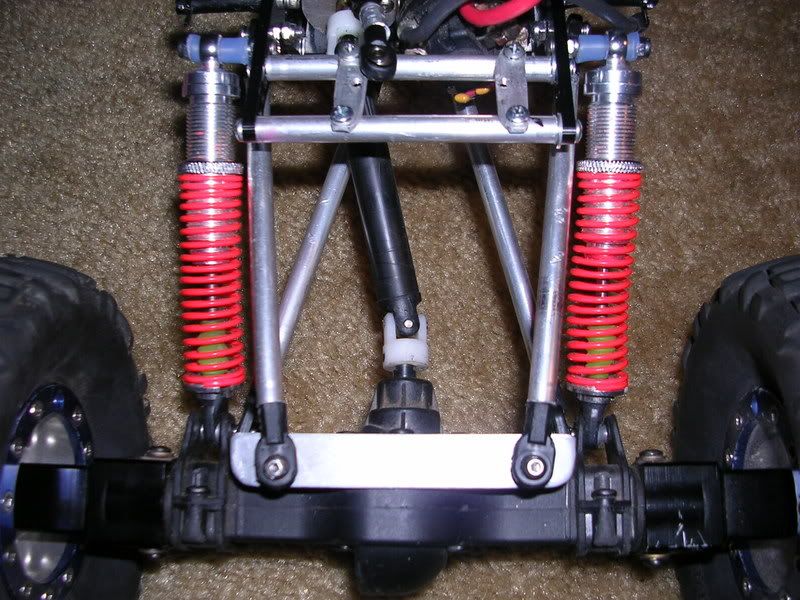 If anyone is wondering I used 1/4 inch solid aluminum rod for the chassis spacers, drag link, and links. I decided to just go ahead and polish everything, I can always anodize it later, and I probably will. I'll try and get on polishing it in the next few days. Thanks, Shaun |
|
| |
|
01-13-2009, 03:11 PM
| #24 |
| Quarry Creeper Join Date: Jan 2008 Location: Portland OR / SLC
Posts: 462
|
looks sexy  |
|
| |
|
01-15-2009, 12:23 PM
| #25 |
| Newbie Join Date: Nov 2008 Location: Noblesville
Posts: 1
|
i would definately have it anodized your project looks pretty good so far keep up the good work it pays off when you finally get it finished.
|
|
| |
|
01-15-2009, 05:18 PM
| #26 |
| Rock Crawler Join Date: Dec 2005 Location: Tulsa, Oklahoma
Posts: 857
|
Thanks guys, its still a work in progress. I got it running minus dig, I have an interview at Hobby Town tomorrow so I'll wait and see if I get the job before I order a servo. Runs great, super stable, and will crawl over anything. The other OKRCRC guys better watch out for me this season  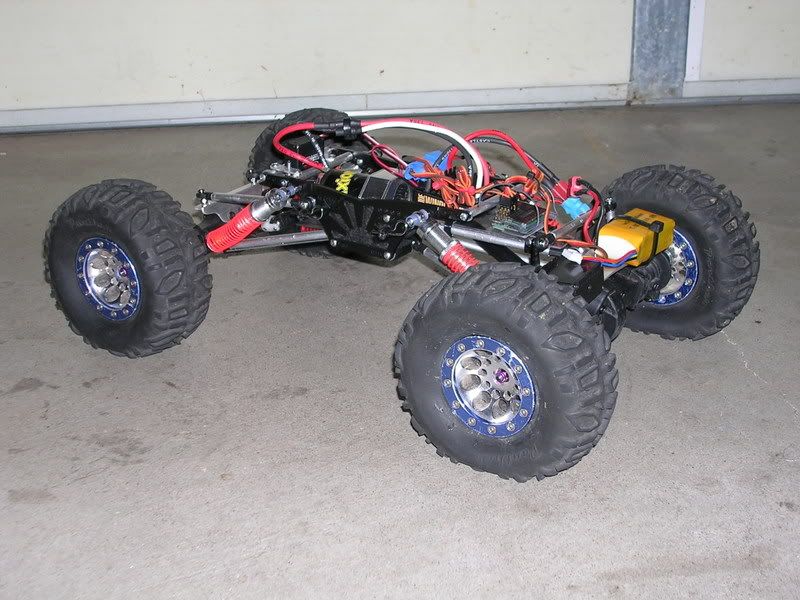 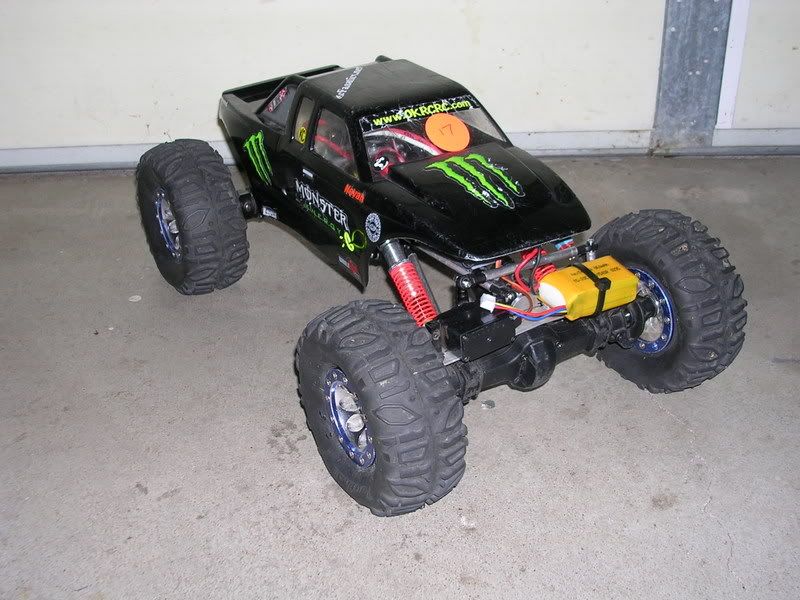 Its got a bit more flex, but I might limit it a little bit, I don't want it to have very much. 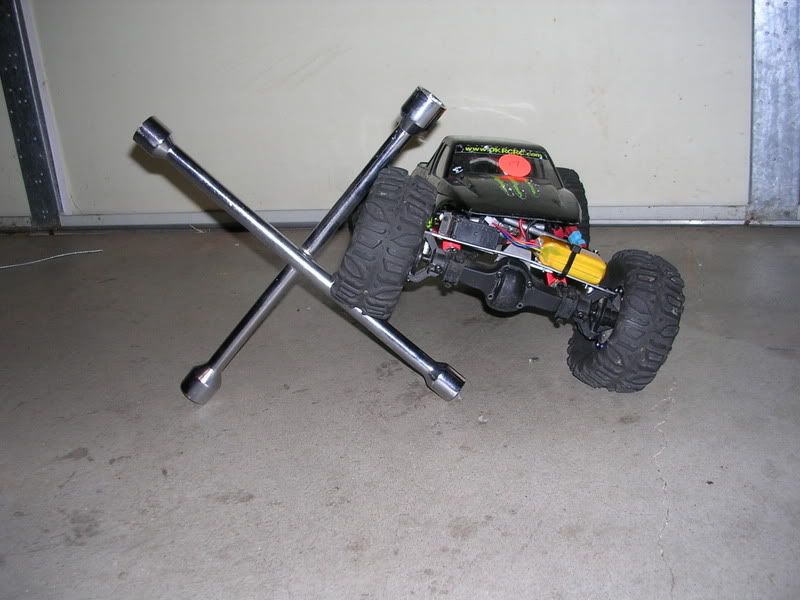 New angle on the dig. I'm going to redo the link. 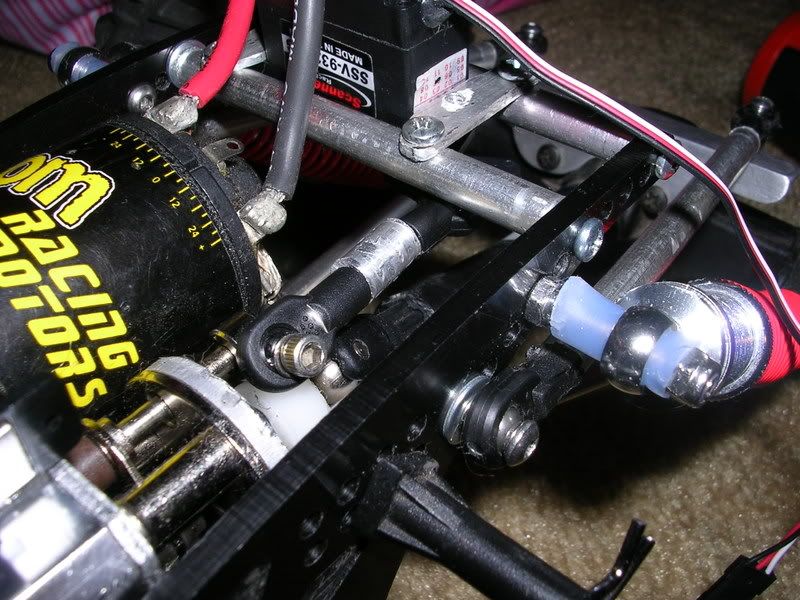 Complete with battery and body, and electronics. If it had some hybrid foams it would be even more stable. 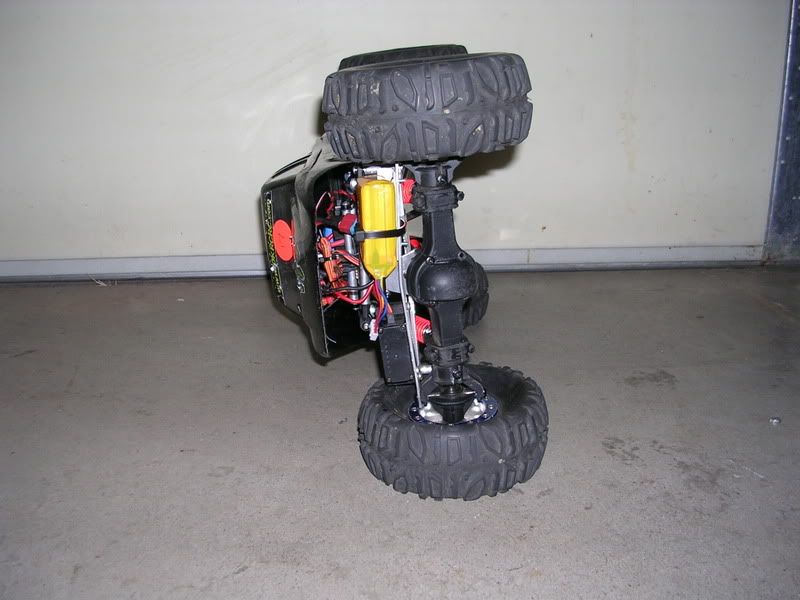 How can you beat that? 3" of ground clearance and still stand it on its side, with a shafty! Now go buy your self a ZERO! When it gets a little warmer I'll get some pics and vids on the rocks, right now its 16 degrees out side. I got alot more work to do, but it runs. I'll also be doing a body for this, grappler, black, with a red rising sun coming out of the front lower portion of the door. Last edited by Shaun; 01-15-2009 at 05:25 PM. |
|
| |
|
03-15-2009, 09:09 PM
| #27 |
| Rock Crawler Join Date: Dec 2005 Location: Tulsa, Oklahoma
Posts: 857
|
Finally got to take it out for a shake down run, and its wicked. It will crawl over anything you toss at it. Once I get a 9100 for steering and HS-85MG for the dig I'll be set. I'm amazed at how well it crawls, and how good the steering set up works.
|
|
| |
|
03-15-2009, 10:49 PM
| #28 |
| Newbie Join Date: Nov 2008 Location: wahiawa
Posts: 43
|
good work.......waiting for that video |
|
| |
|
03-16-2009, 07:59 AM
| #29 | |
| Rock Crawler Join Date: Dec 2005 Location: Tulsa, Oklahoma
Posts: 857
| Quote:
| |
|
| |
|
03-18-2009, 01:52 PM
| #30 |
| RCC Addict Join Date: Jan 2009 Location: Crawlifornia
Posts: 1,941
|
What shocks are you using? I am doing the exact same build almost but with no bta steering and a TAG chassis.
|
|
| |
|
03-18-2009, 04:52 PM
| #31 | |
| Rock Crawler Join Date: Dec 2005 Location: Tulsa, Oklahoma
Posts: 857
| Quote:
I made a list of things to order when I get my paycheck next Friday. Integy Aluminum Knuckles Integy Aluminum Hubs Hitec HS-85MG | |
|
| |
|
03-18-2009, 05:55 PM
| #32 |
| RCC Addict Join Date: Jan 2009 Location: Crawlifornia
Posts: 1,941
| Sweet. I was running some off brand in droop setup. my ground clearance is only 2" but with the weight of that R2dII I am afraid to raise it any. Are yours limited inside at all? Also it looks like you have tons of room for the full size servo mount from ckrc that bolts to the R2. Any reason you didnt use it.? |
|
| |
|
03-18-2009, 06:18 PM
| #33 | |
| Rock Crawler Join Date: Dec 2005 Location: Tulsa, Oklahoma
Posts: 857
| Quote:
| |
|
| |
|
03-18-2009, 06:21 PM
| #34 |
| RCC Addict Join Date: Jan 2009 Location: Crawlifornia
Posts: 1,941
|
I custom built a chassis links and servo/battery mount on my last rig. Came down a 4' drop on its lid and when i flipped it over it flexed REALLY good. Maybe because the chassis split in 2. what body posts are you running |
|
| |
|
03-18-2009, 06:50 PM
| #35 | |
| Rock Crawler Join Date: Dec 2005 Location: Tulsa, Oklahoma
Posts: 857
| Quote:
| |
|
| |
|
03-18-2009, 08:18 PM
| #36 |
| Just jump it!   Join Date: Aug 2008 Location: Cedar City, Utah
Posts: 1,947
|
That thing is awesome.... |
|
| |
|
03-22-2009, 08:22 PM
| #37 | |
| Rock Crawler Join Date: Dec 2005 Location: Tulsa, Oklahoma
Posts: 857
| Quote:
I got some of the wiring taken care of. Looks much better now. 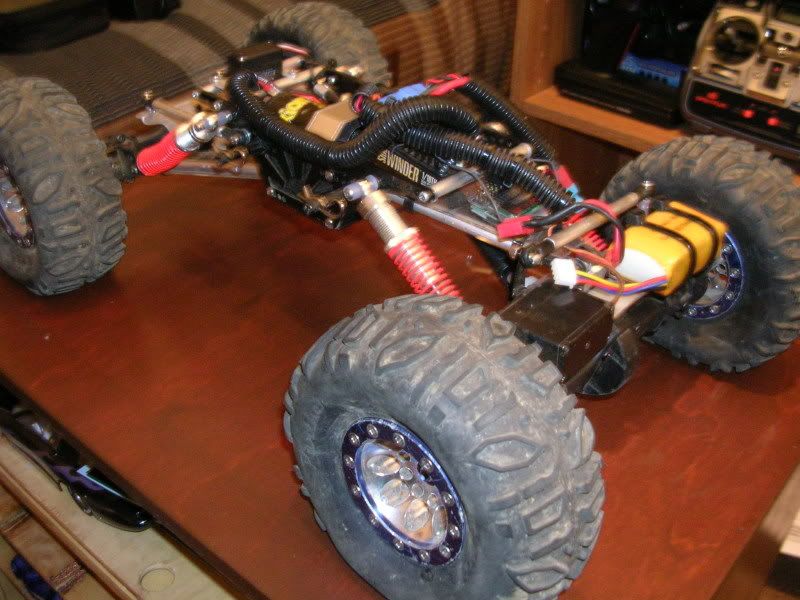 Can't wait, only 5 days till I get my pay check and I can order the rest of the parts | |
|
| |
|
03-28-2009, 05:29 AM
| #38 |
| Newbie Join Date: Sep 2008 Location: United Kingdom
Posts: 21
|
Still great looking build dude. I know i've seen them before somewhere, but where did you get the little alloy mount that fit to the WK axles to allow you to mount the suspension link bars? Cheers Paul. |
|
| |
|
03-28-2009, 07:52 AM
| #39 |
| Rock Crawler Join Date: Dec 2005 Location: Tulsa, Oklahoma
Posts: 857
|
The rear mount, I made myself, from a piece of L channel aluminum, the front one, is a mount from www.TCSCrawlers.com |
|
| |
|
03-28-2009, 10:45 AM
| #40 |
| Picky Fab'r/Acetal Junky   Join Date: Jul 2006 Location: Arizona Desert/AJ
Posts: 3,073
|
Not sure I understand what you mean with the "long shocks". If they are too long, why not just screw the spring adjuster to the top of the body and essentially lower the truck. You could then move the shocks out to the ends of the chassis. Would stand the shock up more. |
|
| |
|
| |


 Linear Mode


