| |
| |||||||
 |
| | LinkBack | Thread Tools | Display Modes |
 01-13-2012, 11:09 AM
| #1 |
| Rock Crawler Join Date: Oct 2011 Location: Lexington
Posts: 503
|
So I've seen a lot of people ask about light and some people have made them, but there aren't any how-tos on doing it. Well I did it, I took a bunch of pictures, and I've got a few tips on doing it yourself. Hopefully this will show you the level of difficulty and answer some questions. Tools -Soldering Iron -Wire Strippers -Hobby Knife -Wire Cutters -Dremel -Styrene -Glue (super glue, styrene cement, model glue, epoxy, or whatever you prefer) -Solder -Wire I recommend 20 or 22 AWG silicone. Anything else will be too stiff. You can find it on ebay for a good price) -Shrunk tube -Liquid tape Materials -LEDs (use whatever color you need for the job. For the light bar I'm doing, I used white) -Battery/holder (I used a Radio Shack CR2032, which RS sells a holder for) -Power switch (I used an SPST Submini switch from Radio Shack) -Time and talent For the LEDs, I used 5mm LEDs from Radio Shack. They are HUGE. For a scaler, use 3mm LEDs (you'll have to order them online). For my Syclone scaler, I will be using 3mm LEDs for sure. Anyway, I wanted to do a light bar for my comp crawler, which has a Nissan truck body for fun. I've been using the truck body to practice my styrene, fab, and wiring work so I can do a good job on my Syclone. So if the styrene or wiring or anything looks a little rough it's because this is the first time I've done it before. I didn't want to wire the lights into the crawler's battery because this would slow down the crawler and shorten battery life. This is also why I didn't buy one of those ebay light kits. A separate light circuit will give me lights without hurting power. The reason I'm using a button battery is two fold: 1) they are small and light and I don't have a lot of room for a battery on this truck. 2) The voltage is low enough that you don't need a resistor before the LEDs (the LEDs are rated at 3.6V max, and the battery is 3V). The switch I used is also the smallest RS offers. You'll notice most of my supplies are from RS, because they were convenient and relatively cheap. Plus looking at the parts in real life makes it easier to visualize how everything will fit together. The first step was fabbing up a rollbar to mount the lights to. Here it is, unpainted and ready for the light bar: 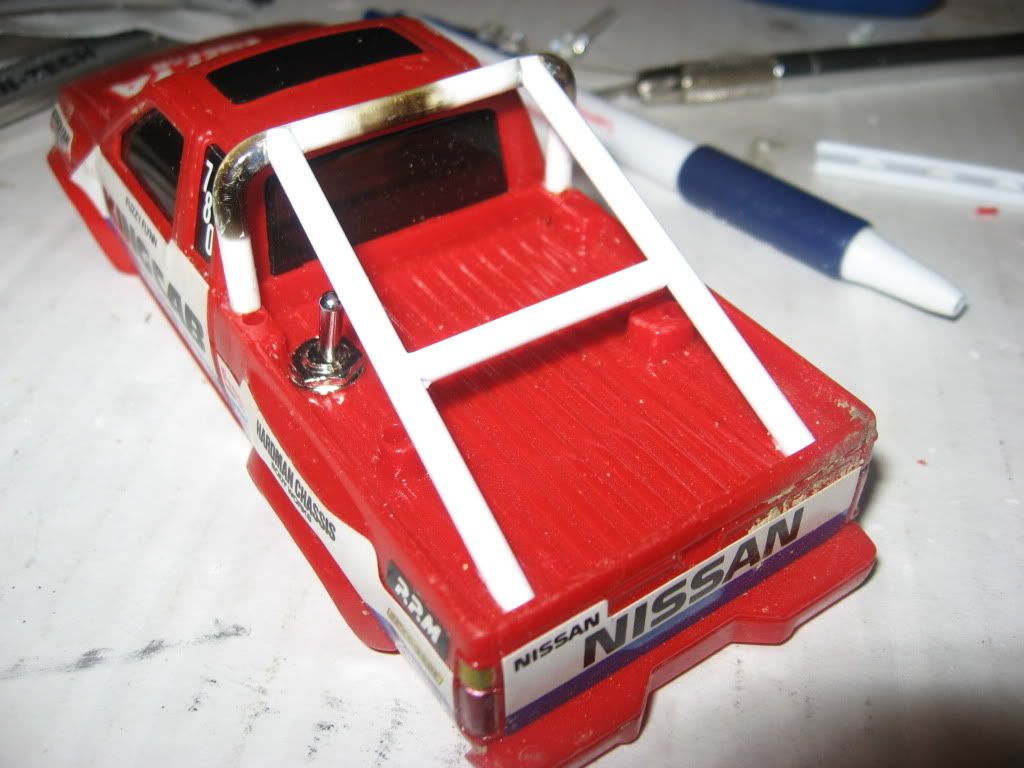 To mount the power switch, I drilled a hole in the body using my Dremel. Measure twice, drill once! I used a tapered bit and just bored out a little at a time until the switch fit properly, then I put the retaining nut on it to hold it in place. 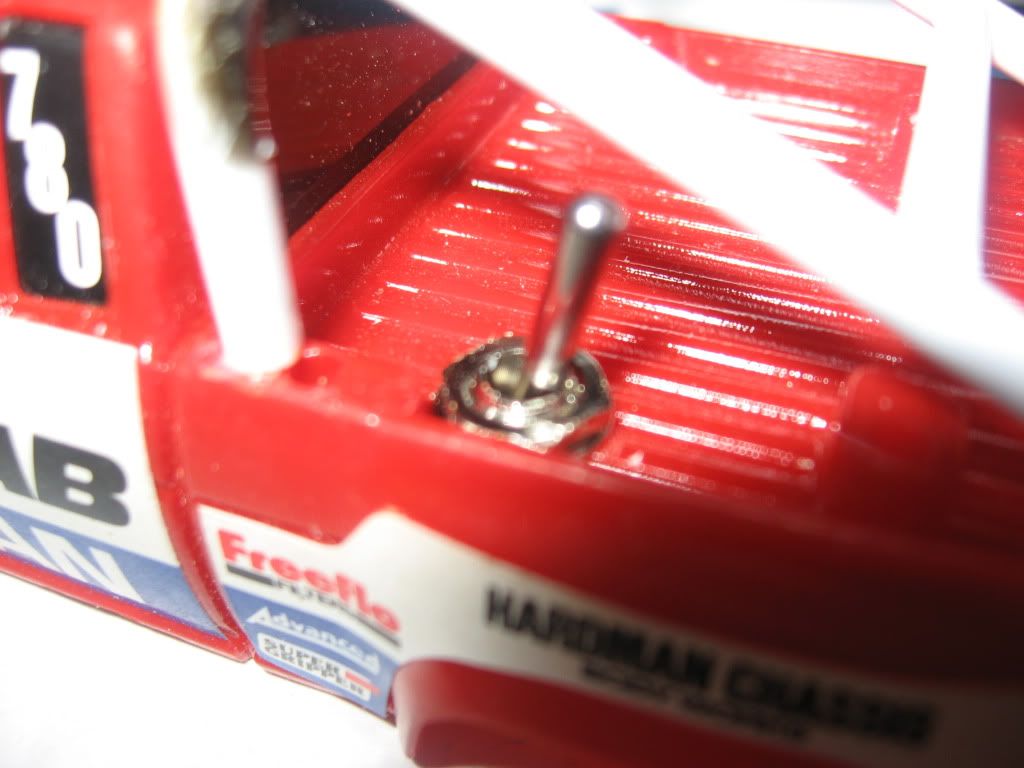 If you use this switch, orient it it thusly to have the forward position be "on:" 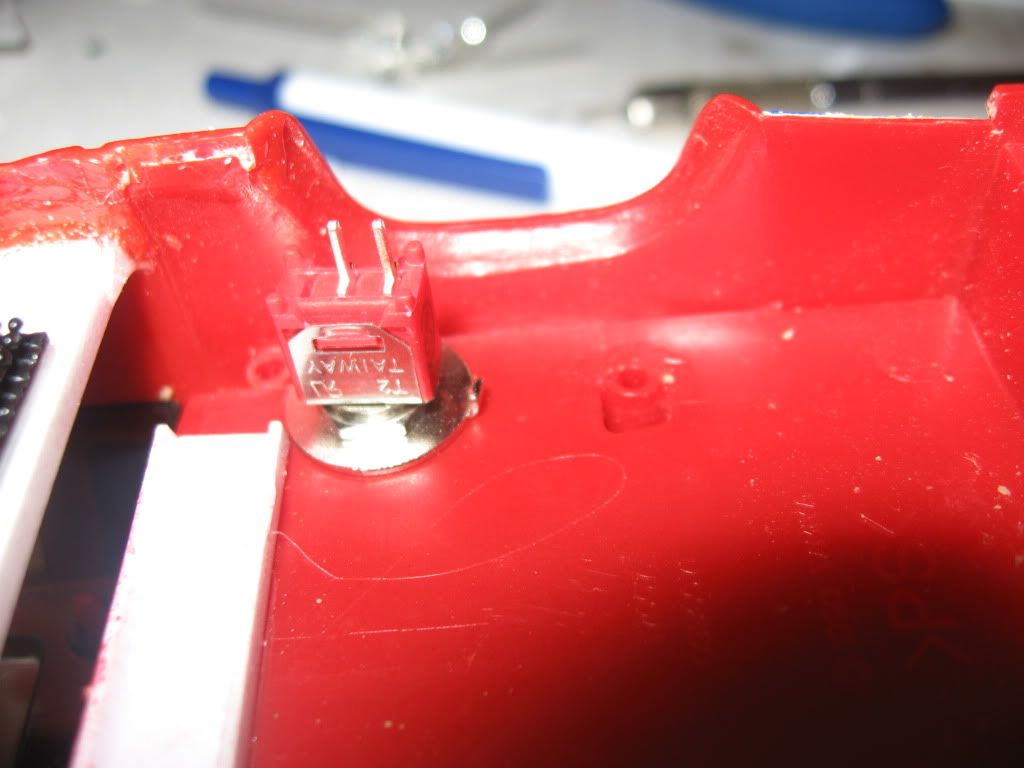 Next, I made a mount for the battery holder. I used some styrene sheet and cut two holes in it for the battery holder's terminals to poke through: 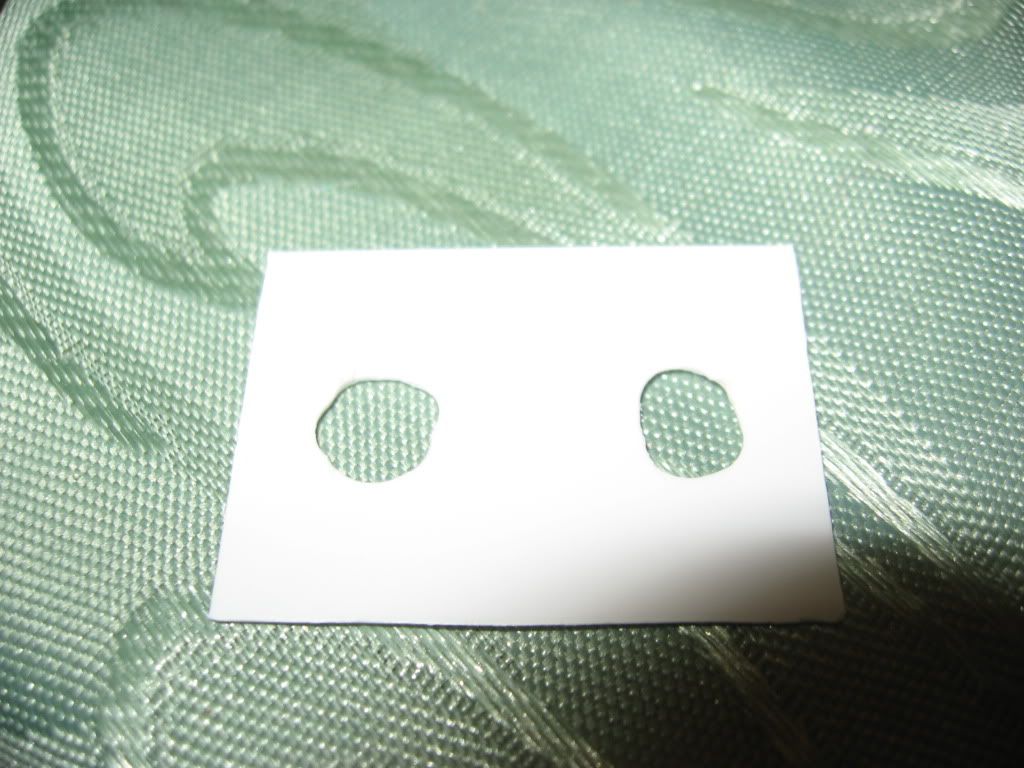 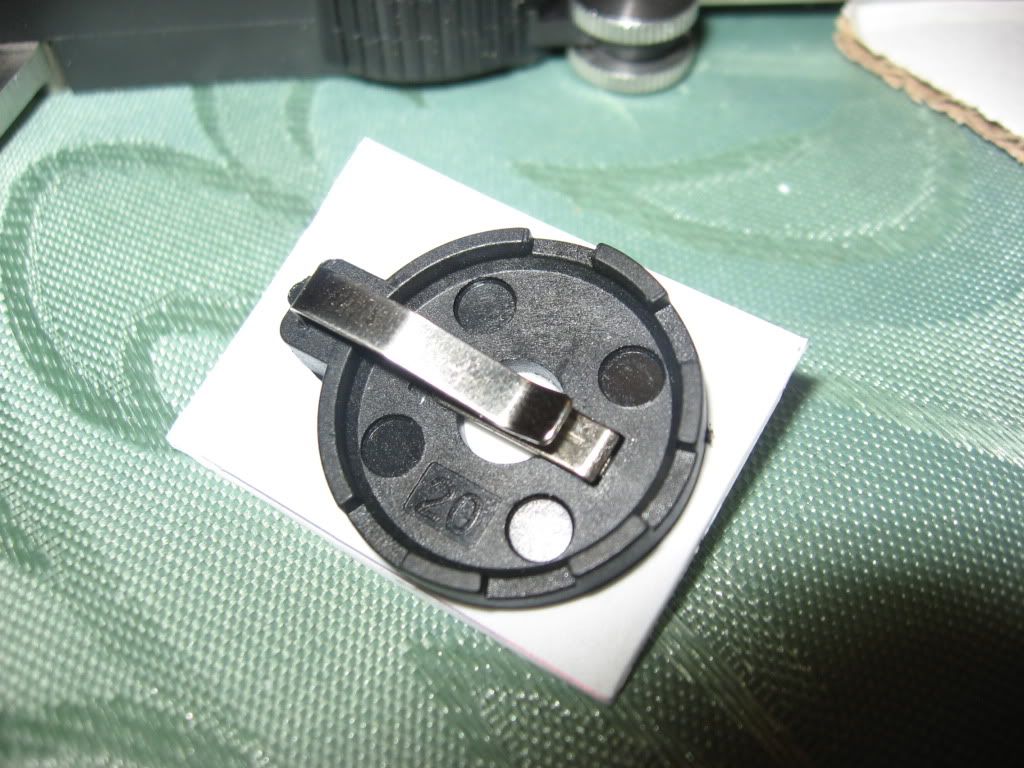 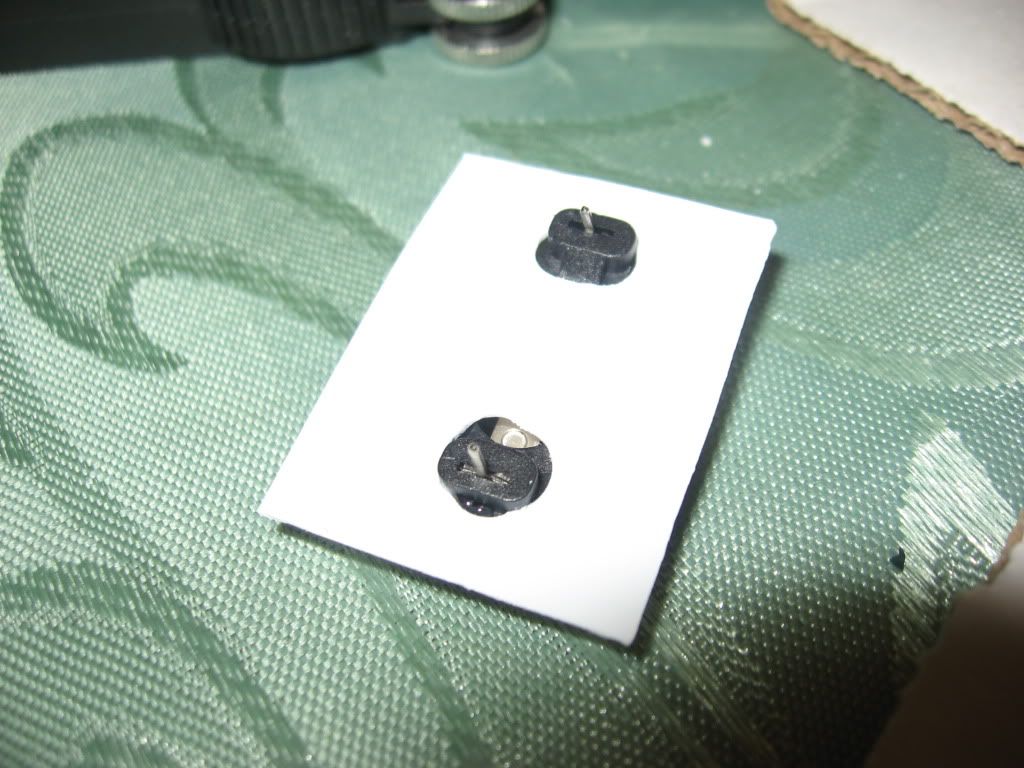 I was planning to just stick the holder in the bed, but the lower bar of the rollbar would make battery changes difficult. Instead, this plate got glued to the rollbar: 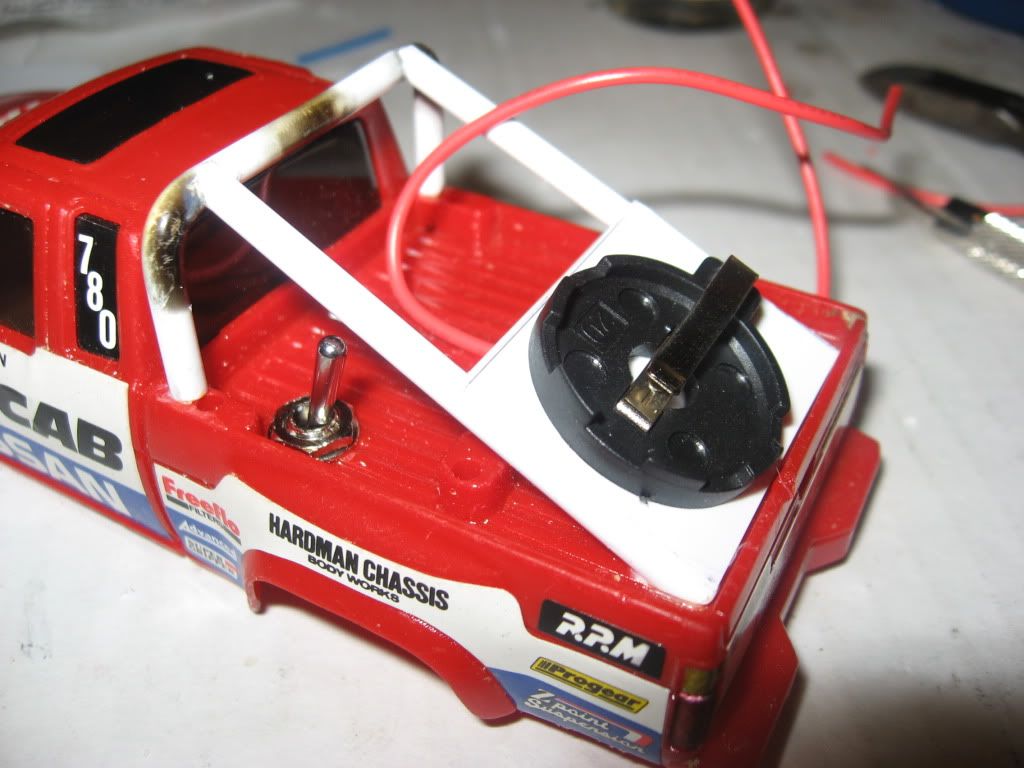 Before I glued the plate and battery holder on, I drilled a small hole in the bed to let the power switch wires poke through. I also soldered on some wires for the battery holder because soldering them on when it's glued in place would be impossible. 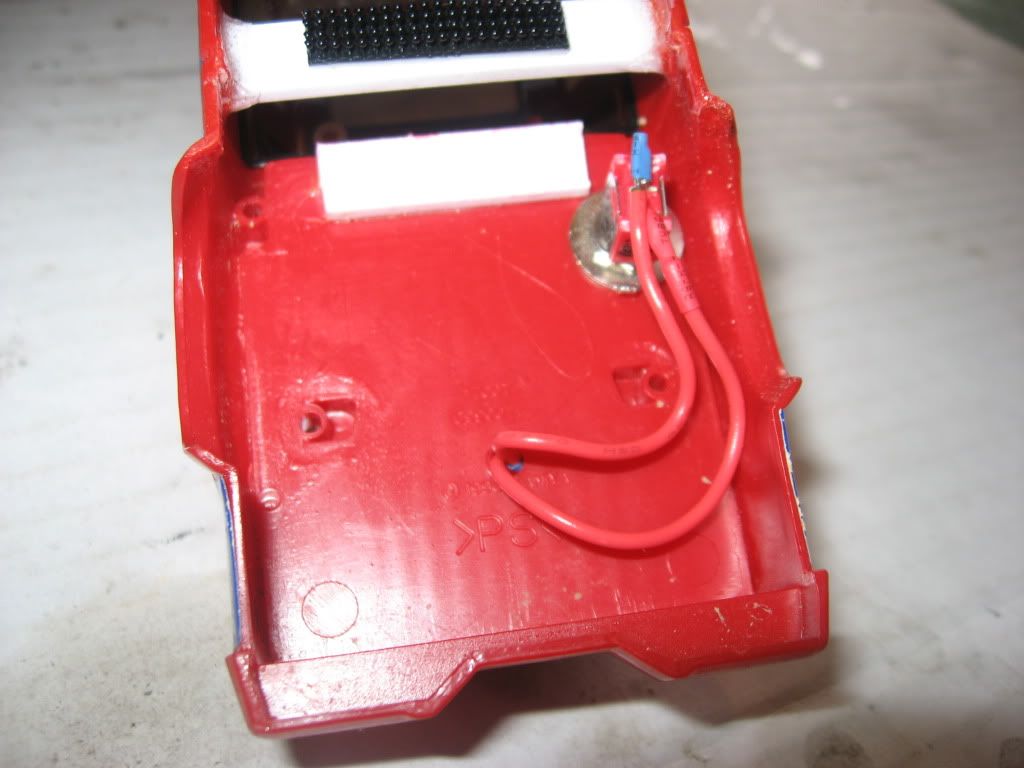 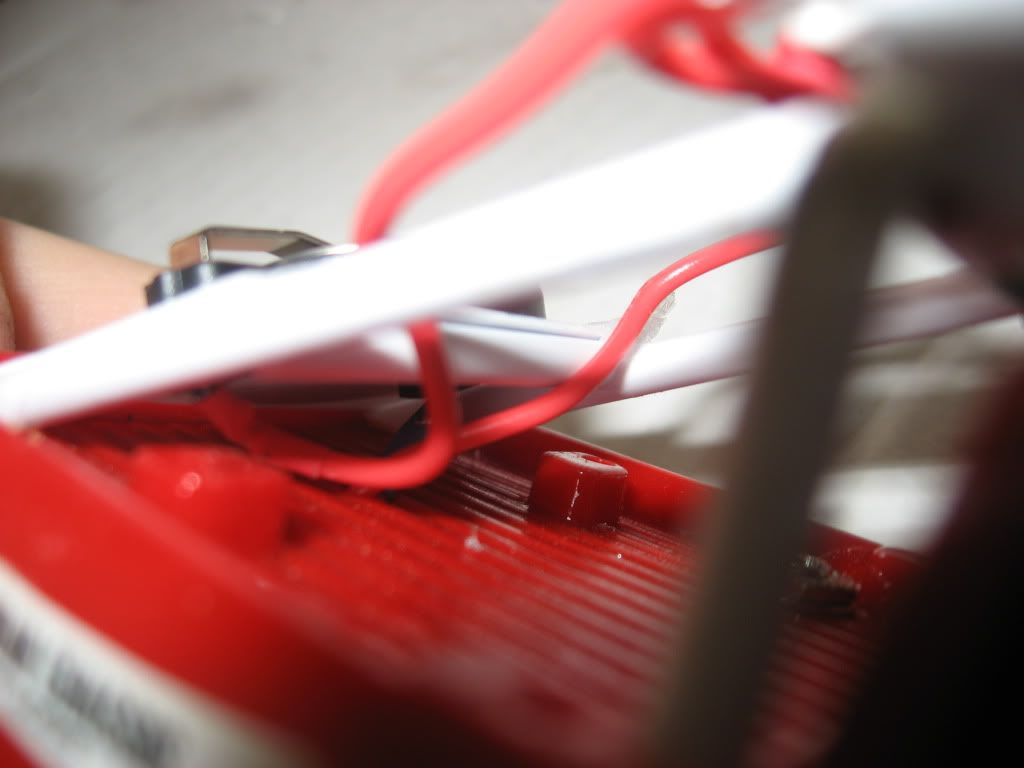 Next, it's time to work on the light bar. Because of their size, I decided to use 3 LEDs (though I think 2 would have been plenty. Four 3mm LEDs would also work). I used some C-channel as a base, drilling 3 holes for the LEDs. Again, measure twice, cut once! Also, err on the LEDs being a little tight in their holes. They are hard to glue, so a press fit will keep them a little more secure. When you install them, remember the longer lead is positive. Or, the flat side of the LED is negative (make sure you remember the polarity, if you wire them backwards they will burn out immediately!!!) 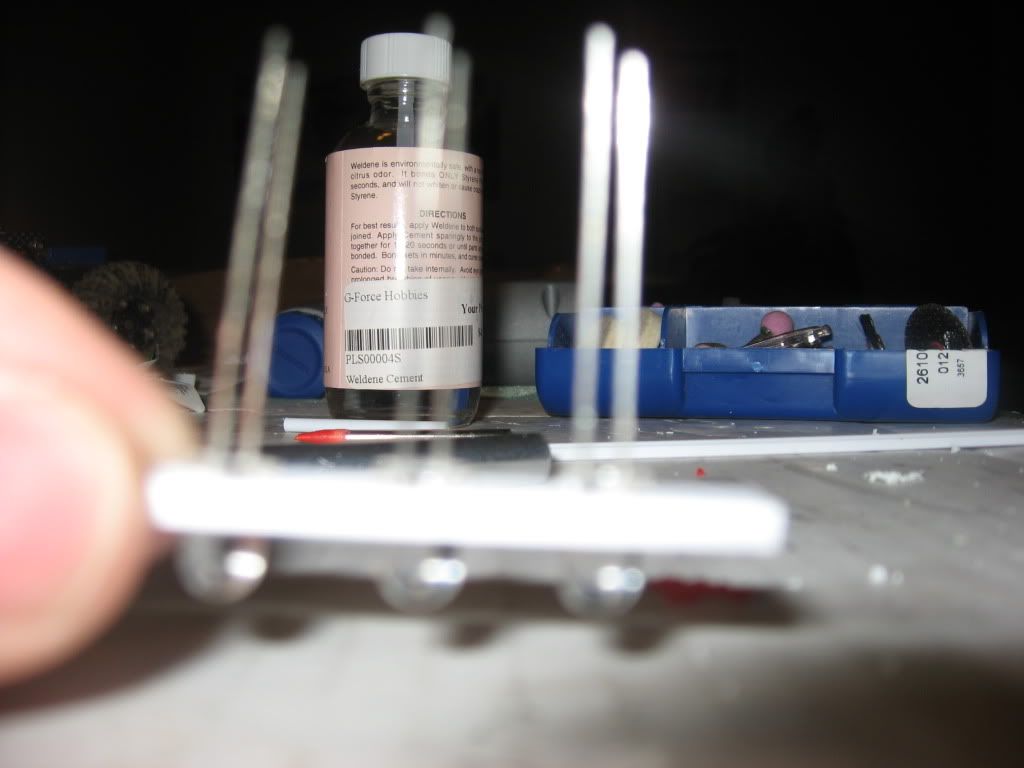 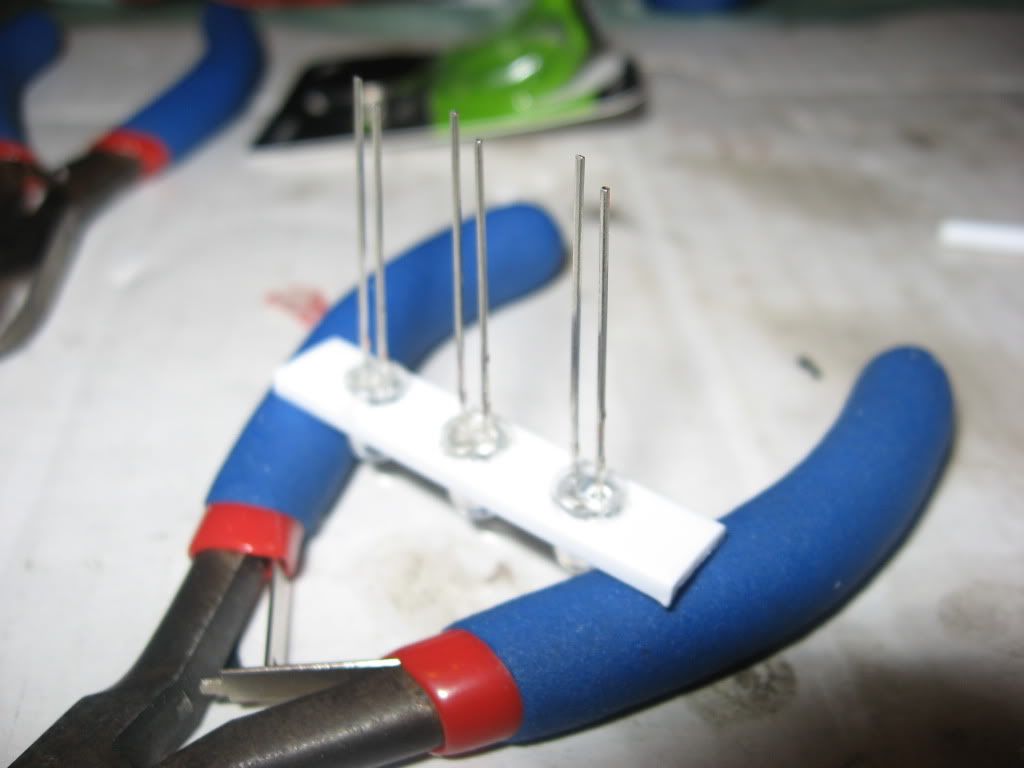 To finish the light bar, I trimmed some more c-channel to make the sides, and used some more plate styrene to make the tops and bottom: 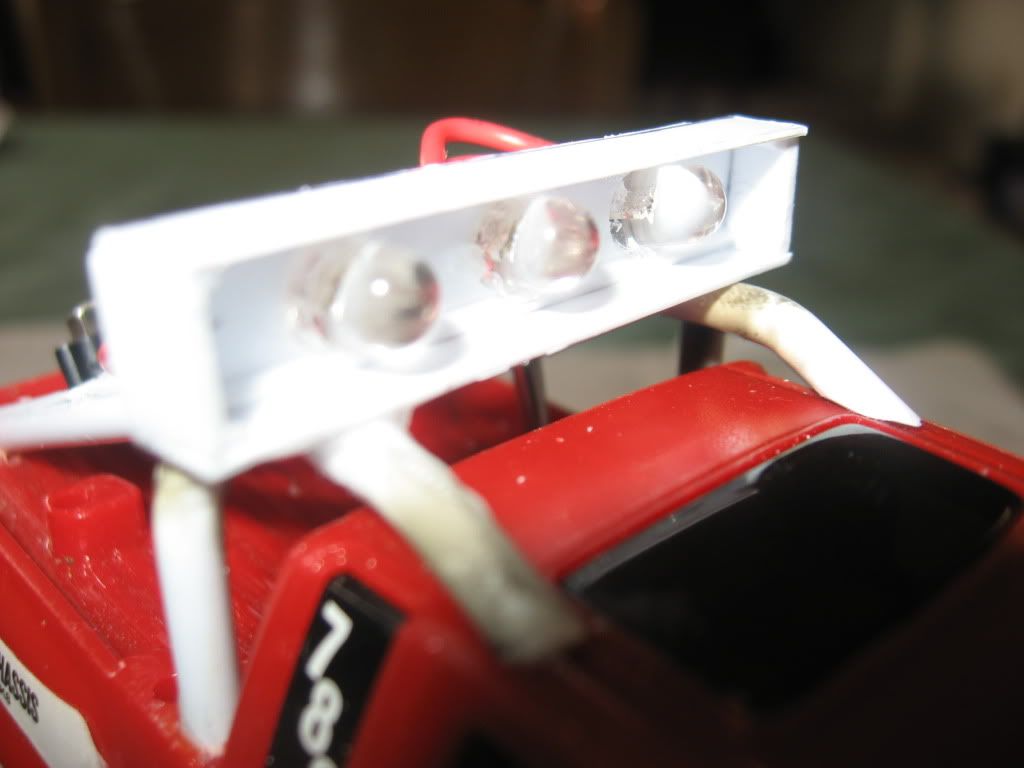 Time to wire the LEDs. I thought wiring them in series would work. It didn't. I could get one LED to light if I jumped it, but two is too much for the button cell. I thought I had a bad LED until my roommate (who is also an engineer) reminded me that current in parallel was identical across all resistors. Duh! I rewired the LEDs in parallel and... 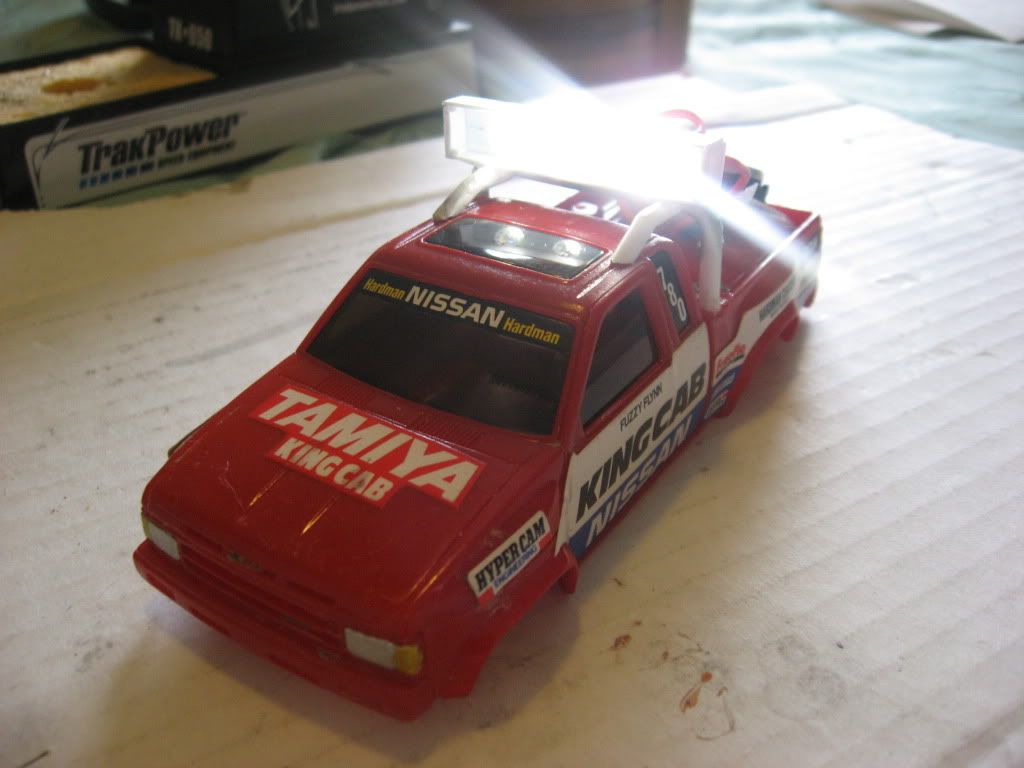 Success!!! All three lights work perfectly at the flip of a switch. Here is what the wiring looks like: 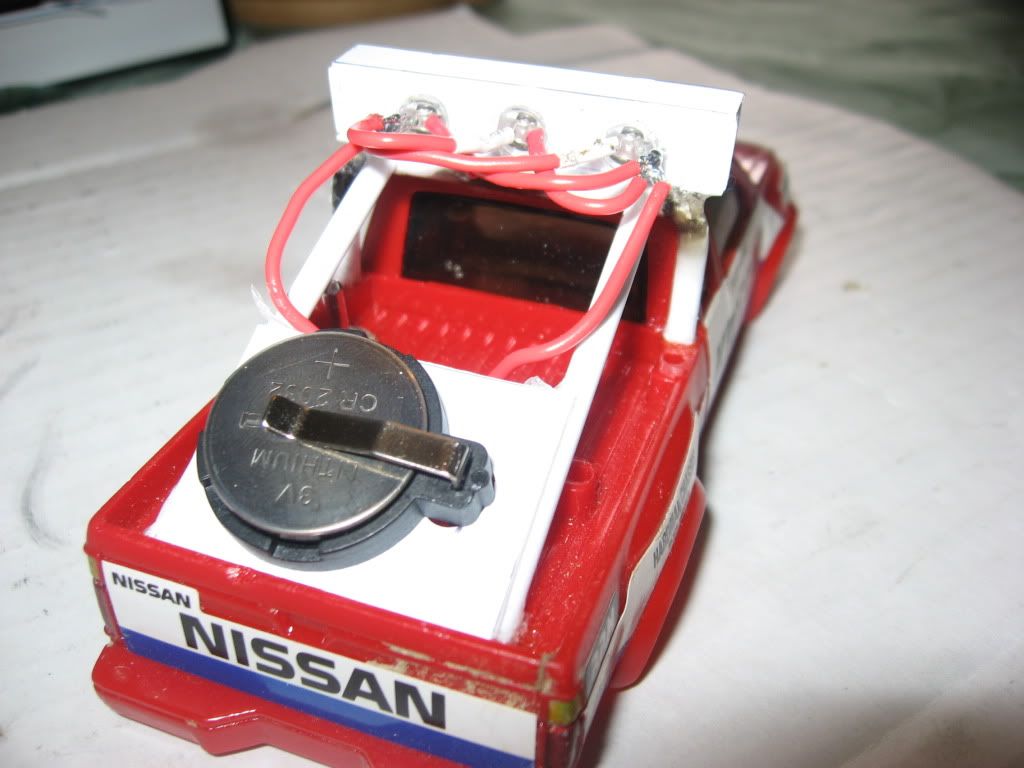 Be sure you have a good soldering iron with a fresh tip. The joints on either end are a pain in the nuts to do. Because of how they are wired, you will have to cover these joints in liquid tape to weatherproof them. Shrink tube works well everywhere else. If you wired everything right, your lights should work just like mine did. Since I finished this in the morning, I took some dark shots in the bathroom to see how bright they were: 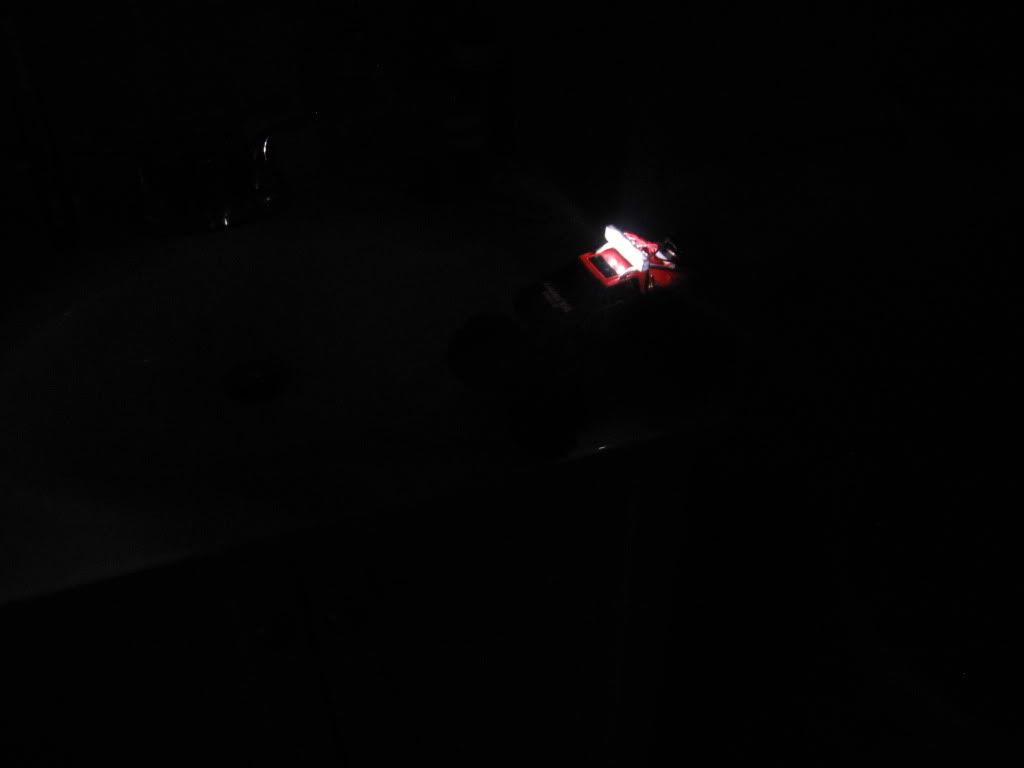 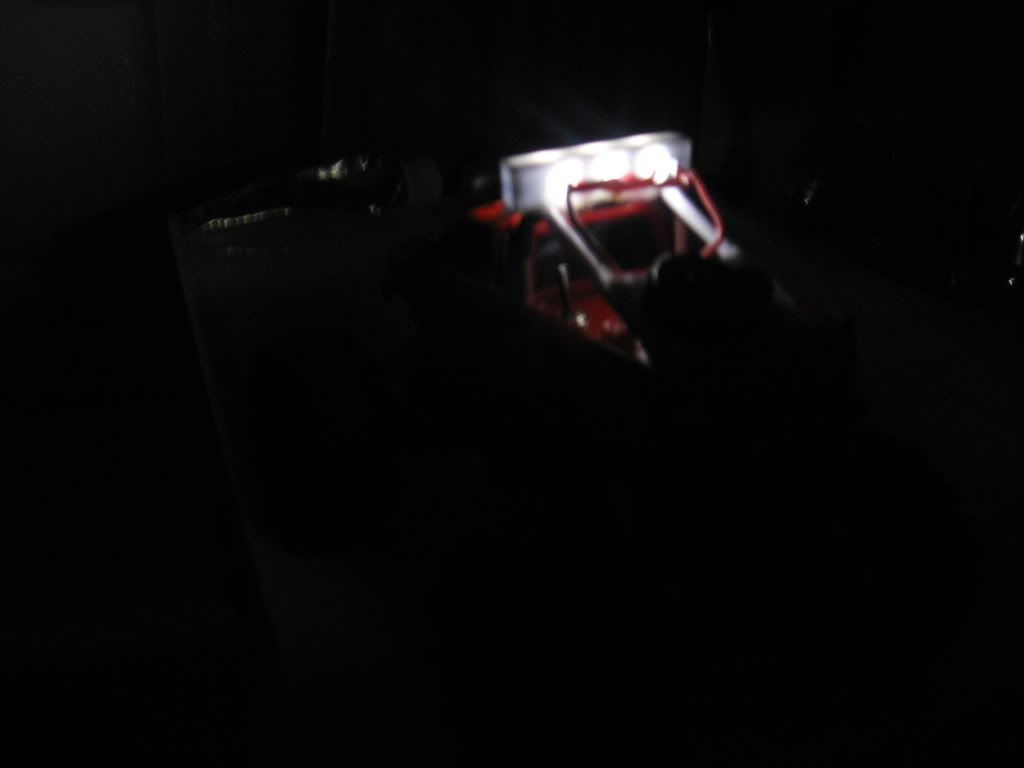 The camera doesn't pick it up, but these are actually bright enough to see the whole room with. Not clear as day, but pretty impressive for about $15 in parts, and definitely enough to light up a trail at night. I'm going to wheel the truck tonight and see how they work.  This took me about 4 hours to pull off, including all the styrene fab work. Level of difficulty? Out of 10 I'd say it's a 6. Depending on what you are doing there is a lot of fabrication and the soldering is really small and can in some tight and weird locations. If you want lights in your scaler, plan on them early because you will have to build some of the truck around the lights. Your skill in styrene work and wiring will really determine how hard this job is. Some tips I can give: Use good wire. I used cheap Radio Shack solid-core wire because I'm cheap and I already regret it. The solid wire is too stiff and brittle. On my scaler I will be using my good Turnigy silicone wire to wire the lights. Obviously plan ahead to figure out where your trouble spots will be. Do a solid job of wiring and don't over-stress the LED's leads because they will break. Also don't go overboard with lights. More lights will drain the battery faster and the batteries are like $5 apiece. More LEDs will also make each one a little dimmer, so plan for that. I think the 3mm LEDs have slightly less amp draw, so they should be a little brighter. To finish off, here's my wiring diagram for this light bar: 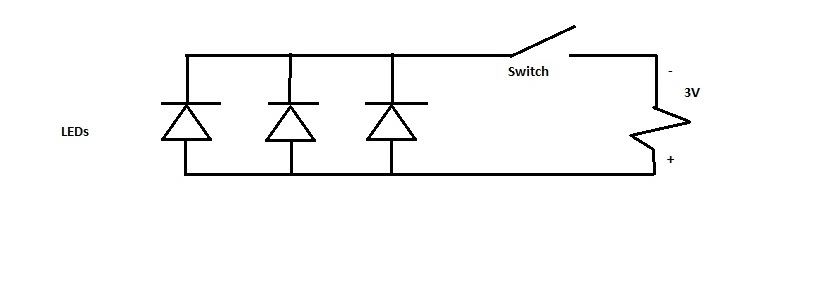 Enjoy, hope to see more people lighting their rigs up! Night crawling pictures when I get off work! |

|  |
| Sponsored Links | |
| | |
|
01-13-2012, 12:39 PM
| #2 |
| Rock Crawler   Join Date: Dec 2010 Location: Madison Co.,Ms.
Posts: 711
|
Sweet dude, been awhile since any tech showed up around here.  |
|
| |
|
01-13-2012, 03:04 PM
| #3 |
| RCC Addict Join Date: Jan 2012 Location: Sweden
Posts: 1,809
|
I'm not surprised by the bright light. Without a current regulating (read: reducing) resistor there's a big risk you'll feed the LEDs too much current, causing them to overheat or at least drastically shorten their life span.
|
|
| |
|
01-13-2012, 06:59 PM
| #4 |
| Rock Crawler Join Date: Oct 2011 Location: Lexington
Posts: 503
|
The CR2032 operates at 0.2 mA and has a capacity of 220 mAh at 3V. It's not going to burn out the LEDs. Running two LEDs in series didn't produce enough current to light either of them. That's why I picked a button battery because it is low voltage and low current and light. I took a few pics and a pair of videos of the lights in action. Unfortunately, as you will hear in the second video, my pinion got cabin fever and decided to leave the party. Luckily I got my Radical brass pinions in today so that shouldn't happen again Losi Micro Crawler :: MVI_0601.mp4 video by Hondahead88 - Photobucket Losi Micro Crawler :: MVI_0603.mp4 video by Hondahead88 - Photobucket   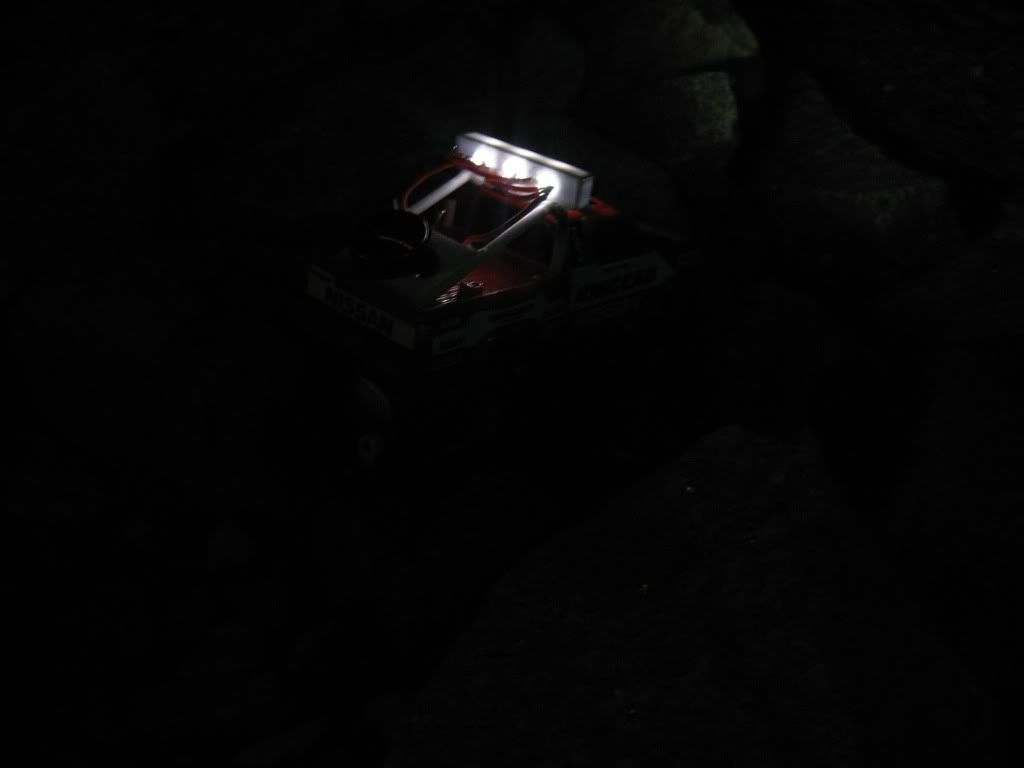 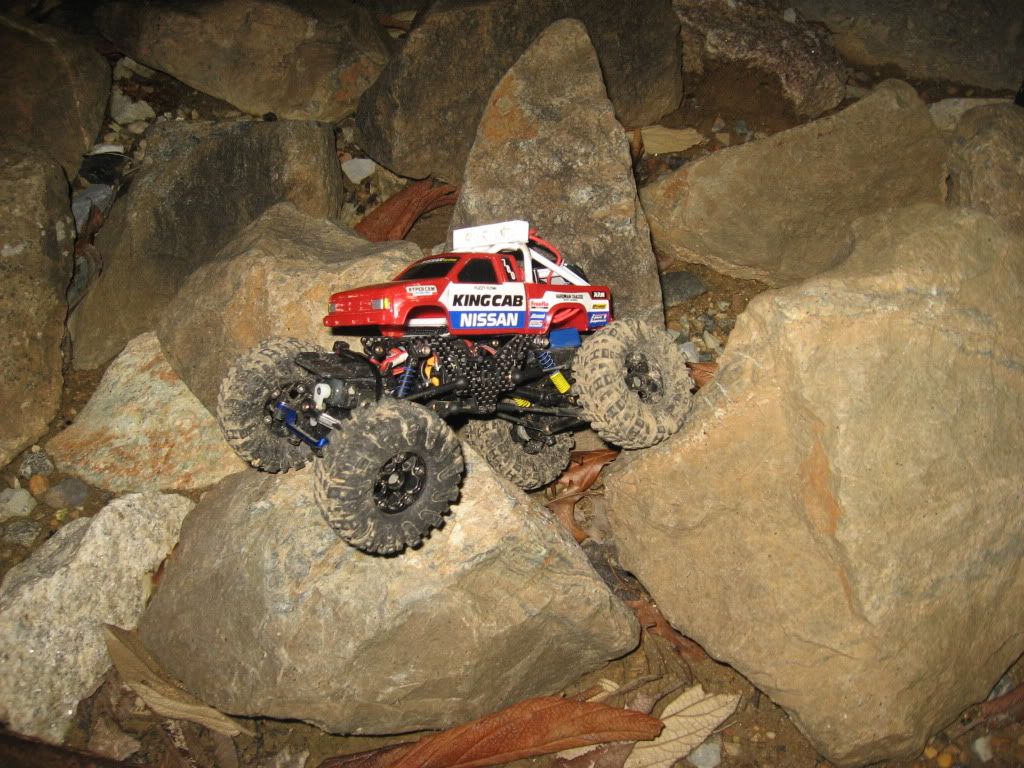 Last edited by 8695Beaters; 01-15-2012 at 08:37 PM. |
|
| |
|
01-14-2012, 12:00 PM
| #5 |
| Quarry Creeper Join Date: Jul 2011 Location: olympia
Posts: 435
|
came out great |
|
| |
|
01-14-2012, 12:13 PM
| #6 |
| Rock Crawler Join Date: Sep 2005 Location: Duncan, BC, Canada
Posts: 750
|
or an old mouse wire will give you 5-7 small wires that are quite flexible. Like the mod, think I'm gonna do it on one of my rigs. |
|
| |
|
01-14-2012, 04:02 PM
| #7 |
| Rock Crawler Join Date: Oct 2011 Location: Lexington
Posts: 503
|
I think the body is misleading. It's not a 1/24 it's a 1/32. On a 1/24 everything would be more scale sized. I'd prefer using a toggle switch as well, but it was hard finding a small switch like this at RS. For my scaler project I will searching for smaller parts that fit better. Also, the wire is 22 AWG and I had a spool of it in my toolbox. No leftover computers in my apartment lol.
|
|
| |
|
01-15-2012, 08:38 PM
| #8 |
| Rock Crawler Join Date: Oct 2011 Location: Lexington
Posts: 503
|
Update: Fixed videos in my second post. Check 'em out to see the lights and crawler at work!
|
|
| |
|
01-17-2012, 12:04 AM
| #9 |
| Pebble Pounder Join Date: Jan 2010 Location: Roswell
Posts: 177
|
I use dip switches when I need small switches for a scale build. LED's come in 10mm, 5mm, 3mm and a few smaller sizes, flat top led's are the best for marker lights. I use 32 gauge wire on my micro builds, it is good quality and can be found at model train stores.  |
|
| |
|
 DIY: How To Make Your Own Lights - Similar Threads
 | ||||
| Thread | Thread Starter | Forum | Replies | Last Post |
| DIY topper? | Hardline | Paint and Body | 5 | 11-20-2011 12:41 PM |
| DIY beadlocks | slobin3d | Chit Chat | 12 | 01-14-2011 08:36 PM |
| DIY Lights | mix237 | Tamiya XC/CC01 | 18 | 04-01-2010 10:31 PM |
| Diy body | mickyteng | Losi Micro-Rock Crawler | 19 | 12-23-2009 05:40 PM |
| Diy Pvr | Jeckler | Chit Chat | 26 | 12-18-2006 04:11 AM |
| |


 Linear Mode


