| |
| |||||||
 |
| | LinkBack | Thread Tools | Display Modes |
 01-29-2024, 12:08 AM
| #21 |
| Quarry Creeper Join Date: Oct 2012 Location: Chicago Area
Posts: 327
|
At this point, I started getting super excited. Things were looking good, and I was ready to start on the meat and potatoes. 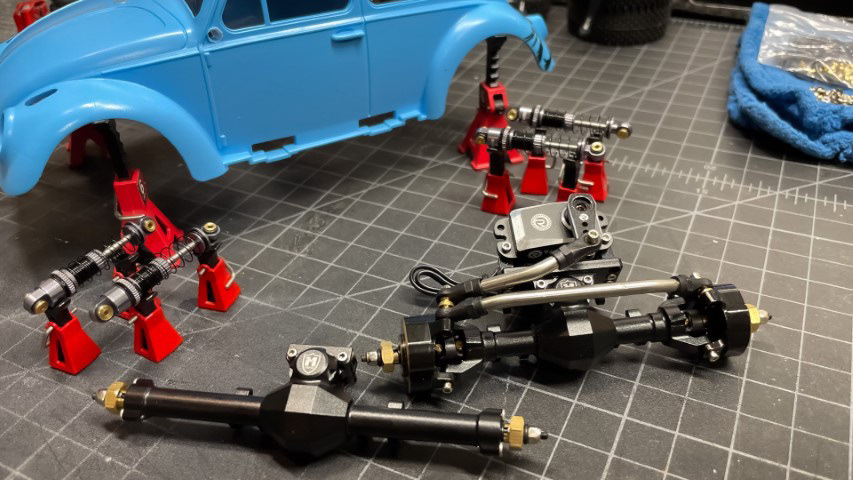 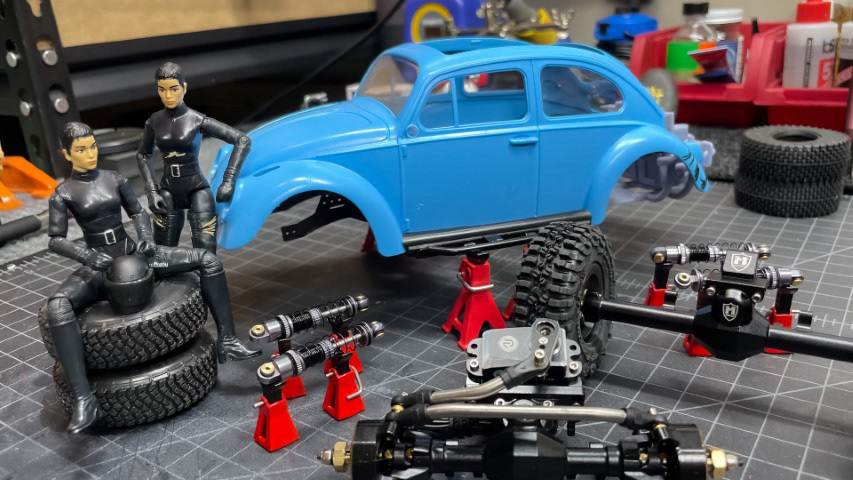 In this hobby, I tend to buy things in two's so I have an extra. You can now see two Salena's. I was planning on making one a driver and using the other as a stunt double. Mainly because I have to cut the legs off to get them into the driver's seat. But instead of doing that... I started liking the idea that they were twins. 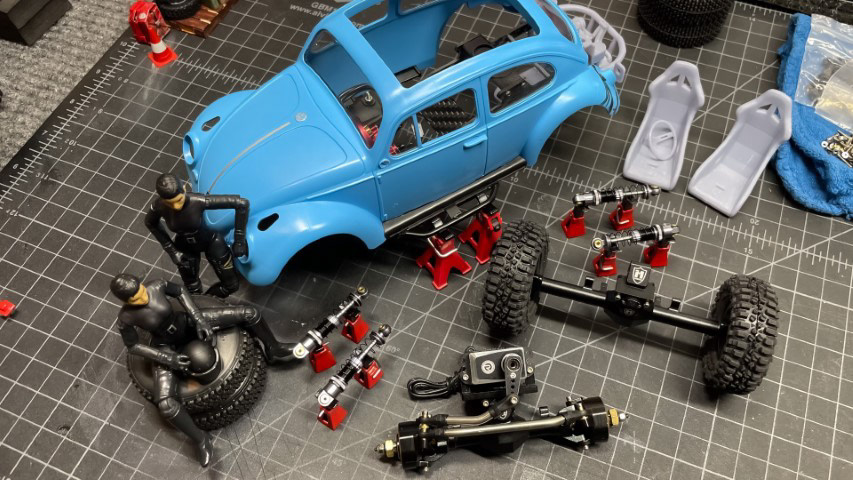 Which started a new idea in my head. I'm always struggling with what color to paint, what kind of decals, how to finish the detailing, etc... Personally, I've found that it helps to imagine a backstory for the build. Who is driving it? What kind of person are they? What's their story? I felt that this helps me envision what the final build will look like. And with that thought in mind, I dubbed these girls the Bang-Bang twins. And in the back of my mind, a story started to unfold... but for now, back to the meat and potatoes! I got the chassis all finished and needed a to figure out how the body would attach in a secure way. The rock rails were the first step. 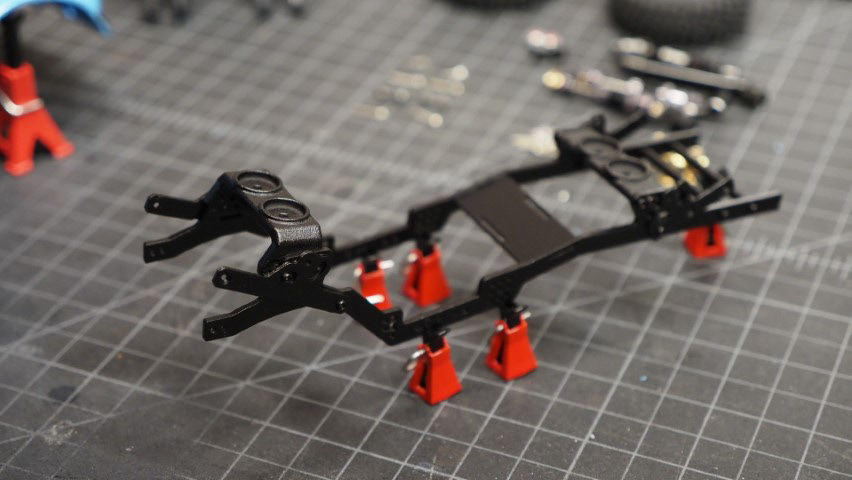 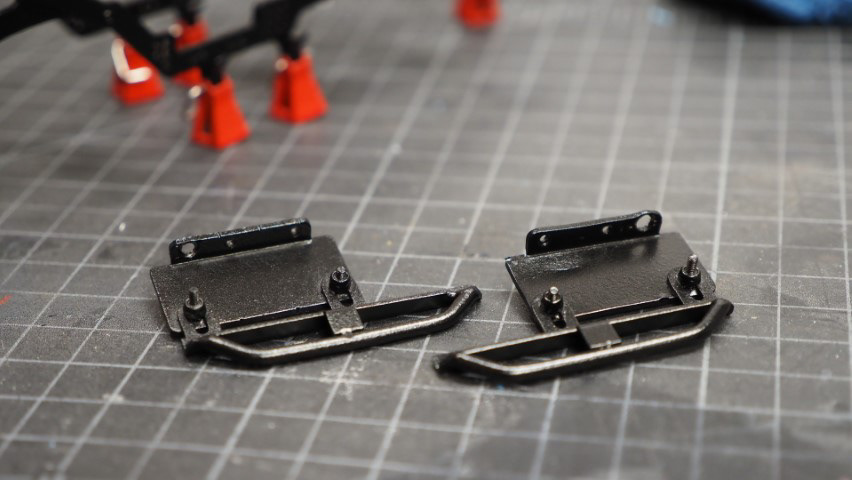 The grooves on the rails held the body in place from side to side. And I just needed to figure out how to secure it, preferably not using magnets. I knew this build would be too heavy to rely only on a magnetized body. 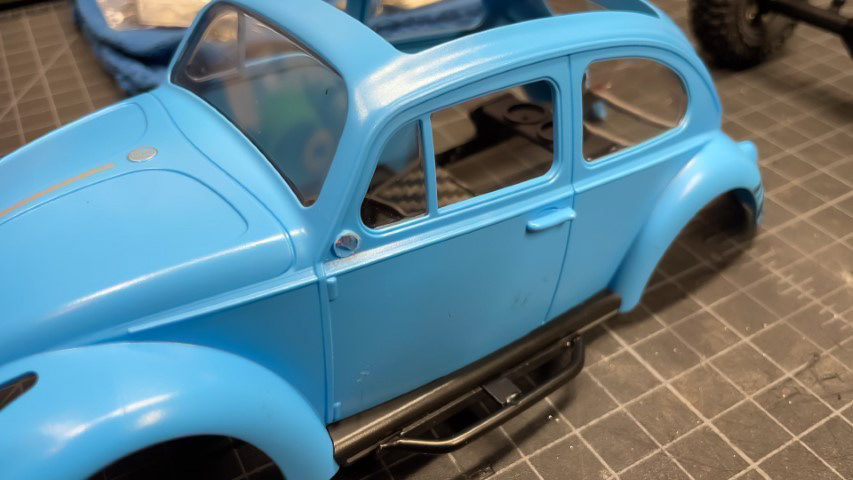 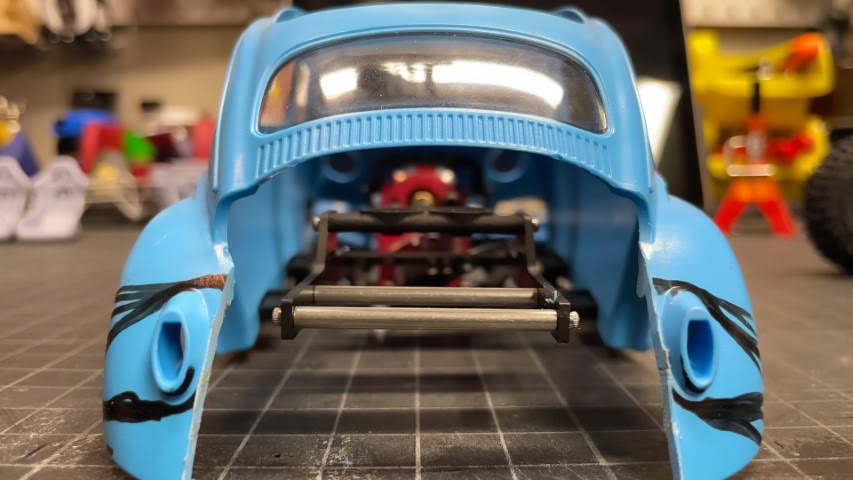 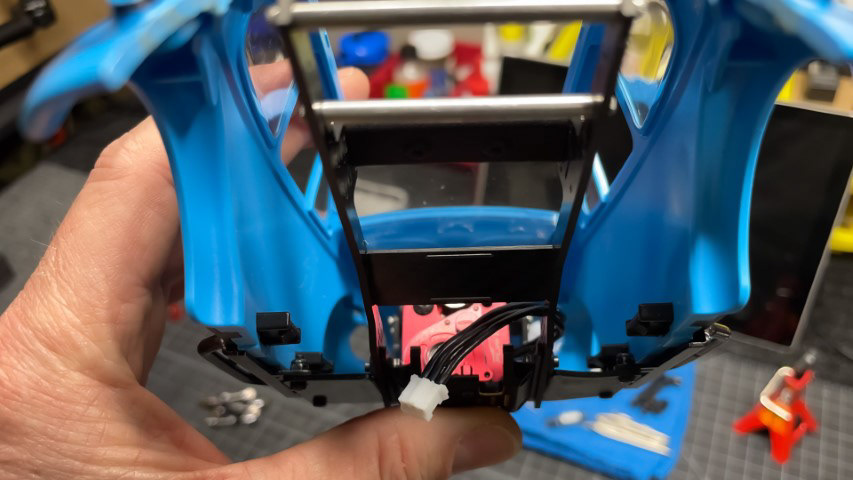 The Meus chassis fit perfect! Things were going very smooth (for once) but I was still trying to figure out how to secure the body. The best option was to screw it down. It would be nice and secure, but we all hate having to remove screws to change the battery right?.... well me too. Buuuuut, then I realized, the Beetle had a removable roof! Why not make it a top loading battery! So, with that decision made, I used four screws on the bottom to secure the body. 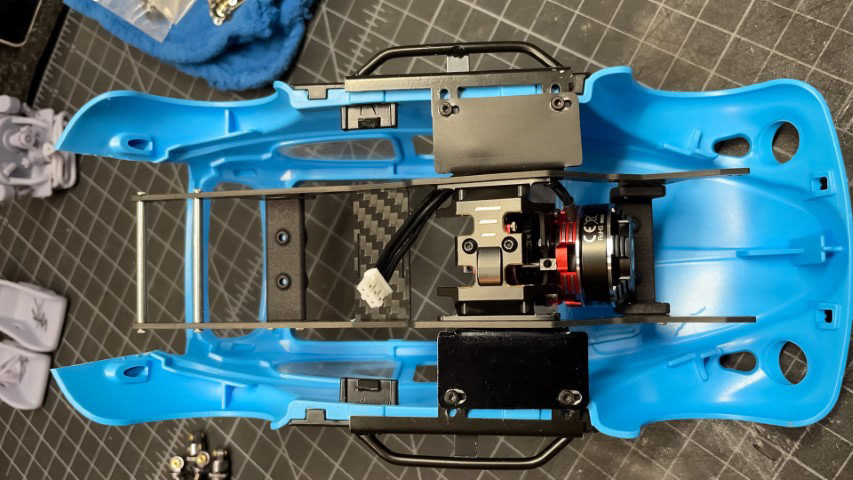 |

|  |
| Sponsored Links | |
| | |
|
01-29-2024, 12:12 AM
| #22 |
| Quarry Creeper Join Date: Oct 2012 Location: Chicago Area
Posts: 327
|
Next, I dropped in the motor and transmission. You simply can't beat Furitek!  And then came the links. The chassis kit had links included. I was able to use some, but I had to make front and rear upper links from some tube and threaded rod. 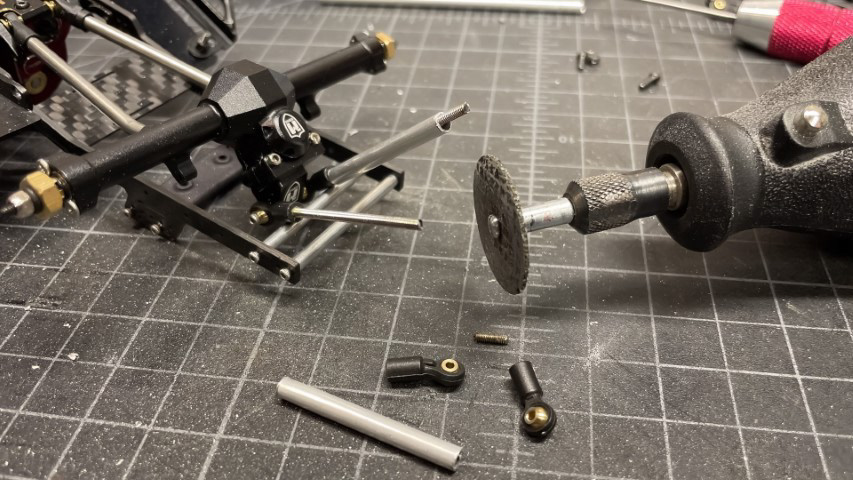 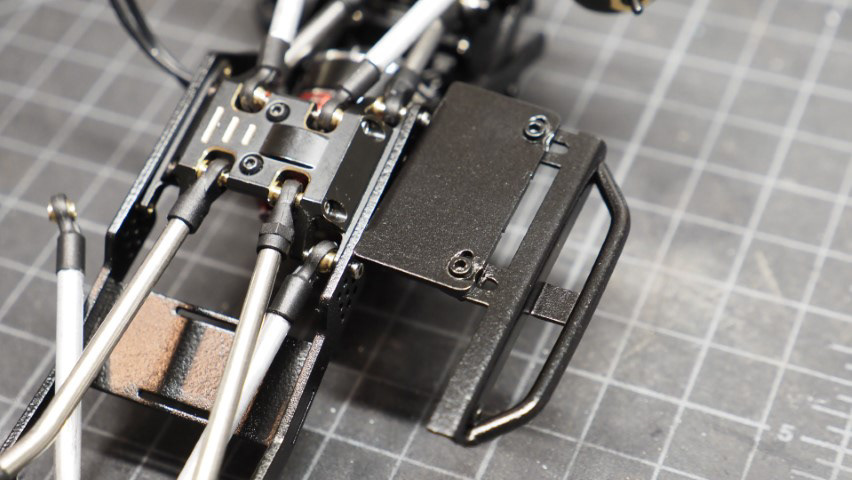 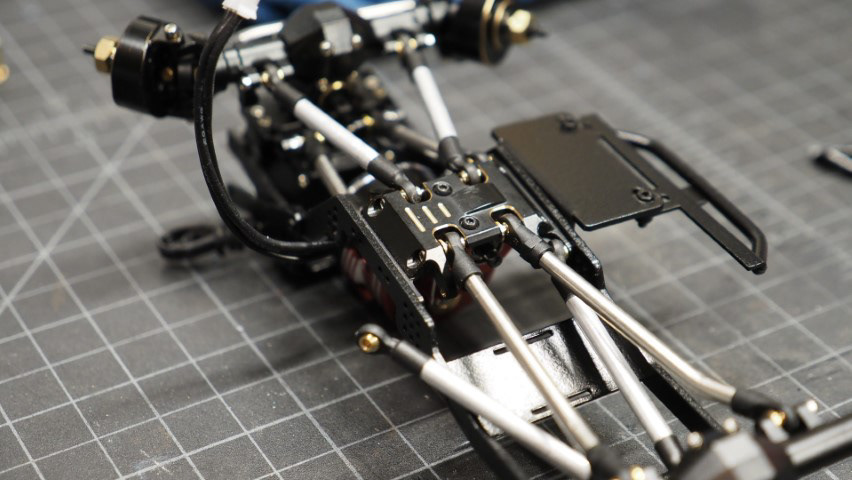 With links on, it was time to set the wheel base. 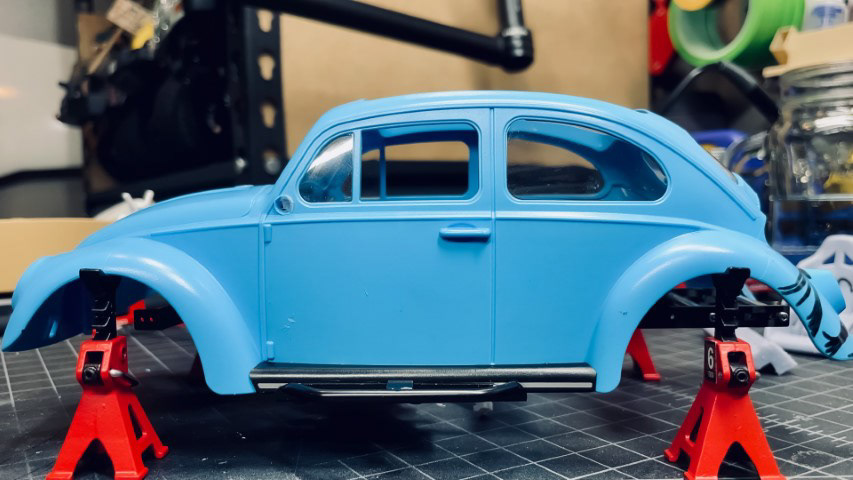 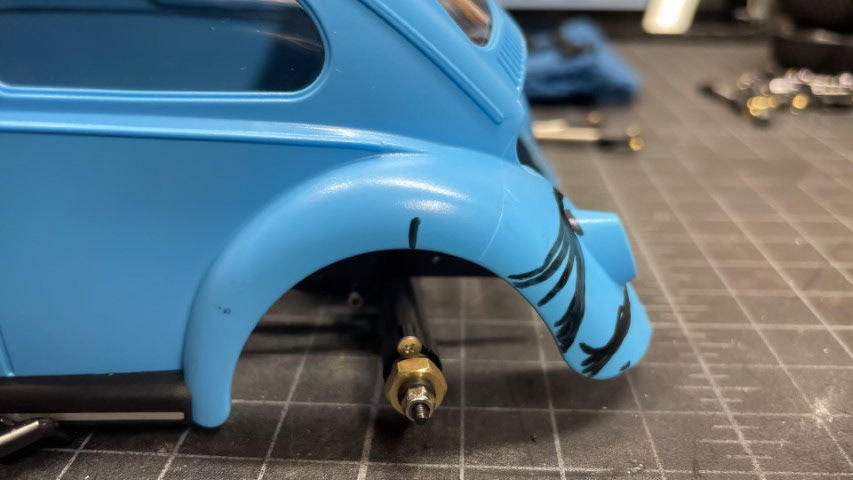 The progress was flying along... at this point I was on day four. I'm self-employed and this is a slow time of year for me. And by that, I mean I had put in four 1213 hour days on this project!  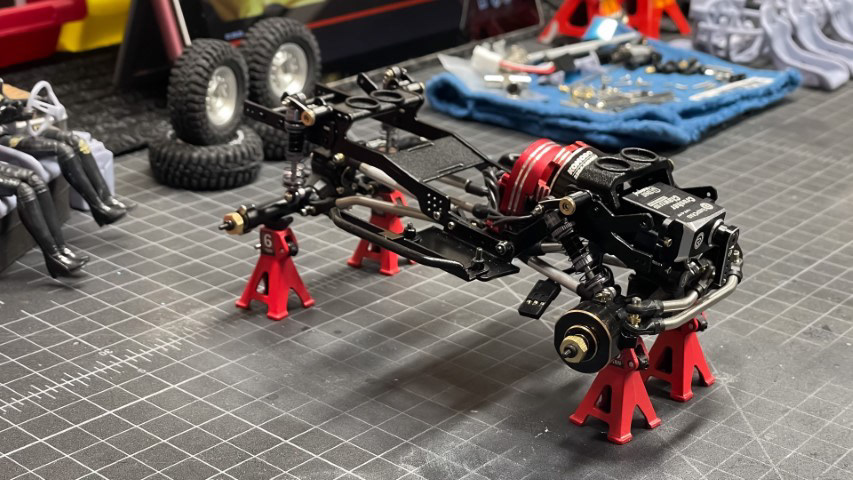 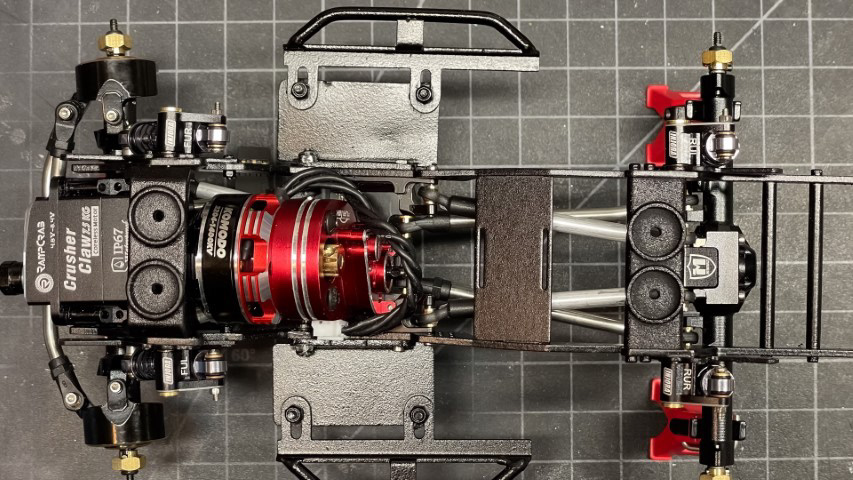 |
|
| |
|
01-29-2024, 12:15 AM
| #23 |
| Quarry Creeper Join Date: Oct 2012 Location: Chicago Area
Posts: 327
|
Now on to the shocks. I was using the Injora Flexblades for the first time. I'm not sure how I feel about them, but on this build they helped to get the articulation I was looking for. 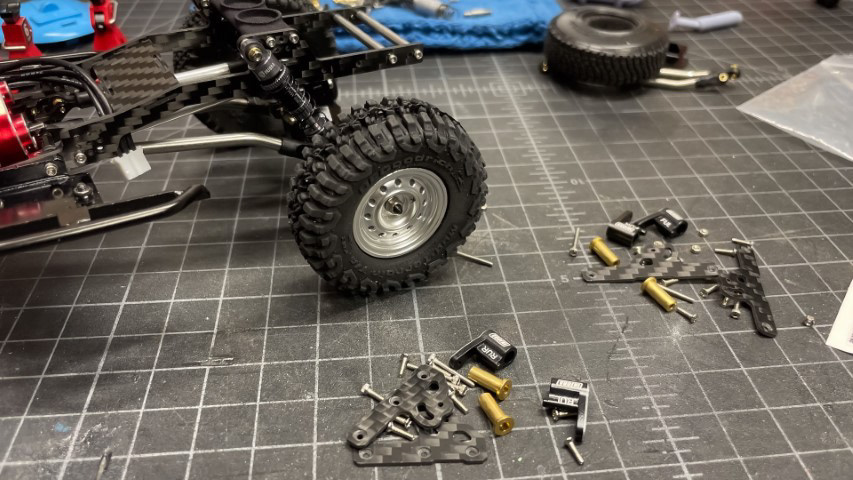 I felt really good at this point. The stance was set and it was looking mean!... Dr. STANCE is in the HOUSE!  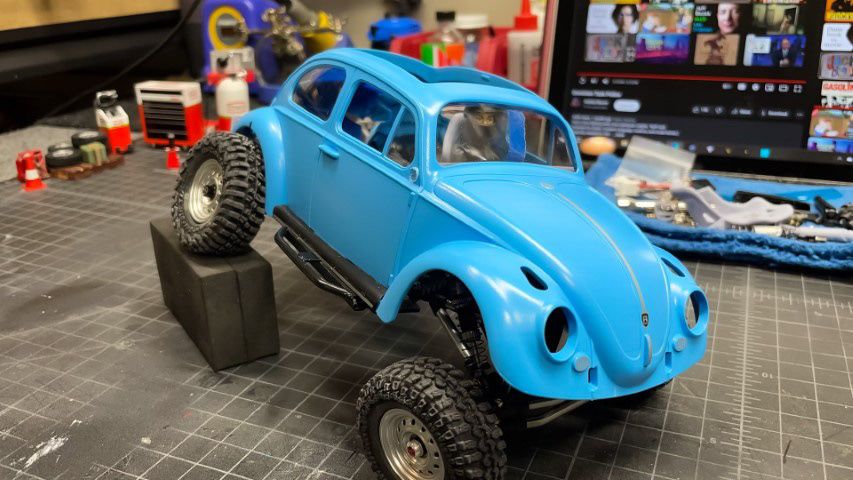 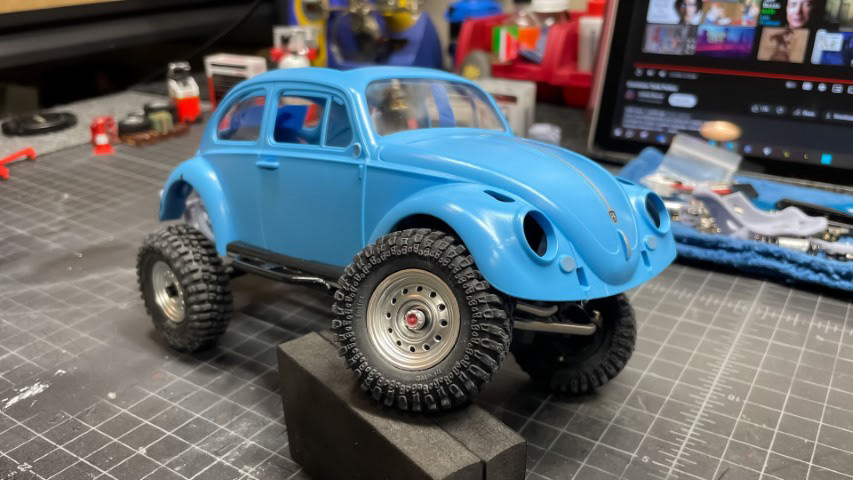 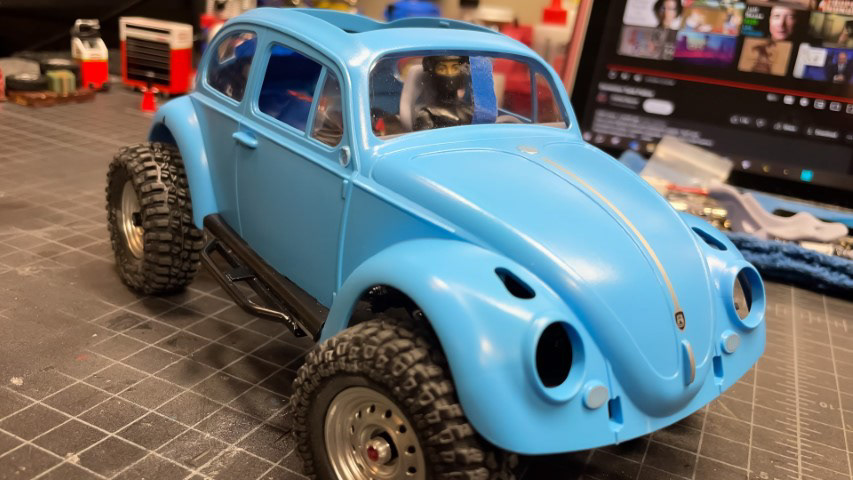 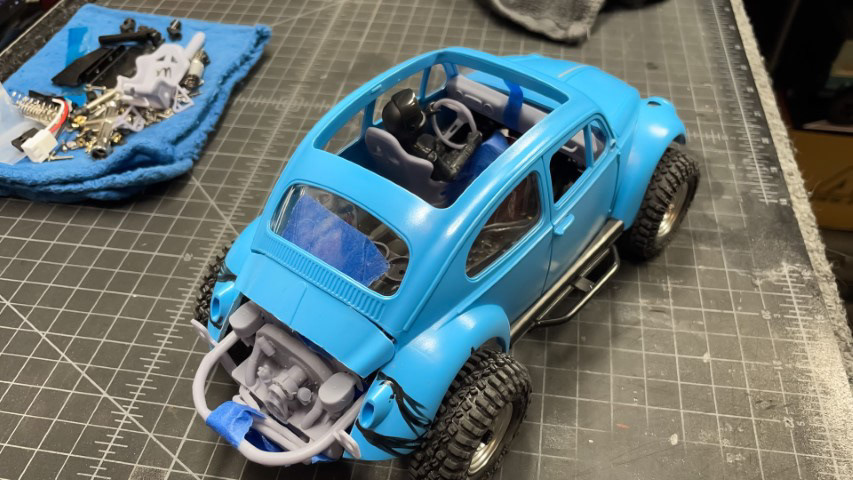 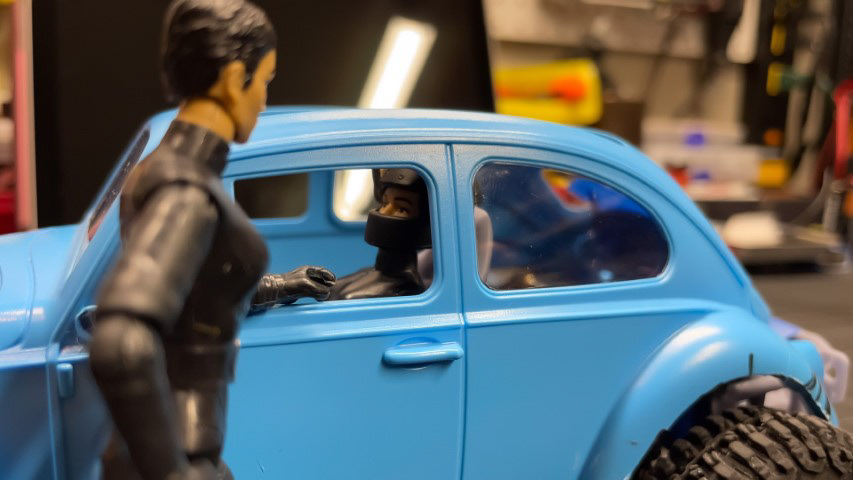 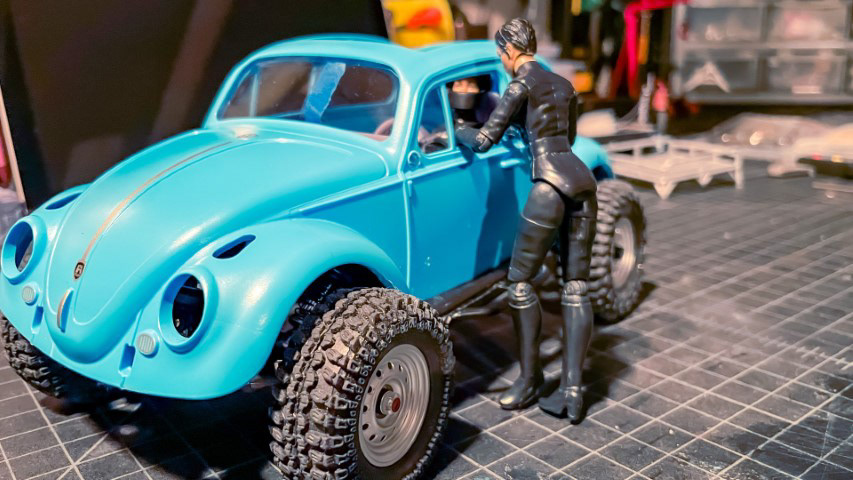 |
|
| |
|
01-29-2024, 12:16 AM
| #24 |
| Quarry Creeper Join Date: Oct 2012 Location: Chicago Area
Posts: 327
|
Man, things were moving right along. This shows the power of thought before action. I sat and really stared at this project before I started. I visualized all the parts I needed, I speculated on the challenges I'd face, and I feel like my hobby skills have really been improving lately. I find I like the modeling almost more than the RC itself. I started in on the body details. I used my favorite rubber trim that I found at Home Depot. It makes great fender flares. Here they are being test fitted. 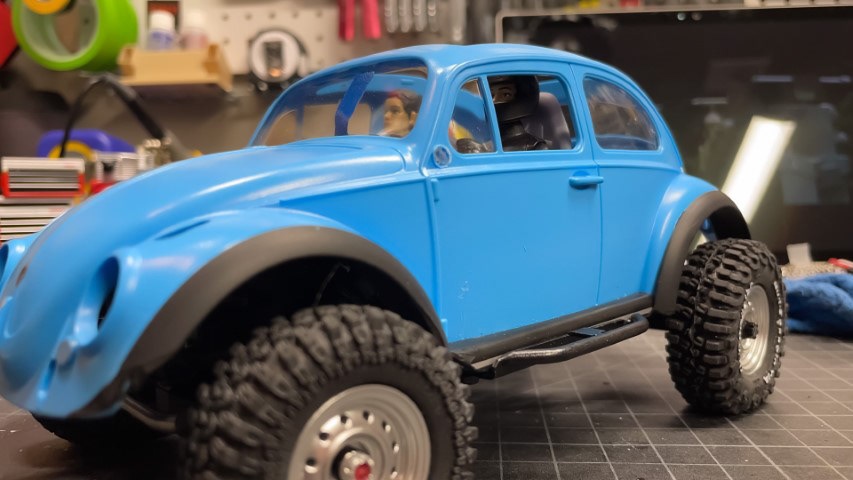 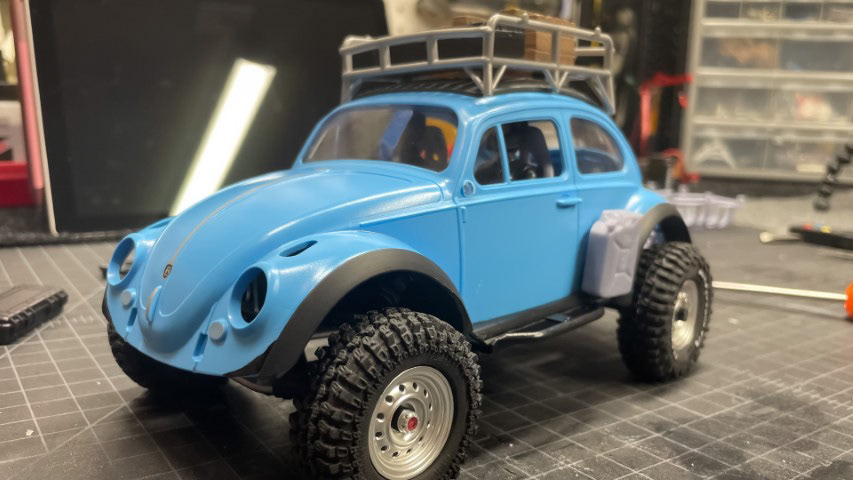 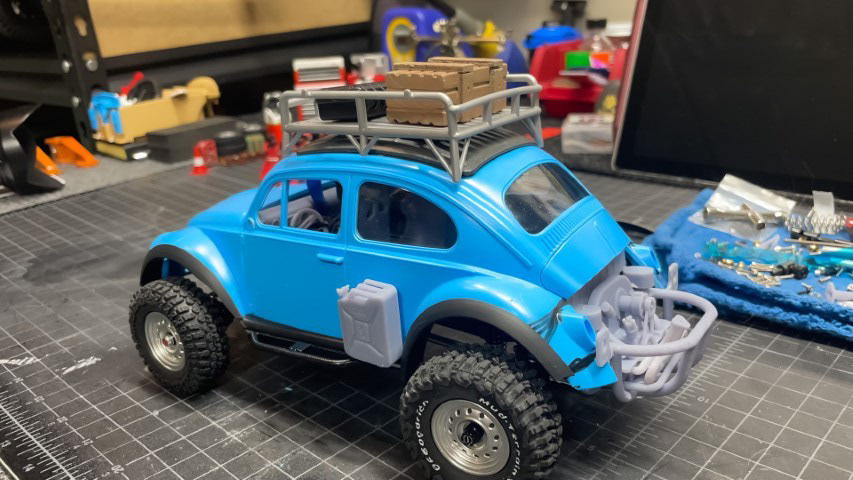 |
|
| |
|
01-29-2024, 12:19 AM
| #25 |
| Quarry Creeper Join Date: Oct 2012 Location: Chicago Area
Posts: 327
|
Then I moved on to the interior. I wasn't sure what I was going to do. I needed to plant the bucket seats on something. Usually when I reach a point where I don't know what to do, I'd just glob a lot of glue on it 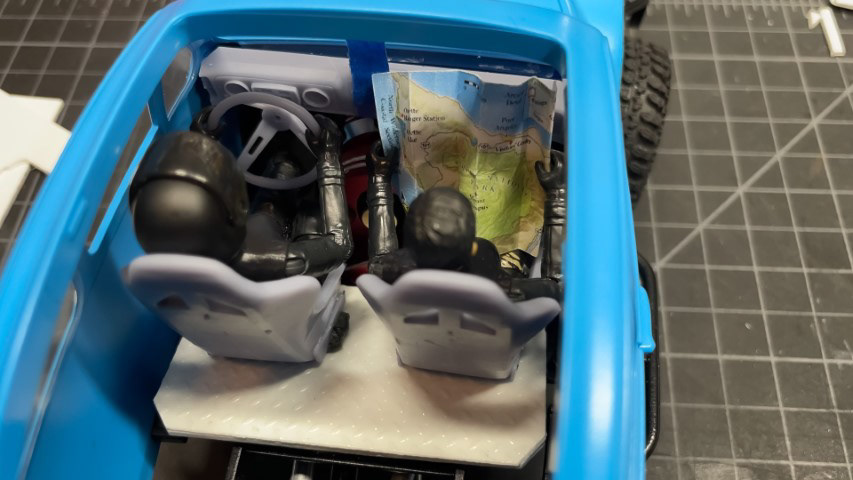 I used 2mm styrene, then i wrapped that in a Diamond pattern styrene for some cool flare. It seemed to be working... 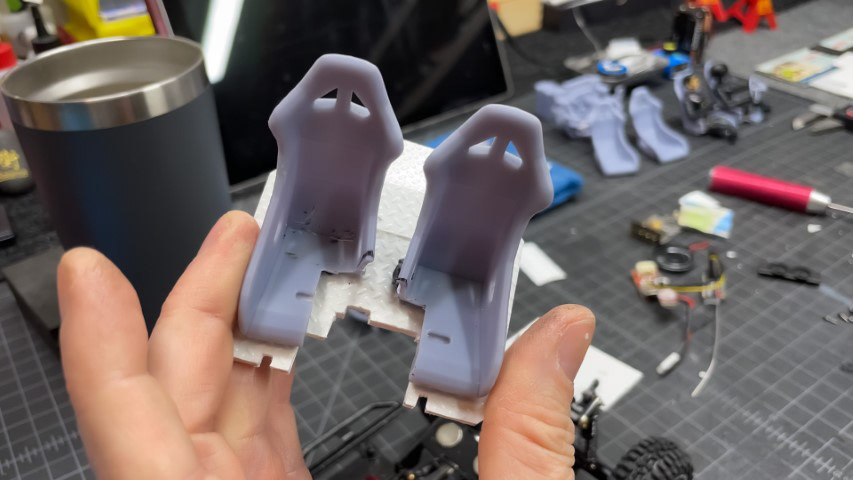 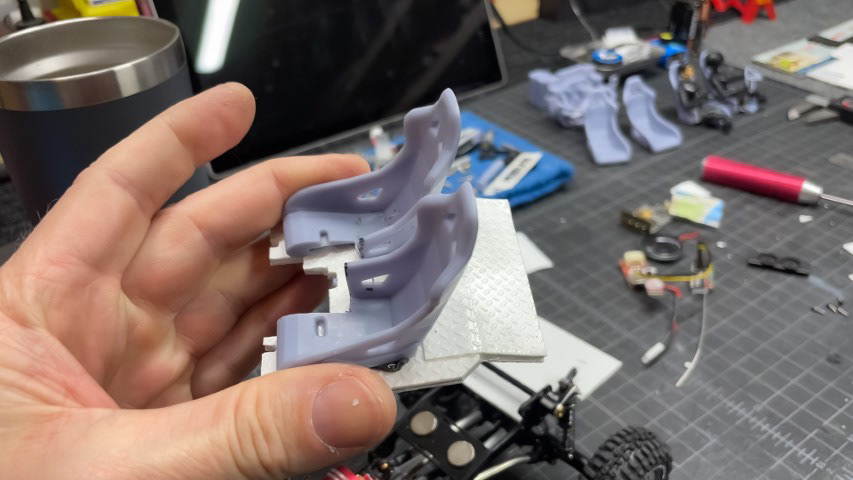 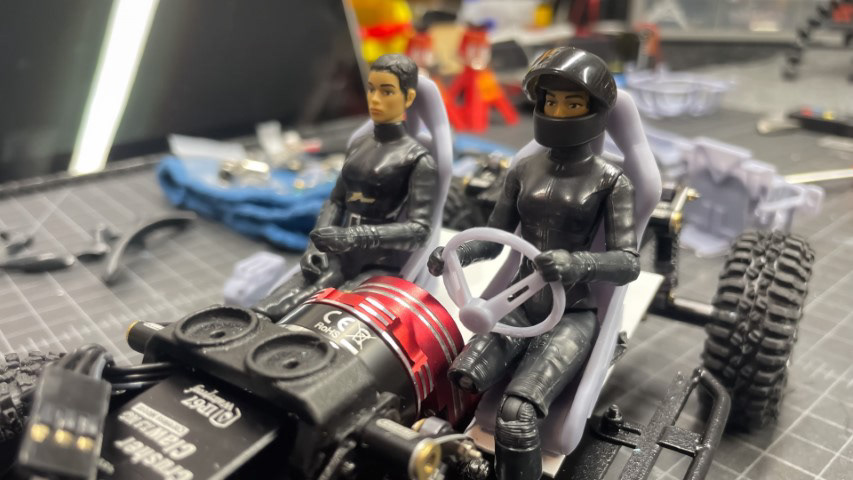 I also decided to put the electronics in the rear, and I mentioned that I wanted to be able to top load the battery, so I built a rear tray. I also knew the rear tray would work as a mounting point for the engine.  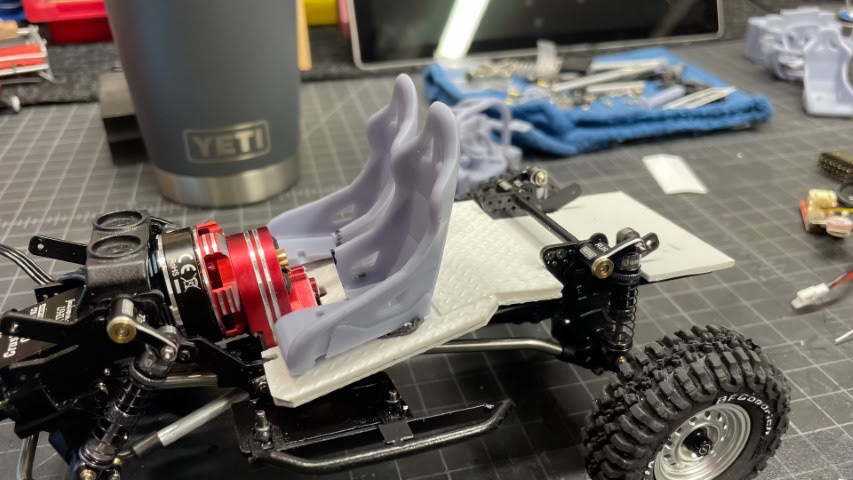 When I installed the flex blades, I had to mount them in a cock-eyed fashion so they would sit the way I liked. This made a perfect notch that I could slide my electronics plate into. 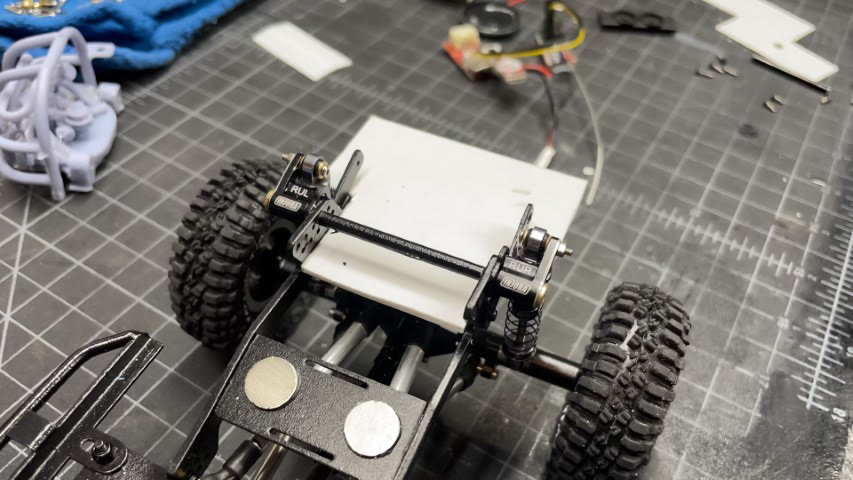 |
|
| |
|
01-29-2024, 12:22 AM
| #26 |
| Quarry Creeper Join Date: Oct 2012 Location: Chicago Area
Posts: 327
|
The interior was really looking clean. I popped on some magnets to hold the floor panels in place. I LOVE the clicking sound a magnet makes when it locks in place! Even though I was going to do the electronics and battery in the rear, I still felt it was a little too bare. So back to www.Thingiverse.com to find a rear bench seat. Lo and behold... I found one! 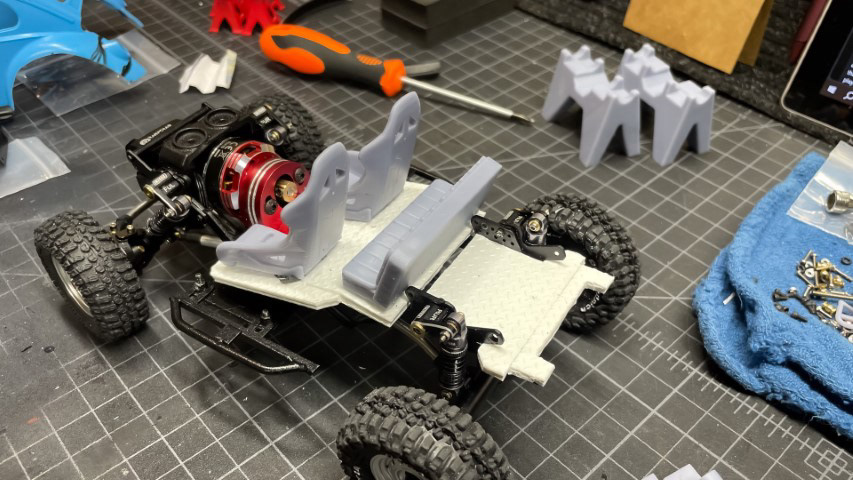 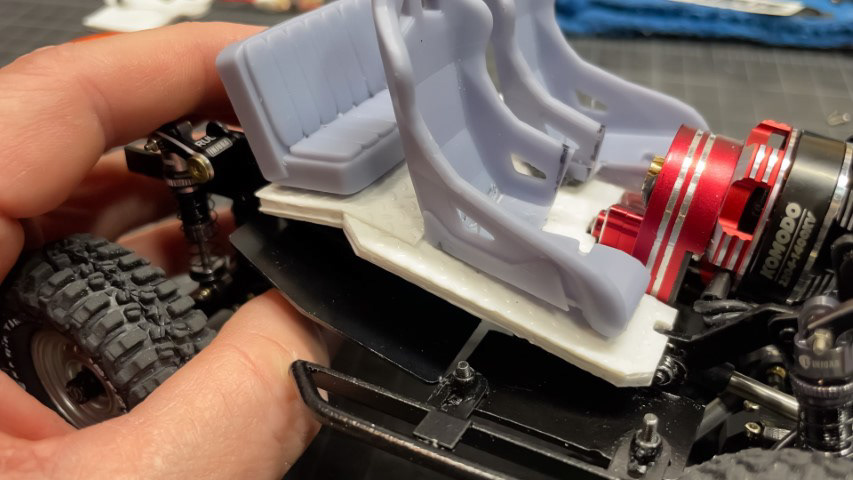 Now it was time to start thinking about how to mount the engine. I had ideas, but you all know that some builds will either lead you to the answer or leave you crying in the corner. I was lucky that things were just falling into place. I made a 90 degree styrene bracket, popped on some magnets and viola... done! 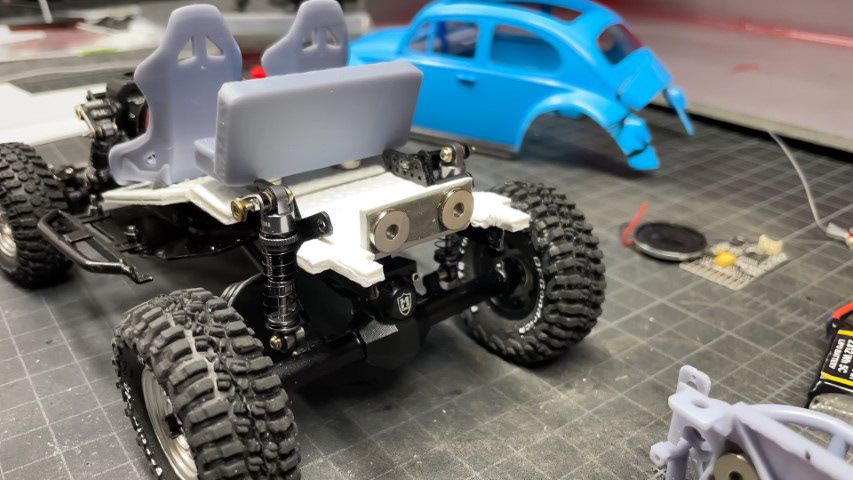 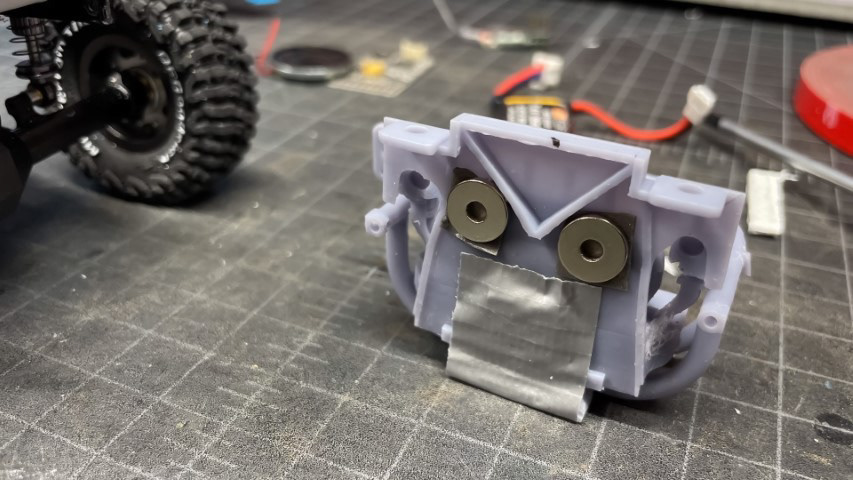 |
|
| |
|
01-29-2024, 12:24 AM
| #27 |
| Quarry Creeper Join Date: Oct 2012 Location: Chicago Area
Posts: 327
|
Moving right along to the electronics. The Meus chassis came with skid plates. But per the parts list, I used a different set that had a lip to hold the body in place. At this point I was thinking about making some inner fenders to hide stuff, but then I looked at the skids that came with the chassis. I had an idea they would make a great electronics tray and decided to mount them behind the primary skids. 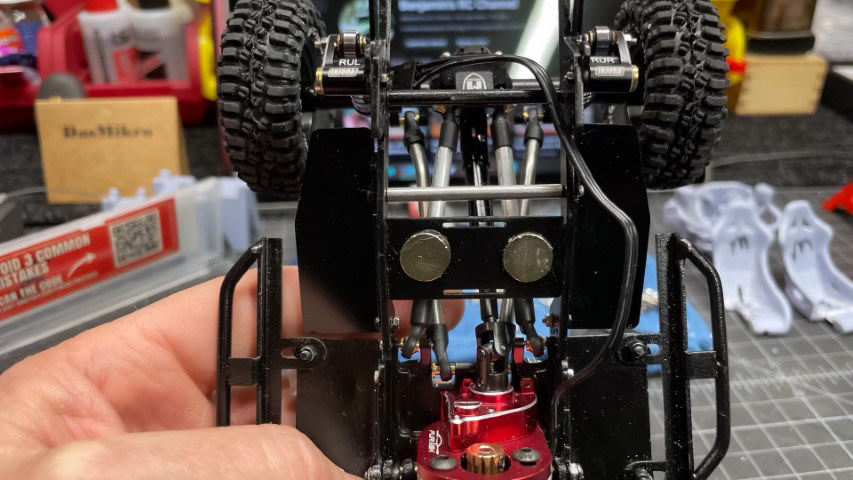 It was perfect, because it created a gap between the skid and the floor plate. This was a perfect place to hide the Furitek Lizard Pro ESC. 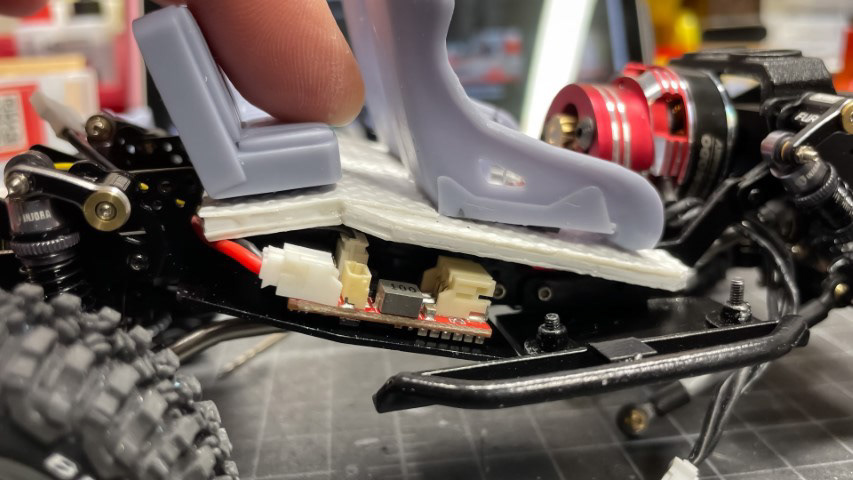 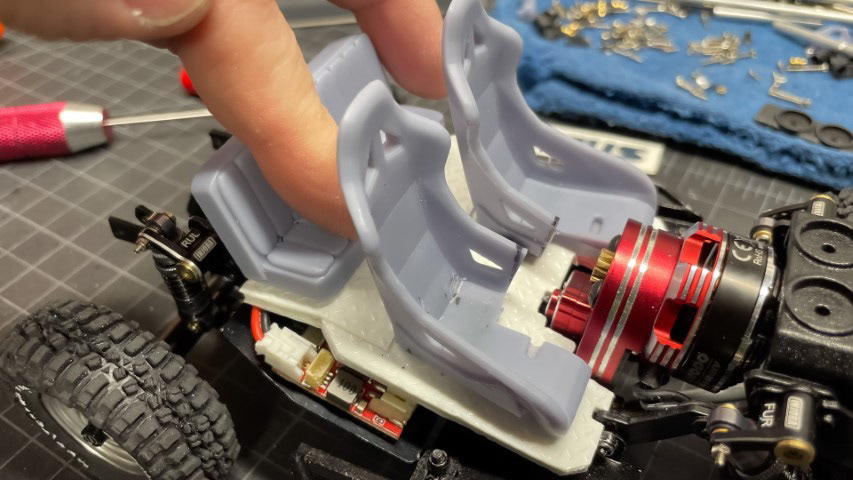 Like I said, sometimes it's just freaky how things fall into place.  I placed the Radiolink receiver and the DasMikro Sound/Light board behind the back seat. 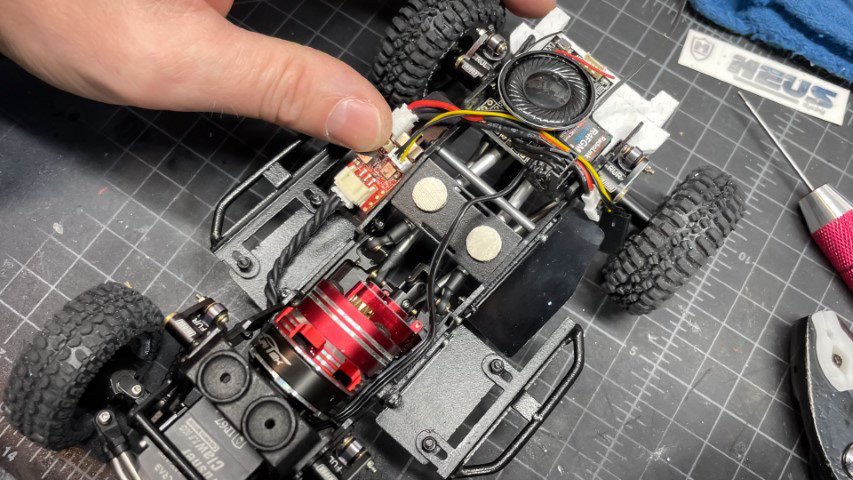 |
|
| |
|
01-29-2024, 12:29 AM
| #28 |
| Quarry Creeper Join Date: Oct 2012 Location: Chicago Area
Posts: 327
|
Now it was time for paint! I love painting but I totally suck at it. Just don't have the patience to WATCH PAINT DRY. Also, I was really stressing because I wasn't sure where I was going with this build. I wanted to have some weathering, but I've never tried doing that before. But, like the 3D printing, I've been studying weathering techniques for many years. Now it was time to give it a try! Earlier last year, I had grabbed some cardboard, duct tape, and a few other things and whipped up this paint booth. It's negative 20 degrees in Chicago, so going outside is not an option and I obviously wasn't going to wait until spring! The paint booth has a 300cfm fan and filter. I can use it as stand alone or hook the filter into the same system as the 3D printer and expel the fumes out of the house. 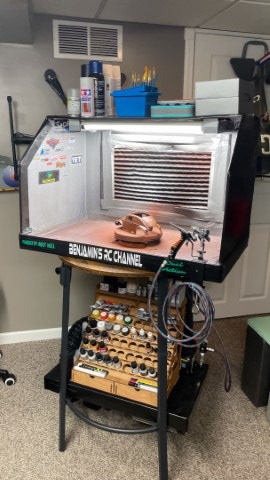 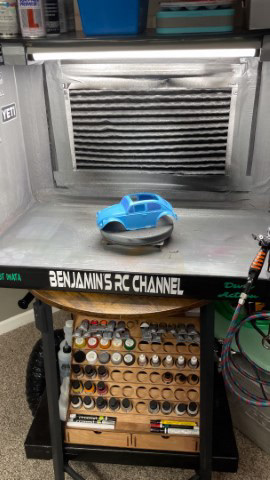 I went to the internet to find some inspiration I even hit up ChatGPT for some options I was starting to get a rat rod vibe... or maybe I was just watching too much RC Everyday. Going back to my theory of basing a build on a 'backstory' I started to think that maybe my Beetle could be found sitting in a parking lot of a South Austin Tattoo parlor. Ahhhhh yeah, that idea stuck with me. I started to let that backstory marinate and I began to paint. I started with a dull red base. 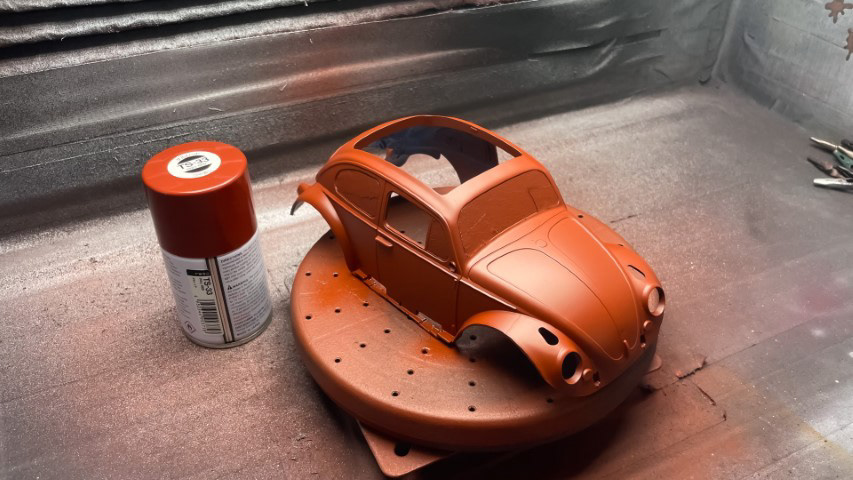 Next I splotched on some orange... 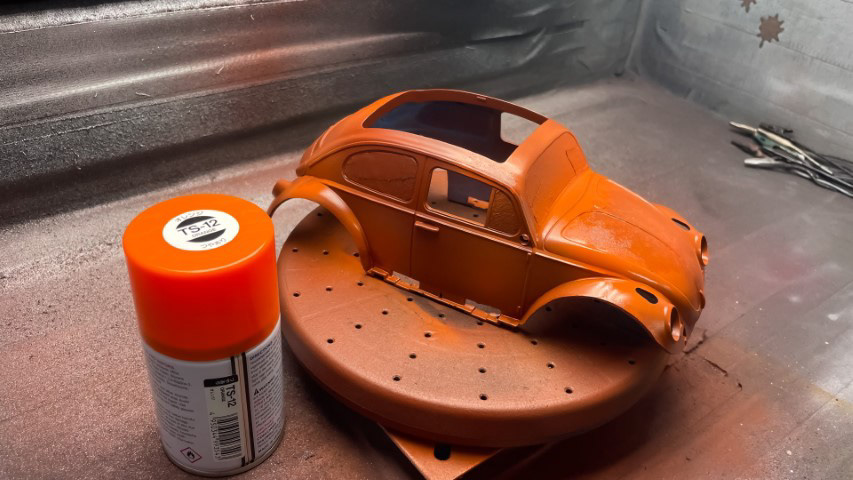 Then splotchy red... 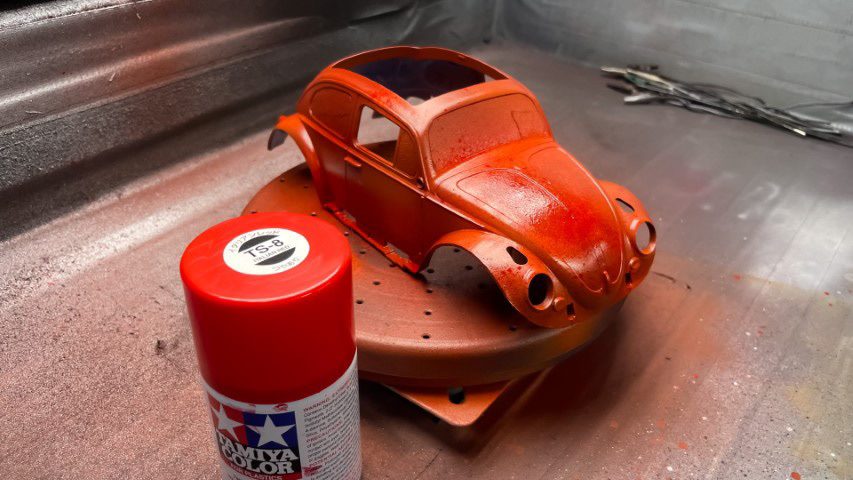 and some gold... 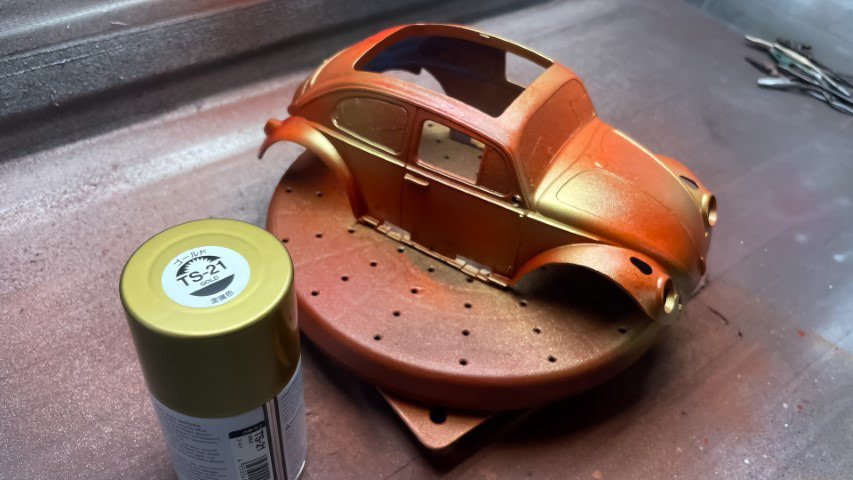 and some gray-green... 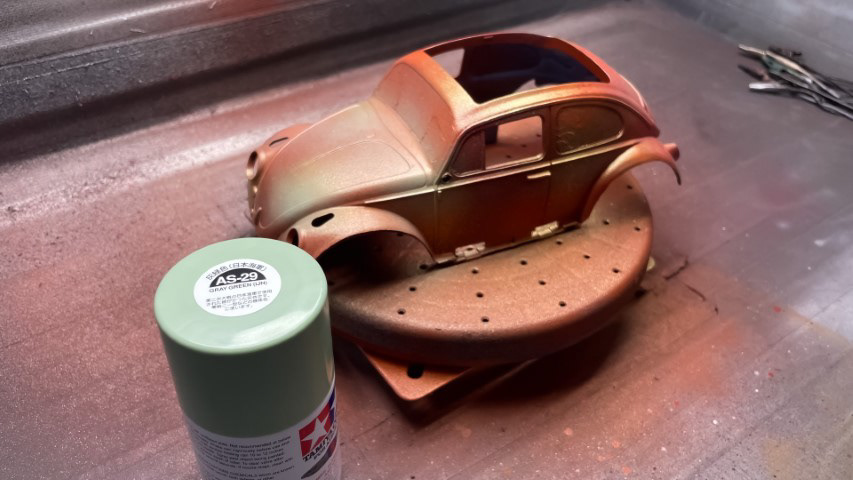 then a final full coat of brown. 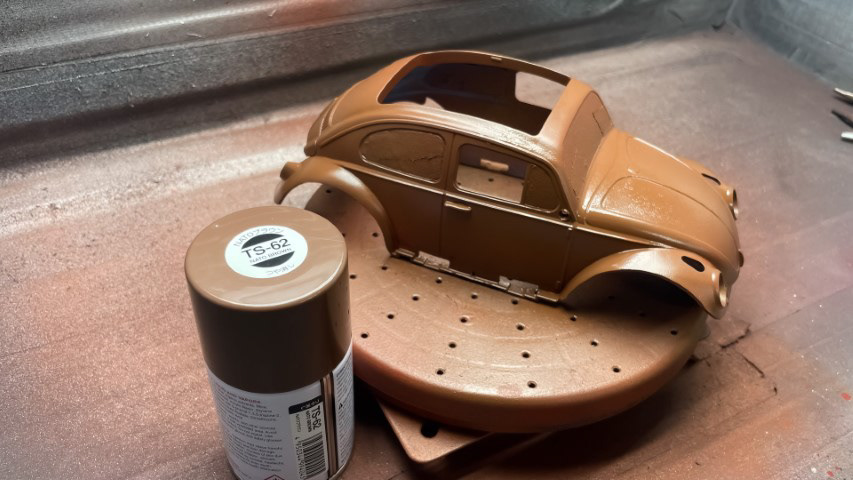 Now that the "rusty" coat was done. I added the hair spray. 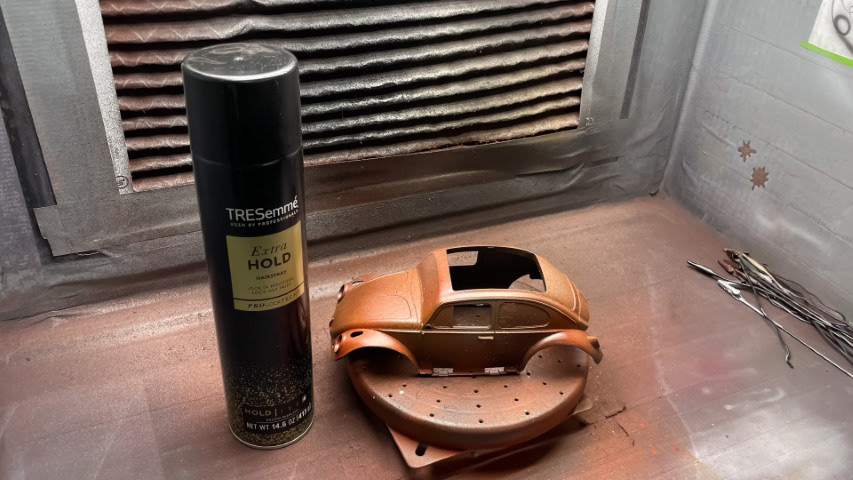 Then a final coat of silver. I believe it was Testor's Gloss Metallic Silver 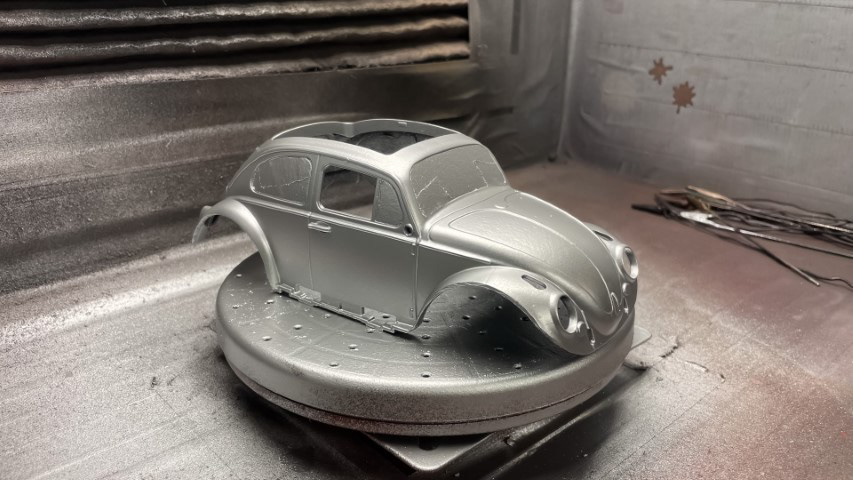 I also blacked out the inside 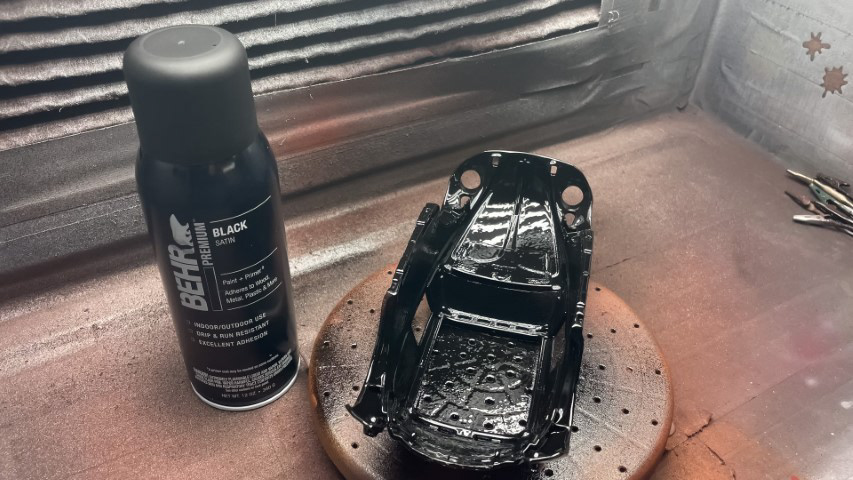 Last edited by TheBakedBeans; 01-29-2024 at 01:01 AM. |
|
| |
|
01-29-2024, 12:32 AM
| #29 |
| Quarry Creeper Join Date: Oct 2012 Location: Chicago Area
Posts: 327
|
And then came the scary part... I took an old toothbrush and a little water and started brushing. Holy sh*t, it worked! I was so excited to see the process that I've watched so many times actually working in MY hands. The rusty body looked great! What do you think? 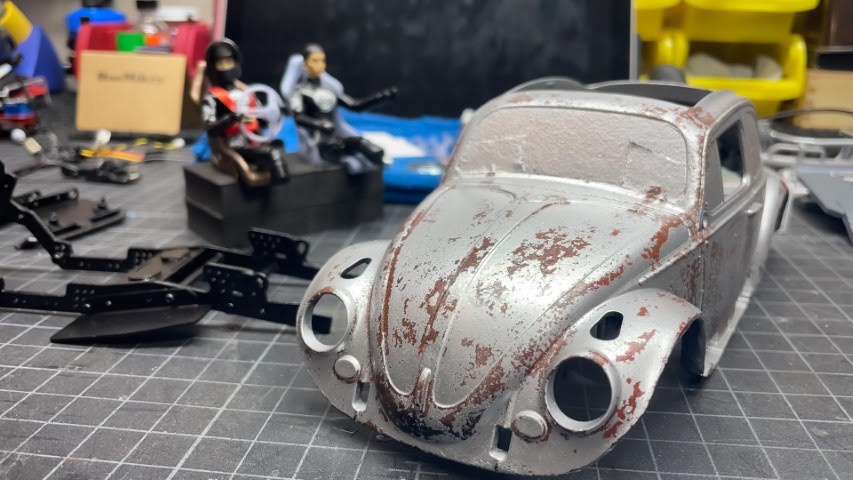 I was extremely happy with the results. But I still felt like it wasn't done. I've learned that layering details will bring an object to life. So, I thought maybe that goes for paint too? I was trying to get a look of an old rusty car that someone bought and gave it a rough home paint job. So I decided to black out the roof and add some STRIPES. 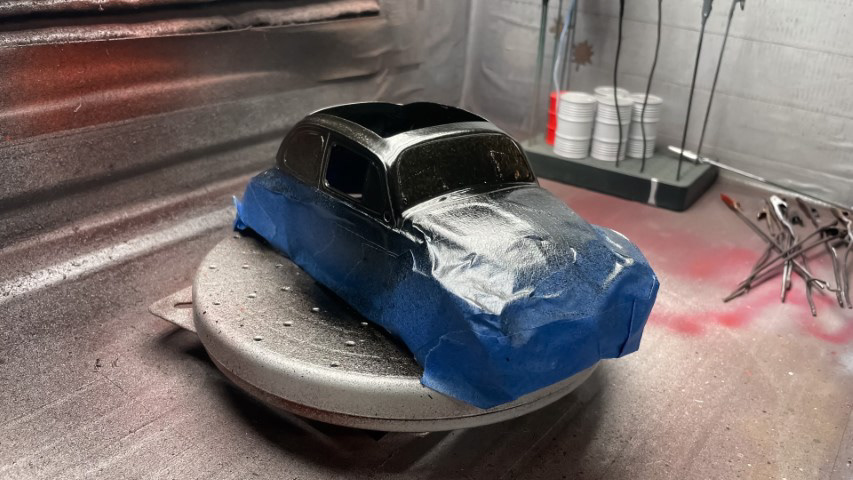 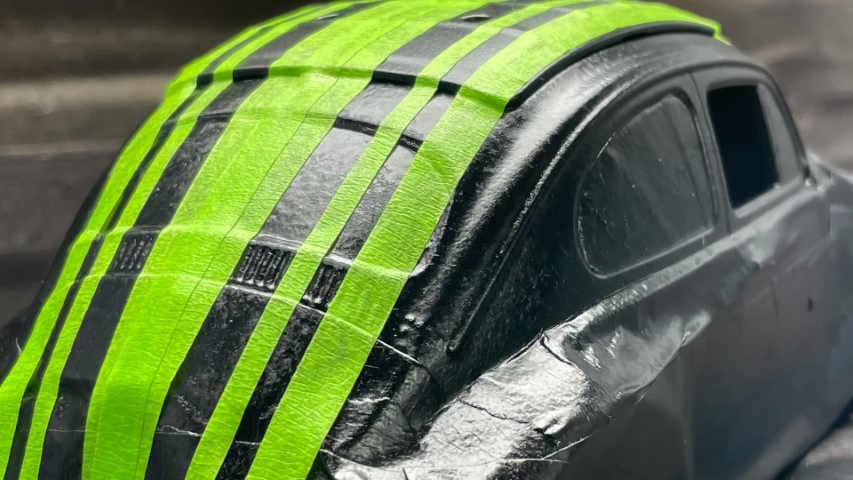 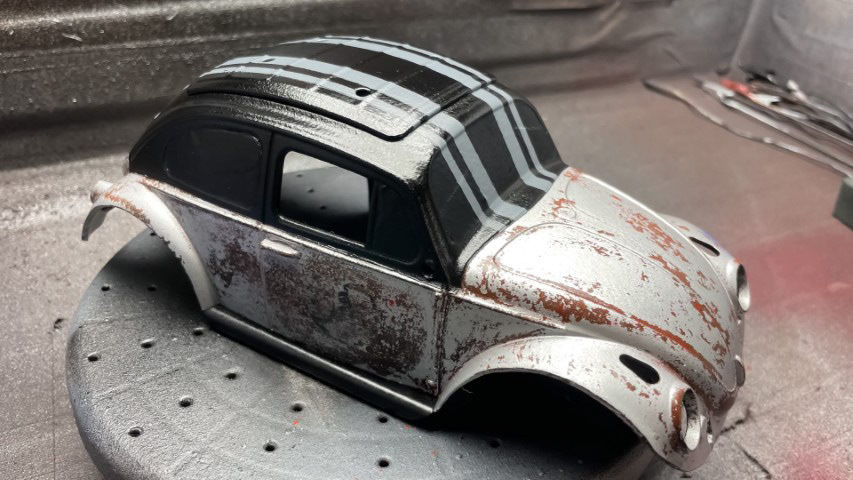 I knew that I was going to put numbers on the doors. I really wanted to paint those numbers on instead of using decals. I attemped it, but i just couldn't get it as crisp as I wanted. (remember how I said I have no patience when it comes to painting) I scrapped it off and you can see a little leftover damage on the door. I wasn't worried since I knew I could make a decal to cover it up. 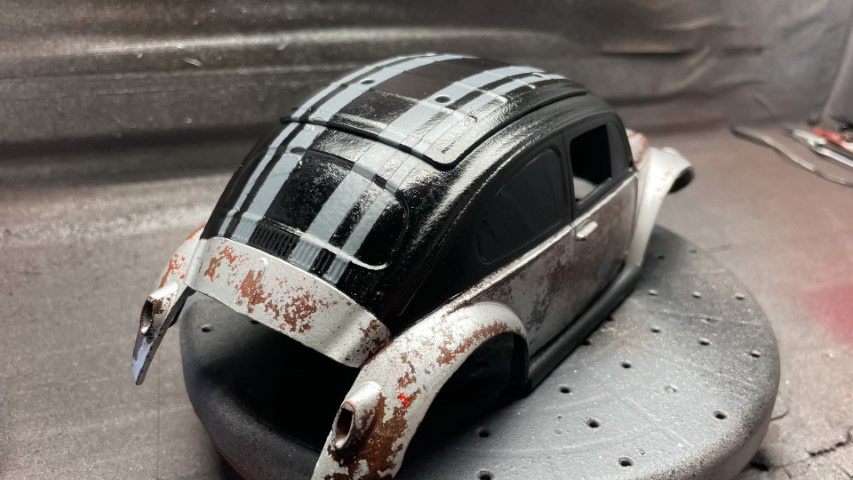 I stared at it a bit longer and decided that the stripes should go beyond the black roof and over the rusty body. Ohhhhh yeah, that looked nice! 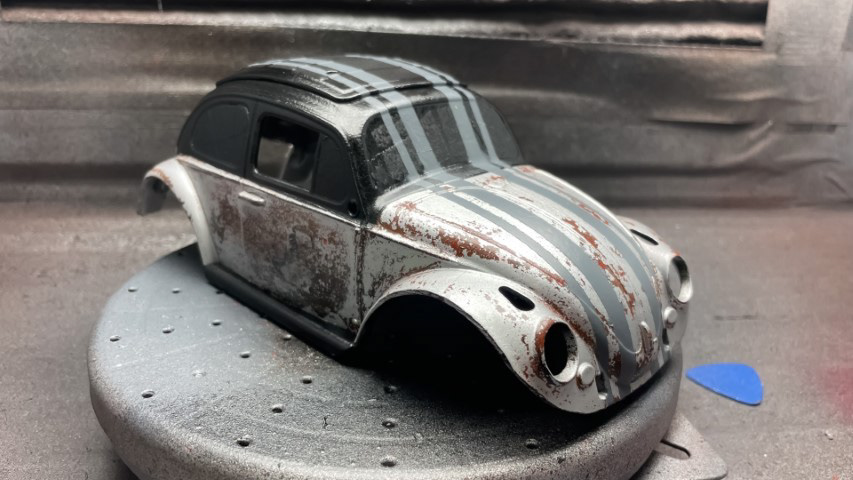 And then it was on to the chassis and interior. I hate the look of carbon fiber, so I even painted the frame. 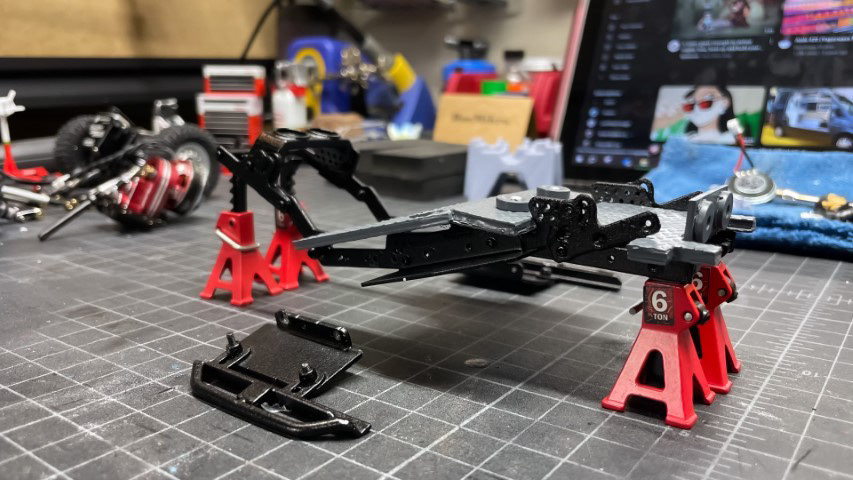 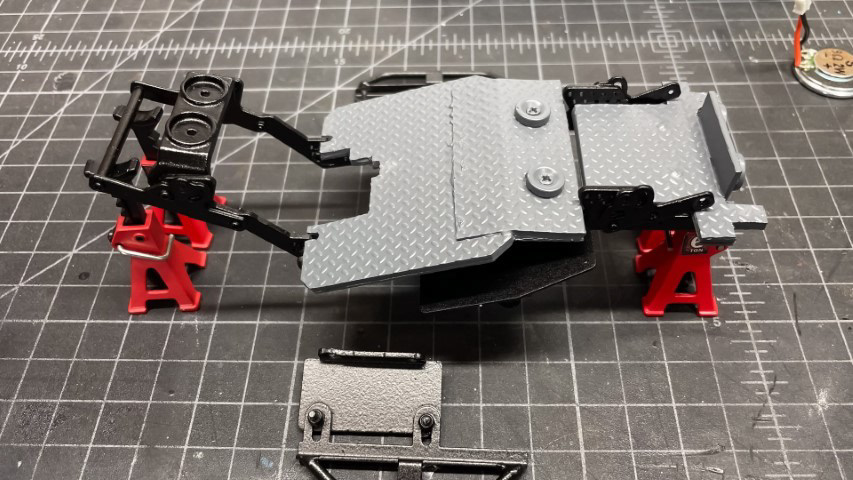 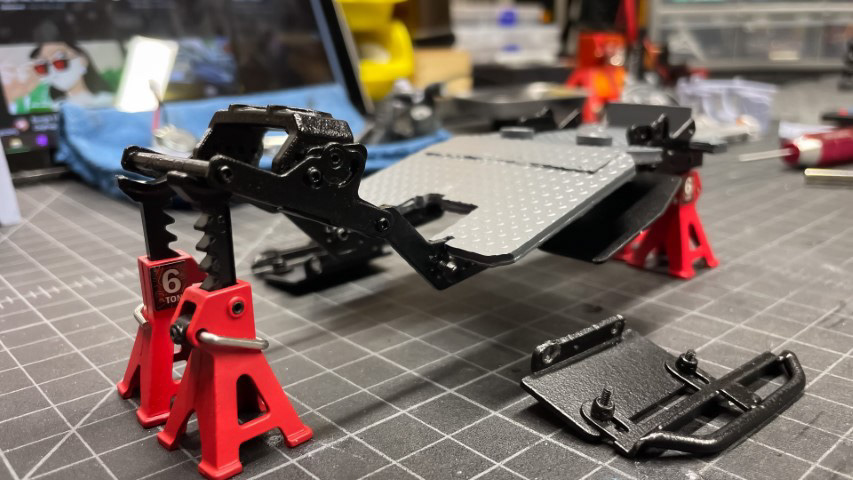 |
|
| |
|
01-29-2024, 12:36 AM
| #30 |
| Quarry Creeper Join Date: Oct 2012 Location: Chicago Area
Posts: 327
|
Next came the Bang Bang twins. I just hit them with some satin black to hide the Batman logos. 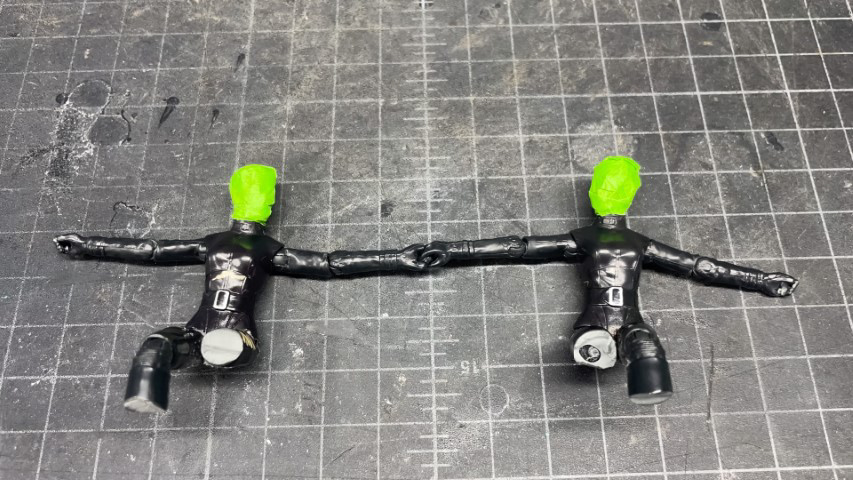 As I was waiting for them to dry, I decided to make some 5-point seatbelts. I got a little lazy and instead of digging for some ribbon, I just used masking tape colored in with a red sharpie and found a little buckle. 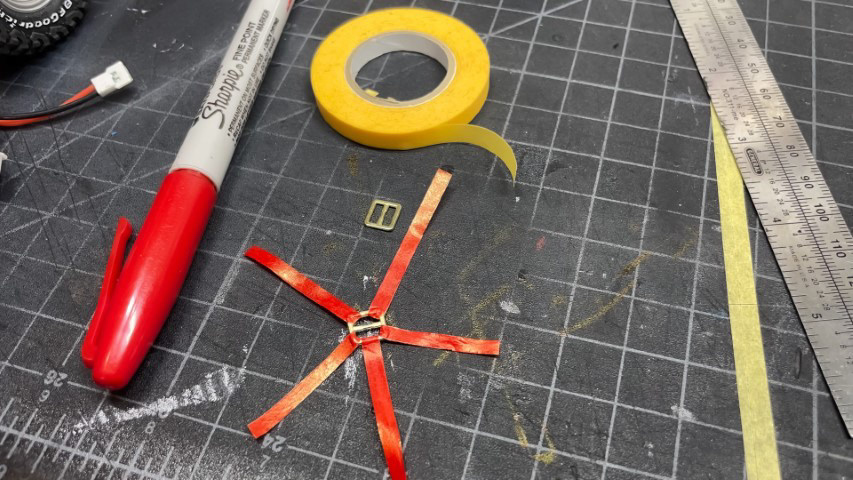 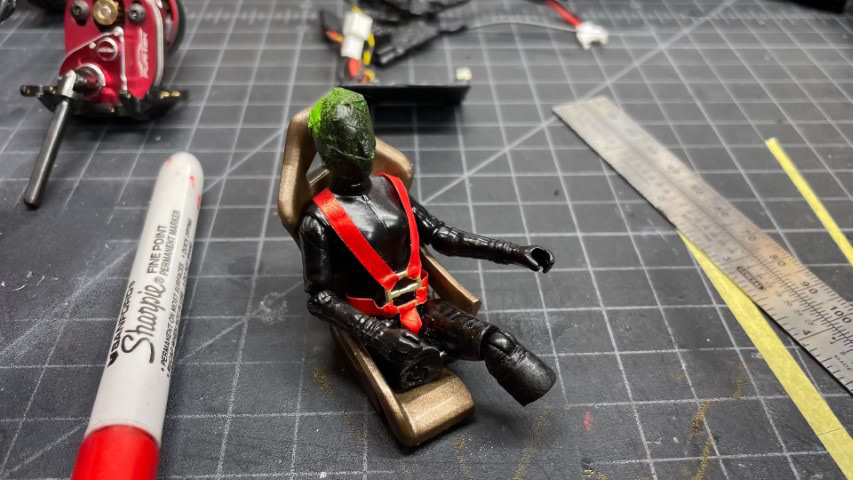 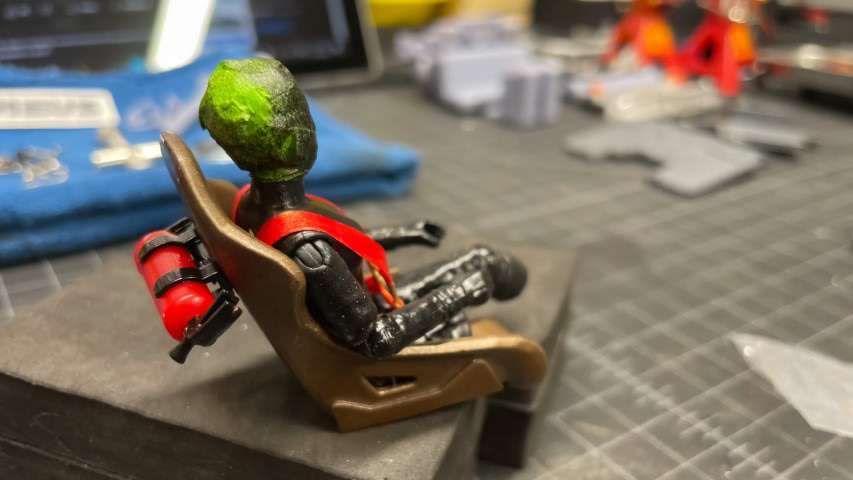 Then added the numbered decals to their jumpsuits  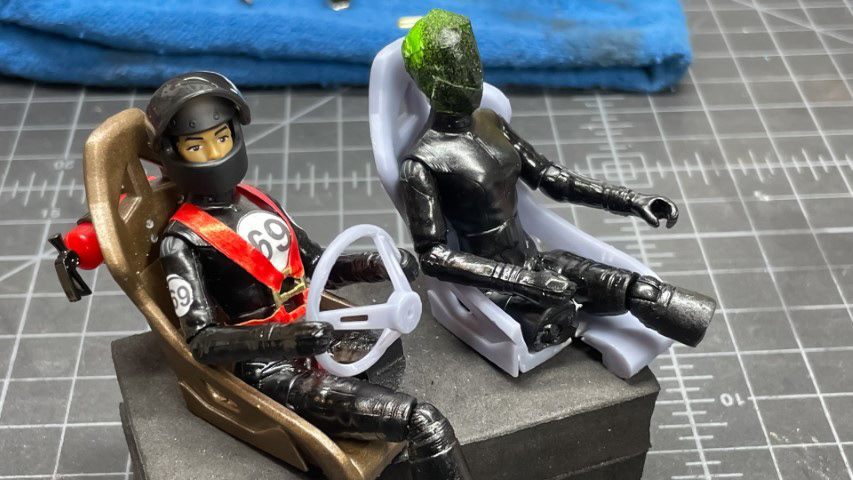 Then the dashboard  I knew the steering wheel was going to stay locked in the hands of the driver, but I wanted it to still look like it was attached. The answer is always MAGNETS! The interior was finally taking shape! 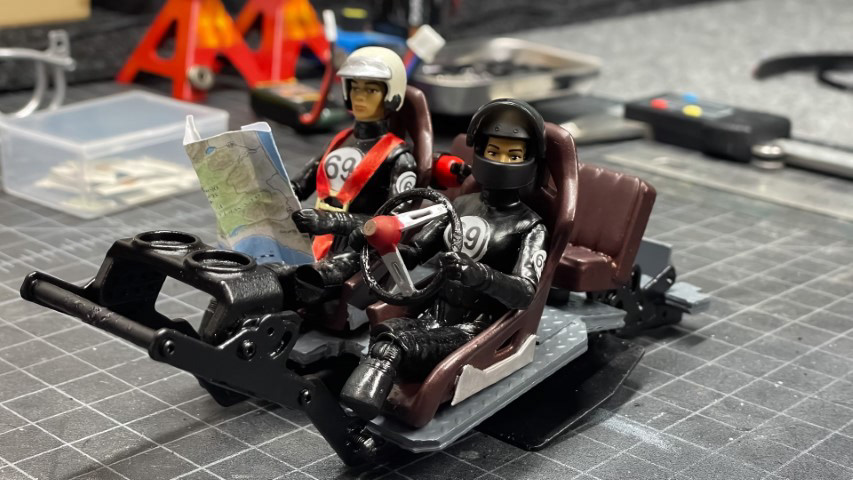 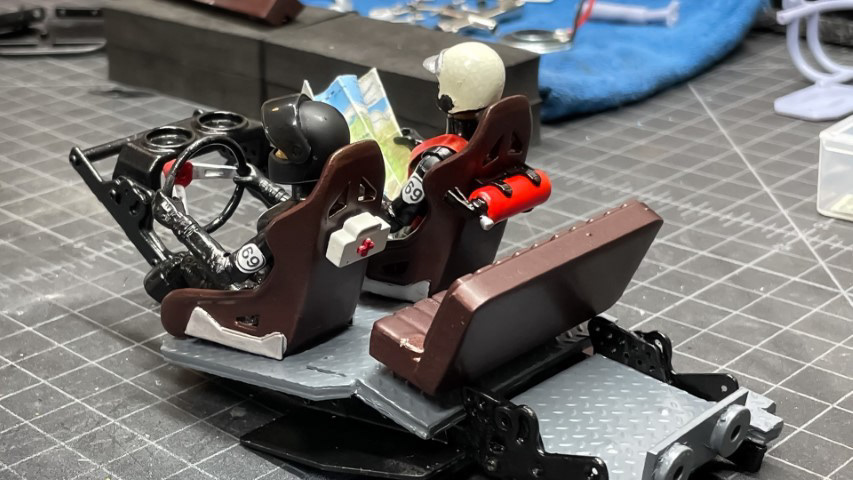 I also took a little time to stencil some paint on the belly of the rear skids. 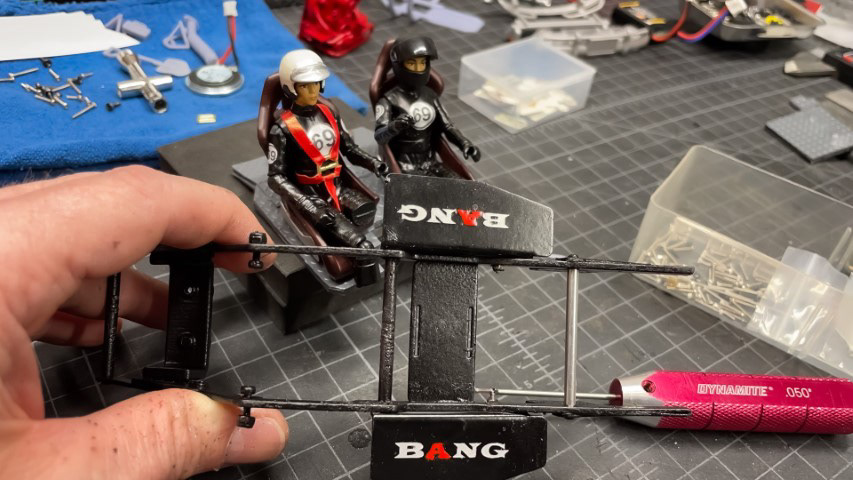 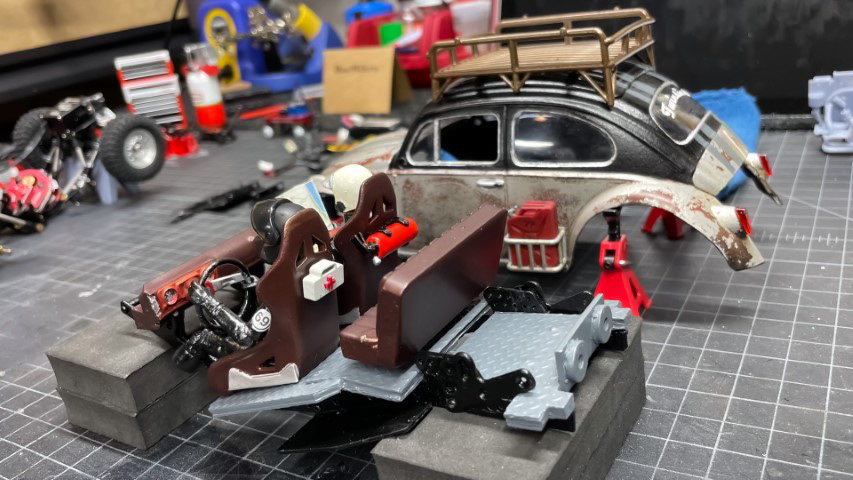 |
|
| |
|
01-29-2024, 12:40 AM
| #31 |
| Quarry Creeper Join Date: Oct 2012 Location: Chicago Area
Posts: 327
|
Next up, was figuring out the final decals for the body. I played with a few different options, but I'm glad on what I landed on. Here are some of the options I considered. 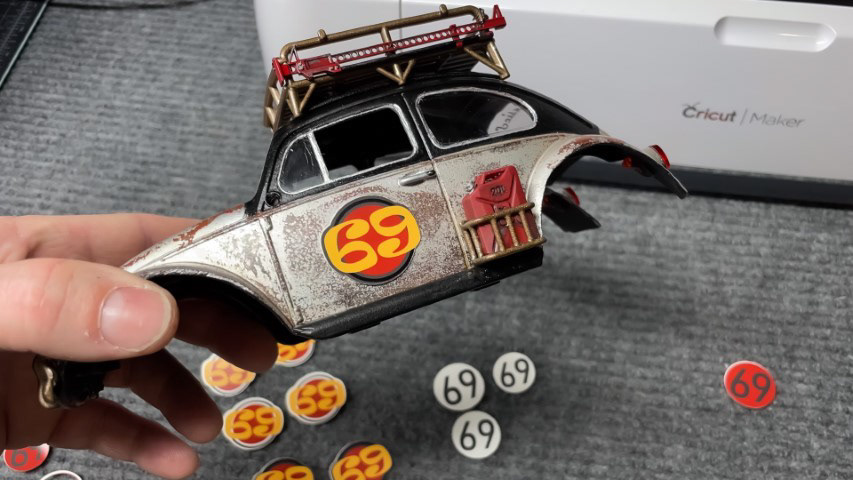 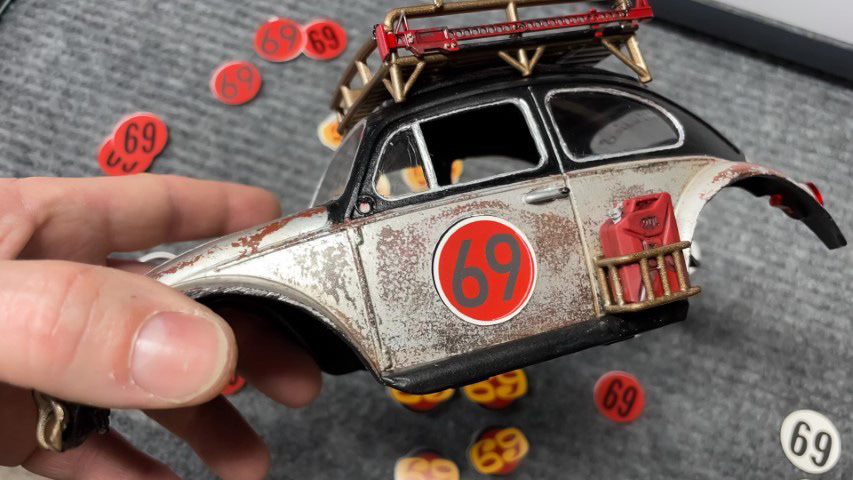 I decided to do the 69 with a black border and white background. With that decided I was getting very excited as I neared the end of this project. I moved on to the exterior details. First up were the mirrors. I printed the brackets, but the reflective surface was cut from flexible mirror tiles and some styrene. They came out nice. A little sloppy if you look close, but when you see in person, they look good. 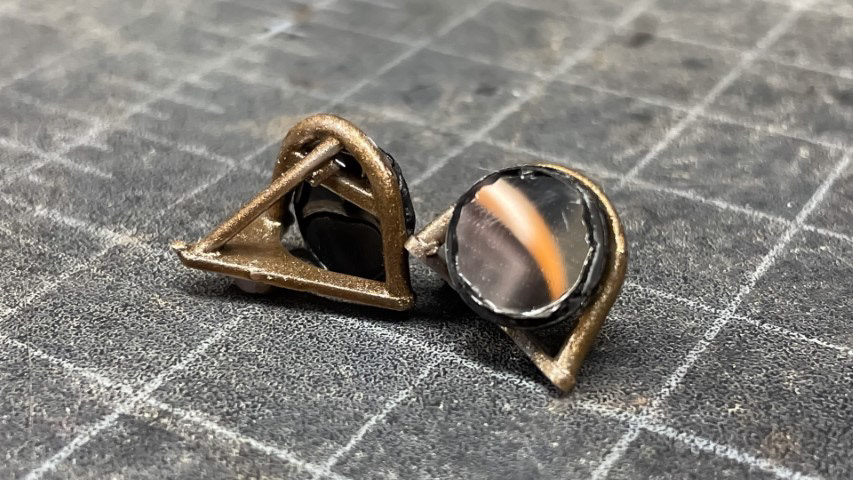 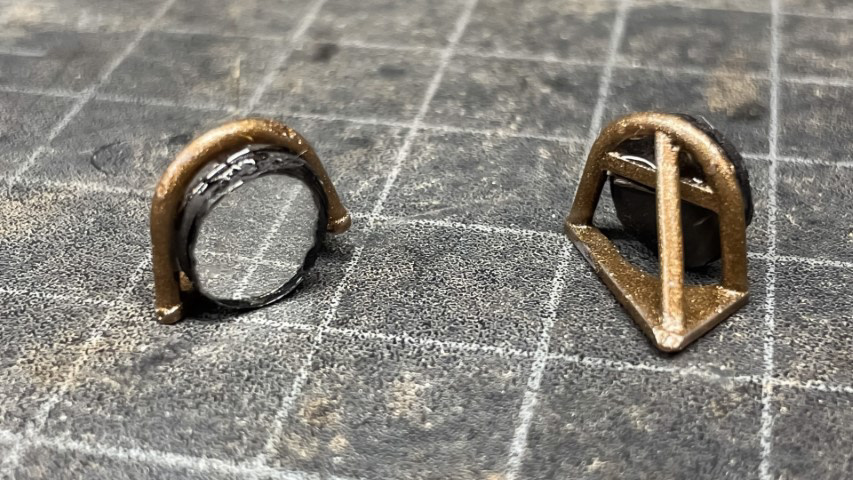 And then the bumpers and plates. I decided this Beetle came from Texas, since I liked the idea of seeing it sitting in the parking lot of a run-down tattoo parlor in south Austin. 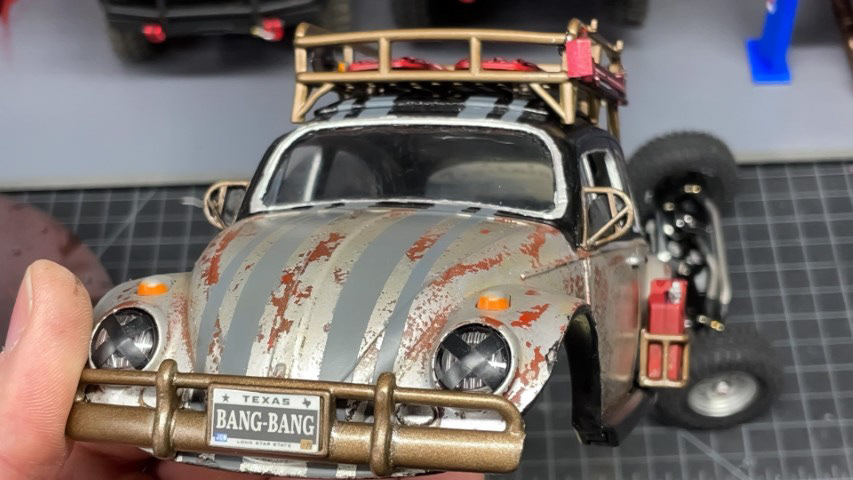 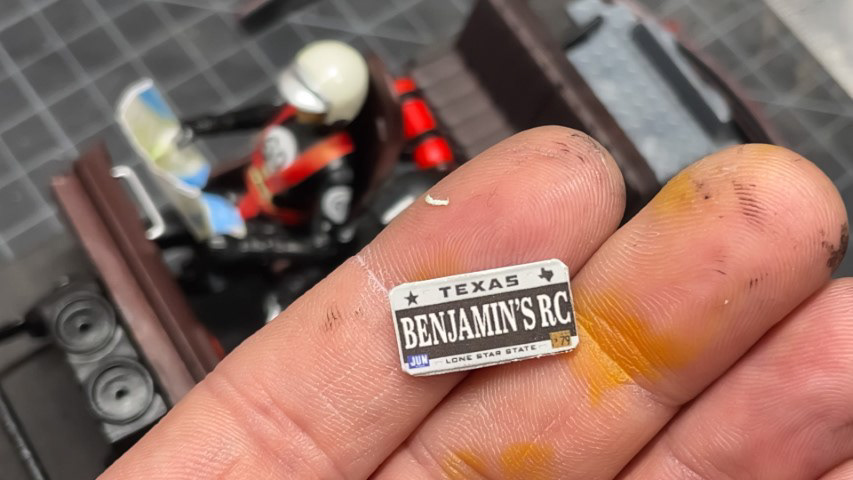 Antennae with a drop of hot glue 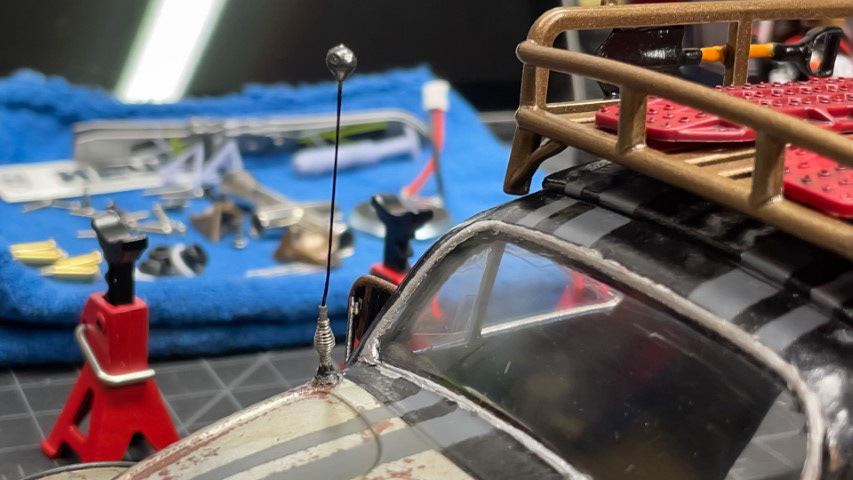 I had my final decals laid out, but I wasn't going to apply them until the veeeeeery end. Almost like 'edging' to completion  so I moved on to painting the engine. so I moved on to painting the engine.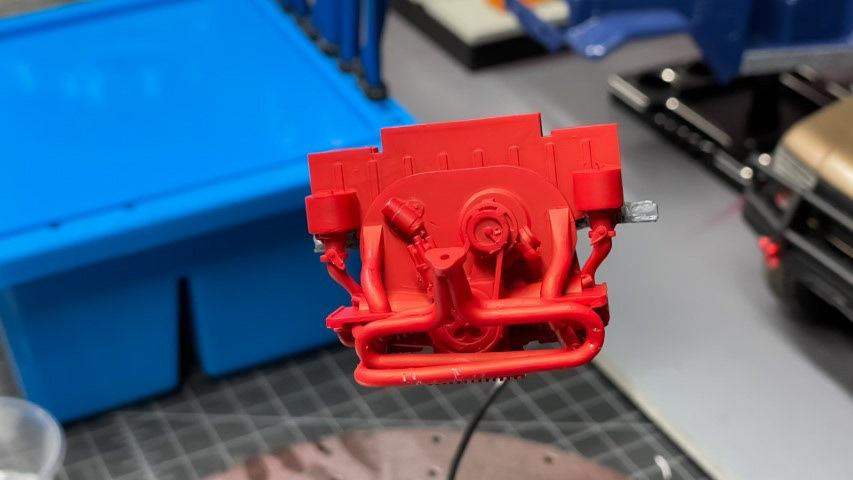 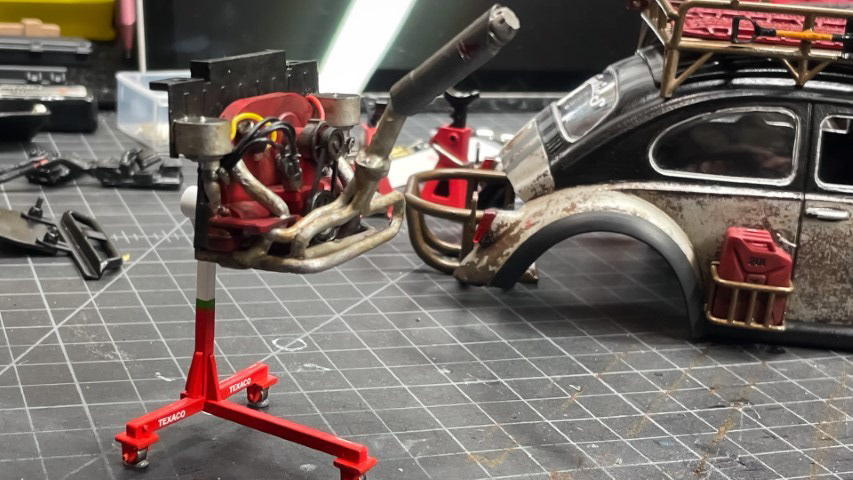 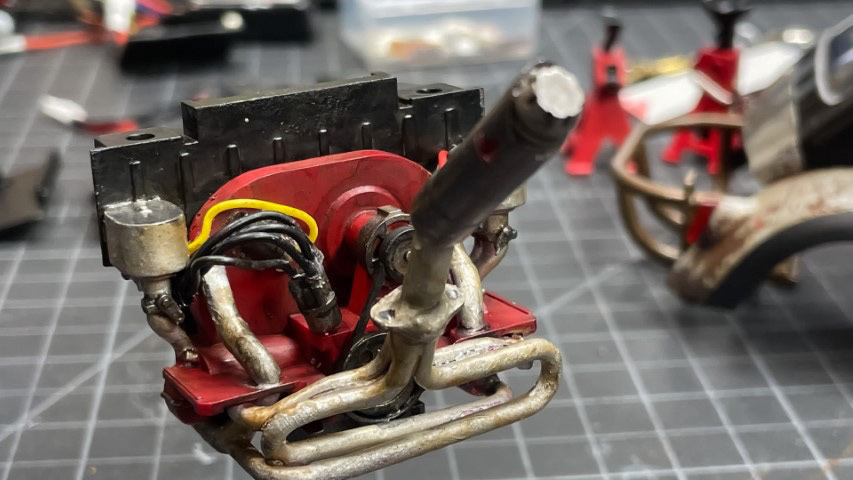 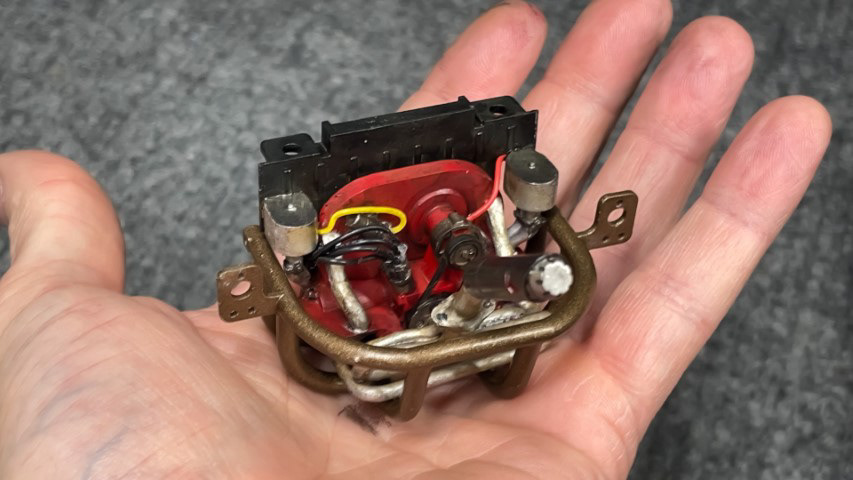 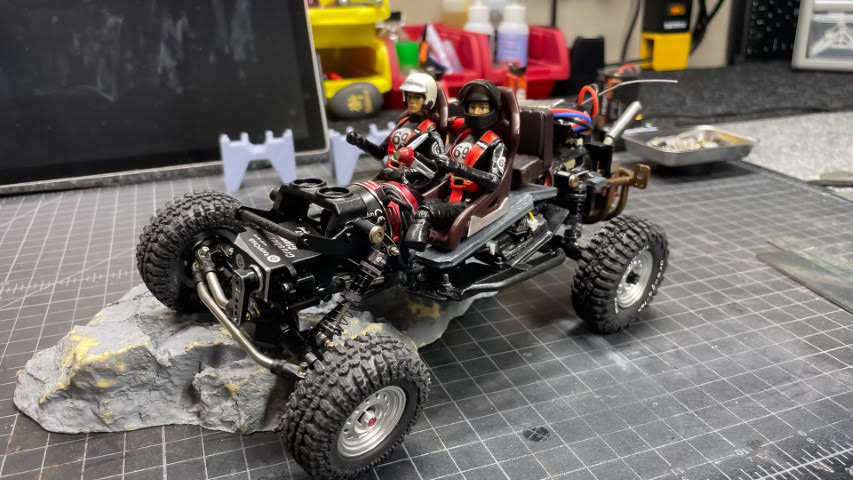 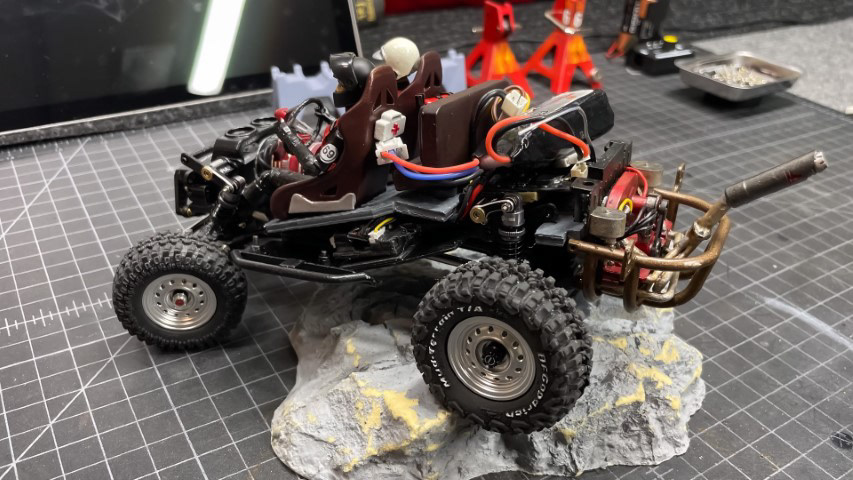 Again, this was my first time weathering anything. I'm pretty happy with the results and I had fun doing it. Not sure why I felt so intimidated by it. |
|
| |
|
01-29-2024, 12:43 AM
| #32 |
| Quarry Creeper Join Date: Oct 2012 Location: Chicago Area
Posts: 327
|
At this point I was on day 7 or 8. I was ready to wrap things up. 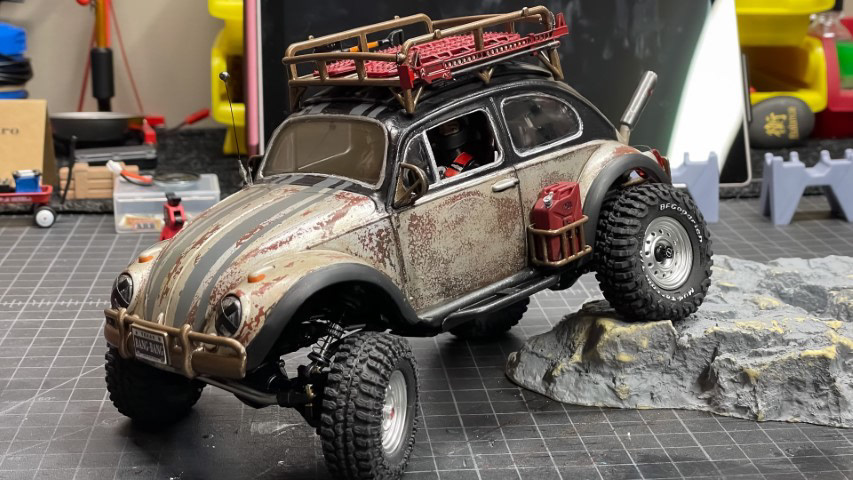 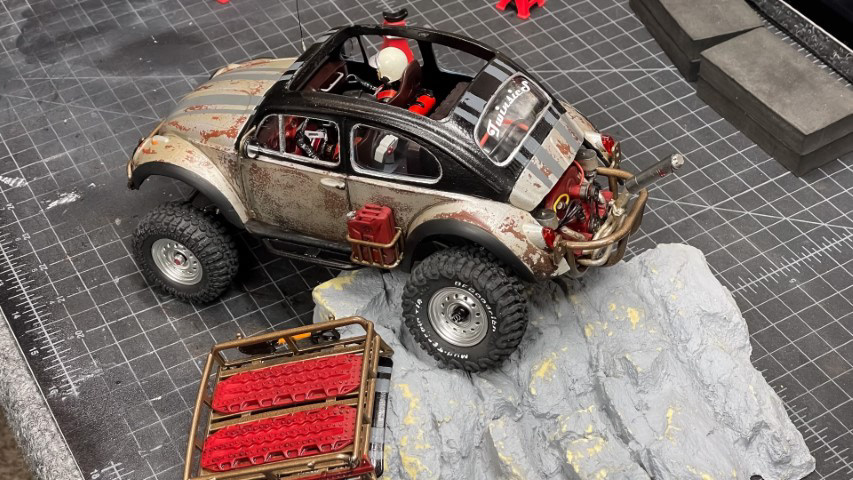 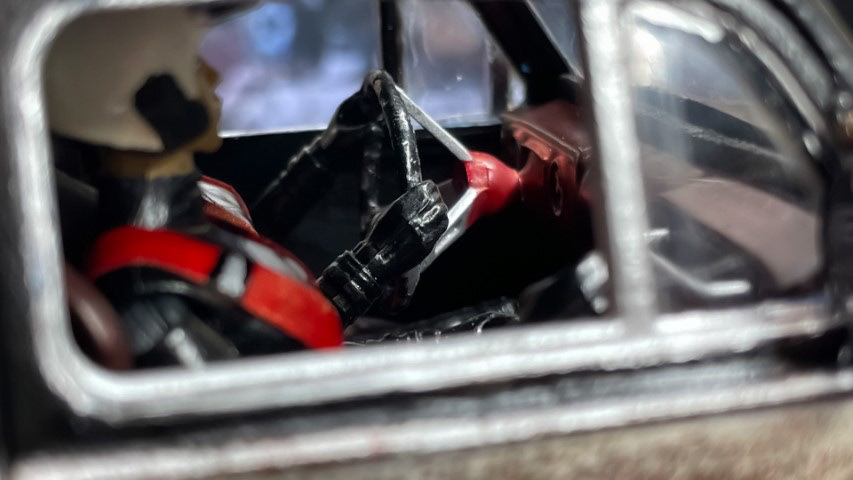 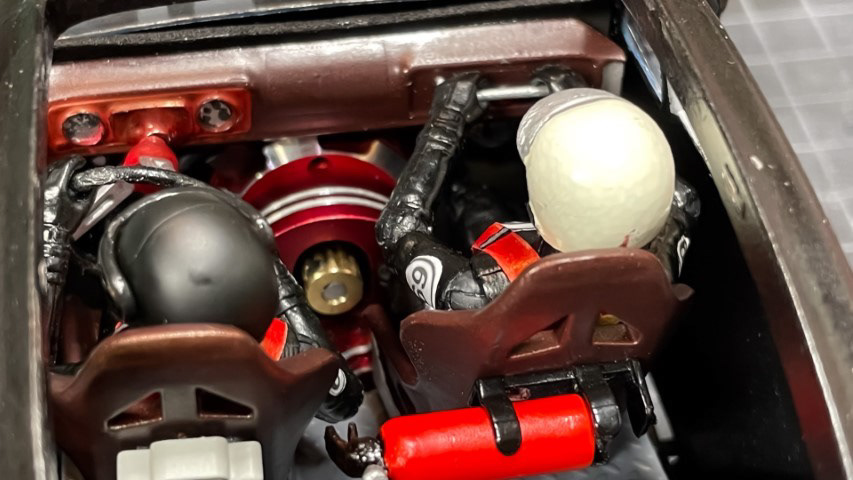 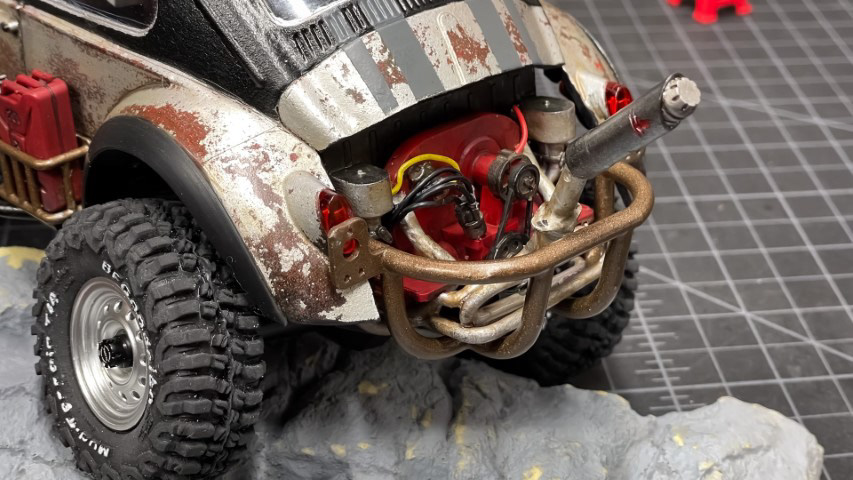 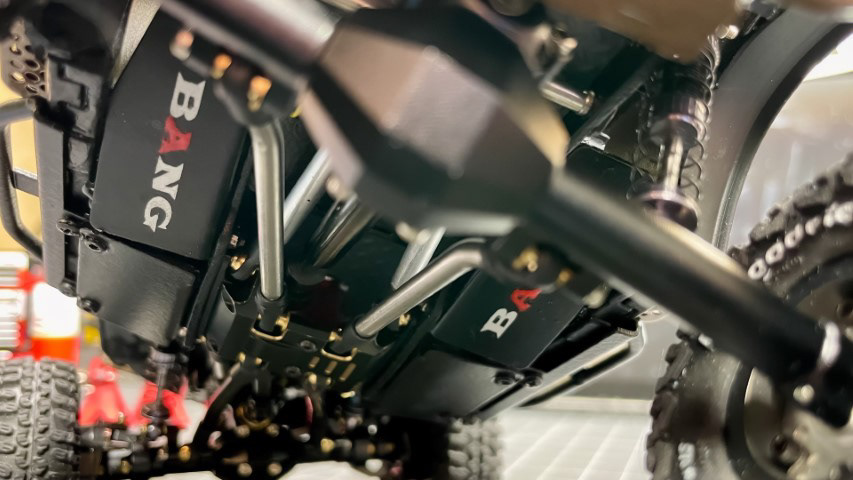 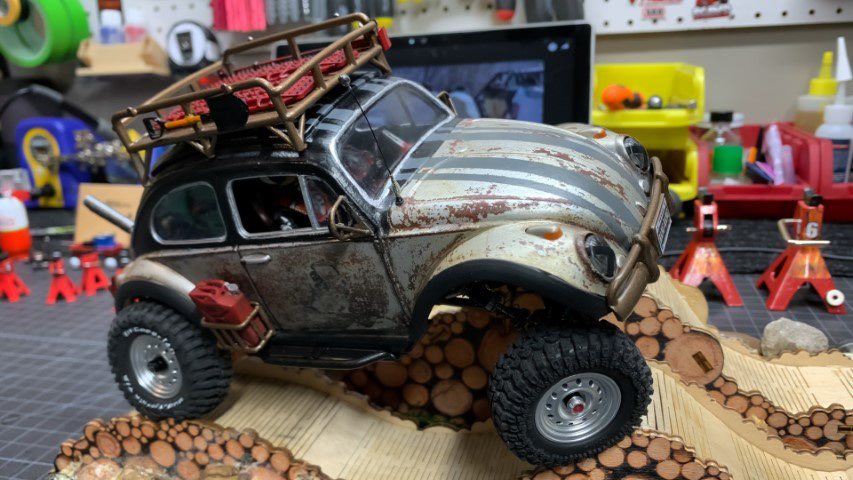 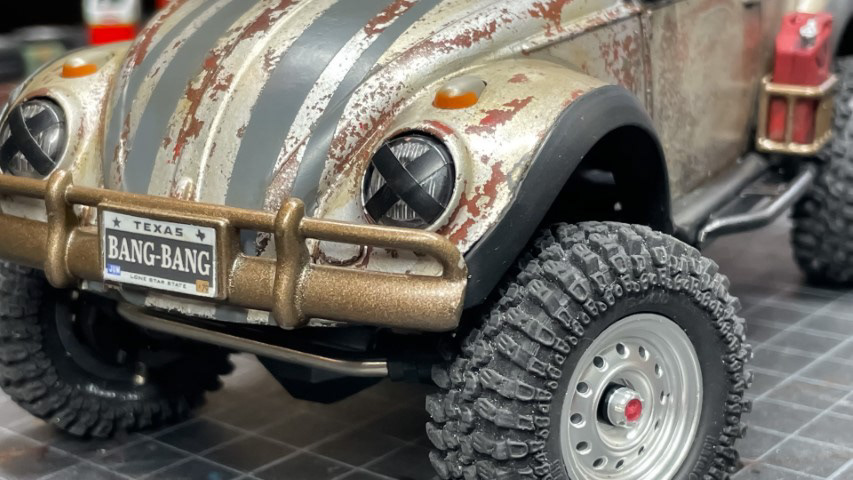 But first I had to play around with it a bit... 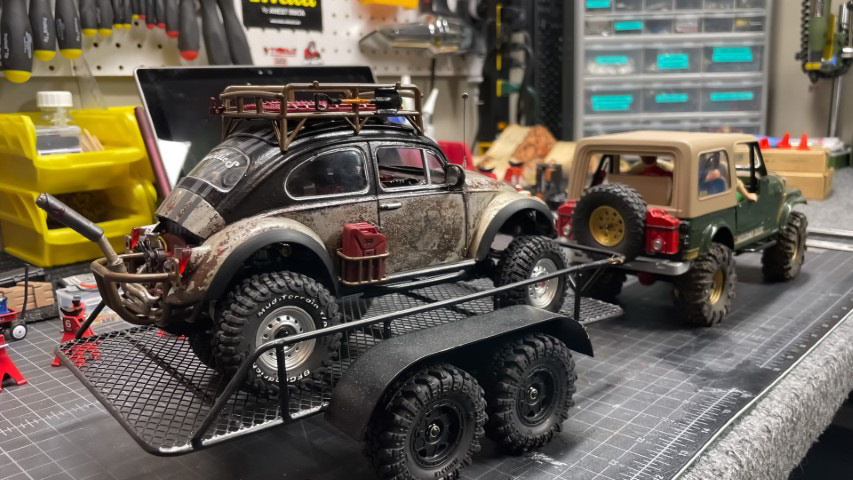 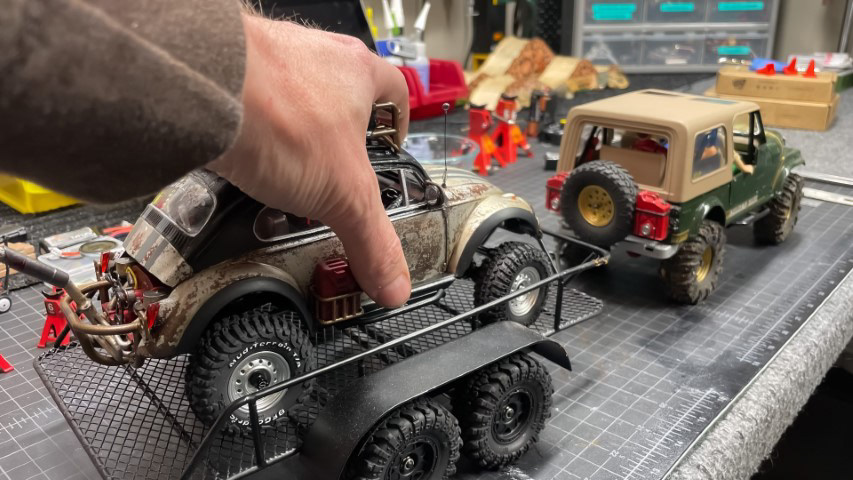 |
|
| |
|
01-29-2024, 12:44 AM
| #33 |
| Quarry Creeper Join Date: Oct 2012 Location: Chicago Area
Posts: 327
|
The time came for the final decals! I print my own using White and/or Clear backed water transfer paper and cut with my Cricut. These were all printed on White backed paper. The quality of these papers will vary, and after testing many different kinds, I landed on a good brand. But the key is using Micro Sol and Micro Set. That really helps them stay on and look like they were painted.  Once applied, they were obviously too white 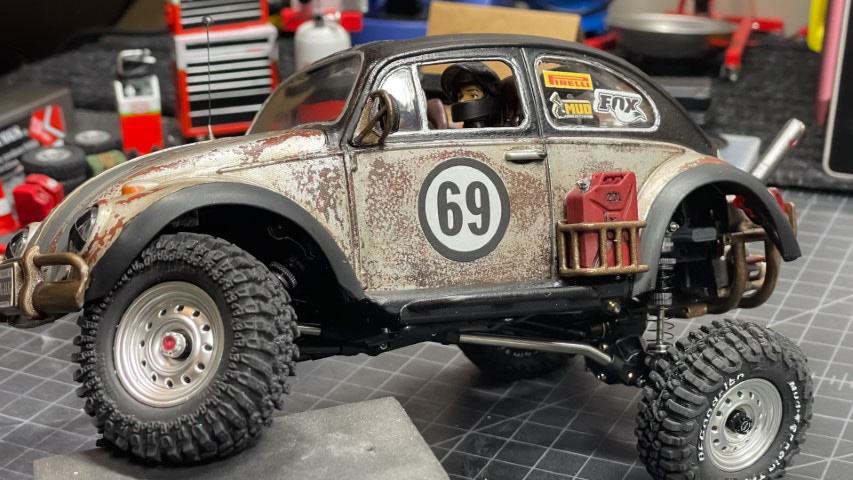 So I hit them with a brown wash to get it to match the rest of the weathering 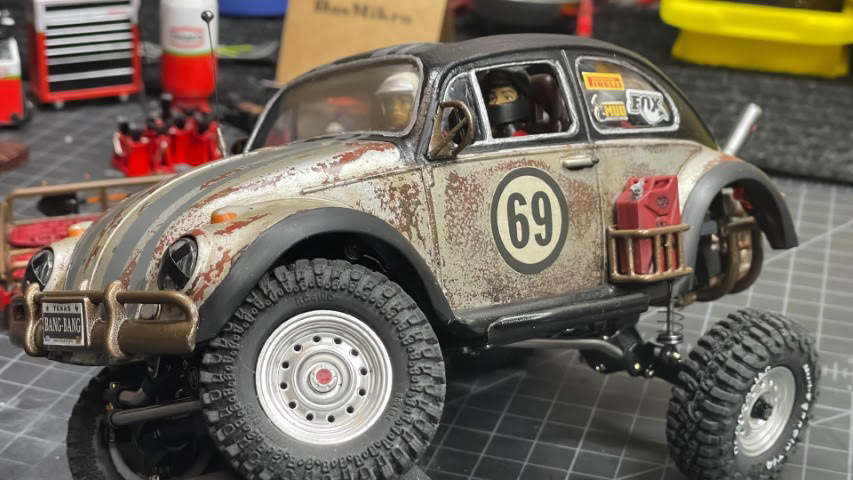 |
|
| |
|
01-29-2024, 12:46 AM
| #34 |
| Quarry Creeper Join Date: Oct 2012 Location: Chicago Area
Posts: 327
|
I looked to @imthatguy at SBG for one more inspiration... I remember seeing his snow van with the snowboards on the side. I had a set of Bruder skis sitting around and it's -20 outside, so I thought these would make a good touch. At least until it warms up. 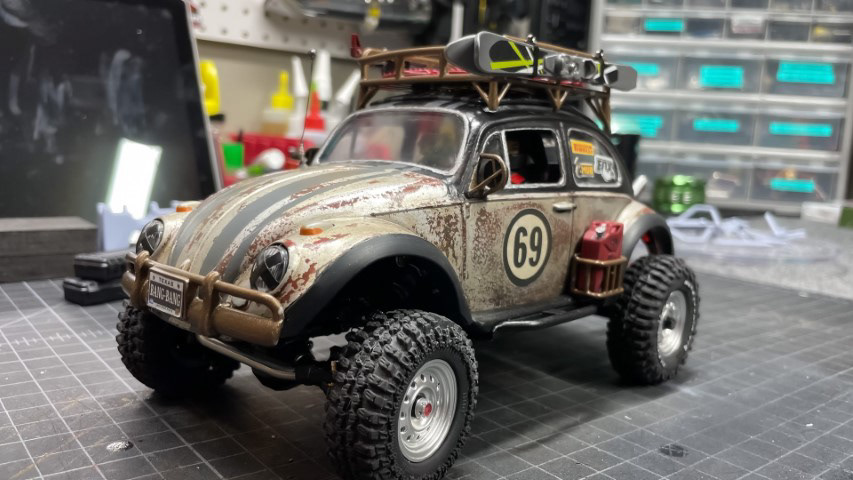 And a few more fun photos... 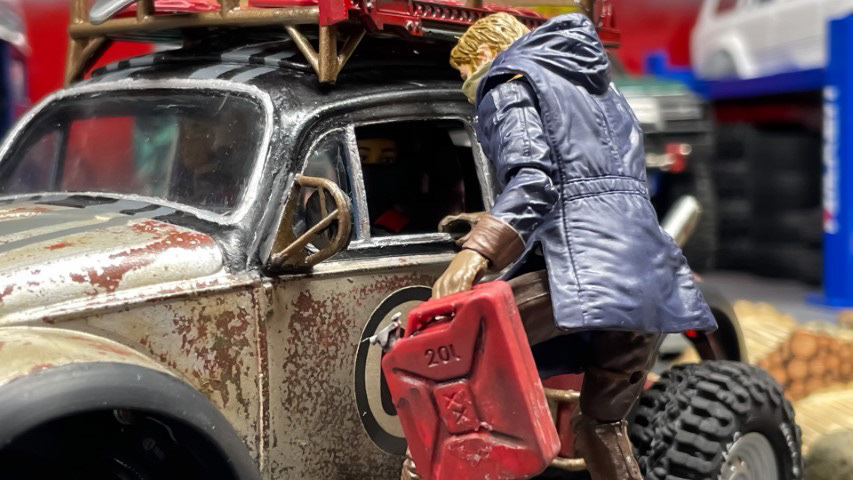 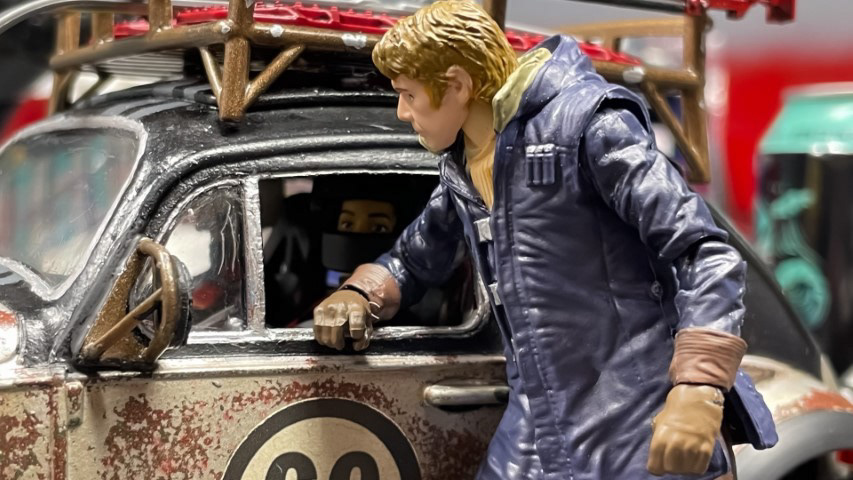 And then I took it out for the first photo shoot. I was on the Fox river at the Batavia damn crawling around on my knees as a maintenance crew laughed at me. I'm sure they thought I was crazy out there on the riverbank in the snow playing with toy cars   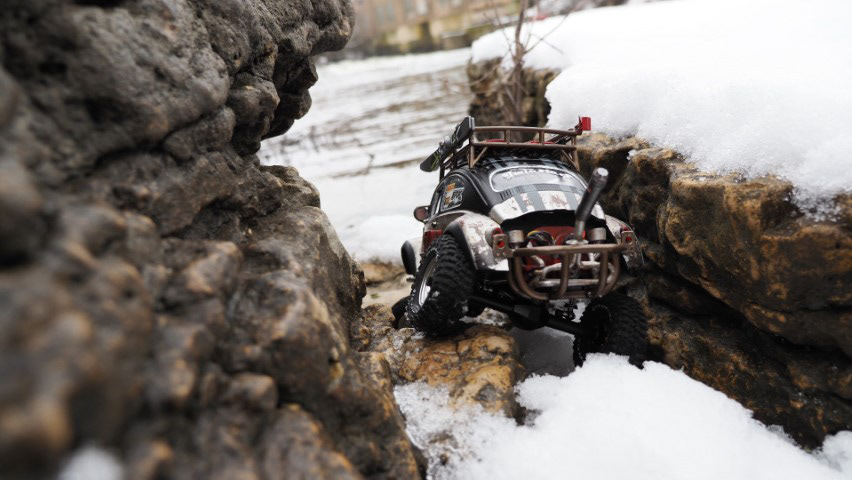 |
|
| |
|
01-29-2024, 12:47 AM
| #35 |
| Quarry Creeper Join Date: Oct 2012 Location: Chicago Area
Posts: 327
|
Well, that wraps up this project. I'll still need to circle back to get that sound board working and install the LEDs. But even if that doesn't happen, I feel good calling this one done! 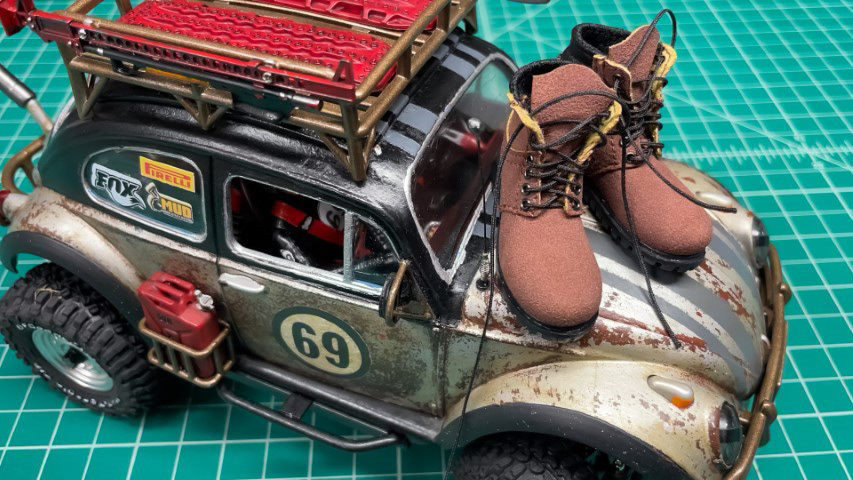 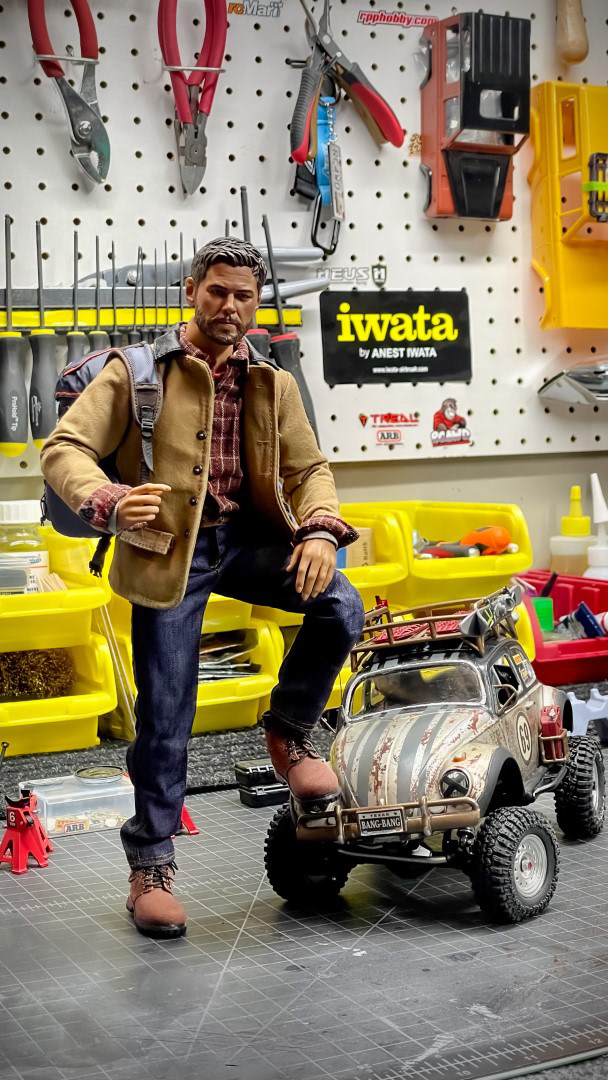 Now, for my next project.... should I go big? or stay small? Last edited by TheBakedBeans; 01-29-2024 at 01:06 AM. |
|
| |
|
02-17-2024, 06:45 PM
| #36 |
| Quarry Creeper  Join Date: Apr 2023 Location: NW Connecticut
Posts: 204
|
Very nice work ! Looks great .
|
|
| |
|
02-20-2024, 03:45 AM
| #37 | |
| Quarry Creeper Join Date: Oct 2012 Location: Chicago Area
Posts: 327
| Quote:
 | |
|
| |
|
02-21-2024, 03:37 AM
| #38 |
| Go Buckeyes!   Join Date: Jun 2017 Location: Mid-Ohio
Posts: 4,135
|
This was a great build and turned out fantastic. Can't wait to see the next build...big or small! |
|
| |
|
02-21-2024, 03:51 PM
| #39 | |
| Quarry Creeper Join Date: Oct 2012 Location: Chicago Area
Posts: 327
| Quote:
I have a half built Black Hawk, a Rock Van waiting for some updates. Ill try to get those done for sure. The YouTube build video is what slows me down the most. But I love doing those videos. | |
|
| |
|
02-21-2024, 11:32 PM
| #40 |
| Rock Stacker Join Date: Apr 2019 Location: Bay Area
Posts: 77
|
Simply amazing work!
|
|
| |
|
 Builder's Notes: SCX24 Playmobil Volkswagen Kitbash - Similar Threads
 | ||||
| Thread | Thread Starter | Forum | Replies | Last Post |
| Builder's Notes: X-Row Kuro King 1/24th D90 | TheBakedBeans | Micro Scale Rigs | 22 | 03-02-2023 11:15 AM |
| Builder's Notes: FJ Series from The Hardbody Crawler Co | TheBakedBeans | Micro Scale Rigs | 53 | 02-28-2023 04:18 PM |
| Builder's Notes: Jaws 2 Another Shark in the Water | TheBakedBeans | Micro Scale Rigs | 18 | 11-27-2022 05:21 PM |
| Builder's Notes: 1/18th Mercedes Benz G500 | TheBakedBeans | Micro Scale Rigs | 20 | 10-17-2022 02:36 PM |
| Builder's Notes: SCX24 Micro Shark Conversion Kit | TheBakedBeans | Micro Scale Rigs | 27 | 10-02-2022 08:30 AM |
| |


 Linear Mode


