| |
 11-26-2014, 07:08 PM
| #41 |
| Rock Crawler Join Date: Feb 2007 Location: Crawling Around
Posts: 871
|
While I'm waiting for Jerry's seats to come in, I started on some basic accessories. This is a printed crate, of course, and I shoved some ropes and stuff inside. But....  I REALLY didn't want to start gluing and screwing stuff to the truck, because I will use this for multiple bodies etc, AND.... I'm onto the magnet theme now, so... 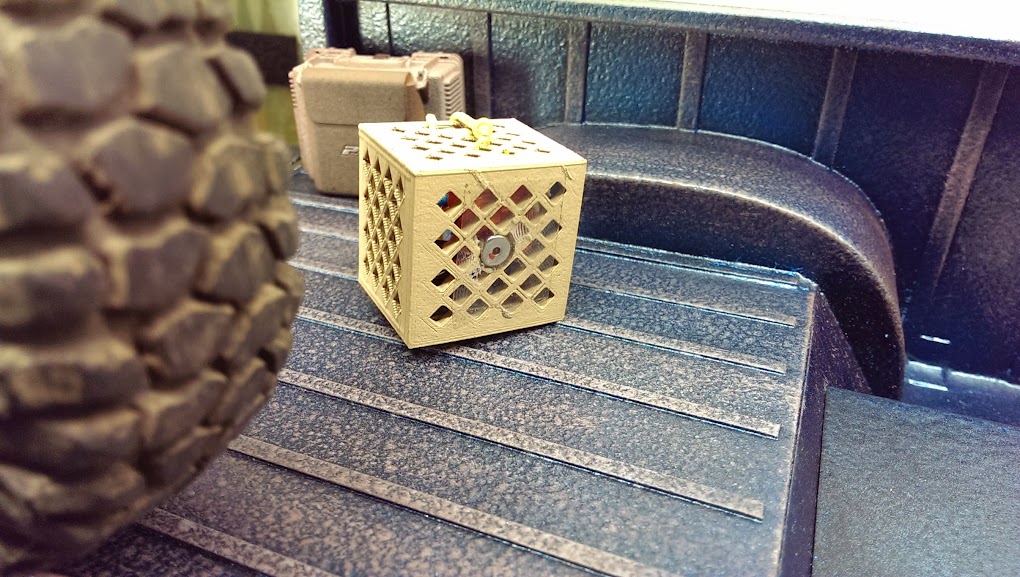 One single 1/4 inch Rare Earth magnet under the crate, and one under the styrene down under the frame. This works so great, I can't describe it to you.. and it's so clean. I did the same trick to the welder in the back of the bed there also, and put some other magnets around the truck in odd places, so I can move stuff around, and once stuck it WON'T come off! Yay! I think the truck will have trouble getting past Magnetic Hill though.  |

|  |
| Sponsored Links | |
| | |
|
11-26-2014, 07:09 PM
| #42 |
| Rock Crawler Join Date: Feb 2007 Location: Crawling Around
Posts: 871
|
And..... ...I think I've gone a bit nuts now, but I'm going to chop off the hood to get an access panel. It's completely unnecessary also, making me sure I've lost it. Anyway, it needed a firewall now.  |
|
| |
|
11-26-2014, 07:47 PM
| #43 |
| Rock Crawler  Join Date: Jan 2010 Location: rockford
Posts: 878
|
Very nice job on this build. Can't wait to catch it in person. Hopefully some time soon.
|
|
| |
|
11-28-2014, 08:34 PM
| #44 |
| Rock Crawler Join Date: Feb 2007 Location: Crawling Around
Posts: 871
|
All this opening hood stuff got me busy on the front end of the truck, and some other stuff started happening. I needed some way to hold up the front end if the hood was going to get a chop, so I made these little extensions to the side plates. The method was a bit confusing to me. I didn't want to trim and cut and trim and cut forever trying to get the extensions to fit right, so I tried to make a cardboard template... didn't work. Can't see where to make the lines. SO... I remembered I had this RC4wd axle packaging... like a thin lexan sheet sort of.. and I put that over the OUTSIDE, and then just traced the lines! Yay! Easy to see everything well! Yaaaayyy!!! This made an hour job into 5 minutes.  The extensions were easy to cut out then, and trace on a styrene sheet, and then cut and install. With only a tiny bit of sanding it's a perfect fit for the fenders, inner fenders, and back of the grill area. Yaaayy!! I think that's going to help a ton with the strength of the front end. 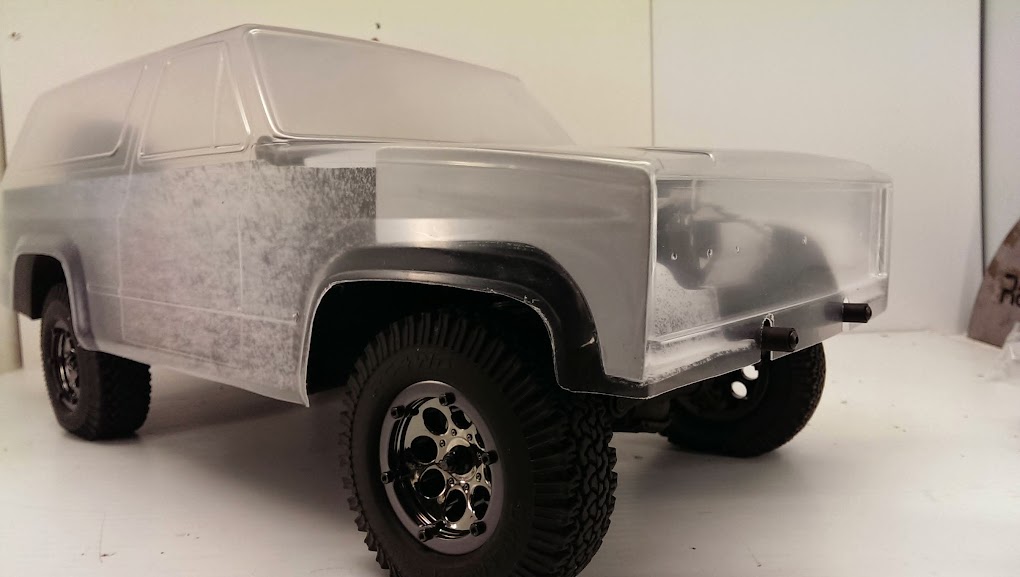 Rick gave me this idea to fillet a little square styrene strip in the corners, and it works great too! Saved me from making 5 little corner gussets and gluing them all over the place. Thanks Rick!  This shot sorta gives you the idea just how much room there is under the hood of this massive thing! The battery goes in the middle of the space there in that white bracket, and the rest is already running in the truck, meaning.... there's TONS of real estate left in here! hhaaha!  |
|
| |
|
11-28-2014, 08:53 PM
| #45 |
| Rock Crawler Join Date: Feb 2007 Location: Crawling Around
Posts: 871
|
I had my exacto knife in my hand, and then I had my grill in the other hand, and a milling machine in the corner... and some stuff happened. Notice the shadow?  Of course, that means I can put a rad in the truck now, and make it worth while.. 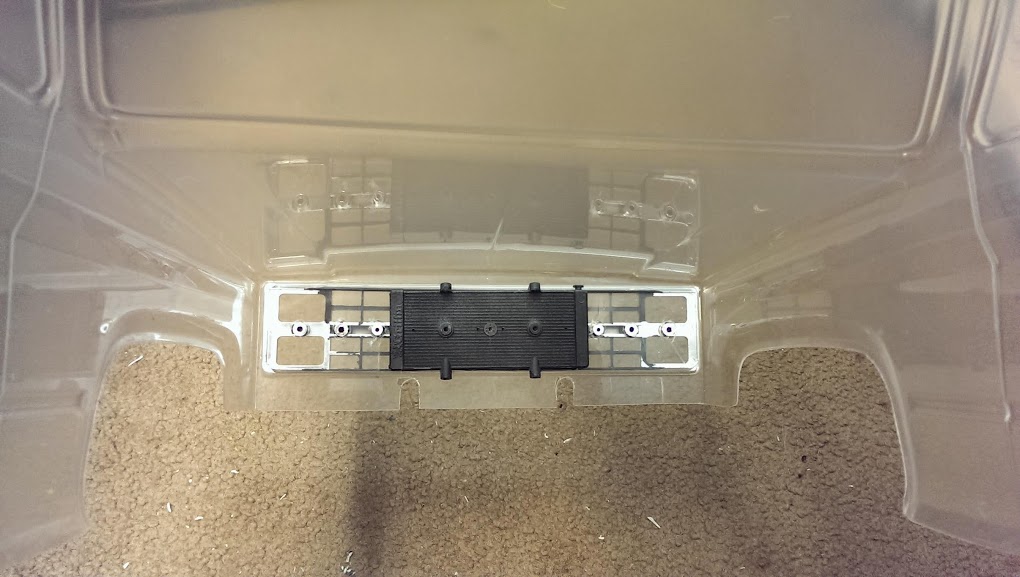 and thanks to that, I came up with this sweet idea to use the center bolt behind the grill to attach the rad. The way this works is I drilled a hole in the dead center of the rad, and the screw hole in the grill is also dead center. Thanks, Vaterra. hahah. The hole I cut in the truck lexan matched up with the grill lines, but the rad was a bit larger in width than that hole, so..... with the one screw I can attach the rad AND the grille all at once, because it pinches the lexan body between the 2 parts. SWEET! I never liked the stock Vaterra grill mount stuff there. You can kinda see it in this picture below, with the grill on the outside, lexan in the middle, and rad behind, but there's only one bolt! haha!  |
|
| |
|
11-28-2014, 08:57 PM
| #46 |
| Rock Crawler Join Date: Feb 2007 Location: Crawling Around
Posts: 871
|
A couple of larger shots here, you can't make out much of the detail, sadly, but it gets me thinking about the final product a bit! Yay! I may indeed change this to a 1984 M1009, instead of 1986, now that the grill can be used properly for a 1984. I'll use the lower outside light for the signal as per stock, and the upper for the headlight dual beam, as per stock. Here's the 1984 picture:  and here's where I'm at with the front end: (my glue bottle happens to be reflecting on the bowtie haha)  This hard-to-see pic below just shows the position of the rad in the truck now. This gives me the room still to make a rad support and some other support for the front end before I end up chopping it up for the hood opening. 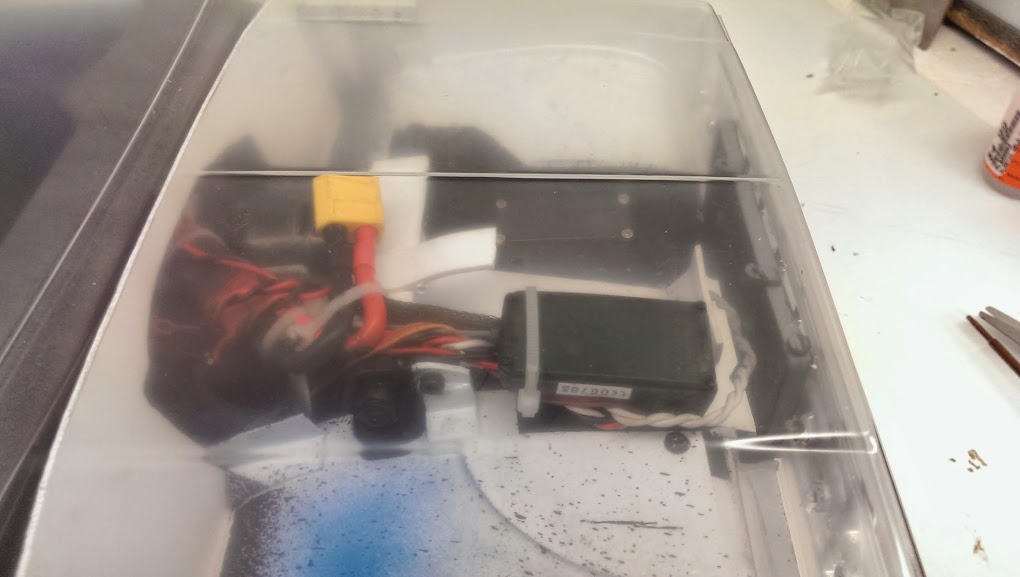 |
|
| |
|
12-01-2014, 11:42 AM
| #47 |
| Rock Crawler Join Date: Feb 2007 Location: Crawling Around
Posts: 871
|
So.. I made up some non-scale features under the hood that actually have function to keep stuff together. I think I can take a few MAJOR tumbles with this before something breaks HAAHA! First off was a bar for the top of the rad support, hood supports. I used a rectangle piece to go across behind the top of the rad and give support to both of the fender extension parts. On those, I used a 1inch rad gusset to brace them square to the fender extensions, and on THAT part, I mounted the hood magnet. I LOVE MAGNETS! Gone are the velcro days forever. I first layered the hood side magnet, then tape, then the truck side magnet into a sandwich. I scooched them around the hood until they were centered nicely on the gusset and on the hood, and then glued the magnet to the lexan hood with a bit of CA glue. After it was really well dried (overnight) then I shoe-goo'd the bottom magnet all over the place (still stuck to the hood) and then put the body on the truck frame, and let that sit over night also. The tape guarantees the magnets don't get glued together. 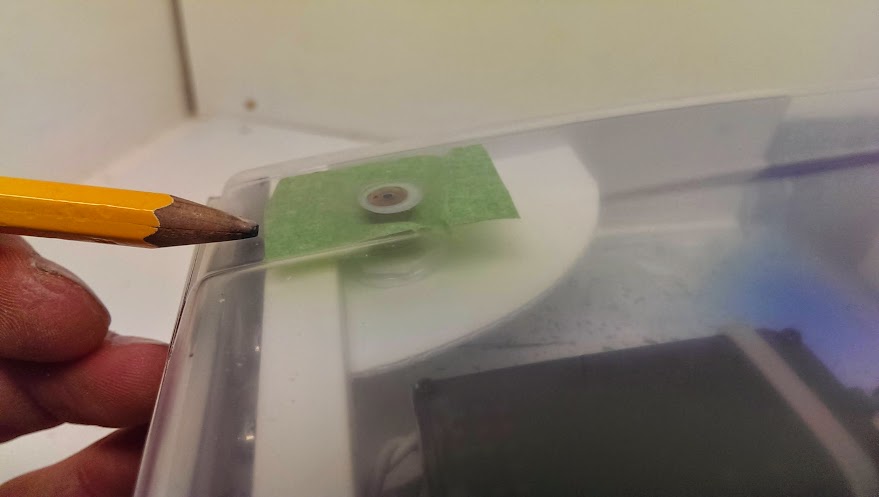 So, now my truck looks like this with the civilian body on it, and you can see some of the engine bay support stuff there, and the rad support bar. 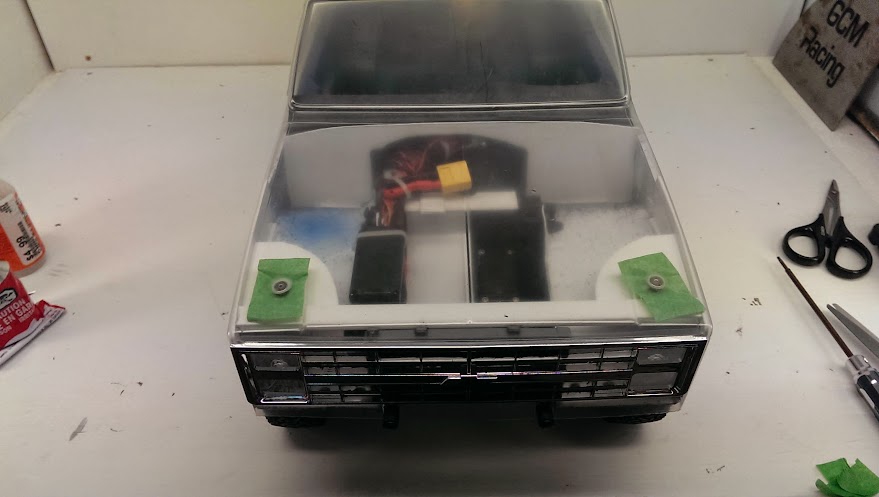 Now that the magnets are glued to the civilian body, and the Truck framing, I repeated the same trick with the tape, and magnet sandwich to get the magnets onto the MIL body also, only this time the sandwich was on the truck first, and the body glue last. Now I have one magnet on the frame each side, and both bodies click on like nothing, and really really CLICK strong! Yay!! 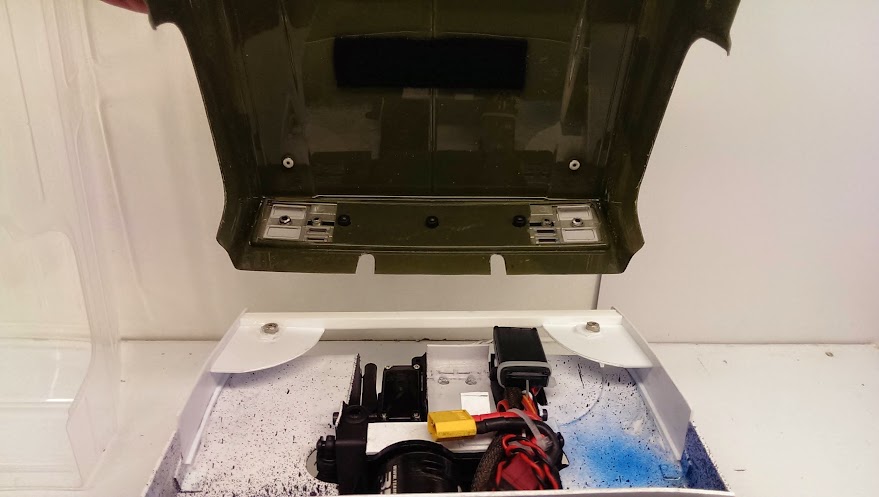 |
|
| |
|
12-01-2014, 11:43 AM
| #48 |
| Rock Crawler Join Date: Feb 2007 Location: Crawling Around
Posts: 871
|
In the mean time, I got the center console in, and added the map of Arnprior (of course, that's where we are) and something to rot your stomach-I mean Coke. Of course, it's on magnets also. HAHA!  And while I was doing that, the seats came in! Yeah! These are printed by JC Custom Works by Jerry. They are hollow, and strong, and come pre-primed. I'm doing cloth seat covers, so it's a perfect match! Yeah! They are a true 1:9 scale like the truck, and it's a great fit. Thanks so much to Jerry for making these up!  |
|
| |
|
12-01-2014, 12:23 PM
| #49 |
| I wanna be Dave Join Date: Oct 2007 Location: Castle Rock, WA
Posts: 8,785
|
Lots of nice scratch work going on in here and those seats look great as well.
|
|
| |
|
12-03-2014, 05:51 AM
| #50 |
| Rock Crawler Join Date: Feb 2007 Location: Crawling Around
Posts: 871
|
Thanks! I like the stuff going into this truck. There's some great vendors out there to help me out! This is officially the 1984 M1009 at the front end now. I did away with the inboard signals and changed up the headlight and signal lamps on this grille, as well as the Civilian one. I like the look. Bumpers are in the works at the moment.  |
|
| |
|
12-03-2014, 11:35 AM
| #51 |
| Rock Stacker Join Date: Nov 2014 Location: SoCal
Posts: 78
|
Looks good. Only issue is the turn signal lens is clear, the bulb is yellow/orange. Going to be changing mine as well to match my '87 1:1. I think the Silverado version, which is what this one is, has the dual headlights while the regular version, which my '87 is, has the single headlight. |
|
| |
|
12-04-2014, 07:15 AM
| #52 |
| Rock Crawler Join Date: Feb 2007 Location: Crawling Around
Posts: 871
|
Thanks, Crusty. I'll fix that on the civilian body. Here's some updates on this Blazer and Dana's build also: https://www.youtube.com/watch?v=sMSF2Wo3ETY |
|
| |
|
12-04-2014, 07:33 AM
| #53 |
| Rock Stacker Join Date: Nov 2014 Location: SoCal
Posts: 78
|
NP. I took a look this morning at my '87 as I was getting in it to head off to work. The front grill is actually more of an aluminum silver color, not chrome. Or at least it is on mine. I'm in the process right now of following your lead and cutting out the grill as you did. I'm just going to paint the lexan behind it a weathered black though, no detail like you did. Love the detail your doing though. Keep us posted as you progress. Looking at the notches in the body for the bumper mounts. Is this because you lowered the body some? I did that on mine as well to align the bumpers like they are on my 1:1. I think it looks a lot better that way. |
|
| |
|
12-08-2014, 03:49 PM
| #54 |
| Rock Crawler Join Date: Feb 2007 Location: Crawling Around
Posts: 871
|
Thanks for the comments. I do like the body lowered on the chassis also, it's way more in line with the real mounting position on the frame. There's new shoes for the Civilian side of this now. I went for the GM/Detroit style rim, like what they had from the dealership options. The bumpers won't stay for this body though, but the rims and Fun Country tires are great!    |
|
| |
|
12-08-2014, 03:50 PM
| #55 |
| Rock Crawler Join Date: Feb 2007 Location: Crawling Around
Posts: 871
|
It turns out Magnets make sweet body mounts also! I've no need for screws, clips, pins, or velcro any more! Yay! Out back I added a pair on each rear fender, partly because they balloon out a bit with the factory body moulds. These click the back right on and in place, and they DON'T fall off, or come undone! Yay! Again!  I thought I'd to a little write up of how I went about this with the body mounting magnets. You can see here there's a set ahead of the door, and behind the door.  The process is easy: CA glue the one magnet to the interior panel, then put on a tiny piece of tape to keep them from gluing both together, then put on magnet #2 on top of the tape. Now you can just dot the back of magnet #2 with CA glue, and close the lexan body onto it. Add a Temporary Magnet #3 to the outside of the lexan to hold it all together until it's dry, and once dry, remove #3, and the tape, and it's GREAT!  |
|
| |
|
12-08-2014, 03:50 PM
| #56 |
| Rock Crawler Join Date: Feb 2007 Location: Crawling Around
Posts: 871
|
Back to the M1009 side of this build, I finally added the proper wheels, which are a black version of the GCM Racing Detroit 8-Hole rims, and used the BFG copied tires again. The steel bumper base is on the truck also, front and rear, and with all the body magnets on the truck the thing really sits nice now! YAY!! I really like this thing! 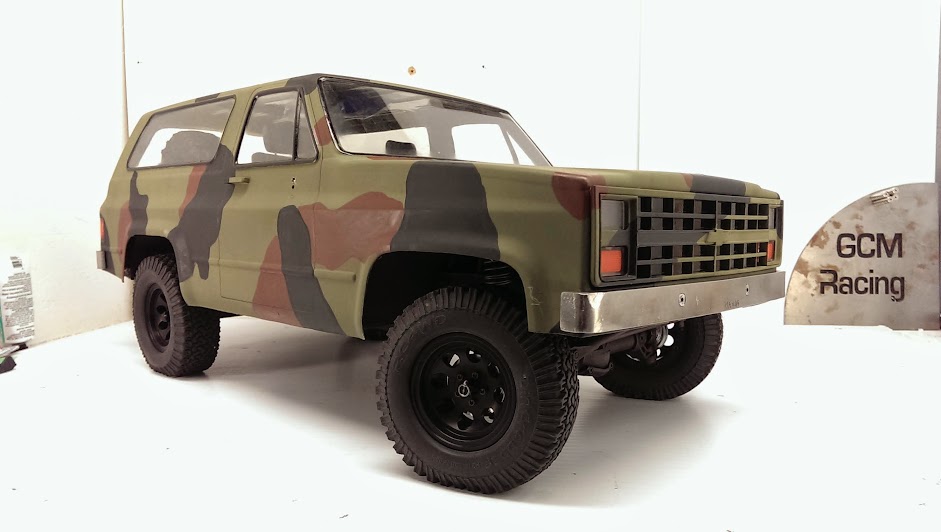 The rims are simple, and understated, and work great with the GCM LOCK hubs front and rear. Just goes all together really nicely for this build.  This last picture below shows you the fantastic features the magnet mounting brings to the lexan body... like the floppy lexan wave is GONE and the body lays straight as an arrow now. Yay! Can you get the excitement I feel about this build? haha. The rim offset with the rotors hangs the tire nicely with the fender, and I'm really happy with the stance! 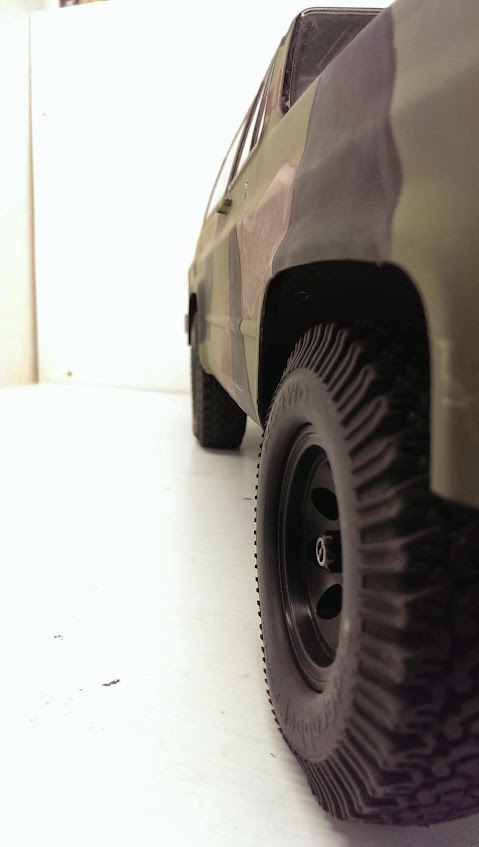 |
|
| |
|
12-08-2014, 09:50 PM
| #57 |
| Rock Crawler Join Date: Jan 2008 Location: Lincoln
Posts: 740
|
I have a quick question, did you strip the chrome plating off of the diff covers before painting? I had a bit of a chore with my Sawback. I'm picking up one of these kits next, and was curious if you knew any tricks.  |
|
| |
|
12-09-2014, 06:26 AM
| #58 |
| Rock Crawler Join Date: Feb 2007 Location: Crawling Around
Posts: 871
|
I ground half it off when I reshaped the cover, but other than that, I just shot it with PlastiKote Black primer,and that's all. Seems to work well enough so far!
|
|
| |
|
12-09-2014, 08:31 AM
| #59 | |
| Rock Crawler Join Date: Sep 2009 Location: Spring, Texas
Posts: 697
| Quote:
Then you can wash and paint if you want.
| |
|
| |
|
12-09-2014, 10:08 AM
| #60 |
| Rock Stacker Join Date: Nov 2014 Location: SoCal
Posts: 78
|
Looking good. Did you narrow the axles or is the offset on the rims just right so that it tucks the tires in where they belong? Any rubbing issues on the inside of the wheels when turned to lock? I'm still debating on weather to narrow my axles to move my tires in some. The bumpers look good. Are you going to trim the little bit of body that hangs out beneath them? What about adding the black air dam that attaches to the bottom of the bumper? Or is that not on the M1009? I've notice a few times in crawling around my back yard that I will drag the back bumper on some steep climbs. Just wondering how well your bumpers would hold up to that. |
|
| |
 |
 GCM's 1986 M1009 Blazer Build - Similar Threads
 | ||||
| Thread | Thread Starter | Forum | Replies | Last Post |
| RCBuzz - Vaterra Ascender (1986 Chevrolet K5 Blazer) | RCBuzz | Vaterra Ascender | 2 | 11-12-2014 09:15 AM |
| Badger's 1986 Chevrolet K-5 Blazer Ascender | badger | Vaterra Ascender | 3 | 09-30-2014 12:16 PM |
| River Ridge #9 - Dana's Blazer and GCM's Hilux Vid | Generis | Scale Videos! | 0 | 09-27-2013 10:06 AM |
| 1986 suzuki samurai build | neightfrog | 1.9 Scale Rigs | 32 | 06-12-2009 02:16 PM |
| |


 Linear Mode


