| |
| |||||||
 |
| | LinkBack | Thread Tools | Display Modes |
 11-01-2011, 05:33 PM
| #41 |
| RCC Addict Join Date: Jun 2008 Location: Wasilla
Posts: 1,304
|
Just an small update of nothing really but some information that I have finally got into my new place and have my shop area setup now so as soon as I get some down time from work this thing will get more done to it. I have a few awesome ideas for this build to come very soon. As far as the pictures and questions about the servo setup its as simple as he says its just a U shaped piece of delrin so to speak that holds the servo and is mounted as a frame spacer up front, couldn't get much simpler than it is. |

|  |
| Sponsored Links | |
| | |
|
11-06-2011, 05:30 PM
| #42 |
| RCC Addict Join Date: Jun 2008 Location: Wasilla
Posts: 1,304
| So I am finally getting settled into the new place, got the hobby shop rebuilt and most of the stuff re-organized and put away my shop area is actually better than its ever been before but memorizing where everything is still has yet to be desired. Electronics and front drag link. This weekend I got the front crossover steering bar cut and installed cut it out of the norm some 1/4inch delrin. used a bent rod end on the upper and a straight on the lower so it would give me a bit more clearance above the front axle on full compression of the suspension. For the electronics im using a 10amp CC BEC along with a stock MRC ESC powering a Holmes Hobbies torquemaster mini, Steering is a Traxxas 2075 waterproof servo up front @ 6v controlled by a Axial 3Channel AX-3 RX and TX. The lipo out back is an 1000mah 2cell and i will be adding a servo for winch up front very soon. Some pics of the bar and the electronics installed, I made this one simple i cut a basic electronics tray front lexan and I didn't waterproof anything on this little rig yet but I will in the end. Also still need to go through and redo the loc-tight on stuff for the suspension.  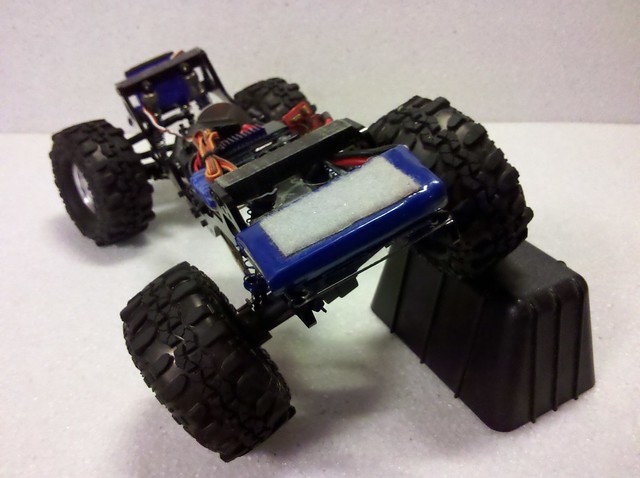 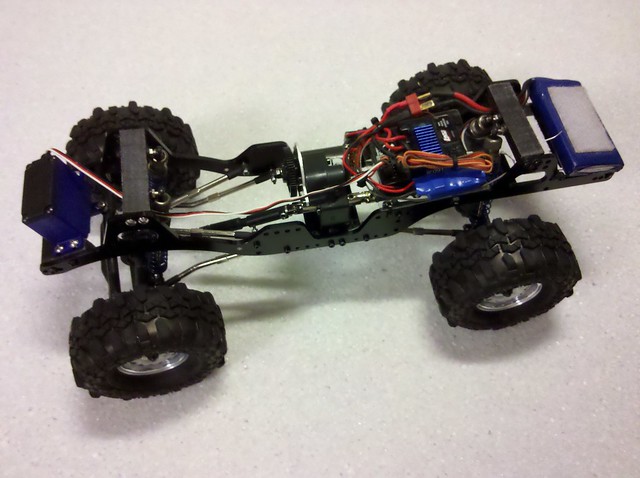 Body and interior. Started on determining an exact height for the body off the frame ended up right about where its at in the pics, a bit of rub on the front fenders on full articulation so ill have to take some of it out and remove the front valance below the front bumper for tire clearance also which i will tell you from experience you would end up doing that on a 1:1 toyota or datsun anyways with these big of tires, i always have too. The interior is a OG interior from a Big bear i only had to barely clearance the interior between the seats for the transmission. i will build a small console or something to cover this up before im finished. Here are a few shots with the body on at the height I've determined works best for this truck with these tires. 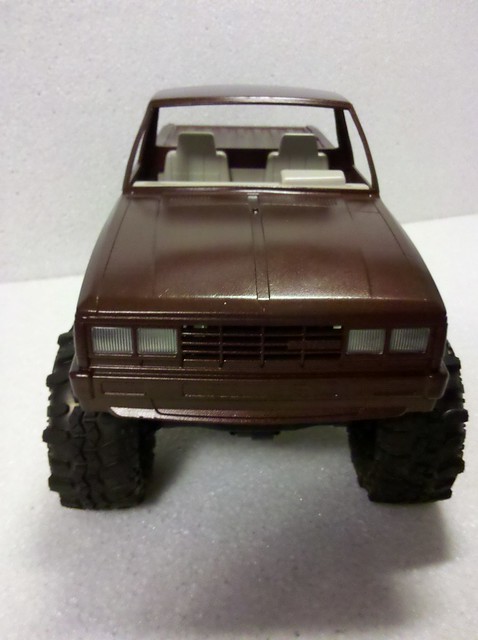 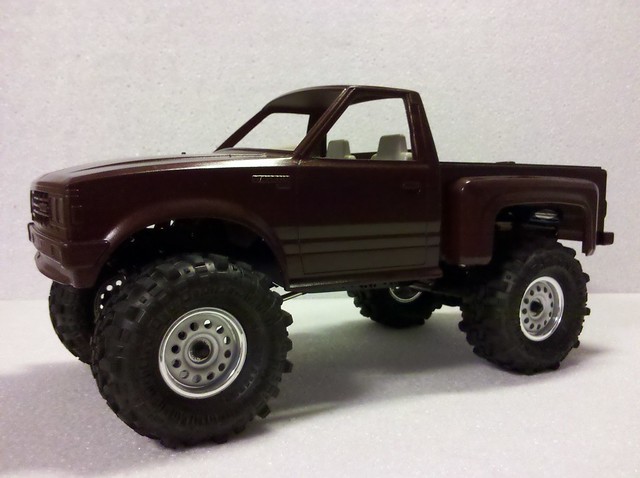 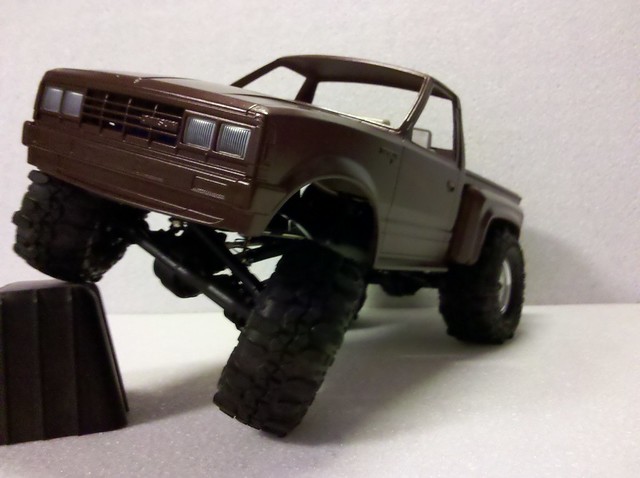 With canopy and canoe. 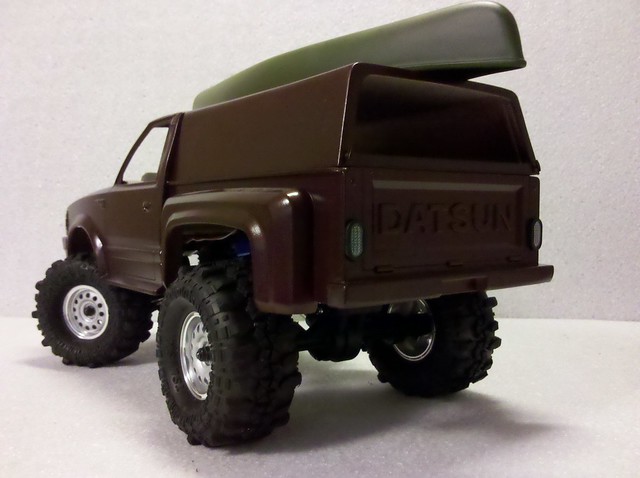 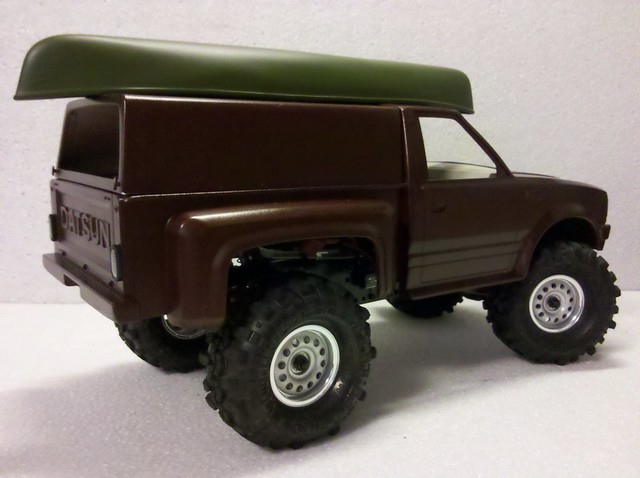 Last edited by akguanja; 11-06-2011 at 05:42 PM. |
|
| |
|
11-06-2011, 07:25 PM
| #43 |
| I wanna be Dave Join Date: Apr 2009 Location: Unnecessary Surgery Land
Posts: 3,406
|
Cute truck
|
|
| |
|
11-06-2011, 08:11 PM
| #44 |
| Quarry Creeper Join Date: Nov 2005 Location: Pueblo West
Posts: 250
|
nice looking rig , that canoe looks right @ home on the top
|
|
| |
|
11-10-2011, 08:13 PM
| #45 | |
| RCC Addict Join Date: Jan 2010 Location: Barboursville, WV
Posts: 1,448
| Quote:
  | |
|
| |
|
11-11-2011, 05:01 PM
| #46 |
| RCC Addict Join Date: Jun 2008 Location: Wasilla
Posts: 1,304
| Window glass The past couple days I haven't had much time I'm battling being sick but I did manage to get a couple things done. I got the rear glass in the canopy and added a few scale stickers and also put the windshield in with the token go prepared visor banner up front on the cab. 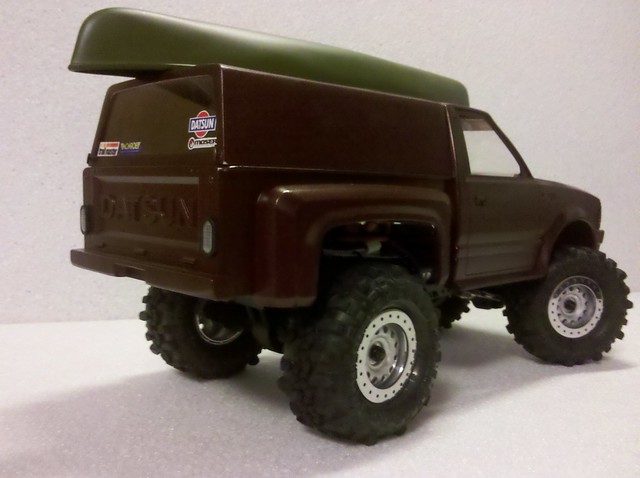 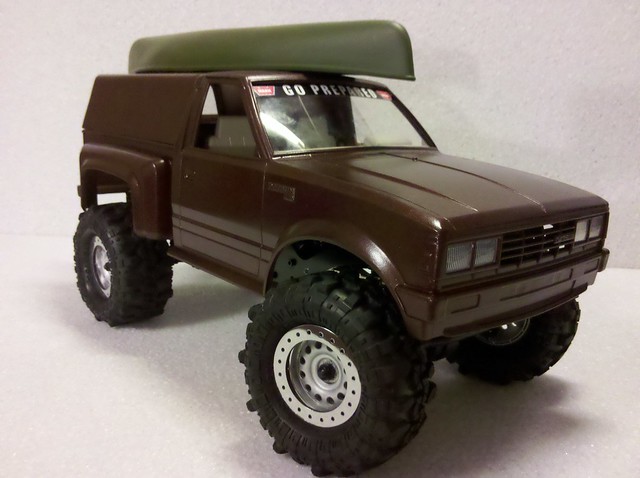 Beadlock rings Yesterday I got a package in the mail from Matt over at Dinky RC. It was 2 sets of bead lock rings he had cut for me for my rims for this Datsun and my other Datsun that he currently still is working on. I hit them with the multiple layers of sandpaper(180, 220,320,600) then some buffing and polish and I ended up with these mirror like finished rings. They arent glued/attached yet I just kind of stuck them on with the friction of the tire to hold them in place but it gives you a good idea how they will look when finished. I think the rings overall help with the tires looking so ballony. 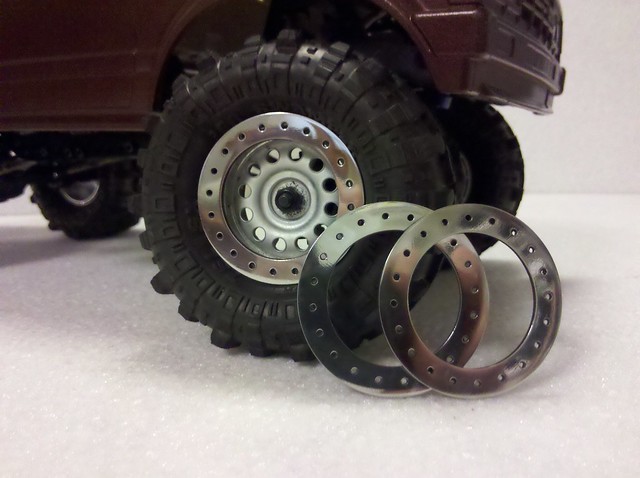 |
|
| |
|
11-11-2011, 06:06 PM
| #47 |
| Rock Crawler Join Date: Oct 2009 Location: Wasilla, Alaska
Posts: 852
|
Looking good Hows the new place?
|
|
| |
|
11-11-2011, 08:44 PM
| #48 | |
| RCC Addict Join Date: Jun 2008 Location: Wasilla
Posts: 1,304
| Quote:
Thanks man! The new place is pretty good, other than not having a garage lol I have my RC stuff alot more organized althoe so it helps with the whole process lol. | |
|
| |
|
11-11-2011, 08:49 PM
| #49 |
| RCC Addict Join Date: Jun 2008 Location: Wasilla
Posts: 1,304
|
So My next goal was to shorten a set of the DMG sand ladders so they would fit on the canopy which i did by 1 section now they look much better imho. I then had to figure out some type of way of mounting them on the sides that was fairly easy to remove them for use. I went with some simple U shaped delrin mounts on each side of the canopy that accept a bungee to hold it in place.  Last edited by akguanja; 11-11-2011 at 09:25 PM. |
|
| |
|
11-12-2011, 03:28 PM
| #50 |
| RCC Addict Join Date: Jun 2008 Location: In the woods
Posts: 1,155
|
paint did turn out awesome.and i love the way the tires turned out also.i love how fat they look on those wheels.
|
|
| |
|
11-15-2011, 02:53 PM
| #51 | |
| RCC Addict Join Date: Jan 2010 Location: Barboursville, WV
Posts: 1,448
| Quote:
| |
|
| |
|
11-15-2011, 03:33 PM
| #52 | |
| RCC Addict Join Date: Jun 2008 Location: Wasilla
Posts: 1,304
| Quote:
| |
|
| |
|
11-21-2011, 03:30 PM
| #53 |
| RCC Addict Join Date: Jun 2008 Location: Wasilla
Posts: 1,304
| Wheel Wells/Body mounts So I managed to get the front and the rear wheel wells finished this weekend. I just used some basic black .040 styrene to make them from. I didn't want anything extremely extensive just a back and kind of a tub to protect the electronics the wheel wells leave just enough room for the interior in the middle. Also made some body mounts that the wheel wells are attached to(through the front and rear shock hoops) out of some clear lexan and put some velcro on them which is how I will be mounting the body as I don't want any screws on the outside. 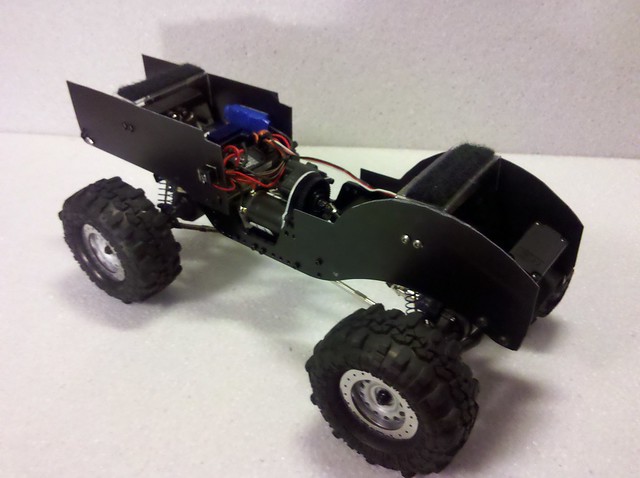 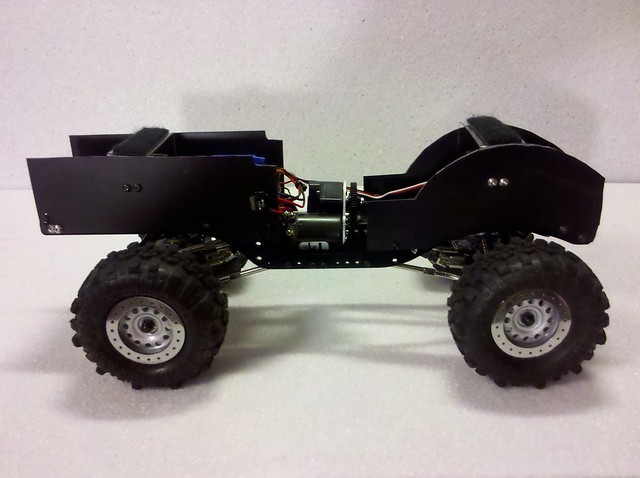 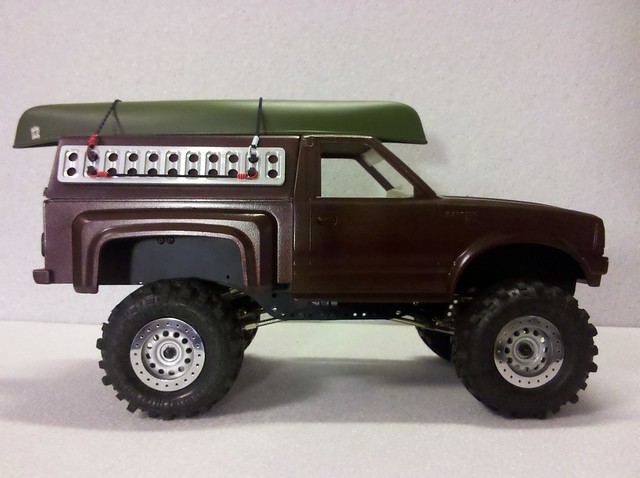 Sand/mud ladder mounts. I also managed to finish the sand ladder mounts on the canopy using the bottom 2 mounts for a bungee and the upper 2 mounts to hold my canoe in place, again with bungees. Here are a couple flex shots so you can see the tuck im getting with where I placed the body mounts etc. Came out just about exactly how I wanted. 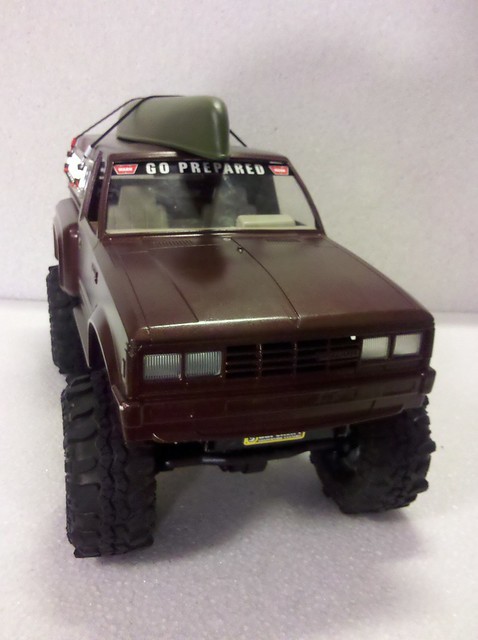 Front tuck 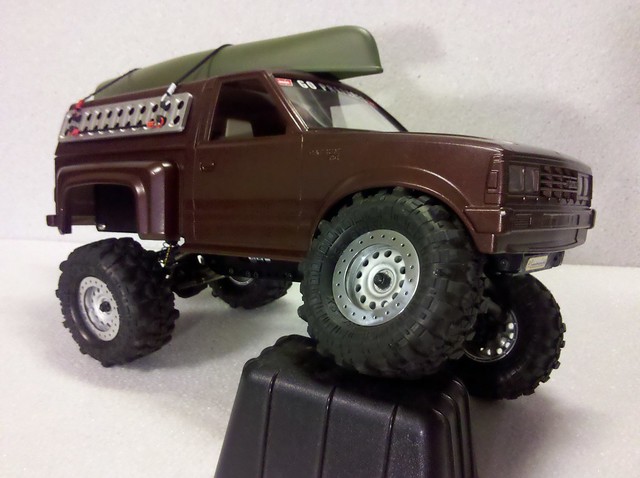 Rear tuck (the tire will actually sink in the rear fender well a lot better than is shown here under actual articulation). 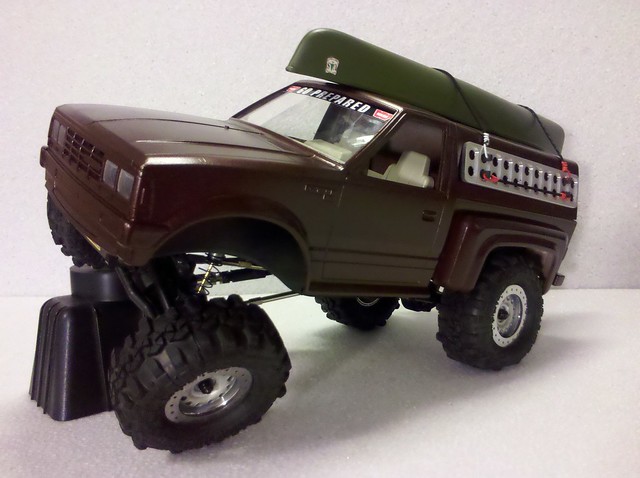 Moving along slowly but surely.... More to come soon. |
|
| |
|
12-01-2011, 02:30 PM
| #54 |
| RCC Addict Join Date: Jun 2008 Location: Wasilla
Posts: 1,304
|
So I got the hardware for these rings in this past week and picked up the drill bits to pre-drill my rims for all these screws. There are 20 per rim and there tiny! Here is a picture for reference. 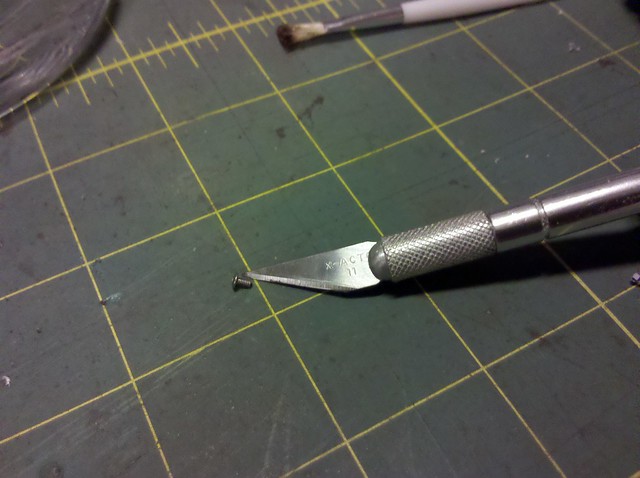 First I used one of the unfinished rings as a pattern then I centered it and marked the first to holes opposite each other and screwed these two screws into the rim. 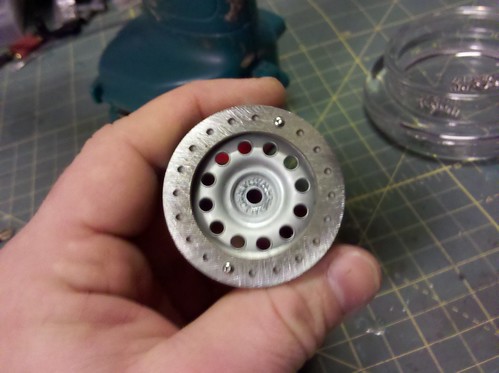 Next I drilled all of the other holes as to make sure everything lined up perfectly for all 20 screws. 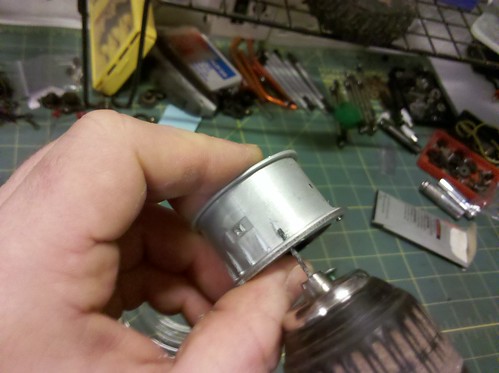 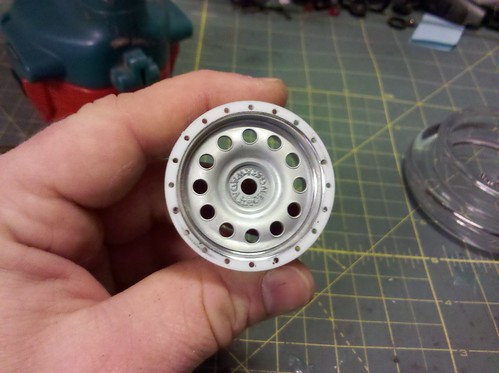 Then I proceeded to screw all of these things in 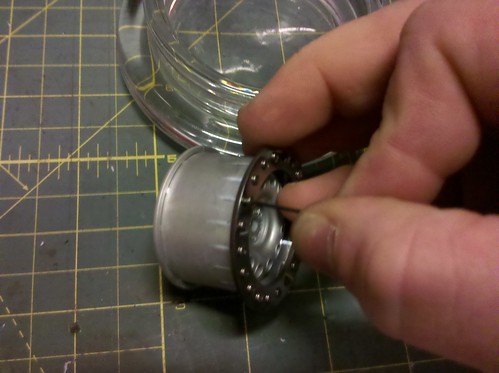 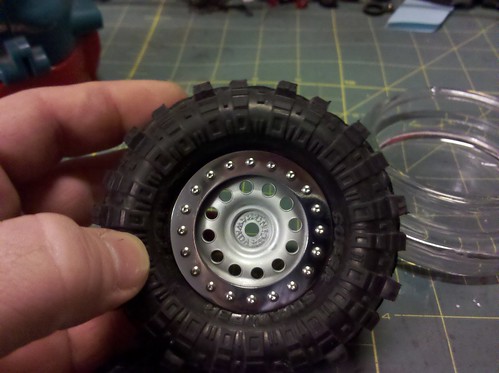 Thanks to Dinky RC and a bit of time on both of our parts id have to say these have to be the coolest kawada rims ever! |
|
| |
|
12-08-2011, 10:54 AM
| #55 |
| Newbie Join Date: Mar 2009 Location: victoria
Posts: 38
|
looks amazing, so much attention to detail
|
|
| |
|
12-08-2011, 11:02 AM
| #56 |
| Quarry Creeper Join Date: Jun 2008 Location: anchorage
Posts: 395
|
Looking good!
|
|
| |
|
12-11-2011, 11:08 PM
| #57 |
| Quarry Creeper Join Date: Apr 2011 Location: Waimanalo, Hawaii \m/
Posts: 426
|
nice work man the truck looks sick |
|
| |
|
12-12-2011, 04:31 PM
| #58 |
| Newbie Join Date: Dec 2010 Location: Greenfield
Posts: 42
|
Nice build...
|
|
| |
|
12-13-2011, 06:30 PM
| #59 |
| RCC Addict Join Date: Jun 2008 Location: Wasilla
Posts: 1,304
|
Thanks for the encouragement guys. This build is going a little slower then normal but I am having ideas and coming up with other stuff in my head to do everyday so it is no way on the BB. I have been keeping my eye out for a semi scale looking driver that will work with this truck i think i finally found one. I'm not sure where it came from but I do know its a nascar(maybe not officially licensed) driver from the 90's I believe, I found it @ a thrift store. I had seen other drivers in this size but all had some weird hand configuration that wouldn't work on a steering wheel and a shifter. This guy has both and after a little paint he should look pretty sweet! 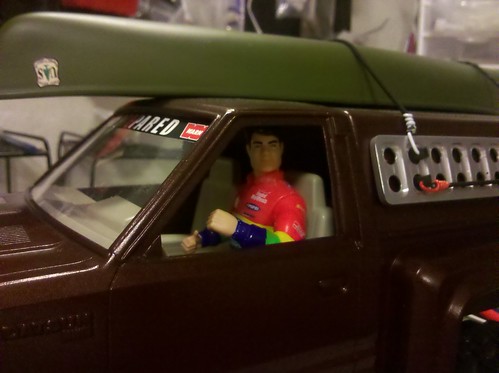 |
|
| |
|
12-14-2011, 09:46 AM
| #60 | |
| Rock Crawler  Join Date: Jun 2010 Location: KCRC
Posts: 774
| Quote:
...great build.
| |
|
| |
|
| |


 Linear Mode


