| |
 05-16-2015, 07:56 PM
| #21 |
| Newbie  Join Date: Dec 2014 Location: Stow
Posts: 34
|
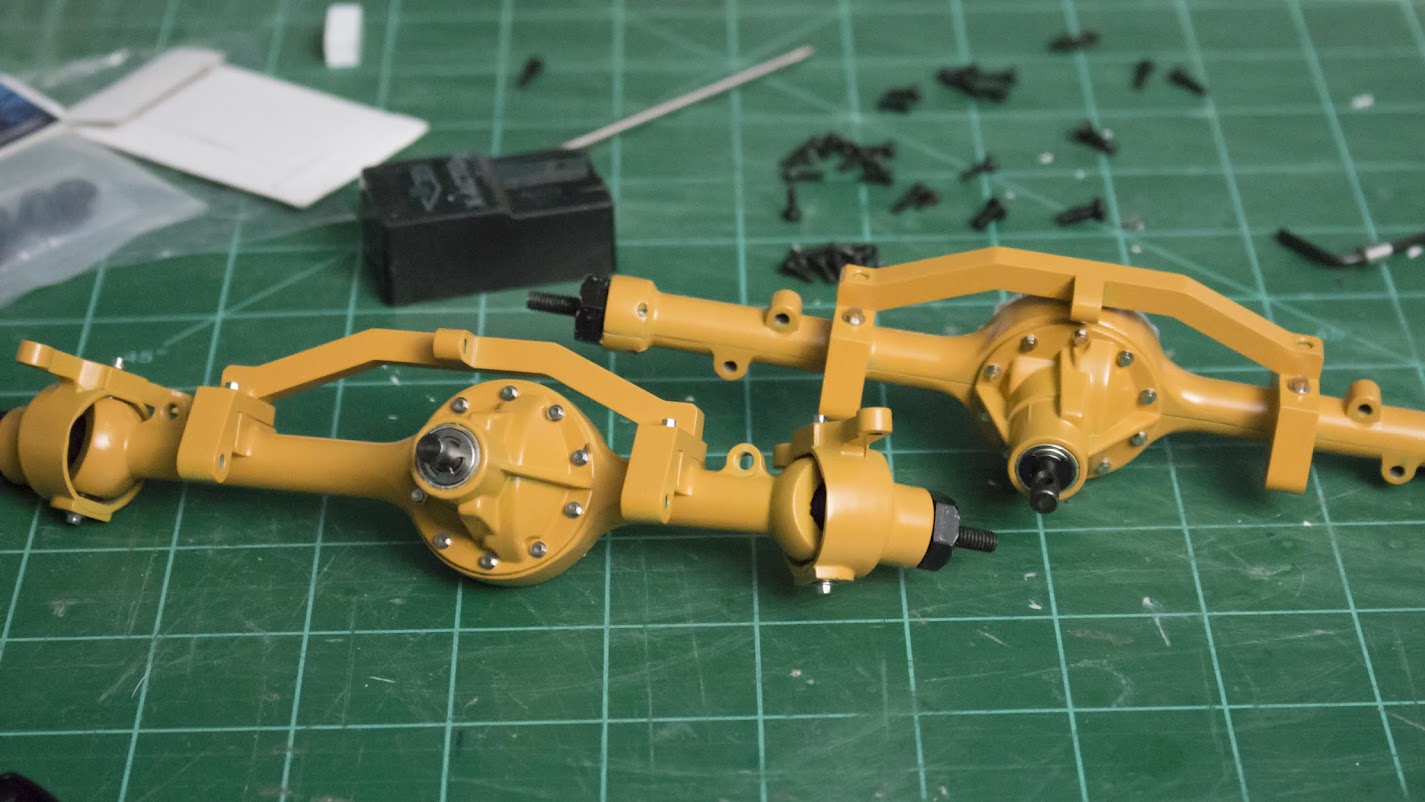
Looking good so far! Question though, whats with the mustard yellow axles and links??? |

|  |
| Sponsored Links | |
| | |
|
05-17-2015, 07:38 AM
| #22 | |
| Quarry Creeper Join Date: Apr 2012 Location: Lansford
Posts: 432
| Quote:
| |
|
| |
|
05-17-2015, 02:16 PM
| #23 |
| Quarry Creeper Join Date: Apr 2012 Location: Lansford
Posts: 432
|
I though that would be all I was going to do today, but I got an idea for my shock mounts and decided to build them too. So I bent up some 3/16" aluminum rod into shock hoops.I drilled 3/16" holes in the frame for these to go into. To mount the shocks, I figured the 3/16" tube would be pretty weak with a 1/8" hole for the screw, so to add a little beef and give nice flat mount points I used 1/4" aluminum rod with a 3/16" hole drilled in it. it also has a 1/8" hole which lines up with the hole on the shock hoop. This forms a nice clamp when the screw is tightened up and should strengthen the mounts point. 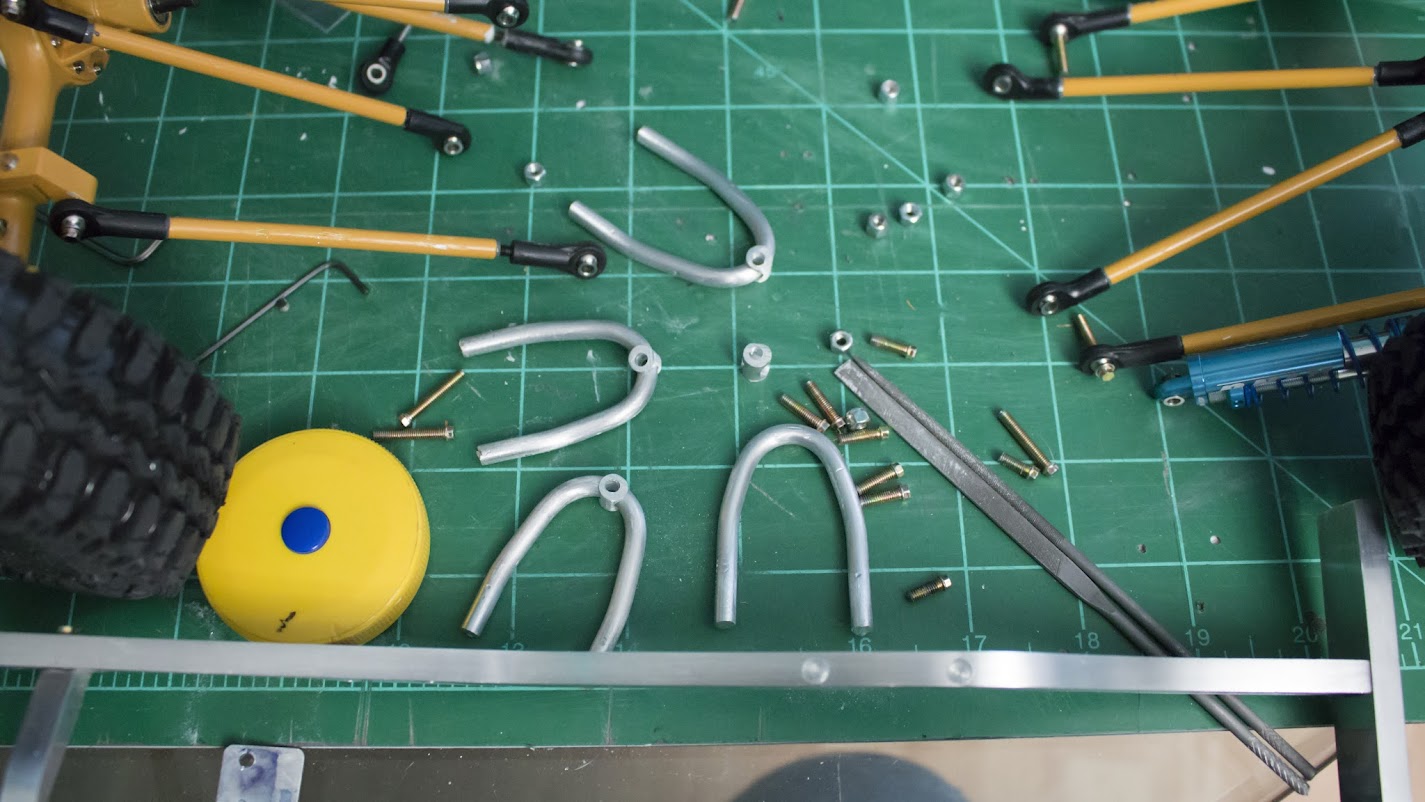  Once the hoops were built and the frame was drilled I then fulled the holes on the frame with JB weld. I cut a small groove on the hoops to let the JB weld squeeze out. I then tapped in the shock hoops with a hammer. They are a tight fit!  And last, I assembled everything I built so far and tested it out. It articulates just as I expected. It needs more weight, but it will get plenty more weight and may need stronger springs by time I'm done!  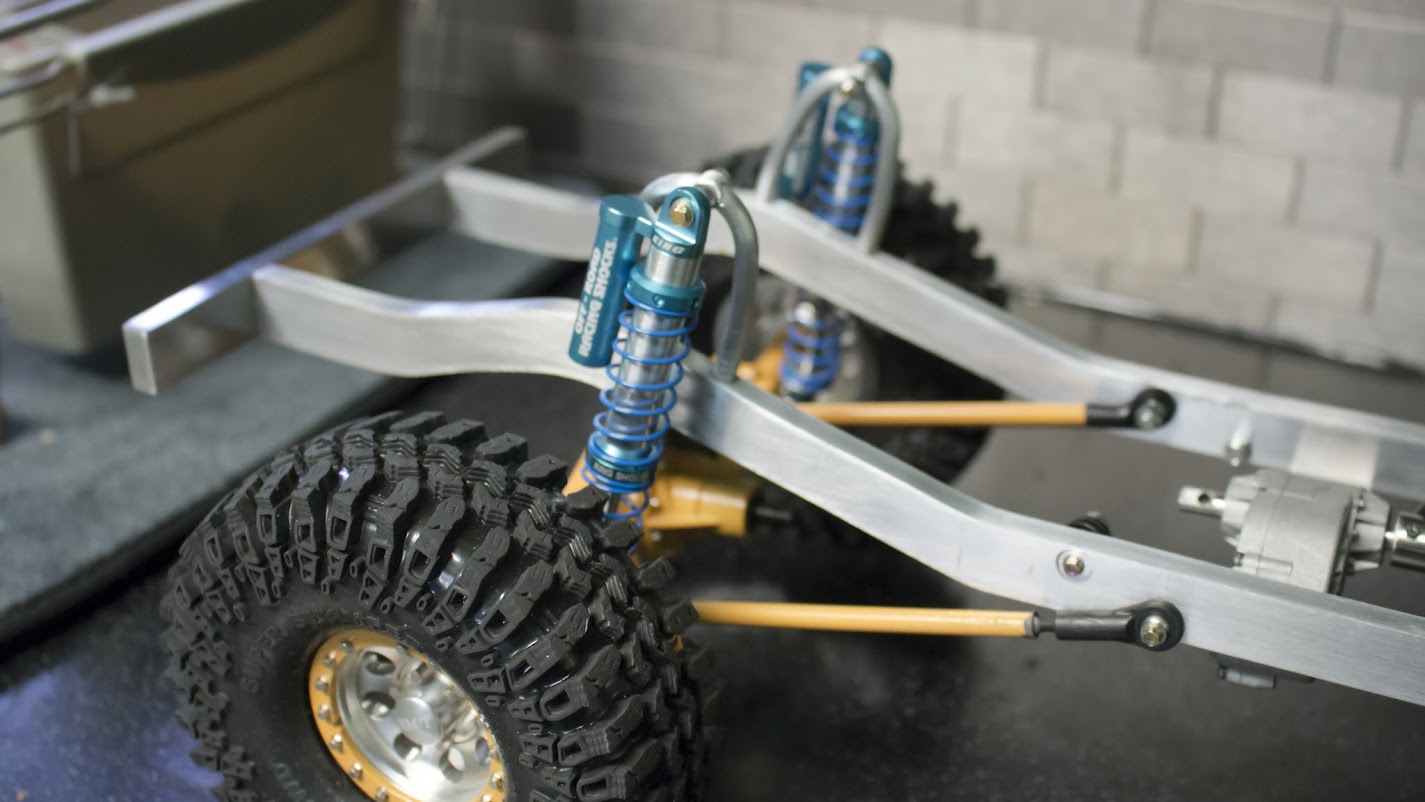    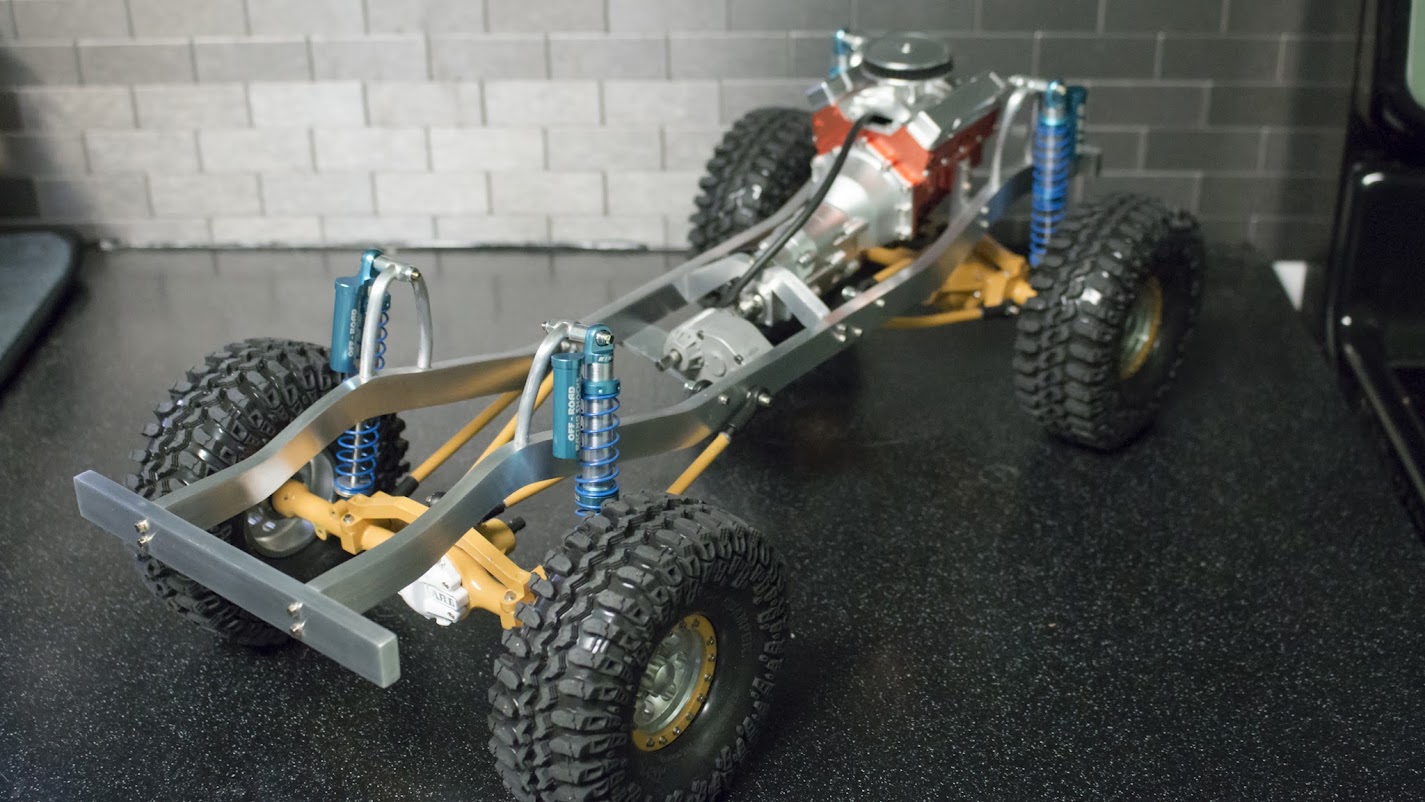 |
|
| |
|
05-17-2015, 05:19 PM
| #24 |
| Pebble Pounder Join Date: Nov 2014 Location: in a tree home atop a redwood tree on the corner of yonder and timbuktoo
Posts: 137
|
Lookin really good! Are you going to paint the shocks (or part of the shocks) caterpillar yellow?
Last edited by lil' bear 4wd; 05-17-2015 at 05:20 PM. Reason: i suck at spelling "caterpillar" |
|
| |
|
05-17-2015, 05:29 PM
| #25 |
| Quarry Creeper Join Date: Apr 2012 Location: Lansford
Posts: 432
|
Of course not! Blue is the signature color of King Racing shocks! With all these colors it's beginning to look like it belongs in a bowl of candy!
|
|
| |
|
05-18-2015, 04:02 AM
| #26 |
| Rock Crawler Join Date: Jan 2013 Location: Australia
Posts: 607
|
Haha i think it looks cool with all the different colours so far!
|
|
| |
|
05-18-2015, 07:13 PM
| #27 |
| Quarry Creeper Join Date: Apr 2012 Location: Lansford
Posts: 432
|
Today my drive shafts came in. During installation just like I expected I had fit issues with the front. One front link was just completely in the way... So I bent them to look kind of funny so I could move them to the outside of the frame rails without the tires hitting them when turning. Then the driveshaft fit well. some other issues I had were with the front shocks... Fully articulated the front tires hit the shocks and if I tried turning from lock to lock, the top of the knuckle caught on the lower spring cup. To fix this I removed the spacer on the upper front shock mount. Even after this the knuckle caught on the lower spring cup. I filed down the corner and problem solved. The only other bug I need to fix is the tire rubbing on the front bumper at full articulation. I think I will limit the shocks a tiny bit, and cut the corners of the bumper to an angle. For now, this is how it sits. Funny links  Upper shock mount spacer gone.  Sharp corner on knuckle(right below bolt head in pic) filed down.  Tire rub 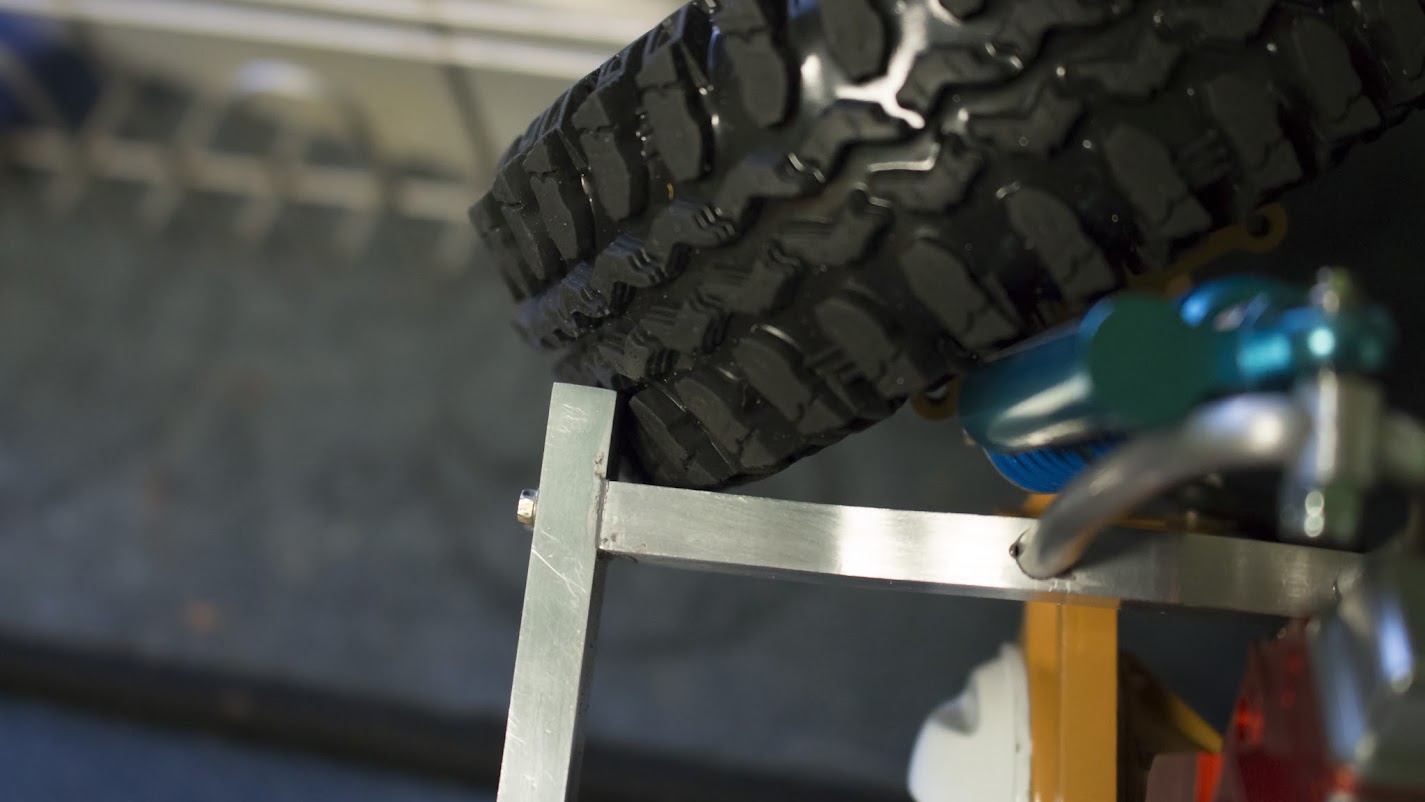 And a flex shot!  |
|
| |
|
05-19-2015, 08:46 AM
| #28 |
| Quarry Creeper Join Date: Jul 2007 Location: Dallas, TX
Posts: 441
|
Nice. I am thinking of getting that motor transmission combo when the transmission is available again.
|
|
| |
|
05-19-2015, 05:43 PM
| #29 | |
| Quarry Creeper Join Date: Apr 2012 Location: Lansford
Posts: 432
| Quote:
It's worth it! It looks cool in the pictures, but it person it looks amazing! | |
|
| |
|
05-20-2015, 03:47 PM
| #30 |
| Quarry Creeper Join Date: Apr 2012 Location: Lansford
Posts: 432
|
The bolts I had ordered for the motor came in, so I got all the allen screws swapped out. No more allen screws! Yay! I then filled all my shocks with shock oil and re-mounted them and the motor and trimmed the front bumper corners. Seems much better now. After this, I carefully fit my steering servo. I should be able to hide it... It has a very tight area to fit in. It's almost touching front of motor, for height it's as low as I can go without having it hit the front diff cover when compressed, and I still had to notch the frame a bit for the steering stabilizer. I will have to put the steering link under the steering arms. If I put it on top the steering stabilizer will be too high and hit the frame. Now I have enough room to put my winch on the edge of the bumper with about 1/4" or so to put the grill between it and the steering servo. So I should be able to make a radiator/fan shroud to cover servo. I then rolled the truck out of the garage for some pictures in the sun!     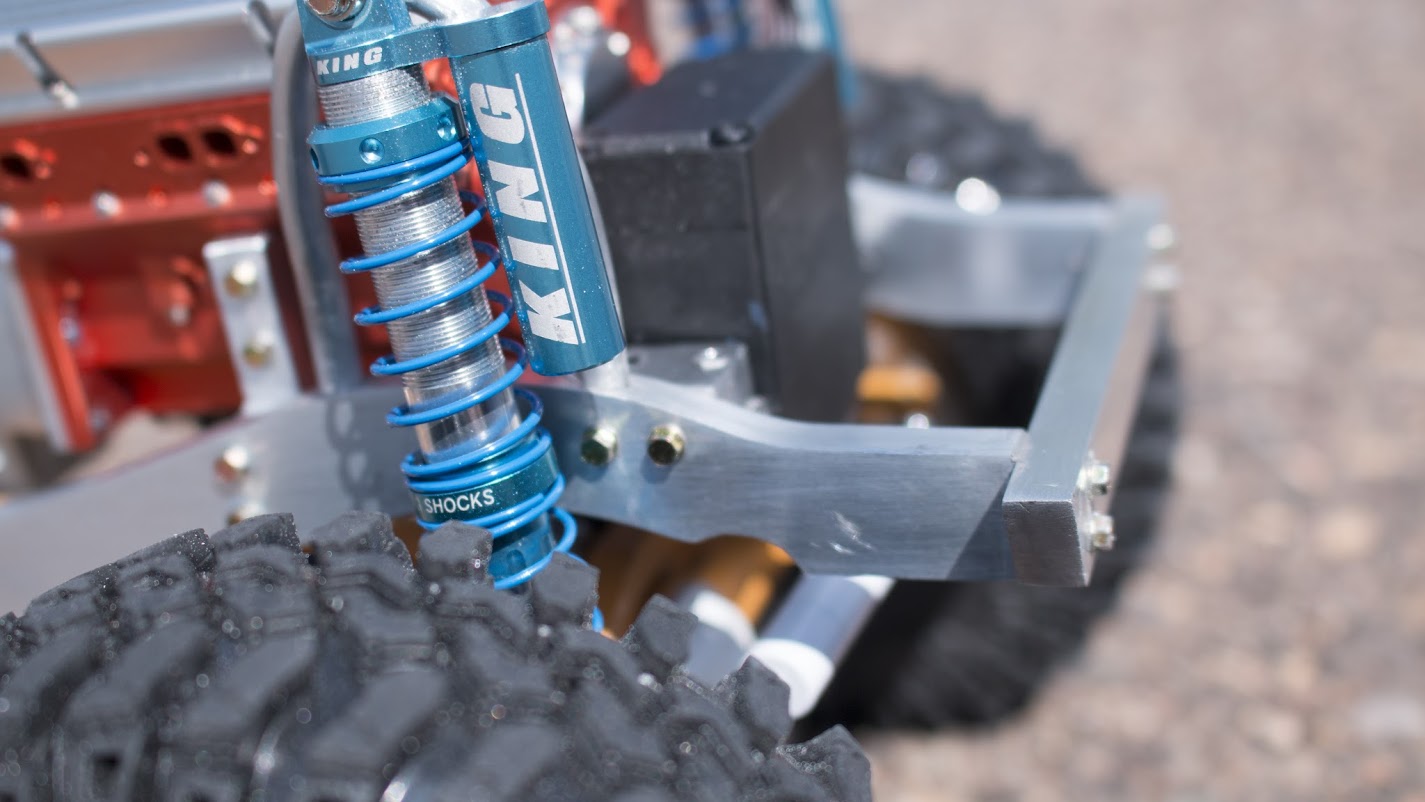   And one in the grass... Every chance my Italian Greyhound has to look big, he takes!  |
|
| |
|
05-21-2015, 02:19 AM
| #31 |
| Rock Crawler Join Date: Jan 2013 Location: Australia
Posts: 607
|
Nice pics, when's it going to get a body? Cute dog by the way |
|
| |
|
05-21-2015, 04:18 AM
| #32 |
| Quarry Creeper Join Date: Apr 2012 Location: Lansford
Posts: 432
|
All the body and details will be next. Since I got all the working bits done that's all I have left! I'll start with the front stinger and grill, then do the cab and bed, get electronics in, and then finish off the front tube and engine bay details.
|
|
| |
|
05-22-2015, 05:49 PM
| #33 |
| Quarry Creeper Join Date: Apr 2012 Location: Lansford
Posts: 432
|
I got my winch mounted and got my yota 2 steering link in the mail and installed. I also started with some body stuff. Of course I work front to back, so the grill was first. It's made from .071" 6061 T6. I had to do some chain drilling...  I used Axial light buckets. And of course I had to use the grills for them. Got all my parts ready for paint!  And then I used aluminum window screen for the grill mesh. I used some airplane canopy glue. It gets sticky and rubbery and dries crystal clear. 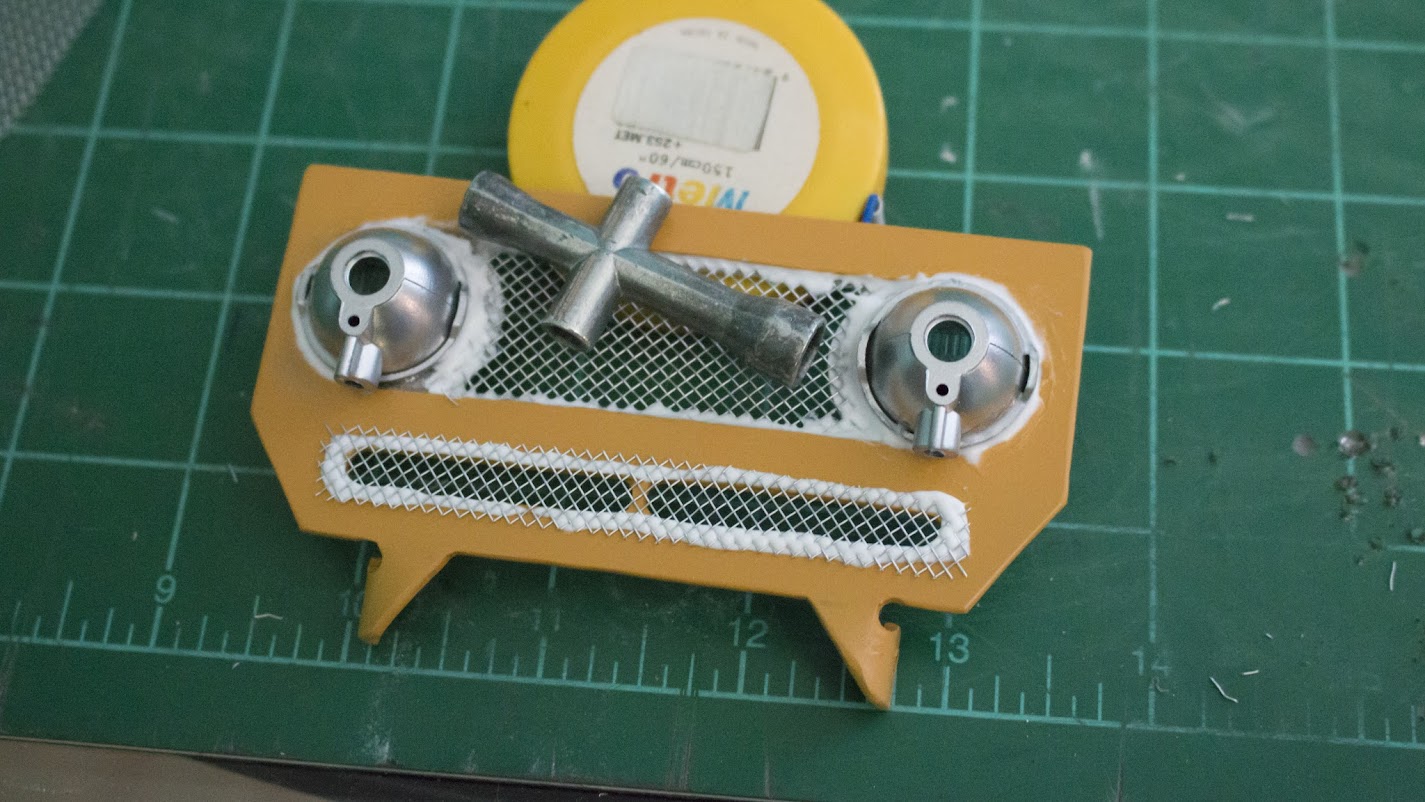 And then I got it mounted up! Using RC4WD scale bolts of course. It looks skinny with that v-8 behind it and no fenders, but I made it to 1/10 scale same as my FJ45LV and the Tamiya FJ40 lexan body.   Here you can see my mounts.  And some more posers. The winch does not sit level... It seems like it's mount plate is bowed. One day I'll have to take it off and bend it a tiny bit.   |
|
| |
|
05-22-2015, 06:14 PM
| #34 | |
| RCC Addict Join Date: Apr 2015 Location: New Brunswick,Canada
Posts: 1,425
| Quote:
great job thinking of doing that with the yeti 380 transmission.. | |
|
| |
|
05-22-2015, 06:21 PM
| #35 | |
| Quarry Creeper Join Date: Apr 2012 Location: Lansford
Posts: 432
| Quote:
| |
|
| |
|
05-22-2015, 06:32 PM
| #36 | |
| RCC Addict Join Date: Apr 2015 Location: New Brunswick,Canada
Posts: 1,425
| Quote:
| |
|
| |
|
05-22-2015, 06:45 PM
| #37 | |
| Quarry Creeper Join Date: Apr 2012 Location: Lansford
Posts: 432
| Quote:
Every size. I'm primarily using M3 for all my construction. The axles have either M2 or M1.6. Can't remember. The v-8 has M1.6, M2, and M2.5. Transfer case has M2. | |
|
| |
|
05-23-2015, 08:46 PM
| #38 |
| Quarry Creeper Join Date: Apr 2012 Location: Lansford
Posts: 432
|
Touched this a tiny bit today. Started with the foundation for my cab. The floor and firewall.  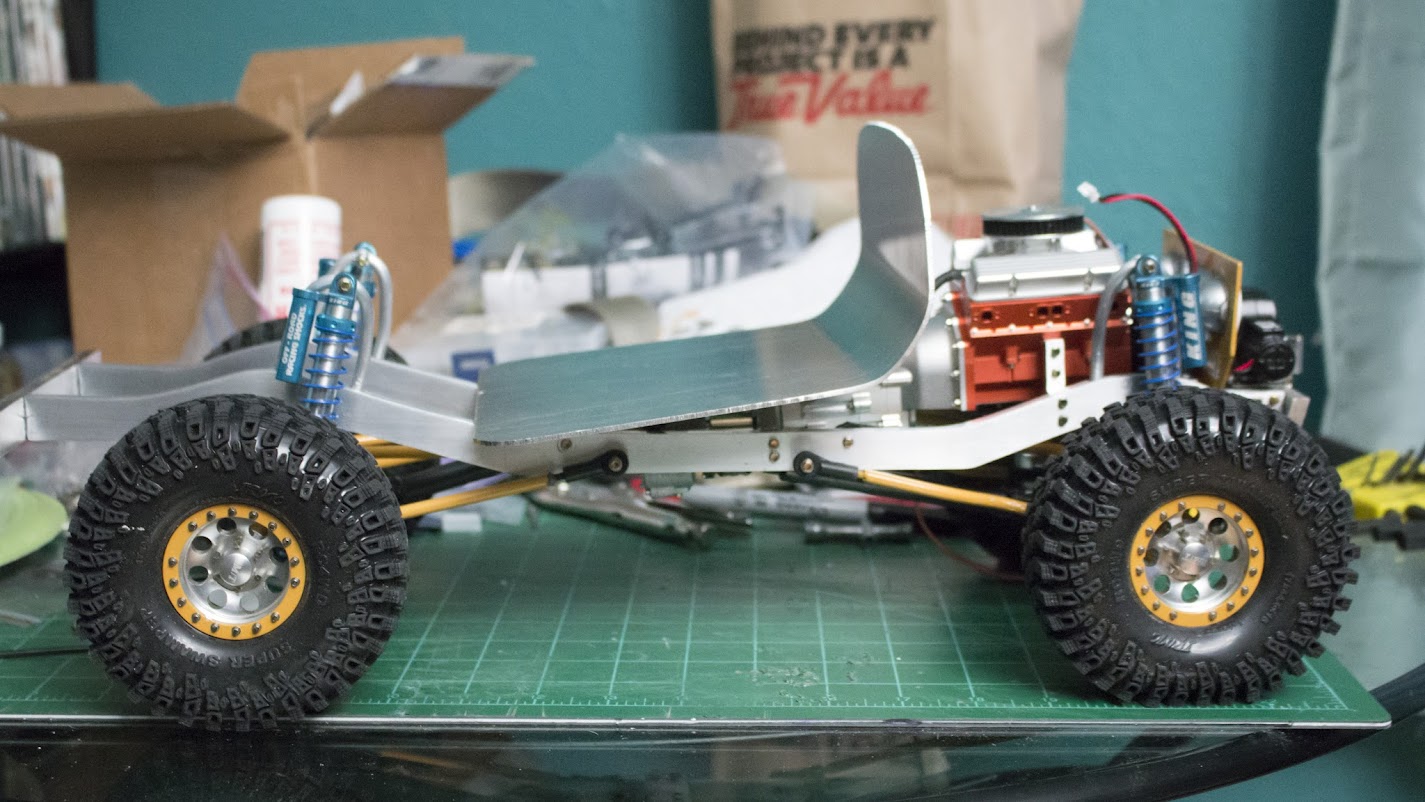 |
|
| |
|
05-24-2015, 03:47 AM
| #39 |
| Rock Crawler Join Date: Jan 2013 Location: Australia
Posts: 607
|
Looks like its really coming along well, can't wait to see it finished!!
|
|
| |
|
05-24-2015, 04:36 PM
| #40 |
| Quarry Creeper Join Date: Apr 2012 Location: Lansford
Posts: 432
|
Today measured and cut out the firewall and floor to clear the transmission. Now I'll need to make the tunnel to cover this.    |
|
| |
 |
| |


 Linear Mode


