| |
 03-19-2012, 10:15 AM
| #41 | |
| Rock Crawler Join Date: Nov 2011 Location: Sin City
Posts: 820
| Quote:
| |

|  |
| Sponsored Links | |
| | |
|
03-19-2012, 07:14 PM
| #42 |
| Quarry Creeper  Join Date: Jan 2011 Location: Augusta
Posts: 306
|
What shocks are you using in there? Are they losi mini slider shocks or something else?
|
|
| |
|
03-19-2012, 09:24 PM
| #43 | |
| Rock Crawler Join Date: Nov 2011 Location: Sin City
Posts: 820
| Quote:
 | |
|
| |
|
03-19-2012, 09:32 PM
| #44 |
| Rock Crawler Join Date: Nov 2011 Location: Sin City
Posts: 820
|
So tonight I got the shocks mounted up with some spacers I had. Changed out the internal plunger on them to the one with two holes in it and filled them with 30wt oil. They work real nice and don't seem to be leaking at all. There isn't just a ton of flex on this guy though so it's not super critical. I need to do some shock upgrades on my other rigs. I also got the Hitec 7950 servo mounted up and put on some steering links. I used an old scx10 106mm link for the lower link...it's pretty scratched up, I may need to find a replacement. I know it's going to get scratched again but hey at least it should look pretty to start right? The drag link I made with Revo rod ends, some threaded rod and a stainless section of tube. It turned out pretty nice and I don't have any contact issues with the springs (it looks closer than it is in the photo). Topped it off with a Robotrontics servo horn. I had to add a 1mm spacer to the SCX lower link which seemed a little strange since it's an SCX10 Axle but when I measured the front tires on the front and rear, there was a slight tow in. Tomorrow's mission...electronics plates. I've got a couple AJ's Machine ESC plates that will work nicely for the rx and ECS. I'll cut up an old SCX10 battery plate for the smaller battery I'm planning to use in this guy. I also need to start thinking about how to mount the body. I see a lot guys using velcro...that might be the way to go. I'd still need to figure out some sort of post system it slides onto so it would sit in the right place every time...but the last thing I want is posts poking thru the hood. The bed, I don't mind so much, I don't think you'd notice it much back there. 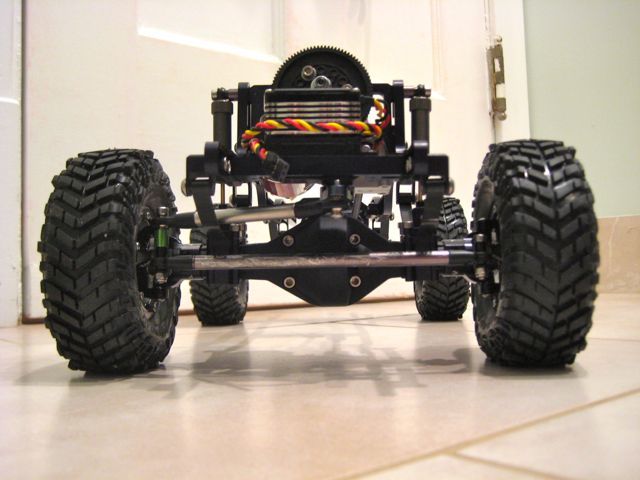 Last edited by JHTreyIII; 03-19-2012 at 09:44 PM. |
|
| |
|
03-23-2012, 03:26 PM
| #45 |
| Rock Crawler Join Date: Nov 2011 Location: Sin City
Posts: 820
|
So I had a vacation day today and got a little bit done with the electronics plates. I took two AJ's Machine plates that are supposed to be for mounting an ESC on an SCX10 chassis and did a little modifying. I set the one for the rx a little lower because it didn't have to clear the primary drive shaft. The BRXL will sit on the upper, larger one. It's going to be a tight fit in there but I want to be sure I've got room for my interior one of these days. Also got the battery plate mounted. I'm not very happy with it...it's not quite straight. I guess its fine, its hidden from view. 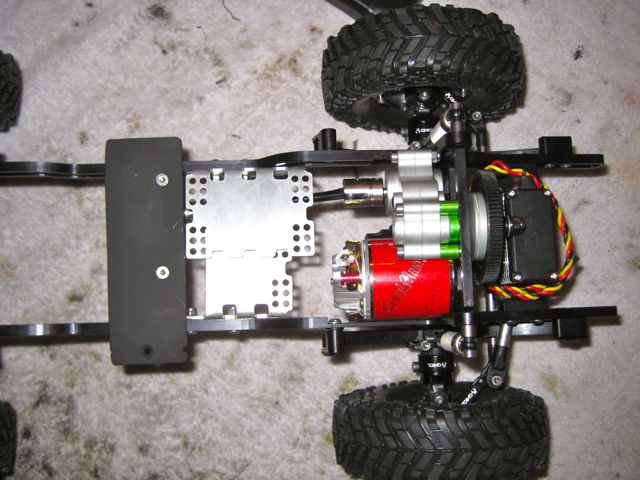 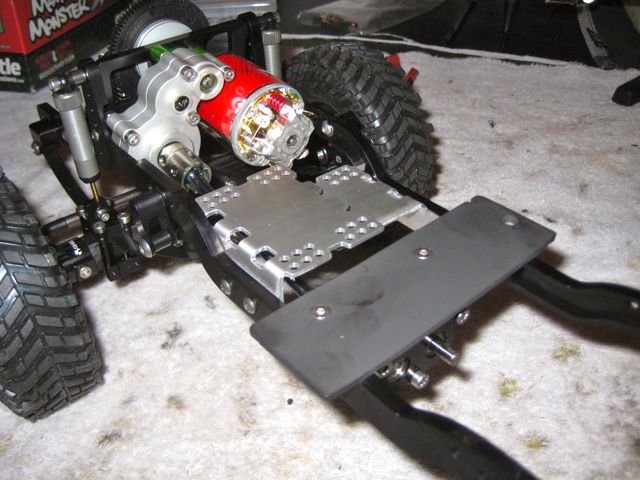 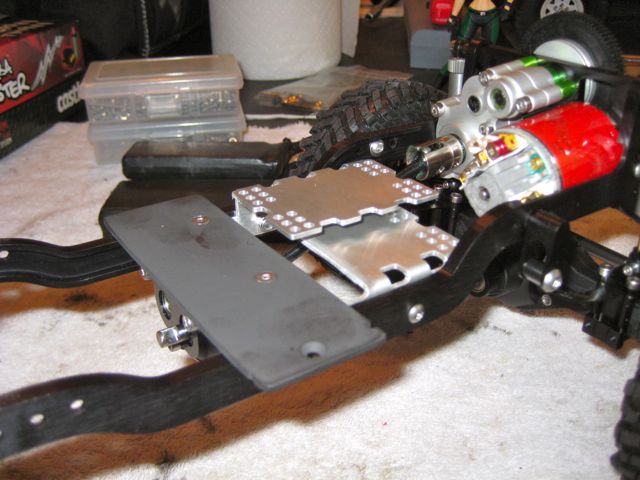 |
|
| |
|
03-23-2012, 05:44 PM
| #46 |
| RCC Addict  Join Date: May 2010 Location: Midwest
Posts: 1,917
|
Looks good from here |
|
| |
|
03-23-2012, 05:49 PM
| #47 | |
| Rock Crawler Join Date: Nov 2011 Location: Sin City
Posts: 820
| Quote:
| |
|
| |
|
03-23-2012, 06:04 PM
| #48 |
| Rock Crawler Join Date: Nov 2011 Location: Sin City
Posts: 820
|
It looks much better covered up by a battery! I'm okay with it now, ha. 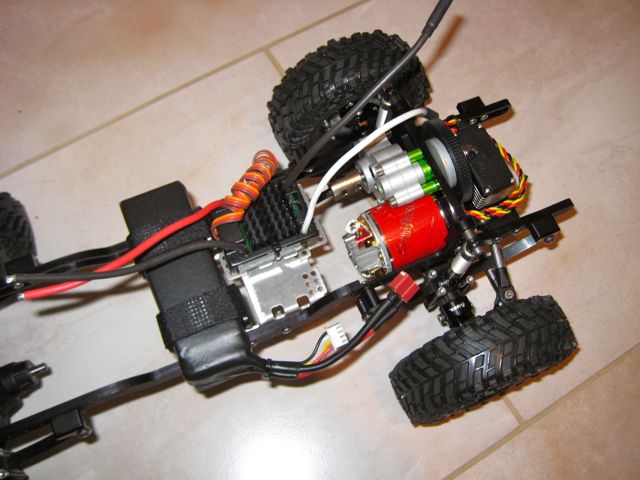 |
|
| |
|
03-24-2012, 05:55 PM
| #49 |
| Rock Crawler Join Date: Nov 2011 Location: Sin City
Posts: 820
|
So I got my driveshaft parts from MIP today. Like I mentioned before, the SCX10 driveshafts were too long. I ordered two new Male Bone (part #8139) from MIP for the Traxxas E-Revo. They're shorter and the splines run almost all the way to the cup. The I reused all the rest of the parts from the SCX10 shafts. The female half now slips on that much further giving me a shorter drive shaft. Worked perfect and the best part is I didn't have to cut anything down. I can always pull these off and use them as SCX10 shafts if there is a need. 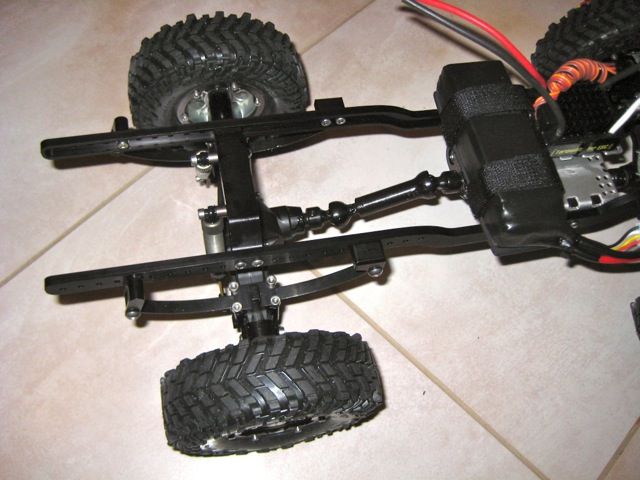 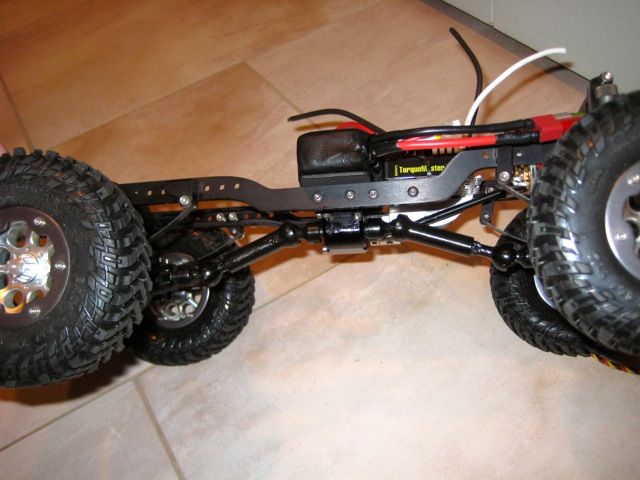 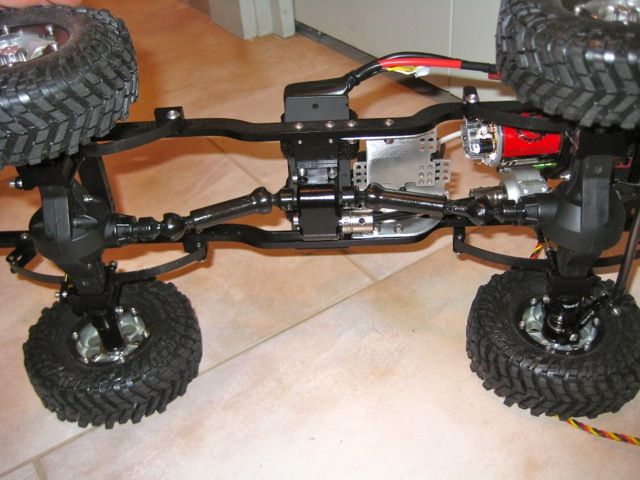 Also I decided to flip my baja claws around. I figured they'd grip better in this direction as any slide on whatever the tire is making contact with would be toward the center of the tire following the tread pattern, keeping it on the obstacle. Don't mind the rear ones, they just weren't done yet in the photo. 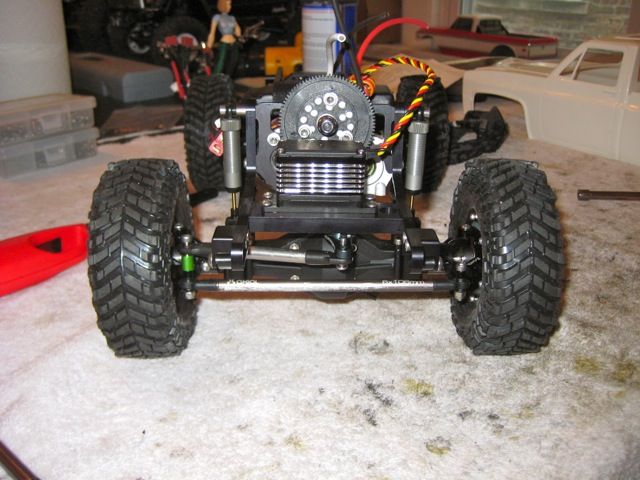 |
|
| |
|
03-24-2012, 09:29 PM
| #50 |
| Rock Crawler Join Date: Nov 2011 Location: Sin City
Posts: 820
|
Got her up and running for the first time tonight! Woo Hoo! I guess I have to start the body now...I just need to decide on a color. I also ordered some sliders from DH Fab for the honcho, they're long but should fit fine and do a nice job protecting the body. I'm also still in need of some bumpers. I'm leaning toward the ones by rcrockarmor.com. They look really nice and would go well with the truck. 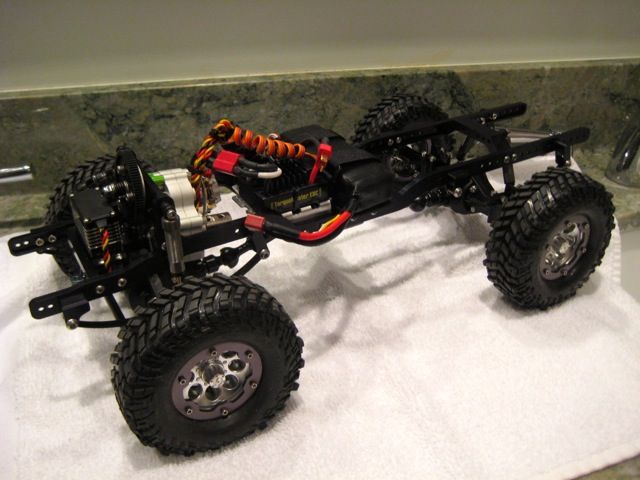 |
|
| |
|
03-24-2012, 09:31 PM
| #51 |
| RCC Addict Join Date: May 2010 Location: Midwest
Posts: 1,917
|
Dude, your kickin' ass on this thing! I'm impressed and a little jealous your making my TF2 seem ordinary. I hate your face. |
|
| |
|
03-24-2012, 09:47 PM
| #52 |
| Rock Crawler Join Date: Nov 2011 Location: Sin City
Posts: 820
|
Haha, I have a buddy who used to say that to me all the time. That cracks me up. Yeah thanks! Those TF2's are still sweet little trucks! I almost bought one. I just figured since you guys were getting them, I should try a different direction so we weren't all driving the same thing. I'm really happy with the way this one is going. It's a cool little rig. I need to look at what you guys did to your leafs. This thing has zero articulation or flex, you'll see tomorrow. Either that or the chino mod, i need to be able to twist a little more. |
|
| |
|
03-31-2012, 10:06 AM
| #53 |
| Rock Crawler Join Date: Nov 2011 Location: Sin City
Posts: 820
|
So it's time I start on the body I guess. Baby steps. First thing I tried was the cutting method using thread. I trimmed this fender with sewing thread. It takes a little while but it's a nice clean line and it's easy to control. I like the technique. 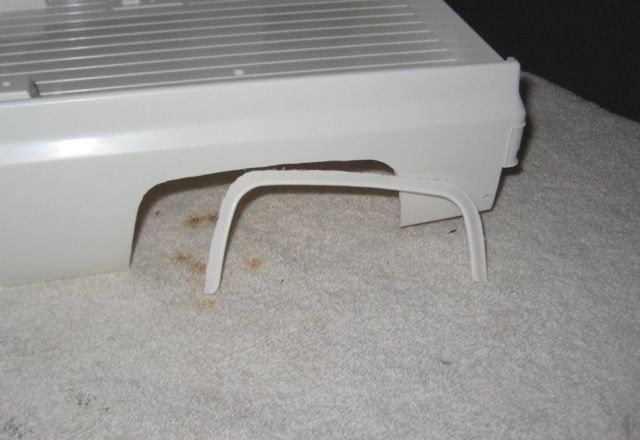 Also started working on some little details...painting the grill today. I'll get a completed shot up later. 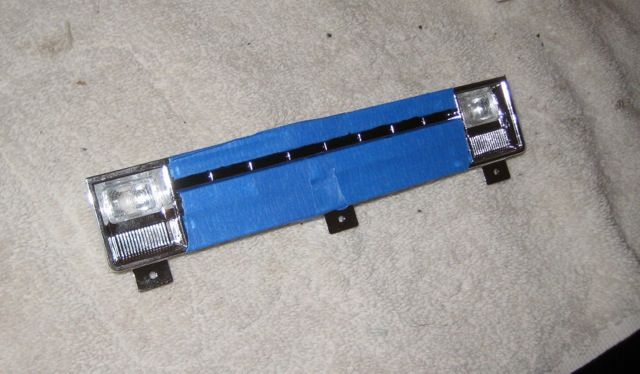 |
|
| |
|
03-31-2012, 12:19 PM
| #54 |
| Rock Crawler Join Date: Nov 2011 Location: Sin City
Posts: 820
|
Chop chop! 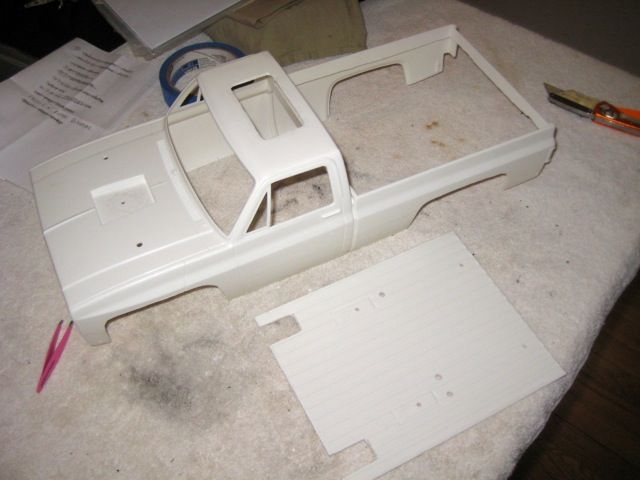 |
|
| |
|
03-31-2012, 12:26 PM
| #55 |
| Quarry Creeper Join Date: Jan 2011 Location: Augusta
Posts: 306
|
I thought you were selling the clod body??
|
|
| |
|
03-31-2012, 12:40 PM
| #56 |
| Rock Crawler Join Date: Nov 2011 Location: Sin City
Posts: 820
|
I sold the old one. I couldn't bring myself to chop up the vintage body so I kept the grill and tailgate and sold it along with all the parts I wasn't planning to use. This one is new...since Tamiya still makes them. I got this one from RPP. Now if I screw it up, I won't feel so bad.
|
|
| |
|
03-31-2012, 12:46 PM
| #57 |
| Quarry Creeper Join Date: Jan 2011 Location: Augusta
Posts: 306
|
Ahhh that makes more sense. I was gonna say your cutting up that vintage body... Very nice job on your build so far. I have one too I think I'm going to make a h3t body for my build. It will be awhile though. |
|
| |
|
03-31-2012, 12:49 PM
| #58 |
| Quarry Creeper Join Date: Jan 2011 Location: Augusta
Posts: 306
|
Also where did you get your lovely ladies in your pics? |
|
| |
|
03-31-2012, 01:16 PM
| #59 | ||
| Rock Crawler Join Date: Nov 2011 Location: Sin City
Posts: 820
| Quote:
Quote:
| ||
|
| |
|
03-31-2012, 04:54 PM
| #60 |
| Rock Crawler Join Date: Nov 2011 Location: Sin City
Posts: 820
|
Well I'm just full of photos today! I guess that's the point of a build thread though, show all the work involved. Got the sunroof partially filled in with some styrene. I've got another layer to put on top of this one before I start with the body filler. Also got the hood scoop hole filled in with some styrene. I didn't want to fill the entire hole with body filler in case it shrinks some. I'm assuming the less body filler, the better. 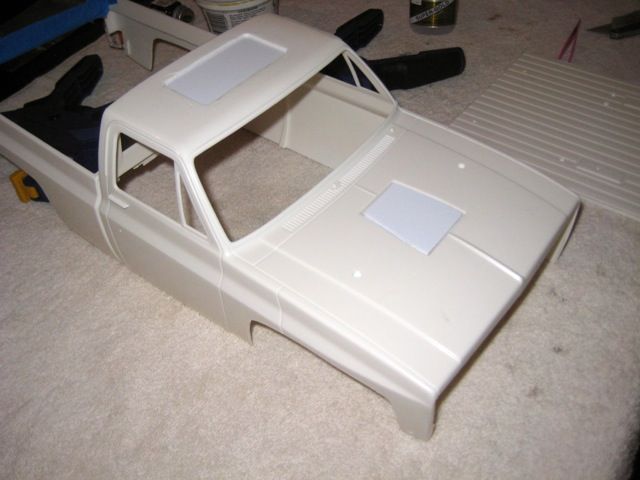 Also went ahead and put a full layer of .040 styrene under the bed. It will be a backstop for the hole filler plus add a little rigidity to it. Now, I'll just let these sit for a little while so the plastruct bondene can set up. 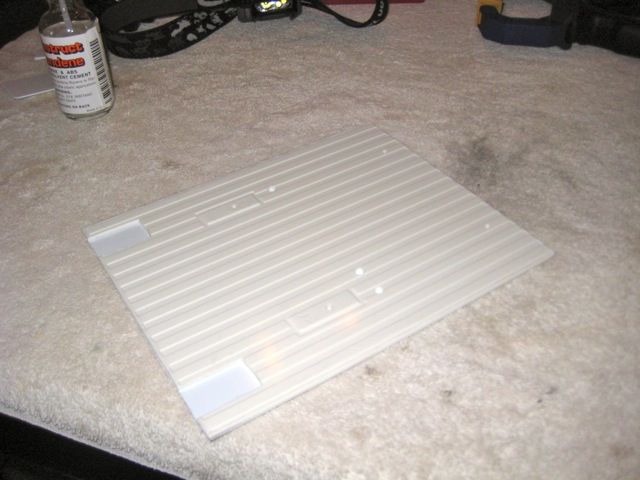 |
|
| |
 |
 JHTreyIII's Class 1 Build - 1981 Chevy Pickup - Similar Threads
 | ||||
| Thread | Thread Starter | Forum | Replies | Last Post |
| JHTreyIII's 'Big Metal Bitch' Wraith Build | JHTreyIII | Axial Wraith | 141 | 04-18-2014 06:42 PM |
| JHTreyIII's '72 Chevy C10 Build | JHTreyIII | Axial SCX-10 | 83 | 10-29-2012 05:05 PM |
| Project Buster..... Ultimate Clod Build (or so I hope) | Lumpmister | Tamiya Clod Buster | 3 | 07-01-2007 08:04 AM |
| It's not a Clod Buster - It's the God Buster | SINNER | Tamiya Clod Buster | 5 | 11-28-2006 07:08 AM |
| |


 Linear Mode


