| | #1 |
| Pebble Pounder Join Date: Nov 2015 Location: Gilsum, NH
Posts: 126
|
Howdy all First, Long time visitor, first time poster. Wanted to thank everyone who has shared on here. Such a wealth of information. Thank you all so much! Second, There are plenty of Gelande builds already so I won't focus too much on wrenching up the stock chassis. Instead I will share my experiences, upgrades and design choices in building up what has so far been a very enjoyable kit. [IMG] 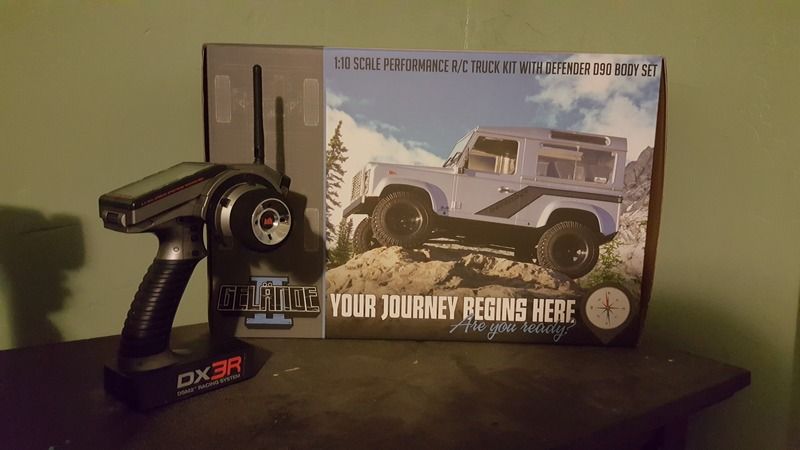 [/IMG] [/IMG]
Last edited by 2kind; 07-12-2016 at 06:01 PM. |
| |  |
| Sponsored Links | |
| | #2 |
| Pebble Pounder Join Date: Nov 2015 Location: Gilsum, NH
Posts: 126
|
The chassis went together as expected with the exception of one minor "oh crap" moment. After finishing the stock chassis build and wiring up some temporary electronics to get the roller a rollin' I centered my HS-5646WP servo, turned the wheels right, all's well, but when I cranked the wheel to the left I hear a pop. [IMG] 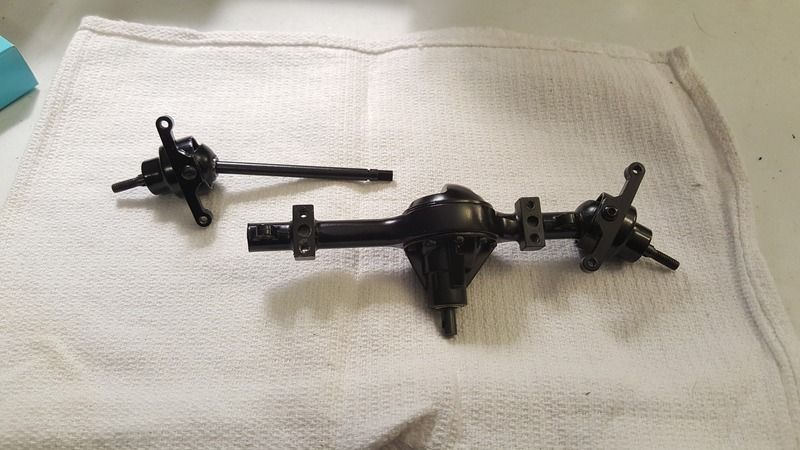 [/IMG] [/IMG]Snapped the axle in two pieces by the left knuckle. With only around 3 hours spent with the rig and not even getting on the ground yet, Crippled. A bit disappointed for sure but knowing RC4WD and their service on top of having the other much more time consuming half of the build to do (the hard body), I wasn't to shaken up. Immediately I emailed them with my issue and had a brand new full front axle (part#Z-A0080) in my hands within the next 7 days. Much respect guys! Last edited by 2kind; 07-12-2016 at 05:55 PM. |
| |  |
| | #3 |
| Pebble Pounder Join Date: Nov 2015 Location: Gilsum, NH
Posts: 126
|
While waiting for the new axle to come in I started to think of my color pallet. This is what I came up with. [IMG] 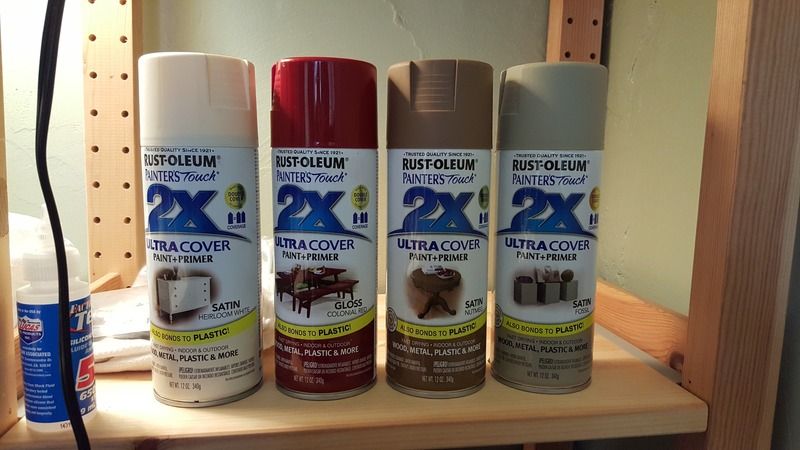 [/IMG] [/IMG]These Rust-Oleum paints have worked well for me in the past on an old Hi-lux body used for my scx 10. Now, I'm a rather picky person that knows very little about painting. They seem to spray on relatively even and fill decently as long as you have patience and do light coats. No primer was used on the shell before applying the first layer. So I taped off the roof section and let the can rip. [IMG] 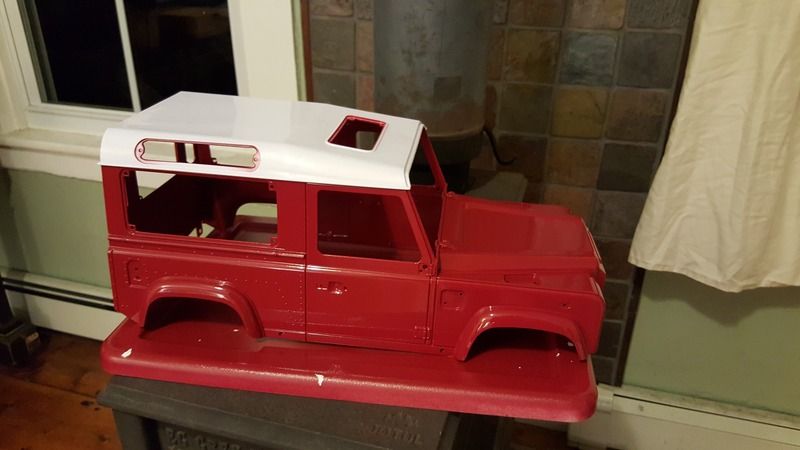 [/IMG] [/IMG]The Colonial Red has simply got to be seen in person for one to fully respect its beauty, Wowzer!! The Heirloom White was exactly what I wanted for the roof. The other two, Nutmeg and Fossil will be for the interior. Last edited by 2kind; 07-12-2016 at 05:55 PM. Reason: forgot to add |
| |  |
| | #4 |
| Pebble Pounder Join Date: Jan 2015 Location: lebanon
Posts: 106
|
That sucks don't think I have ever seen that happing.
|
| |  |
| | #5 |
| Pebble Pounder Join Date: Nov 2015 Location: Gilsum, NH
Posts: 126
|
After 4 to 5 coats of the primary and secondary colors with no sanding in between and letting it cure for about 2 days it was time for a dry fitting of all body parts (mirrors wouldn't stay put) and chassis. [IMG] 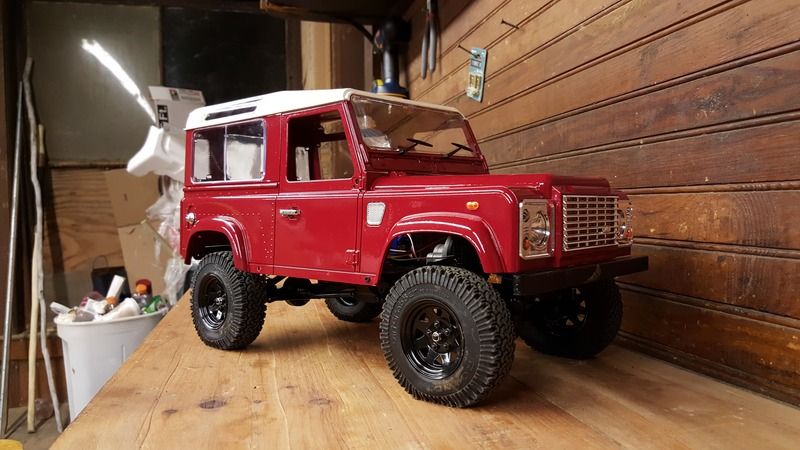 [/IMG] [/IMG][IMG] 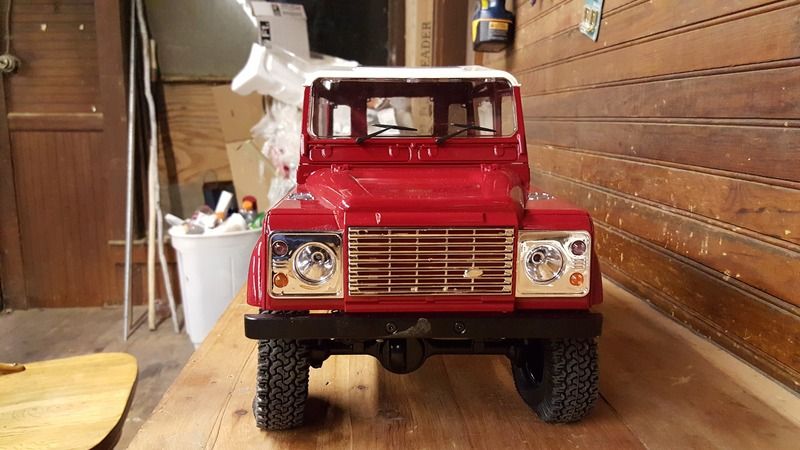 [/IMG] [/IMG]Very happy with how the paint job came out. It is by no means perfection. Not sure about the chrome pieces though. It looks nice but a bit to classy for my taste in ladies. This is going to be a trailing rig and the bling just seemed out of place to me. Last edited by 2kind; 07-12-2016 at 05:53 PM. |
| |  |
| | #6 |
| Pebble Pounder Join Date: Nov 2015 Location: Gilsum, NH
Posts: 126
|
Hey Chopper It was a bit surprising to say the least. Plastic servo horn to boot. I'm guessing it was something wrong with the cast.
|
| |  |
| | #7 |
| Pebble Pounder Join Date: Nov 2015 Location: Gilsum, NH
Posts: 126
|
Knowing any bumpers, racks, and/or cages were going to be black, I figured her tertiary color would indeed be black. For a while I have been wanting to give Plasti dip a try and see how well it would hold up on my rigs. This would be as good as anytime to give it a go. I used the spray Plasti dip on all the shinny bits except the door handles. The fenders also got the treatment. [IMG] 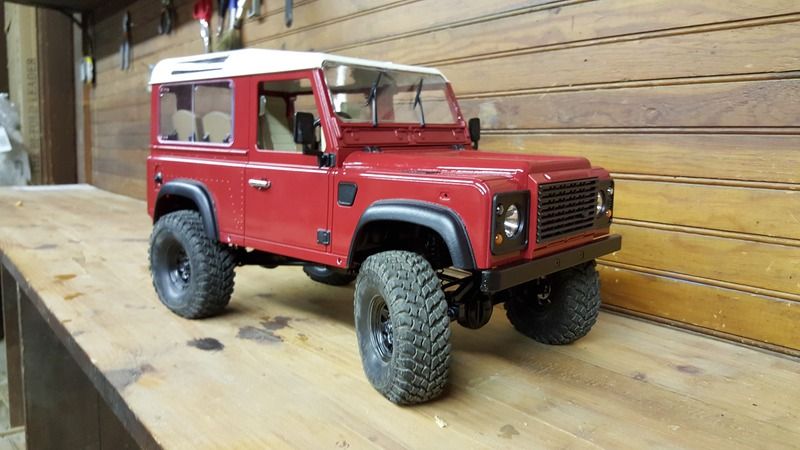 [/IMG] [/IMG][IMG] 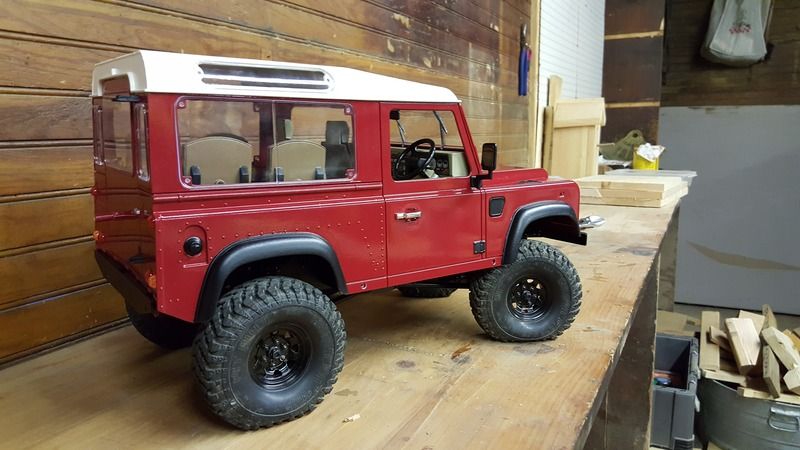 [/IMG] [/IMG]Really liking how the fenders and ex-chromey bits have their own texture on the rig. All the hinges including the back door's got a Testers Paint flat black covering to help outline everything. The back door handle received a splash of silver to match the other two doors. You can make out a bit of the interior but I will go over that in more detail. Also, trying out a set of 1.55 Pit bull Growlers on RC4WD 5 lug steel wagon wheels to see how something a little bigger fits. Last edited by 2kind; 07-12-2016 at 05:51 PM. |
| |  |
| | #8 |
| Pebble Pounder Join Date: Nov 2015 Location: Gilsum, NH
Posts: 126
|
A couple poser shots on my test track with the 1.55 Growlers. Probably the best set of tires I have. Every rig should own a set. Sadly, this can not be and these shall return to my SCX. The increased OD to about 103mm means longer shocks of some kind will be needed to prevent rubbing on the fenders. Preload is pretty much maxed, which makes the body act like a bobble head. [IMG] 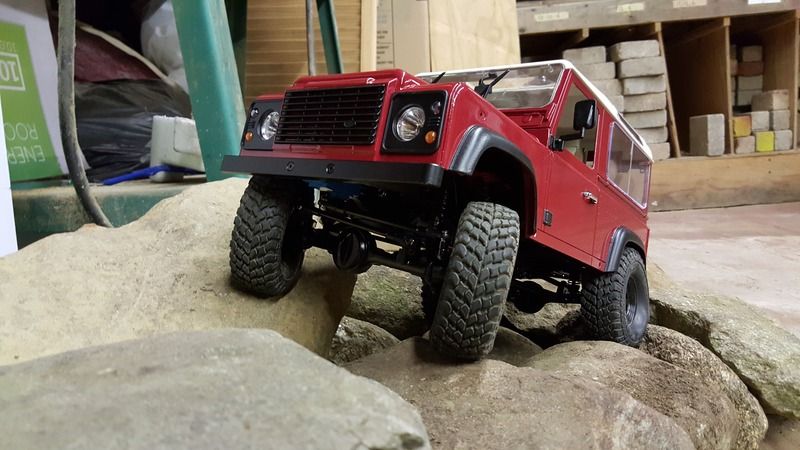 [/IMG] [/IMG][IMG] 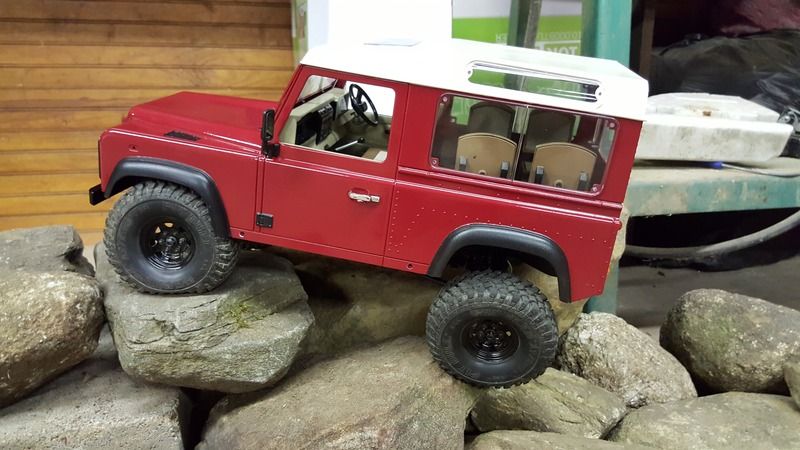 [/IMG] [/IMG]If anyone has a recommendation for shocks, It would be great to get a few different ideas of what might work. I did take apart the shocks when building the kit, greased the o-rings with marine grease and added some 50wt oil. Don't think they have leaked a drop while the truck has been sitting here on the bench for a couple weeks now. Last edited by 2kind; 07-12-2016 at 05:50 PM. |
| |  |
| | #9 |
| Quarry Creeper Join Date: Oct 2014 Location: Milpitas
Posts: 258
|
been there. Found basically anything bigger than the stock dirt grabbers will rub unless you cut. Luckily I have other kits (like the vaterra) which I can use those tires. I really like your interior gave me ideas for mine.
|
| |  |
| | #10 |
| Pebble Pounder Join Date: Nov 2015 Location: Gilsum, NH
Posts: 126
|
Thanks Habanero! I will try to put up some shots of the interior tonight after work. Not sure I'm willing to hack the body up quite yet. I have a few options on hand to play with, so we will see how that goes first.
|
| |  |
| | #11 |
| Pebble Pounder Join Date: Nov 2015 Location: Gilsum, NH
Posts: 126
|
I was pretty excited to do my first interior though I'm not sure if it will be kept. Aside from being rather rough around the edges, The satin Nutmeg just isn't Tan/Yellow enough for me. I'm wanting every color to stand out and bring something to the table, I feel it does not. A more traditional leather look will help the Fossil stand out that much more as well. What do you guys think? [IMG] 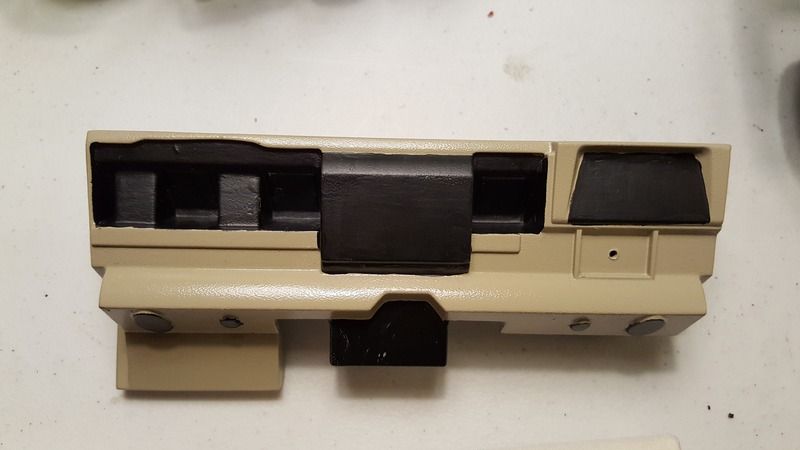 [/IMG] [/IMG][IMG] 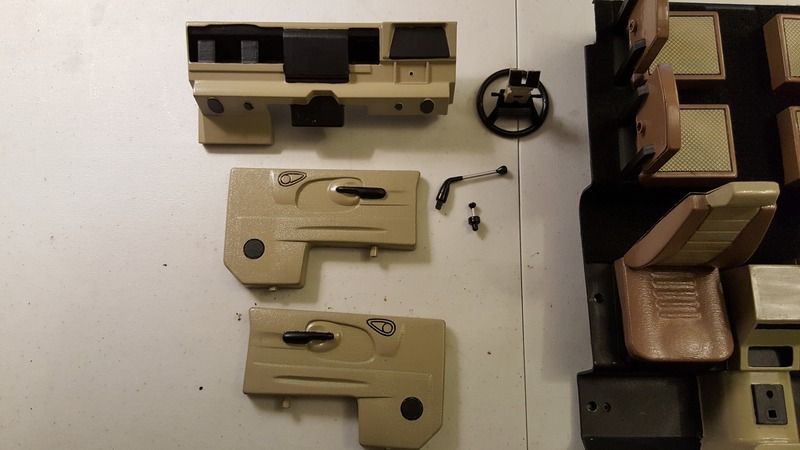 [/IMG] [/IMG][IMG] 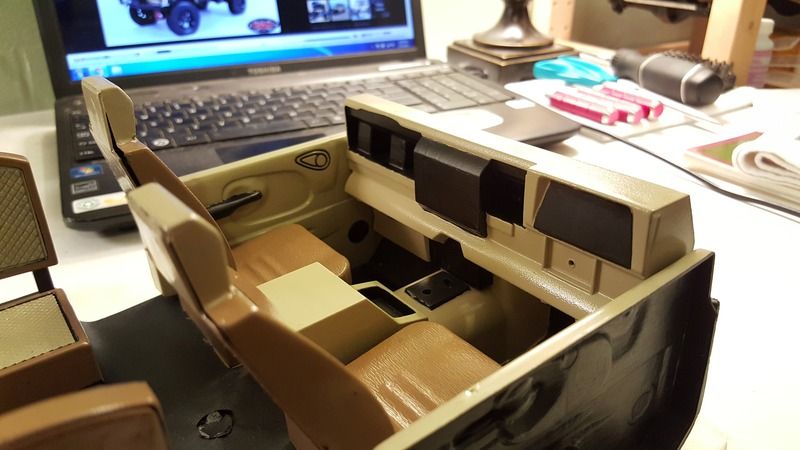 [/IMG] [/IMG]I like the carpeted look inside. Done with double sided felt from Walmart. One side has a sticky like Velcro. The other is felted. The door panels, dash, console, and middle seat cushions were done in satin Fossil. It will probably stay. The black is the same Testors Flat Black from before. [IMG] 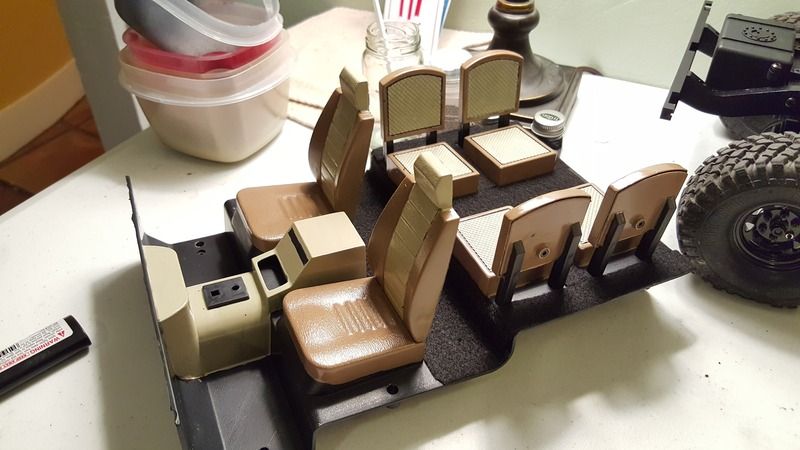 [/IMG] [/IMG][IMG] 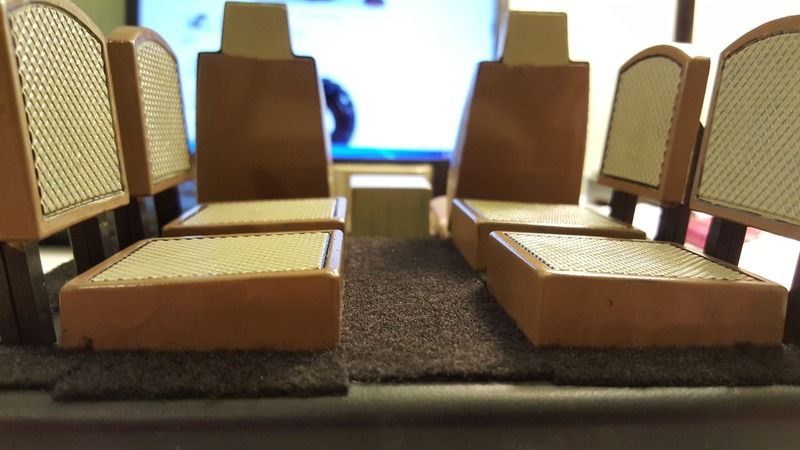 [/IMG] [/IMG][IMG] 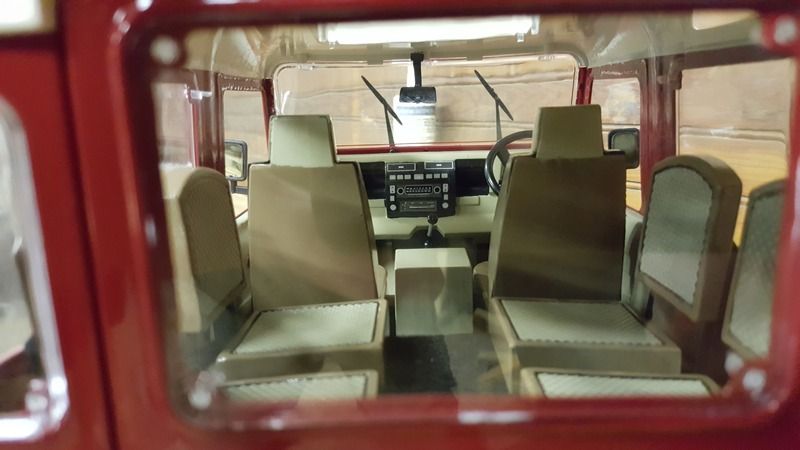 [/IMG] [/IMG]The Mirror inserts are from a Tamiya Hi-Lux mirror set. Had to sand them down a little around the edges. Then I just Gorilla Glued them in place. Now I just need to work out something for the rear view mirror. [IMG] 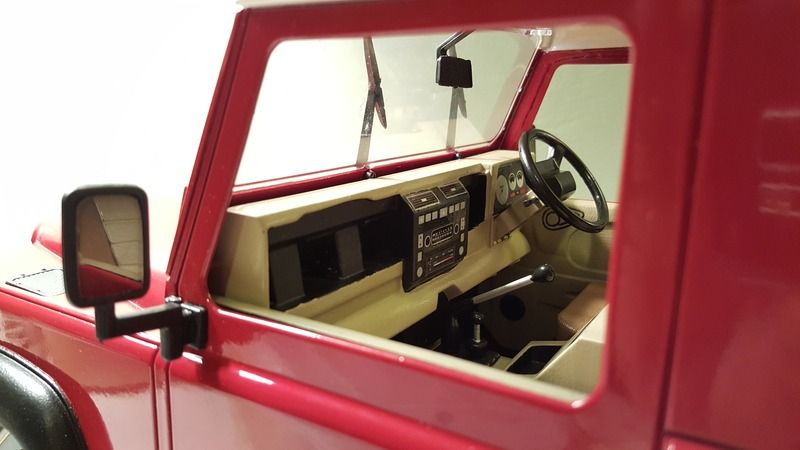 [/IMG] [/IMG]
Last edited by 2kind; 07-12-2016 at 05:48 PM. |
| |  |
| | #12 |
| Pebble Pounder Join Date: Nov 2015 Location: Gilsum, NH
Posts: 126
|
The bumper is mounted. I opted for maximum protection. The ARB Land Rover winch bumper from RC4WD (Part# Z-S0853) looks like it should deliver. With winter coming, it may be a while before it gets tested. Even though mine sits just a hair off, it really is a nice bumper. If the look does it for you the build should definitely satisfy. Mounting strait to the chassis and not to the stock bumper resulted in the body making contact with the bumper ever so slightly. I'm comfortable with it but any closer and I wouldn't be. [IMG] 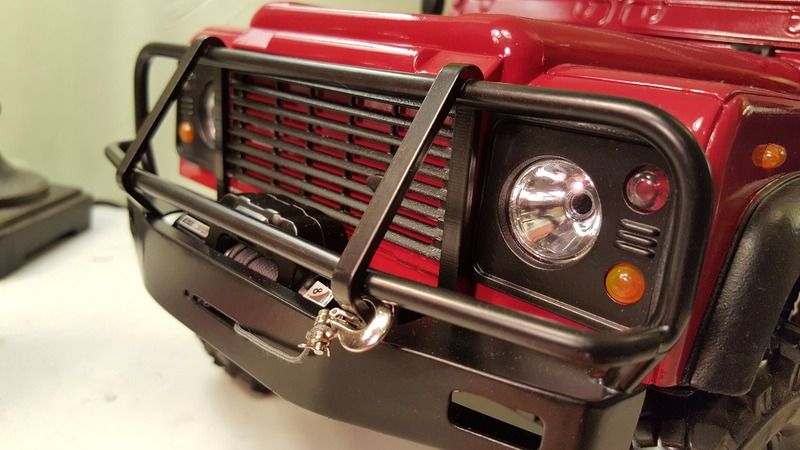 [/IMG] [/IMG]Turns out I actually have the plastic tree that the bumper uses. [IMG 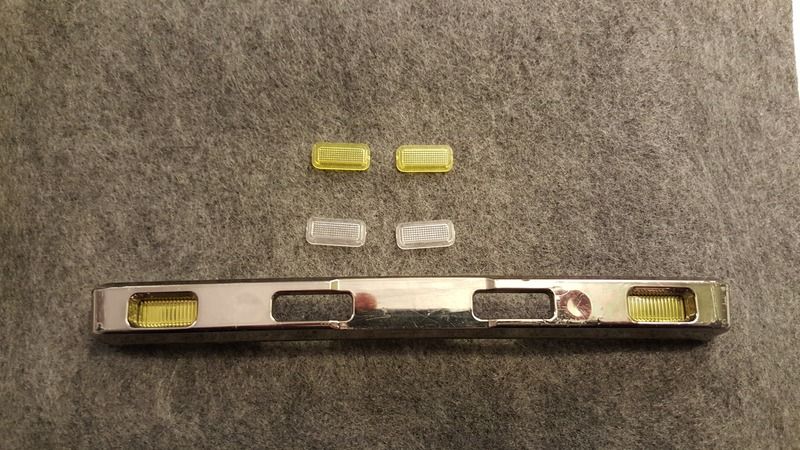 [/IMG] [/IMG]Also picked up the RC4WD 1/10 Warn 9.5cti winch (Part# Z-S1079). Had to turn the silver plate that comes attached to the winch 180 degrees in order to get it to fit down in the bumper. Still need to pick up a receiver for it. Looks the part we'll see how well it pulls 10lbs of stuck truck. [IMG 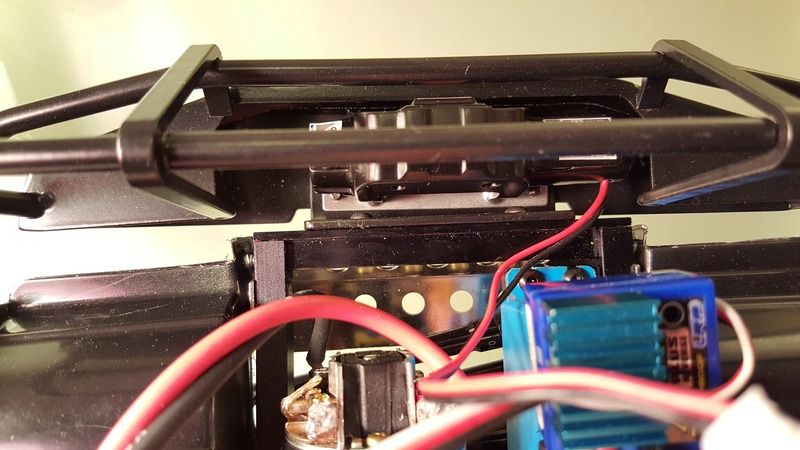 [/IMG] [/IMG]The Gelande 2 Steering Guard (Part#Z-S0824). Wasn't sure how well it would bolt up with everything else being added to the front. Those tires are RC4WD 1.9 Flashpoints on the stock rims. [IMG] 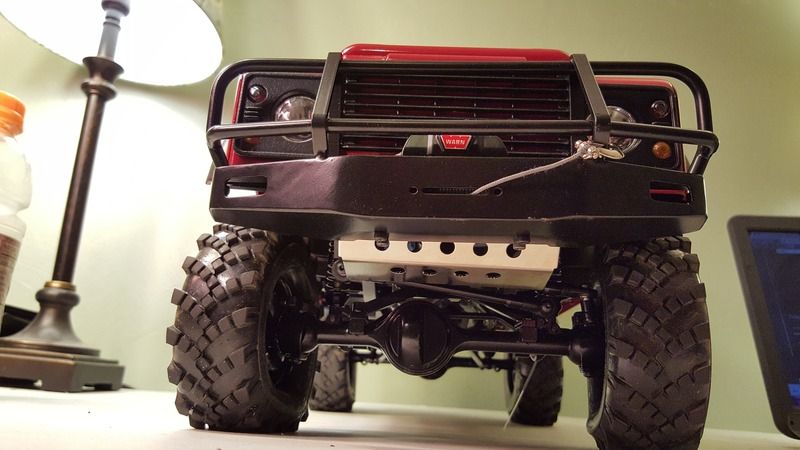 [/IMG] [/IMG]You can see I moved the steering guard back one hole from where it should be. The reason is it hits the brace that connects the bumper to the frame. If you do mount the ARB bumper to the stock bumper I believe you would be able to bolt everything up to spec. As it is, it just barely works with a bit or contact to the pan hard upper rod end. If the shocks get changed out, this will have to be rethought out. [IMG 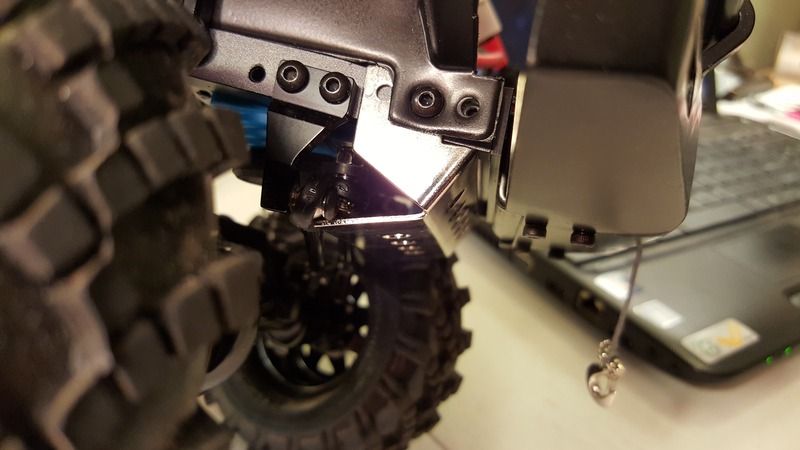 [/IMG] [/IMG][IMG] 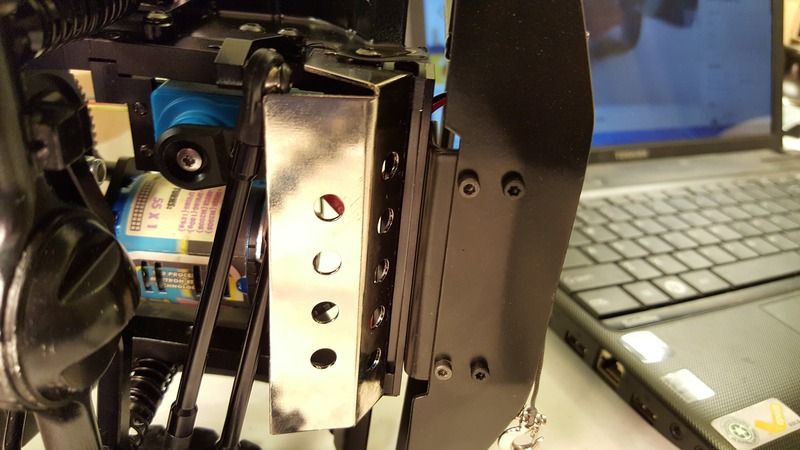 [/IMG] [/IMG]and the Inner fender set for the D90 body (Part# Z-S1194). Please excuse the ever growing nest of wires. These were very strait forward. Cut, drill preset wholes, sand edges, paint, then finally bolt up. They are made of a flimsy lexan like plastic that at first touch, I regretted buying, but once bolted up prove to be a lot more rigid and I think they will work very well. [IMG] 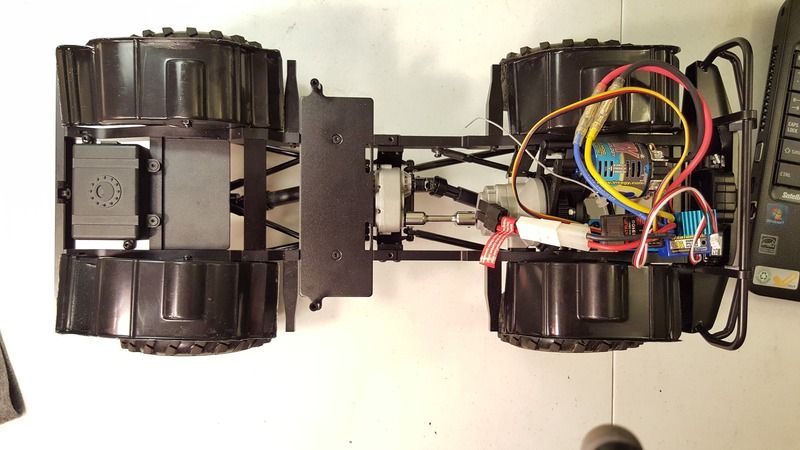 [/IMG] [/IMG][IMG] 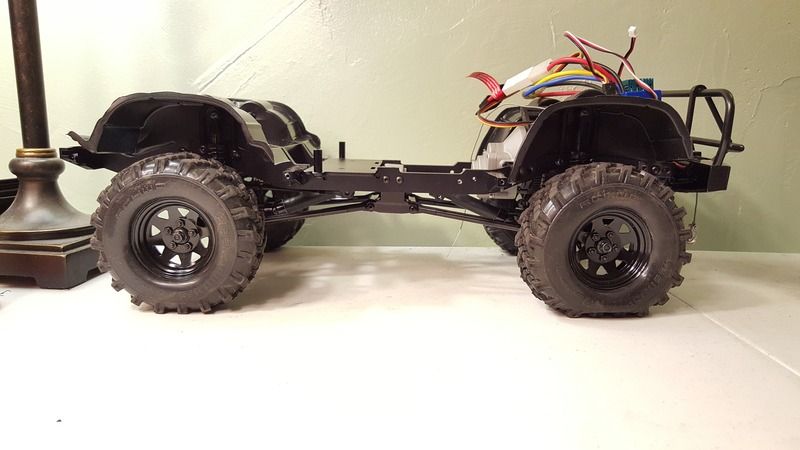 [/IMG] [/IMG]You can see the temporary electronics here. I haven't decided on a motor and ESC yet but leaning towards the Tekin FXR and their 45t Pro crawlers motor. I only have experience with a Novak 2s Goat Brushless System which I have grown to really like a lot over the years but have been wanting a brushed setup for a while. What do you all recommend? The rig is Heavy and precision is everything to me. Should I go with a bit more modern censored brushless system instead? Last edited by 2kind; 07-12-2016 at 06:07 PM. |
| |  |
| | #13 |
| Rock Crawler Join Date: Mar 2014 Location: Dallas, Texas
Posts: 640
|
Go sensored. Good looking rig so far.
|
| |  |
| | #14 |
| Pebble Pounder Join Date: Nov 2015 Location: Gilsum, NH
Posts: 126
|
Thank you MeanTT. I will look into some brushless setups. |
| |  |
| | #15 |
| Rock Crawler Join Date: Jan 2014 Location: Granite Falls, WA
Posts: 568
|
Great looking D90. Interior is splendid!! Not sure if you've read through the Comprehensive Guide to the Gelande 2, but there are some good tips there, for nearly every aspect of this truck. Here's the specific section for Motor, ESC, and Gearing. I was going to run a non-sensored, Turnigy 1250KV brushless outrunner (airplane motor), but upon witnessing how rough it performed in my SCX10 Jeep, I've decided to go brushed, using a Sidewinder 3 ESC and a Yeah Racing Hackmoto 35T motor (appears to be identical to the RC4WD BOOST 35T rebuildable motor). |
| |  |
| | #16 |
| I wanna be Dave  Join Date: Apr 2014 Location: North Carolina
Posts: 2,254
|
Welcome! You're off to a great start. I love the color choices. Here are a couple of thoughts in no particular order: - You asked about shocks. Proline Scalers (90 mm), RRD Emulsions (90 mm) and King Scalers (80 or 90 mm) all offer nice performance while maintaining scale looks. The Prolines and RRDs are more discreet than the blingy Kings. -- You might want to push out the front axle just a hair (5mm or so). Stock links leave the axle sitting a bit aft in the wheel well. -- For a power plant, don't overlook a good brushed setup. A Crawlmaster Pro 13T or 16T makes for a sweet, silky smooth ride. You can go 3s if you want, but there's really no need. If you're going to look at brushless, hard to beat the Holmes Puller Pro Stubby on 2s with the Holmes BLE ESC. -- For electronics placement, I devised a little platform setup in my latest TF2 thread that works equally well on a Gelande. It allows you to put everything but the battery under the hood with room to spare. -- It will be hard to get anything to stick on the chrome, and Plasti Dip is made to peel off of anything. If it doeasn't hold up, your fallback is to de-chrome using Easy-Off Oven Cleaner, then paint flat black and coat with a matte clear. -- I like the 1.7 Iroks and 1.9 Tomahawks for Defenders. You can stuff 4.1" with no or minimal rubbing, and both tires perform well. The Tomahawks trade a bit of stickiness in the softer X2SS compound for a slightly firmer compound (X3) that handles the weight of the rig very well and still grips very nicely. Keep us posted and let us know how else we can help.  Last edited by new2rocks; 11-29-2015 at 08:19 PM. |
| |  |
| | #17 |
| Pebble Pounder Join Date: Nov 2015 Location: Gilsum, NH
Posts: 126
|
Thanks a bunch! That means a lot. I do indeed know of The Comprehensive Guide to the Gelande 2. Great write up and very thankful for it. Sorry that brushless setup didn't work out for you johnnyluv. Glad you found peace with the Sv3 and Hackmoto 35T. The Mamba Monster 2 has worked well for me in the Yeti XL. It is anything but smooth at slow creeps though (sensorless as well). So I have been on the fence with Castle stuff. Well the other day at my LHS I spotted a Sidewinder 3 and decided to give it a shot. Seems to be a pretty versatile controller so it could be used for other things if need be. It's rather big and was to tall to fit on the plate behind the battery so I ended up squeezing it in the electronics box without the top. Snug as a bug. [IMG] 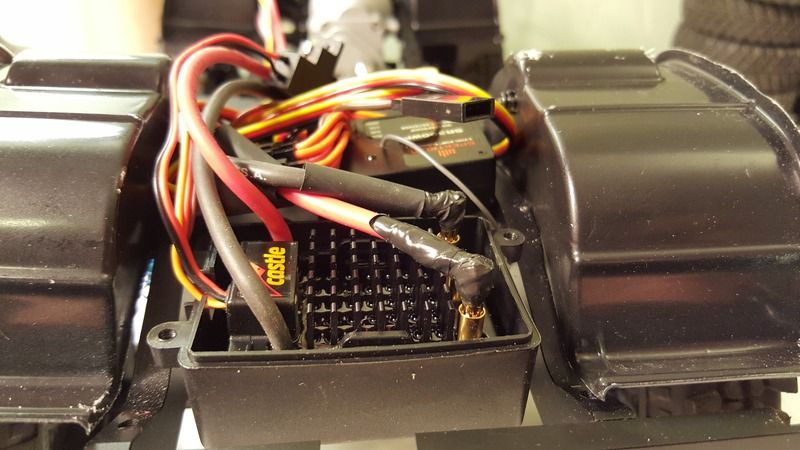 [/IMG] [/IMG]Haven't decided on a motor yet. Still using the Integy Matrix 55T. [IMG] 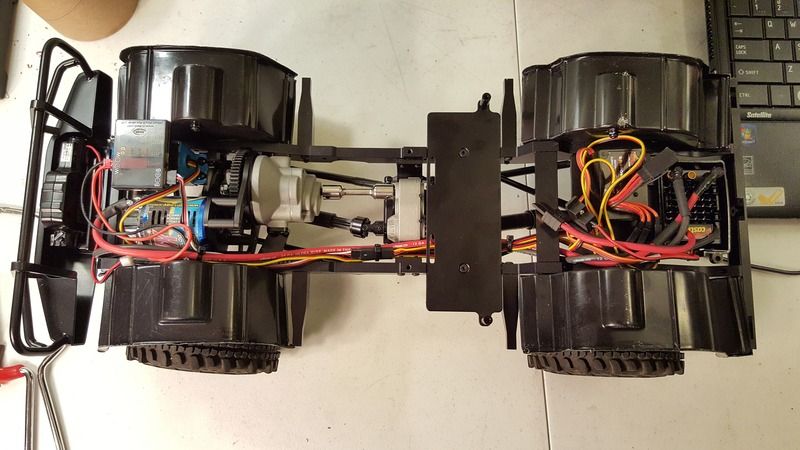 [/IMG] [/IMG]Not quite as clean as I would like but will work. Also picked up a RC4WD Winch Controller, atop the servo. Everything is wired, works, and fits together. All 3 channels are being used, so now I need to figure out what to do about lighting. Tossed on an old set of 90mm King Shocks to see how they fit. Front pair went on with stock spacer settings but the rear needed an extra 2mm worth of spacers on the top to flex properly. The steering guard got moved back to stock position because of which, 5mm spacers were added between the frame and bumper brace. [IMG] 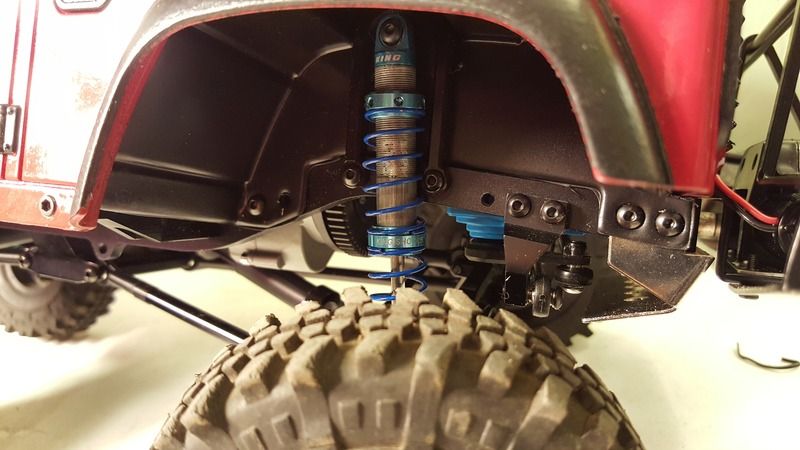 [/IMG] [/IMG]Thanks new2rocks for the kind words, tips, and suggestions. I added 3mm spacers (extras from kit) to the front links, top, and bottom. Definitely looks better and with the addition of longer shocks, rubbing is at a minimum. [IMG 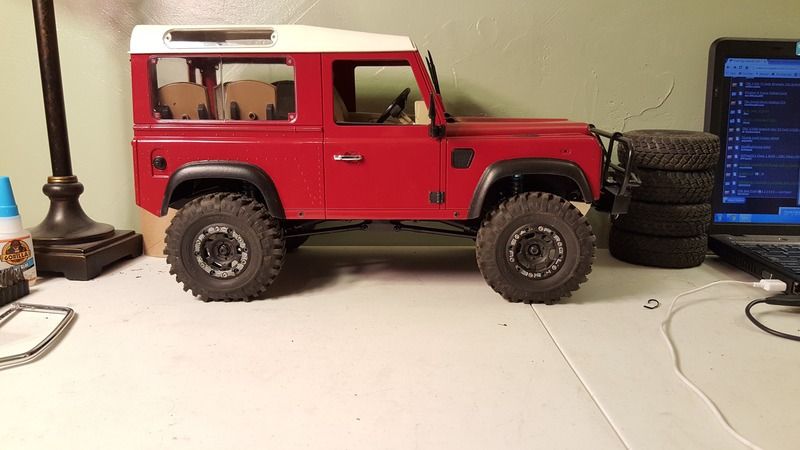 [/IMG] [/IMG]The RC4WD 1.9 Trail Busters are not too aggressive nor too stock looking. They are a few years old now, stock foams on Proline wheels with weights and hold the truck up with incredible ease. Last edited by 2kind; 07-12-2016 at 06:09 PM. |
| |  |
| | #18 |
| Pebble Pounder Join Date: Nov 2015 Location: Gilsum, NH
Posts: 126
|
I've been trying to decide how to do the seals around the windows and how thick to make them. In the end I just taped them off and cut the lines with a X-acto. The Rust-Oleum Flat Black blends in well with everything. [IMG] 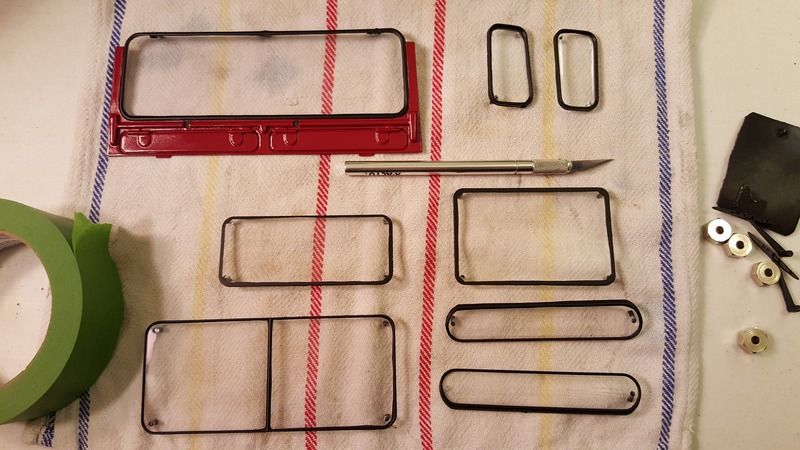 [/IMG] [/IMG][IMG] 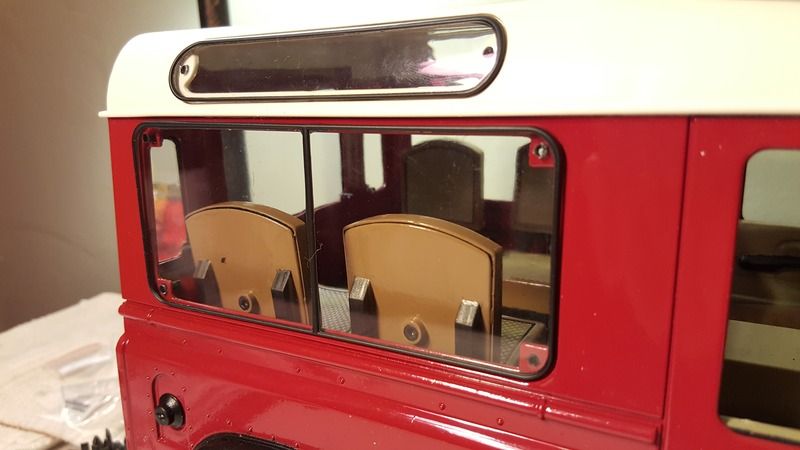 [/IMG] [/IMG]A future project will be to sand out the tabs holding the windows in place and painting the frame they sit in a flat black. Pretty sure a bit of Gorilla Glue would hold the window in place after that. An idea I've been playing with is having bars inside, between the seat and window but that probably means an internal roll cage of sorts. Even if for looks, it may be beyond my skills. We shall see. Last edited by 2kind; 07-12-2016 at 06:10 PM. |
| |  |
| | #19 |
| I wanna be Dave  Join Date: Apr 2014 Location: North Carolina
Posts: 2,254
|
Excellent progress. A little tip for the windows...instead of Gorilla Glue, try a spot of Shoe Goo. Dries clear, doesn't haze, not quite as brittle as Gorilla Glue, and won't melt the plastic. Keep us posted!
|
| |  |
| | #20 |
| Pebble Pounder Join Date: Nov 2015 Location: Gilsum, NH
Posts: 126
|
Do to many reasons, this build has been in limbo for almost four months. Things are back on track now and I've been able to make a few updates. To pick up where we left off, I sanded out the window tabs and painted the framing flat black. [IMG] 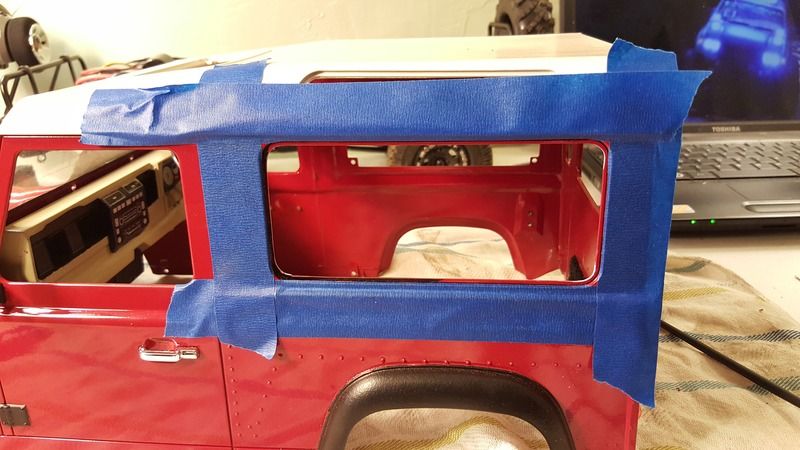 [/IMG] [/IMG]After trying my way first and failing, I decided to listen to you, new2rocks. Still on the hunt for Shoe goo, but I did come across this Testors Clear Parts Cement and Window Maker. If you have a mold supposedly you can make windows with this stuff. Going to try it with the rear view mirror which I've yet to do. The rig has been out a few times along with a number of rollovers and all the glass has held in place. [IMG][/IMG] Next came a bit of everything in no particular order. I wanted to get the spare off the body and also keep it centered so I opted for the Tough Armor Rear Tire Carrier (part#Z-S1200). The foot print is the same as the stock bumper which is great because the RC4WD Mud Flaps (part#Z-S0890) bolt right up. It also plays well with the Adventure Land Rover D90 Roof Rack (part#Z-C0024) [IMG] 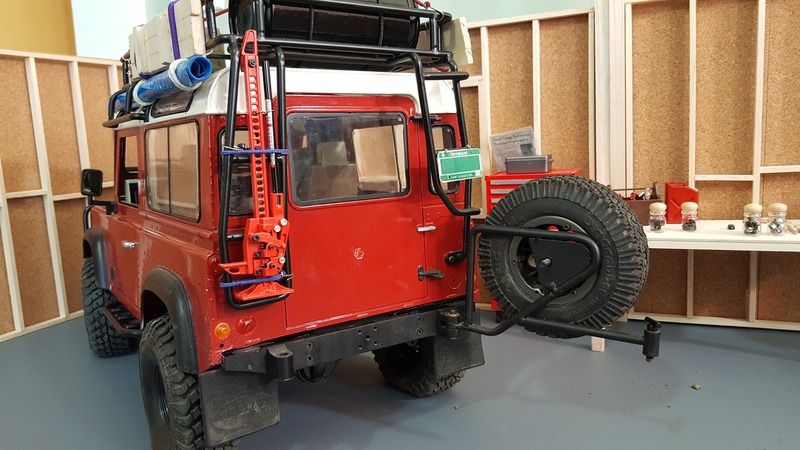 [/IMG] [/IMG][IMG] 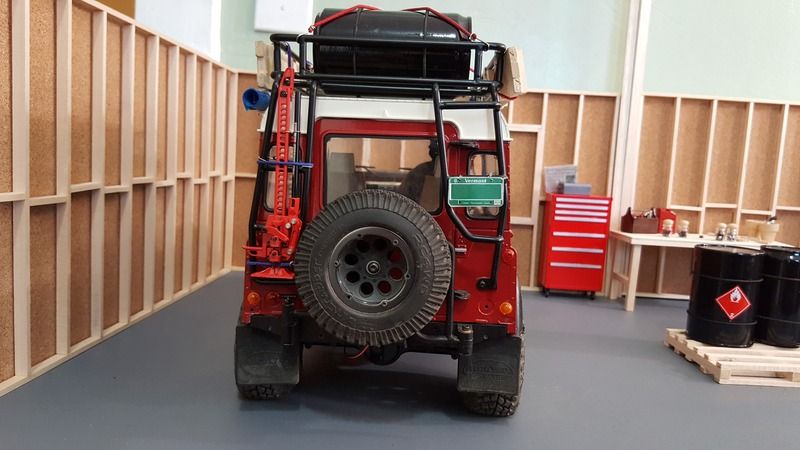 [/IMG] [/IMG]Along with the mud flaps I ordered a Superlift Adjustable Steering Stabilizer (65mm-90mm part#Z-S098 [IMG] 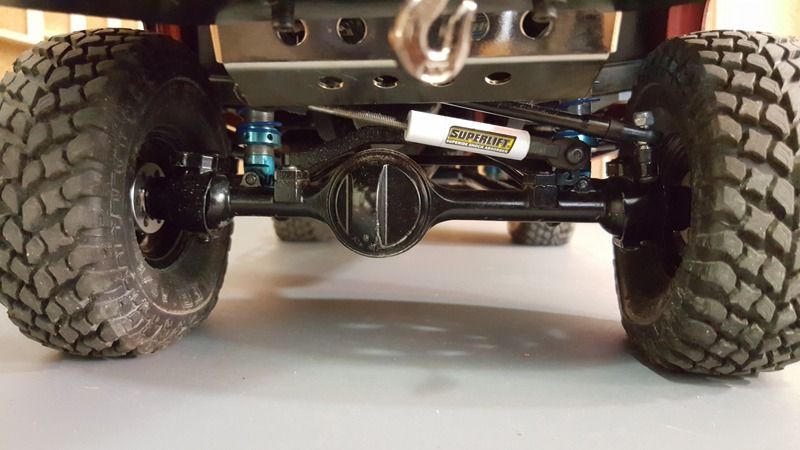 [/IMG] [/IMG]The first pair of rock sliders I picked up were the Gelande Side Rock Sliders (part#Z-S0137). Really nice for the price. My only gripe was having to deal with them every time you remove the body. [IMG] 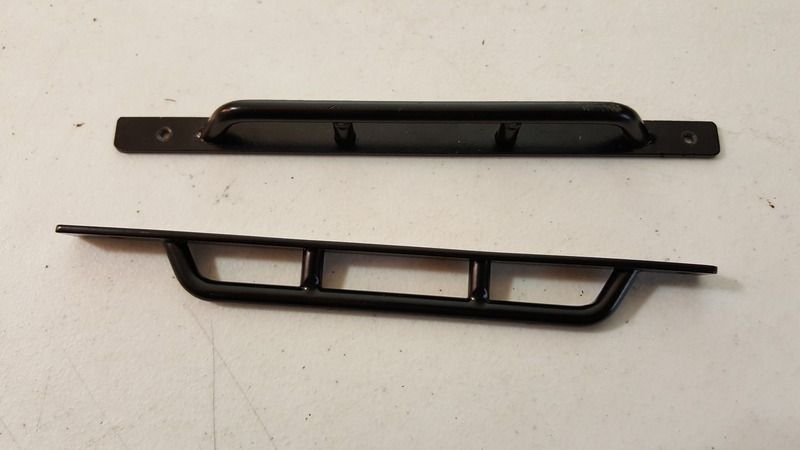 [/IMG] [/IMG][IMG] 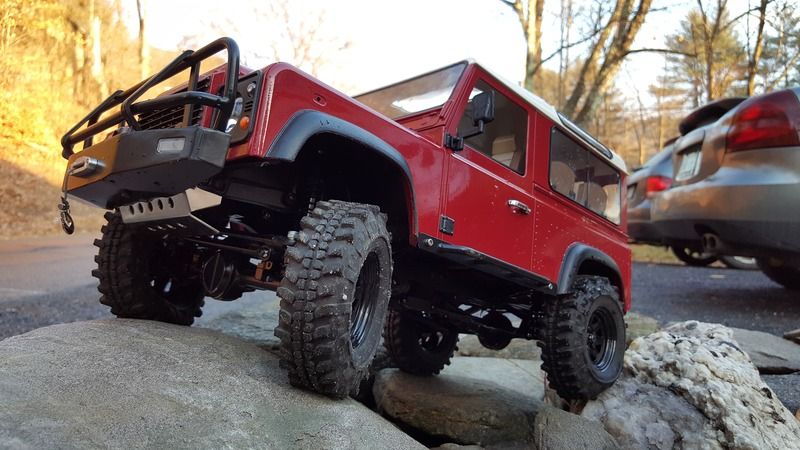 [/IMG] [/IMG]Finally in Stock again and being impressed with the bumper I nabbed a set of Tough Armor Steel Side Sliders (part#Z-S1166). While I'm a little skeptical of the two small bolts holding each side on, of taking the weight this rig is approaching. They have held up great. You do loose a bit of clearance but the amount of protection added easily out weighs that loss, IMO. So far, I would recommend these over the first set. [IMG] 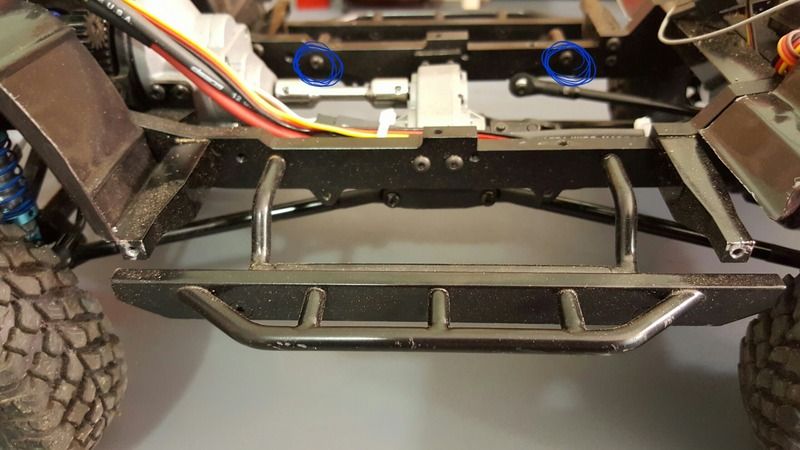 [/IMG] [/IMG]Latest thing would be the before mentioned Adventure Land Rover D90 Roof Rack (part#Z-C0024). I've come across many folks having issues with their racks being bent or for other reasons not lining up correctly. Mine however was in perfect shape as far as I can tell. The build and look is top notch. It is too bad a little more time wasn't spent on the rear mount positions but that would be my only dislike. [IMG 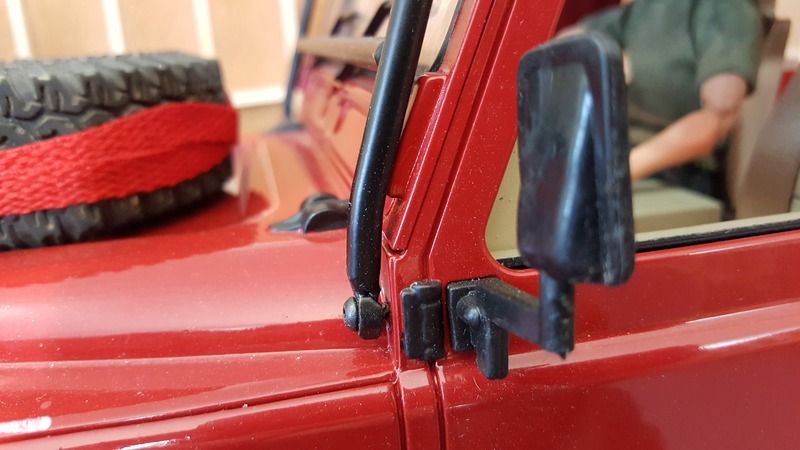 [/IMG] [/IMG][IMG] 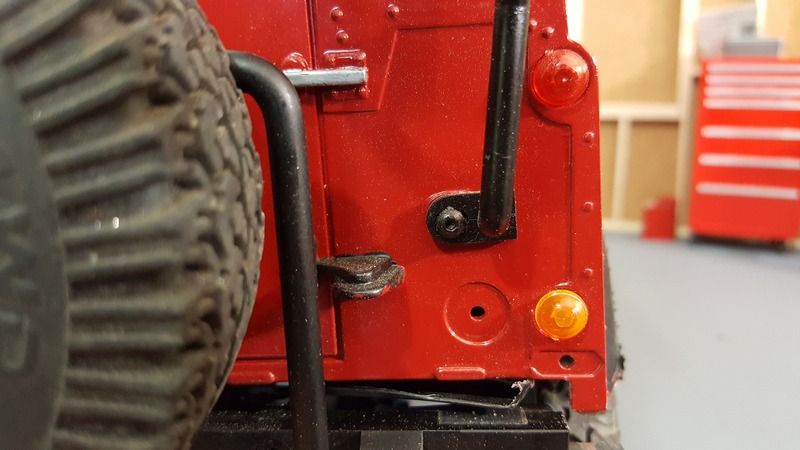 [/IMG] [/IMG][IMG] 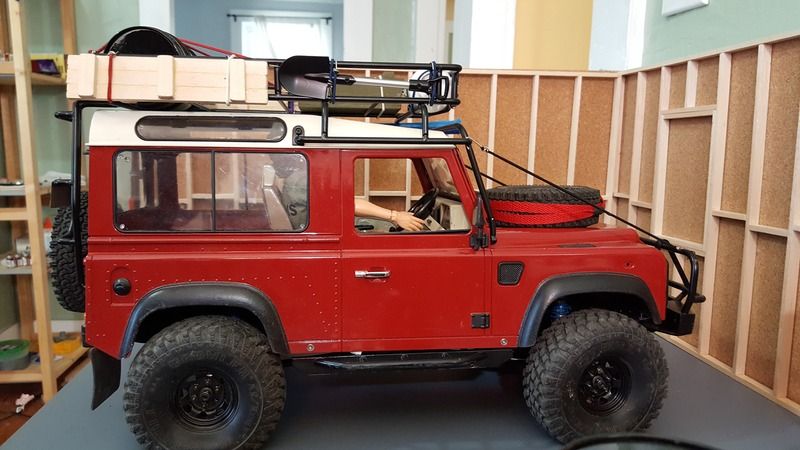 [/IMG] [/IMG][IMG] 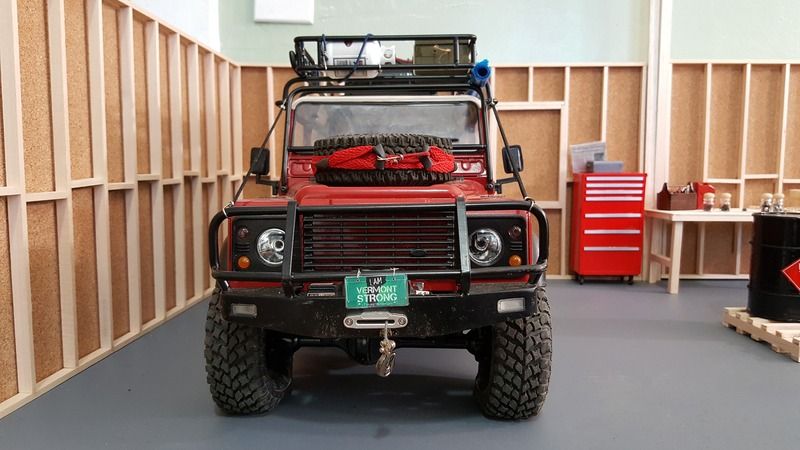 [/IMG] [/IMG][IMG] 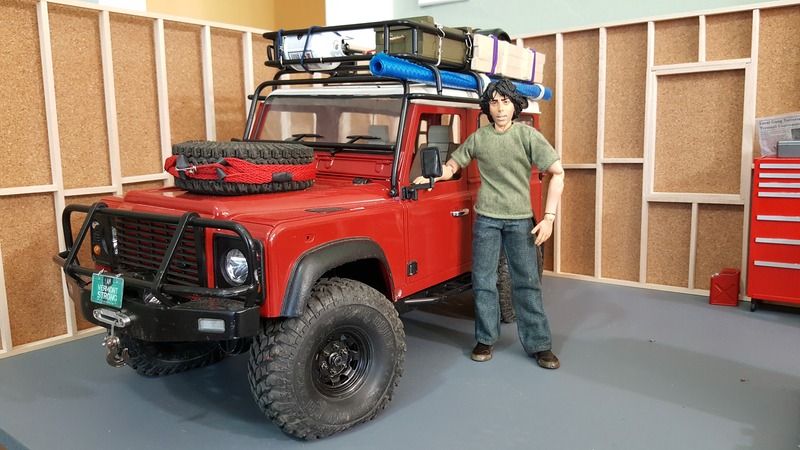 [/IMG] [/IMG]
Last edited by 2kind; 07-12-2016 at 06:26 PM. |
| |  |
 |
| Tags |
| d90, gelande ii, rc4wd |
 2Kind's Gelande II D90 - Similar Threads
 | ||||
| Thread | Thread Starter | Forum | Replies | Last Post |
| Gelande 2 d90 interior | Reino_3000 | Paint and Body | 0 | 12-20-2014 11:08 PM |
| Gelande D90 Pickup | bird8oy85 | 1.9 Scale Rigs | 6 | 03-23-2014 04:54 PM |
| my old d90 Gelande | oldrtybstrd | Scale Videos! | 0 | 08-19-2013 05:52 PM |
| |