| |
 06-04-2016, 08:33 PM
| #61 |
| Quarry Creeper Join Date: May 2012 Location: Berlin
Posts: 310
|
I got the interior in today. All looks good except the dash had loose fibers. I hit it with some heat and it was fine. I'm not going to do a complete photo shoot of it unless someone asks. I started to do a video for it.... but i soon came to the conclusion: I don't have that much to say about it. It doesn't come with hardware. But if you have this body, you have a whole mini-bag of suitable harware. For the head rests, use piano wire ("music wire" if you go to lowes). I love that stuff, super useful. Now, if you've made it this far, thanks. I need some feedback on this. I've never finished a 3D part. I knew sanding would be involved because of the stepping. There's no way you could just paint this set out of the box and have it look good. But that's standard. Is the liberal use of putty normal? I imagine if done right, it will create a very smooth and nice finish.   These are in the middle of being puttied. This is going to be a lot of work... but that's what it's all about. |

|  |
| Sponsored Links | |
| | |
|
06-08-2016, 11:25 AM
| #62 |
| Rock Crawler  Join Date: Sep 2013 Location: New Orleans
Posts: 630
|
Just placed an order for one of these body's, as it was a very good deal, Not even sure what chassis I'll use. Who printed your interior? Most of my small 3D parts I have done in transparent acrylic which yields lots of detail. So far I'm not seeing anyone who produces a full interior except for Pro line's version. Looking really good so far.
|
|
| |
|
06-08-2016, 12:34 PM
| #63 |
| I wanna be Dave Join Date: Feb 2009 Location: Detroit
Posts: 2,075
|
coulda used acetone... but hey we learn something new everyday! here is for your future of owning 3d printed parts. https://www.youtube.com/watch?v=9qByAGrbmS8 or even use Tamiya surface primer. but your way is good too. just note over time.. your putty will shrink down a little bit. |
|
| |
|
06-08-2016, 07:56 PM
| #64 | |
| Quarry Creeper Join Date: May 2012 Location: Berlin
Posts: 310
| Quote:
The interior was printed by R3scaledesignz. You have to contact him on Facebook. https://m.facebook.com/story.php?sto...49116835196471 Definitely a nice body at any price. | |
|
| |
|
06-08-2016, 08:03 PM
| #65 | |
| Quarry Creeper Join Date: May 2012 Location: Berlin
Posts: 310
| Quote:
In this process of smoothing the interior, I find I'm sanding almost all the putty away. Now I've resorted to just sanding on many of the parts, seems to go quicker and much less messy. | |
|
| |
|
06-11-2016, 07:29 PM
| #66 |
| Quarry Creeper Join Date: May 2012 Location: Berlin
Posts: 310
|
I have finished both rear wheel wells. I realized that a real 96 cherokee has a cutout for the back seat, so I added that. It makes the seat fit much nicer. I originally wanted to put the rear seat on hinges, like a real one, so I could fold it down and have it look right. But the seat is too large for that no matter what I do. I am making the floor so I can pull out the rear seat and have it look like it is just tucked away. I run my cherokees with the rear seat folded almost 100% of the time. It just looks nicer and I love the space. Here is the cutaway. It's a bit squared... but squared is in my skill set. This is only my second styrene project after all. 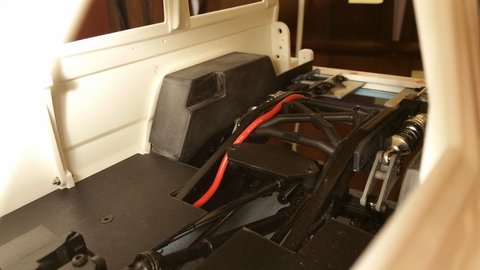 I admittedly got a bit heavy handed with the file/sandpaper. But this is all going to be painted and covered with carpet anyway. Here is the seat, just sitting in place. I havnt glued the main floor 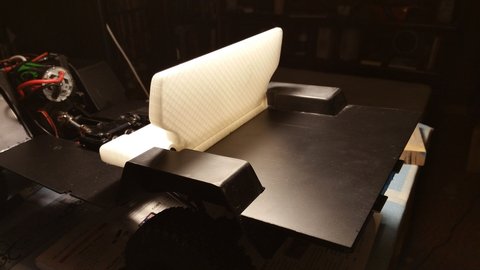 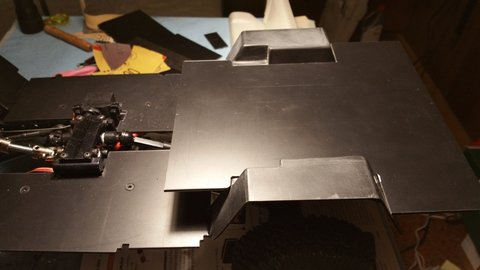 It's actually starting to look like something.. 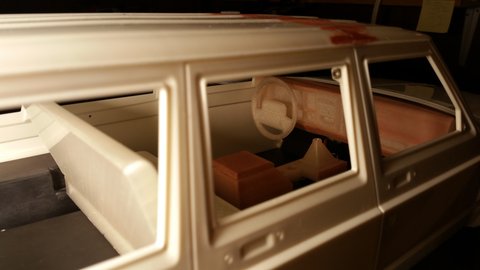 Last edited by Dustinf; 07-25-2017 at 05:52 PM. |
|
| |
|
06-12-2016, 06:18 AM
| #67 | |
| Rock Crawler Join Date: Sep 2013 Location: New Orleans
Posts: 630
| Quote:
| |
|
| |
|
06-18-2016, 07:55 PM
| #68 |
| Quarry Creeper Join Date: May 2012 Location: Berlin
Posts: 310
|
Just a brief update. I've been working on the rear interior panels. This is just the basis starting panels. I'm going to add layers and cut outs to match a 1:1 cherokee. Also notice the light bucket. In hindsight, I shouldn't have made it square, as the real ones have a slope to them. 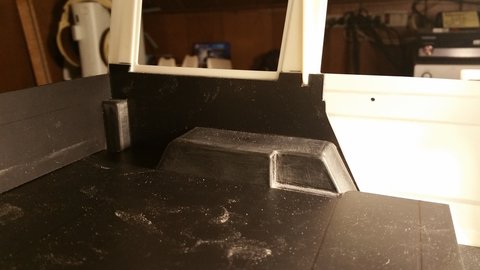 Here is the panel uninstalled and pre layer. Kind of weird looking. 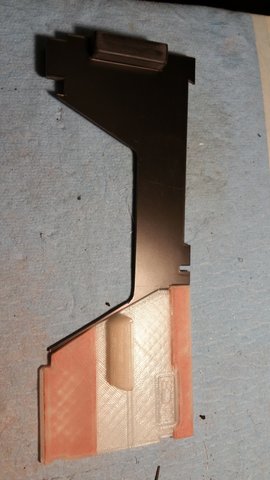 Last edited by Dustinf; 07-25-2017 at 10:22 PM. |
|
| |
|
06-22-2016, 10:31 PM
| #69 |
| Quarry Creeper Join Date: May 2012 Location: Berlin
Posts: 310
|
Finally finished one of the panels. And it's the one that will be covered by the spare tire... but at least it will look good underneath. I originally wanted to do the same cutout/compartment of a 1:1. But it just didn't look right so I settled with this. 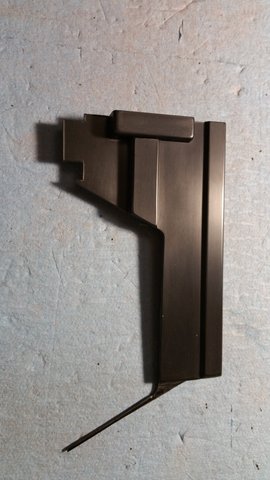 I cut holes in the middle layers. Chambers to help keep the weight down. I don't mind a heavy rig, but at this rate, this thing will be 15lbs+. 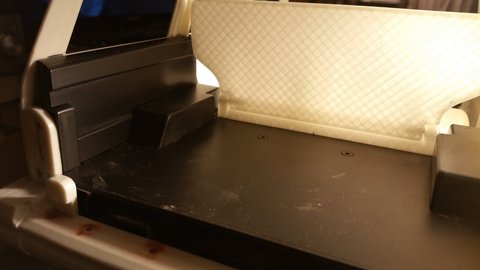 And with the spare just sitting there. I don't know how I will mount it yet. It's hollow, so I'll be able to keep something in it. Maybe the light system. I'm also going to cover it in carpet like the other parts. 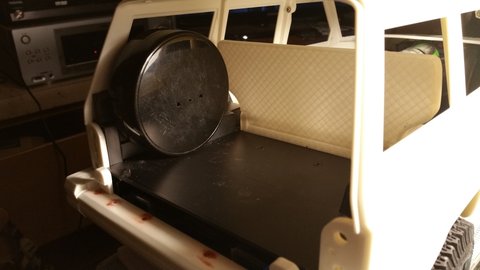 I'll do the next side and move onto the rear hatch. Last edited by Dustinf; 07-25-2017 at 10:19 PM. |
|
| |
|
06-22-2016, 10:50 PM
| #70 |
| Quarry Creeper Join Date: Sep 2010 Location: appleton
Posts: 357
|
My 1:1 was leather on the spare cover Sent from my LG-H900 using Tapatalk |
|
| |
|
06-23-2016, 12:08 PM
| #71 | |
| Quarry Creeper Join Date: May 2012 Location: Berlin
Posts: 310
| Quote:
Good call, I've seen it go both ways. But leather might look better in small scale. | |
|
| |
|
06-24-2016, 07:11 AM
| #72 |
| Rock Stacker Join Date: Sep 2014 Location: Wichita
Posts: 64
|
So much detail!!! Looking forward to more updates
|
|
| |
|
06-27-2016, 11:00 PM
| #73 |
| Quarry Creeper Join Date: May 2012 Location: Berlin
Posts: 310
|
One more piece to the puzzle. Rear hatch. Turned out alright. The fit is really nice. It will glue onto the rear hatch.   I'm making sure the windows will fit while I'm doing this. I havnt started cutting the lexan yet, I still have a bit of trepidation towards the glass. This is what the back of this panel looks like.  It's slow going. Last edited by Dustinf; 07-26-2017 at 10:54 AM. |
|
| |
|
07-04-2016, 08:36 AM
| #74 |
| Quarry Creeper Join Date: May 2012 Location: Berlin
Posts: 310
|
I'm currently taking a week off of this build to avoid getting burnt out. Figured I'd use this time to work on a diorama for my 1:6 collectables and catch up on the bows I need to finish. |
|
| |
|
07-13-2016, 12:23 AM
| #75 |
| Quarry Creeper Join Date: May 2012 Location: Berlin
Posts: 310
|
I decided to go with a gimmicky smoking exhaust once again. This one will be much nicer. I was able to muffle it almost completely and I'm placing the unit in the feont. This way I can run a scale pipe all the way back. Maybe even add a muffler to change the sound. 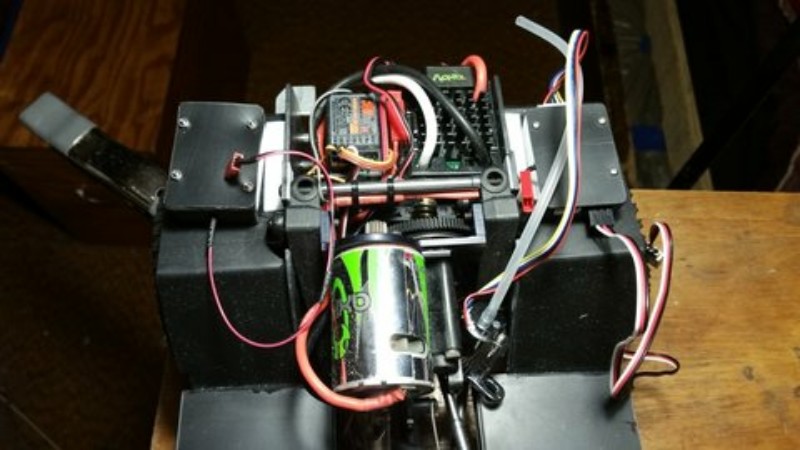 It's two units that sit on either wheel well. This should still allow room for one of my horn units. Last edited by Dustinf; 08-06-2017 at 10:35 AM. |
|
| |
|
07-20-2016, 08:28 PM
| #76 |
| Quarry Creeper Join Date: May 2012 Location: Berlin
Posts: 310
|
Back to it, finially. I'm honestly overwhelmed by the amount of work this thing is going to be to finish. I finished getting the spare mounted. I had the round part from some tamiya parts tree. I just needed to make a cap. I did that my mounting a piece of styrene to a dremel and sanding it perfectly round. It has plenty of space inside. I believe I will use this store my light system. 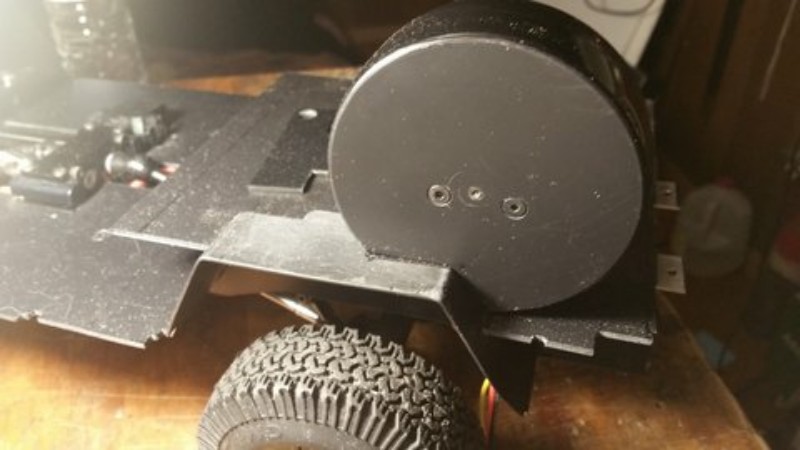 I also made same pieces for the front. This is what I will mount my dash to. It took me awhile to figure out, and I'm not sure if it is the right choice (having the dash be part of the chassis, not attached to the body), but time will tell. 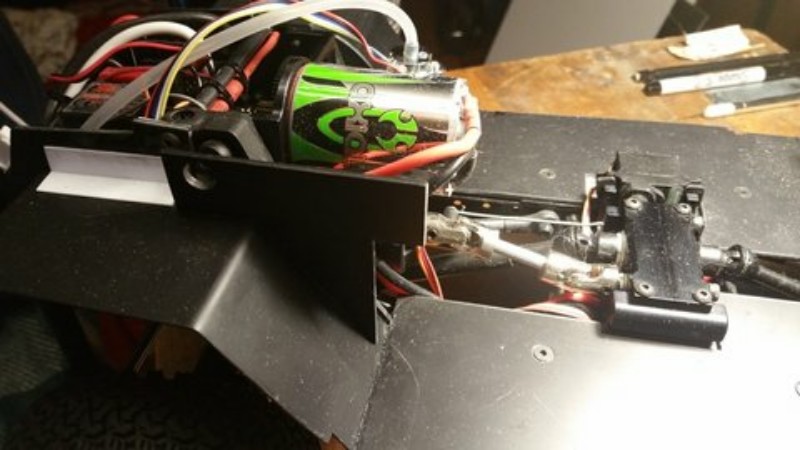 As of right now, everything feels solid. Last edited by Dustinf; 08-06-2017 at 10:37 AM. |
|
| |
|
07-30-2016, 10:56 PM
| #77 |
| Quarry Creeper Join Date: May 2012 Location: Berlin
Posts: 310
|
Thanks for checking out the build guys. It's a long process. I got the dash installed. This way I can start setting up the seats and finish the interior. I decided to make the dash part of the chassis rather than attach it to the body. I'm trying to do that with as much as possible. If thing thing needs maintenance once finished... it's going to be a pain to take down. It is all made to come apart in a clean way though. Actually, the entire interior including wheel wells comes off as one piece. As of now it takes 16 screws, however. 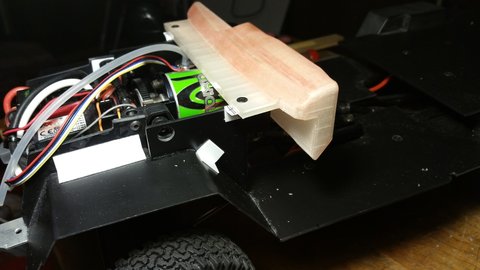 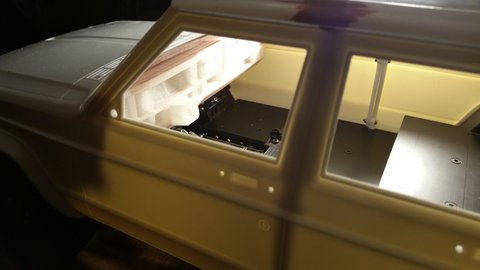 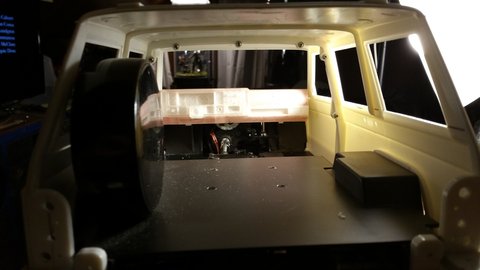 Last edited by Dustinf; 08-06-2017 at 10:46 AM. |
|
| |
|
08-03-2016, 12:33 PM
| #78 | |
| Newbie Join Date: Aug 2016 Location: Raleigh
Posts: 2
| Quote:
This is pretty scale and I like the cantilever suspension. How wide is it? | |
|
| |
|
08-14-2016, 01:01 PM
| #79 | |
| Quarry Creeper Join Date: May 2012 Location: Berlin
Posts: 310
| Quote:
I love the Ta's, but I'll have to check out the at's you mention. It's not very wide. I get nice tire tuck with this set up. I'll measure tonight and respond. | |
|
| |
|
09-05-2016, 10:28 AM
| #80 | |
| Quarry Creeper Join Date: Dec 2015 Location: Sutter
Posts: 489
| Quote:
Sent from my SM-T320 using Tapatalk | |
|
| |
 |
| Tags |
| cherokee, class, hardbody, jeep, scale |
 Cherokee XJ Hardbody Class 1 Build - Similar Threads
 | ||||
| Thread | Thread Starter | Forum | Replies | Last Post |
| Just saw this on FB - cherokee XJ hardbody | Noll11 | Paint and Body | 239 | 03-07-2017 09:02 PM |
| Nappy's Class 1 Cherokee build "Frank" | Nappy | Axial SCX-10 | 7 | 01-22-2015 10:58 AM |
| cherokee hardbody? | Stitch | General Scale Talk | 6 | 12-03-2008 02:07 AM |
| |


 Linear Mode


