| |
 03-05-2019, 10:37 PM
| #21 |
| Pebble Pounder Join Date: Sep 2018
Posts: 109
|
Dude this looks so cool!! Loving the rear wheels in back it's kinda like a Dakar truck!! Sent from my ONEPLUS A6003 using Tapatalk |

|  |
| Sponsored Links | |
| | |
|
03-06-2019, 10:36 PM
| #22 | |
| Quarry Creeper  Join Date: Apr 2016 Location: Canada, Ottawa/Gatineau
Posts: 290
| Quote:
Thank you, the 2 upright spares and center cabinet is base on the Bowler Wildcat. | |
|
| |
|
03-06-2019, 10:37 PM
| #23 |
| Quarry Creeper Join Date: Apr 2016 Location: Canada, Ottawa/Gatineau
Posts: 290
|
I wasnt satisfied with the look of the bungees to secure the spare tires, therefore using a 5-point harness kit, paper clips to fabricate hooks, I made my own tie down straps, but God sewing at this scale sucks. One done, number two in progress, but my fingers hurt, therefore time to call it quits!  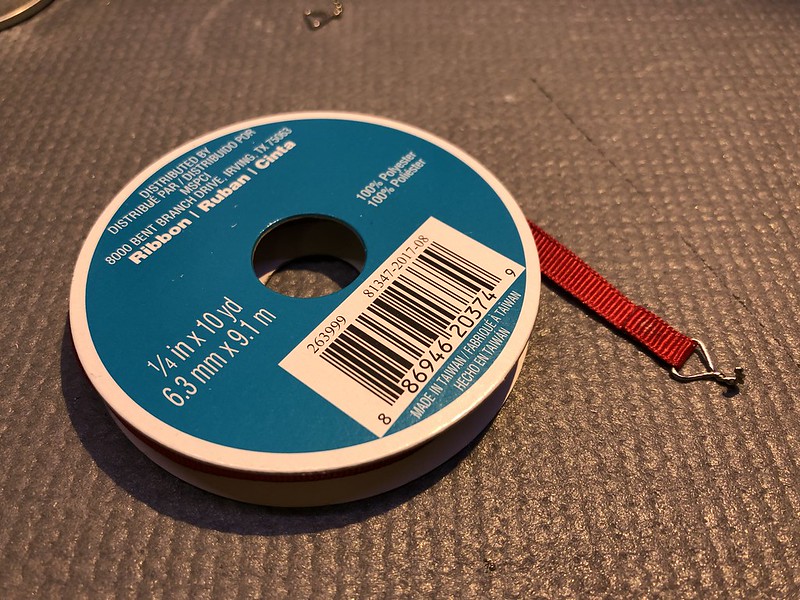 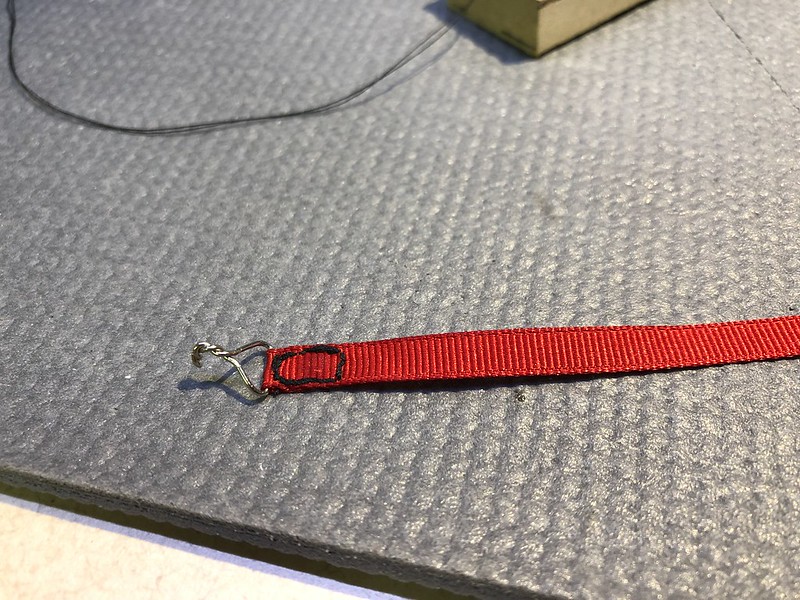  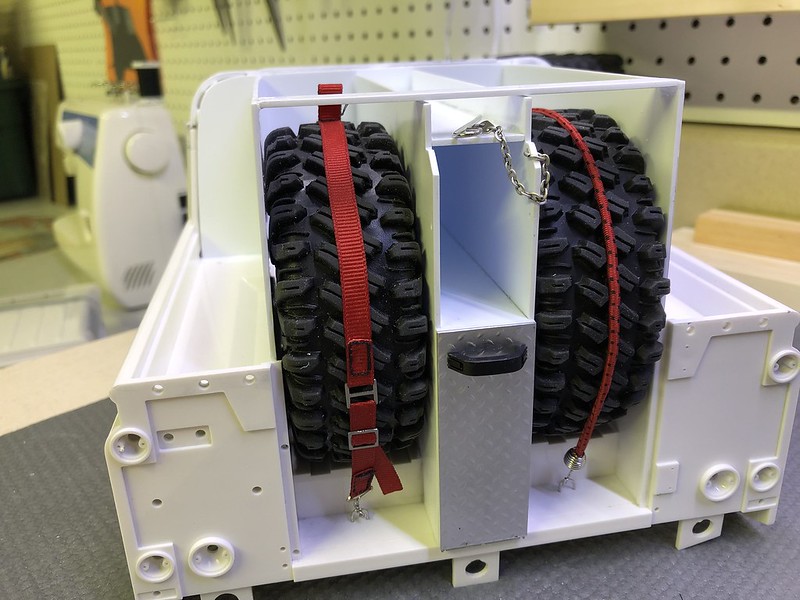 D |
|
| |
|
03-07-2019, 05:03 AM
| #24 |
| Pebble Pounder Join Date: Sep 2018
Posts: 109
|
Dude they look awesome!! This rigs going to look so good loving the details!! Think I need to steal some of your ideas!! Sent from my ONEPLUS A6003 using Tapatalk |
|
| |
|
03-07-2019, 03:47 PM
| #25 | |
| Quarry Creeper Join Date: Apr 2016 Location: Canada, Ottawa/Gatineau
Posts: 290
| Quote:
D | |
|
| |
|
03-07-2019, 03:50 PM
| #26 |
| Quarry Creeper Join Date: Apr 2016 Location: Canada, Ottawa/Gatineau
Posts: 290
|
Some quick progress before dinner, the second strap is done, the center stowage cabinet was fixed to the body, yet removable in the future.  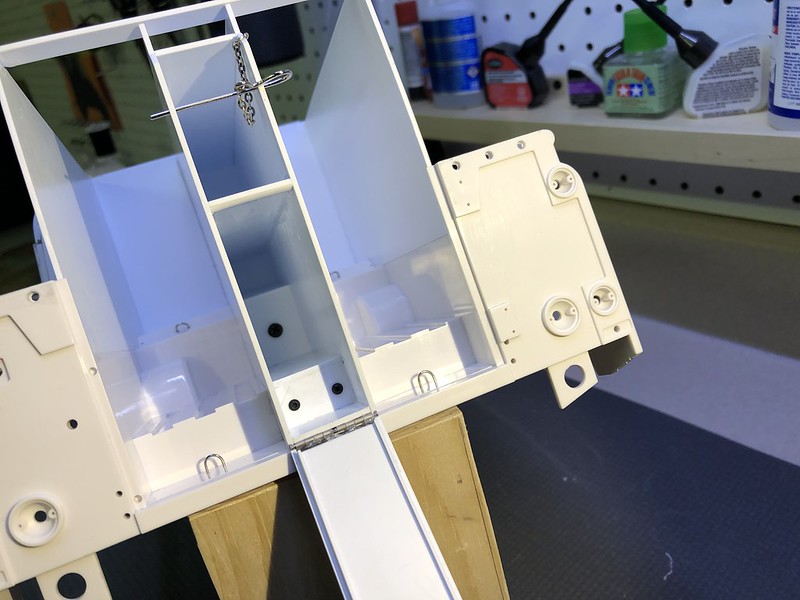 On the side cabinets I added one partition per side to stow recovery chains and I made these cutesy little brackets to hold a scale Hi-Lift jack. 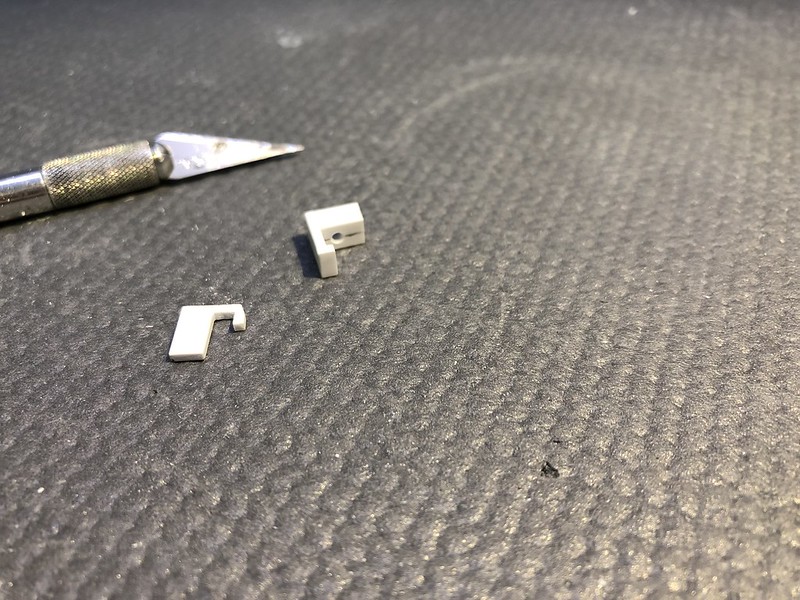 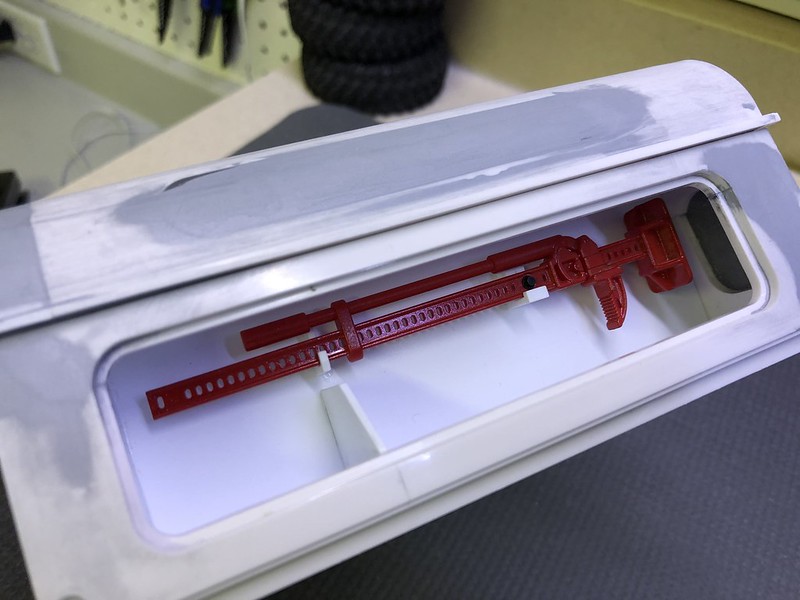 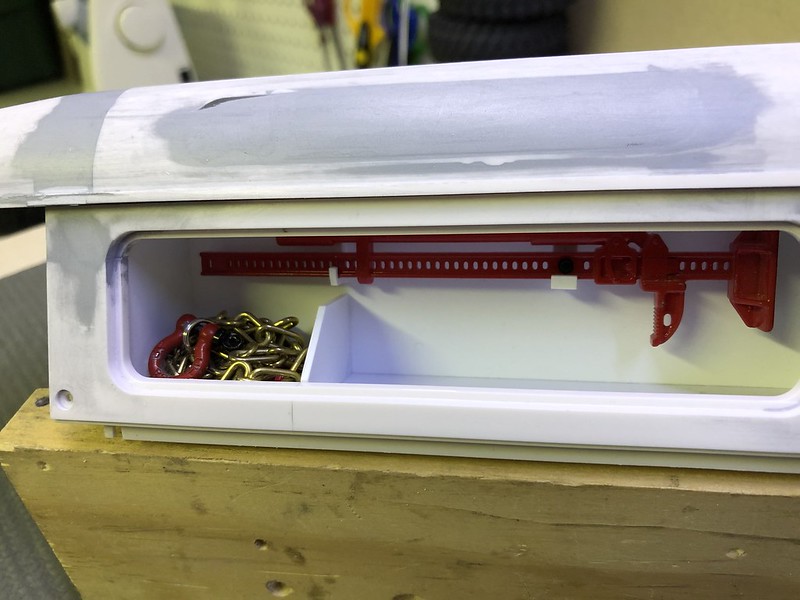 Now, if you excuse me, I must go feed my family. D |
|
| |
|
03-07-2019, 04:08 PM
| #27 |
| I wanna be Dave Join Date: Oct 2012 Location: Medina
Posts: 2,263
|
Skills! Very nice work and certainly one of the more creative builds I've seen! Question, are you concerned about heat build up in the motor surrounded by the styrene?
|
|
| |
|
03-07-2019, 10:19 PM
| #28 | |
| Quarry Creeper Join Date: Apr 2016 Location: Canada, Ottawa/Gatineau
Posts: 290
| Quote:
Yes and no, I will monitor the motor temps and if they are high, I will add one fan in the upper portion of the engine block with an air intake towards the transmission. D | |
|
| |
|
03-07-2019, 10:22 PM
| #29 |
| Quarry Creeper Join Date: Apr 2016 Location: Canada, Ottawa/Gatineau
Posts: 290
|
Boy... this is what a full evening of work gives you when you are going for scale points... a fully functional shovel mount. 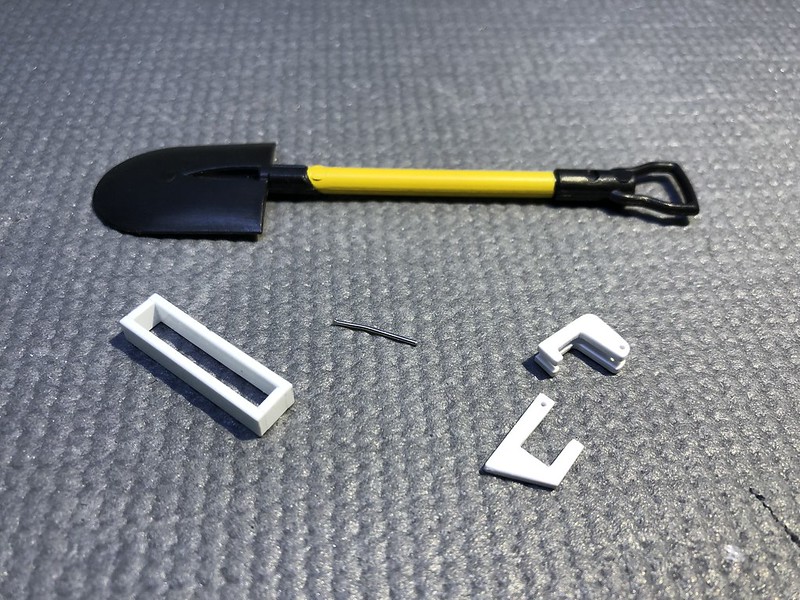 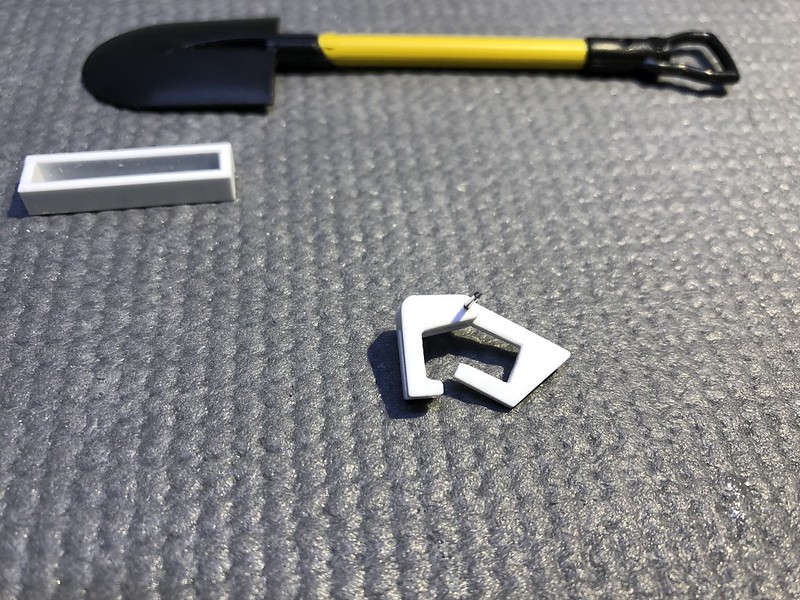 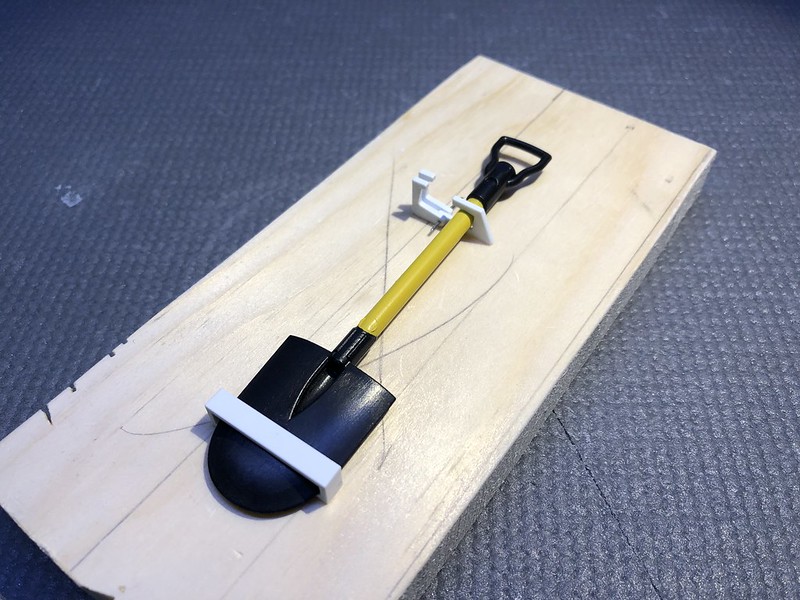 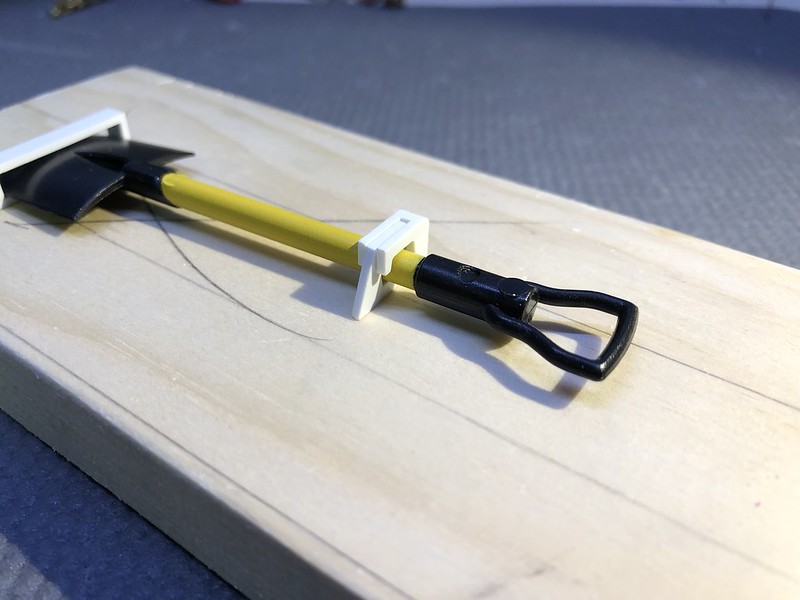 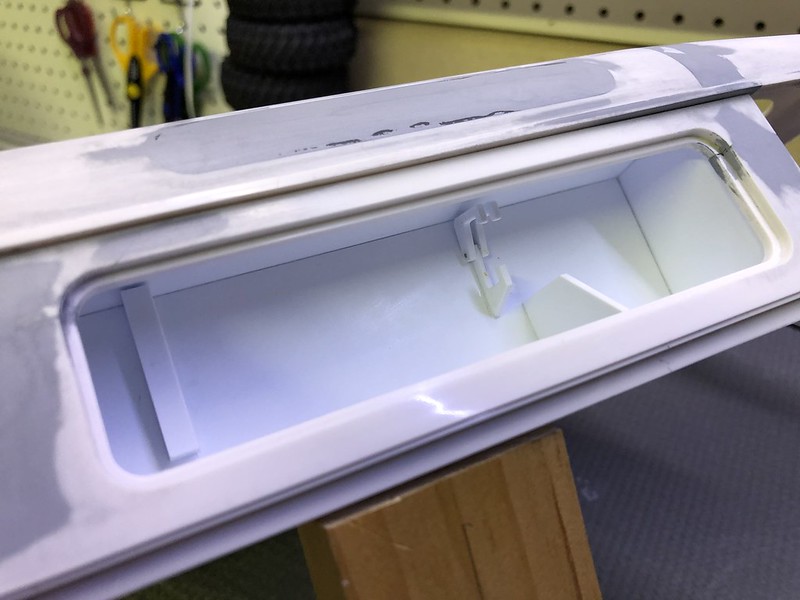 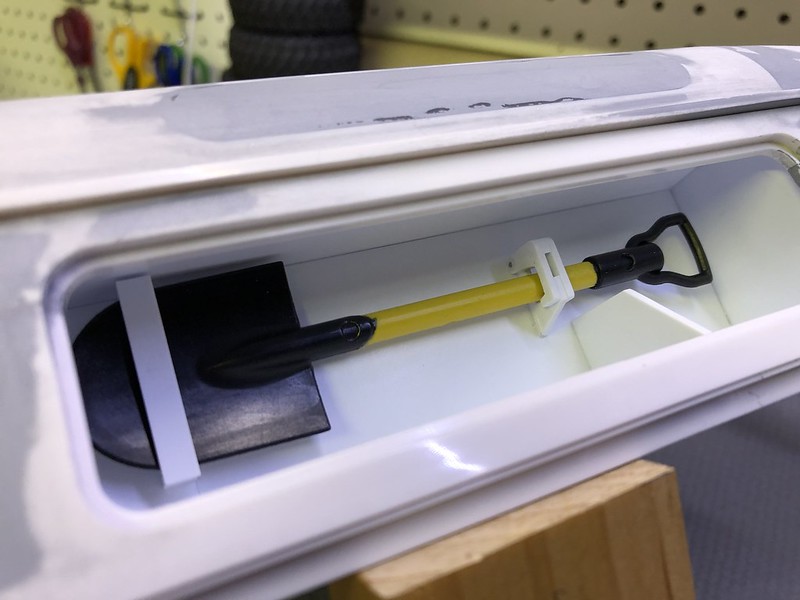 Now, if this mount actually opens and closes, which it does, I can only assume that it counts towards functional scale item for the points of project D-Rat?!? D |
|
| |
|
03-08-2019, 08:29 PM
| #30 |
| Quarry Creeper Join Date: Apr 2016 Location: Canada, Ottawa/Gatineau
Posts: 290
|
Had a busy evening, therefore very little progress was made on project D-Rat. I carved the body to recess the hinges for the side cabinet doors, then proceeded to drill and thread for M1.3 the 8 holes required to mount the hinges. 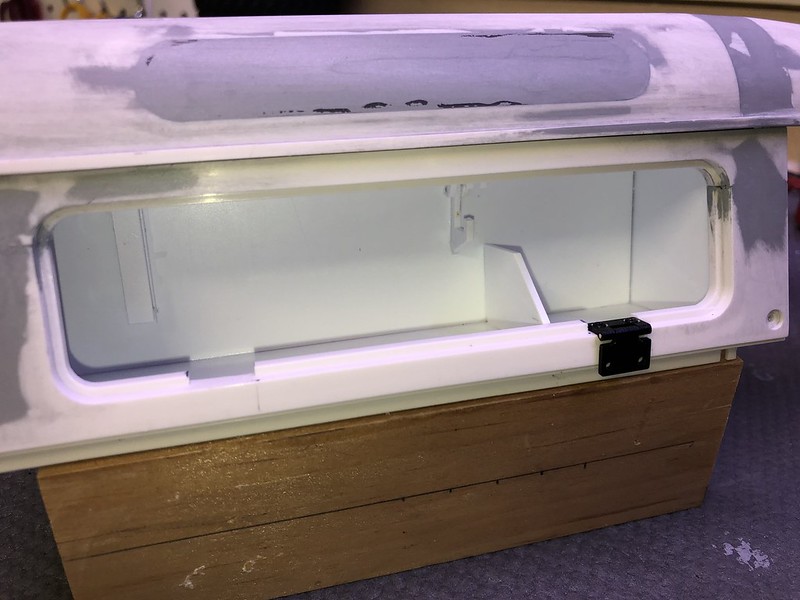 D |
|
| |
|
03-09-2019, 10:33 PM
| #31 |
| Quarry Creeper Join Date: Apr 2016 Location: Canada, Ottawa/Gatineau
Posts: 290
|
Well
This will be attempt #3 at making a latch system to keep the side cabinets doors closed for D-Rat; the first two designs either didnt keep the doors closed tightly or they just snapped off! 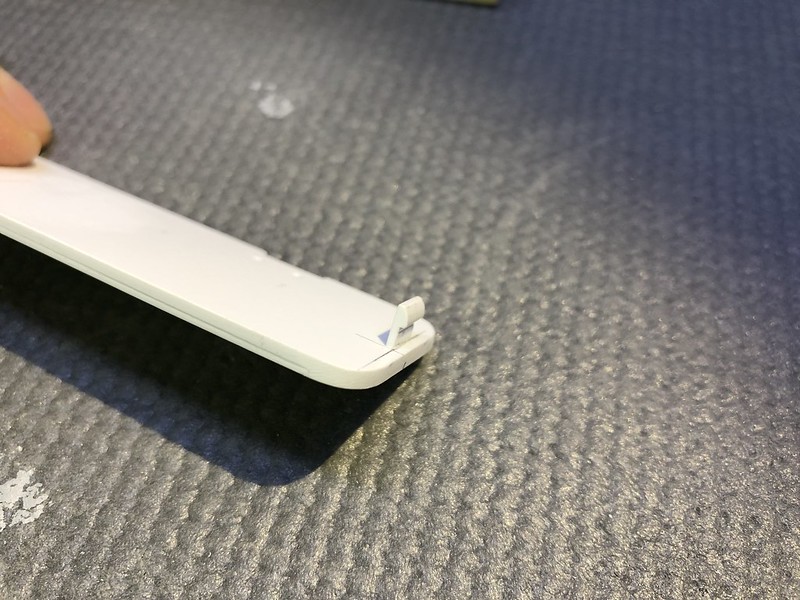 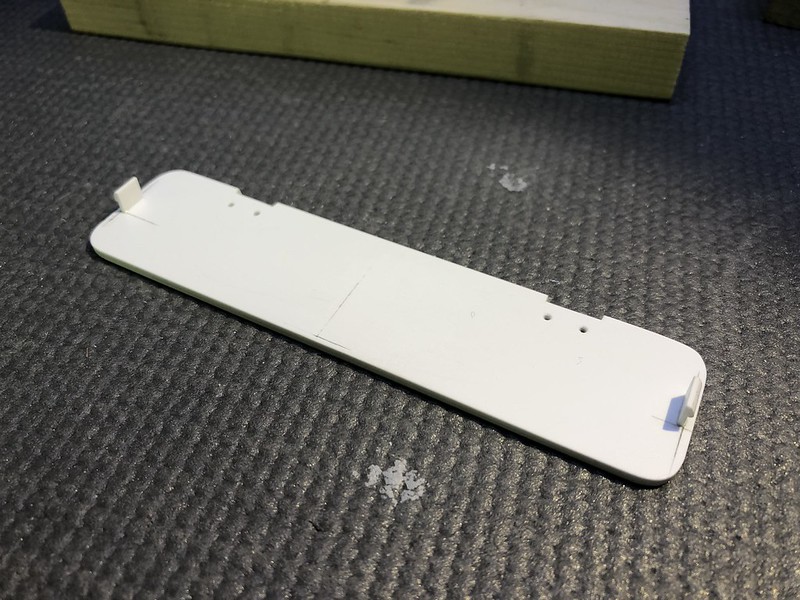 Since I been working on the side doors, I made some handles to go on them, but failed to measure twice before drilling the holes... derp! 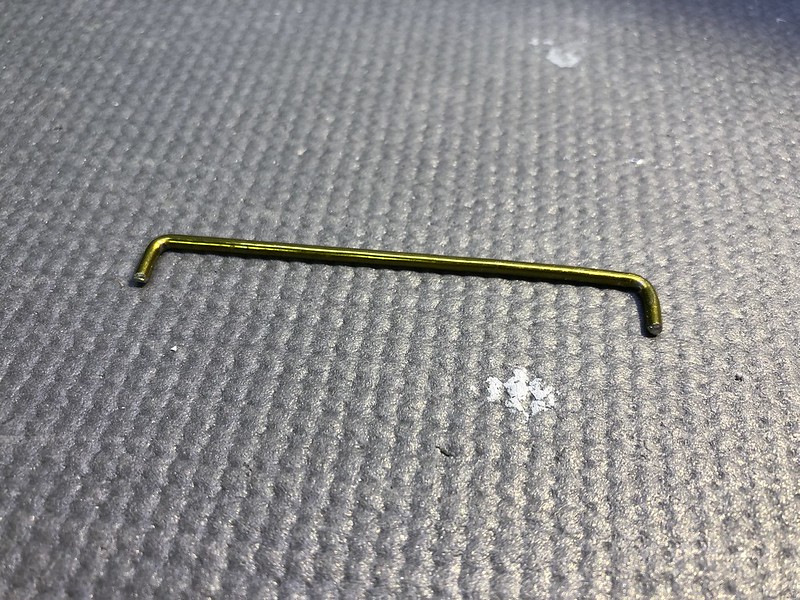 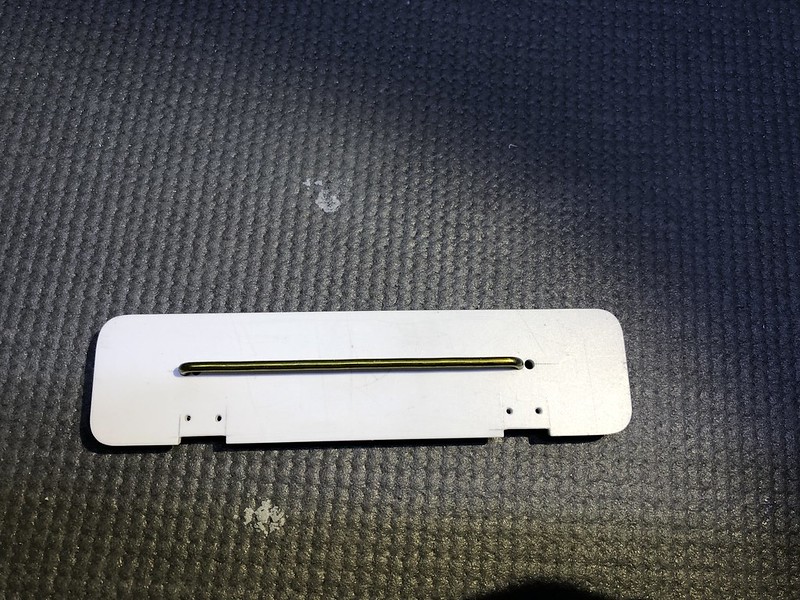 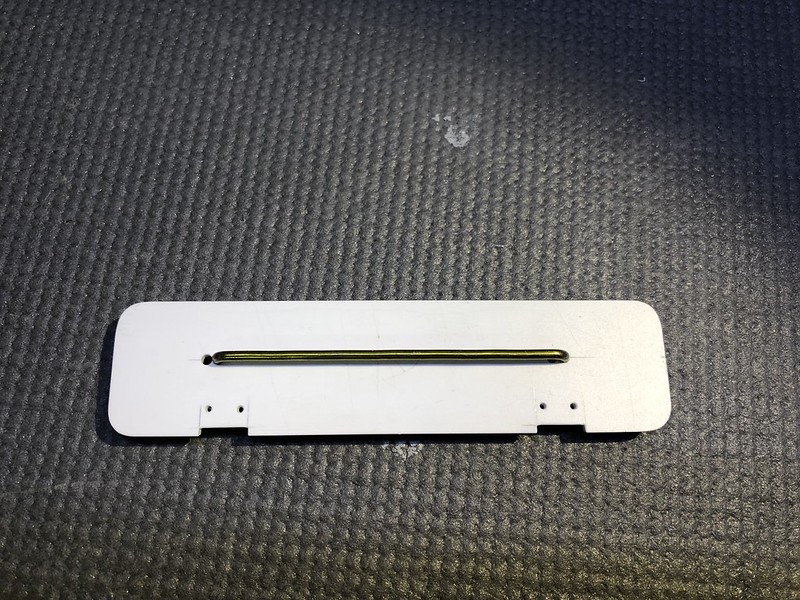 Nothing some styrene plugs and a bit of MEK cant fix. 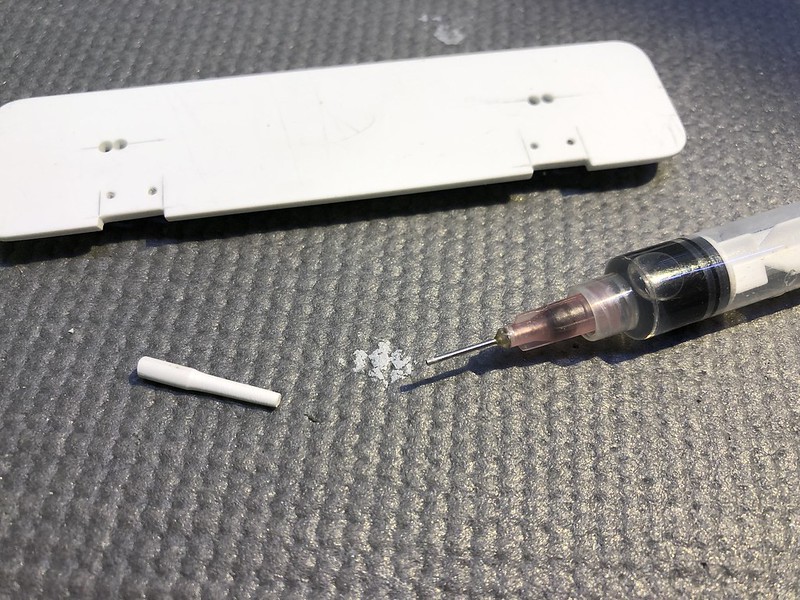  While I waited for the fused plugs to harden, I started work on the rear fender flares.  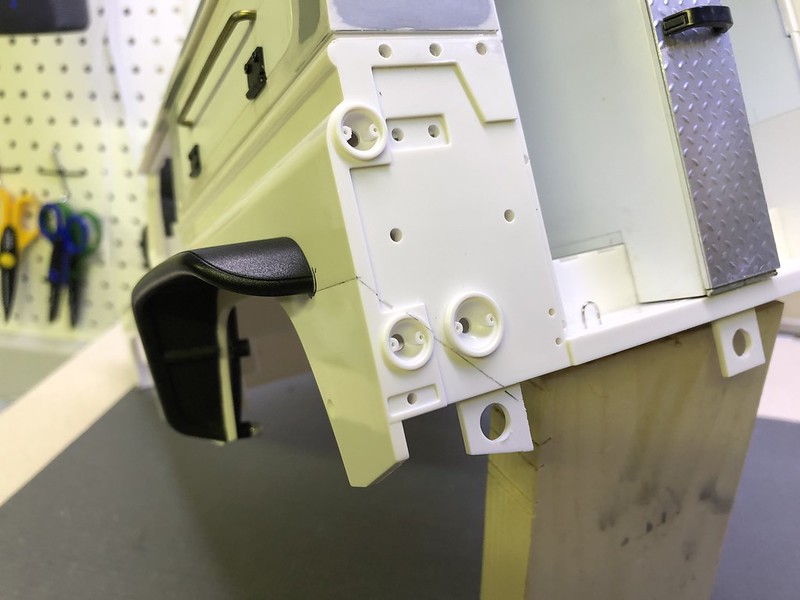  Satisfactory results, but Ill need to readjust the wheelbase to fix the visual gap with the rear tire, order some hardware to mount the flares properly and cut the rear corners off. D |
|
| |
|
03-10-2019, 10:10 PM
| #32 |
| Quarry Creeper Join Date: Apr 2016 Location: Canada, Ottawa/Gatineau
Posts: 290
|
Bam, the roof section of project D-Rat and the side stowage cabinets are done! The doors to the side cabinets were finished with scale aluminum checkered plate, the current latch system appears to work and the handles were installed. 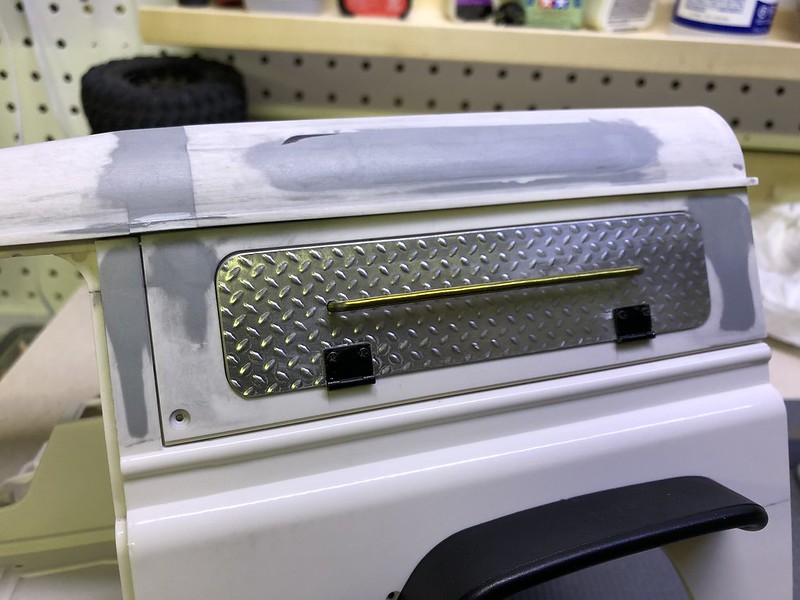  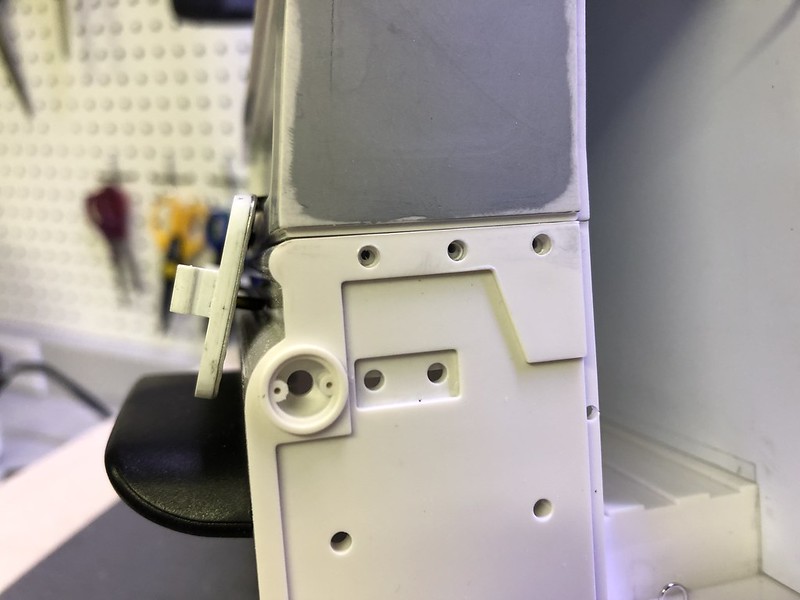 Now, onto the body, the rear corners were chopped at 45 degrees, keeping only the lower inner brake lights and the fender flares mounting holes were drilled. 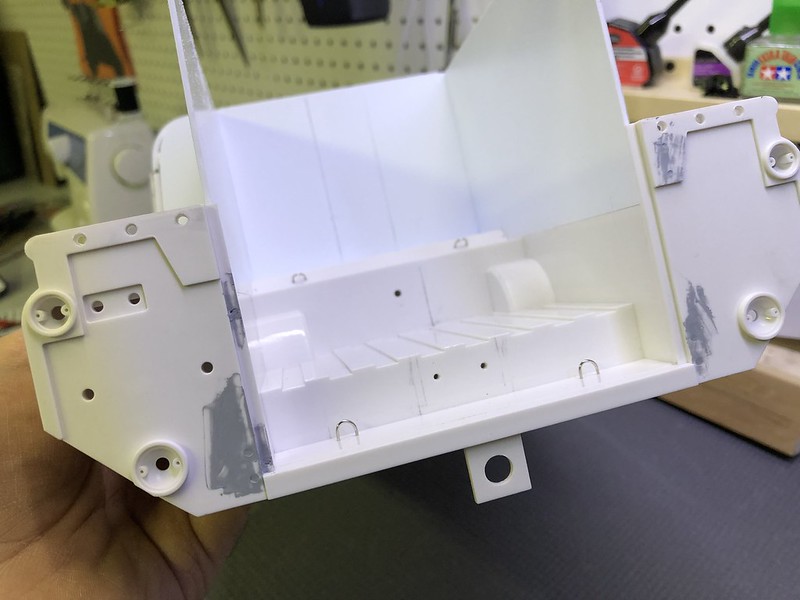 I had to fabricate a custom tab for the hole that ended up where the fuel filler recess is and I patched some of the holes for the original flares which are now of no use. 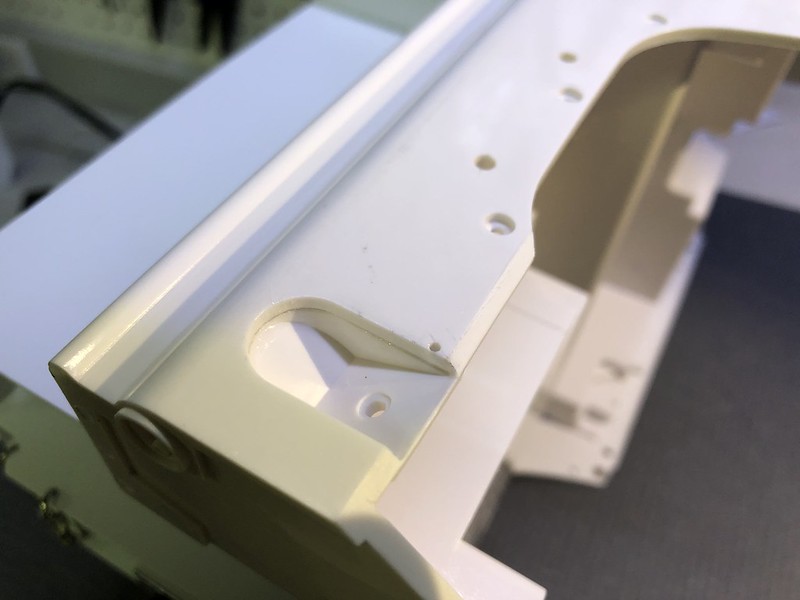 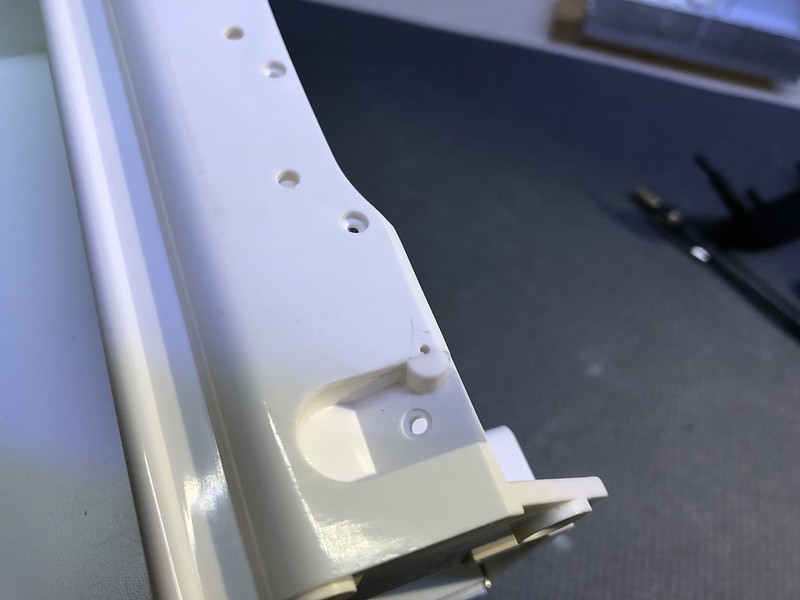 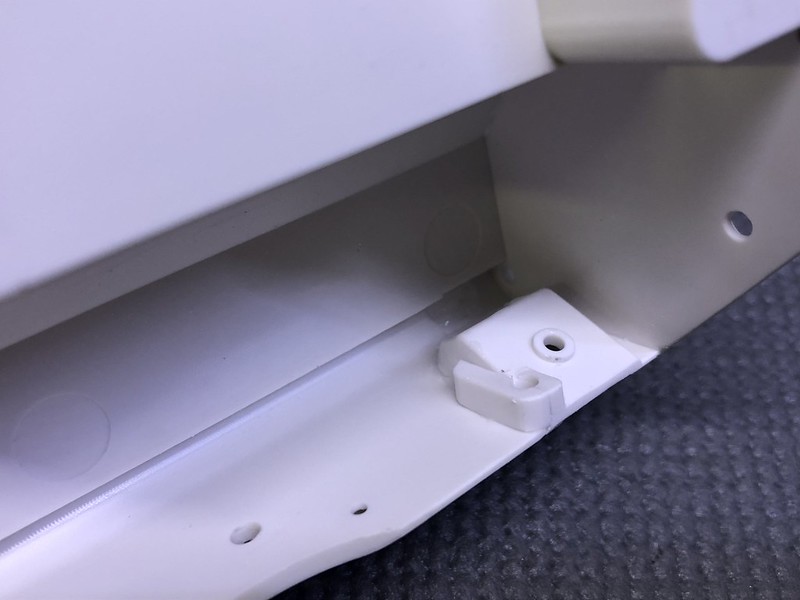 I also shaved the hinge tab that is supposed to be used with the rear cargo door and deleted all the related holes in the rear body panel. Next up will be trimming of the rear quarter panels to match the new fender flares and make new rear suspension links to readjust the wheelbase. D |
|
| |
|
03-11-2019, 10:20 PM
| #33 |
| Quarry Creeper Join Date: Apr 2016 Location: Canada, Ottawa/Gatineau
Posts: 290
|
Small progress on project D-Rat, I got both quarter panels trimmed to the shape of the fender flares and I started figuring out the wheelbase (again) to match the gap with the new rear wheel arches. 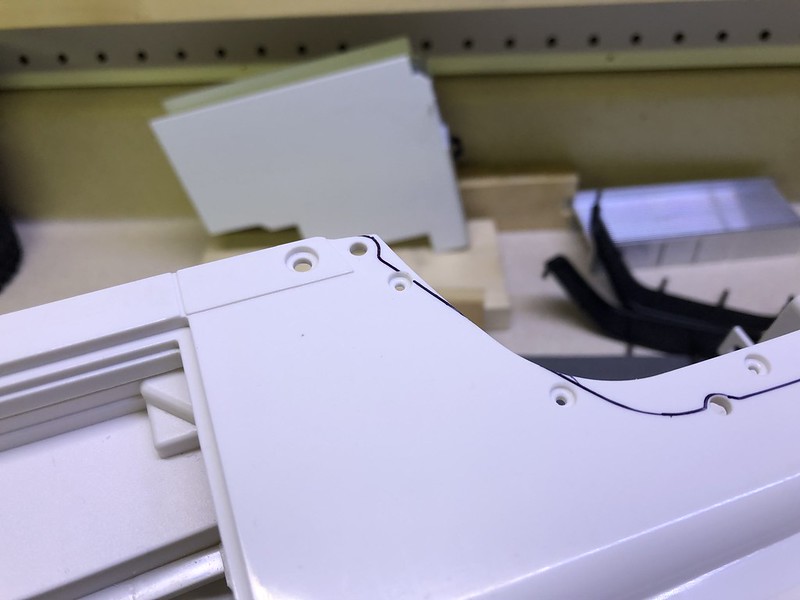 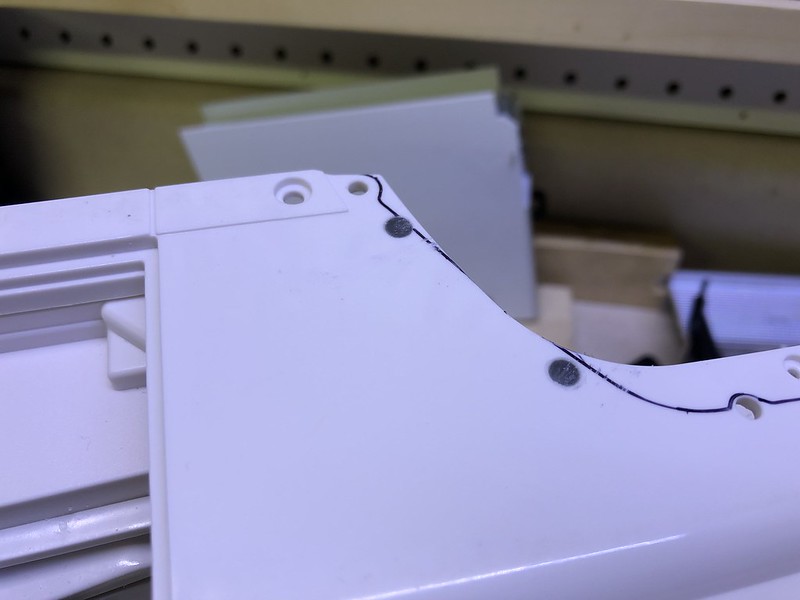 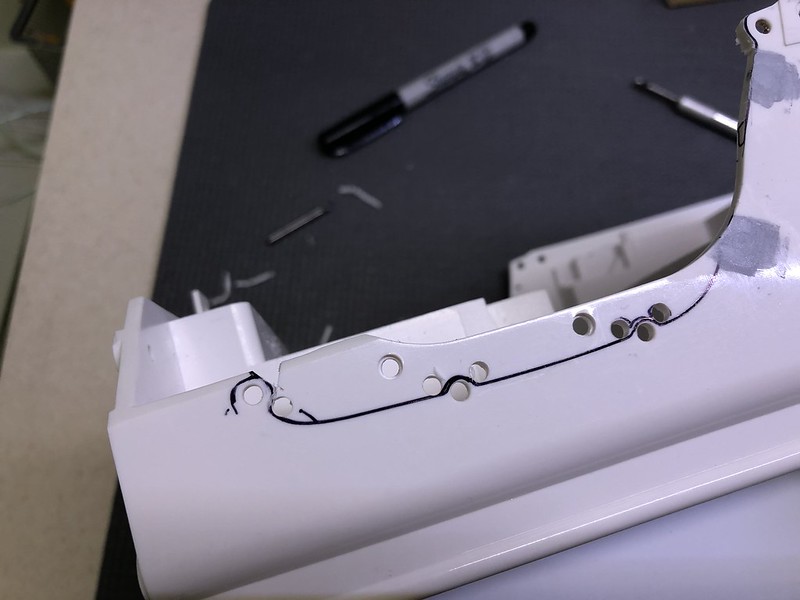 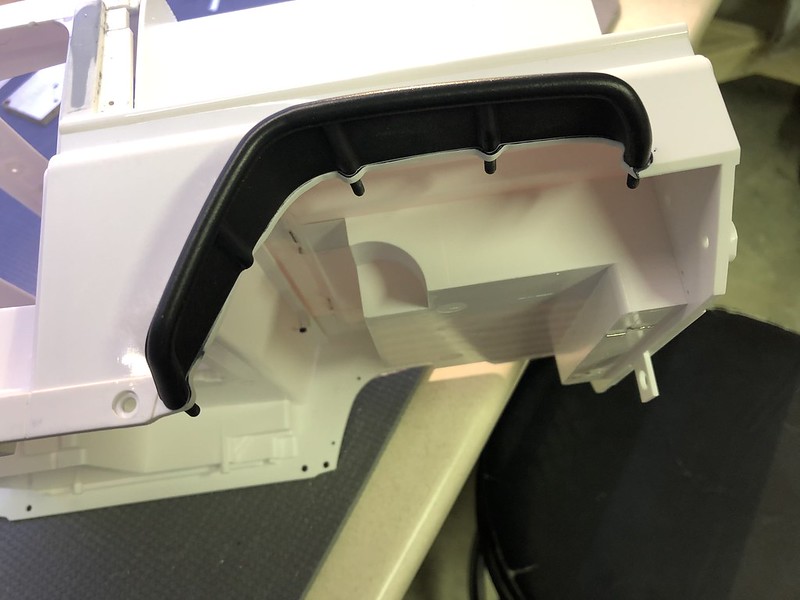 The plan is to fabricate new rear links tomorrow evening. D |
|
| |
|
03-12-2019, 10:15 PM
| #34 |
| Quarry Creeper Join Date: Apr 2016 Location: Canada, Ottawa/Gatineau
Posts: 290
|
The new rear suspension links are done and they fix the gap between the tires and the rear wheel arch; the upper links are aluminum and the lower are steel for better weight distribution and sliding over rocks. Shown, from left to right, the Axial stock rear links, in the middle are the new ones to fix the gap and the originals at the far right which I made to match the 275mm wheelbase of the Team Raffee D90 hardbody.  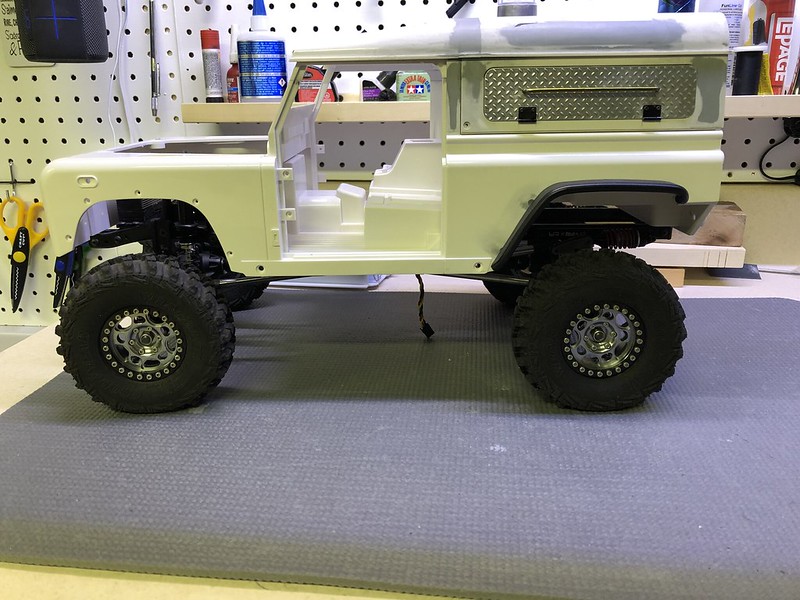 Second, I modified some 6mm thick wheel hexes (that fit standard 4mm axles) to function with the Vanquish 5mm axles the portals need and to finally be able to install those gorgeous Team DC bronze wheels.   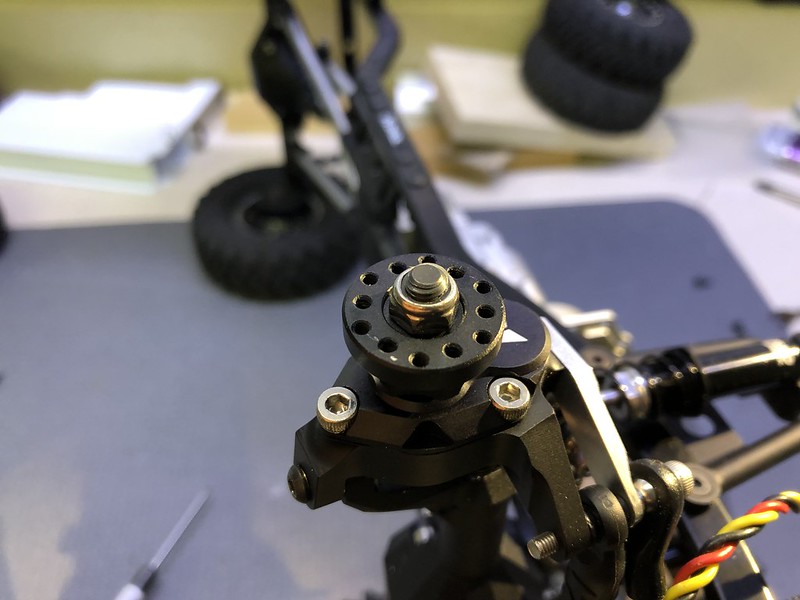 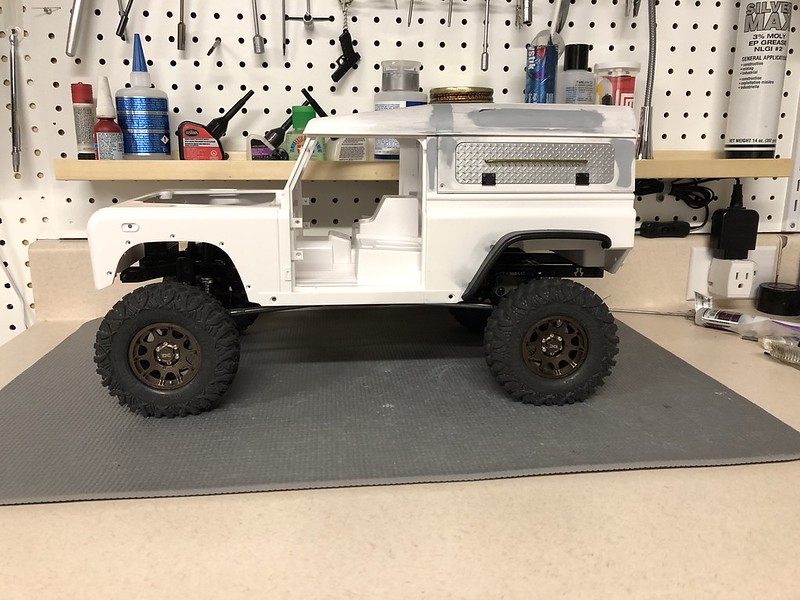 Third, I flipped the orientation of the rear cantilever suspension and spaced them away from the frame rails. The shocks are now pointing towards the center of the truck versus the rear, and the spacing gives the clearance required for the screw heads to install the rear chassis brace. 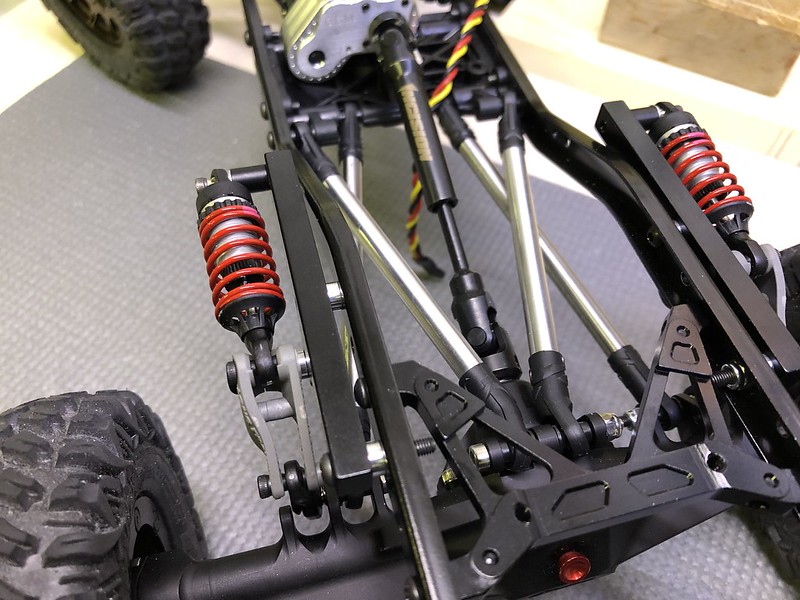  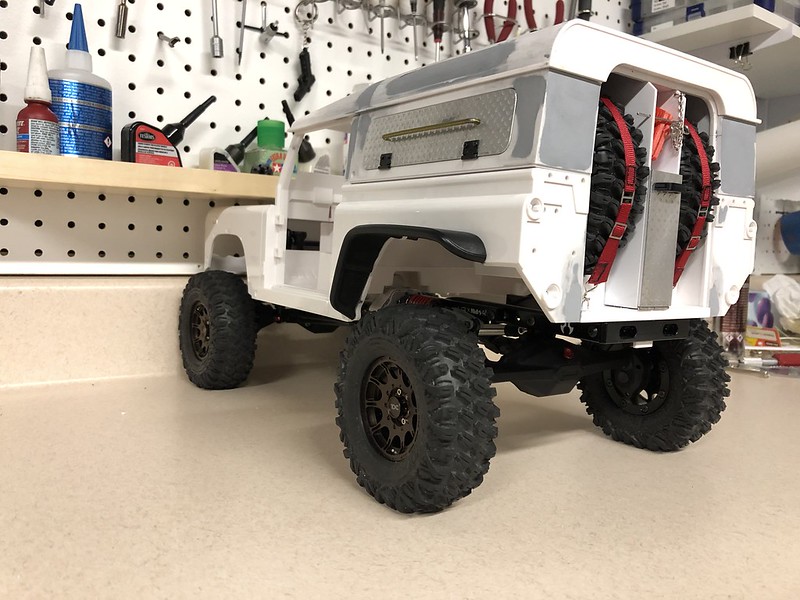 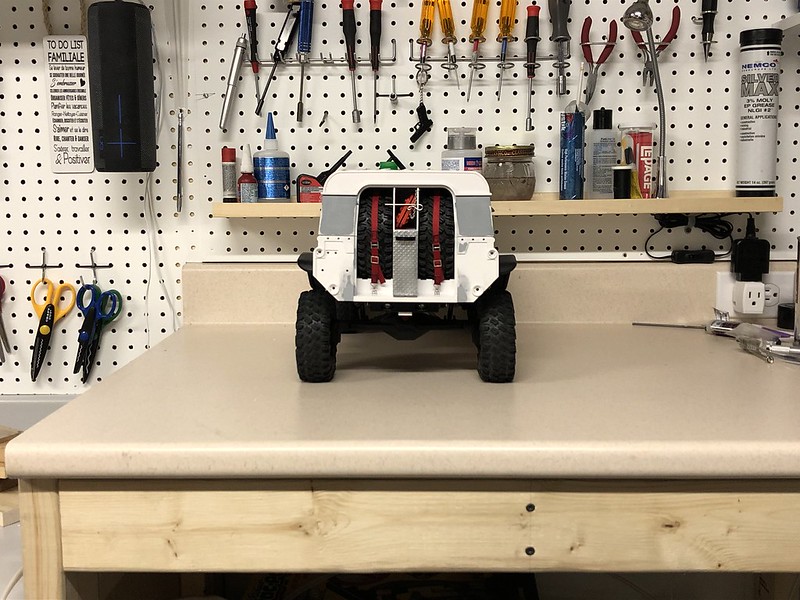 Fourth, I made a new panhard link, my first one made contact with the front axle pumpkin under some conditions, the new one clears everything with lots of extra space. V1.0: 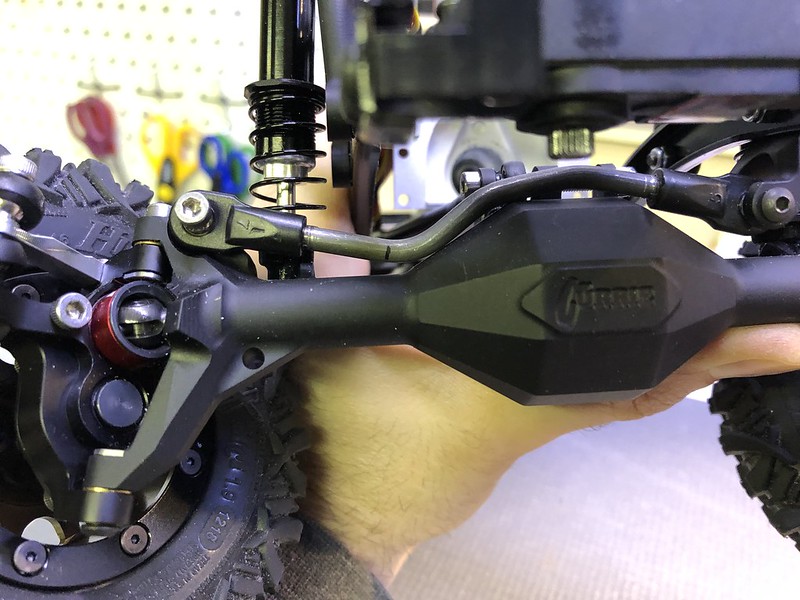 V2.0: 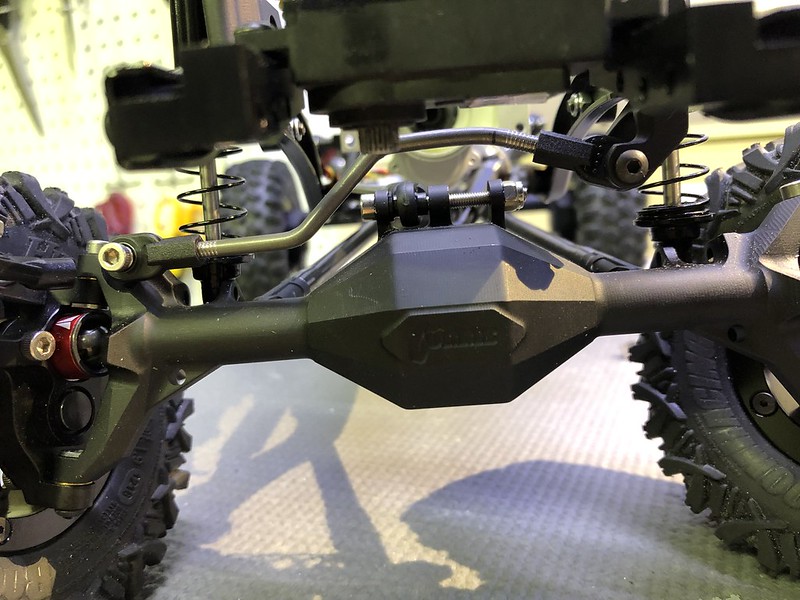 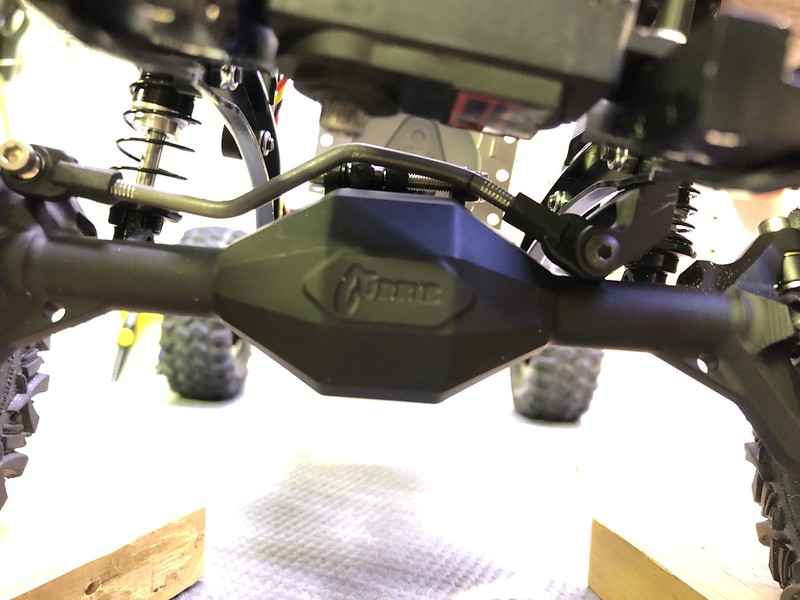 I also started the design and fabrication of a rear sway bar, with the bar mount finished, which goes onto the rear chassis brace, hence the rear suspension work. 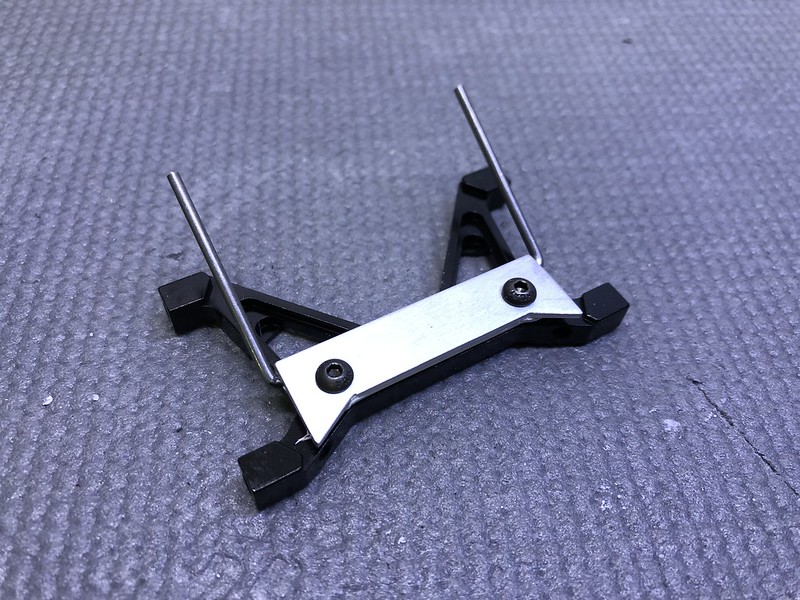 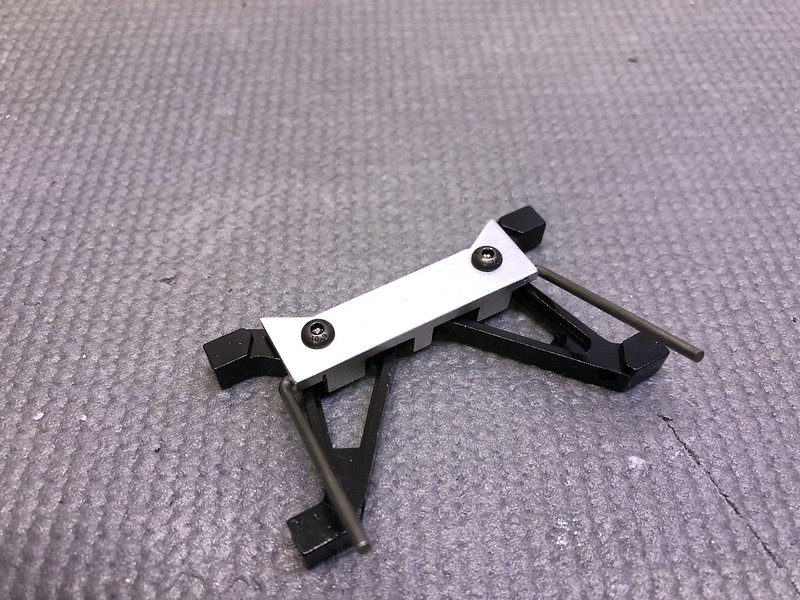 Now, I just need to figure out the sway bar links, which will be a challenge due to the 22mm bore to bore length I need. D |
|
| |
|
03-13-2019, 02:44 PM
| #35 |
| Quarry Creeper Join Date: Apr 2016 Location: Canada, Ottawa/Gatineau
Posts: 290
|
A quick before dinner update, I manage to finish the rear sway bar setup. 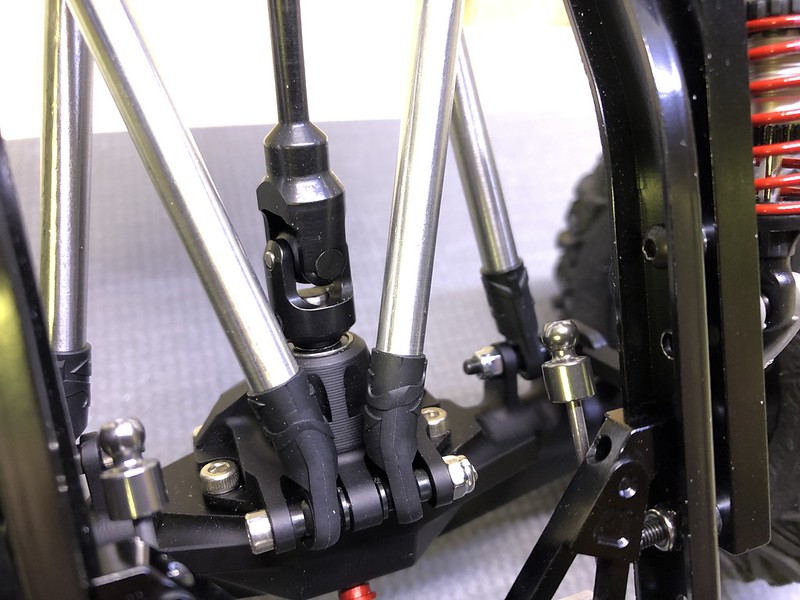 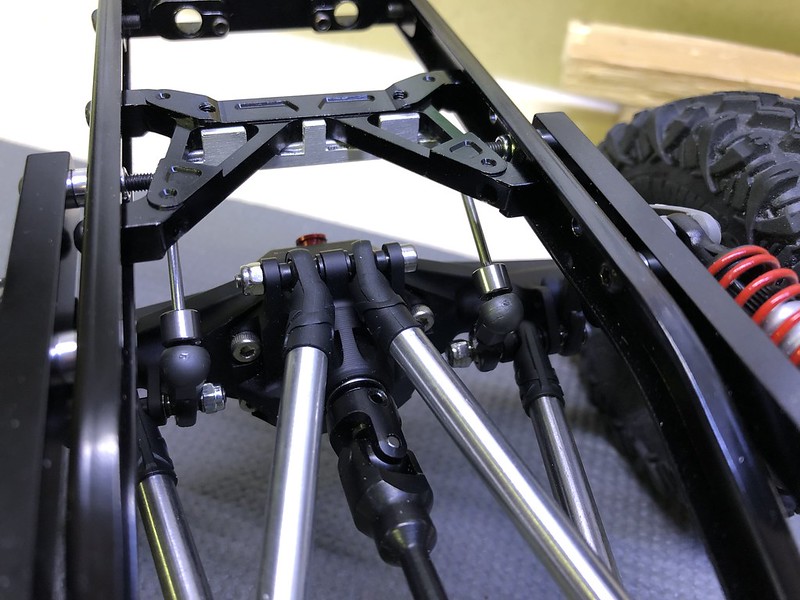  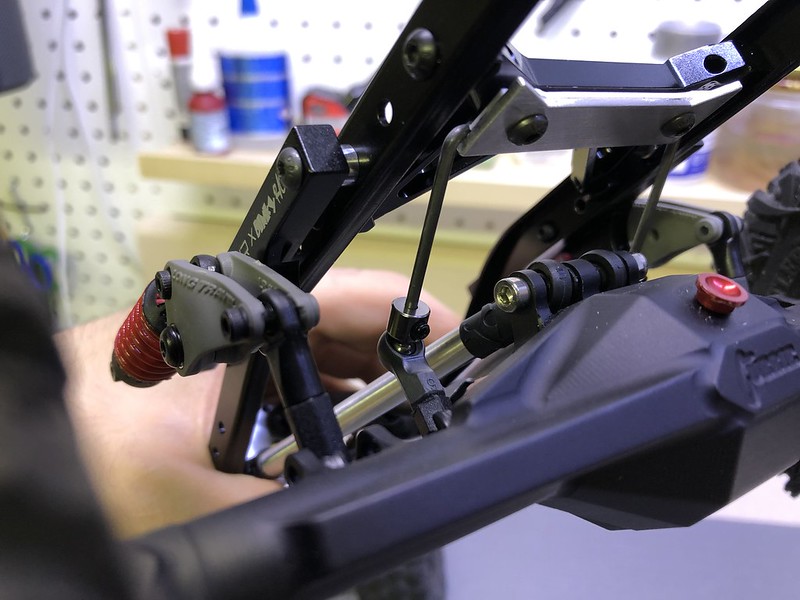 D |
|
| |
|
03-13-2019, 09:45 PM
| #36 |
| Quarry Creeper Join Date: Apr 2016 Location: Canada, Ottawa/Gatineau
Posts: 290
|
Good progress was made this evening on project D-Rat, the rear bumper was envisioned, designed, fabricated and is now ready for paint once I decide on a color. It is an all steel construction with the mounting tabs made of 1/8 x 1/2 flat bar and everything else being 1/4 round stock. Every pieces are cut then precisely sanded and adjusted to their required final length and angle before MIG welded, than painstakingly filed by hand to the final shape. The build: 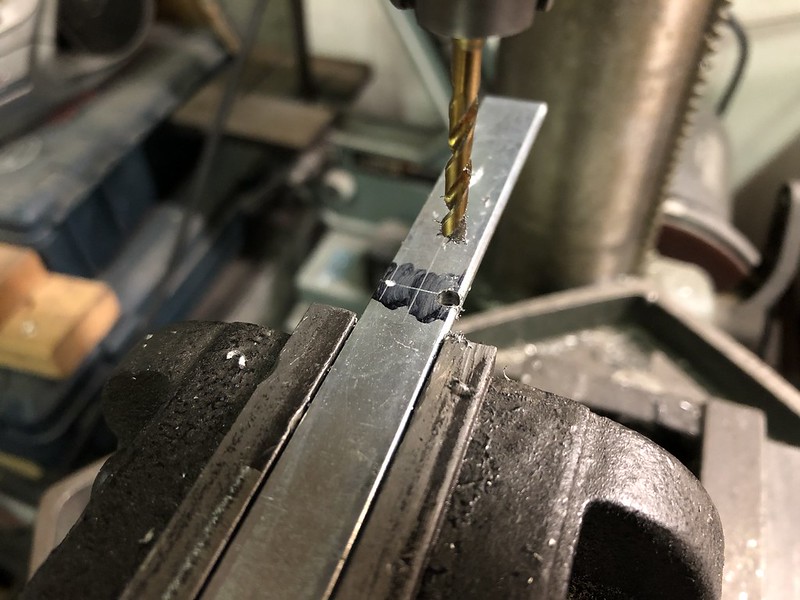 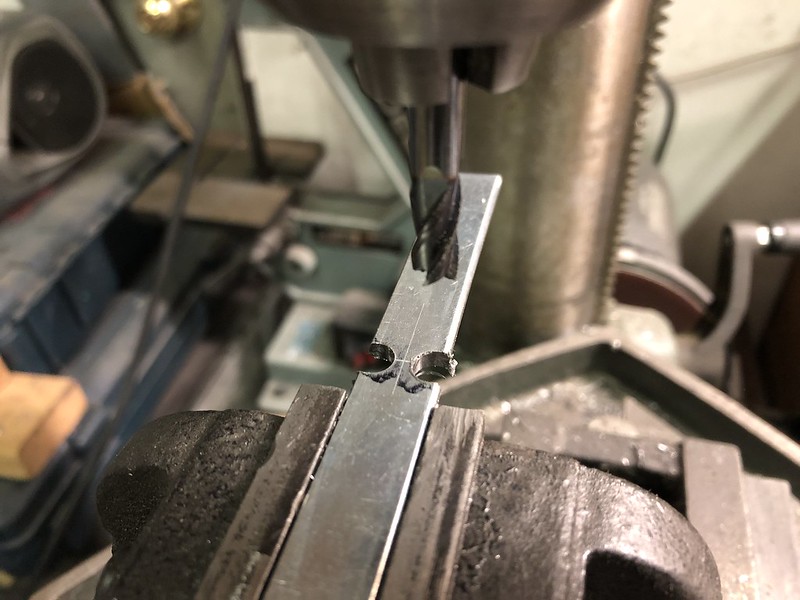 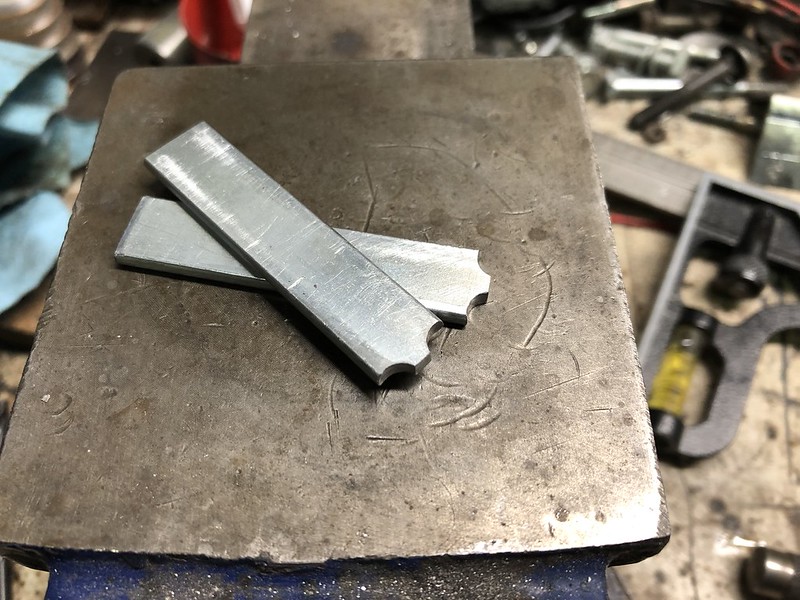 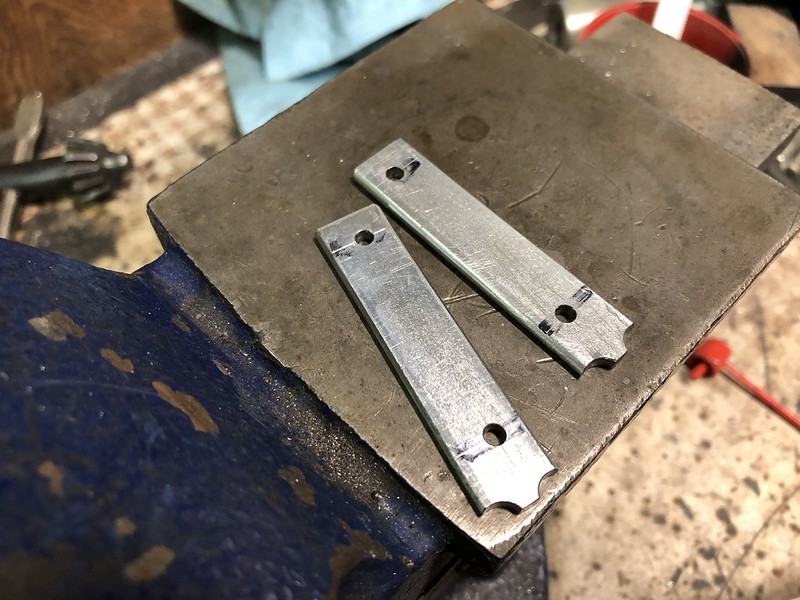 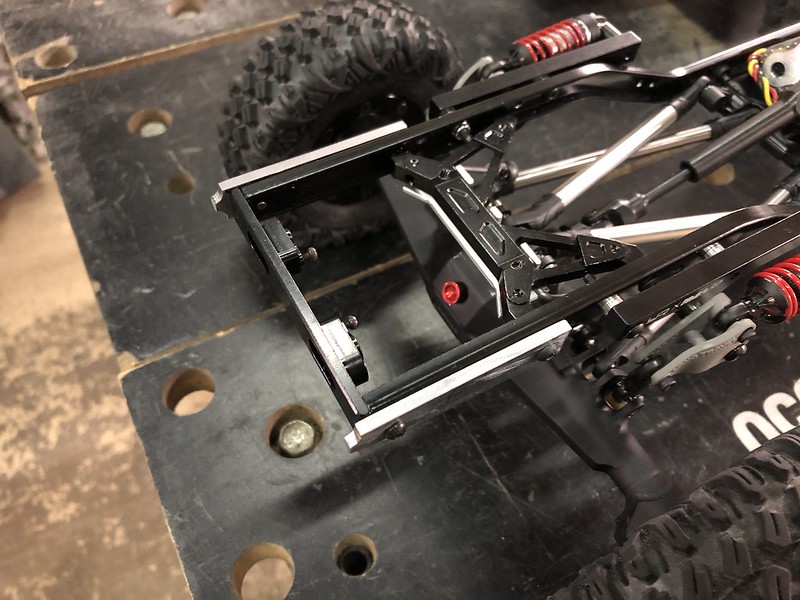 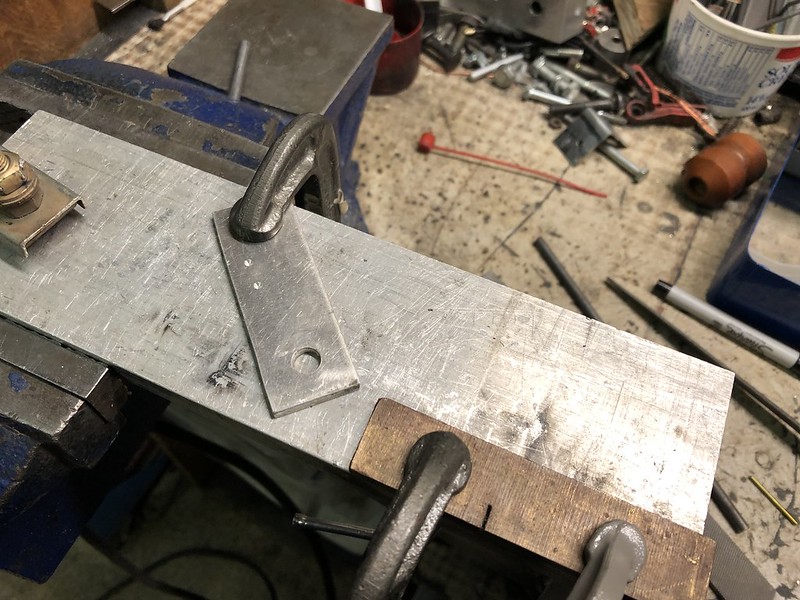 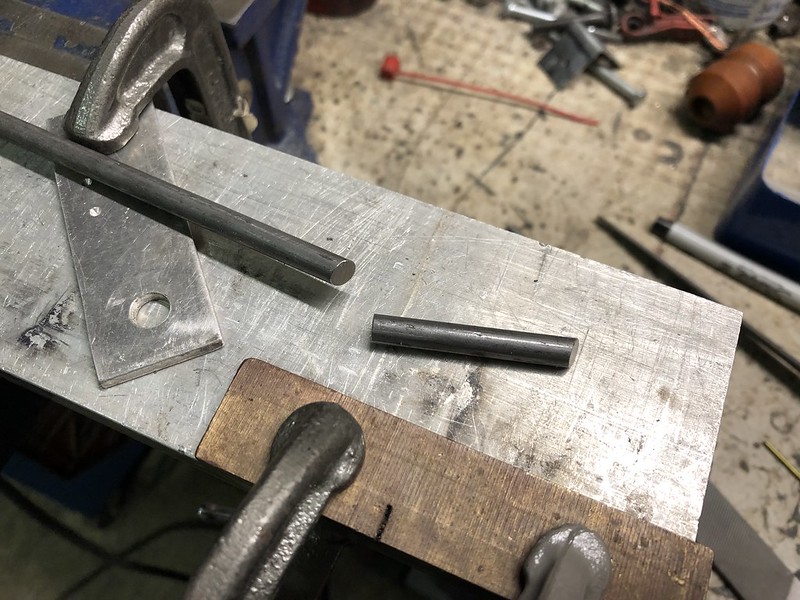 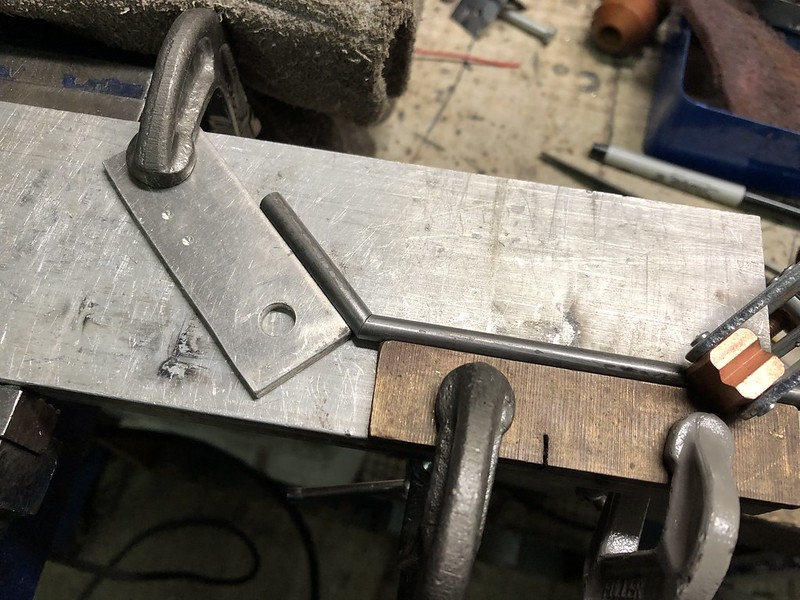  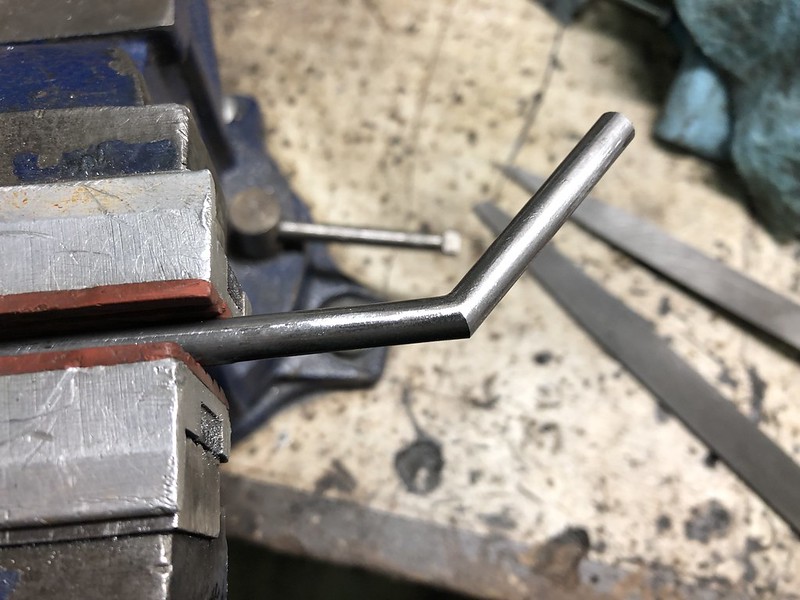 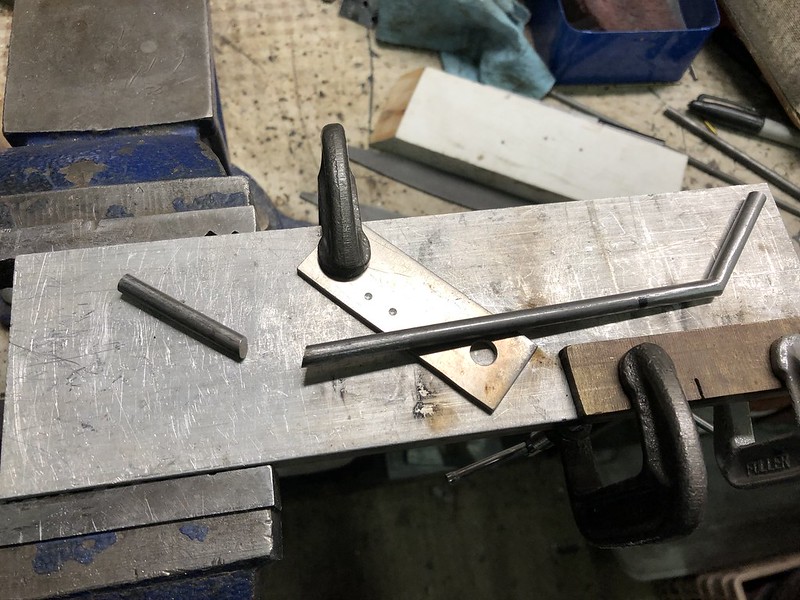 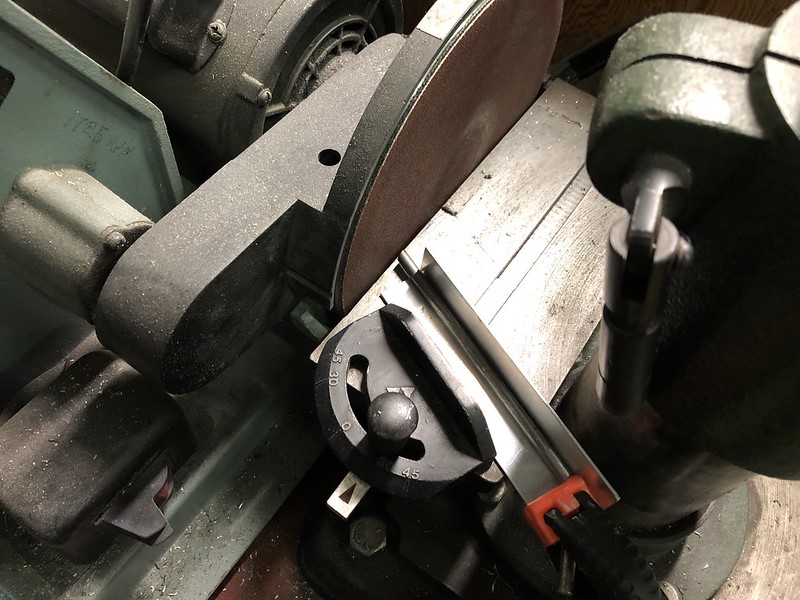 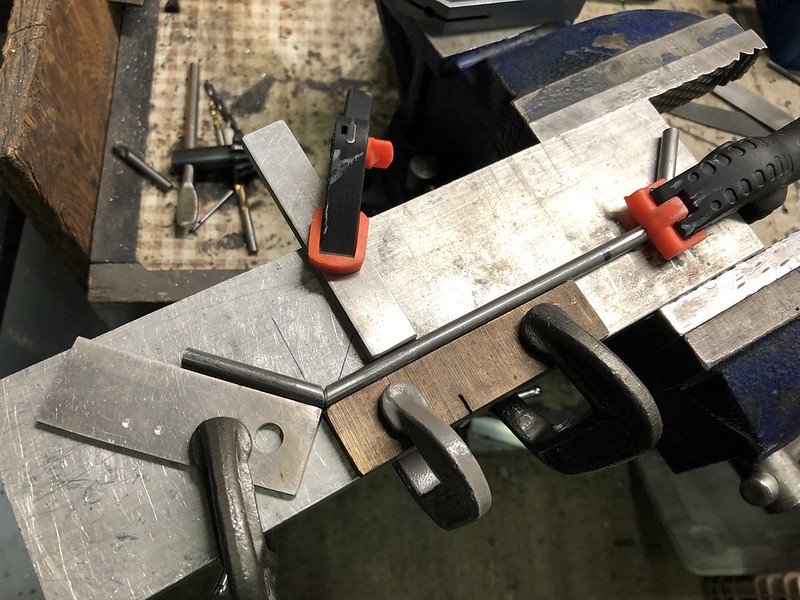 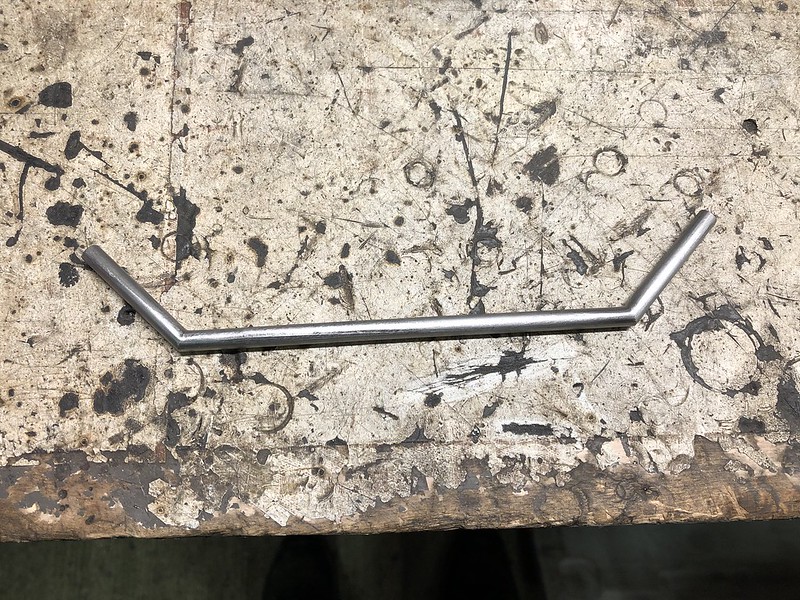 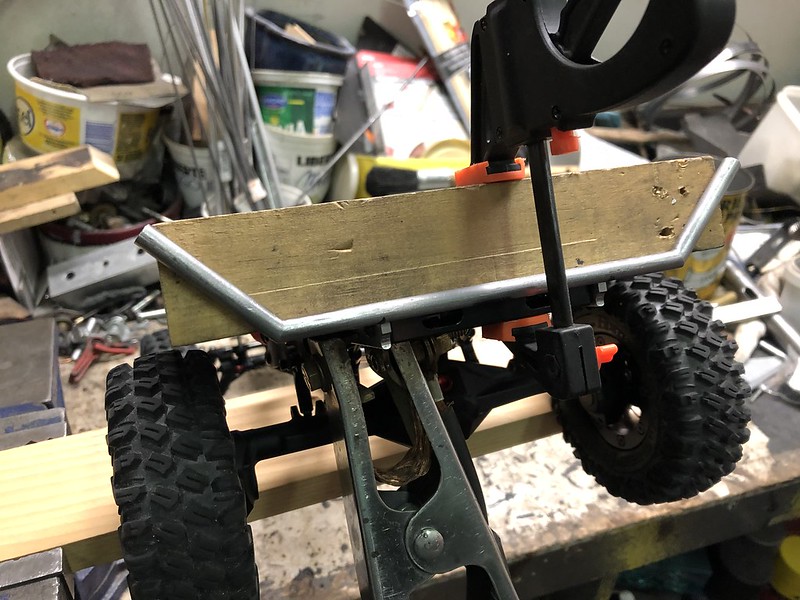 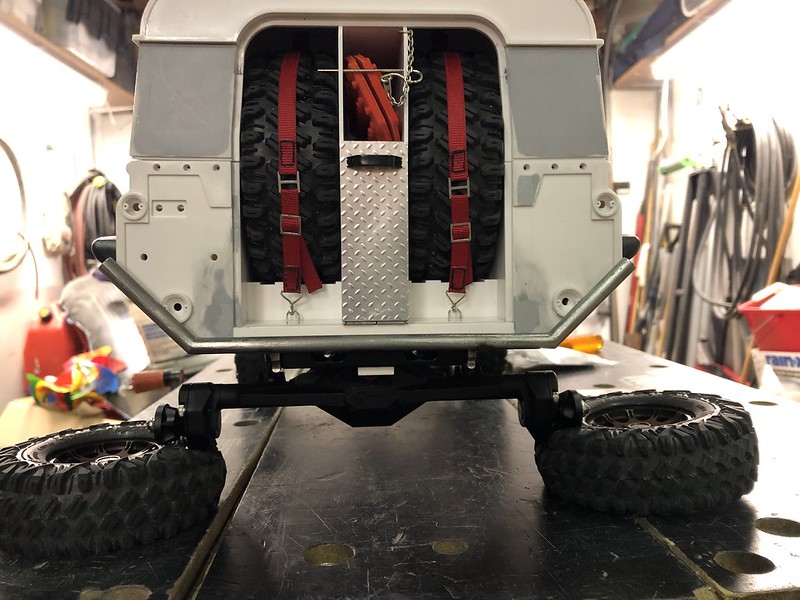 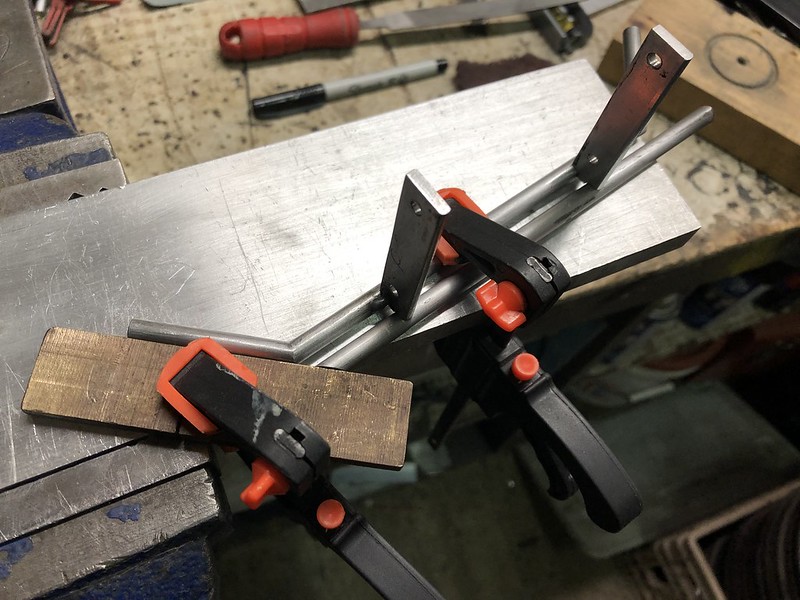 The final product: 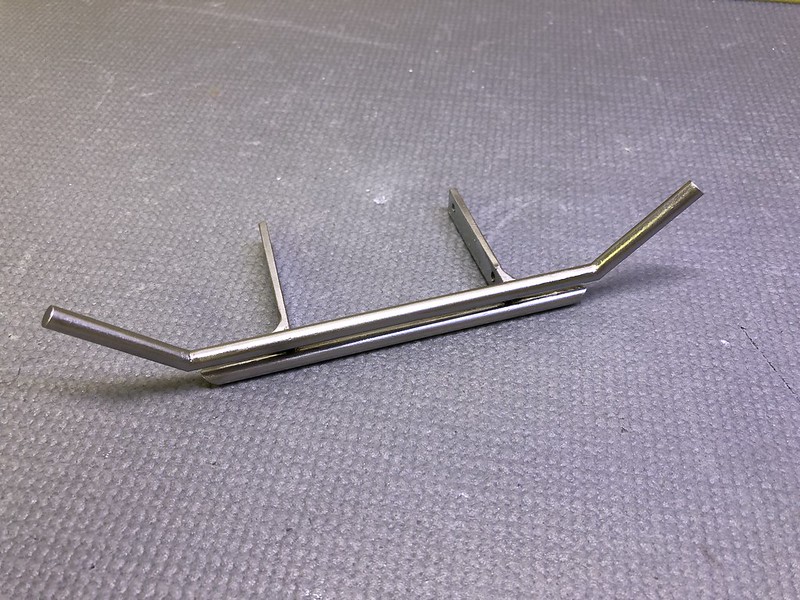 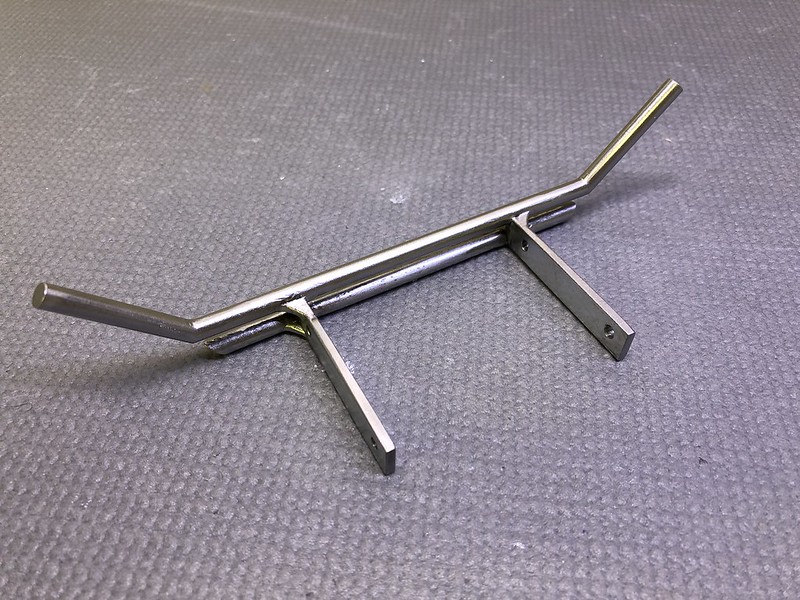  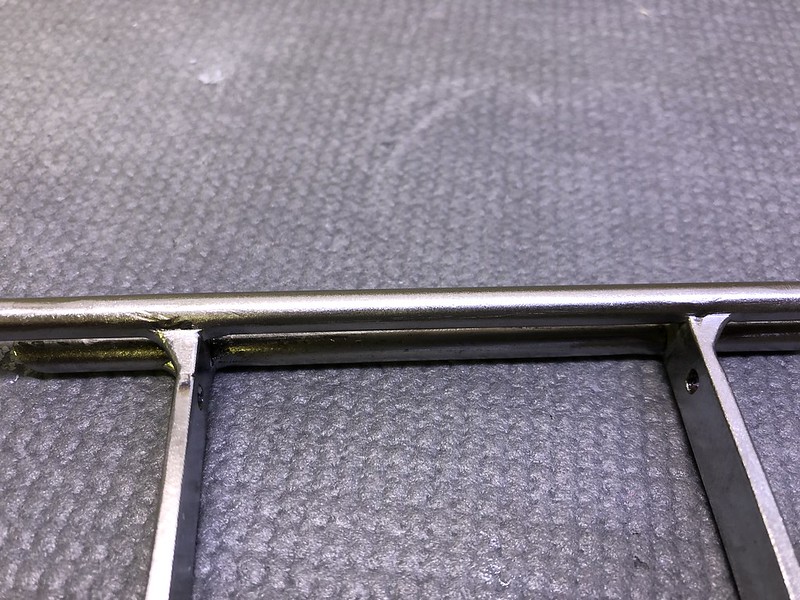 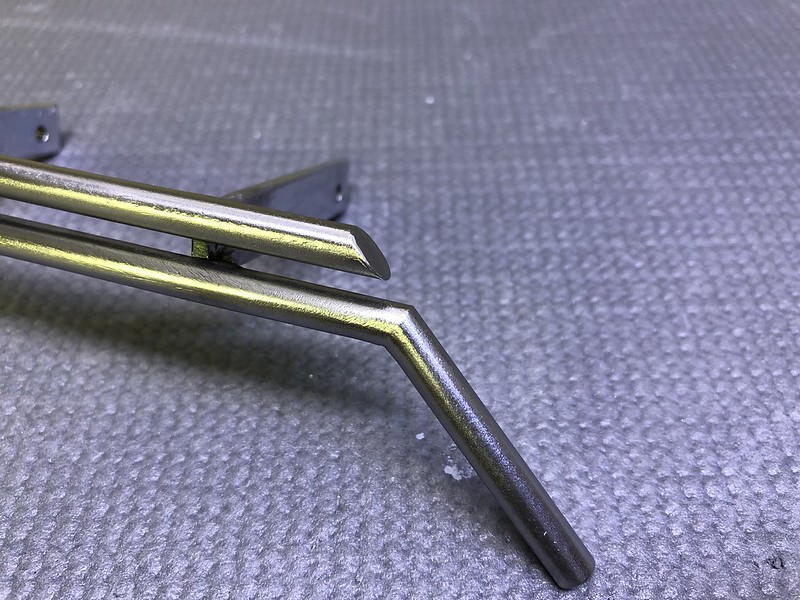 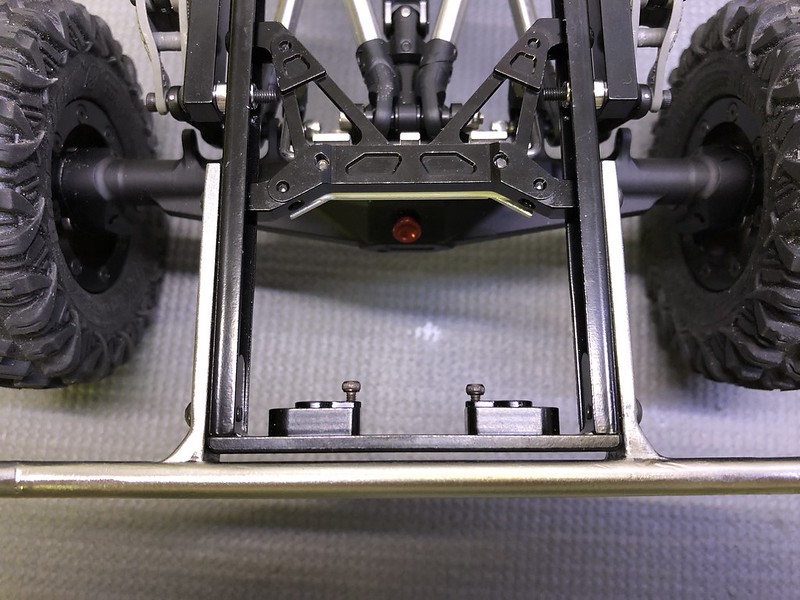 With the chassis/body: 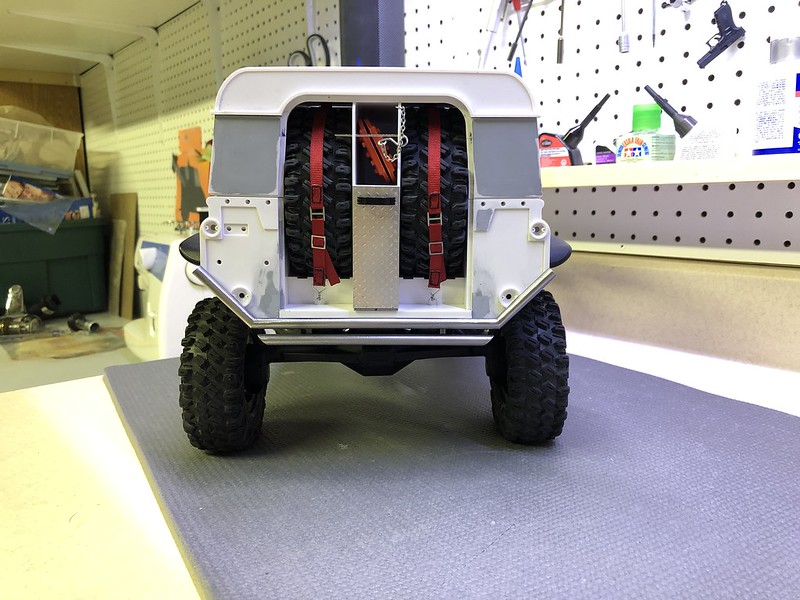   Eventually I will bite the bullet and buy myself a nice TIG that can do both steel and aluminum, hence cutting down quite a bit of post-welding processing due to the TIG scalpel like precision. D |
|
| |
|
03-14-2019, 08:59 AM
| #37 |
| RCC Addict Join Date: Sep 2017 Location: The OC
Posts: 1,615
|
Mad skillz.  |
|
| |
|
03-14-2019, 12:18 PM
| #38 | |
| Quarry Creeper Join Date: Apr 2016 Location: Canada, Ottawa/Gatineau
Posts: 290
| Quote:
D | |
|
| |
|
03-15-2019, 02:55 PM
| #39 |
| Quarry Creeper Join Date: Apr 2016 Location: Canada, Ottawa/Gatineau
Posts: 290
|
Spent a long while on figuring how to secure the body to the chassis for project D-Rat. In between sessions of design I installed some rear recovery hooks to the bumper mounting tabs. 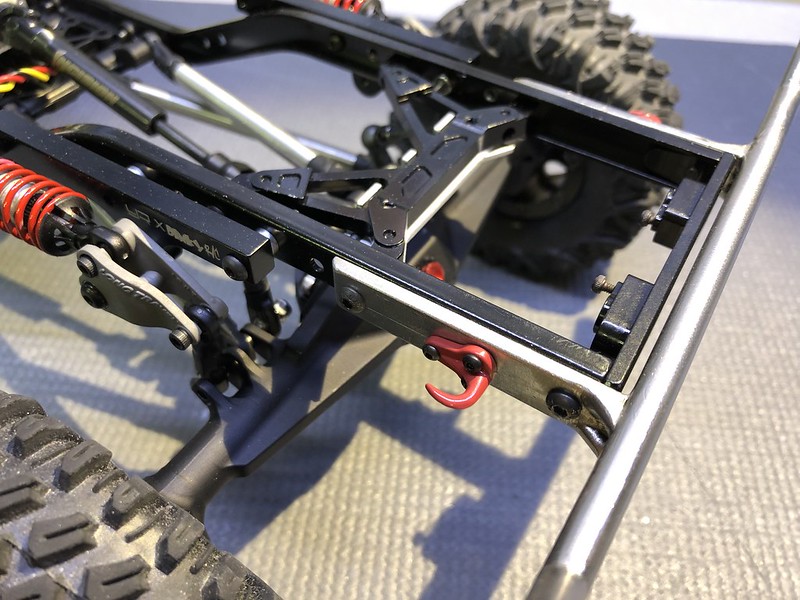 Having formulated a plan to mount the body to the chassis using rare earth magnets, I started fabrication of the required pieces. First on the list is the rear mount using the rear bumper as part of my solution. For the body side, I made a base out of 1/4 aluminum on which I machined pockets to localize the magnets, which was then glued to the body. 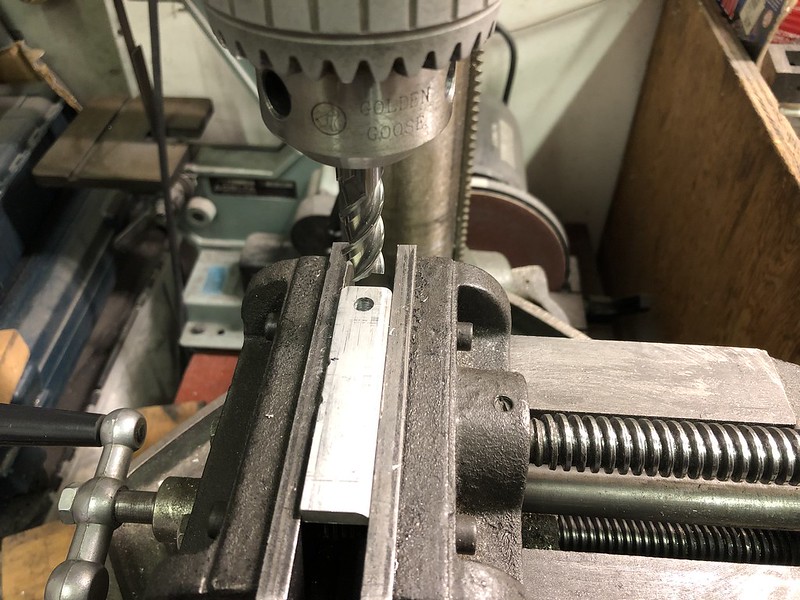   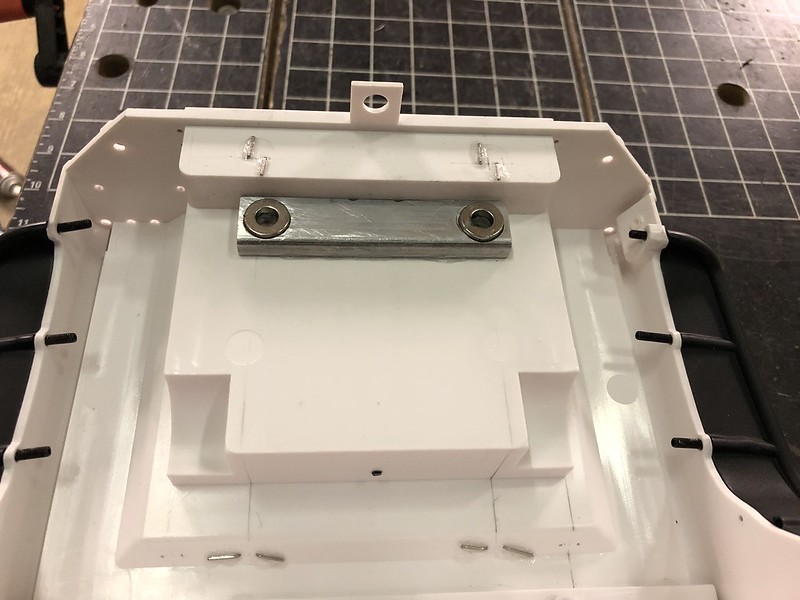 Second, I welded a cross-member across the rear bumper mounting tabs, which also has locator pins. All I need to do on the rear mount is make a spacer to adjust the height of the chassis side magnets. 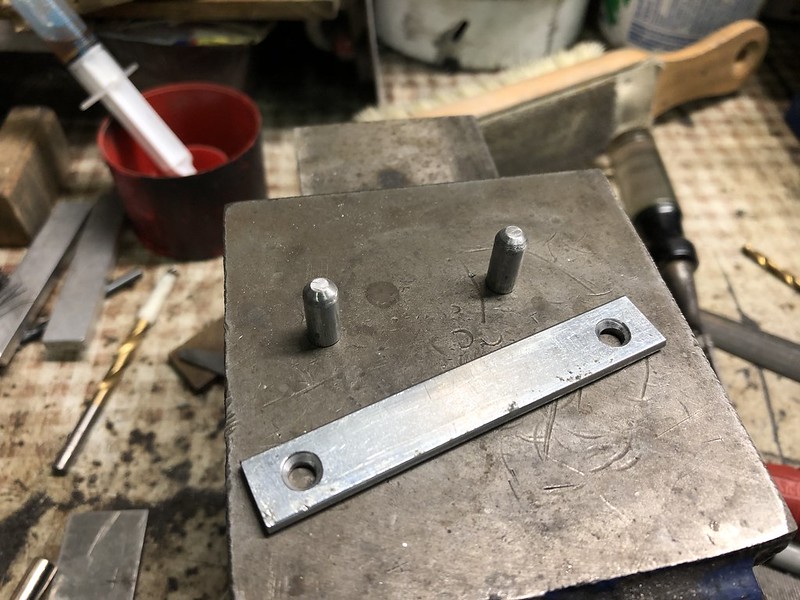  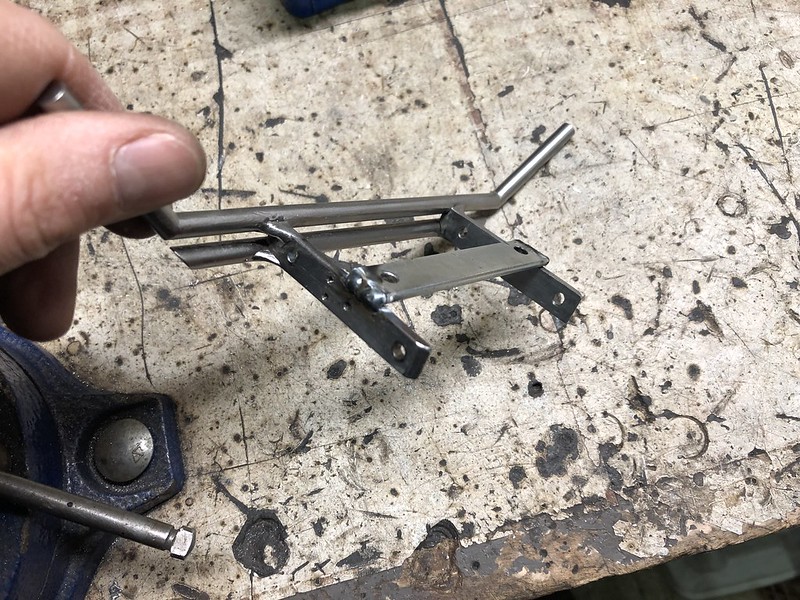  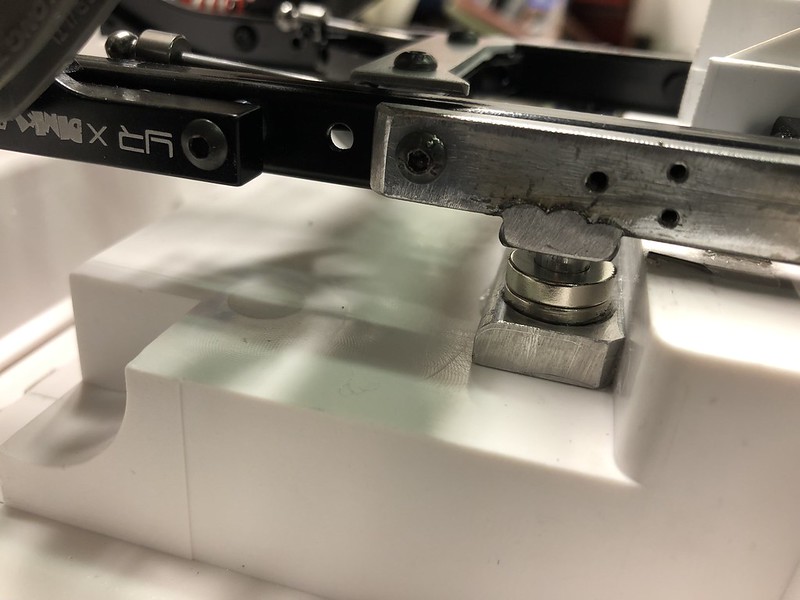 For the front mount, I decided to kill 3 birds at once as I simultaneously need a location to install the electronics, add the front mount and protect the body from the eventual abuse it will be subject to, therefore, the rock sliders will have to perform all 3 tasks. I started by cutting up a deck/patio post mounting plate to which I drilled all the holes required for both the skid plate and the suspension links. 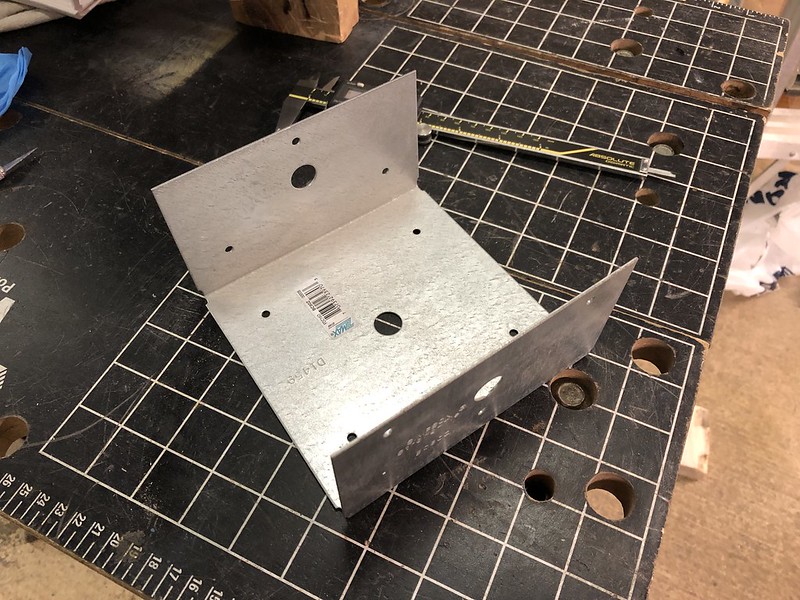  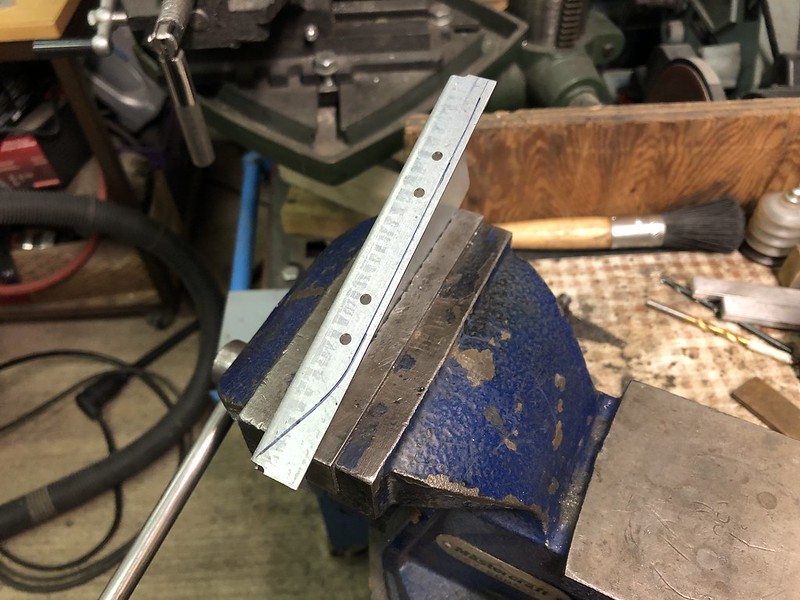 The excess material was trimmed to the shape of the chassis, I added a bend to the portion the sticks out from the side of the body and I welded a locator pin to each of the rock sliders. 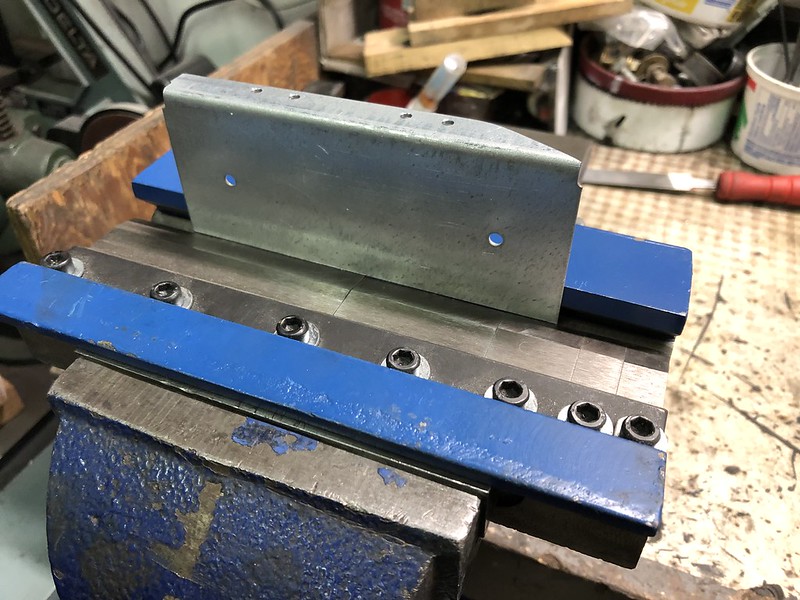 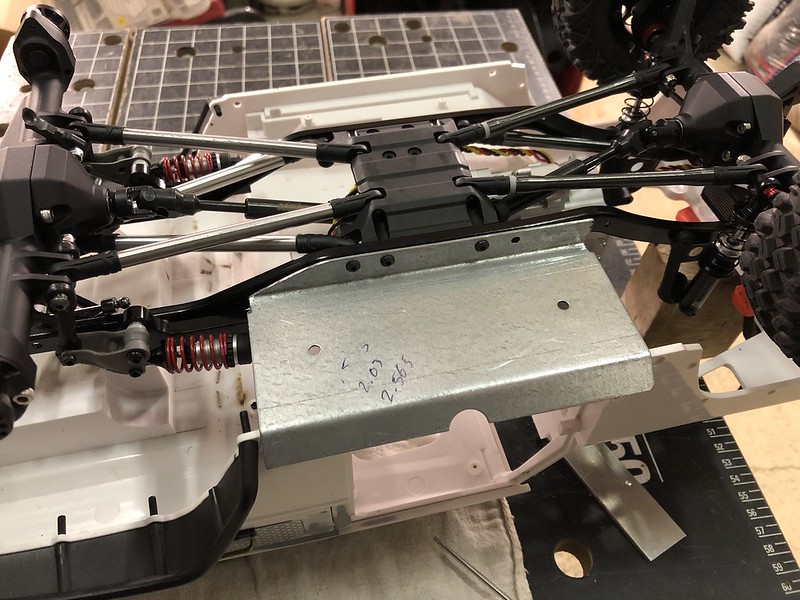 The process continues, but it's enough for today. D |
|
| |
|
03-16-2019, 01:42 AM
| #40 |
| Pebble Pounder Join Date: Sep 2018
Posts: 109
|
Looking good dude Sent from my ONEPLUS A6003 using Tapatalk |
|
| |
 |
 Defender D90 Rat Rod - Similar Threads
 | ||||
| Thread | Thread Starter | Forum | Replies | Last Post |
| Rat Rod 1/6 | Husy | Large Scale Rigs | 2 | 02-17-2013 04:36 AM |
| Pro Street Rat Rod '47 Ford Pickup Rat Racer thingy on Ebay... | STANG KILLA SS | Chit Chat | 21 | 12-31-2012 09:54 AM |
| CJ Rat Rod? | BJoe | Chit Chat | 13 | 09-15-2009 05:30 PM |
| |


 Linear Mode


