| |
 03-14-2009, 09:41 PM
| #61 |
| Built, not bought   Join Date: Oct 2004 Location: Gresham
Posts: 4,504
|
And then? Come on,don't start building like me,REAL SLOW. |

|  |
| Sponsored Links | |
| | |
|
03-18-2009, 01:13 PM
| #62 |
| Quarry Creeper Join Date: Jun 2008 Location: Hell
Posts: 399
|
Damnit you got a 5 star thing next to your forum and I didn't. Heres a picture where you can see the bump stops on a 1:1 bronco on pirate4x4 But I was thinking you could use U bolts from leaf spring mounts to bolt the bump stops to the tube on your truck. Though if their 1/4in diameter then it might not hold as secure. or you might already have a better idea. 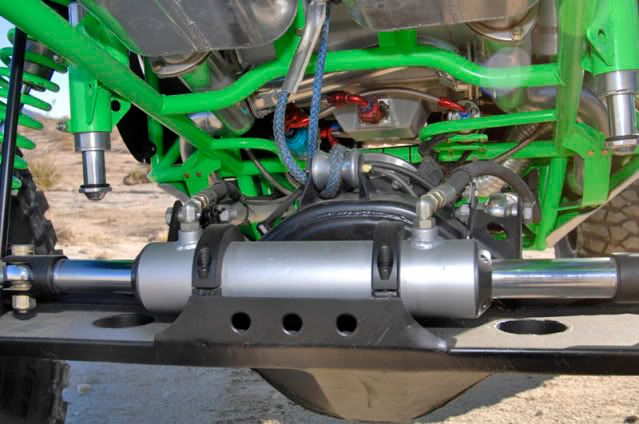 |
|
| |
|
03-18-2009, 08:05 PM
| #63 |
| I wanna be Dave Join Date: Jul 2006 Location: The beautiful Pacific Northwest
Posts: 6,923
|
That's exactly where my bump stops are going to be. I already have a method of mounting them, but thanks for the ideas. I've been sick for 2 weeks, and have been waiting on parts so things are going a little slow right now. The steering was the real bitch, but I have it figured out now and will have some updates in the next few days. I hope to have it running by the weekend so I can do some testing. |
|
| |
|
03-24-2009, 11:28 PM
| #64 |
| I wanna be Dave Join Date: Jul 2006 Location: The beautiful Pacific Northwest
Posts: 6,923
|
Alright, I got a little more done. I need some input about paint. I plan to have the chassis powder coated silver. Should I braze the steel doors onto the chassis and have them powder coated silver.....bolt them on later and paint them to match the rest of the red body panels....or does anyone know if you can paint something after it's been powder coated? Will the paint stick to it? Also notice that I put longer shock shafts on it. Raised the ride height about 1/2". Once the rest of the weight is on the truck, it should sit about perfect. 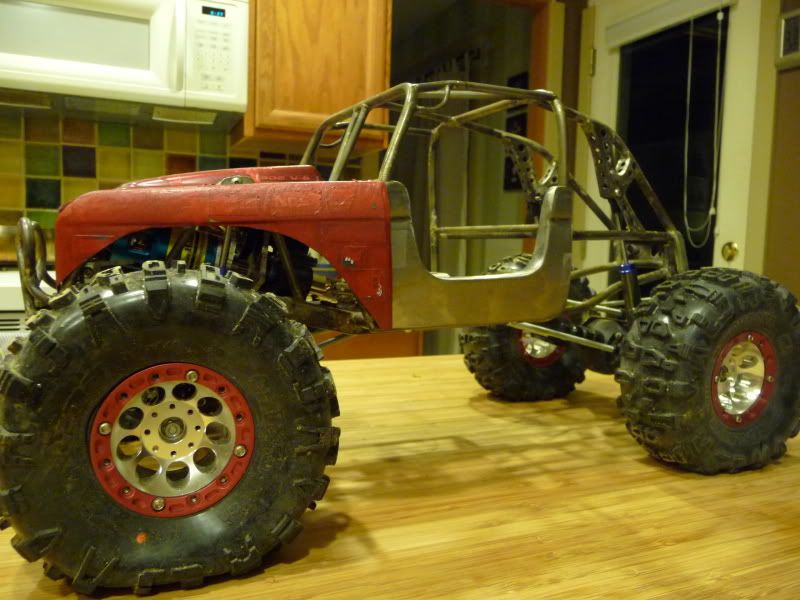 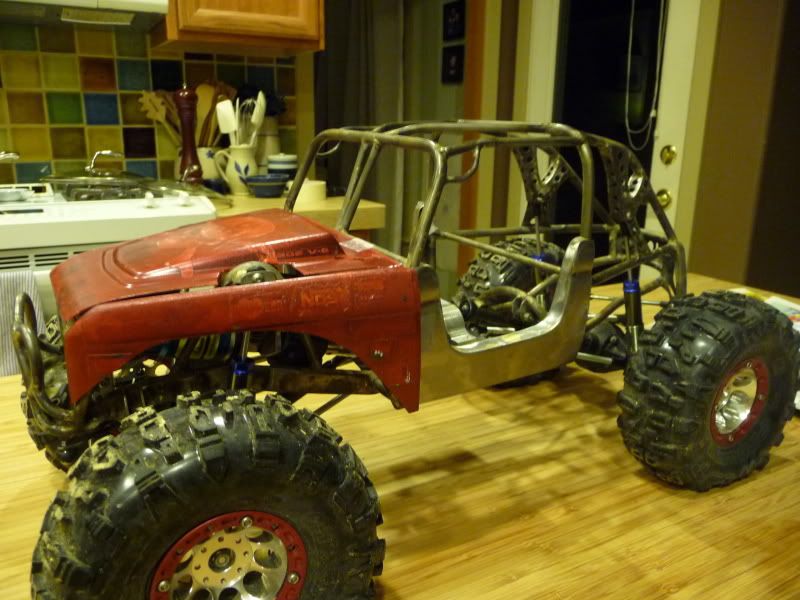 Got the steering done. With all the crazy steering going into some builds on here, I figured I better get fancy with mine. I drilled a 3/16" hole through the frame rail, opened it up a little so I could put sleeve made from brass pipe through it, and brazed it in. I then cut a piece of 3/16" solid stainless as the steering shaft, and brazed a steering arm on the bottom. Then I made a steering arm for the top from 6061 aluminum with a set screw that seats into a hole drilled part way through the stainless shaft. Seems to work pretty well, hopefully it hold up. 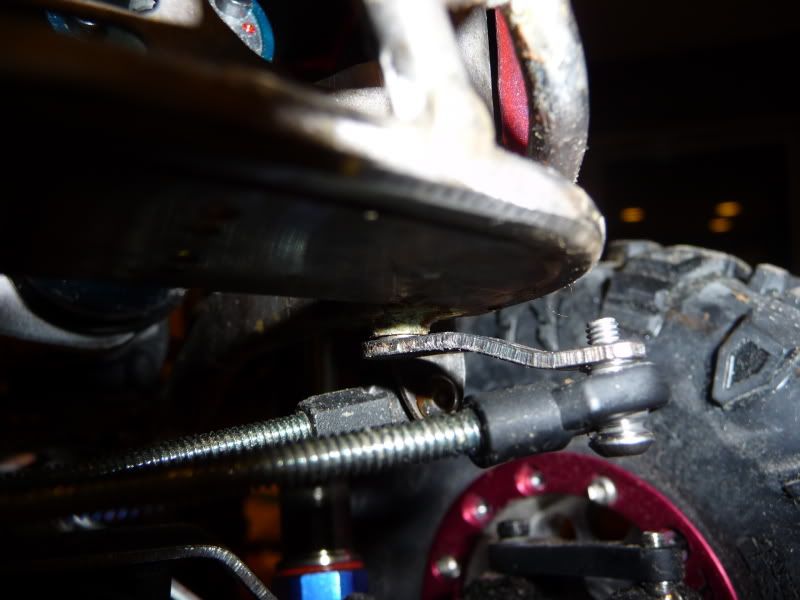 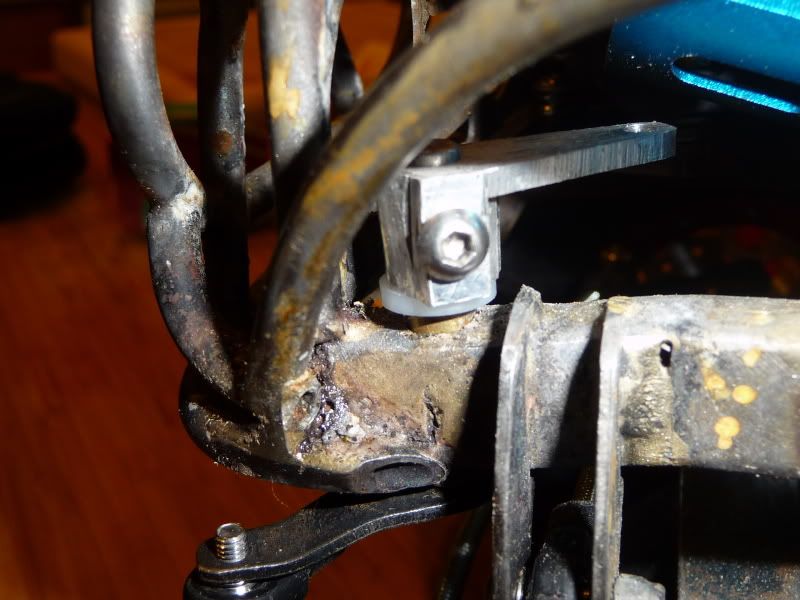 Here's the front end from the top. Things are going to be tight! 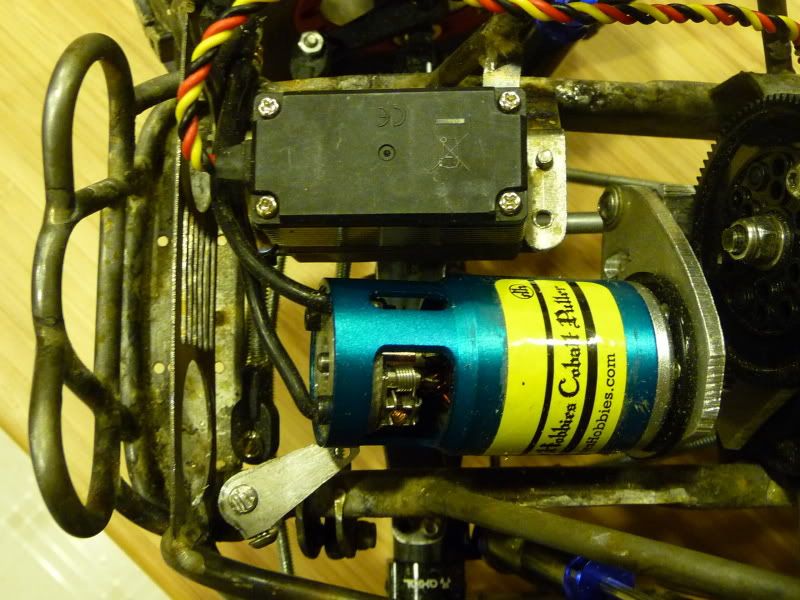 Here's a shot of the t-case with everything hooked up. Beefy driveline from the trans to t-case. We'll see how well Big D's t-case holds up :surrender:. 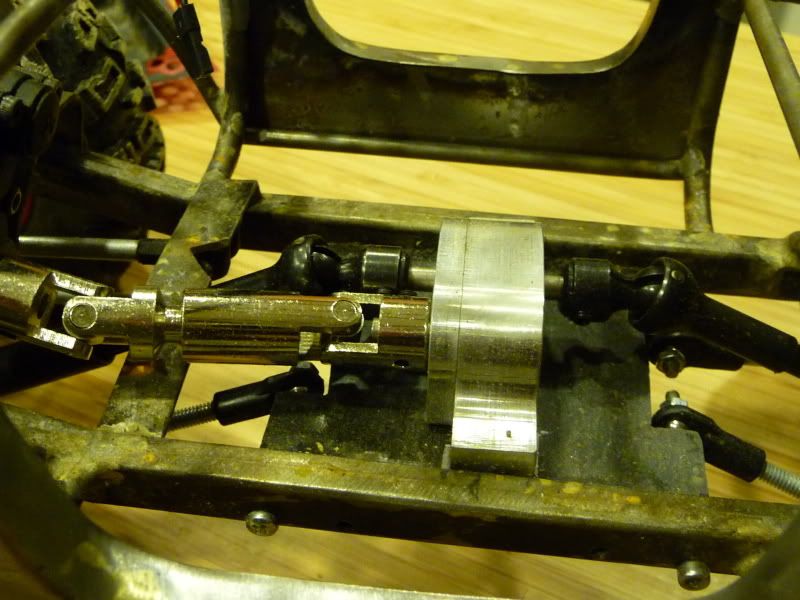 I actually put my electronics in it the other night and ran it around my yard for a few minutes. Seems to do quite well. I will have to gear it down a little, with 16/84 gearing and that 480 puller motor it has a top speed of around 12-14 MPH but no low end power. I did catch some sweet air off the dirt pile in front of my house Last edited by War Pig; 11-04-2012 at 08:25 PM. |
|
| |
|
03-25-2009, 05:28 AM
| #65 |
| I wanna be Dave Join Date: Aug 2005 Location: NE Ohio
Posts: 8,817
|
Awesome idea on the steering, and that stance is right on.. This is one build I am looking forward to seeing in person. I would think as long as you scuff it you should be able to paint PC.. |
|
| |
|
03-25-2009, 08:39 AM
| #66 |
| Rock Crawler Join Date: Jan 2007 Location: Do I look like a freaking people person?
Posts: 874
|
I'm luvin' this build. Your steering set-up is impressive!
|
|
| |
|
03-25-2009, 10:42 AM
| #67 |
| I wanna be Dave Join Date: Jan 2009 Location: laying low
Posts: 2,508
|
wow great work!!! everything on this scaler is PIMPED to the max...nicley done and great attention to detail!! SICK!! |
|
| |
|
03-25-2009, 04:01 PM
| #68 | |
| Rock Crawler Join Date: Nov 2006 Location: Holland
Posts: 673
| Quote:
If you prep right,no problem. -Make sure the powdercoat is fully cured/hardened. -Sand down the powdercoat till it's dull/matte. -Usual degreasing. -Put on a 2K paint. That's all.Easy.  | |
|
| |
|
03-26-2009, 06:49 PM
| #69 |
| WOOPOOW!! Join Date: Nov 2008 Location: Atlanta, GA
Posts: 4,218
|
Yup, new favorite rig |
|
| |
|
03-26-2009, 07:43 PM
| #70 |
| Im Brandon  Join Date: Feb 2005 Location: Colfax, CA
Posts: 8,156
|
Nice build, love the doors and those rear shock mounts |
|
| |
|
03-26-2009, 09:15 PM
| #71 |
| Rock Crawler  Join Date: Apr 2008 Location: Boise, Idaho
Posts: 954
|
WOW, what a sweet build Looking really nice! I love the tube chassis.
|
|
| |
|
03-26-2009, 10:37 PM
| #72 |
| I wanna be Dave  Join Date: Mar 2004 Location: The Haunted Forest
Posts: 3,586
|
Soooooo Pimping Tim! Can't wait to see it move around. Nothing like spending 1000 hours on a rig to then go ruin it in the mud! |
|
| |
|
03-26-2009, 11:54 PM
| #73 |
| I wanna be Dave Join Date: Jul 2006 Location: The beautiful Pacific Northwest
Posts: 6,923
|
Thanks alot guys. More progress. I've gotta try to keep up with you, Gerrish. Every time I log on, you have a new update, do you even work? I decided to braze the doors on. 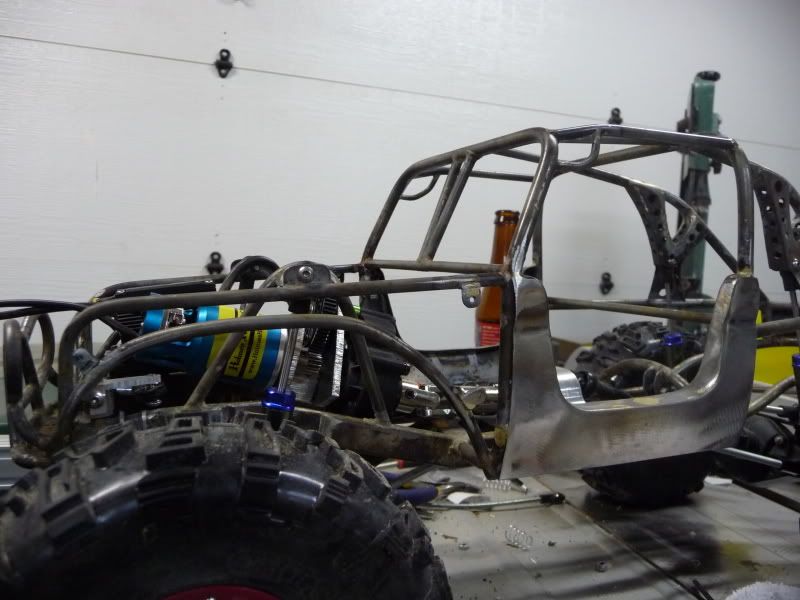 I don't know if you guys have seen the new stainless RC4WD scale rod ends, but they are awesome! 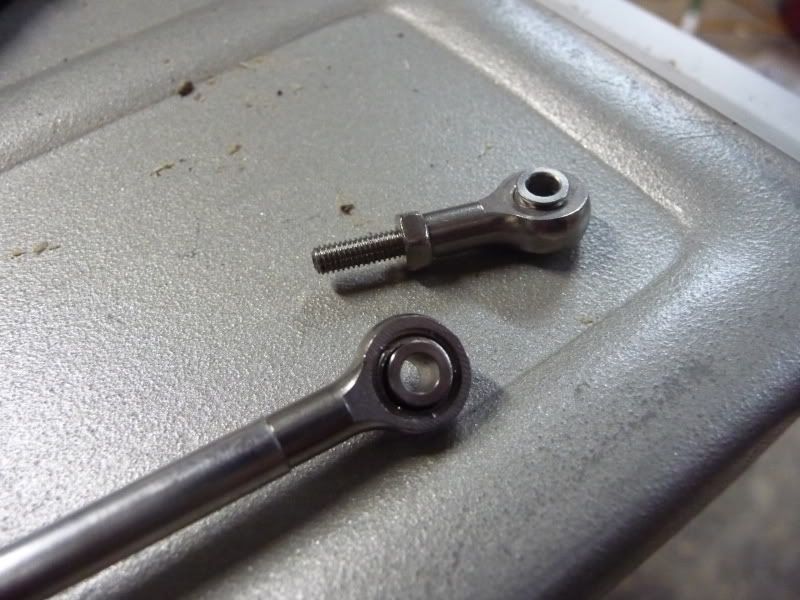 They aren't cheap ($3.50 each) but you can't beat the look. They have a tiny bit of slop in them, but I'm not too worried. Got all my steering linkage and panhard bars cut and tapped tonight. Rear. 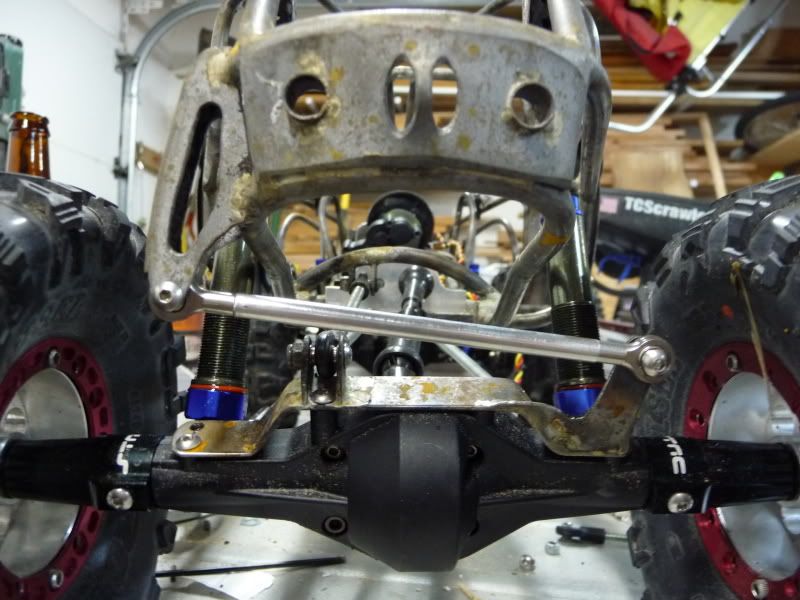 Front steering. 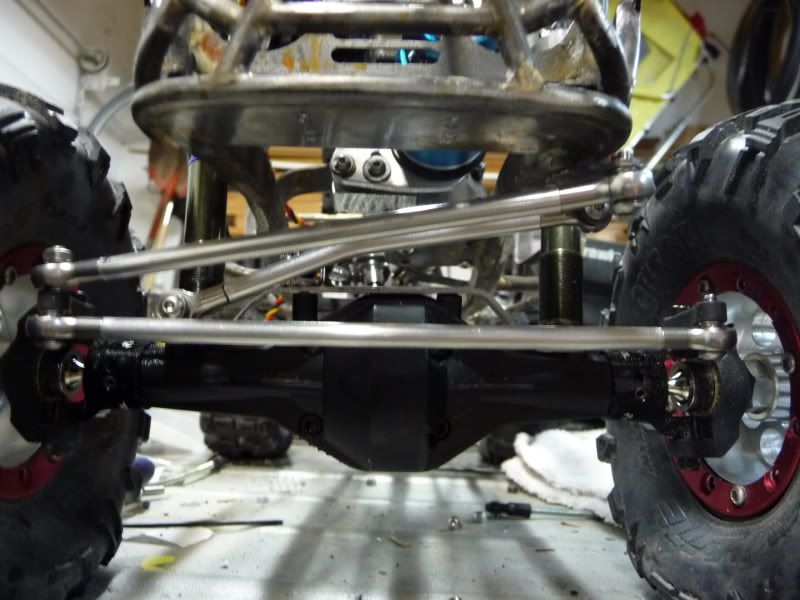 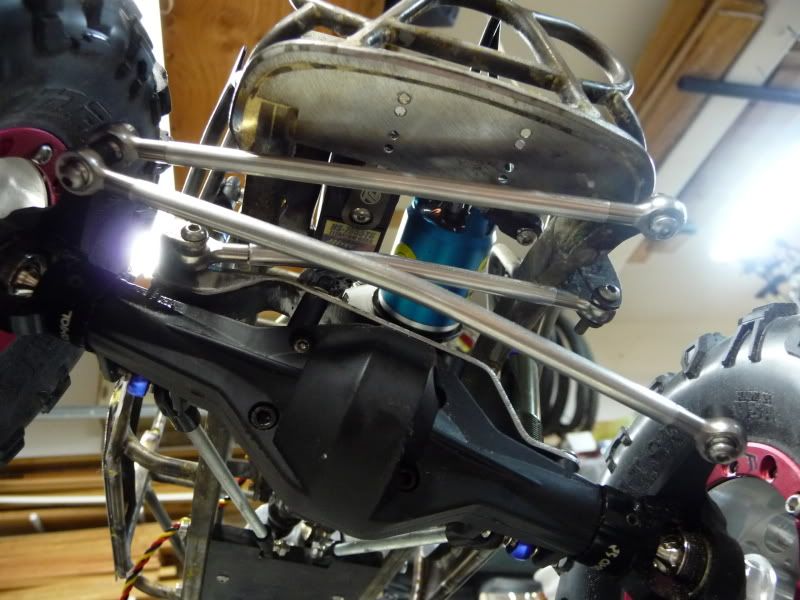 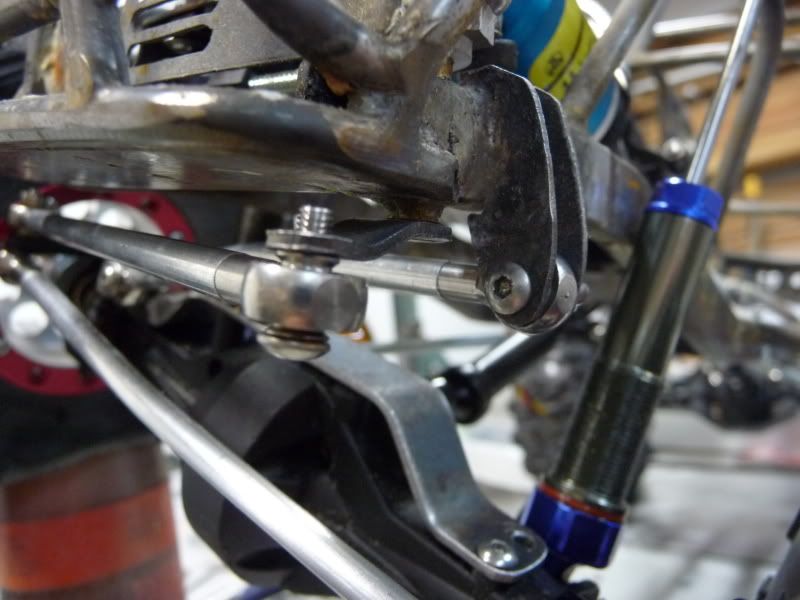 Double shear panhard bar mount (gotta do it right). 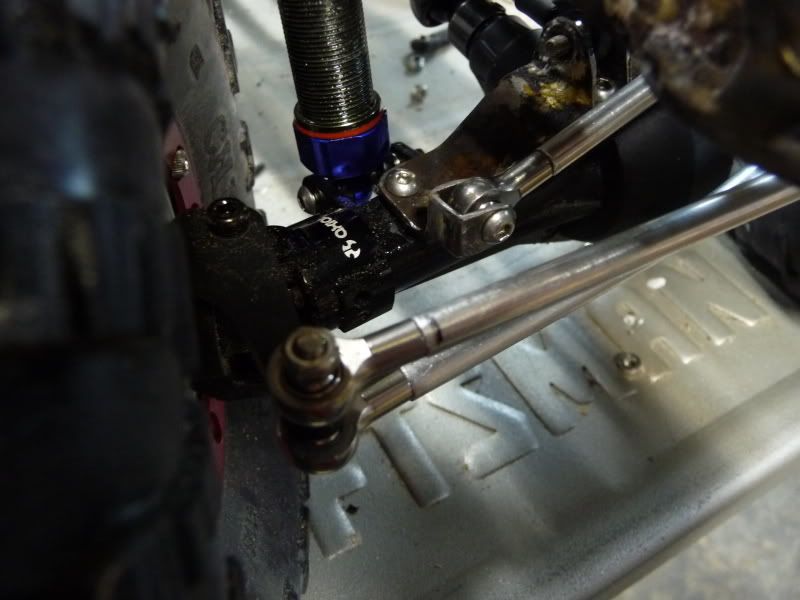 Also brazed on the fender mounting tabs and got the fender cut and drilled. Now if I can find the other fender, I'll be in business. 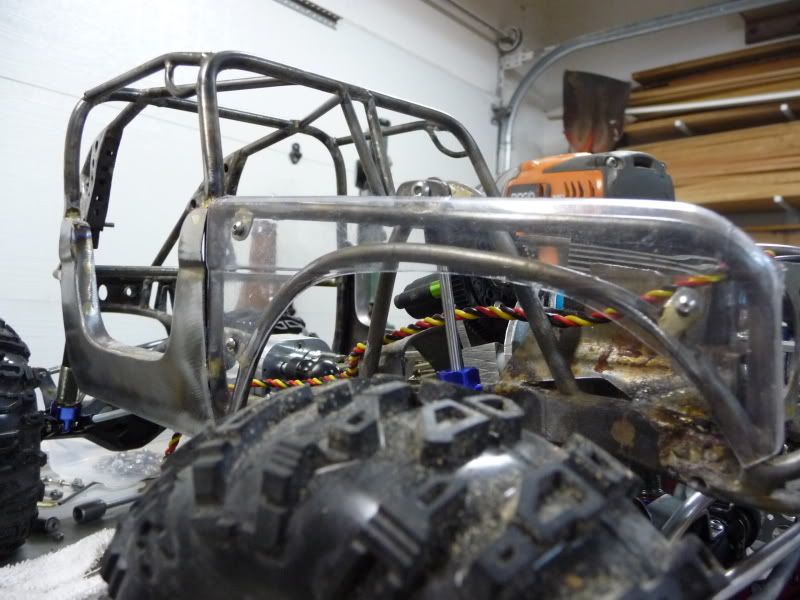 Thanks for looking, Tim. Last edited by War Pig; 11-04-2012 at 08:26 PM. |
|
| |
|
03-27-2009, 12:29 AM
| #74 |
| RCC Addict Join Date: Dec 2007 Location: Calgary
Posts: 1,575
|
That is looking bad ass. Great job I've been thinking about getting those Rc4wd scale rod ends for one of my scalers. But like you said at $3.50 each they will add up. I havent heard any feed back on them from someone who has used them. Let me know what you think of them. Cheers |
|
| |
|
03-27-2009, 03:11 PM
| #75 |
| Quarry Creeper Join Date: Oct 2007 Location: Kernersville
Posts: 352
|
Wow, this thing is sick... awesome job. |
|
| |
|
03-28-2009, 08:50 AM
| #76 |
| I wanna be Dave Join Date: Aug 2005 Location: NE Ohio
Posts: 8,817
|
well.. I have been inspired. Amazing work, Can't wait to see what is next. Any bump steer issues? |
|
| |
|
03-28-2009, 11:37 AM
| #77 | |
| I wanna be Dave Join Date: Jul 2006 Location: The beautiful Pacific Northwest
Posts: 6,923
| Quote:
Montana is going to be off the hook this year..... I haven't noticed any bump steer issues yet, but i only had it running for about 10 minutes the other day. It was also going about 12 mph so speed wobble was more of an issue than bump steer I don't see any problems with it, the panhard angle is pretty close to the steering rod angle, and with it being half droop and half uptravel, it makes it less of an issue than if it were all up travel. Rock lights, skids, body panels, air bump stops, and headlights are in the works for this weekend....stay tuned and thanks for all the positive comments. Tim. | |
|
| |
|
03-28-2009, 11:55 AM
| #78 |
| Built, not bought Join Date: Oct 2004 Location: Gresham
Posts: 4,504
|
The more I see of your work,the more I think I should just build Barbie cars. Nice progress,can't wait to see it finished. Pat |
|
| |
|
03-28-2009, 08:28 PM
| #79 |
| I wanna be Dave Join Date: Jul 2006 Location: The beautiful Pacific Northwest
Posts: 6,923
|
Thanks Pat, maybe you can just put Barbie in your Wreckluse....if you ever get it done. I found the LED's of my dreams 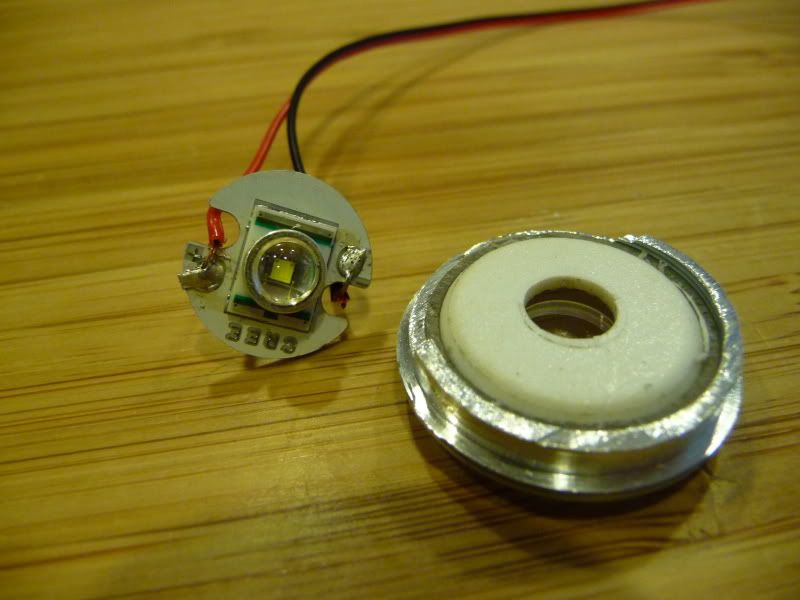 Very low profile. 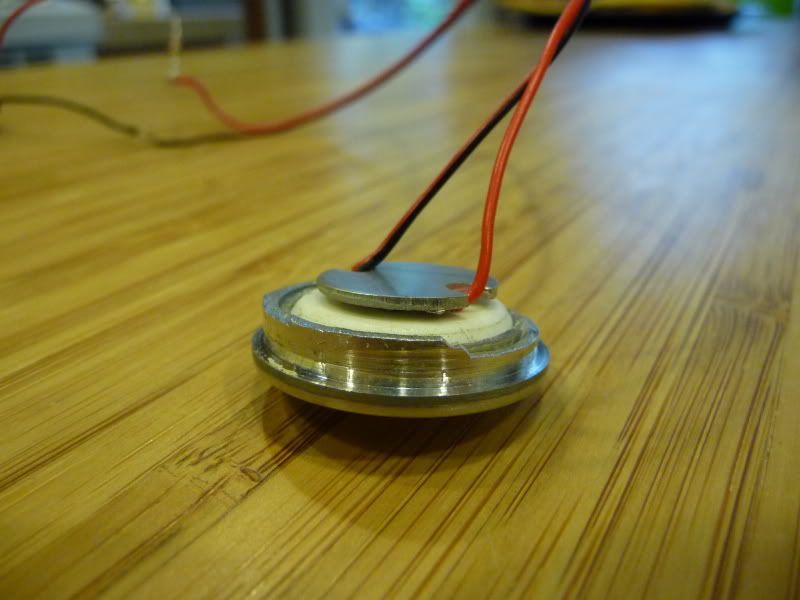 |
|
| |
|
03-28-2009, 08:40 PM
| #80 |
| Custom Carbon Fiber   Join Date: Oct 2007 Location: Connecticut :(
Posts: 4,501
|
this things coming out Great, I cant wait to see some action shots but love watching the build of it. Im with Pat, this things got me rethinking my next build |
|
| |
 |
| |


 Linear Mode


