| |
 02-23-2010, 04:14 PM
| #21 |
| Quarry Creeper Join Date: Jan 2009 Location: East Mids, UK
Posts: 362
|
Nice styrene work! What kind of filler do you use?? Nice colour choice too.
|

|  |
| Sponsored Links | |
| | |
|
02-23-2010, 06:21 PM
| #22 | |||||||
| I'm a stupid C U N T! Join Date: Jun 2005 Location: In the Garage!
Posts: 4,307
| Quote:
Quote:
Quote:
Quote:
 Quote:
Quote:
| |||||||
|
| |
|
02-23-2010, 07:00 PM
| #23 | |
| RCC Addict  Join Date: Dec 2007 Location: On The Lake
Posts: 1,449
| Quote:
| |
|
| |
|
02-23-2010, 10:37 PM
| #24 |
| I'm a stupid C U N T! Join Date: Jun 2005 Location: In the Garage!
Posts: 4,307
|
Well I got most the LED's wired up, the bumper trimmed and replaced the Roller fairlead with a MSD fairlead which we have several of in stock |
|
| |
|
02-24-2010, 11:14 PM
| #25 |
| I'm a stupid C U N T! Join Date: Jun 2005 Location: In the Garage!
Posts: 4,307
|
Photo update time Got most of the LED's hooked up, I'm using the 3racing controller and I picked up a few of the axial led's and found out that the 5 string kit doesn't work with the 3racing setup.......... (In my best Tim Taylor voice grunt grunt) So I rewired it! I'm up to 9 LED's on the chassis and will have 6 more on the body when it's done, for a grand total of 15. Got the Bumper trimmed up and finished off, narrowed up the rock rails and finished up.On to the pics 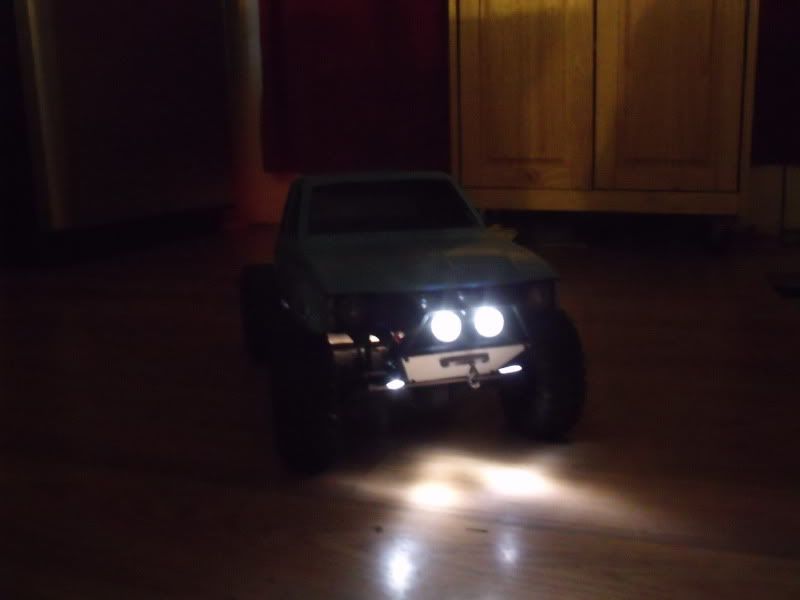  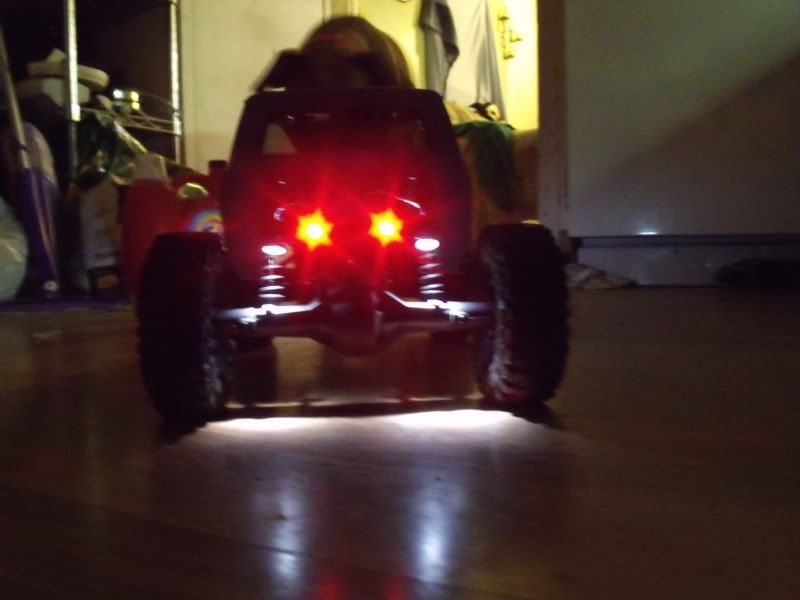 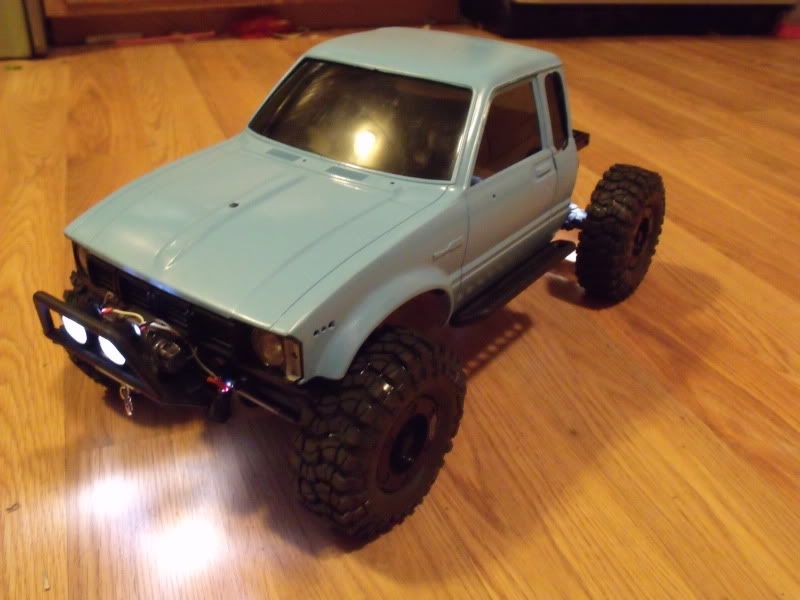 |
|
| |
|
02-25-2010, 08:51 PM
| #26 |
| Rock Stacker Join Date: Nov 2009 Location: Bozeman, MT
Posts: 68
|
Awesome looking rig man. That body looks damn straight with the Ex Cab. Cant wait to get mine together!!
|
|
| |
|
02-26-2010, 06:02 PM
| #27 |
| I'm a stupid C U N T! Join Date: Jun 2005 Location: In the Garage!
Posts: 4,307
|
Update time I got a package from MontanaMatt yesterday and in it was a set of Rcbro leaf spring kits, and some rc4wd leafs , So I went to town tearing apart the stock 3link in back and went to figuring out how to make the leafs work. The stock Leaf kit's shackles wont work with the rear bumper installed so I used the original ones to make a template for some dog leg shackle out of 3/32 aluminum. Once that was done I could install the front mount. I removed the rear shock towers for a bit to gain a bit of access while I tinker and they will go back on when I'm done.I got the Body mounted today as well, I used a front post off the tamiya High lift kit, and the slide in body posts that came with the honcho kit. I used 2 of the screw down body post holders and ran a screw through the the rock slider mount up, then used a spacer then the screw on body post. On the rear cage I used the 2 holes that are already in the rear X brace in the chassis and lined it up with the X brace on the tube bed and drilled through the bed and screwed the bed to the chassis brace. for now it seems plenty strong, If it gets to be weak I'll add supports. Pics 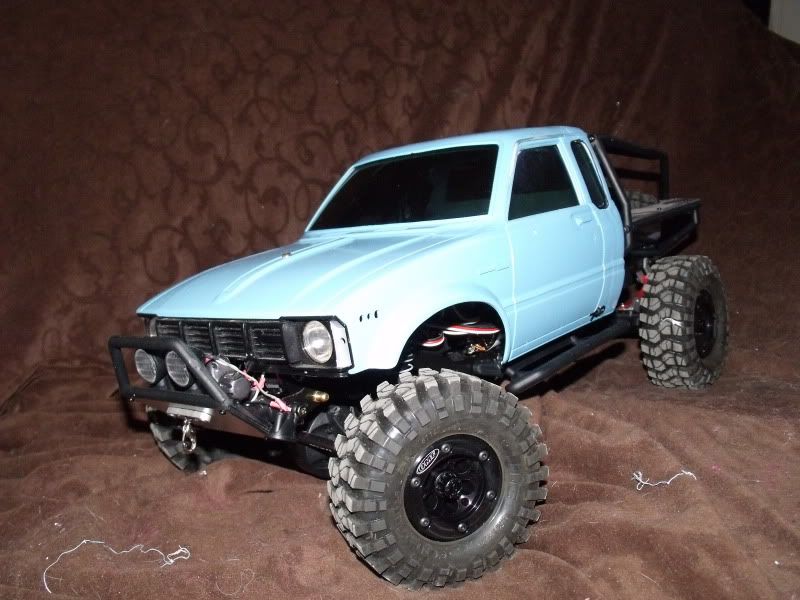 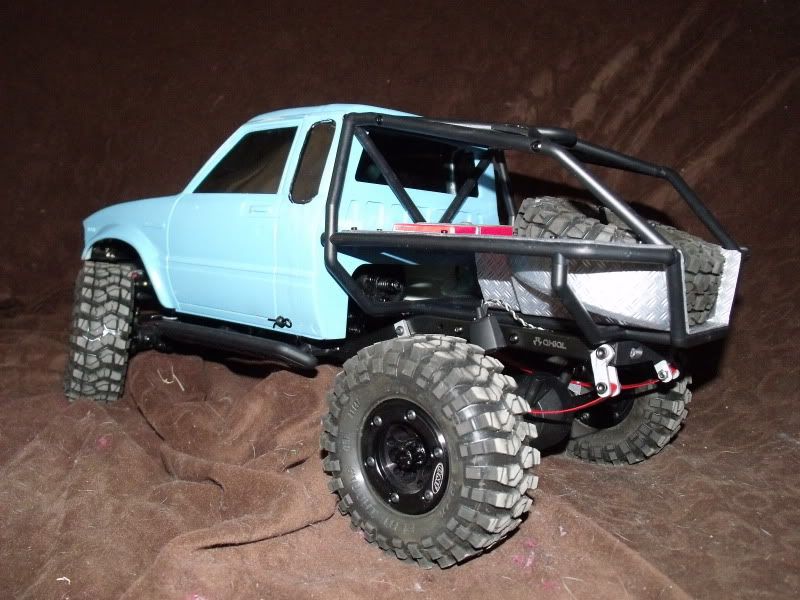 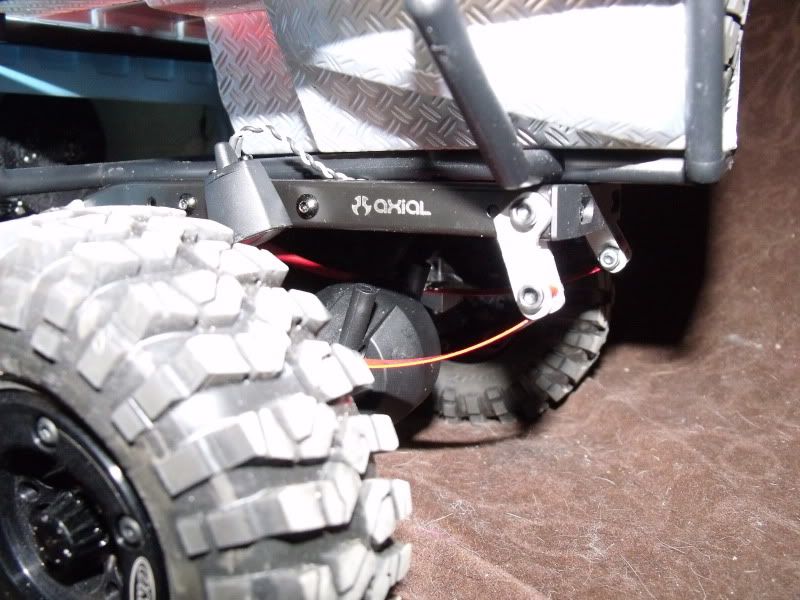 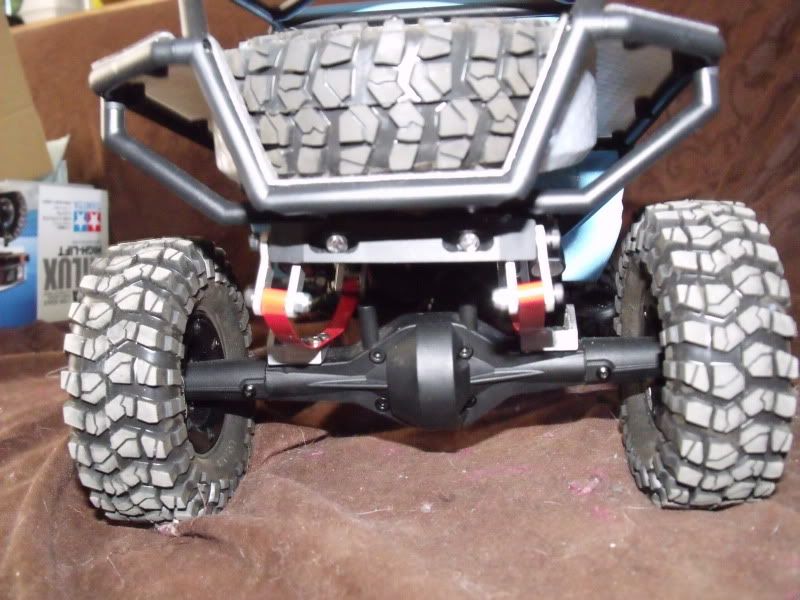 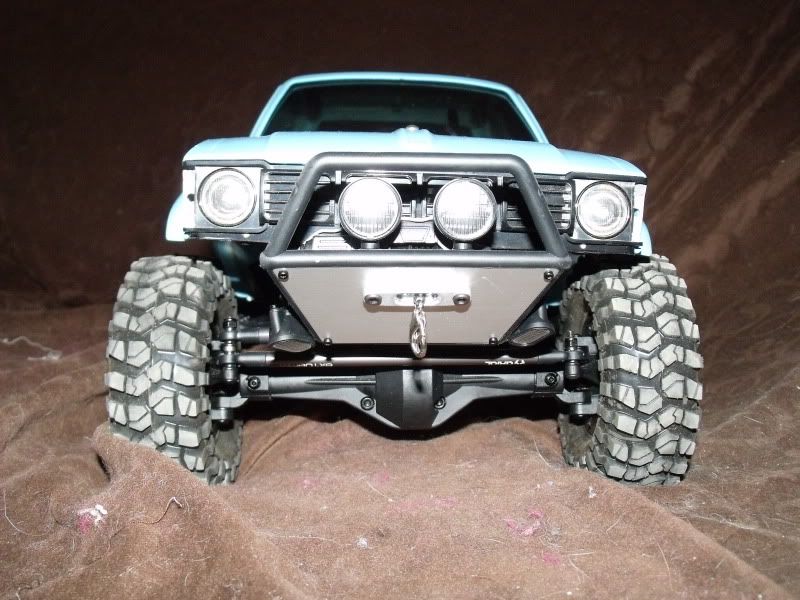 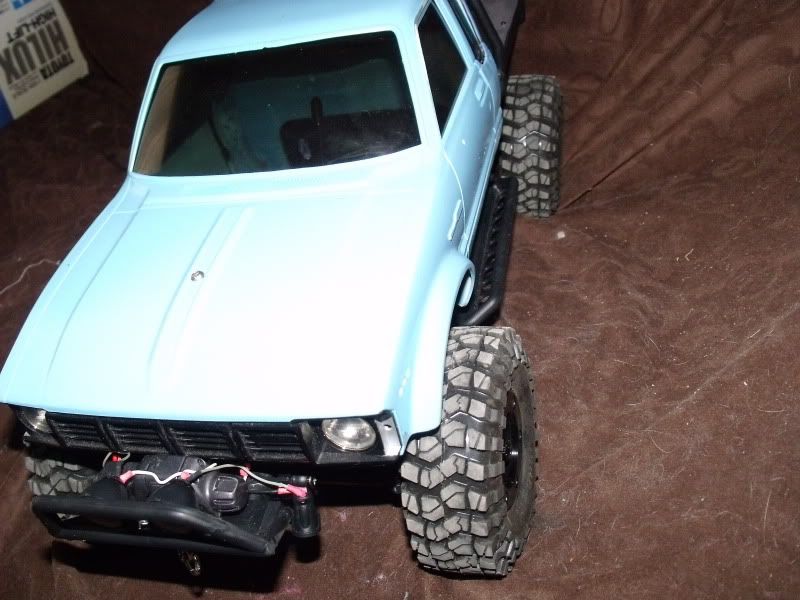 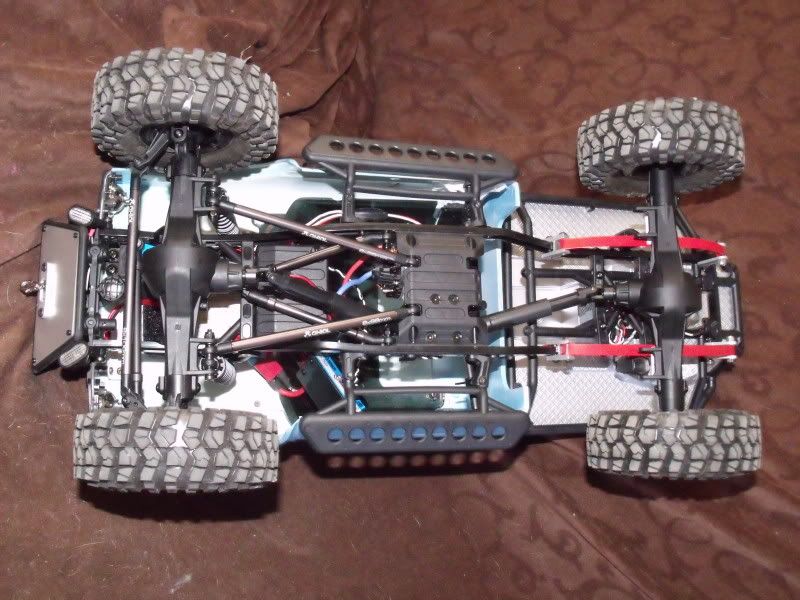 |
|
| |
|
02-26-2010, 06:25 PM
| #28 |
| I'm a stupid C U N T! Join Date: Jun 2005 Location: In the Garage!
Posts: 4,307
|
To do list BEC Finish LED's Finish rear window Reinstall rear shocks tear evarything down, Paint everything that isn't black, black shave off servo mount posts touch up paint install stickers Wheel the PISS out of it |
|
| |
|
02-27-2010, 12:44 AM
| #29 |
| Rock Crawler Join Date: Sep 2007 Location: Petaluma
Posts: 607
|
nice rig
|
|
| |
|
02-27-2010, 08:32 AM
| #30 |
| RCC Addict Join Date: Dec 2007 Location: On The Lake
Posts: 1,449
|
Turned out really nice Aaron It's inspiring me to get started on my Honcho |
|
| |
|
02-27-2010, 10:12 AM
| #31 |
| I wanna be Dave Join Date: Aug 2005 Location: NE Ohio
Posts: 8,817
|
Dam Aaron, look at you go! looks like the paint and body turned out great |
|
| |
|
02-27-2010, 12:27 PM
| #32 | |||
| I'm a stupid C U N T! Join Date: Jun 2005 Location: In the Garage!
Posts: 4,307
| Quote:
Quote:
Quote:
| |||
|
| |
|
02-27-2010, 12:43 PM
| #33 | |
| RCC Addict Join Date: Dec 2007 Location: On The Lake
Posts: 1,449
| Quote:
| |
|
| |
|
02-27-2010, 12:51 PM
| #34 |
| Rock Stacker Join Date: Jan 2010 Location: Nanaimo BC, Canada
Posts: 93
|
sweet "honcho" another idea for the sliders that I did on mine...cut out the flat piece on the bottom (with the circles in it) so they are just the "tube"...truck looks good, thinkin bout leafin my rear soon...
|
|
| |
|
02-27-2010, 01:15 PM
| #35 |
| I'm a stupid C U N T! Join Date: Jun 2005 Location: In the Garage!
Posts: 4,307
|
thought I'd throw out a couple pictures of it naked, so you can see my body mounts, the radio placement all that good stuff Specs are 3s 2100 thunderpower FX/R Integy 45t Losi 2.4 RX with the case off 645 mg for now 3 racing led controller Soon to have a CC BEC Pics 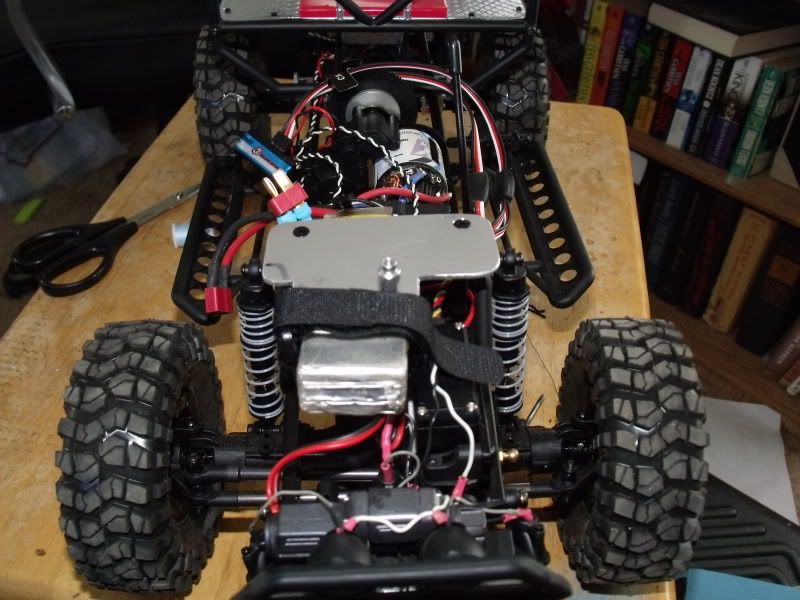 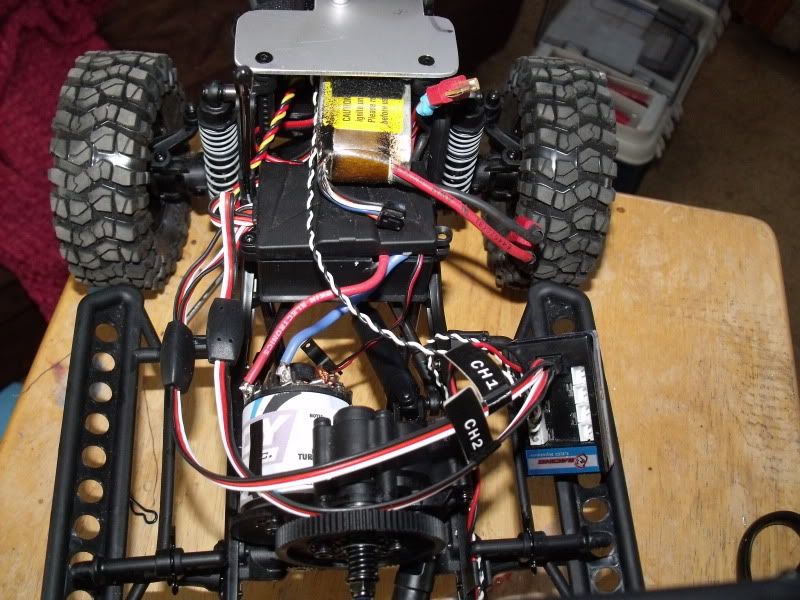 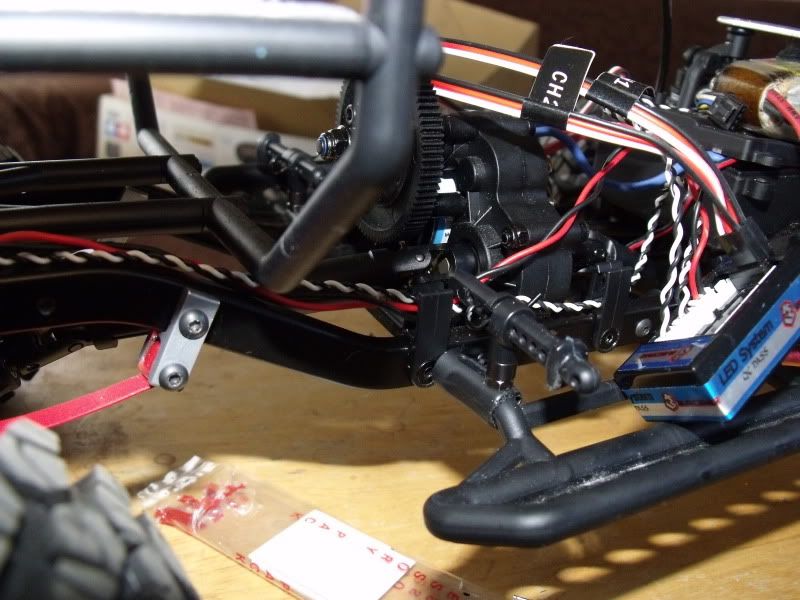 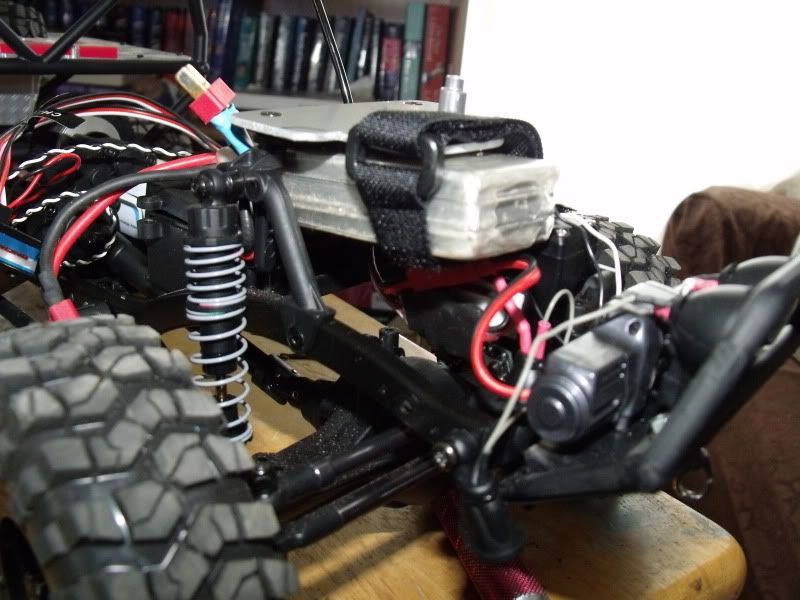 |
|
| |
|
02-27-2010, 07:43 PM
| #36 |
| I'm a stupid C U N T! Join Date: Jun 2005 Location: In the Garage!
Posts: 4,307
|
You can't really see it in the pictures but the seams of the splice were visable through the paint, and some of the old body lines were too, It was bugging me so I sanded the joint area down and re-fillered it. I Used the foam pad sanders for the first go around and I think there just a bit to soft for this, they countout to the shape and enhance it instead of flattening it out, so this time i'm going to sand with a rigid block and see what that nets me. 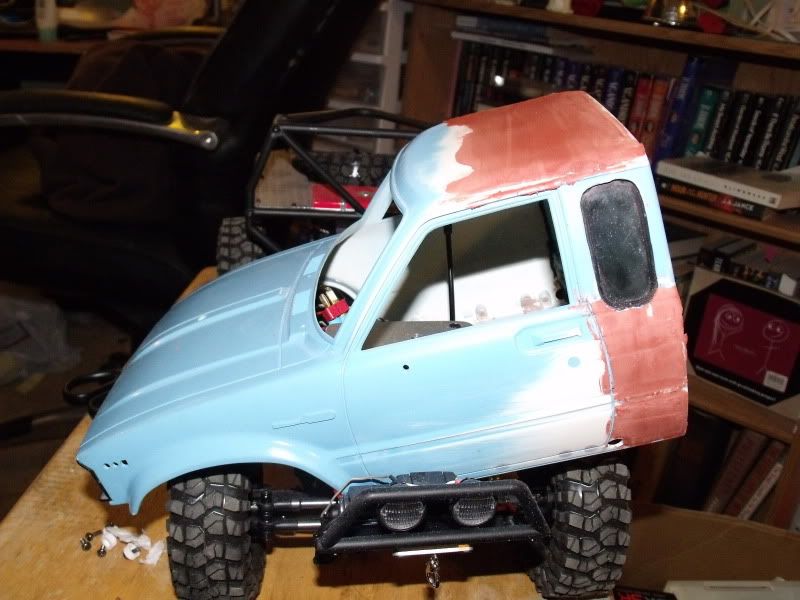 |
|
| |
|
02-27-2010, 07:58 PM
| #37 |
| Rock Stacker Join Date: Nov 2009 Location: Bozeman, MT
Posts: 68
|
Great job on body mounts man. You can see the ex cab lines but im sure you can smoooth that out a bit. Good inspiration for my build to come. |
|
| |
|
02-27-2010, 08:34 PM
| #38 |
| I wanna be Dave Join Date: Aug 2005 Location: NE Ohio
Posts: 8,817
|
Oh man, here we go again..
|
|
| |
|
02-27-2010, 08:36 PM
| #39 | |
| I'm a stupid C U N T! Join Date: Jun 2005 Location: In the Garage!
Posts: 4,307
| Quote:
 | |
|
| |
|
02-27-2010, 10:08 PM
| #40 |
| I'm a stupid C U N T! Join Date: Jun 2005 Location: In the Garage!
Posts: 4,307
|
Mmm Bondo buggers! that is all......
|
|
| |
 |
| |


 Linear Mode


