| |
 10-26-2010, 09:00 PM
| #1 |
| RCC Addict Join Date: Dec 2007 Location: Ward, SC
Posts: 1,108
|
Since I sold my T1E Berg back in late July I have been waiting with great anticipation the public release of Axials new comp rig the XR10. When the XR10 was the released and I watched in envy of all the build threads being posted on here. Finally I sold "Little TJ" (2.2 Scaler) last week and purchased a XR10. I knew I could not be happy with the stock configuration so a new chassis was in store. I don't care to much for bodied rigs anymore and though I loved my Moonbuggy and it worked, I thought it may be nice to try something new this time. When I saw Jeremy was going to release the BJ4 designed around the XR10 I knew this was the chassis I was going to have this go round. Here are the specs as of Day 1. Axial XR-10 Kit #51282 Y-town BJ4 Chassis (Thanks Jeremy!) Tekin FXR Jp Warrior 45T motors DX3r Hitec 7950TH ServoCastle BEC @ 7.4V GForce 800mah 3S Lipo ($8.40 each we will see how long they last) Stock Axial shocks (The verdict is still out on the shocks) Stock springs up front (Going to try Golds) Stock springs in rear (Going to try Golds) 30wt Losi Shock Oil F/R BWD Links all the way around upper and lower ("Thanks Don") HB White Dot Sedonas (Thanks Andy) Nova DD Foam Firm Inners/Soft Outters up front Nova DD Foam Firm Inners/Soft Outters in the rear ATi Turbines berg offset with 6oz in each front (absolutely love these wheels) ON ORDER: VP Zero Ackerman Knuckles (jpcustoms) VP Chubs (jpcustoms) Freq-E Skins Other things still need to be done: *Cut up some body panels and paint. I dropped the ride height to 3.25 at the front of the skid and 3.5 at the rear. Also limited the rear down travel .5 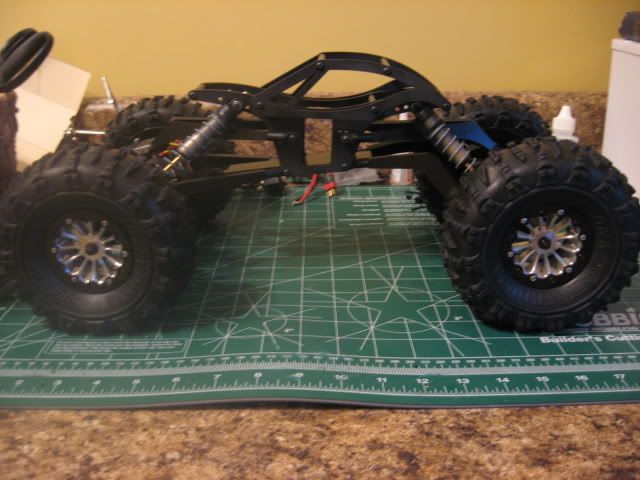 This chassis has some smooth looking lines about it, yet it maintains its functionality. 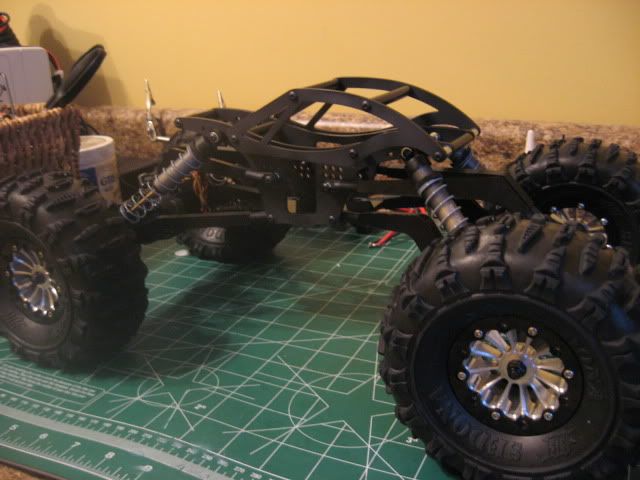 The track width with the ATi's and Sedonas is 10.75 up front and 10.25 at the rear.  All electronis installed minus the motors. I hope to install them before bed tonight and get a total weight check at work tomorrow.  Last edited by limited77; 12-16-2010 at 08:30 PM. Reason: added parts links |

|  |
| Sponsored Links | |
| | |
|
10-26-2010, 10:30 PM
| #2 |
| I wanna be Dave Join Date: Oct 2008 Location: Sumter
Posts: 6,141
|
lookin good! wish ya could make it to TN this weekend. i actually decided to rebuild mine with the stock chassis rather than put it together in a rush and hate myself later. keep us updated! |
|
| |
|
10-27-2010, 09:00 AM
| #3 |
| RCC Addict Join Date: Dec 2007 Location: Ward, SC
Posts: 1,108
|
I went ahead and did the 9mm bearing mod just as preventive measures. Id rather not ruin a day out crawling an hour from the house with a bearing failure. I also replace the rest with a Acer ceramic bearing kit #AX03. Click pic below for the kit.  |
|
| |
|
10-28-2010, 07:33 PM
| #4 |
| RCC Addict Join Date: Dec 2007 Location: Ward, SC
Posts: 1,108
|
Cut up some body panels today. Used .030 lexan sheet. The paint is sprint white backed in indy silver.  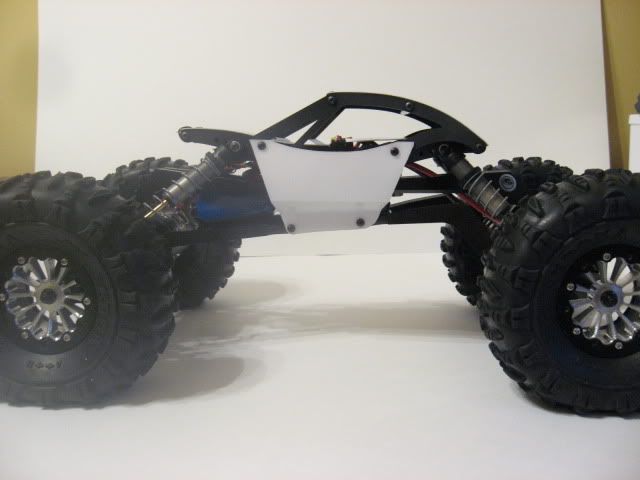 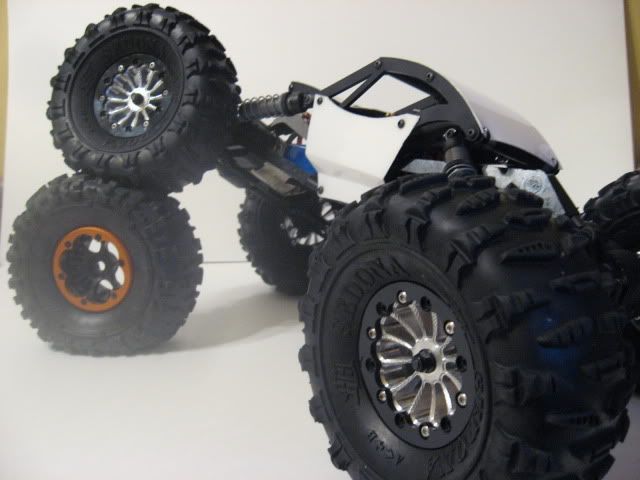 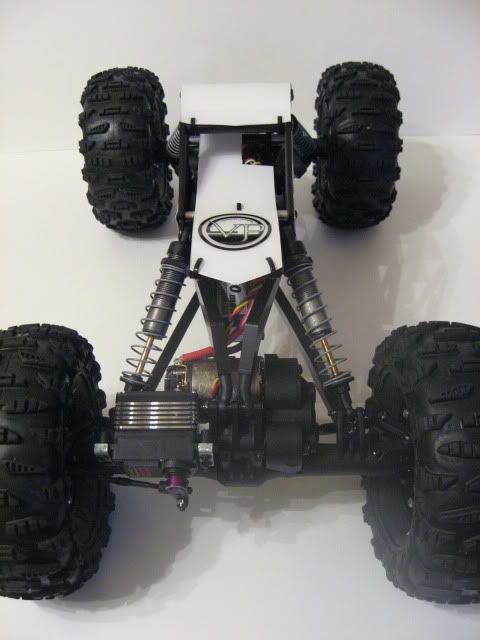 |
|
| |
|
10-28-2010, 07:48 PM
| #5 |
| RCC Addict Join Date: Dec 2007 Location: Ward, SC
Posts: 1,108
|
Anyone know what would be causing the distortion on the left side of my pictures? Turtle.....? Btw Turtle gave a great basic photography class on RCCTV a year or so ago.
|
|
| |
|
10-30-2010, 10:11 PM
| #6 |
| Quarry Creeper Join Date: Oct 2010 Location: Clovis, NM
Posts: 341
|
Beautiful rig man. I've dealt with those BWD guys before, they are awesome to work with. Did you tell them you had XR10 axles with a BJV4 chassis and they made you the right length links for a 12.5" overall length?
|
|
| |
|
10-30-2010, 10:44 PM
| #7 |
| Quarry Creeper   Join Date: Dec 2009 Location: San Jose
Posts: 265
|
The distortion is a smudge on your lens, almost guarentee it....possibly a light leak but unlikely....more like a finger print on the lens Paul  |
|
| |
|
10-30-2010, 11:18 PM
| #8 | |
| RCC Addict Join Date: Dec 2007 Location: Ward, SC
Posts: 1,108
| Quote:
| |
|
| |
|
10-30-2010, 11:19 PM
| #9 | |
| RCC Addict Join Date: Dec 2007 Location: Ward, SC
Posts: 1,108
| Quote:
Thanks for the input! I'll clean the lens and see what happens. | |
|
| |
|
10-31-2010, 12:19 AM
| #10 |
| RCC Addict Join Date: Dec 2007 Location: Ward, SC
Posts: 1,108
|
Spent a good part of the day finishing up the details on this rig between a couple good football games. A much anticipated little package came in today from JPcustomrcs, which included my VP knuckles and I actually opted for the HR Chubs instead of the VP ones. Apparently after my research was done on the two, the HR hubs became my choice when I found that they have slightly more adjustability over the VP hubs. Yes, I may never need to clock my hubs that much but at least I will have that option. 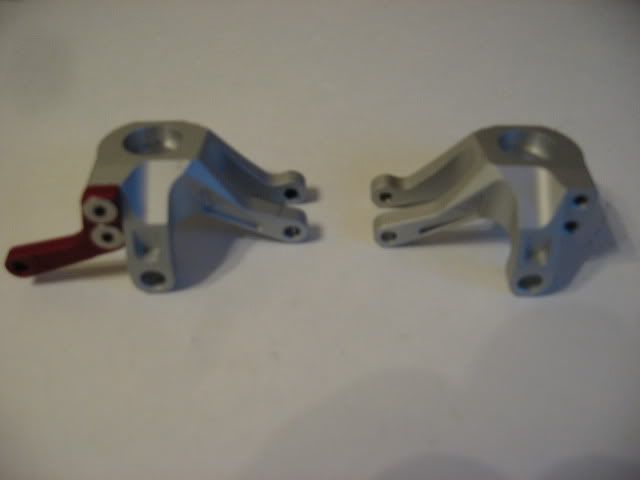 The unfortunate thing I found out though was the VP knuckles will not work with these wheels. The biggest headache of the day though was hacking into my wifes Cricut. Its a small 12" plotter designed for vinyl cutting etc... I thought it would be cool to personalize these panels with what I had avalible. So I had some black vinyl and went to work. Used Achilles and Chiller True Type fonts. Today was the first time I have every used it. 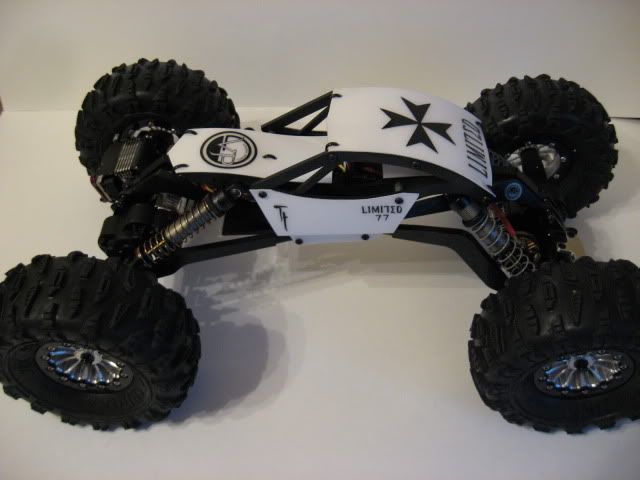 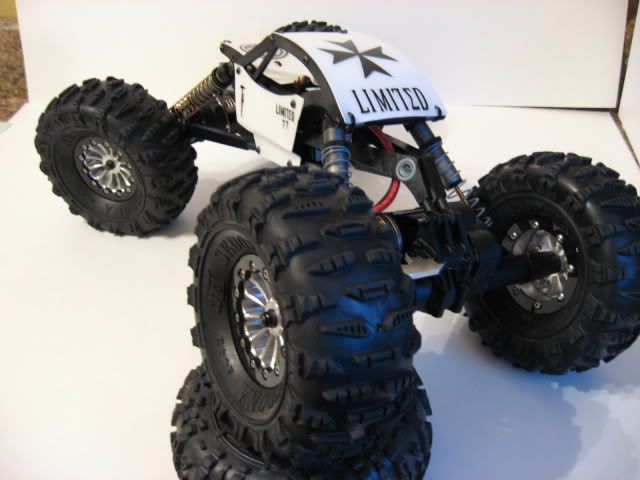 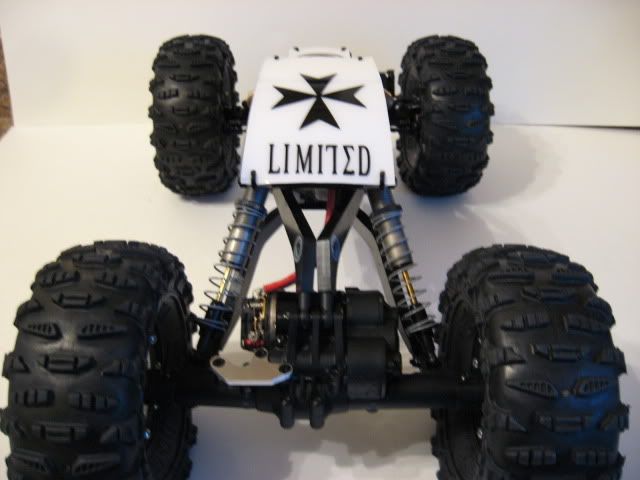 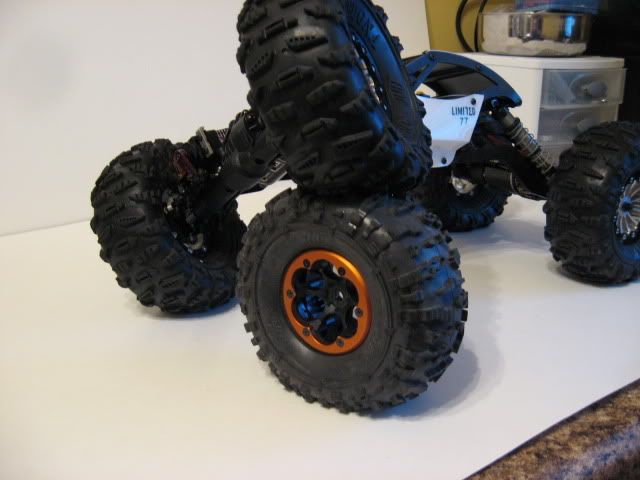 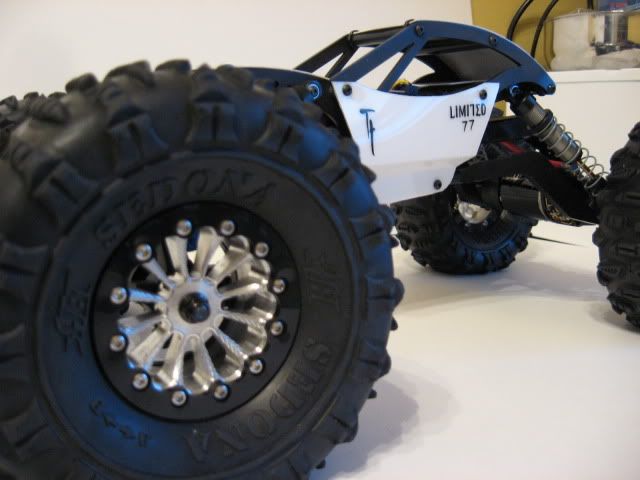 Last edited by limited77; 10-31-2010 at 12:32 AM. Reason: detail |
|
| |
|
10-31-2010, 05:13 AM
| #11 |
| I wanna be Dave Join Date: Mar 2008 Location: In the Dark Edges of your Mind
Posts: 6,386
|
I think it was worth the trouble. The vinyl looks great! The knuckles are worth sacrificing being able to run the wheels up front. The allow you to turn sharper than a berg with 300s. |
|
| |
|
10-31-2010, 07:44 PM
| #12 |
| I wanna be Dave Join Date: Oct 2008 Location: Sumter
Posts: 6,141
|
looks really good! did you get a chance to get it on the rocks today?
|
|
| |
|
10-31-2010, 08:30 PM
| #13 | |
| RCC Addict Join Date: Dec 2007 Location: Ward, SC
Posts: 1,108
| Quote:
         | |
|
| |
|
11-01-2010, 01:56 PM
| #14 | |
| RCC Addict Join Date: Dec 2007 Location: Ward, SC
Posts: 1,108
| Quote:
| |
|
| |
|
11-01-2010, 08:10 PM
| #15 |
| RCC Addict Join Date: Dec 2007 Location: Ward, SC
Posts: 1,108
|
Here's the setup for my first run: Day 1 - 10/31/2010 Total running weight 6lb 2oz Wheel weight 6oz added in each front nothing added to the rear. 12 7/16 WB (Compressed) Track width - 10.75 front & 10.25 rear HB White Sedonas/DD Foams Losi gold springs Front & Stock Rear 30wt Shock oil all around Besides the track width this has always been a starting setup for me. I have built a few bergs in the past yet this XR10 left me speechless. The same basic starting setup I have used on my past bergs and yet they never performed like this. The XR10 took on everything I could throw at it. I really have no answer on why this thing performed as well as it has in the first 3hrs I have ran it; it simply amazed me. I never drove it box stock so I can not compare it to stock; sorry. The thing turns on a dime. Hell I'm amazed at how sharp it will turn without dig engaged. The only woe I had of the day was I lost a spring cup; thankfully I had a spare on me. And now thanks to JeepinDoug's Spring Cups I dont have to worry about that again. In the end this rig left me scratching my head wondering "how did it/I just do that?" Well it did and Axial made it possible with most capable rig and with minimal amounts of tuning to be successful. The only problem is, everyone is gonna have one now! Congrats Axial! Last edited by limited77; 11-03-2010 at 10:44 AM. |
|
| |
|
11-04-2010, 09:34 PM
| #16 |
| RCC Addict Join Date: Dec 2007 Location: Ward, SC
Posts: 1,108
|
Few minor updates: BWD Extended No-Flex Steering Knuckle Arm 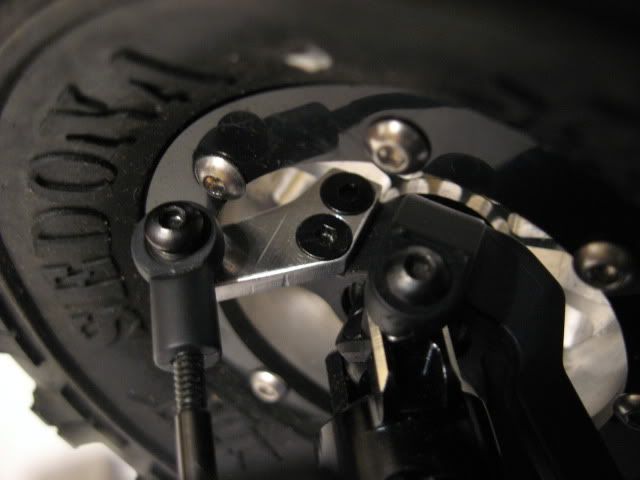 Next, I worked on removing some slop out of the stock drag link. I was going to go with the Lunsford Ti Drag Link since I had a couple laying around. 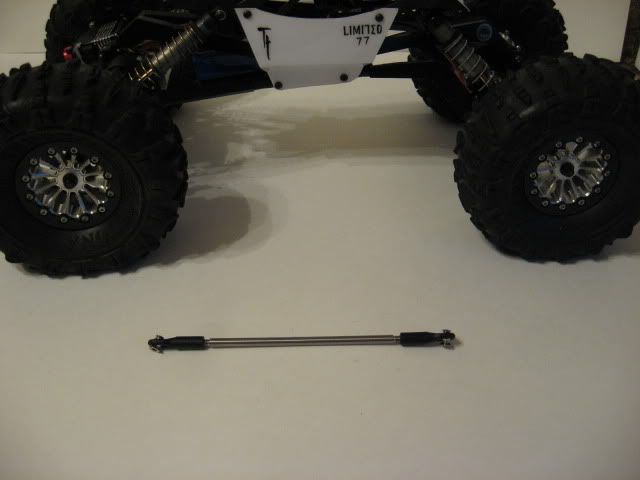 It appeared to me though that I would hang up way to much though. So I opted to change out the stock links for some revo/jato ends and it seems to take out some of slop. there is still some there, it is just not quite as prevalent. 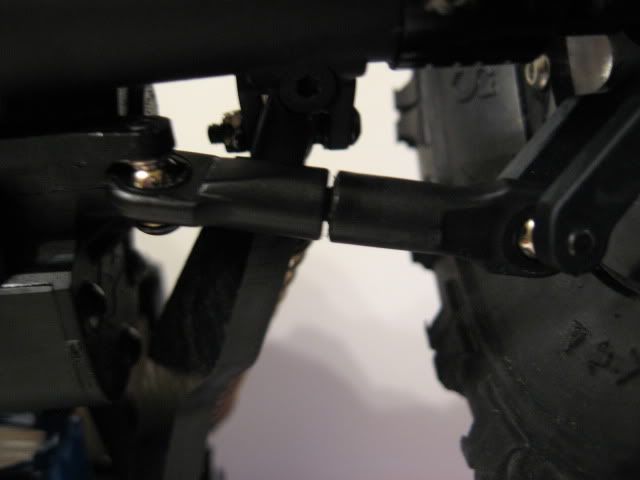 Lastly I replaced the servo horn with a robotronics one I have had a while that I had never installed. I don't have the part number as it was no longer in the original packaging, so i am not sure if it is the long or short one. It measures roughly 7/8 or 25mm eye to eye from the bottom hole to the servo screw. 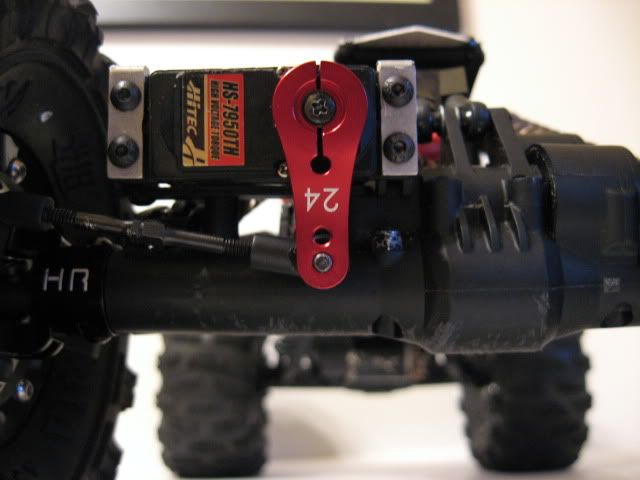  |
|
| |
|
11-05-2010, 11:16 AM
| #17 |
| I wanna be Dave Join Date: Oct 2008 Location: Sumter
Posts: 6,141
|
yep thats the long one...R17002...i still cant believe the gear cover fell off!
|
|
| |
|
11-05-2010, 12:41 PM
| #18 | |
| I wanna be Dave Join Date: Sep 2009 Location: Nor Cal
Posts: 2,213
| Quote:
Your gearbox cover fell off??? | |
|
| |
|
11-05-2010, 12:53 PM
| #19 | |
| RCC Addict Join Date: Dec 2007 Location: Ward, SC
Posts: 1,108
| Quote:
 | |
|
| |
|
11-08-2010, 09:56 AM
| #20 |
| RCC Addict Join Date: Dec 2007 Location: Ward, SC
Posts: 1,108
|
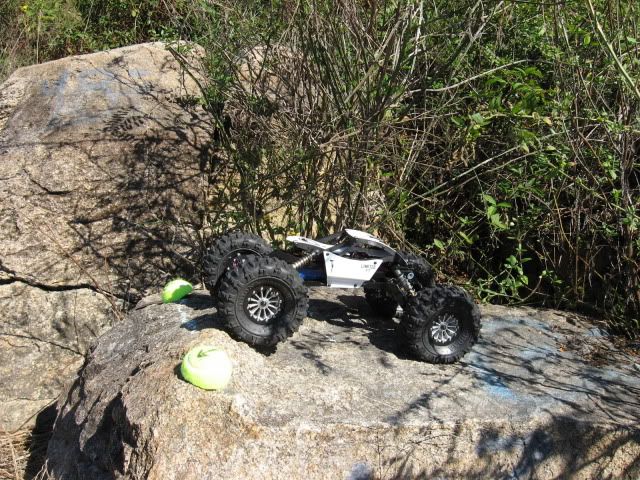
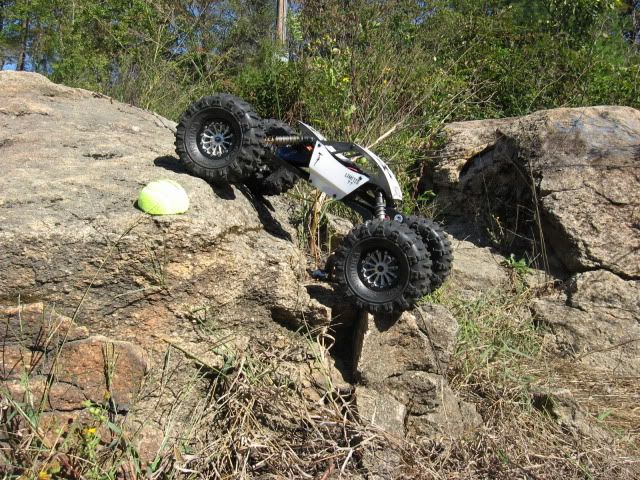
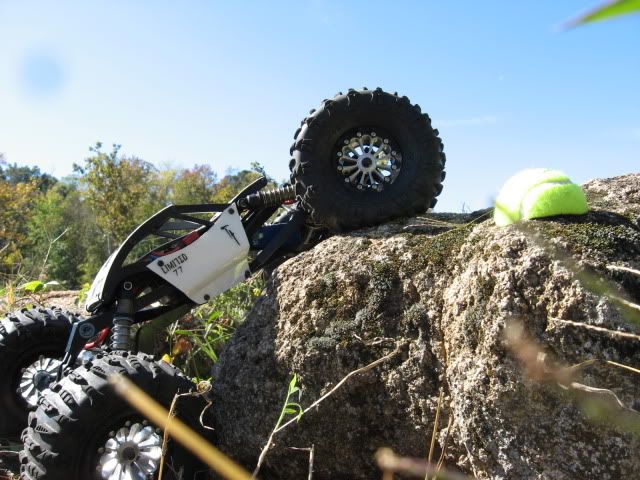
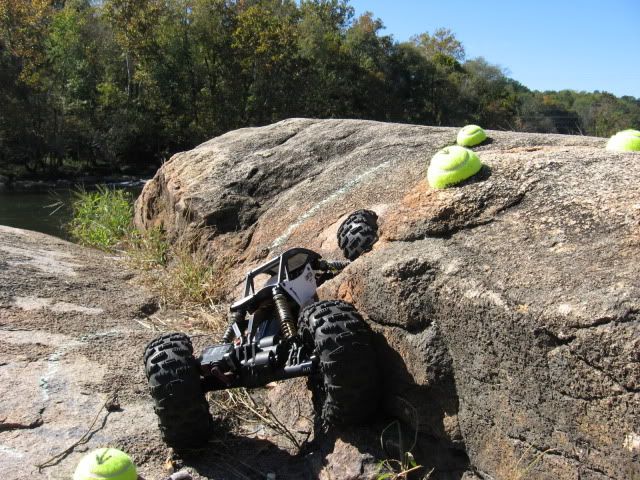
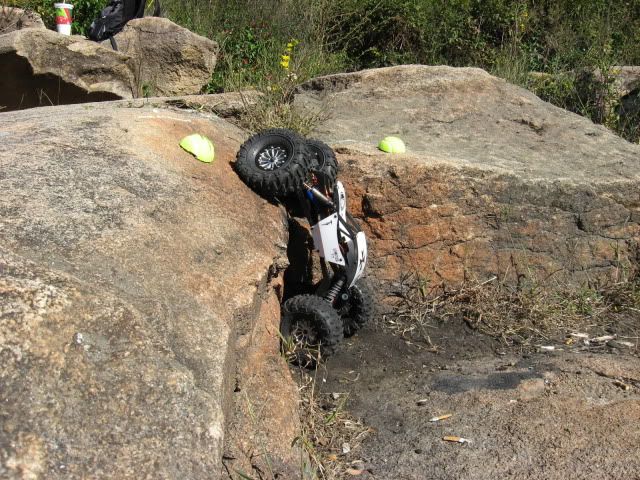
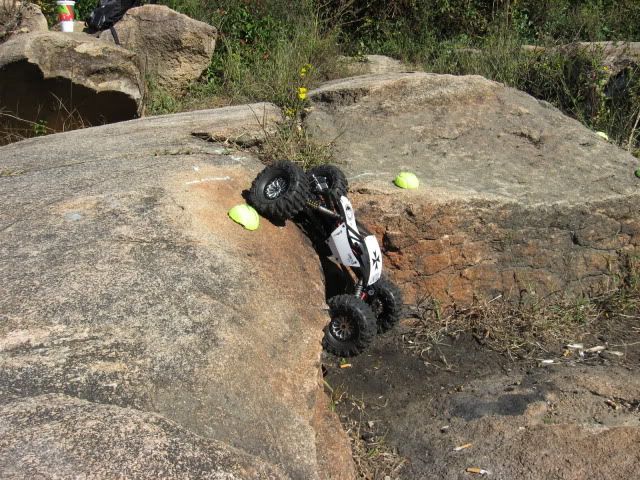
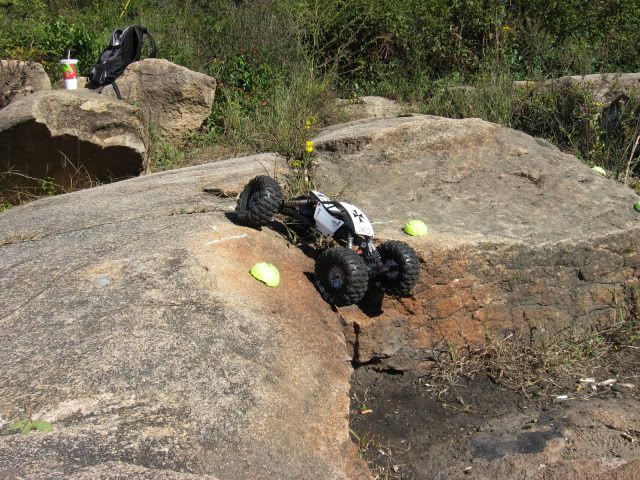
We had a little practice comp this past Sunday to get everyone ready for the up coming season. Nothing has changed; i am still amazed at what this rig can do. After seeing Ittybittys BTA drag linlk and seeing that it doesn't hang up like it would appear, I decide that I will be making the switch there. Other than that I will try golds on the rear too as I have been running stock springs back there. No carnage to report yet. Here's a few pics from Sunday: Rolling like a big shot! Juice on one side. Juice on the other side! 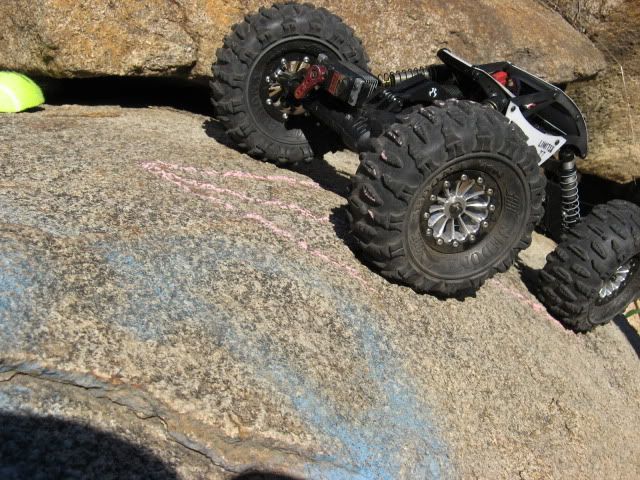 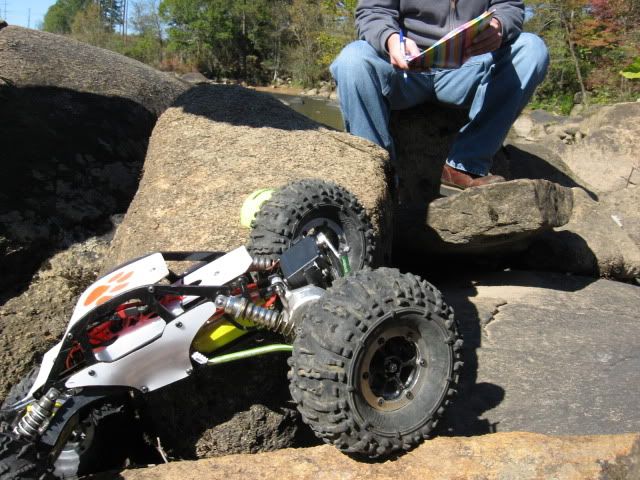 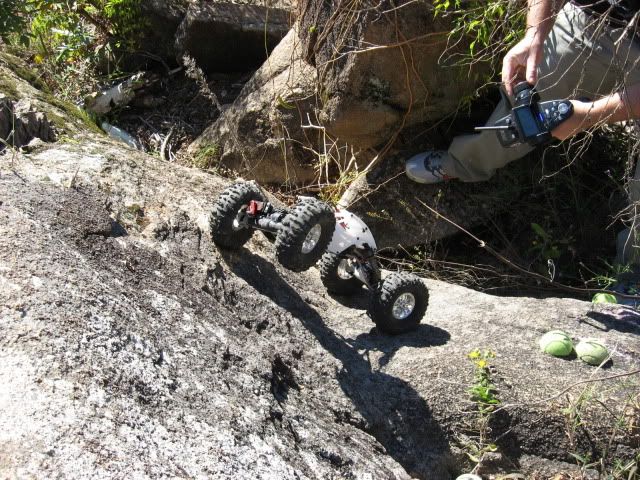 |
|
| |
 |
| |


 Linear Mode


