| |
 09-08-2011, 03:42 PM
| #41 |
| I wanna be Dave  Join Date: Oct 2006 Location: Martinsburg WV
Posts: 2,781
|
I just emerged from the depths of my shop to find that the mail-lady brought me a present today!!   A quick image does NOT do these justice, they look absolutely fabulous. Like little jewels. Because they're real reflectors!! Thank you BigSki!!! |

|  |
| Sponsored Links | |
| | |
|
09-09-2011, 01:04 PM
| #42 |
| I wanna be Dave Join Date: May 2008 Location: Baltimore
Posts: 4,442
| I used a set to make tail lights on my Jeep, it was well worth the effort. Right now I'm in the middle of casting some uber clear front headlight lenses, I'll update my thread when I pop them out of the mold. |
|
| |
|
09-09-2011, 02:06 PM
| #43 | |
| I wanna be Dave Join Date: Oct 2006 Location: Martinsburg WV
Posts: 2,781
| Quote:
Mine are sorta yellowish. Not horrible, but... I'm interested in what you've got in the works after getting these reflectors.Got the servo mounted today. I cut the mounting point into the passenger side, the panhard and the drag link will cross instead of lining up. I hope this will not present a problem. There was not enough room to mount it in the drivers side w/o interfering with the panhard mount, mounted this way the suspension will still fully cycle w/o anything interfering. Without the drag link hooked up anyway, I can't really make a new one until I widen the axles...  Minimal invasion of under-hood space... 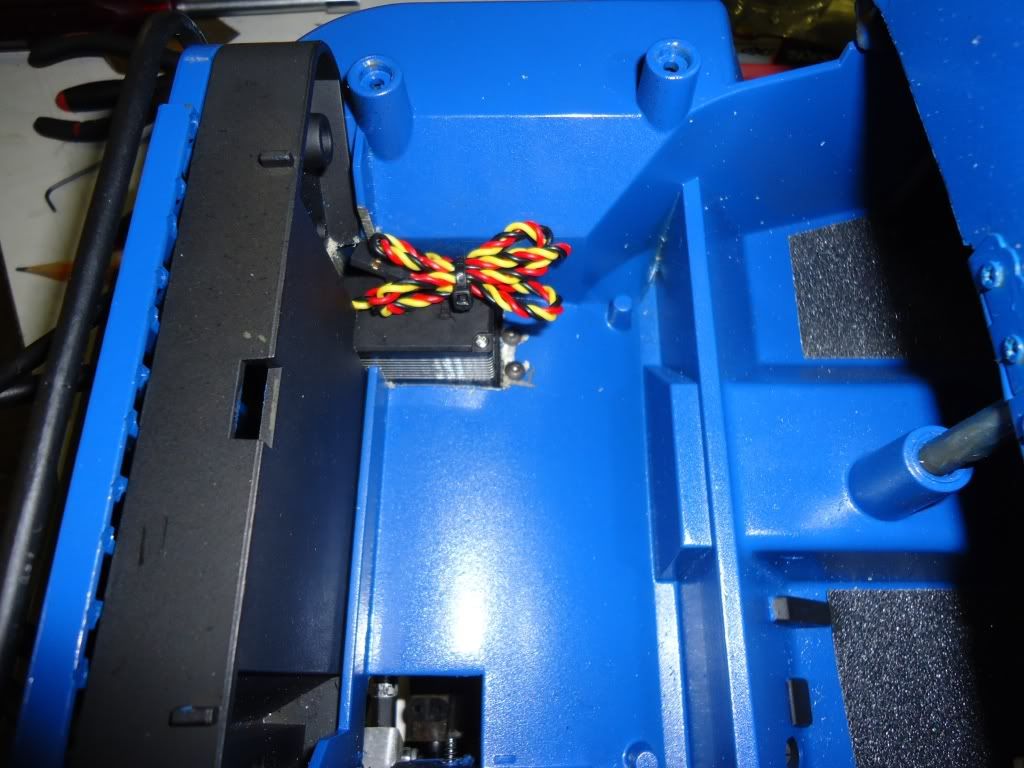 Last edited by Big Mike; 09-09-2011 at 02:10 PM. | |
|
| |
|
09-09-2011, 02:18 PM
| #44 |
| I wanna be Dave Join Date: Aug 2008 Location: Austin, TX, USA
Posts: 4,273
|
Ooh, I wouldn't do that. I really like the idea of a 3 link and track bar, but with the track bar and drag link crisscrossing like that, you'll have some awful bumpsteer. I'd find a way to move the servo to the driver's side or just go with a 4 link front suspension setup. Really diggin' the Jeep so far! |
|
| |
|
09-10-2011, 09:26 AM
| #45 | |
| I wanna be Dave Join Date: Oct 2006 Location: Martinsburg WV
Posts: 2,781
| Quote:
Yea, I made up a quick drag link just to test and it was pretty bad, crossing links is definitely a no-no. | |
|
| |
|
09-10-2011, 11:20 AM
| #46 | |
| I wanna be Dave Join Date: Oct 2006 Location: Martinsburg WV
Posts: 2,781
| Quote:
It's very tight, and I'm going to need a different horn with more offset, but it fits... 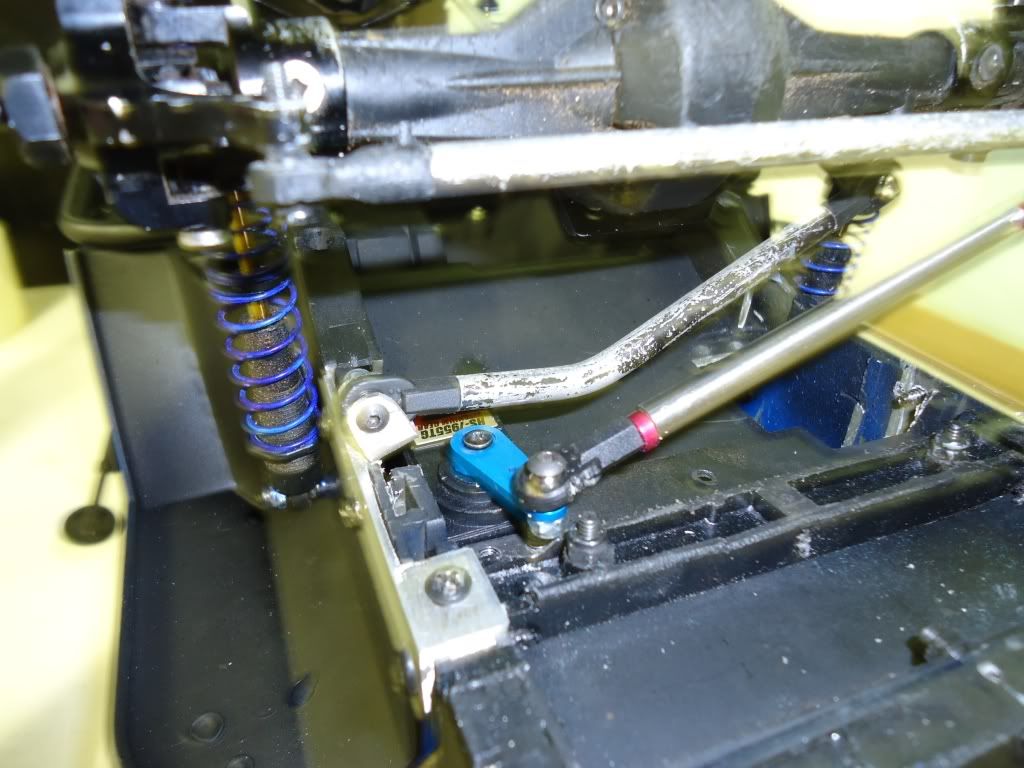 Proper geometry has been achieved... 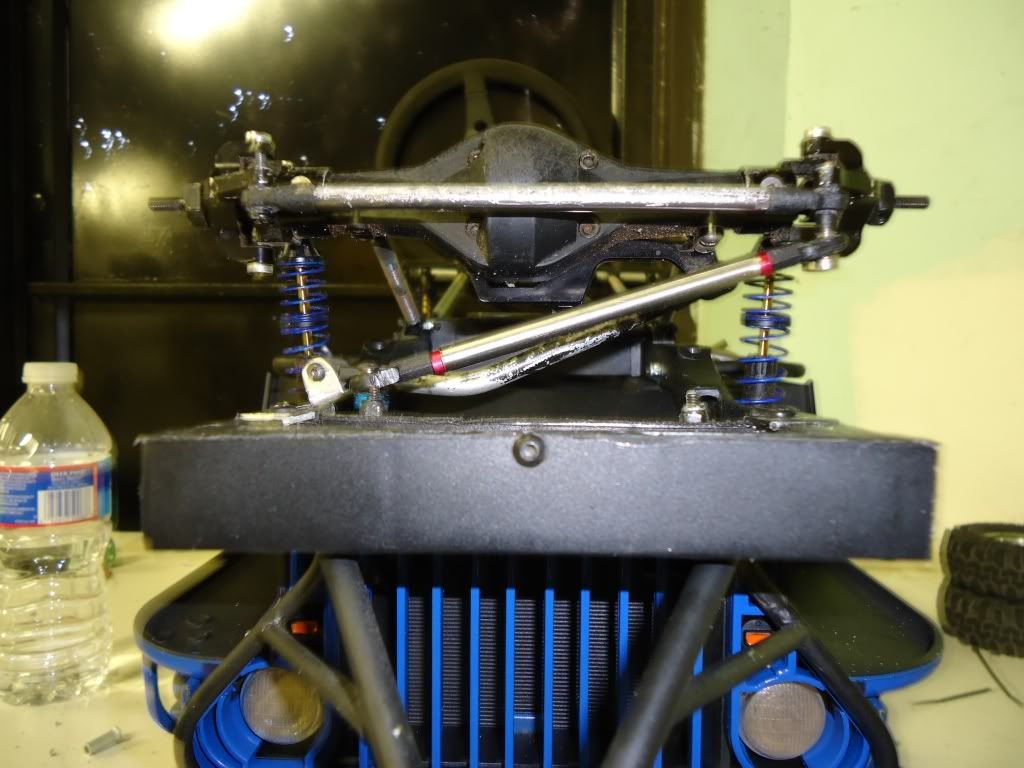 Full range of suspension travel with zero bump steer... 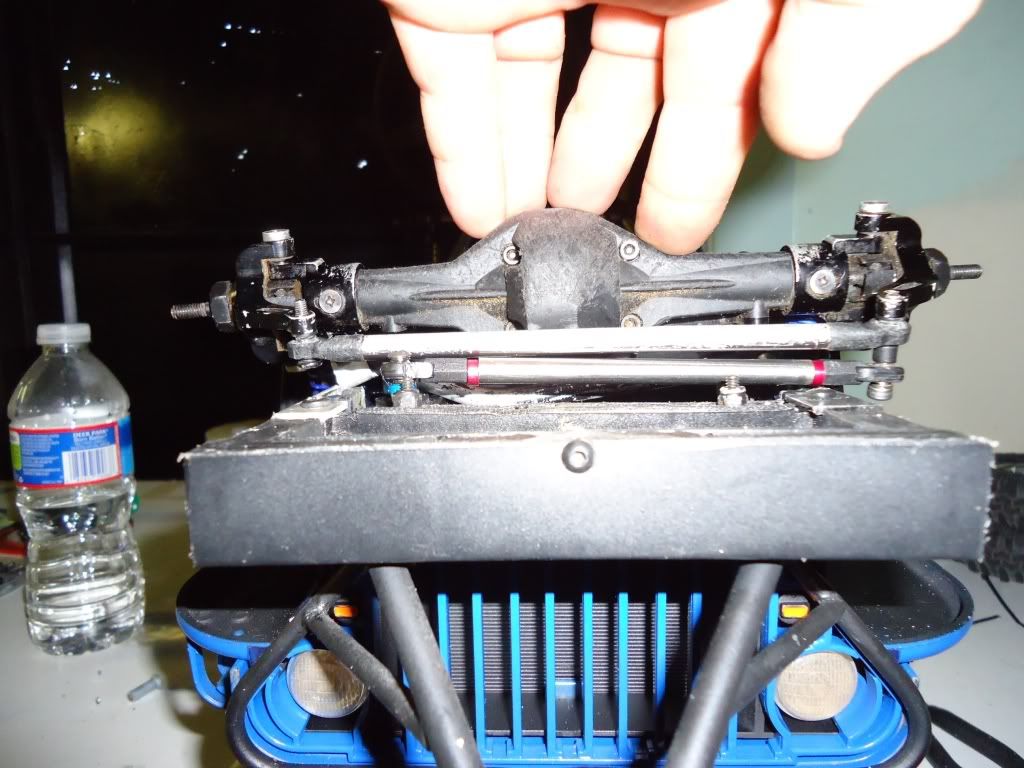 BooYa!! Now we can proceed as planned... BooYa!! Now we can proceed as planned...
| |
|
| |
|
09-10-2011, 11:22 AM
| #47 |
| I wanna be Dave Join Date: Aug 2008 Location: Austin, TX, USA
Posts: 4,273
|
Hell yeah, dude! Good job!! |
|
| |
|
09-12-2011, 09:14 PM
| #48 |
| I wanna be Dave Join Date: May 2008 Location: Baltimore
Posts: 4,442
|
Hey Mike, how long did it take for you get get access at onesixthwarrior? I signed up last week ( to order the metal plate set for my Jeep) and I still haven't gotten added into the site yet. It says my registration is complete but I still need a moderator to add me in. I hope I don't miss out on these plates!
|
|
| |
|
09-13-2011, 06:40 AM
| #49 | |
| I wanna be Dave Join Date: Oct 2006 Location: Martinsburg WV
Posts: 2,781
| Quote:
I don't think he would mind if I PM'ed you his real e-mail addy, that way you could just contact him directly. Look in your box. He's on point, his work is top-drawer and he had them to me in 3 days... Motor/transmission install. Pretty simple once I created enough clearance for it to sit back far enough (I forgot how long the Cobalt Puller was. But I made it fit, and the spot that got removed can't be seen unless you really look for it) I did'nt want to invade the "radiator" anymore than I already have, and I also wanted to take advantage of the natural slope of the engine bay floor to kick the driveline angle down some. So it's not such an extreme angle leaving the body... 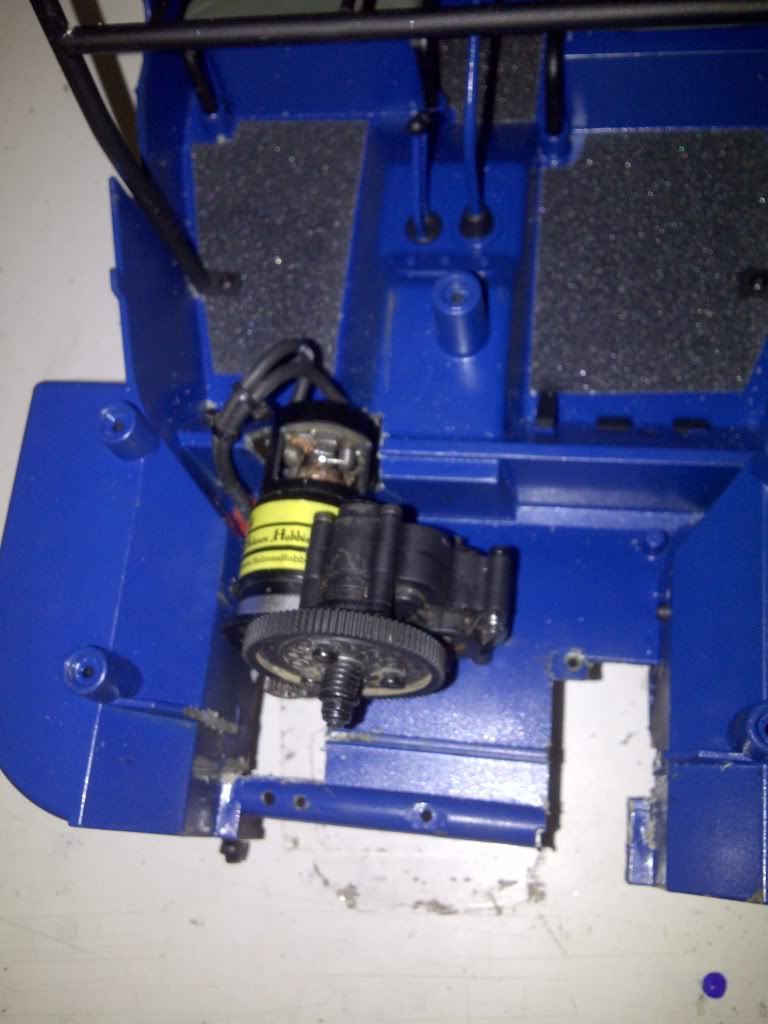 The easy part - it just sits in the floor and gets bolted down like it normally would... 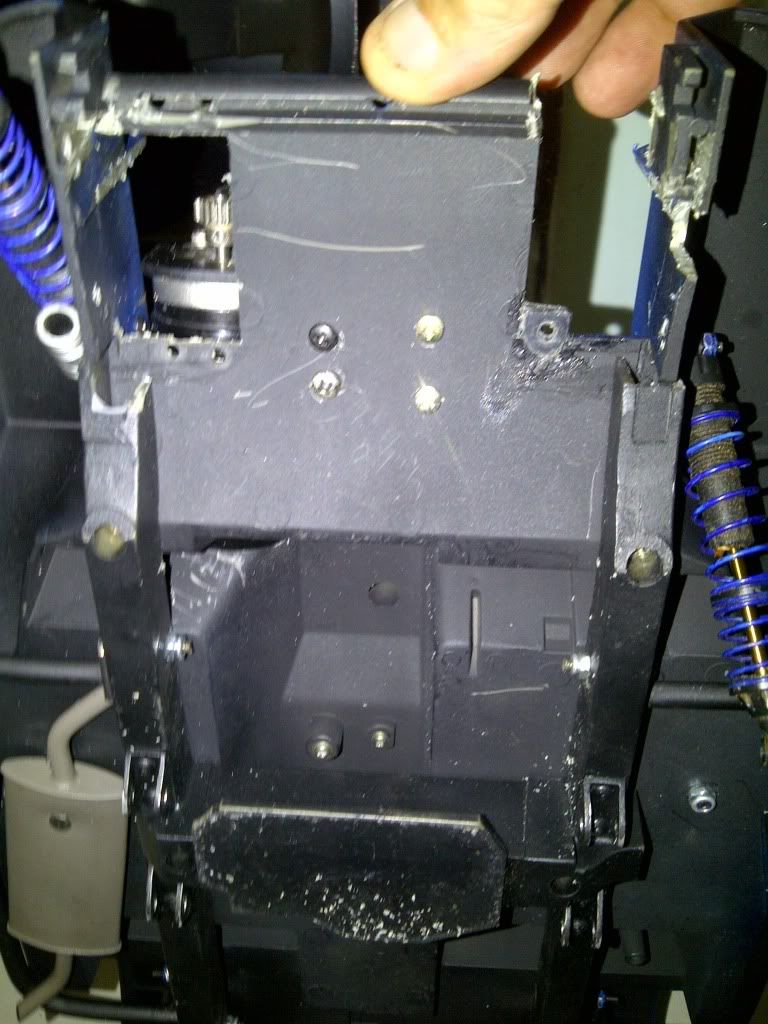 (WTF was wrong w/ my camera yesterday?) Last edited by Big Mike; 09-13-2011 at 06:59 AM. | |
|
| |
|
09-13-2011, 07:41 AM
| #50 |
| I wanna be Dave Join Date: Oct 2006 Location: Martinsburg WV
Posts: 2,781
|
Pics of the data plates and guages. These are very high quality photo-etched pieces, the pics do not really do them justice. Guage set. He leaves the needles off, you add them yourself (so you can point them where you want, "off" or "running") A sharp Xacto and some silver pinstripe tape... 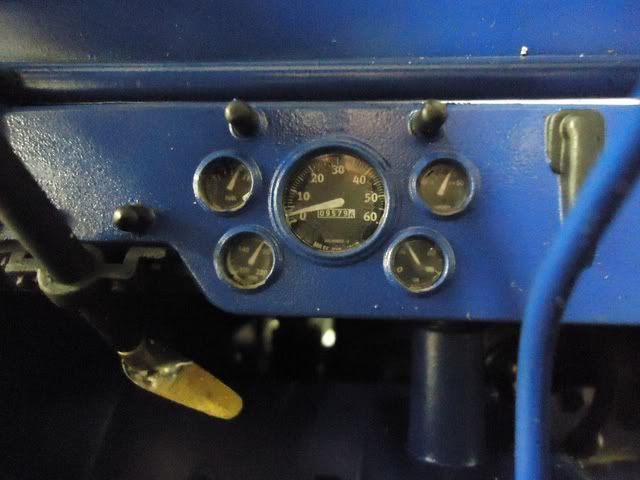 Dashboard data plates. They're made on thin aluminum sheet that you file to shape yourself, so they have bright metal edges and slightly rounded corners just like the real ones would... 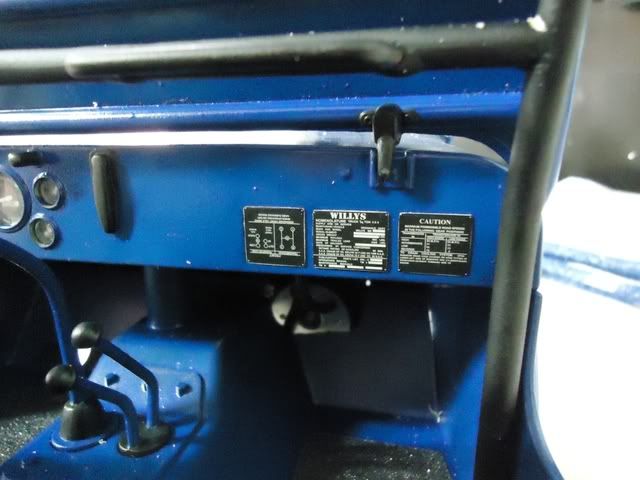 There are more neat little details included in the set, like the frame I.D. plate it would receive while being built at Willys Overland... 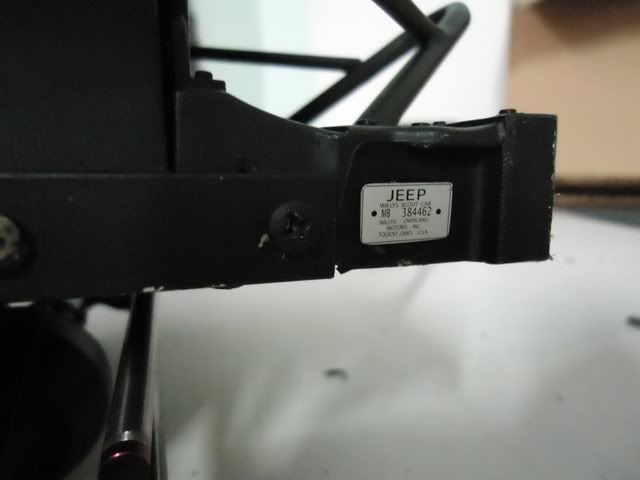 |
|
| |
|
09-13-2011, 08:30 AM
| #51 |
| RCC Addict  Join Date: May 2008 Location: Green Bay
Posts: 1,138
|
Looks great, I do love his gauges and plates. I even used the one for the trailer. I did not get the gauges to use on the Jeep, I use them as parts in the garage. Love your steering set up too, I fought and gave up, back on the axle. |
|
| |
|
09-13-2011, 11:09 AM
| #52 | |
| I wanna be Dave Join Date: Oct 2006 Location: Martinsburg WV
Posts: 2,781
| Quote:
I had a bit of luck with the steering I think. It's pretty much spot-on. I tried to duplicate the Hand Bros. setup for the most part. I haven't actually "steered" yet but I think it will work. The suspension cycles w/o moving the steering, that's the important part. Finally spent some cash on the Jeep, I did'nt really have a choice unless I want to shelve it. And I hate having an unfinished project on hand (especially when I'm excited about it) A Disruptor transfer case is on the way from RC4WD. RCP is pitching in with some 2.2 Rok Lox, a fan to keep the engine bay cool, and an assortment of SCX10 springs to tune the suspension. Found a 1:8th scale 3Racing winch on Ebay (the 1:10th scale winch I have is definitely too small) and hit up Bowtie for the proper stickers for it. The driver is where the budget went out the window. I'll just post pics of her when she gets here (I decided I wanted a female driver. Just to be different from the norm) She ended up costing $55 (Head here, body there, and she has to have clothes too) but she's gonna look great driving the Jeep... Last edited by Big Mike; 09-13-2011 at 12:57 PM. | |
|
| |
|
09-13-2011, 07:45 PM
| #53 |
| I wanna be Dave Join Date: May 2008 Location: Baltimore
Posts: 4,442
|
CY girls?? My jeeps' driver has been bugging me for a 'friend' lately..... Thanks for the PM, I'll get a hold of the guy. Man, I wish I knew you needed RokLox, I have another brand new set that is just collecting dust. |
|
| |
|
09-14-2011, 12:58 PM
| #54 | |
| I wanna be Dave Join Date: Oct 2006 Location: Martinsburg WV
Posts: 2,781
| Quote:
Damn, just pulled the trigger on 4 2.2 Rok Lox. Axle work is progressing. I have made some stellar progress today after suffering a disaster/total setback last night. Last night I was disgusted, today I feel a lot better. "Beef Toob" style widening. Step 1 was extention of stock axle shafts using 3/16" steel brake line and Safety-Silv. Then I could use them to plot out the housing extension... 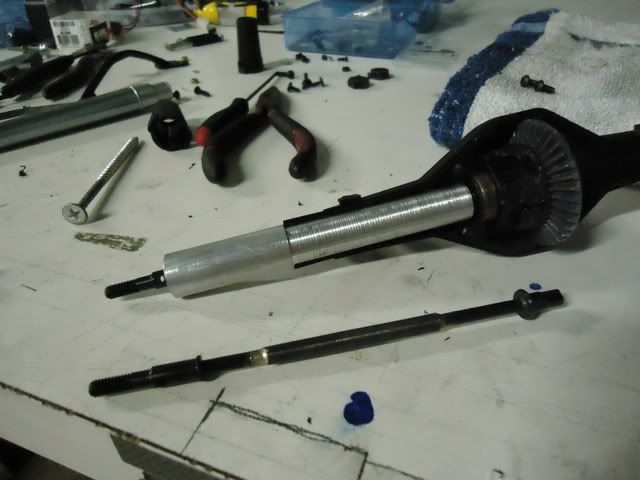 The "Toobs" began life as 1/2" aluminum rod stock. Having a mini-lathe is the only reason I'm able to pull this off, without it it would be impossible to center-bore for the axle shaft and machine the bearing seat... 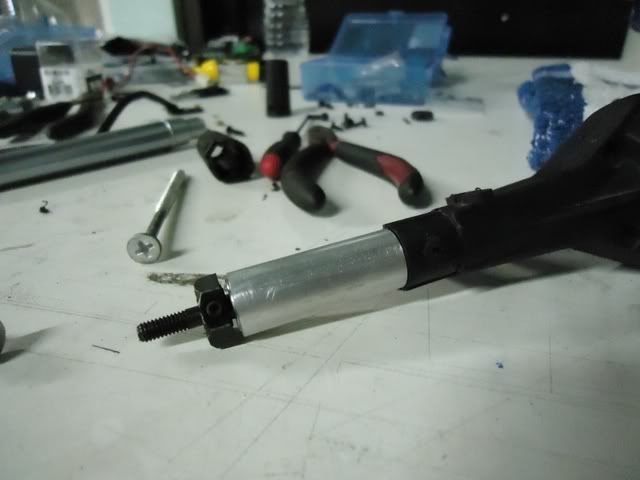 Inside I used a "retainer washer" to keep the axles from sliding out. This and a shim behind each outboard bearing gave me perfect spacing and tolerances... 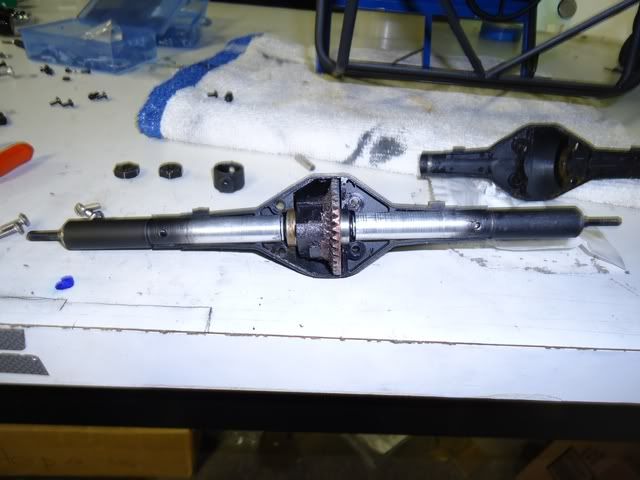 The straight axle adapter pieces get cut down and re-used to hold the axle housing ends together... 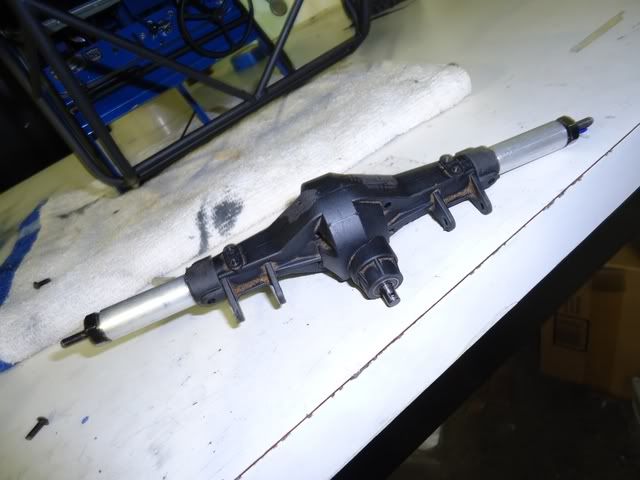 a quick shot o' flat black, and temporarily re-install just to make sure all is good... 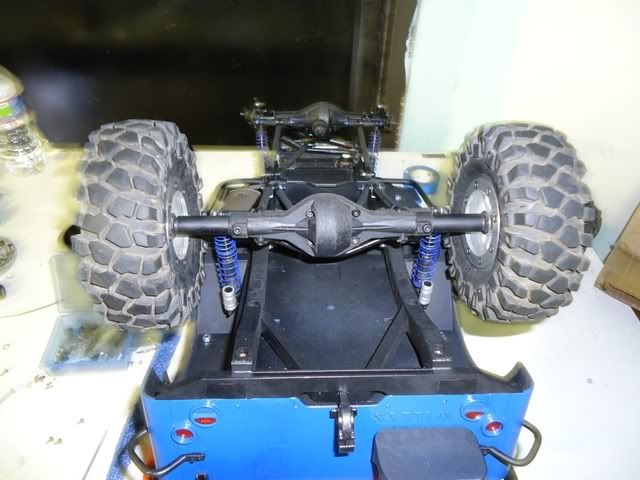 BAM!!! looks like it'll work If I can pull this off with the front axle, it's all downhill from there!! | |
|
| |
|
09-14-2011, 01:49 PM
| #55 |
| Newbie Join Date: Oct 2009 Location: new bedford
Posts: 35
|
wow that thing looks great. nice job.
|
|
| |
|
09-14-2011, 02:43 PM
| #56 |
| I wanna be Dave Join Date: May 2008 Location: Baltimore
Posts: 4,442
|
Good progress so far! I know exactly what you mean by having a mini lathe, I don't know how I lived without one for so long. I had made (1) Beef Toob from aluminum to get the dimensions for KC Jones for the long beef toobs. I was gonna make the other 3 for my own use but KC hooked me up for all of the leg work that I did. The way that you cut and sleeved the axle shaft is exactly the way that I'm going to build the next axle set for the next Jeep build. PM me when you get yours up and running, I'd be interested in meeting up and going for a trail ride. |
|
| |
|
09-14-2011, 05:54 PM
| #57 | |
| I wanna be Dave Join Date: Oct 2006 Location: Martinsburg WV
Posts: 2,781
| Quote:
We're definitely hitting Gambrill or Sugarloaf when I get running. The hard work is behind me now, it won't be too long. Man, the front axles were a hell of a fight. But you know what? I won! This is a cheap and easy way to widen axles if you can make the toobs and if you can braze. I don't think you'll have any issues. I did the fronts the same way, it was complicated from a measuring standpoint, and there's a couple extra things to do (spotting/drilling/tapping holes to bolt up the C's) but overall it's not hard. I'm officially at "roller status"!! | |
|
| |
|
09-15-2011, 09:46 AM
| #58 |
| Rock Crawler Join Date: Jan 2008 Location: Lincoln
Posts: 740
|
Damn, this thing is turning out sweet! How difficult was it to braze up the axles? Did you have to jig everything up to keep things straight? |
|
| |
|
09-15-2011, 09:47 AM
| #59 |
| Pebble Pounder Join Date: Dec 2006 Location: Trevorton
Posts: 152
| Im glad I ran across this build... awesome man... just awesome... |
|
| |
|
09-15-2011, 10:51 AM
| #60 | ||
| I wanna be Dave Join Date: Oct 2006 Location: Martinsburg WV
Posts: 2,781
| Quote:
Quote:
I used 3/16" brake line, the axles fit inside perfectly once I removed the ridge left by the tubing cutter. No jigging required other than making sure the length was right. My tires are already here!! If everyone took care of business the way RCP does, the world would be a better place. I should give props to Bowtie as well, his magnificent Warn winch sticker sheet got here in 2 days as well. Top-drawer customer service... This 1:1 Jeep has been my inspiration as I have built and shopped for parts... 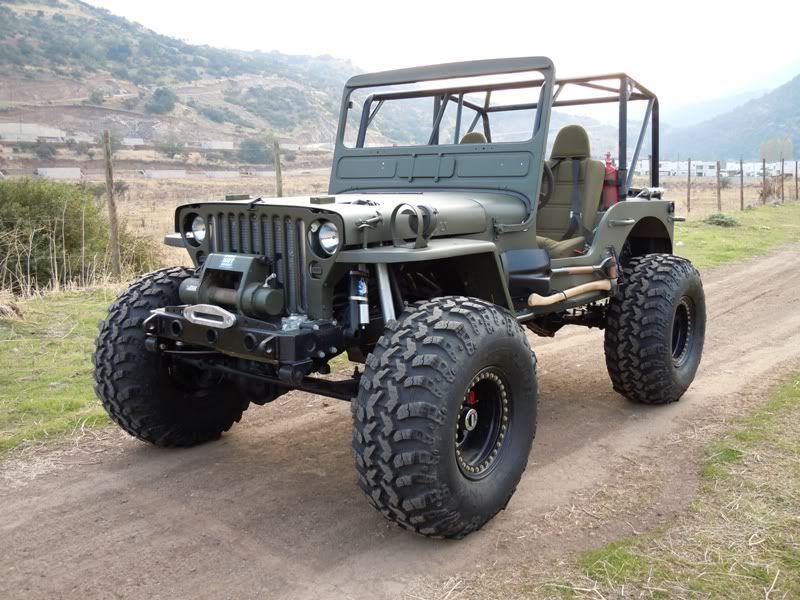 ...and here's mine as it sits now... 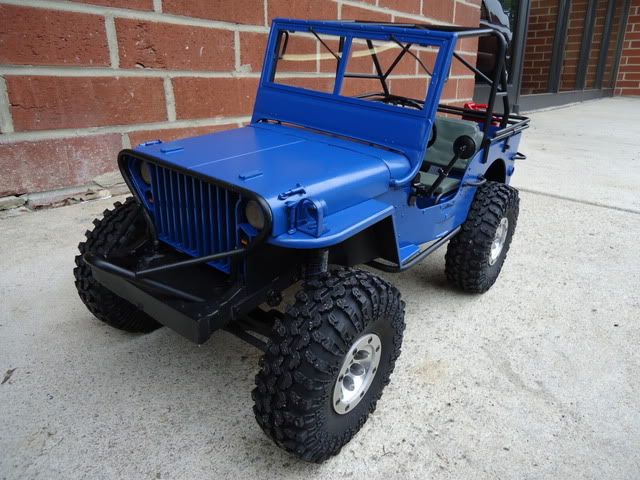 Not far off at all!! Damn, I haven't been this stoked about a build since my first TLT... Front axle pic. It shows the difference between the fronts and rears, inside they are indentical. It has to be shorter and drilled/tapped for the C's, and the C's hold the axles in the housings so no retainer needed inside. Other than that they are the same part. I dug out my old plastic C's and machined them into another pair of "housing end retainers" 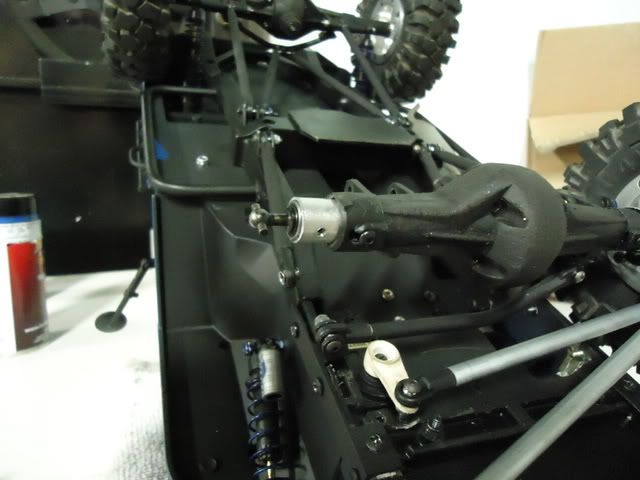 And a quick, un-forced poser shot. It'll go a little farther if the terrain forces it. Should be good to go out on the trail! 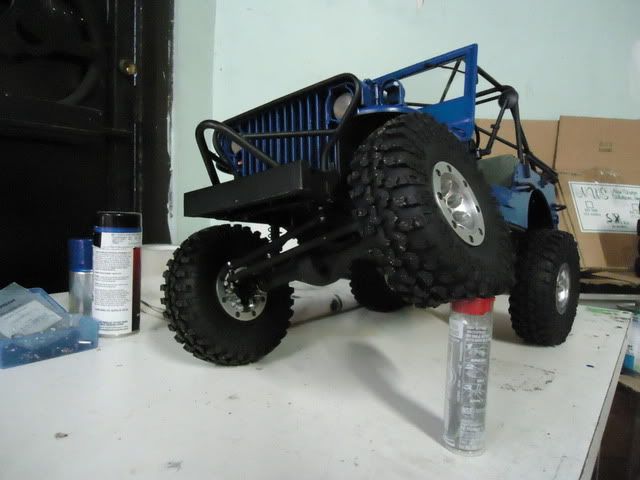 Damn I love it when a plan comes together!!! Last edited by Big Mike; 09-15-2011 at 03:19 PM. | ||
|
| |
 |
| |


 Linear Mode


